1-PVE平台环境配置简介
1 系统环境
1.1 系统版本
官网下载地址,选择Proxmox VE 8.x即可,最终更新完都会到最新版本,目前我的版本为8.4.1
https://www.proxmox.com/en/downloads
1.2 组件更新
配置更新源
官方的源速度有限并且有时候会网络超时,因此更新到国内源,这里用的是USTC的源,当然其他源也是可以的
# debian源
sed -i 's|^deb http://ftp.debian.org|deb https://mirrors.ustc.edu.cn|g' /etc/apt/sources.list
sed -i 's|^deb http://security.debian.org|deb https://mirrors.ustc.edu.cn/debian-security|g' /etc/apt/sources.list
#  pve源
echo "deb https://mirrors.ustc.edu.cn/proxmox/debian/pve bookworm pve-no-subscription" > /etc/apt/sources.list.d/pve-no-subscription.list
sed -i 's|^deb |#deb |g' /etc/apt/sources.list.d/pve-enterprise.list
# Ceph源
if [ -f /etc/apt/sources.list.d/ceph.list ]; then
  CEPH_CODENAME=`ceph -v | grep ceph | awk '{print $(NF-1)}'`
  source /etc/os-release
  echo "deb https://mirrors.ustc.edu.cn/proxmox/debian/ceph-$CEPH_CODENAME $VERSION_CODENAME no-subscription" > /etc/apt/sources.list.d/ceph.list
fi
# 配置镜像源后更新系统
apt-get update

# 重启生效
reboot
设置定时更新
系统整体比较稳定,且更新频率一般,因此这里设置一个每月自动更新
# 系统默认运行就是root用户,这里直接以root用户身份设置定时任务
corntab -e
0 0 1 * * apt-get update
#*  *  *  *  *
#-  -  -  -  -
#|  |  |  |  |
#|  |  |  |  +----- 星期几 (0星期天 - 6星期六)
#|  |  |  +---------- 月份 (1 - 12)
#|  |  +--------------- 一个月中的第几天 (1 - 31)
#|  +-------------------- 小时 (0 - 23)
#+------------------------- 分钟 (0 - 59)
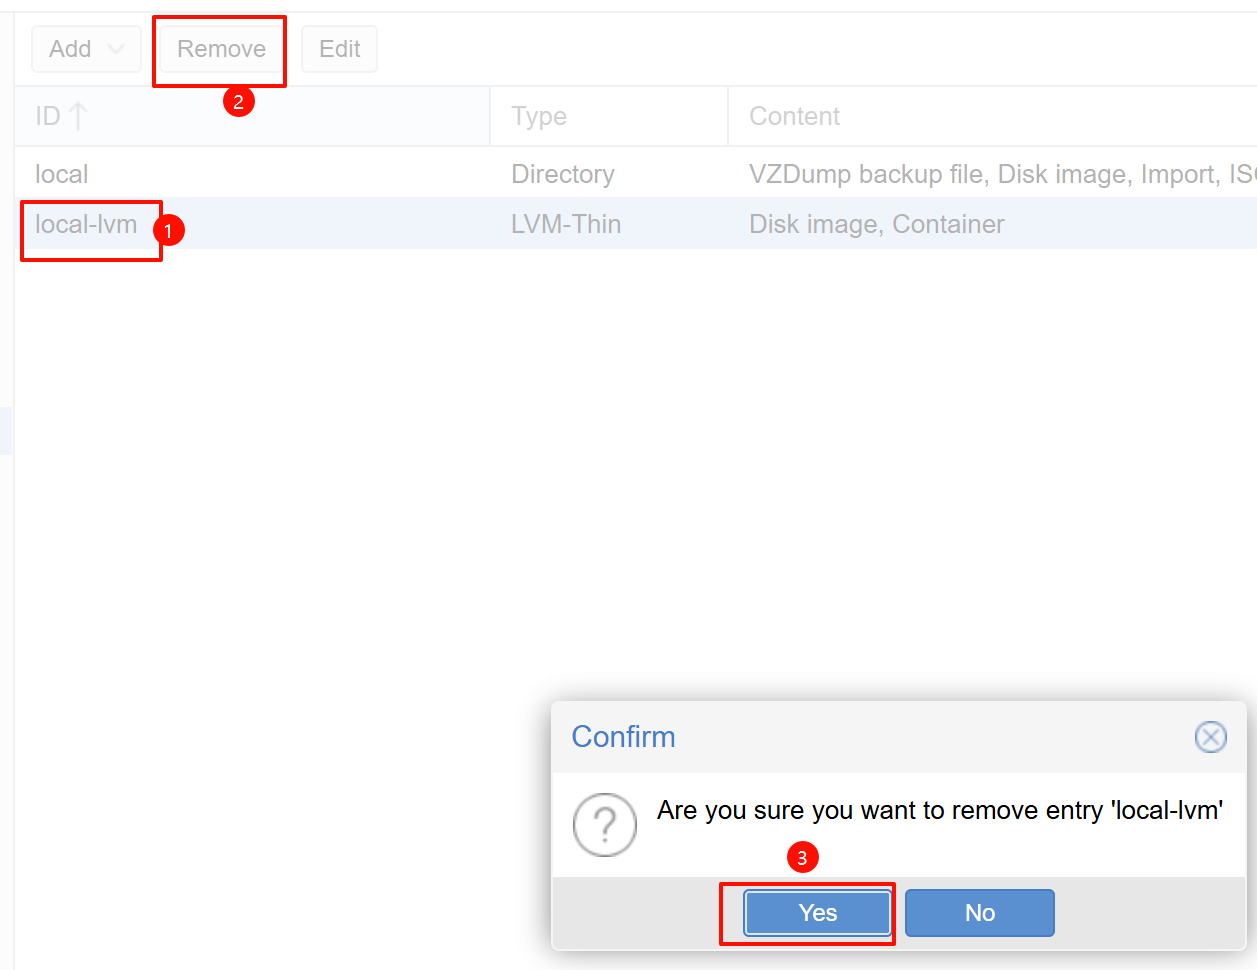
1.3 磁盘空间管理
合并初始分区
系统默认会把系统空间分配得很小,并且local-lvm 和 lvm 两个分区并没有本质性的区别,我们可以通过网络挂载镜像源来起到同样的效果,可以合并成一个
# 查看分区情况
lskblk
# 删除 date分区,并将空间补充到 / 分区内
lvremove pve/data
lvextend -l +100%FREE -r pve/root
resize2fs /dev/mapper/pve-root
完成后手动在Web页面中更新配置
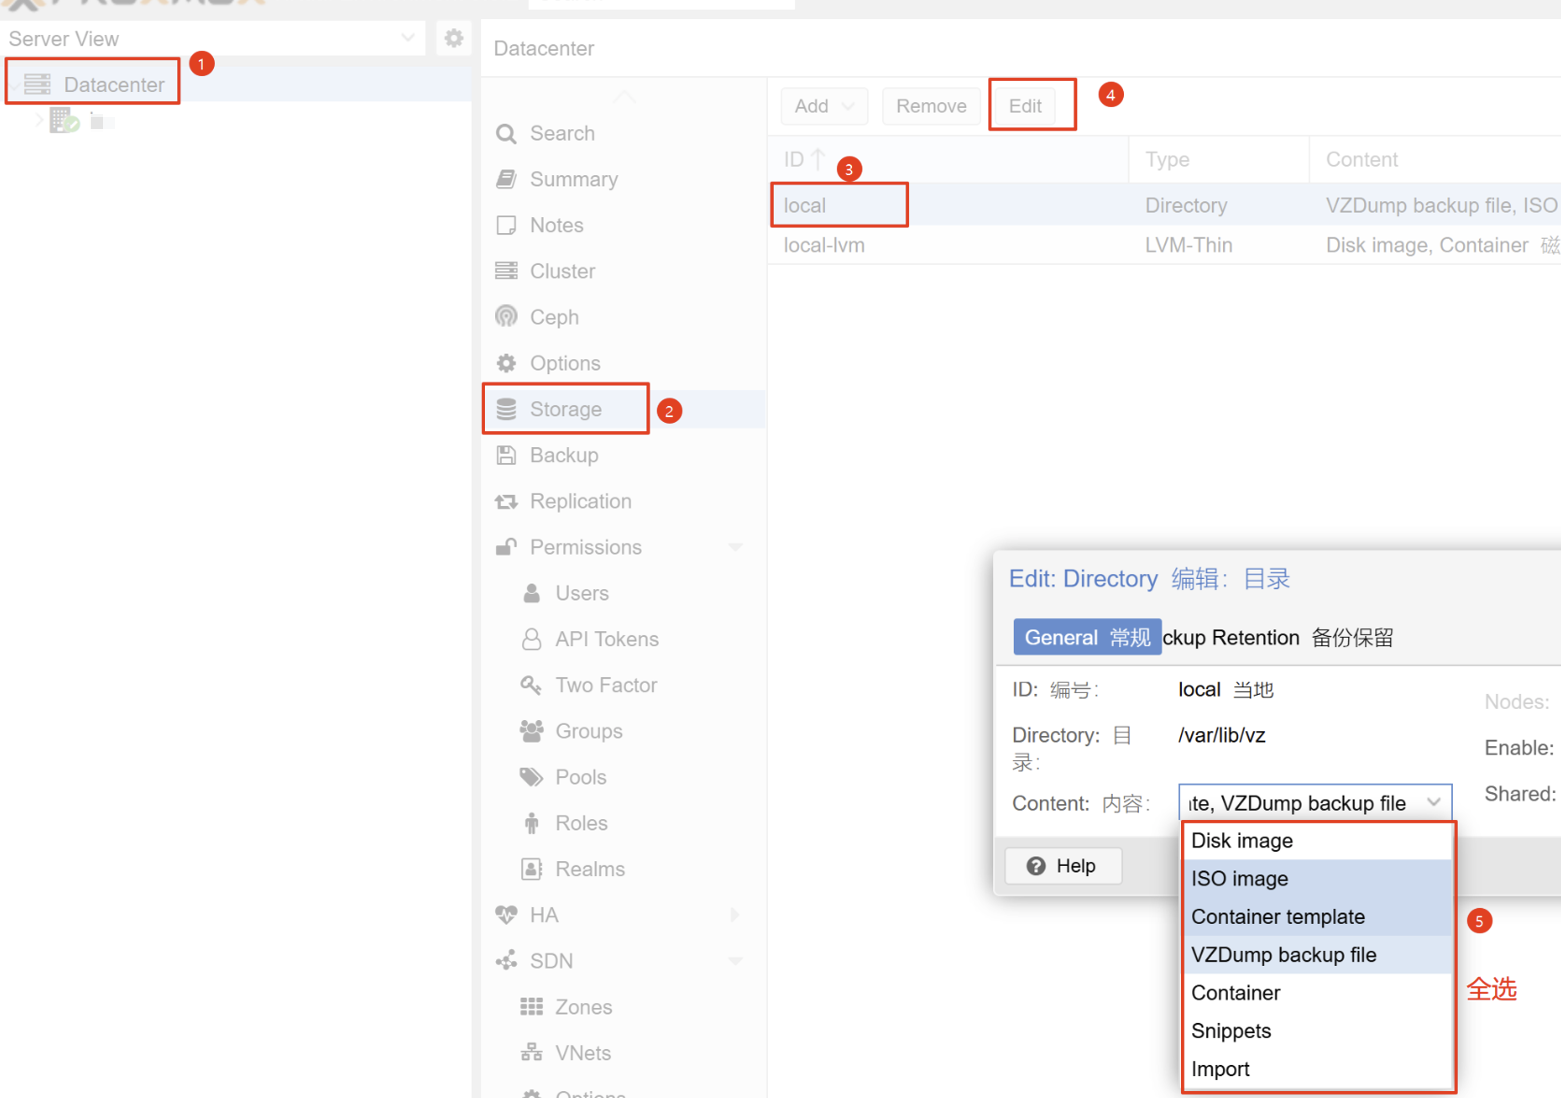
挂载网络存储

在刚刚合并分区属性的界面,点击add按钮可以添加网络文件系统,这里我简单在NAS上创建了一个NFS供两个服务器挂载,并且设置了只读来保证文件完整和可能的冲突
如果没有NAS,这里可以把镜像存在终端电脑里,通过服务器挂载终端的原理是一样的
值得注意的是:
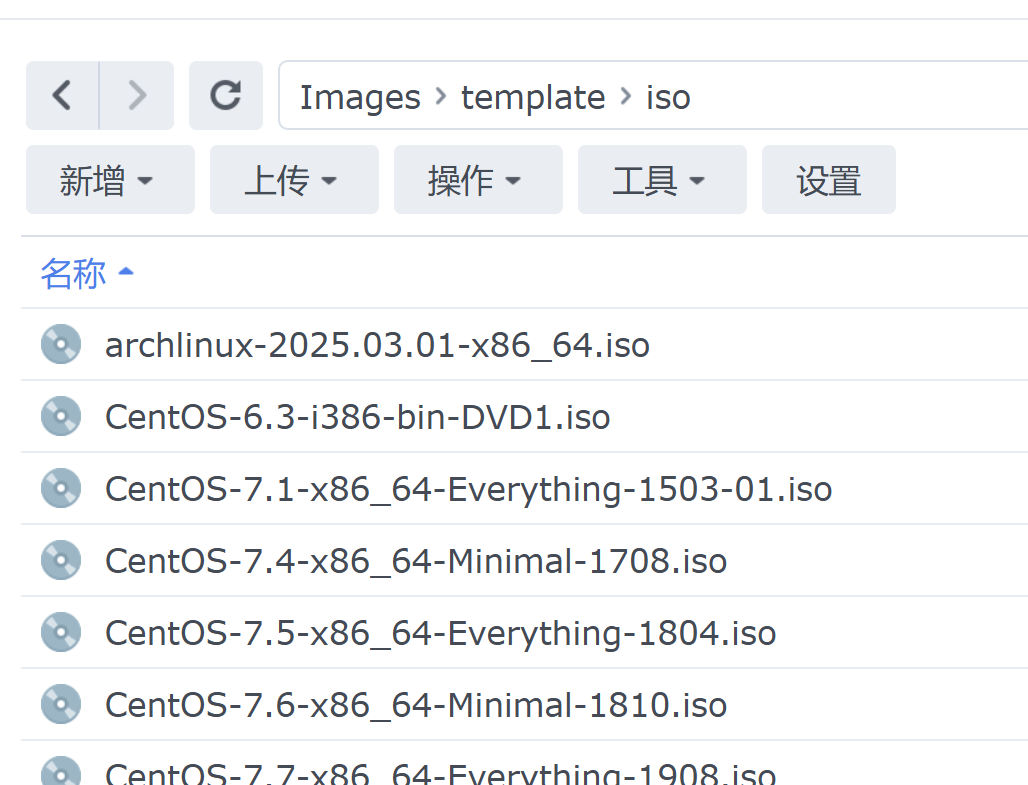
PVE服务器会在添加的网络硬盘里自动创建文件夹,例如镜像需要放在/template/iso文件夹里才能正确识别

1.4 网络设计
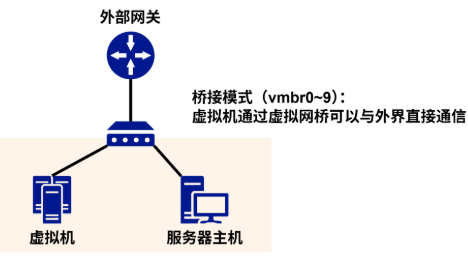
在PVE服务器里可以创建vmbr(虚拟网桥,可以理解为虚拟交换机,VMBR取值范围为0~4094),由于这里仅仅是实验,实际上用到的子网不会超过6个。
按照虚拟机如何与外部网络进行通信,可以分为三种类型:
- 虚拟机可通过虚拟网桥直接与外界通信,这个在VMware Workstation 或者 Virtual Box里面称为桥接模式,PVE安装时如果有插网线,默认会建立一个这种模式的VMBR0
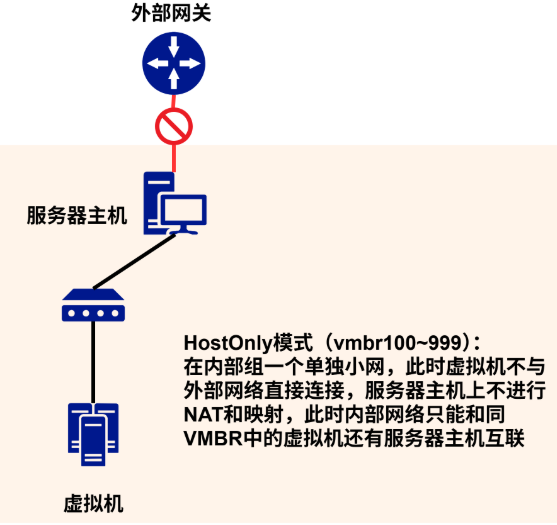
- 虚拟机通过服务器作为NAT网关上网,此时虚拟机和外部网络是无法直接互联的,需要在服务器主机上进行NAT地址转换或者配置映射打洞,这种模式类似于VMware Workstation或者Virtual Box里的NAT模式

- 在NAT模式的基础上,断开服务器主机对内部网络的代理行为,使虚拟机只能和同网段的设备通信,类似于VMware Workstation或者Virtual Box里的仅主机模式
网卡配置文件
#/etc/network/interfaces
# 我的网卡是enp3s0,根据实际网卡来,双网卡的话可以类似再创建一个vmbr来连接不同的外部网络

auto lo
iface lo inet loopback

iface enp3s0 inet manual

auto vmbr0
iface vmbr0 inet dhcp
        bridge-ports enp3s0
        bridge-stp off
        bridge-fd 0
# bridge mode

auto vmbr10
iface vmbr10 inet static
    address 192.168.10.254/24
    bridge-ports none
    bridge-stp off
    bridge-fd 0
    post-up   echo 1 > /proc/sys/net/ipv4/ip_forward
    post-up   iptables -t nat -A POSTROUTING -s '192.168.10.254/24' -o vmbr0 -j MASQUERADE
    post-down iptables -t nat -D POSTROUTING -s '192.168.10.254' -o vmbr0 -j MASQUERADE
# nat mode 10

auto vmbr20
iface vmbr20 inet static
    address 192.168.20.254/24
    bridge-ports none
    bridge-stp off
    bridge-fd 0
    post-up   echo 1 > /proc/sys/net/ipv4/ip_forward
    post-up   iptables -t nat -A POSTROUTING -s '192.168.20.254/24' -o vmbr0 -j MASQUERADE
    post-down iptables -t nat -D POSTROUTING -s '192.168.20.254' -o vmbr0 -j MASQUERADE
# nat mode 20

auto vmbr30
iface vmbr30 inet static
    address 192.168.30.254/24
    bridge-ports none
    bridge-stp off
    bridge-fd 0
    post-up   echo 1 > /proc/sys/net/ipv4/ip_forward
    post-up   iptables -t nat -A POSTROUTING -s '192.168.30.254/24' -o vmbr0 -j MASQUERADE
    post-down iptables -t nat -D POSTROUTING -s '192.168.30.254' -o vmbr0 -j MASQUERADE
# nat mode 30

auto vmbr100
iface vmbr100 inet static
        address 169.254.100.254/24
        bridge-ports none
        bridge-stp off
        bridge-fd 0
#only-host mode 1

auto vmbr150
iface vmbr150 inet static
        address 169.254.150.254/24
        bridge-ports none
        bridge-stp off
        bridge-fd 0
#only-host mode 150

auto vmbr200
iface vmbr200 inet static
        address 169.254.200.254/24
        bridge-ports none
        bridge-stp off
        bridge-fd 0
#only-host mode 2

source /etc/network/interfaces.d/*
重启网络使配置生效
systemctl restart networking
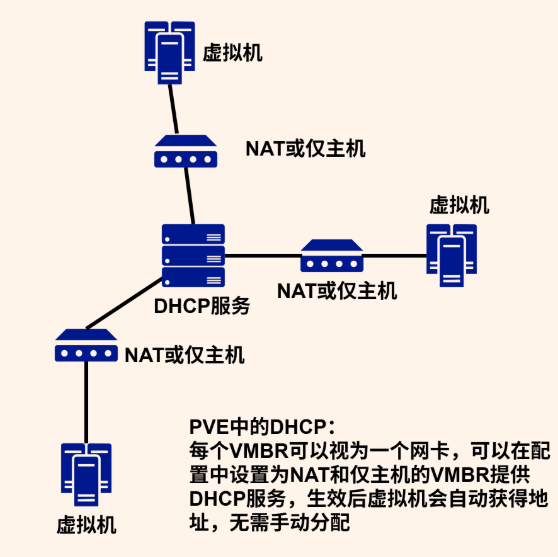
子网DHCP
DHCP可以使用dnsmasq,我使用复古的isc-dhcp-server,这个设置非必要,配置完后可以省去为每个虚拟机手动设置IP地址的步骤
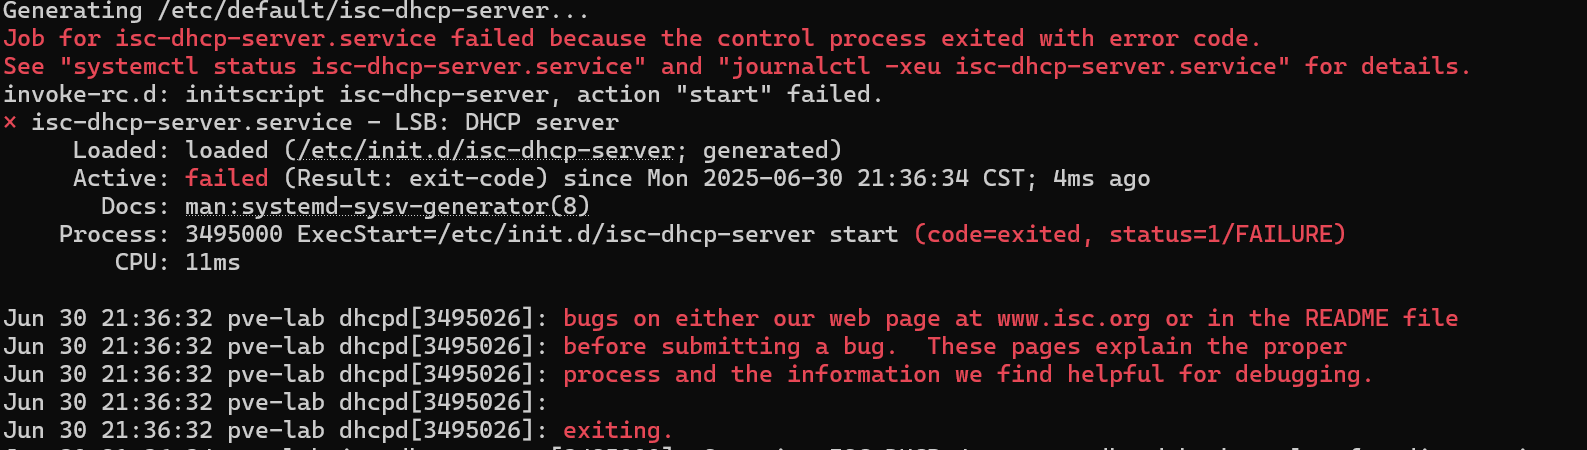
1.在pve中使用apt进行安装
apt install isc-dhcp-server
安装后会报错,这是正常的,因为还没有正常配置
2.首先梳理一下网桥和需要进行的配置
| 网络模式 | 网桥名称 | 本机地址 | DHCP服务器 |
|---|---|---|---|
| 桥接模式 | vmbr0 | - | 外部分配 |
| NAT模式 | vmbr10 | 192.168.10.254/24 | 本机分配 |
| NAT模式 | vmbr20 | 192.168.20.254/24 | 本机分配 |
| NAT模式 | vmbr30 | 192.168.30.254/24 | 本机分配 |
| 仅主机 | vmbr100 | 169.254.100.254/24 | 本机分配 |
| 仅主机 | vmbr150 | 169.254.150.254/24 | 本机分配 |
| 仅主机 | vmbr200 | 169.254.200.254/24 | 本机分配 |
将需要进行dhcp的网卡加入生效列表,使用空格进行间隔
vi /etc/default/isc-dhcp-server
INTERFACESv4="vmbr10 vmbr20 vmbr30 vmbr100 vmbr150 vmbr200"

- 编辑作用域及子网信息
vi /etc/dhcp/dhcpd.conf
# dhcpd.conf
#
# Sample configuration file for ISC dhcpd
#

# option definitions common to all supported networks...
#option domain-name "example.org";
option domain-name-servers 119.29.29.29;

default-lease-time 600;
max-lease-time 7200;

# The ddns-updates-style parameter controls whether or not the server will
# attempt to do a DNS update when a lease is confirmed. We default to the
# behavior of the version 2 packages ('none', since DHCP v2 didn't
# have support for DDNS.)
ddns-update-style none;

# If this DHCP server is the official DHCP server for the local
# network, the authoritative directive should be uncommented.
authoritative;

# Use this to send dhcp log messages to a different log file (you also
# have to hack syslog.conf to complete the redirection).
#log-facility local7;

# No service will be given on this subnet, but declaring it helps the
# DHCP server to understand the network topology.

#subnet 10.152.187.0 netmask 255.255.255.0 {
#}

# This is a very basic subnet declaration.

#subnet 10.254.239.0 netmask 255.255.255.224 {
#  range 10.254.239.10 10.254.239.20;
#  option routers rtr-239-0-1.example.org, rtr-239-0-2.example.org;
#}

subnet 192.168.10.0 netmask 255.255.255.0 {
  range 192.168.10.11 192.168.10.200;
  option subnet-mask 255.255.255.0;
  option routers 192.168.10.254;
}

subnet 192.168.20.0 netmask 255.255.255.0 {
  range 192.168.20.11 192.168.20.200;
  option subnet-mask 255.255.255.0;
  option routers 192.168.20.254;
}

subnet 192.168.30.0 netmask 255.255.255.0 {
  range 192.168.30.11 192.168.30.200;
  option subnet-mask 255.255.255.0;
  option routers 192.168.30.254;
}

subnet 169.254.100.0 netmask 255.255.255.0 {
  range 169.254.100.11 169.254.100.200;
  option subnet-mask 255.255.255.0;
}

subnet 169.254.150.0 netmask 255.255.255.0 {
  range 169.254.150.11 169.254.150.200;
  option subnet-mask 255.255.255.0;
}

subnet 169.254.200.0 netmask 255.255.255.0 {
  range 169.254.200.11 169.254.200.200;
  option subnet-mask 255.255.255.0;
}
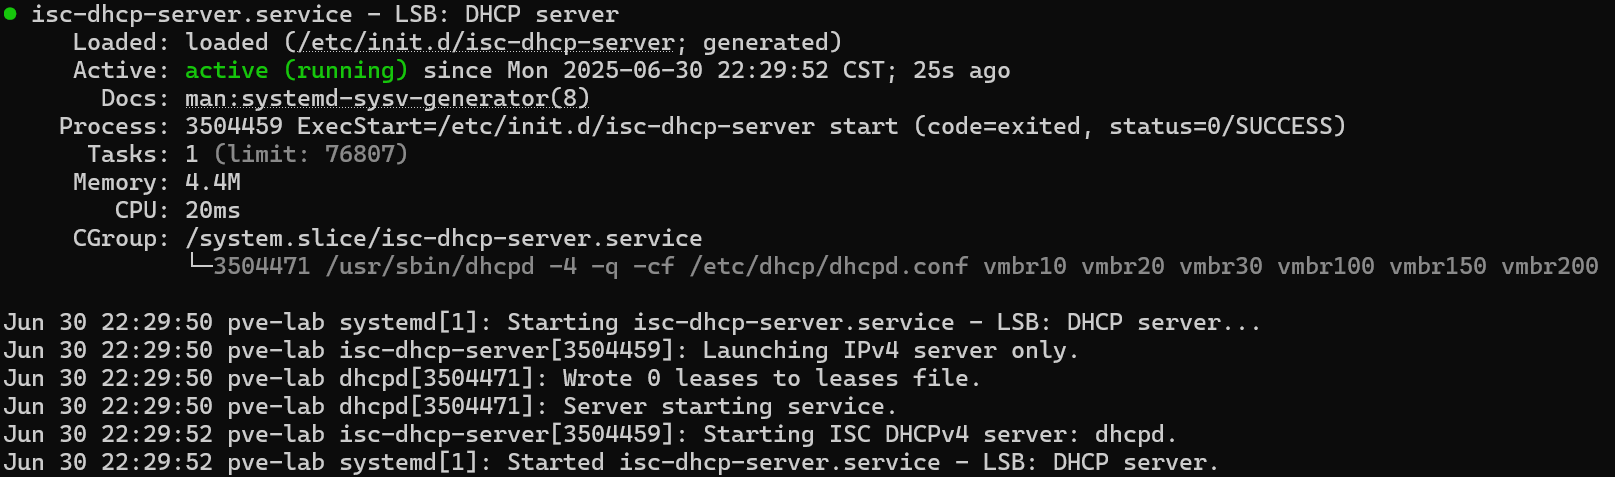
启动服务
systemctl start isc-dhcp-server
作者:Gaoniaofei
本文链接:https://www.cnblogs.com/gaoniaofei/p/18958746
Quotes:习惯塑造了我们,因此,优秀应该是一种习惯而不是某种举动。--亚里士多德

 浙公网安备 33010602011771号