kubernetes in action - Replication Controller
理解这个问题,就是pods在Kubernetes中怎么进行failover
在Kubernetes的work node上有kubelet,会负责监控该work node上的pods,如果有container挂掉了,它会负责重启
但是如果进程没有挂掉,只是hang住,或是死循环,或是死锁了,这个怎么判断
所以还需要引入,liveness probes,用于主动探测Pods是否正常
liveness probe
- An HTTP GET probe performs an HTTP GET request on the container’s IP address, a port and path you specify. If the probe receives a response, and the response code doesn’t represent an error (in other words, if the HTTP response code is 2xx or 3xx), the probe is considered successful. If the server returns an error response code or if it doesn’t respond at all, the probe is considered a failure and the container will be restarted as a result.
- A TCP Socket probe tries to open a TCP connection to the specified port of the container. If the connection is established successfully, the probe is successful. Otherwise, the container is restarted.
- An Exec probe executes an arbitrary command inside the container and checks the command’s exit status code.
If the status code is 0, the probe is successful. All other codes are considered failures.
probe分为三种,Http,Tcp,Exec
创建一个Http Probe,
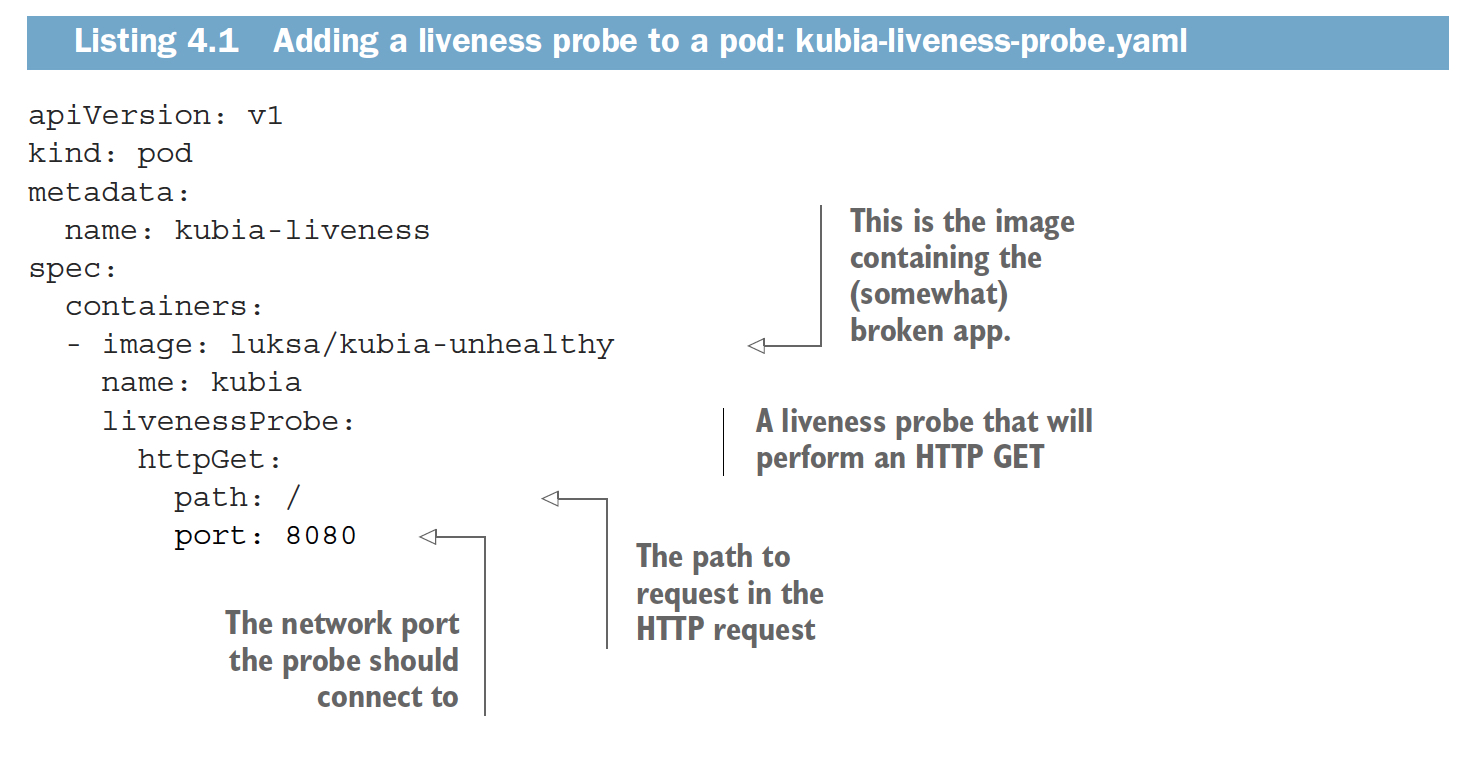
这样后面,kubelet会定期主动通过定义的probe进行探测,如果probe失败就重启container
通过下面的命令看出当前pod的状态,
$ kubectl get po kubia-liveness
NAME READY STATUS RESTARTS AGE
kubia-liveness 1/1 Running 1 2m
看上一次重启的原因,
When you want to figure out why the previous container terminated, you’ll want to
see those logs instead of the current container’s logs. This can be done by using
the --previous option:
$ kubectl logs mypod --previous
也可以查看pod的详细信息,
$ kubectl describe po kubia-liveness
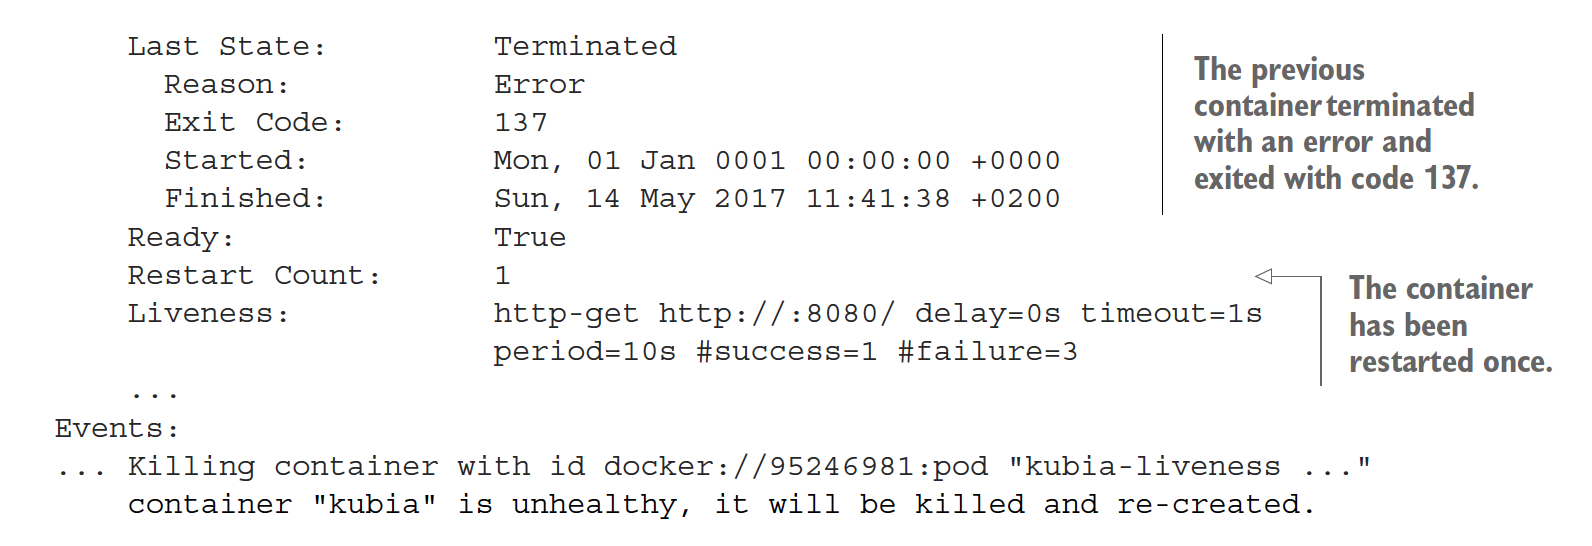
这里可以看到更详细的restart信息,和具体的liveness probe的命令
Liveness: http-get http://:8080/ delay=0s timeout=1s period=10s #success=1
➥ #failure=3
参数本身也比较好理解,#failure=3,判断failure要重试3次,
其中delay是个比较关键的参数,默认是0,如果你的服务需要初始化时间,很容易造成第一次probe失败,
所以可以设大些,

liveness probe,让我们更有效的探测pod或container的fail,这样kubelet可以更加有效的重启和恢复服务
但是kubelet是在work node上面,如果一个node挂了,怎么办?
这就需要ReplicationController,RC会保障他管理的pod在node间failover
ReplicationController

上面是RC的工作流程图,RC不会去迁移Pod,只是根据数目的对比决定是删除Pod,还是创建新的Pod
从图中,知道有几个要素,

我们如何知道RC管理哪些Pod?通过label selector来筛选(更改RC的label selector或是其中pod的label,都可以改变RC管理的Pod范围)
一般一个RC管理的是同一种的Pod,所以Pod的数目就是副本数,通过replica count来定义 (扩缩容)
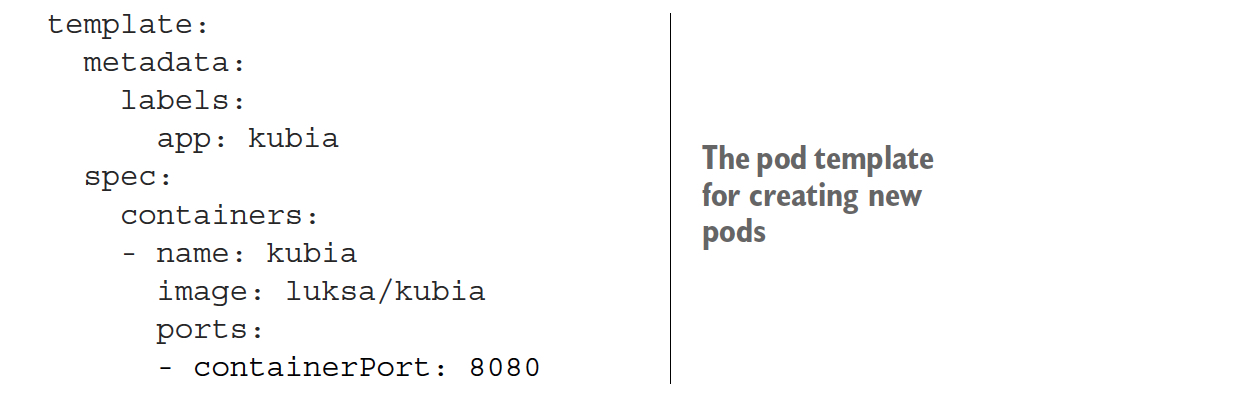
最后需要有一个Pod模板,用于创新新的Pod (影响新创建的Pod,不会影响已经在运行的Pod)
Kubernetes是采用declarative approach的方式去管理集群,即你不要下达具体的操作指令,而只需要规定需要达到的状态,比如维护2种RC,每个并发度是10;然后Kubernetes会根据当前的实际状态做具体的操作去满足你所需要的状态
创建RC,

$ kubectl create -f kubia-rc.yaml
replicationcontroller "kubia" created
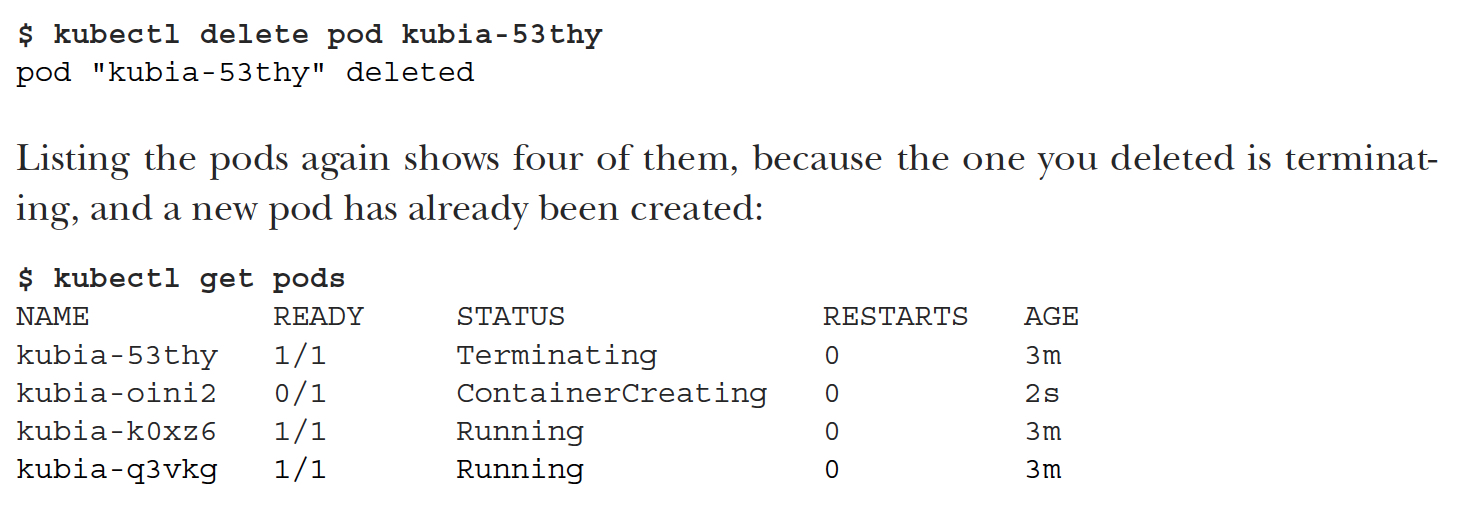
RC的效果,被删除的Pod,会被重新创建
看RC的状态,
$ kubectl get rc
NAME DESIRED CURRENT READY AGE
kubia 3 3 2 3m
$ kubectl describe rc kubia
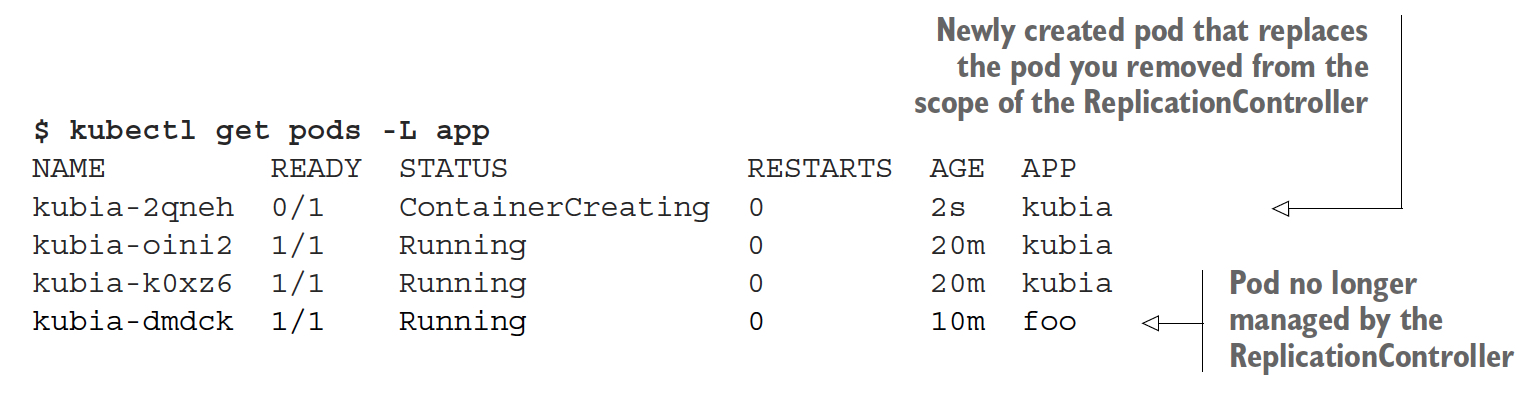
看下,实际修改一个RC中的Pod的label,会发生什么?
$ kubectl label pod kubia-dmdck app=foo --overwrite
pod "kubia-dmdck" labeled
该pod会脱离RC的管理,RC会创建一个新的Pod来替代该Pod
可以对RC进行扩缩容,可以通过命令,也可以直接修改rc的配置文件
$ kubectl scale rc kubia --replicas=10
$ kubectl edit rc kubia
删除RC,可以选择保留Pods或不保留
$ kubectl delete rc kubia --cascade=false
replicationcontroller "kubia" deleted
ReplicaSet
新版本的Kubernetes会用replicaSet替换当前的replicationcontroller,
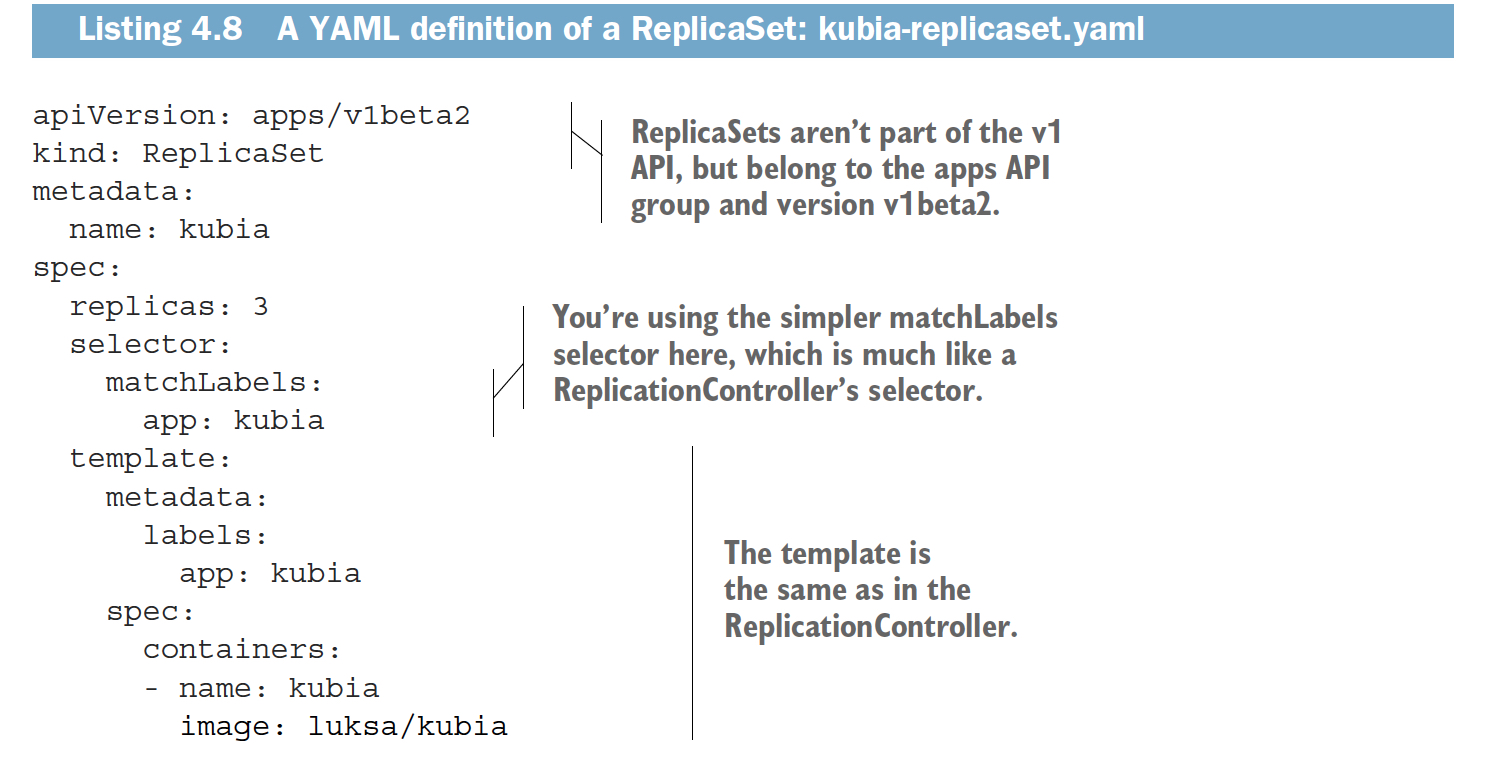
不同在于,首先版本不同,replicaSet属于v1beta2
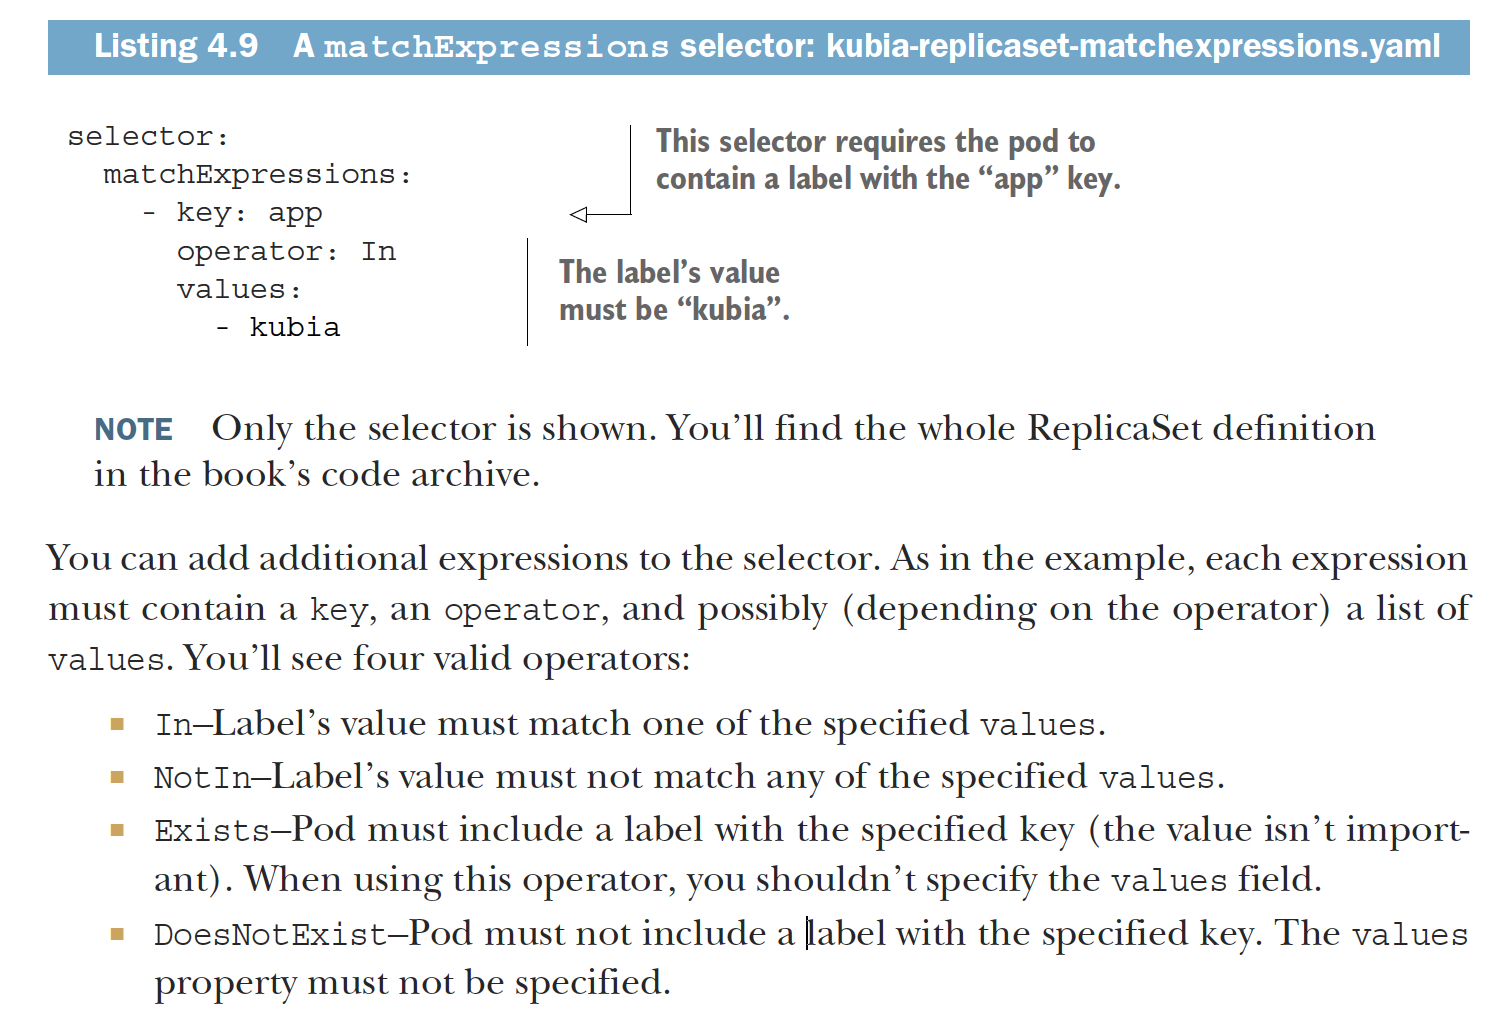
主要是,selector更为灵活,虽然这里使用matchLabels和原来差不多
但可以使用,matchExpressios
DaemonSet
DaemonSet是种特殊形式,如下图,比如kubelet,就是一种典型的DaemonSet
A DaemonSet makes sure it creates as many pods as there are nodes and deploys each one on its own node

DaemonSet也可以选择部分node,通过nodeSelector

Job
可完成的,就是batch任务

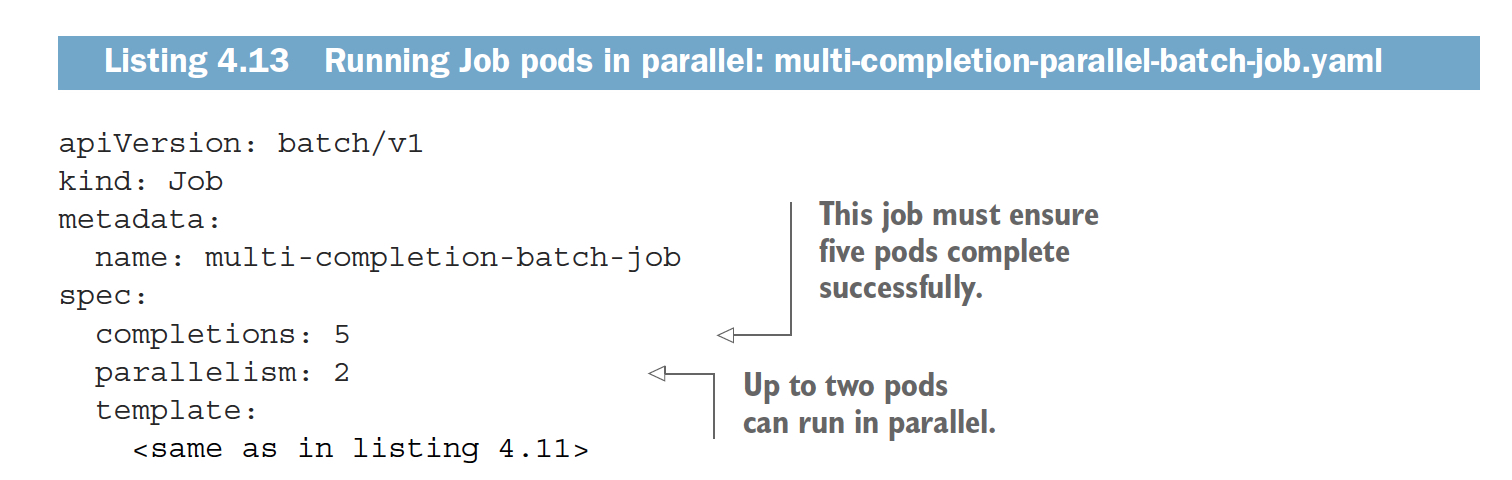
对于Job有两个参数,比较关键
completions,job pod需要被执行几次
parallelism,同时有几个pod被执行
可以通过,activeDeadlineSeconds,来设定最大执行时间,超时会被关闭,算fail
CronJob
定期执行的job
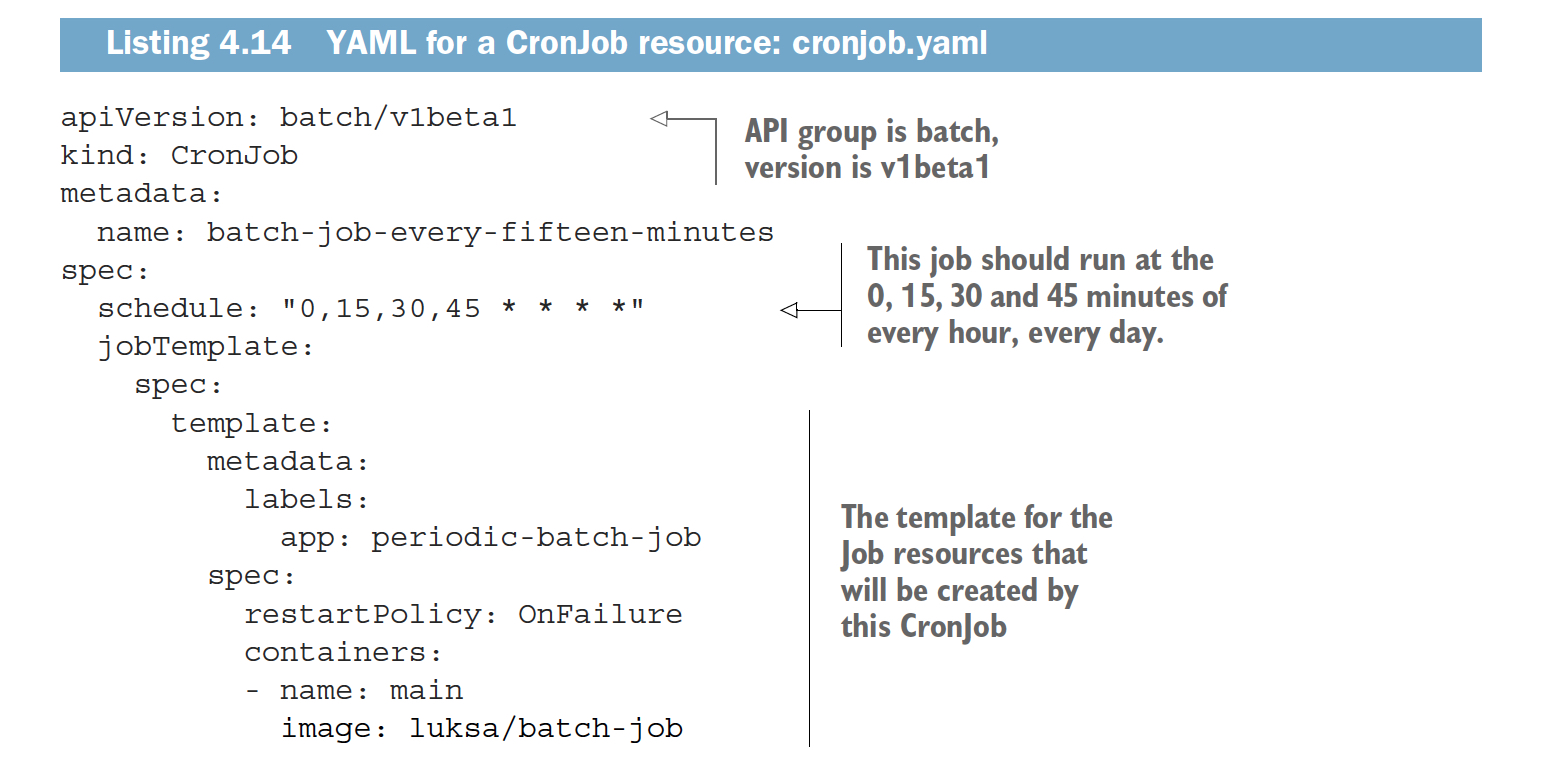
关键是对,schedule的理解,
五项,代表
Minute
Hour
Day of month
Month
Day of week.
"0,15,30,45 * * * *", which means at the 0, 15, 30 and 45 minutes mark of every hour
(first asterisk), of every day of the month (second asterisk), of every month (third
asterisk) and on every day of the week (fourth asterisk)
"0,30 * 1 * *", you wanted it to run every 30 minutes, but only on the first day of the month
"0 3 * * 0",if you want it to run at 3AM every Sunday
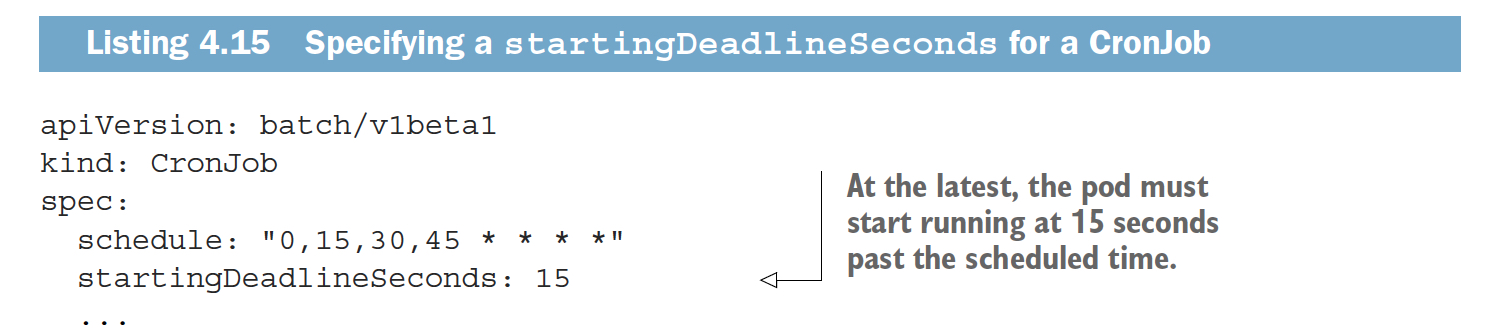
对于cronJob,都不可能完全精确时间点执行的,可能因为前面的任务拖延或其他问题导致,我们要设个期限,超出这次cronjob就不执行了,否则会堆积大量的cronjob

 浙公网安备 33010602011771号