
macOS Mojave 10.14.2 下安装 python3安装及python虚拟virtualenv/virtualenvwrapper环境安装/django2.0的安装
1.默认情况下mac os 自带的系统是python2.7
我们不用 brew 这类的安装工具的,我们直接去python.org python 官网下载最新python。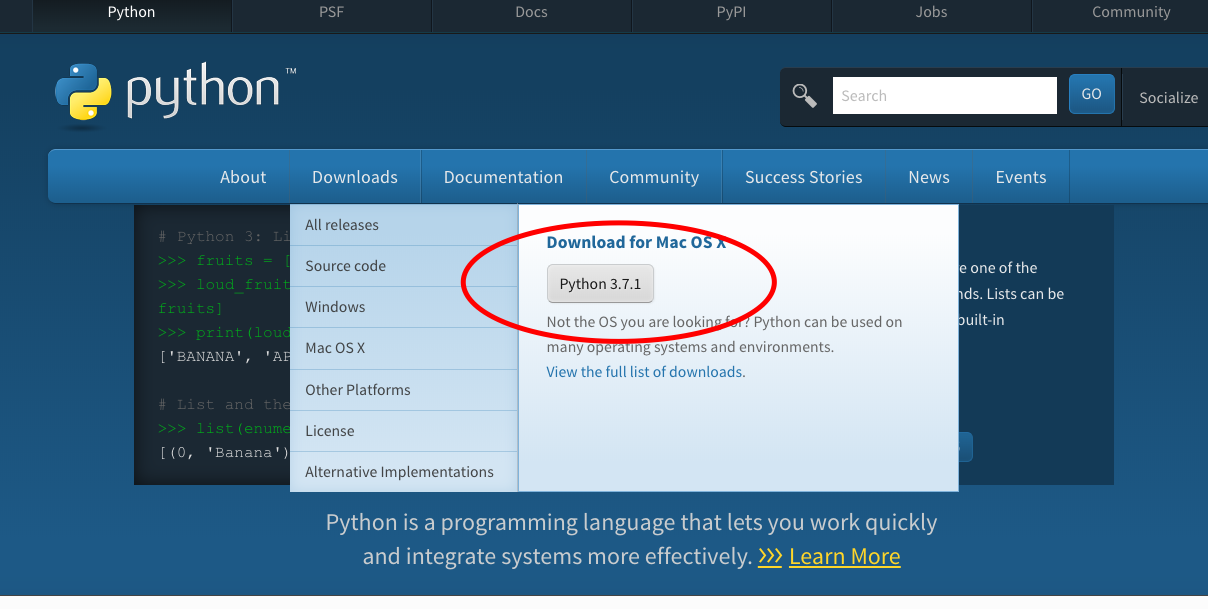
下载最新的 3.7.1 下载地址:https://www.python.org/ftp/python/3.7.1/python-3.7.1-macosx10.9.p

然后安提示操作,我本地有安装的了,就不一一操作了。
这装完以后,我们在终端下执行python 默认的是python2
kingdeMacBook-Air:~ king$ python

Python 2.7.10 (default, Aug 17 2018, 19:45:58)

[GCC 4.2.1 Compatible Apple LLVM 10.0.0 (clang-1000.0.42)] on darwin

Type "help", "copyright", "credits" or "license" for more information.

>>>
我们刚刚安装的是python3
kingdeMacBook-Air:~ king$ python3

Python 3.7.1 (v3.7.1:260ec2c36a, Oct 20 2018, 03:13:28)

[Clang 6.0 (clang-600.0.57)] on darwin

Type "help", "copyright", "credits" or "license" for more information.

>>>
我们直接安装virtualenvwapper,安装完成以后默认就会安装上virtualenv
 1 kingdeMacBook-Air:~ king$ pip3 install virtualenvwrapper
 2 Collecting virtualenvwrapper
 3   Retrying (Retry(total=4, connect=None, read=None, redirect=None, status=None)) after connection broken by 'ReadTimeoutError("HTTPSConnectionPool(host='pypi.org', port=443): Read timed out. (read timeout=15)")': /simple/virtualenvwrapper/
 4   Retrying (Retry(total=3, connect=None, read=None, redirect=None, status=None)) after connection broken by 'ReadTimeoutError("HTTPSConnectionPool(host='pypi.org', port=443): Read timed out. (read timeout=15)")': /simple/virtualenvwrapper/
 5   Retrying (Retry(total=2, connect=None, read=None, redirect=None, status=None)) after connection broken by 'ReadTimeoutError("HTTPSConnectionPool(host='pypi.org', port=443): Read timed out. (read timeout=15)")': /simple/virtualenvwrapper/
 6   Retrying (Retry(total=1, connect=None, read=None, redirect=None, status=None)) after connection broken by 'ReadTimeoutError("HTTPSConnectionPool(host='pypi.org', port=443): Read timed out. (read timeout=15)")': /simple/virtualenvwrapper/
 7   Downloading https://files.pythonhosted.org/packages/2b/8c/3192e10913ad945c0f0fcb17e9b2679434a28ad58ee31ce0104cba3b1154/virtualenvwrapper-4.8.2-py2.py3-none-any.whl
 8 Collecting stevedore (from virtualenvwrapper)
 9   Downloading https://files.pythonhosted.org/packages/35/fa/8683fab2a6e15ecfe107996e56fab91e52fe3ec0b40ca9440a0e1ffe6892/stevedore-1.30.0-py2.py3-none-any.whl (42kB)
10     100% | ████████████████████████████████ | 51kB 29kB/s
11 Collecting virtualenv-clone (from virtualenvwrapper)
12   Downloading https://files.pythonhosted.org/packages/16/9d/6419a4f0fe4350db7fdc01e9d22e949779b6f2d2650e4884aa8aededc5ae/virtualenv_clone-0.4.0-py2.py3-none-any.whl
13 Collecting virtualenv (from virtualenvwrapper)
14   Downloading https://files.pythonhosted.org/packages/7c/17/9b7b6cddfd255388b58c61e25b091047f6814183e1d63741c8df8dcd65a2/virtualenv-16.1.0-py2.py3-none-any.whl (1.9MB)
15     100% | ████████████████████████████████ | 1.9MB 7.4kB/s
16 Collecting pbr!=2.1.0,>=2.0.0 (from stevedore->virtualenvwrapper)
17   Downloading https://files.pythonhosted.org/packages/f3/04/fddc1c2dd75b256eda4d360024692231a2c19a0c61ad7f4a162407c1ab58/pbr-5.1.1-py2.py3-none-any.whl (106kB)
18     100% | ████████████████████████████████ | 112kB 73kB/s
19 Collecting six>=1.10.0 (from stevedore->virtualenvwrapper)
20   Downloading https://files.pythonhosted.org/packages/73/fb/00a976f728d0d1fecfe898238ce23f502a721c0ac0ecfedb80e0d88c64e9/six-1.12.0-py2.py3-none-any.whl
21 Installing collected packages: pbr, six, stevedore, virtualenv-clone, virtualenv, virtualenvwrapper
22 Successfully installed pbr-5.1.1 six-1.12.0 stevedore-1.30.0 virtualenv-16.1.0 virtualenv-clone-0.4.0 virtualenvwrapper-4.8.2
查看本地安装情况
kingdeMacBook-Air:~ king$ pip list
Package           Version
----------------- -------
pbr               5.1.1
pip               18.1
setuptools        39.0.1
six               1.12.0
stevedore         1.30.0
virtualenv        16.1.0
virtualenv-clone  0.4.0
virtualenvwrapper 4.8.2
此时我们的 virtualenvwrapper 已经安装完成了,但是我们在终端下面是无法直接使用的,需要配置我们的环境
kingdeMacBook-Air:~ king$ mkvirtualenv
-bash: mkvirtualenv: command not found
我们先配置python虚拟环境的存放目录,这个只是存放虚拟环境的可执行文件及以后安装django2这类的保存的目录,与系统的真实环境是没有作何关系的。
我们在自己用户目录下面创建一个virtualenv_workon_home目录,用来顾放以后不同的虚拟环境
kingdeMacBook-Air:~ king$ ls
Applications Library Public
Desktop Movies Pictures
Documents Music
Downloads
mkdir virtualenv_workon_home
kingdeMacBook-Air:~ king$ ls
Applications Library Public
Desktop Movies virtualenv_workon_home
Documents Music
Downloads Pictures
最后我们需要设置我们的环境,我们在~/.bash_profile
kingdeMacBook-Air:~ king$ sudo vi ~/.bash_profile
Password:
Sorry, try again.
Password:
添加如下代码:
export WORKON_HOME=~/virtualenv_workon_home
source /Library/Frameworks/Python.framework/Versions/3.7/bin/virtualenvwrapper.sh
完整的代码如下:
# Setting PATH for Python 3.7
# The original version is saved in .bash_profile.pysave
PATH="/Library/Frameworks/Python.framework/Versions/3.7/bin:${PATH}"
export PATH
export WORKON_HOME=~/virtualenv_workon_home
source /Library/Frameworks/Python.framework/Versions/3.7/bin/virtualenvwrapper.sh
重新打开终端会出现一个错误信息,提示如下:
Last login: Sun Dec 23 18:54:15 on ttys000
/usr/bin/python: No module named virtualenvwrapper
virtualenvwrapper.sh: There was a problem running the initialization hooks.

If Python could not import the module virtualenvwrapper.hook_loader,
check that virtualenvwrapper has been installed for
VIRTUALENVWRAPPER_PYTHON=/usr/bin/python and that PATH is
set properly.
kingdeMacBook-Air:~ king$

这个是由于系统默认是python2 ,而我们安装的 virtualenvwrapper 在python3中,我们需要去修改/Library/Frameworks/Python.framework/Versions/3.7/bin/virtualenvwrapper.sh
kingdeMacBook-Air:~ king$ vi /Library/Frameworks/Python.framework/Versions/3.7/bin/virtualenvwrapper.sh
找到:
# Locate the global Python where virtualenvwrapper is installed.
if [ "${VIRTUALENVWRAPPER_PYTHON:-}" = "" ]
then
    VIRTUALENVWRAPPER_PYTHON="$(command \which python)"fi
将里面的修改成为python3
# Locate the global Python where virtualenvwrapper is installed.
if [ "${VIRTUALENVWRAPPER_PYTHON:-}" = "" ]
then
    VIRTUALENVWRAPPER_PYTHON="$(command \which python3)"
#VIRTUALENVWRAPPER_PYTHON="$(command \which python)"
fi
这个是让系统自动去查到python3的目录 为 VIRTUALENVWRAPPER_PYTHON 的目录,主要是在创建虚拟环境时复制这个虚拟环境需要的文件所在的目录
Last login: Sun Dec 23 19:11:13 on ttys004
kingdeMacBook-Air:~ king$ which python
/usr/bin/python
kingdeMacBook-Air:~ king$ which python3
/Library/Frameworks/Python.framework/Versions/3.7/bin/python3
kingdeMacBook-Air:~ king$
现在我们来创建一个虚拟环境
kingdeMacBook-Air:virtualenv_workon_home king$ mkvirtualenv django2
Using base prefix '/Library/Frameworks/Python.framework/Versions/3.7'
New python executable in /Users/king/virtualenv_workon_home/django2/bin/python3.7
Also creating executable in /Users/king/virtualenv_workon_home/django2/bin/python
Installing setuptools, pip, wheel...
done.
virtualenvwrapper.user_scripts creating /Users/king/virtualenv_workon_home/django2/bin/predeactivate
virtualenvwrapper.user_scripts creating /Users/king/virtualenv_workon_home/django2/bin/postdeactivate
virtualenvwrapper.user_scripts creating /Users/king/virtualenv_workon_home/django2/bin/preactivate
virtualenvwrapper.user_scripts creating /Users/king/virtualenv_workon_home/django2/bin/postactivate
virtualenvwrapper.user_scripts creating /Users/king/virtualenv_workon_home/django2/bin/get_env_details

默认我们就进入了这个刚刚创建的工作目录的了
(django2) kingdeMacBook-Air:virtualenv_workon_home king$ ls -la ~/virtualenv_workon_home/
total 0
drwxr-xr-x   3 king  staff   96 12 23 19:23 .
drwxr-xr-x+ 24 king  staff  768 12 23 19:22 ..
drwxr-xr-x   6 king  staff  192 12 23 19:23 django2
(django2) kingdeMacBook-Air:virtualenv_workon_home king$
前面就是代表我们进入了这个虚拟目录了
退出当前虚拟工作环境使用 deactivate 命令
查看当前系统环境中有多少个虚拟环境
(django2) kingdeMacBook-Air:virtualenv_workon_home king$ deactivate
kingdeMacBook-Air:virtualenv_workon_home king$ lsvirtualenv
django2
=======
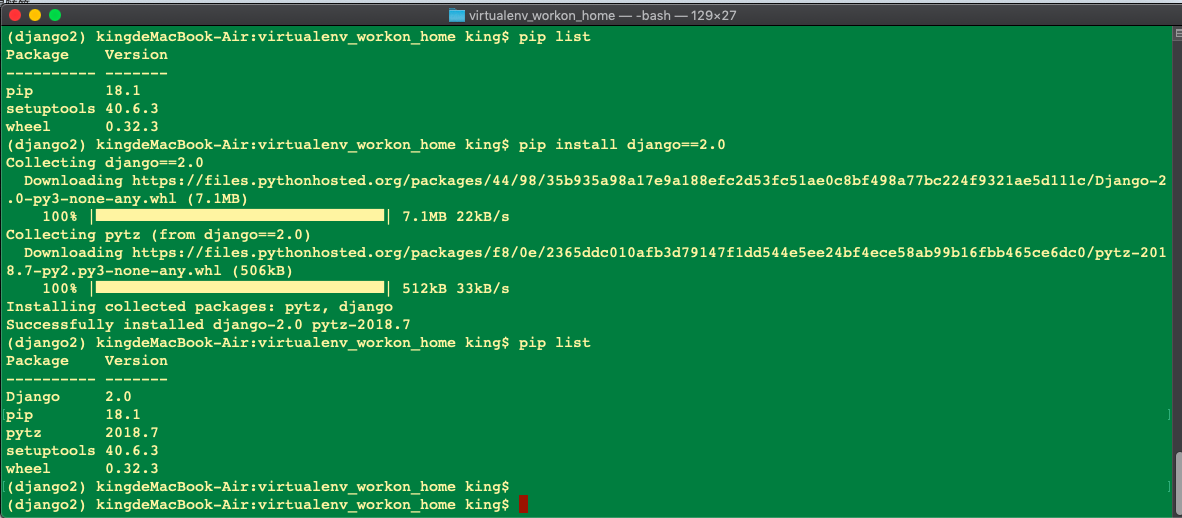
再次进入刚刚的django2的虚拟环境,进去以后我们安装django2.0的框架
django2) kingdeMacBook-Air:virtualenv_workon_home king$ pip list
Package    Version
---------- -------
pip        18.1
setuptools 40.6.3
wheel      0.32.3
(django2) kingdeMacBook-Air:virtualenv_workon_home king$ pip install django==2.0
Collecting django==2.0
  Downloading https://files.pythonhosted.org/packages/44/98/35b935a98a17e9a188efc2d53fc51ae0c8bf498a77bc224f9321ae5d111c/Django-2.0-py3-none-any.whl (7.1MB)
    100% |████████████████████████████████| 7.1MB 22kB/s
Collecting pytz (from django==2.0)
  Downloading https://files.pythonhosted.org/packages/f8/0e/2365ddc010afb3d79147f1dd544e5ee24bf4ece58ab99b16fbb465ce6dc0/pytz-2018.7-py2.py3-none-any.whl (506kB)
    100% |████████████████████████████████| 512kB 33kB/s
Installing collected packages: pytz, django
Successfully installed django-2.0 pytz-2018.7
(django2) kingdeMacBook-Air:virtualenv_workon_home king$ pip list
Package    Version
---------- -------
Django     2.0
pip        18.1
pytz       2018.7
setuptools 40.6.3
wheel      0.32.3
(django2) kingdeMacBook-Air:virtualenv_workon_home king$

 浙公网安备 33010602011771号