
LNMP环境的搭建(yum)方法(精)
第一 先安装nginx
nginx在官方CentOS社区yum里面没有,需要在nginx的官方网站去下载yum的配置文件
官方:https://www.nginx.com/resources/wiki/start/topics/tutorials/install/
配置文件/etc/yum.repos.d/nginx.repo(还有一种,官方做了rpm的nginx yum repo,安装rpm,就会在/etc/yum.repo.d/目录下生产文件)
[nginx]
name=nginx repo
baseurl=http://nginx.org/packages/centos/$releasever/$basearch/         $releasever 是linux 的版本号centos 7
gpgcheck=0
enabled=1
配置后查看 yum list nginx ,就会发现有了nginx,然后我们就可以安装了。
yum install nginx
看到nginx安装成功,就是启动它了, which nginx (rpm -ql nginx)可以看它的目录
/etc/init.d/nginx start             //CentOS6

/bin/systemctl start nginx         //CentOS7

//还可以在目录文件中启动
//加入开机启动以后研究
验证:输入ip地址查看默认网页
参考查看 : https://www.cnblogs.com/fps2tao/p/7577378.html
第二 安装 php
(我是感觉安装php会一块安装依赖把(apache)httpd也安装上去,但是单纯安装(apache)httpd,再安装php需要配置apache的配置文件支持php扩展)
如下:
编辑 /usr/local/apache2/conf/httpd.conf 文件时要注意:

找到:
AddType  application/x-compress .Z
AddType application/x-gzip .gz .tgz
在后面添加:
AddType application/x-httpd-php .php(使Apcche支持PHP)
AddType application/x-httpd-php-source .php5

找到:    <IfModule dir_module>    DirectoryIndex index.html    </IfModule>
添加:    <IfModule dir_module>    DirectoryIndex index.html index.php    </IfModule>

找到:    #ServerName www.example.com:80
修改为:  ServerName 127.0.0.1:80或者ServerName localhost:80    记得要去掉前面的“#”


修改默认的Web站点目录

找到:DocumentRoot "/usr/local/apache2/htdocs"
修改为:DocumentRoot "/home/www/WebSite" --该目录为自己创建的目录

找到:<Directory "/usr/local/apache2/htdocs">
修改为:<Directory "/home/www/WebSite">
直接安装php这个配置可以不看
------
查看 yum list php php-fmp
这里为啥要安装php-fpm,因为php-fpm,是nginx和php的桥梁,php-fpm(快速进程管理),php-fpm默认进程为127.0.0.1:9000,一会php和php-fpm安装完成后,要配置nginx的配置文件,让其遇到客户端php请求是,转发给php-fpm(127.0.0.1:9000),php-fpm再让php解析完成,最后又给nginx.
安装:
yum install -y php php-fpm
yum install php php-pear php-devel httpd //可选,参数更新中 php-pear为php的扩展工具,安装后可以用pecl install 命令安装php扩展
安装成功后,然后在配置nginx的配置文件,让它遇到php的时候转发给php-fpm
    location ~ \.php$ {
        root           /usr/share/nginx/html;    //这个地方要改下下
        fastcgi_pass   127.0.0.1:9000;
        fastcgi_index  index.php;
        fastcgi_param  SCRIPT_FILENAME  /scripts$fastcgi_script_name;  // /script要改成 $document_root 及/usr/share/nginx/html路径,后面是文件名,就是这个绝对路径的文件名给php-fpm
        include        fastcgi_params;
    }
然后重启nginx ,启动 php-fpm 后用phpinfo()测试.
//CentOS7

/bin/systemctl restart nginx
/bin/systemctl start php-fpm

//CentOS6
/etc/init.d/nginx restart
/etc/init.d/php-fpm start
此时 nginx 和php 已经安装成功,但是php还不能连接mysql,先别急往后看.
注:php7的安装方法:
http://www.cnblogs.com/fps2tao/p/7577544.html
第三 安装mysql
因为CentOS7现在已经 不支持 mysql了,取而代之的是mariadb.所以mysql 的yum repo,要在官网获取.
网址 :https://dev.mysql.com/downloads/repo/yum/
安装一个适合自己系统的mysql,下载的是rpm包,安装后会在/etc/yum.repos.d/下面建立msyql的repo.( mysql-community.repo)
wget https://dev.mysql.com/get/mysql57-community-release-el7-11.noarch.rpm
rpm -ivh mysql57-community-release-el7-11.noarch.rpm
更新一下本地的yum库
yum clean
yum makecache
安装
yum install mysql mysql-server php-mysql
php-mysql是php连接数据库的插件,不然php没有连接mysql的接口(msyql可以正常启动也没办法)。
安装完成后启动
#systemctl start mysqld
安装完成之后会自动在log中生成连接的密码
查看密码:
[root@mysqlA ~]# cat /var/log/mysqld.log |grep password
2016-08-23T02:33:48.872073Z 1 [Note] A temporary password isgenerated for root@localhost: %IrczkB+J7Ez
你必须重新设置密码才能执行语句
[root@mysqlA ~]# mysql -uroot -p
Enter password:
Welcome to the MySQL monitor.  commands end with ; or \g.
Your MySQL connection id is 4
Server version: 5.7.14
Copyright (c) 2000, 2016, Oracle and/or its affiliates. All rights reserved.
Oracle is a registered trademark of Oracle Corporation and/or its
affiliates. Other names may be trademarks of their respective
owners.
Type 'help;' or '\h' for help. Type '\c' to clear the current input statement.
mysql> show databases;
ERROR 1820 (HY000): You must reset your password using ALTER USER statement before executing this statement.
修改密码~
这个安装后不用配置,直接重启php-fpm.
测试
扩展内容:mysql 密码修改
https://www.cnblogs.com/fps2tao/p/9950989.html
ALTER user 'root'@'localhost' IDENTIFIED BY 'L123#@'
其实想要重置 5.7 的密码很简单,就一层窗户纸:
1、修改/etc/my.cnf,在 [mysqld] 小节下添加一行:skip-grant-tables=1
这一行配置让 mysqld 启动时不对密码进行验证
2、重启mysqld 服务:systemctl restart mysqld
3、使用 root 用户登录到 mysql:mysql -uroot
4、切换到mysql数据库,更新 user 表:
update user set authentication_string = password('123456'),password_expired = 'N', password_last_changed = now() where user = 'root';
在之前的版本中,密码字段的字段名是 password,5.7版本改为了 authentication_string
在修改了密码后 刷新一下缓存
flush privileges;
5、退出 mysql,编辑 /etc/my.cnf 文件,删除 skip-grant-tables=1的内容
6、重启mysqld 服务,再用新密码登录即可
不然 下面这些远程和 更改密码的sql 都不能运行
mysql> -- 下面我们另外添加一个新的 root 用户, 密码为空, 只允许 192.168.1.100 连接

mysql> GRANT ALL PRIVILEGES ON *.* TO 'root'@'192.168.1.100' IDENTIFIED BY '' WITH GRANT OPTION;
mysql> flush privileges;
mysql> update user set password=PASSWORD('123456') where user='root';
mysql> flush privileges;
mysql 8 用phpmyadmin登录失败的问题 : https://www.cnblogs.com/fps2tao/p/9953430.html
一个服务器安装的例子,nginx,php,mysql,redis
https://blog.csdn.net/qq_26245325/article/details/78916178
第四,如果yum形式安装mariadb,数据库呢 ( https://blog.csdn.net/qq_39719589/article/details/81835330 )
1) 删除原有的mysql包
yum remove mysql mysql-server mysql-libs compat-mysql51
2)安装 mariadb
yum install mariadb-server mariadb
3) mariadb数据库的相关命令是:
systemctl start mariadb  #启动MariaDB
systemctl stop mariadb  #停止MariaDB
systemctl restart mariadb  #重启MariaDB
systemctl enable mariadb  #设置开机启动
4)首次登录到数据库
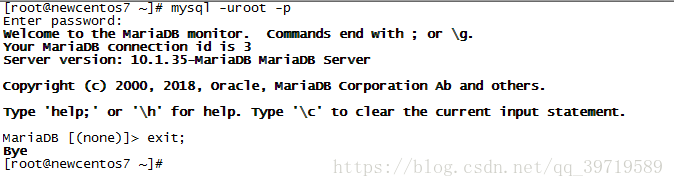
mysql -uroot -p
登录到MariaDB,此时root账户的密码为空,直接回车即可,退出Mariadb,exit;即可。
5)进行MariaDB的相关简单配置,使用
mysql_secure_installation
命令进行配置(先退出数据库)。
首先是设置密码,会提示先输入密码

Enter current password for root (enter for none):<–初次运行直接回车

设置密码

Set root password? [Y/n] <– 是否设置root用户密码,输入y并回车或直接回车
New password: <– 设置root用户的密码
Re-enter new password: <– 再输入一次你设置的密码

其他配置

Remove anonymous users? [Y/n] <– 是否删除匿名用户,回车

Disallow root login remotely? [Y/n] <–是否禁止root远程登录,回车(后面授权配置)

Remove test database and access to it? [Y/n] <– 是否删除test数据库,回车

Reload privilege tables now? [Y/n] <– 是否重新加载权限表,回车
初始化MariaDB完成,直接登录,成功。
6)配置MariaDB的字符集
使用vim /etc/my.cnf.d/server.cnf命令编辑server.cnf文件,在[mysqld]标签下添加:
init_connect='SET collation_connection = utf8_unicode_ci'
init_connect='SET NAMES utf8'
character-set-server=utf8
collation-server=utf8_unicode_ci
skip-character-set-client-handshake
配置初始化完成,重启Mariadb。
之后进入Mariadb,查看字符集。
show variables like "%character%";show variables like "%collation%";

7) 添加用户,设置权限
创建用户命令(用户名,密码请自行修改)
create user username@localhost identified by 'password';
授予外网登陆权限
grant all privileges on *.* to username@'%' identified by 'password';
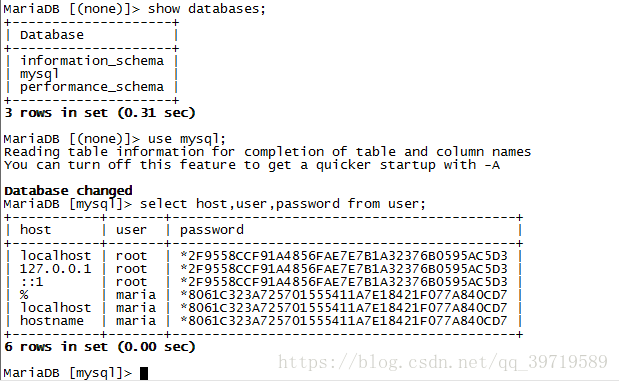
select host,user,password from user;
简单的用户和权限配置就完成了。
授予部分权限只需把all privileges改为select,insert,update,delete,create,drop,index,alter,grant,references,reload,shutdown,process,file其中一部分即可。

 浙公网安备 33010602011771号