第四章 SportsStore一个实际的(数据)应用
在这一章中,我开始构建一个更实际的项目,该项目演示了如何将ASP.NET Core MVC和EF Core一起使用。该项目将是简单但实际的,并将重点放在最常用的EF Core功能上。这个应用程序将是我在许多书中使用的SportsStore应用程序的变体,它将更加关注数据和数据存储。
在本章中,我构建了一个简单的ASP.NET Core MVC应用程序。在下一章中,我将添加EF Core,并将应用程序数据存储在数据库中。在下面的章节中,我将添加更多的数据操作、扩展数据模型、添加对客户功能的支持,并向您展示如何扩展应用程序。贯穿SportsStore的所有章节(4-10章),我都会指出将在后面哪些章节(如11-18章)更详细地描述这些关键的功能。从第5章开始,当我向项目中添加EF Core时,我还将描述您可能遇到的最常见问题,并解释如何解决它们。
注意:本书的重点是EF Core以及如何在MVC应用程序中使用它。我省略了一些SportsStore功能,如Administration管理员功能中的身份验证,却扩展了其他功能,如数据模型。
4.1 创建项目
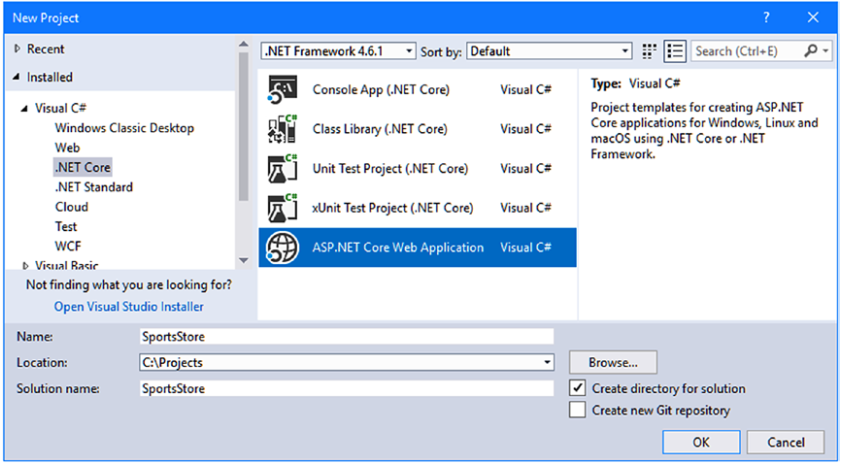
下面创建SportsStore工程,启动Visual Studio创建新项目。选择ASP.NET Core Web Application project,将Name设置为SportsStore,然后单击Browse按钮,选择一个适合的位置来存储项目,如图4-1所示。
小贴士:您可以从GitHub资源库为本书下载这个项目,https://github.com/apress/pro-ef-core-2-for-asp.net- coremvc。
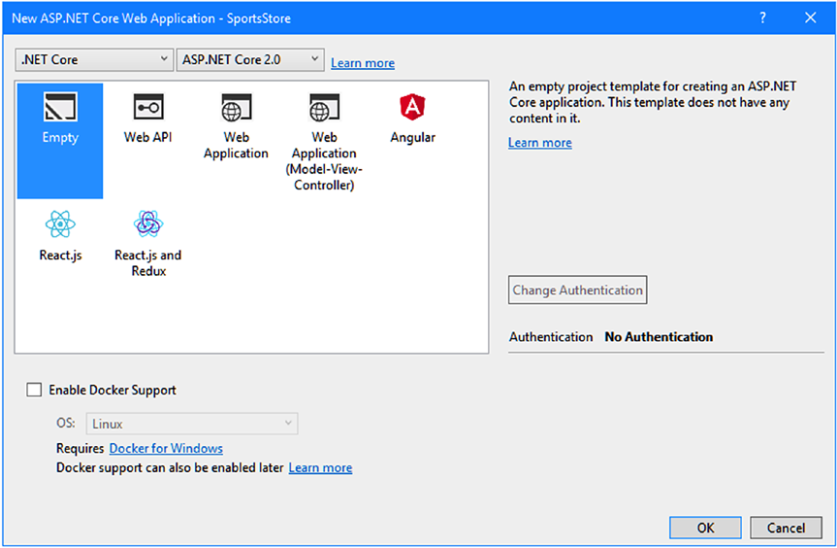
单击OK按钮继续,在弹出窗口顶部确保选中了.NET Core和ASP.NET Core 2.0,然后单击Empty模板,如图4-2所示。当然也可以使用能直接将ASP.NET Core MVC和Entity Framework Core引用添加到一个工程中的工程模板,但这么做会掩盖一些有用的细节。所以我们选择的是Empty空白模板从一个空白的ASP.NET Core project开始,并在接下来的章节中逐步构建它,这样您就可以看到不同组件是如何协同工作的。
单击OK按钮,Visual Studio将使用ASP.NET Core的基本配置创建SportsStore项目。但不配置MVC框架或EF Core。
4.1.1 配置MVC框架
下一步是为MVC框架添加基本配置,这样我就可以添加Controllers控制器和Views视图来处理HTTP请求。我将MVC中间件添加到ASP.NET Core请求管道,如清单4-1所示。
 1 //Listing 4-1. Configuring MVC in the Startup.cs File in the SportsStore Folder
 2 using System;
 3 using System.Collections.Generic;
 4 using System.Linq;
 5 using System.Threading.Tasks;
 6 using Microsoft.AspNetCore.Builder;
 7 using Microsoft.AspNetCore.Hosting;
 8 using Microsoft.AspNetCore.Http;
 9 using Microsoft.Extensions.DependencyInjection;
10
11 namespace SportsStore
12 {
13     public class Startup
14     {
15         public void ConfigureServices(IServiceCollection services)
16         {
17             services.AddMvc();
18         }
19         public void Configure(IApplicationBuilder app, IHostingEnvironment env)
20         {
21             app.UseDeveloperExceptionPage();
22             app.UseStatusCodePages();
23             app.UseStaticFiles();
24             app.UseMvcWithDefaultRoute();
25         }
26     }
27 }
这些更改使用默认路由配置MVC框架,添加对静态文件的支持,并配置错误页面,以便为开发人员提供有用的详细信息。
4.1.2 添加Model
此应用程序的Model模型将基于产品列表。我创建了Models文件夹,往里面添加了一个Product.cs文件。代码如清单4-2所示。
1 //Listing 4-2. The Contents of the Product.cs File in the Models Folder
2 namespace SportsStore.Models {
3     public class Product {
4         public string Name { get; set; }
5         public string Category { get; set; }
6         public decimal PurchasePrice { get; set; }
7         public decimal RetailPrice { get; set; }
8     }
9 }
这是我在书中经常使用的Product类,稍作修改以更好地演示EF Core功能。
4.1.3 添加一个仓储类
为了在应用程序中对数据提供一致性的访问,我喜欢使用repository仓储模式,其中interface接口用于定义访问数据的属性和方法,实现类用于处理数据存储机制。使用仓储模式的优点是:对应用程序的MVC部分进行单元测试更容易,并且对应用程序的其余部分隐藏了数据存储的细节(封装)。
小贴士:对于大多数项目来说,使用仓储是一个好主意,但它不是使用EF Core的必要条件。例如在第3部分中,大多数示例没有仓储,因为有许多复杂的代码要更改,而且我不想对多个类和接口重复进行更改。如果您还怀疑仓储模式的好处请不要担心,因为您总是可以稍后添加一个仓储模式,尽管需要进行一点重构。
为了创建仓储接口,我添加了一个IRepository.cs文件添加到Models文件夹,并添加了如清单4-3所示的代码。
1 //Listing 4-3. The Contents of the IRepository.cs File in the Models Folder
2 using System.Collections.Generic;
3 namespace SportsStore.Models {
4     public interface IRepository {
5         IEnumerable<Product> Products { get; }
6         void AddProduct(Product product);
7     }
8 }
Products属性将提供对所有产品的只读访问(Products属性只读),AddProduct方法将用于添加新产品。
在本章中,我先把模型对象存储在内存中,后面再用EF Core存到数据库。我在Models文件夹添加了一个DataRepository.cs,并添加了如清单4-4所示的代码。
 1 //Listing 4-4. The Contents of the DataRepository.cs File in the Models Folder
 2 using System.Collections.Generic;
 3 namespace SportsStore.Models
 4 {
 5     public class DataRepository : IRepository
 6     {
 7         private List<Product> data = new List<Product>();
 8         public IEnumerable<Product> Products => data;
 9         public void AddProduct(Product product)
10         {
11             this.data.Add(product);
12         }
13     }
14 }
DataRepository类实现IRepository接口,并使用一个List来存产品对象,这意味着一旦应用程序停止或重启数据就会丢失。我在第4章中介绍了一个持久仓储,但是这在我引入EF Core之前,已经足够让项目的ASP.NET Core MVC方面正常工作了。我将清单4-5所示的语句添加到Startup类中,以便在DI依赖注入将DataRepository类注册为IRepository接口的实现。
 1 //Listing 4-5. Configuring Dependency Injection in the Startup.cs File in the SportsStore Folder
 2 using System;
 3 using System.Collections.Generic;
 4 using System.Linq;
 5 using System.Threading.Tasks;
 6 using Microsoft.AspNetCore.Builder;
 7 using Microsoft.AspNetCore.Hosting;
 8 using Microsoft.AspNetCore.Http;
 9 using Microsoft.Extensions.DependencyInjection;
10 using SportsStore.Models;
11 namespace SportsStore
12 {
13     public class Startup
14     {
15         public void ConfigureServices(IServiceCollection services)
16         {
17             services.AddMvc();
18             services.AddSingleton<IRepository, DataRepository>();
19         }
20         public void Configure(IApplicationBuilder app, IHostingEnvironment env)
21         {
22             app.UseDeveloperExceptionPage();
23             app.UseStatusCodePages();
24             app.UseStaticFiles();
25             app.UseMvcWithDefaultRoute();
26         }
27     }
28 }
清单4-5中的语句使用AddSingleton方法注册DataRepository类,这意味着DI依赖注入第一次解析对IRepository接口的依赖关系时将创建单个(DataRepository类的)对象,然后将其用于所有后续依赖关系。(DI依赖注入的单例了解一下)
4.1.4 添加控制器和视图
示例应用程序的重点是产品对象的管理,因为这能更好地演示不同的数据操作功能。我需要一个Controller控制器来接收HTTP请求并将它们转换为对产品对象的操作,因此我创建了Controllers文件夹,并向其添加了一个HomeController.cs文件,控制器代码如清单4-6所示。
 1 //Listing 4-6. The Contents of the HomeController.cs File in the Controllers Folder
 2 using Microsoft.AspNetCore.Mvc;
 3 using SportsStore.Models;
 4 namespace SportsStore.Controllers
 5 {
 6     public class HomeController : Controller
 7     {
 8         private IRepository repository;
 9         public HomeController(IRepository repo) => repository = repo;
10         public IActionResult Index() => View(repository.Products);
11         [HttpPost]
12         public IActionResult AddProduct(Product product)
13         {
14             repository.AddProduct(product);
15             return RedirectToAction(nameof(Index));
16         }
17     }
18 }
Index() Action操作方法将产品对象的集合从仓储传递到其视图,视图将向用户显示数据表格。AddProduct方法根据从HTTP POST请求中接收的数据,创建并存储一个新产品对象。
接下来我创建了Views/Home文件夹,并向其中添加了一个Index.cshtml文件,其内容如清单4-7所示。这个视图将显示应用程序的产品数据,并允许用户创建新对象。
 1 //Listing 4-7. The Contents of the Index.cshtml File in the Views/Home Folder
 2 @model IEnumerable<Product>
 3 <h3 class="p-2 bg-primary text-white text-center">Products</h3>
 4 <div class="container-fluid mt-3">
 5     <div class="row">
 6         <div class="col font-weight-bold">Name</div>
 7         <div class="col font-weight-bold">Category</div>
 8         <div class="col font-weight-bold text-right">Purchase Price</div>
 9         <div class="col font-weight-bold text-right">Retail Price</div>
10         <div class="col"></div>
11     </div>
12     <form asp-action="AddProduct" method="post">
13         <div class="row">
14             <div class="col"><input name="Name" class="form-control" /></div>
15             <div class="col"><input name="Category" class="form-control" /></div>
16             <div class="col">
17                 <input name="PurchasePrice" class="form-control" />
18             </div>
19             <div class="col">
20                 <input name="RetailPrice" class="form-control" />
21             </div>
22             <div class="col">
23                 <button type="submit" class="btn btn-primary">Add</button>
24             </div>
25         </div>
26     </form>
27     @if (Model.Count() == 0)
28     {
29         <div class="row">
30             <div class="col text-center p-2">No Data</div>
31         </div>
32     }
33     else
34     {
35         @foreach (Product p in Model)
36         {
37             <div class="row p-2">
38                 <div class="col">@p.Name</div>
39                 <div class="col">@p.Category</div>
40                 <div class="col text-right">@p.PurchasePrice</div>
41                 <div class="col text-right">@p.RetailPrice</div>
42                 <div class="col"></div>
43             </div>
44         }
45     }
46 </div>
grid网格布局用于显示创建新对象的内联表单,以及应用程序所有现有产品对象的详细信息,或占位符(如果没有对象的话)。
4.1.5 收尾工作
右键单击SportsStore工程,选择添加➤新项目,并选择JSON文件模板(在ASP.NET Core➤Web➤General),来创建一个.bowerrc的文件,添加清单4 - 8所示的内容。(注意这个文件名很重要:它以句点开始,包含字母r两次,没有文件扩展名)。
1 Listing 4-8. The Contents of the .bowerrc File in the SportsStore Folder
2 {
3     "directory": "wwwroot/lib"
4 }
我再次使用JSON文件模板创建了一个bower.json文件,内容显示在清单4 - 9。
1 Listing 4-9. The Contents of the bower.json File in the SportsStore Folder
2 {
3     "name": "asp.net",
4     "private": true,
5     "dependencies": {
6     "bootstrap": "4.0.0"
7     }
8 }
将更改保存到文件后,Visual Studio将下载Bootstrap包的新版本,并将其安装到wwwroot/lib文件夹中。
注意:在本章中我用来安装Bootstrap的客户端包管理工具Bower已经被废弃,最终会被替换。Bower仍然处于积极的支持下,Visual Studio中对它提供了集成支持,这也是我在本书中使用它的原因。
接下来,我创建了Views/Shared文件夹,并向其中添加了一个_Layout.cshtml文件。用于定义共享布局。如清单4-10所示
 1 Listing 4-10. The Contents of the _Layout.cshtml File in the Views/Shared Folder
 2 <!DOCTYPE html>
 3 <html>
 4 <head>
 5     <meta name="viewport" content="width=device-width" />
 6     <title>SportsStore</title>
 7     <link rel="stylesheet" href="~/lib/bootstrap/dist/css/bootstrap.min.css" />
 8 </head>
 9 <body>
10     <div class="p-2">
11         @RenderBody()
12     </div>
13 </body>
14 </html>
这个简单的布局提供了HTML文档框架,所以我不必在每个视图中都再写一遍。它还包含一个link元素,告诉浏览器要请求Bootstrap风格的CSS文件,我在整本书中使用它来样式化内容。
为了默认使用清单4-10中的布局,我在Views文件夹内添加了一个_ViewStart.cshtml的文件。内容如清单4-11所示。(如果您使用MVC View Start Page项的模板来创建这个文件,那么Visual Studio将自动添加列表中显示的内容。)
1 Listing 4-11. The Contents of the _ViewStart.cshtml File in the Views Folder
2 @{
3      Layout = "_Layout";
4 }
为启用ASP.NET Core MVC tag helpers,而且让model类更容易被引用, 我在Views文件夹内添加了一个_ViewImports.cshtml文件。如清单4-12所示的内容。
1 Listing 4-12. The Contents of the _ViewImports.cshtml File in the Views Folder
2 @using SportsStore.Models
3 @addTagHelper *, Microsoft.AspNetCore.Mvc.TagHelpers
最后一步是配置应用程序,使其能够侦听端口5000上的HTTP请求。我编辑了Properties文件夹内的launchSettings.json来替换随机分配的端口,如下所示清单4-13。端口5000没有什么特别的意义,除了我在本书的例子中使用它。
 1 //Listing 4-13. Changing the Service Ports in the launchSettings.json File in the Properties Folder
 2 {
 3   "iisSettings": {
 4     "windowsAuthentication": false,
 5     "anonymousAuthentication": true,
 6     "iisExpress": {
 7       "applicationUrl": "http://localhost:5000/",
 8       "sslPort": 0
 9     }
10   },
11   "profiles": {
12     "IIS Express": {
13       "commandName": "IISExpress",
14       "launchBrowser": true,
15       "environmentVariables": {
16         "ASPNETCORE_ENVIRONMENT": "Development"
17       }
18     },
19     "SportsStore": {
20       "commandName": "Project",
21       "launchBrowser": true,
22       "environmentVariables": {
23         "ASPNETCORE_ENVIRONMENT": "Development"
24       },
25       "applicationUrl": "http://localhost:5000/"
26     }
27   }
28 }
4.2 运行小例子
下面编译和运行小例子,新打开一个命令行或PowerShell窗口,导航到SportStore项目文件夹(包含了bower.json文件),执行下面清单4-14中的命令
Listing 4-14. Starting the Example Application
dotnet run
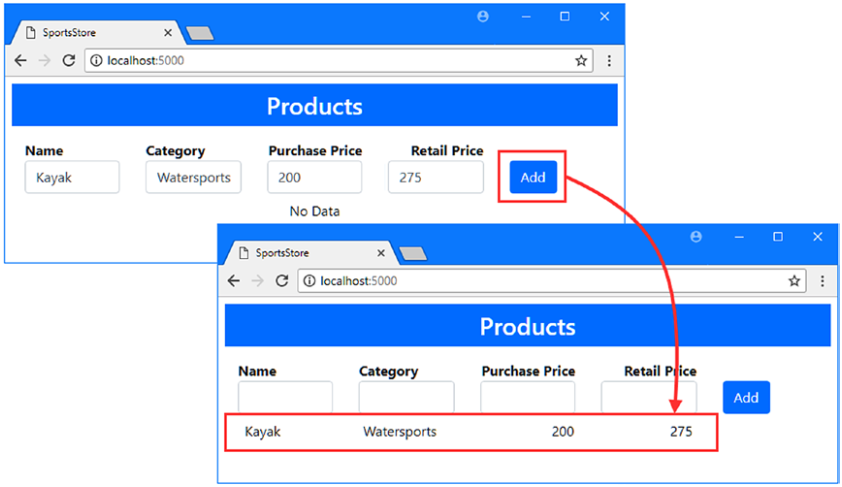
该应用会在5000端口监听HTTP请求,打开浏览器导航到http://localhost:5000你将看到初始占位符,当你填写表单字段并单击Add按钮时,它将被替换,如图4-3所示。
4.3 本章小结
本章我创建了一个简单的ASP.NET Core MVC 应用程序,我后面的章节还要接着用。目前应用程序的数据还是存储在内存中的,这意味着应用程序停止或重启后所有的数据将会丢失。下一章,我将EF Core添加到项目中,以此将数据持久化存储到数据库中。


 浙公网安备 33010602011771号