Django快速开发之投票系统
2015-10-05 14:57 虫师 阅读(20795) 评论(9) 收藏 举报https://docs.djangoproject.com/en/1.8/intro/tutorial01/
参考官网文档,创建投票系统。
================
Windows 7/10
Python 2.7.10
Django 1.8.2
================
1、创建项目(mysite)与应用(polls)
D:\pydj>django-admin.py startproject mysite
D:\pydj>cd mysite
D:\pydj\mysite>python manage.py startapp polls
添加到setting.py
# Application definition

INSTALLED_APPS = (
    'django.contrib.admin',
    'django.contrib.auth',
    'django.contrib.contenttypes',
    'django.contrib.sessions',
    'django.contrib.messages',
    'django.contrib.staticfiles',
    'polls',
)
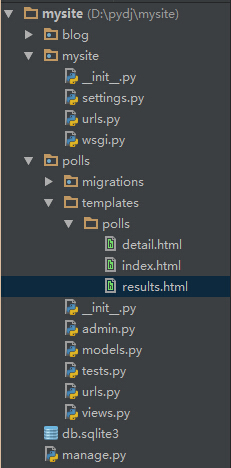
最终哪个目录结构:
2、创建模型(即数据库)
一般web开发先设计数据库,数据库设计好了,项目就完了大半了,可见数据库的重要性。打开polls/models.py编写如下:
# coding=utf-8
from django.db import models


# Create your models here.
# 问题
class Question(models.Model):
    question_text = models.CharField(max_length=200)
    pub_date = models.DateTimeField('date published')

    def __unicode__(self):
        return self.question_text


# 选择
class Choice(models.Model):
    question = models.ForeignKey(Question)
    choice_text = models.CharField(max_length=200)
    votes = models.IntegerField(default=0)

    def __unicode__(self):
        return self.choice_text
执行数据库表生成与同步。
D:\pydj\mysite>python manage.py makemigrations polls
Migrations for 'polls':
  0001_initial.py:
    - Create model Question
    - Create model Choice
    - Add field question to choice

D:\pydj\mysite>python manage.py syncdb
……
You have installed Django's auth system, and don't have any superusers defined.
Would you like to create one now? (yes/no): yes
Username (leave blank to use 'fnngj'):    用户名(默认当前系统用户名)
Email address: fnngj@126.com     邮箱地址
Password:     密码
Password (again):    重复密码
Superuser created successfully.
3、admin管理
django提供了强大的后台管理,对于web应用来说,后台必不可少,例如,当前投票系统,如何添加问题与问题选项?直接操作数据库添加,显然麻烦,不方便,也不安全。所以,管理后台就可以完成这样的工作。
打开polls/admin.py文件,编写如下内容:
from django.contrib import admin
from .models import Question, Choice


# Register your models here.
class ChoiceInline(admin.TabularInline):
    model = Choice
    extra = 3


class QuestionAdmin(admin.ModelAdmin):
    fieldsets = [
        (None,               {'fields': ['question_text']}),
        ('Date information', {'fields': ['pub_date'], 'classes': ['collapse']}),
    ]
    inlines = [ChoiceInline]
    list_display = ('question_text', 'pub_date')


admin.site.register(Choice)
admin.site.register(Question, QuestionAdmin)
当前脚本的作用就是将模型(数据库表)交由admin后台管理。
运行web容器:
D:\pydj\mysite>python manage.py runserver
Performing system checks...

System check identified no issues (0 silenced).
October 05, 2015 - 13:08:12
Django version 1.8.2, using settings 'mysite.settings'
Starting development server at http://127.0.0.1:8000/
Quit the server with CTRL-BREAK.
登录后台:http://127.0.0.1:8000/admin
登录密码就是在执行数据库同步时设置的用户名和密码。

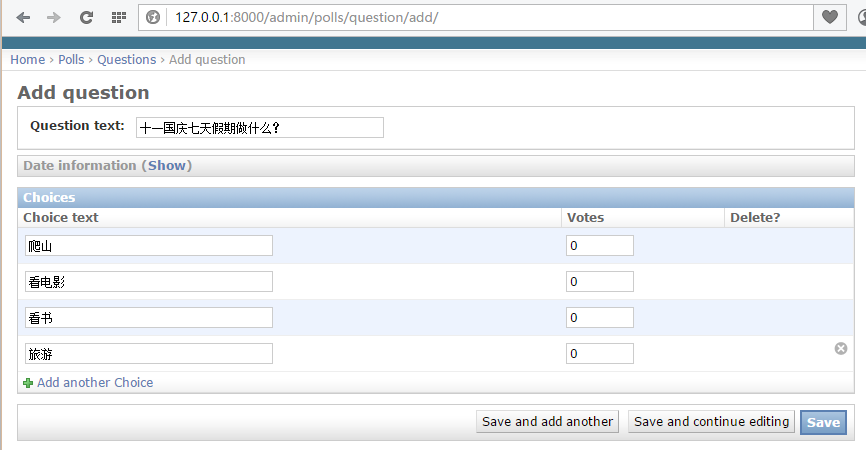
点击“add”添加问题。
4、编写视图
视图起着承前启后的作用,前是指前端页面,后是指后台数据库。将数据库表中的内容查询出来显示到页面上。
编写polls/views.py文件:
# coding=utf-8
from django.shortcuts import render, get_object_or_404
from django.http import HttpResponseRedirect, HttpResponse
from django.core.urlresolvers import reverse
from .models import Question, Choice


# Create your views here.
# 首页展示所有问题
def index(request):
    # latest_question_list2 = Question.objects.order_by('-pub_data')[:2]
    latest_question_list = Question.objects.all()
    context = {'latest_question_list': latest_question_list}
    return render(request, 'polls/index.html', context)


# 查看所有问题
def detail(request, question_id):
    question = get_object_or_404(Question, pk=question_id)
    return render(request, 'polls/detail.html', {'question': question})


# 查看投票结果
def results(request, question_id):
    question = get_object_or_404(Question, pk=question_id)
    return render(request, 'polls/results.html', {'question': question})


# 选择投票
def vote(request, question_id):
    p = get_object_or_404(Question, pk=question_id)
    try:
        selected_choice = p.choice_set.get(pk=request.POST['choice'])
    except (KeyError, Choice.DoesNotExist):
        # Redisplay the question voting form.
        return render(request, 'polls/detail.html', {
            'question': p,
            'error_message': "You didn't select a choice.",
        })
    else:
        selected_choice.votes += 1
        selected_choice.save()
        # Always return an HttpResponseRedirect after successfully dealing
        # with POST data. This prevents data from being posted twice if a
        # user hits the Back button.
        return HttpResponseRedirect(reverse('polls:results', args=(p.id,)))
5、配置url
url是一个请求配置文件,页面中的请求转交给由哪个函数处理,由该文件决定。
首先配置polls/urls.py(该文件需要创建)
from django.conf.urls import url
from . import views

urlpatterns = [
    # ex : /polls/
    url(r'^$', views.index, name='index'),
    # ex : /polls/5/
    url(r'^(?P<question_id>[0-9]+)/$', views.detail, name='detail'),
    # ex : /polls/5/results/
    url(r'^(?P<question_id>[0-9]+)/results/$', views.results, name='results'),
    # ex : /polls/5/vote
    url(r'^(?P<question_id>[0-9]+)/vote/$', views.vote, name='vote'),
]
接着,编辑mysite/urls.py文件。
from django.conf.urls import include, url
from django.contrib import admin

urlpatterns = [
    url(r'^polls/', include('polls.urls', namespace="polls")),
    url(r'^admin/', include(admin.site.urls)),
]
6、创建模板
模板就是前端页面,用来将数据显示到web页面上。
首先创建polls/templates/polls/目录,分别在该目录下创建index.html、detail.html和results.html文件。
index.html
{% if latest_question_list %}
    <ul>
    {% for question in latest_question_list %}
        <li><a href="{% url 'polls:detail' question.id %}">{{ question.question_text }}</a></li>
    {% endfor %}
    </ul>
{% else %}
    <p>No polls are available.</p>
{% endif %}
detail.html
<h1>{{ question.question_text }}</h1>

{% if error_message %}<p><strong>{{ error_message }}</strong></p>{% endif %}

<form action="{% url 'polls:vote' question.id %}" method="post">
{% csrf_token %}
{% for choice in question.choice_set.all %}
    <input type="radio" name="choice" id="choice{{ forloop.counter }}" value="{{ choice.id }}" />
    <label for="choice{{ forloop.counter }}">{{ choice.choice_text }}</label><br />
{% endfor %}
<input type="submit" value="Vote" />
</form>
results.html
<h1>{{ question.question_text }}</h1>

<ul>
{% for choice in question.choice_set.all %}
    <li>{{ choice.choice_text }} -- {{ choice.votes }} vote{{ choice.votes|pluralize }}</li>
{% endfor %}
</ul>

<a href="{% url 'polls:detail' question.id %}">Vote again?</a>
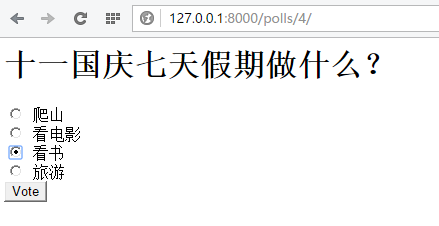
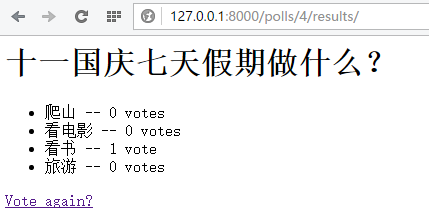
7、功能展示
启动web容器,访问:http://127.0.0.1:8000/polls/

==========
django相关文章:
http://www.cnblogs.com/fnng/category/581256.html

 浙公网安备 33010602011771号