iOS自动化环境搭建(超详细)
2020-04-01 22:33 虫师 阅读(11780) 评论(8) 收藏 举报1.macOS相关库安装
- libimobiledevice
> brew install libimobiledevice
使用本机与苹果iOS设备的服务进行通信的库。
- ideviceinstaller
brew install ideviceinstaller
获取设备udid、安装app、卸载app、获取bundleid
- carthage
> brew install carthage
第三方库管理工具。
- ios-deploy
> brew install ios-deploy
ios-deploy 不依赖于XCODE,进行安装和调试IOS应用程序。
- node & npm
> brew install node
> brew install npm
- appium-doctor
npm install -g appium-doctor
- 验证appium环境
> appium-doctor

info AppiumDoctor Appium Doctor v.1.11.0
info AppiumDoctor ### Diagnostic for necessary dependencies starting ###
info AppiumDoctor  ✔ The Node.js binary was found at: /usr/local/bin/node
info AppiumDoctor  ✔ Node version is 10.15.1
info AppiumDoctor  ✔ Xcode is installed at: /Applications/Xcode-beta.app/Contents/Developer
info AppiumDoctor  ✔ Xcode Command Line Tools are installed in: /Applications/Xcode-beta.app/Contents/Developer
info AppiumDoctor  ✔ DevToolsSecurity is enabled.
info AppiumDoctor  ✔ The Authorization DB is set up properly.
info AppiumDoctor  ✔ Carthage was found at: /usr/local/bin/carthage. Installed version is: 0.33.0
info AppiumDoctor  ✔ HOME is set to: /Users/tech
...
2.XCode
Xcode 是iOS开发环境,可以到app store 下载安装。
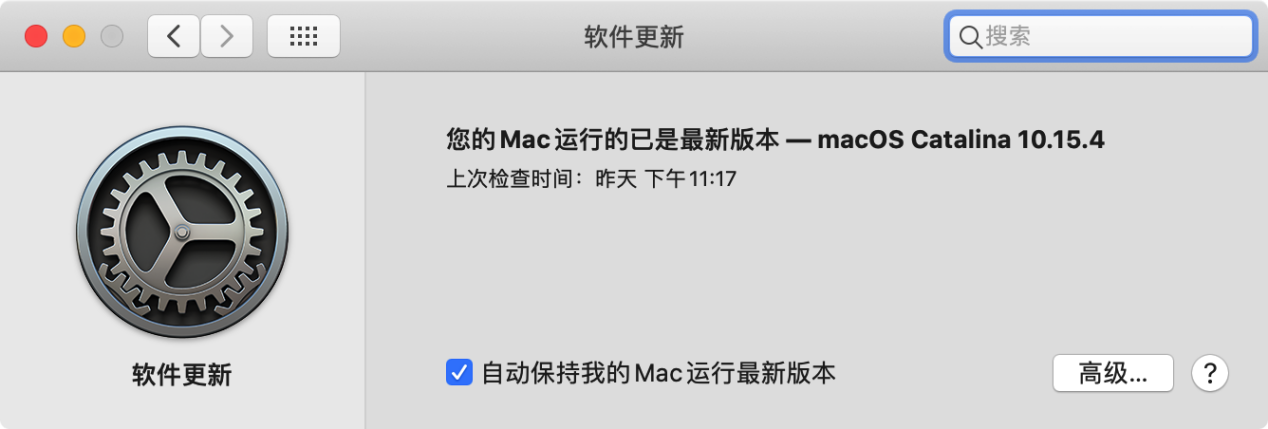
Xcode 的安装需要macOS升级到最新的版本,如果你的系统不是最新版本需要升级。
WebDriverAgent
在模拟器中运行的用于iOS的WebDriver服务器。
https://github.com/appium/WebDriverAgent
该项目由facebook开发,appium拉了个分支来维护,更新上超过了facebook,所以我们用appium的分支。
-
通过git clone 将项目克隆下来。
-
进入项目目录执行shell脚本:
../WebDriverAgent> ./Scripts/bootstrap.sh
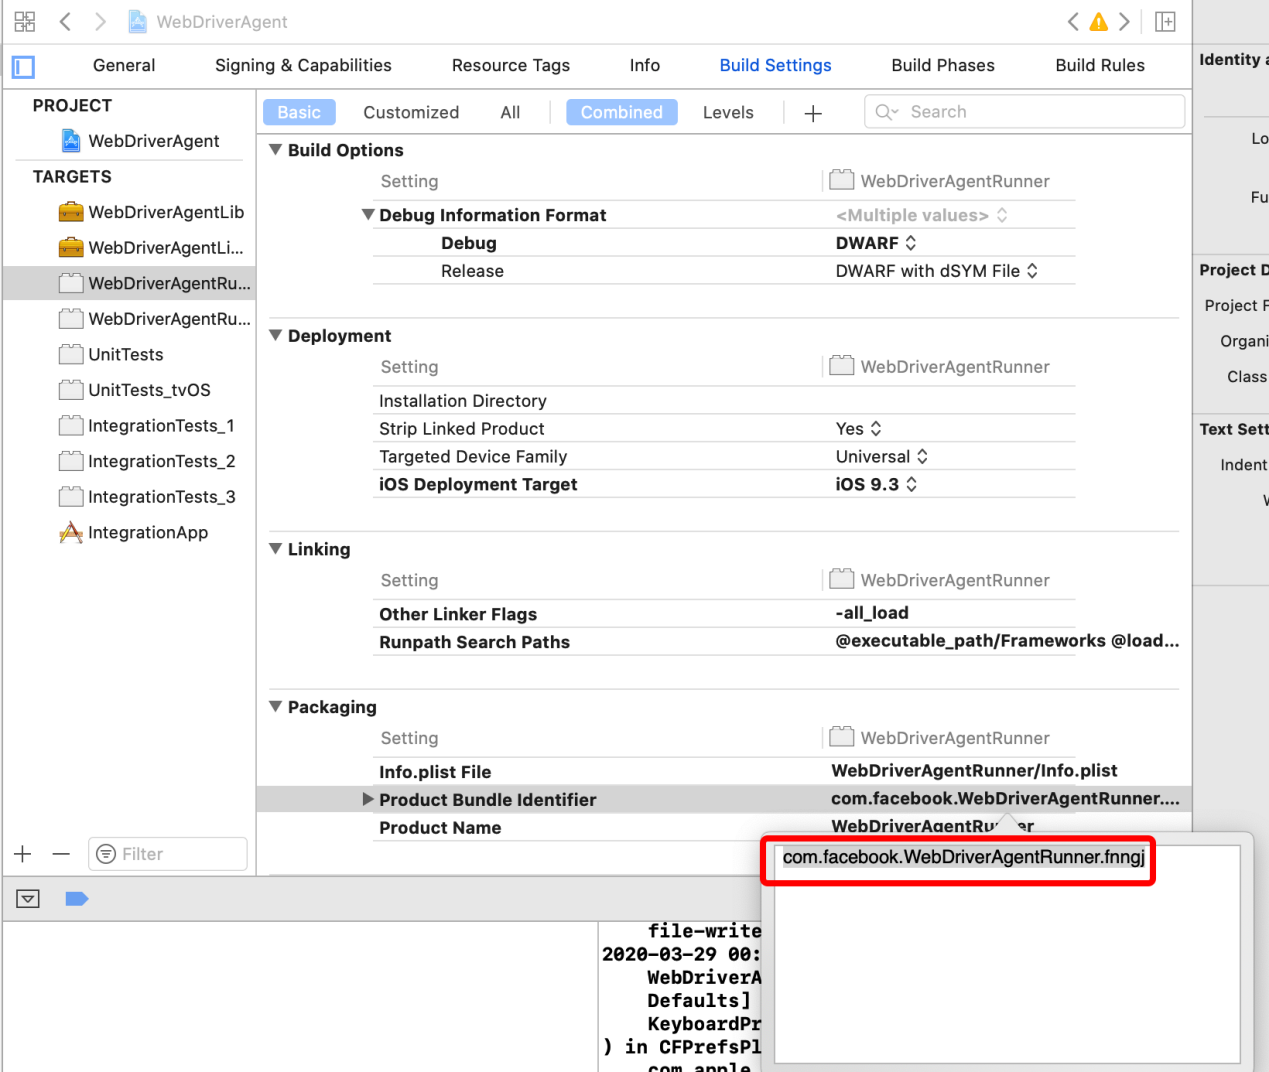
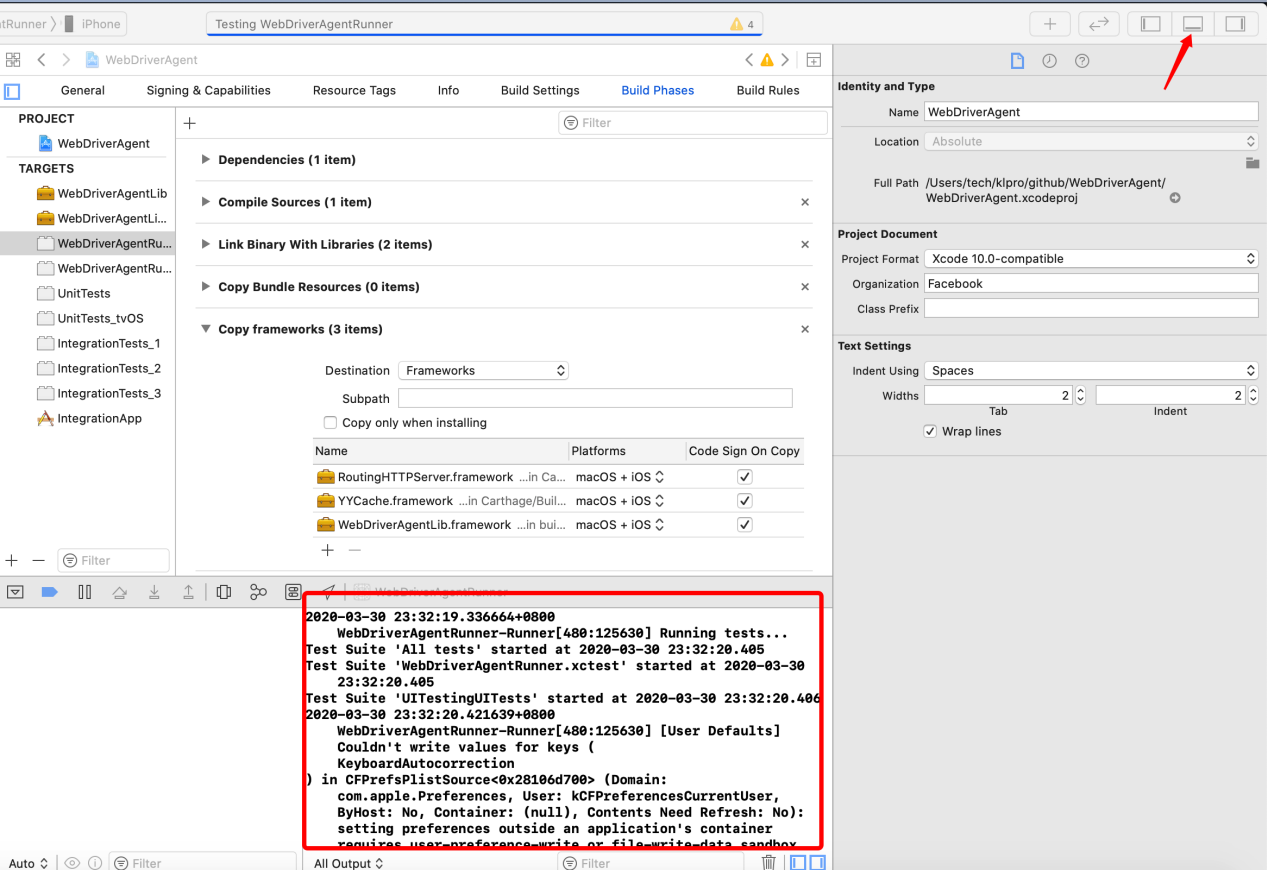
- 通过xcode导入WebDriverAgent 项目
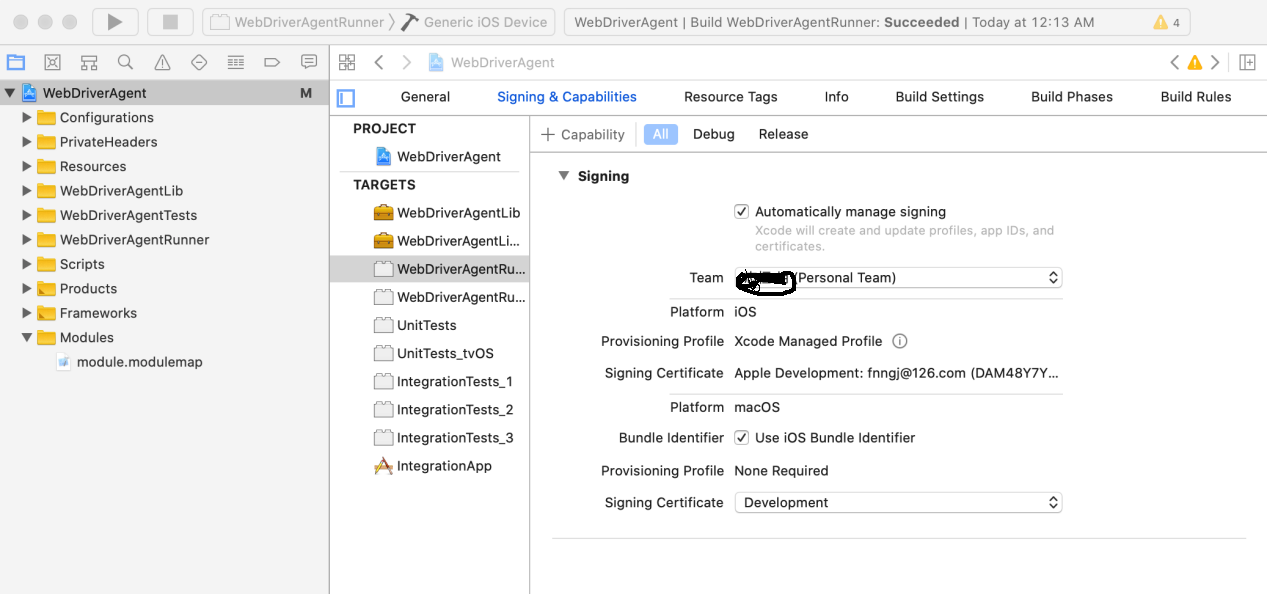
- 找到build Settings ---> packaging---> Product Bundle Identifier 选项。将值修改为唯一识别的字符串。
- Build Phases ---> Copy frameworks ---> 检查框架。
- RoutingHTTPServer.framework
- YYCache.framework
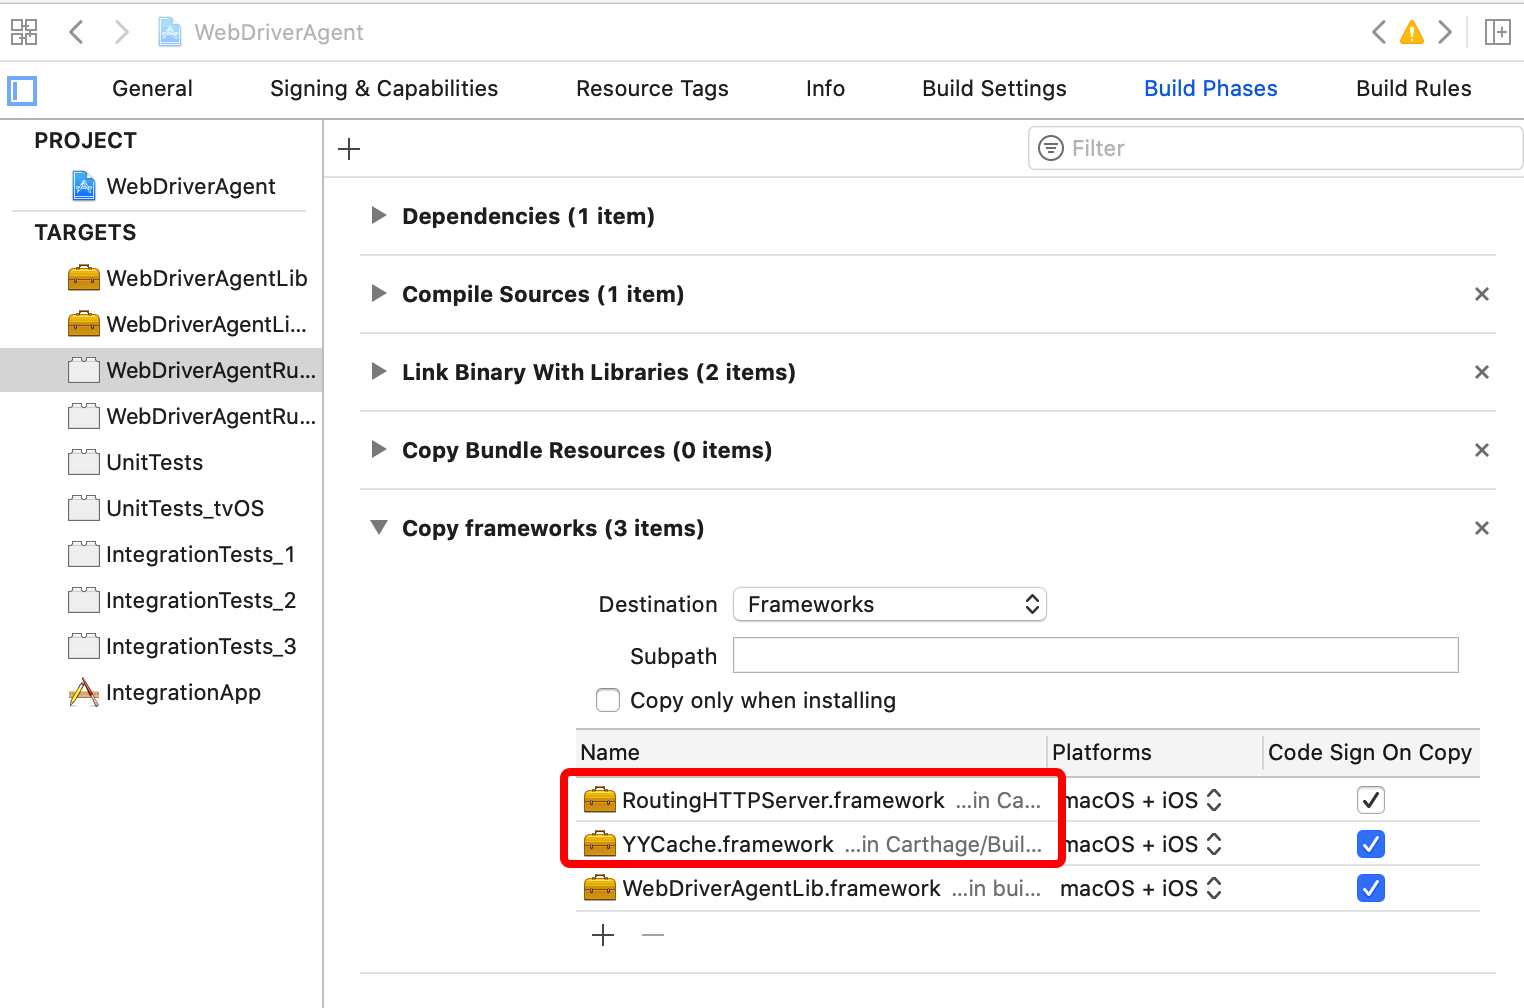
如果没有这两个框架,点击下方加号+添加。
3.iPhone
准备一台iPhone手机,通过数据线与PC进行连接。
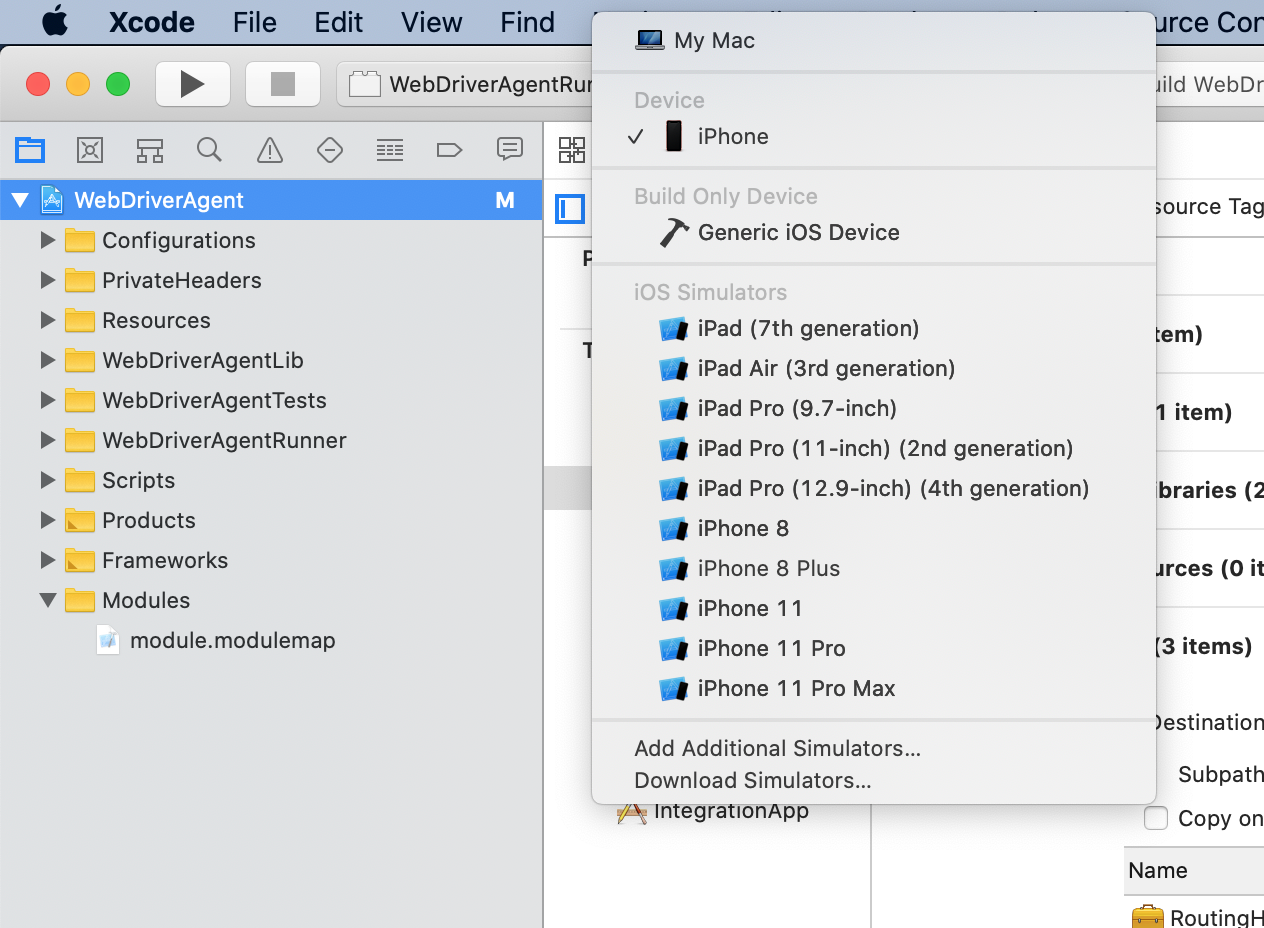
1.选择连接的手机
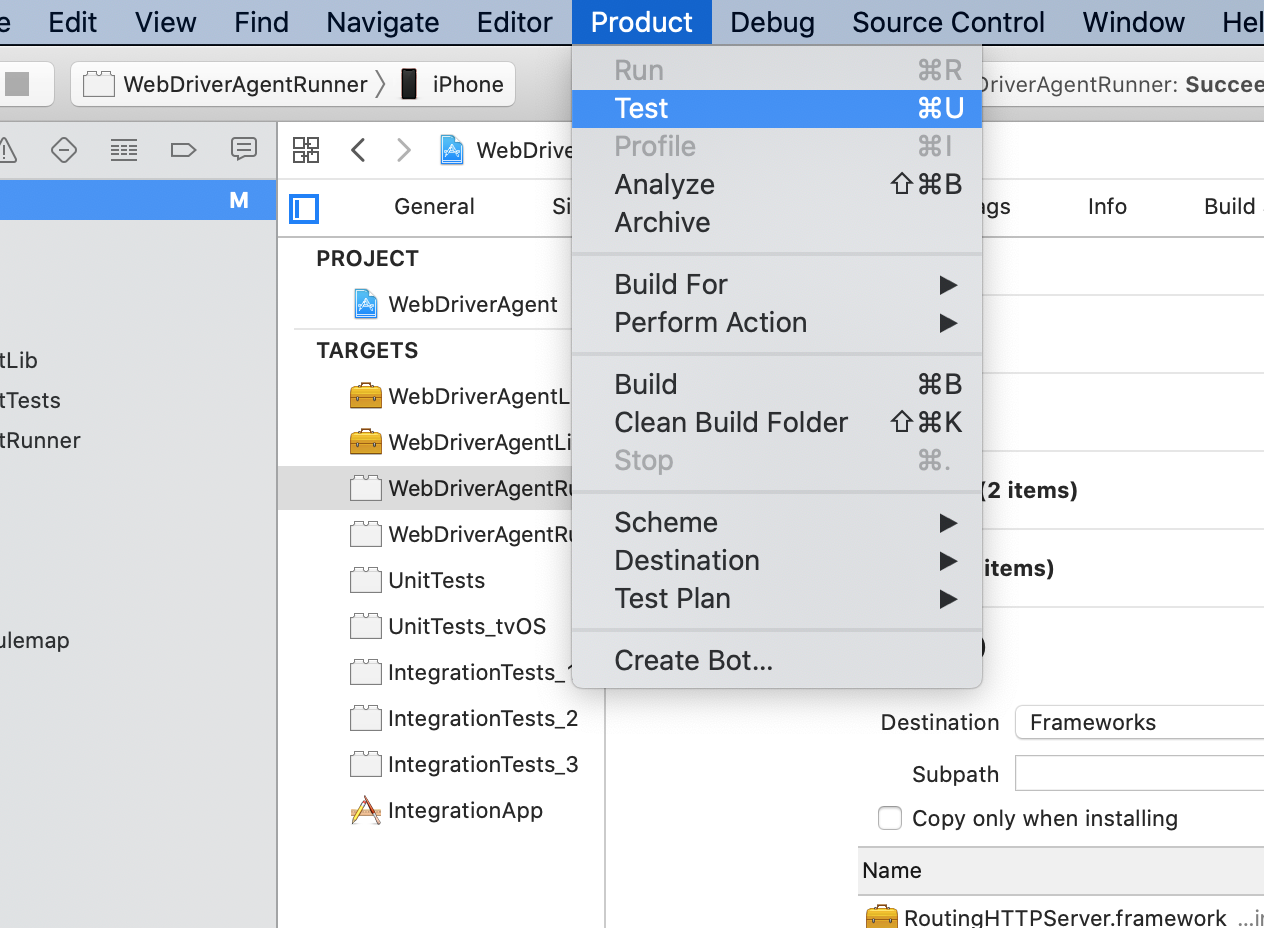
2.菜单栏:product --> Scheme --> WebDriverAgentRunner

3.菜单栏:Product---> Test
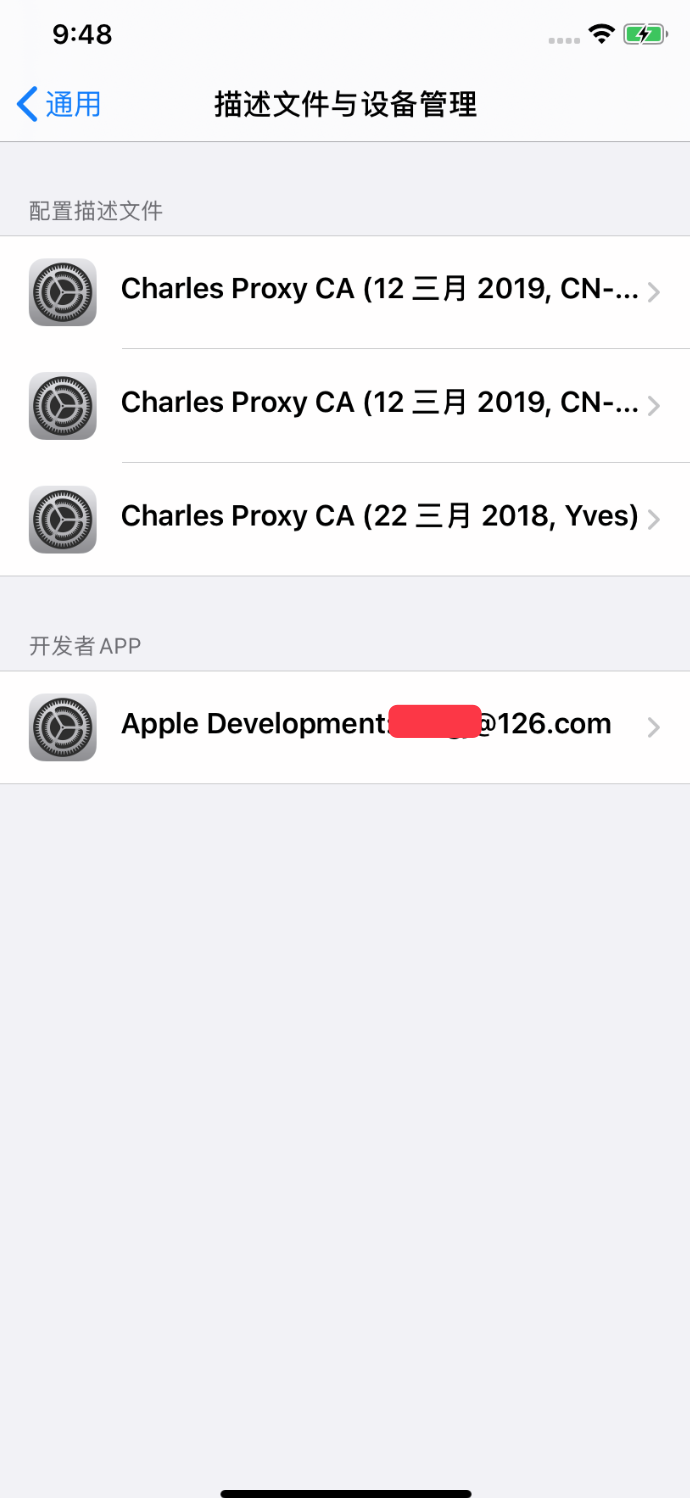
4.在iPhone手机上打开设置:通用--> 描述文件与设备管理--> 开发者App ,设置Apple Development xxxxx 在此iPhone上受信任。
5.检查日志是否有错误。
4.iproxy
安装 usbmuxd,他自带了iproxy小工具,iproxy将设备上的端口映射到电脑上的某个端口。
> brew install usbmuxd
> iproxy 8100 8100
5.开始测试
终于可以开始测试了,你有几种选择。
我选 openatx/facebook-wda,因为它更加简单。
安装:
pip3 install -U facebook-wda
测试脚本:
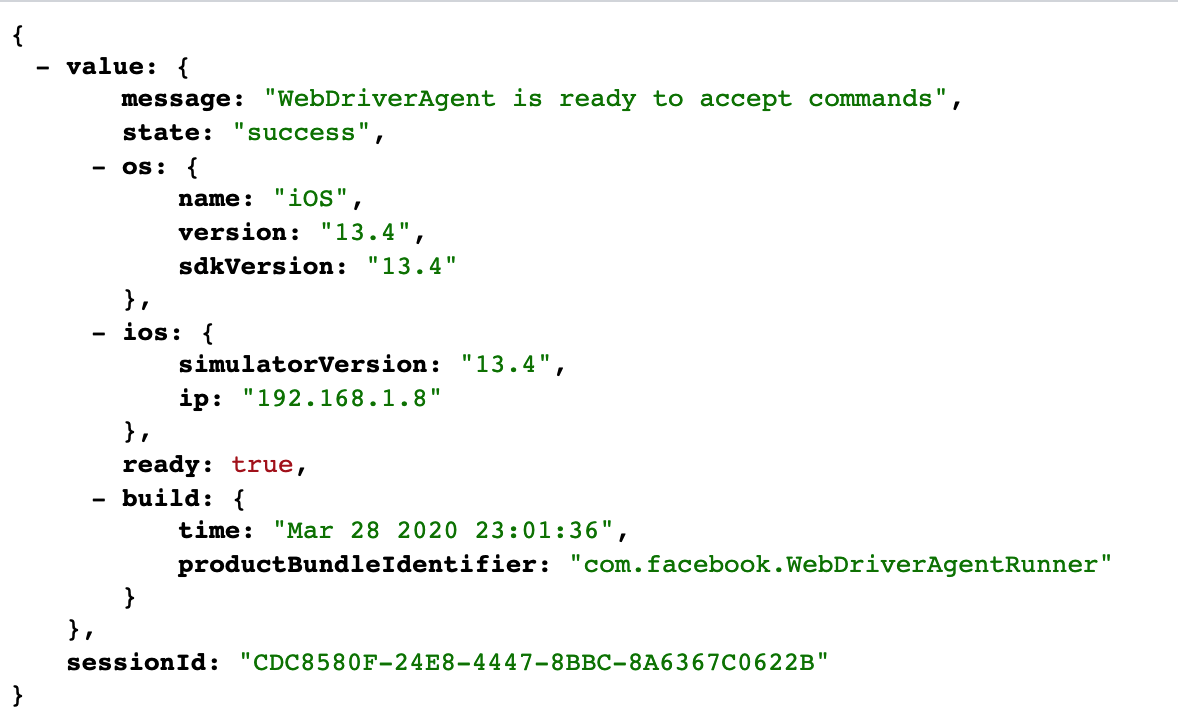
import wda

c = wda.Client('http://localhost:8100')
print(c.status())
结果:
{'message': 'WebDriverAgent is ready to accept commands', 'state': 'success', 'os': {'name': 'iOS', 'version': '13.4', 'sdkVersion': '13.4'}, 'ios': {'simulatorVersion': '13.4', 'ip': '192.168.1.8'}, 'ready': True, 'build': {'time': 'Mar 28 2020 23:01:36', 'productBundleIdentifier': 'com.facebook.WebDriverAgentRunner'}, 'sessionId': 'F951380E-7219-4EA9-84FC-CC8BE78A12F8'}
好了,可以开始你的iOS自动化测试了。

 浙公网安备 33010602011771号