Hadoop学习:伪分布环境搭建
环境要求
此次流程记录是Ubuntu Server 20.04系统下Hadoop集群的搭建。Linux和Windows所需软件包括:(1)Java 1.5.x及以上,必须安装,建议选择Java 8版本。(2)ssh 必须安装并且保证 sshd一直运行,以便用Hadoop 脚本管理远端Hadoop守护进程。
软件下载
Mobaxterm:一款多功能的远程连接工具,支持多种协议,自带SFTP功能,下载链接;

Java:Java 8是目前使用最为广泛的版本(可能是因为Java版本迭代所带来的学习成本问题),自此安装也是选择Java 8为运行环境,方便维护,下载链接;

SSH:集群的工作环境需要远程连接进行管理,通过对master和slaves安装SSH服务,方便管理。Ubuntu安装SSH服务命令apt-get install openssh-server。
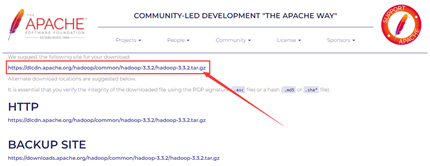
Hadoop:此次安装的重头戏,前往Apache官方网站下载即可,https://www.apache.org/dyn/closer.cgi/hadoop/common/hadoop-3.3.2/hadoop-3.3.2.tar.gz
软件的安装和配置
Mobaxterm的安装
Mobaxterm下载后,双击安装包进行安装,经典的“下一步”,并进行安装位置的选择,完成安装。
SSH的安装
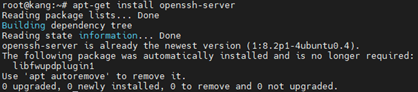
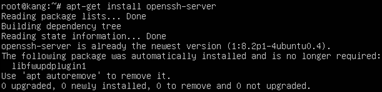
Ubuntu安装后默认就具有SSH服务,由于未进行配置,此时还是个单向的服务,“只出不进”——能通过SSH命令远程连接其他主机,其他主机不能通过SSH访问本机。安装OpenSSH,在Terminal中输入命令:
apt-get update
apt-get install openssh-server
配置SSH
新建root用户,键入命令passwd root,并输入、确定密码。
首先,编辑系统或者重要服务配置文件时,做好备份。键入命令
cp /etc/ssh/sshd_config /etc/ssh/sshd_config.bak
再通过Vim进行SSH的配置,
vim /etc/ssh/sshd_config
添加一行PermitRootLogin yes,按键盘Esc,输入英文冒号、wq,推出并保存。再重启SSH服务:
service ssh restart
远程连接
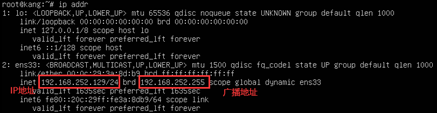
在虚拟主机Terminal中输入ip addr,查看默认分配的IP地址。
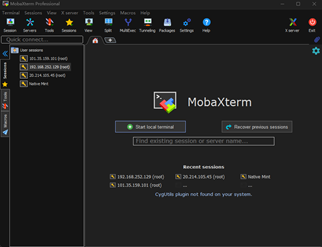
打开Mobaxterm,进行远程连接配置,新建远程连接任务,选择协议类型,根据上一步获取的信息,在Mobaxterm中输入虚拟主机的相关信息。
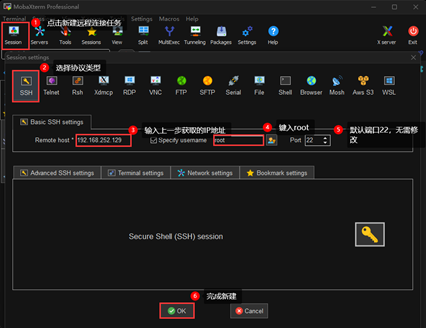
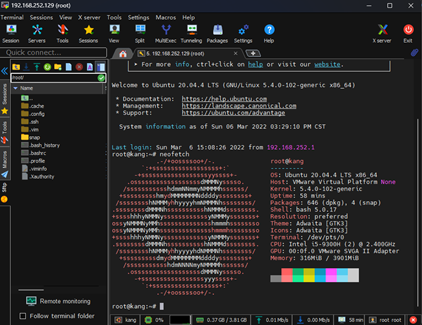
输入之前配置的root账户的密码,完成远程连接。
Java的安装和配置
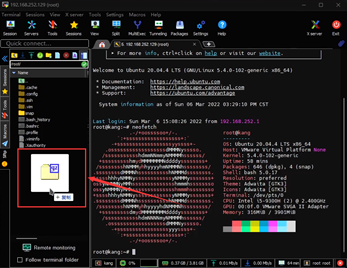
使用的Mobaxterm的SFTP的功能,支持拖拽上传,直接将下载的Java 8打包压缩包拖至文件夹中。由于处在内网环境下,传输速率应该会很快。
进入到Java 8所在文件夹,进行解压
tar -zxvf jdk-8u321-linux-x64.tar.gz
配置环境变量,vim /etc/profile,在末尾添加语句,配置环境变量。
JAVA_HOME=/path/to/java/jdk1.8.0_321
PATH=$PATH:$HOME/bin:$JAVA_HOME/bin
export JAVA_HOME
export PATH
重载环境变量配置文件source /etc/profile,并检查Java是否配置完成java -version。

Hadoop的安装和配置
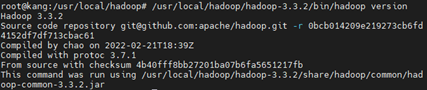
重复安装Java时的步骤,拖拽上传Hadoop压缩包,并进行解压,验证安装。
Hadoop分布式配置
克隆虚拟主机
将配置好的已有主机(Master)克隆两台(Node1、Node2)。
在克隆选项时,需注意选择“创建完整克隆”,否则后续步骤将失败。

配置网络和主机名
由于VMware克隆机制,会将源主机的所有信息原封不动得复制一份,包括软件和硬件信息。所以需要对克隆的Nodes的网络进行配置。
- 生成MAC地址。
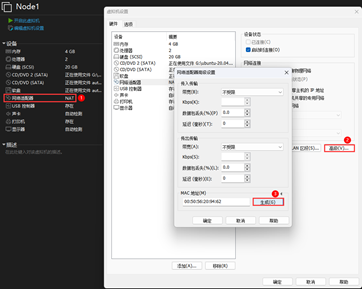
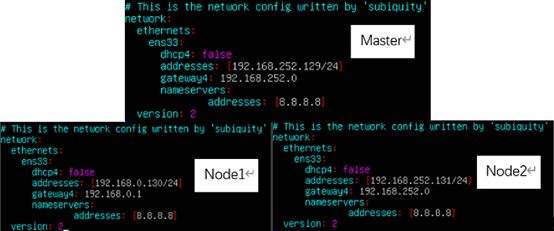
- 配置IP和网关,分别对三个主机进行配置。使用shell命令
vim etc/netplan/00-installer-config.yaml
对网络进行配置。使用netplan –debug apply使得配置生效。
# This is the network config written by 'subiquity'
network:
  ethernets:
    ens33:
      addresses: [192.168.***.***/24]
      gateway4: 192.168.***.2
      nameservers:
              addresses: [8.8.8.8, 8.8.4.4]
      dhcp4: false
  version: 2
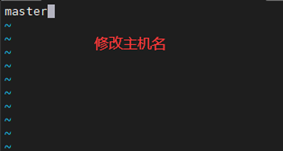
- 修改主机名
vim /etc/hostname
分别为master、node1、node2。
分布式集群
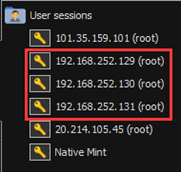
经过上述步骤,再通过Mobaxterm连接这三台主机(master、node1、node2)。
- 防火墙:分别关闭这三台主机的防火墙,并不允许防火墙自启。在Ubuntu 20.04版本中,
ufw status防火墙默认时关闭(inactive)状态。

- SSH免密:在master主机执行
ssh-keygen -t rsa
生成密钥文件,生成过程一路回车即可,并使用
ssh-copy-id -i node1
ssh-copy-id -i node2
命令,该命令的作用其实就是将密钥复制到node1和node2的/root/.ssh/authorized_keys文件中,方法不限,也可手动将密钥复制到两个节点的/root/.ssh/authorized_keys文件中去,能达到同样的效果。实现master能够免密登录到node1和node2。为后续的工作打好基础。

- IP映射:修改master主机IP hosts映射,vim /etc/hosts。在node1、node2中做出相同的配置,或者使用命令
scp /etc/hosts node<id>:/etc/hosts

- Hadoop配置文件:修改master主机的Hadoop配置文件workers(/path/to/hadoop/etc/hadoop/workers),向其中添加主机名node1、node2或者二者对应的IP。修改hadoop-env.sh(/path/to/hadoop/etc/hadoop/hadoop-env.sh),添加Java安装的根目录。

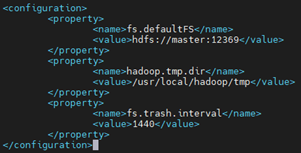
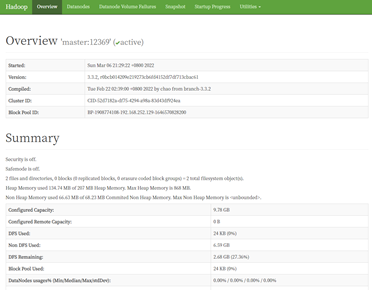
修改core-site.xml文件,hdfs监听端口、Hadoop临时文件夹内容因人而异。
<?xml version="1.0" encoding="UTF-8"?>
<?xml-stylesheet type="text/xsl" href="configuration.xsl"?>
<!--
  Licensed under the Apache License, Version 2.0 (the "License");
  you may not use this file except in compliance with the License.
  You may obtain a copy of the License at

    http://www.apache.org/licenses/LICENSE-2.0

  Unless required by applicable law or agreed to in writing, software
  distributed under the License is distributed on an "AS IS" BASIS,
  WITHOUT WARRANTIES OR CONDITIONS OF ANY KIND, either express or implied.
  See the License for the specific language governing permissions and
  limitations under the License. See accompanying LICENSE file.
-->

<!-- Put site-specific property overrides in this file. -->

<configuration>
    <property>
        <name>fs.defaultFS</name>
        <value>hdfs://master:12369</value>
    </property>
    <property>
        <name>hadoop.tmp.dir</name>
        <value>/usr/local/hadoop/tmp</value>
    </property>
    <property>
        <name>fs.trash.interval</name>
        <value>1440</value>
    </property>
</configuration>
修改hdfs-site.xml配置文件。
<?xml version="1.0" encoding="UTF-8"?>
<?xml-stylesheet type="text/xsl" href="configuration.xsl"?>
<!--
  Licensed under the Apache License, Version 2.0 (the "License");
  you may not use this file except in compliance with the License.
  You may obtain a copy of the License at

    http://www.apache.org/licenses/LICENSE-2.0

  Unless required by applicable law or agreed to in writing, software
  distributed under the License is distributed on an "AS IS" BASIS,
  WITHOUT WARRANTIES OR CONDITIONS OF ANY KIND, either express or implied.
  See the License for the specific language governing permissions and
  limitations under the License. See accompanying LICENSE file.
-->

<!-- Put site-specific property overrides in this file. -->

<configuration>
    <property>
        <name>dfs.replication</name>
        <value>1</value>
    </property>
    <property>
        <name>dfs.permissions</name>
        <value>false</value>
    </property>
    <property>
        <name>dfs.http.address</name>
        <value>0.0.0.0:50070</value>
    </property>
</configuration>

修改yarn-site.xml配置文件。
<?xml version="1.0"?>
<!--
  Licensed under the Apache License, Version 2.0 (the "License");
  you may not use this file except in compliance with the License.
  You may obtain a copy of the License at

    http://www.apache.org/licenses/LICENSE-2.0

  Unless required by applicable law or agreed to in writing, software
  distributed under the License is distributed on an "AS IS" BASIS,
  WITHOUT WARRANTIES OR CONDITIONS OF ANY KIND, either express or implied.
  See the License for the specific language governing permissions and
  limitations under the License. See accompanying LICENSE file.
-->
<configuration>

    <!-- Site specific YARN configuration properties -->

    <property>
        <name>yarn.resourcemanager.hostname</name>
        <value>master</value>
    </property>
    <property>
        <name>yarn.nodemanager.aux-services</name>
        <value>mapreduce_shuffle</value>
    </property>
    <property>
        <name>yarn.log-aggregation-enable</name>
        <value>true</value>
    </property>
    <property>
        <name>yarn.log-aggregation.retain-seconds</name>
        <value>604800</value>
    </property>
</configuration>

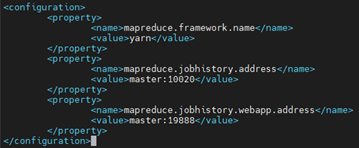
修改mapred-site.xml配置文件。
<?xml version="1.0"?>
<?xml-stylesheet type="text/xsl" href="configuration.xsl"?>
<!--
  Licensed under the Apache License, Version 2.0 (the "License");
  you may not use this file except in compliance with the License.
  You may obtain a copy of the License at

    http://www.apache.org/licenses/LICENSE-2.0

  Unless required by applicable law or agreed to in writing, software
  distributed under the License is distributed on an "AS IS" BASIS,
  WITHOUT WARRANTIES OR CONDITIONS OF ANY KIND, either express or implied.
  See the License for the specific language governing permissions and
  limitations under the License. See accompanying LICENSE file.
-->

<!-- Put site-specific property overrides in this file. -->

<configuration>
    <property>
        <name>mapreduce.framework.name</name>
        <value>yarn</value>
    </property>
    <property>
        <name>mapreduce.jobhistory.address</name>
        <value>master:10020</value>
    </property>
    <property>
        <name>mapreduce.jobhistory.webapp.address</name>
        <value>master:19888</value>
    </property>
</configuration>
- 拷贝master主机已经配置完毕的hadoop到node1和node2中
scp -rf /usr/local/hadoop/hadoop-3.3.2 node<id>:/usr/local/hadoop/
此时应该是覆盖了。
- 启动Hadoop:输入
/usr/local/hadoop/hadoop-3.3.2/bin/hdfs namenode -format
命令生成初始化文件。运行启动键本:
/usr/local/hadoop/hadoop-3.3.2/sbin/start-all.sh
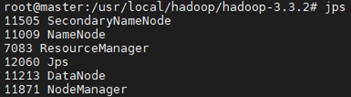
- 大功告成!。


 浙公网安备 33010602011771号