angular入门篇7----Http模块的使用(1):创建资源接口
angular入门篇7----Http模块的使用(1):RESTful创建资源接口
在前后端分离的项目中我们需要使用Http模块的功能实现后端接口提供的服务。
本篇首先简单得创建几个接口,供项目使用。
方法一 RESTful Web Service
RESTful主要是提供API设计的规范方法。在实际中我们利用RESTful将后端资源发布为URL,例如:查找数据库中一个人的工资。
这里我们使用JS代码为RESTful提供数据。
1.1 安装必要的软件包
首先我们需要安装json-server及jsonwebtoken,在项目终端输入:
npm install json-server
npm install jsonwebtoken
1.2 JavaScript代码提供数据
在\Store路径下创建一个data.js文件:
module.exports=function(){
    return{
        products:[
            {id:1,name:"Kayak",catagory:"Watersports",description:"A boat for one person",price:275},
            {id:2,name:"LifeJacket",catagory:"Watersports",description:"Protective and fasionable",price:48.95},
            {id:3,name:"Soccer Ball",catagory:"Soccer",description:"FIFA-approved size and weight",price:19.50},
            {id:4,name:"Corner Flags",catagory:"Soccer",description:"Give you playing field a professional touch",price:34.95},
            {id:5,name:"Stadium",catagory:"Soccer",description:"Flat-packed 35,000-seat stadium",price:79500},
            {id:6,name:"Thinking Cap",catagory:"Chess",description:"Improve brain efficiency by 75%",price:16},
            {id:7,name:"Unsteady Chair",catagory:"Chess",description:"Secritly give you opponent a disadvantage",price:29.95},
            {id:8,name:"Human Chess Board",catagory:"Chess",description:"A fun game for the family",price:75},
            {id:9,name:"Bling Bling King",catagory:"Chess",description:"Gold-plated,diamond-studded King",price:1200},
        ],
        order:[]
    }
}
代码内容很简单,即返回一个product[]实例供我们使用。
1.3 配置服务
package.json下找到如下内容:
"scripts": {
    "ng": "ng",
    "start": "ng serve",
    "build": "ng build",
    "watch": "ng build --watch --configuration development",
    "test": "ng test"
  },
添加一行配置:
"scripts": {
    "ng": "ng",
    "start": "ng serve",
    "build": "ng build",
    "watch": "ng build --watch --configuration development",
    "test": "ng test",
    "json": "json-server data.js -p 3500 -m authMiddleware.js"
  },
目的是使服务将data.js作为数据库,并通过3500端口访问。
运行 && 效果
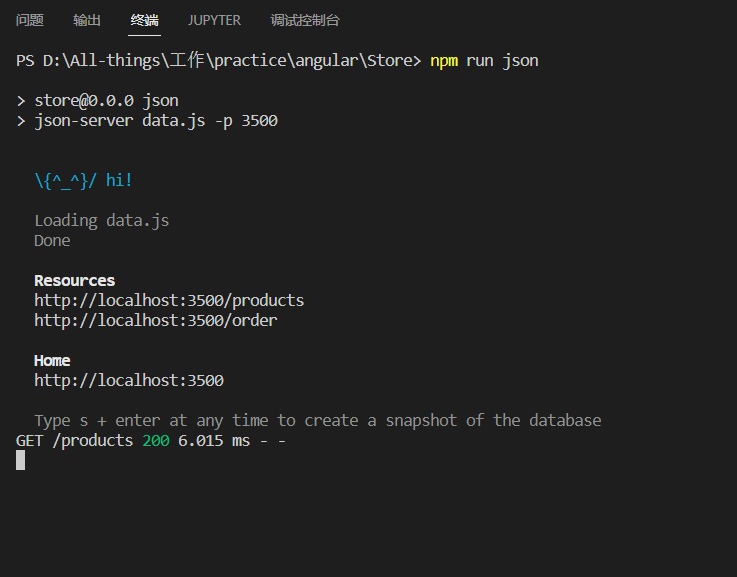
在终端输入:
npm run json
可以看到如下内容:
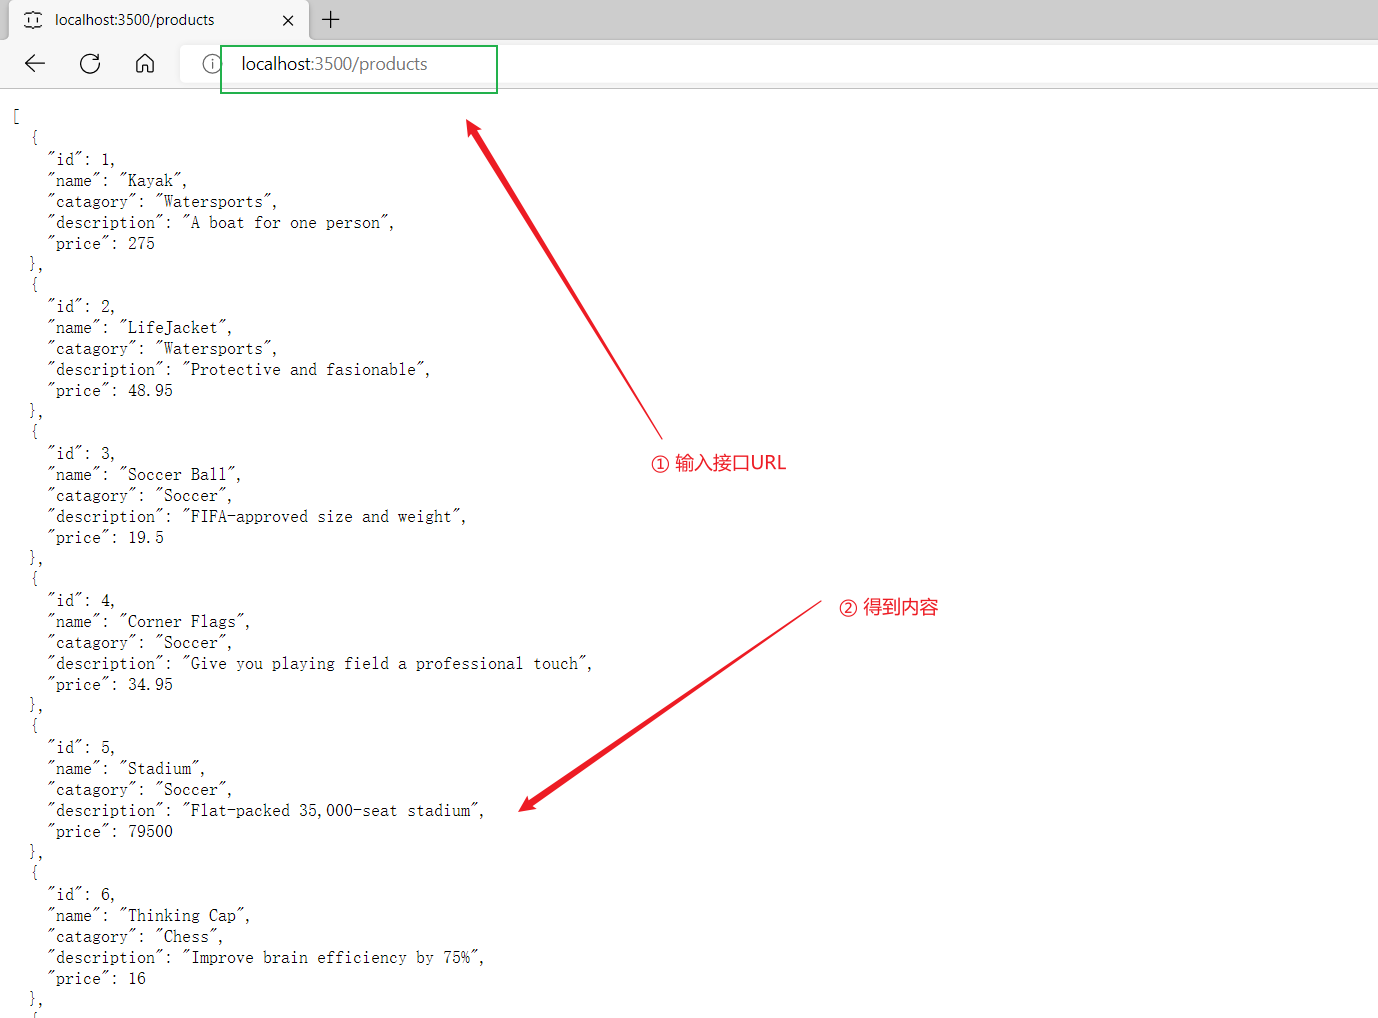
我们在浏览器输入服务提供的Resources之一:
http://localhost:3500/products
可以得到如下内容:
方法二 Express框架
Express是nodejs内经典的框架。可以提供我们需要的路由。
2.1 添加Express到项目
安装express、body-parser。在项目终端输入如下指令:
npm install express
npm install body-parser
这样我们的项目便自动添加了Express。
2.2 添加JavaScript数据源
参考1.2 的内容添加data.js文件
2.3 添加路由服务
在/Store下添加文件app.js:
const express = require("express")
const app = express()
const DataSender = require("../Store/data")
const bodyParser = require("body-parser");
app.use(bodyParser.json())
//跨域配置
app.use(bodyParser.urlencoded({
    extended:true
}))

const allowCrossDomain = function (req, res, next) {
    res.header('Access-Control-Allow-Origin', '*'); //自定义中间件,设置跨域需要的响应头。
    res.setHeader('Access-Control-Allow-Methods', 'GET, POST, OPTIONS, PUT, DELETE'); //允许任何方法
    res.setHeader('Access-Control-Allow-Headers', 'X-Requested-With,content-type,X-Session-Token'); //允许任何类型
    next();
};

app.use(allowCrossDomain);

app.get("/products",(req,res,next)=>{
    console.log("products");
    res.send(DataSender().products)
})

app.get("/orders",(req,res,next)=>{
    console.log("orders");
    res.send(DataSender().order)
})
app.listen(3500);
不同于RESTful,这里的访问服务是我们自己写的。
2.4 启动服务
在项目终端,我们输入如下指令:
node app.js
这样项目便开始运行了。
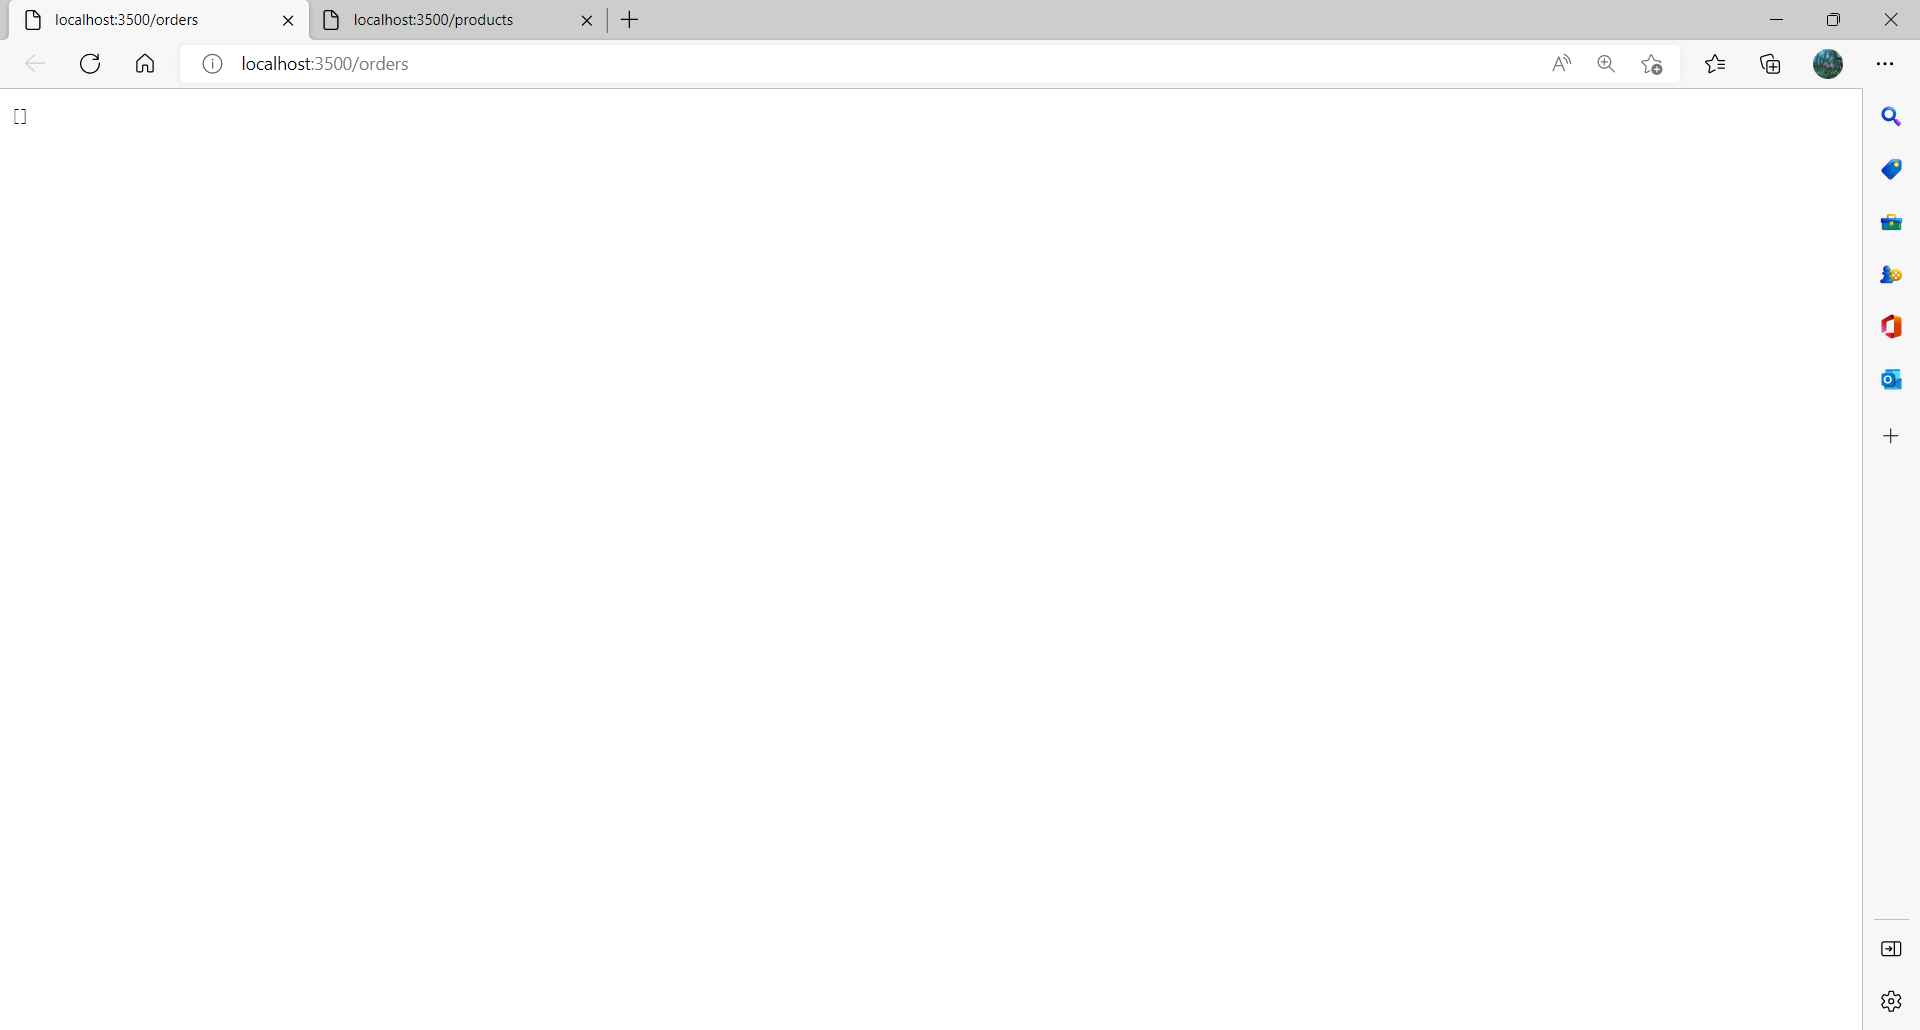
我们在浏览器输入:
http://localhost:3500/products
或
http://localhost:3500/orders
便能得到结果:

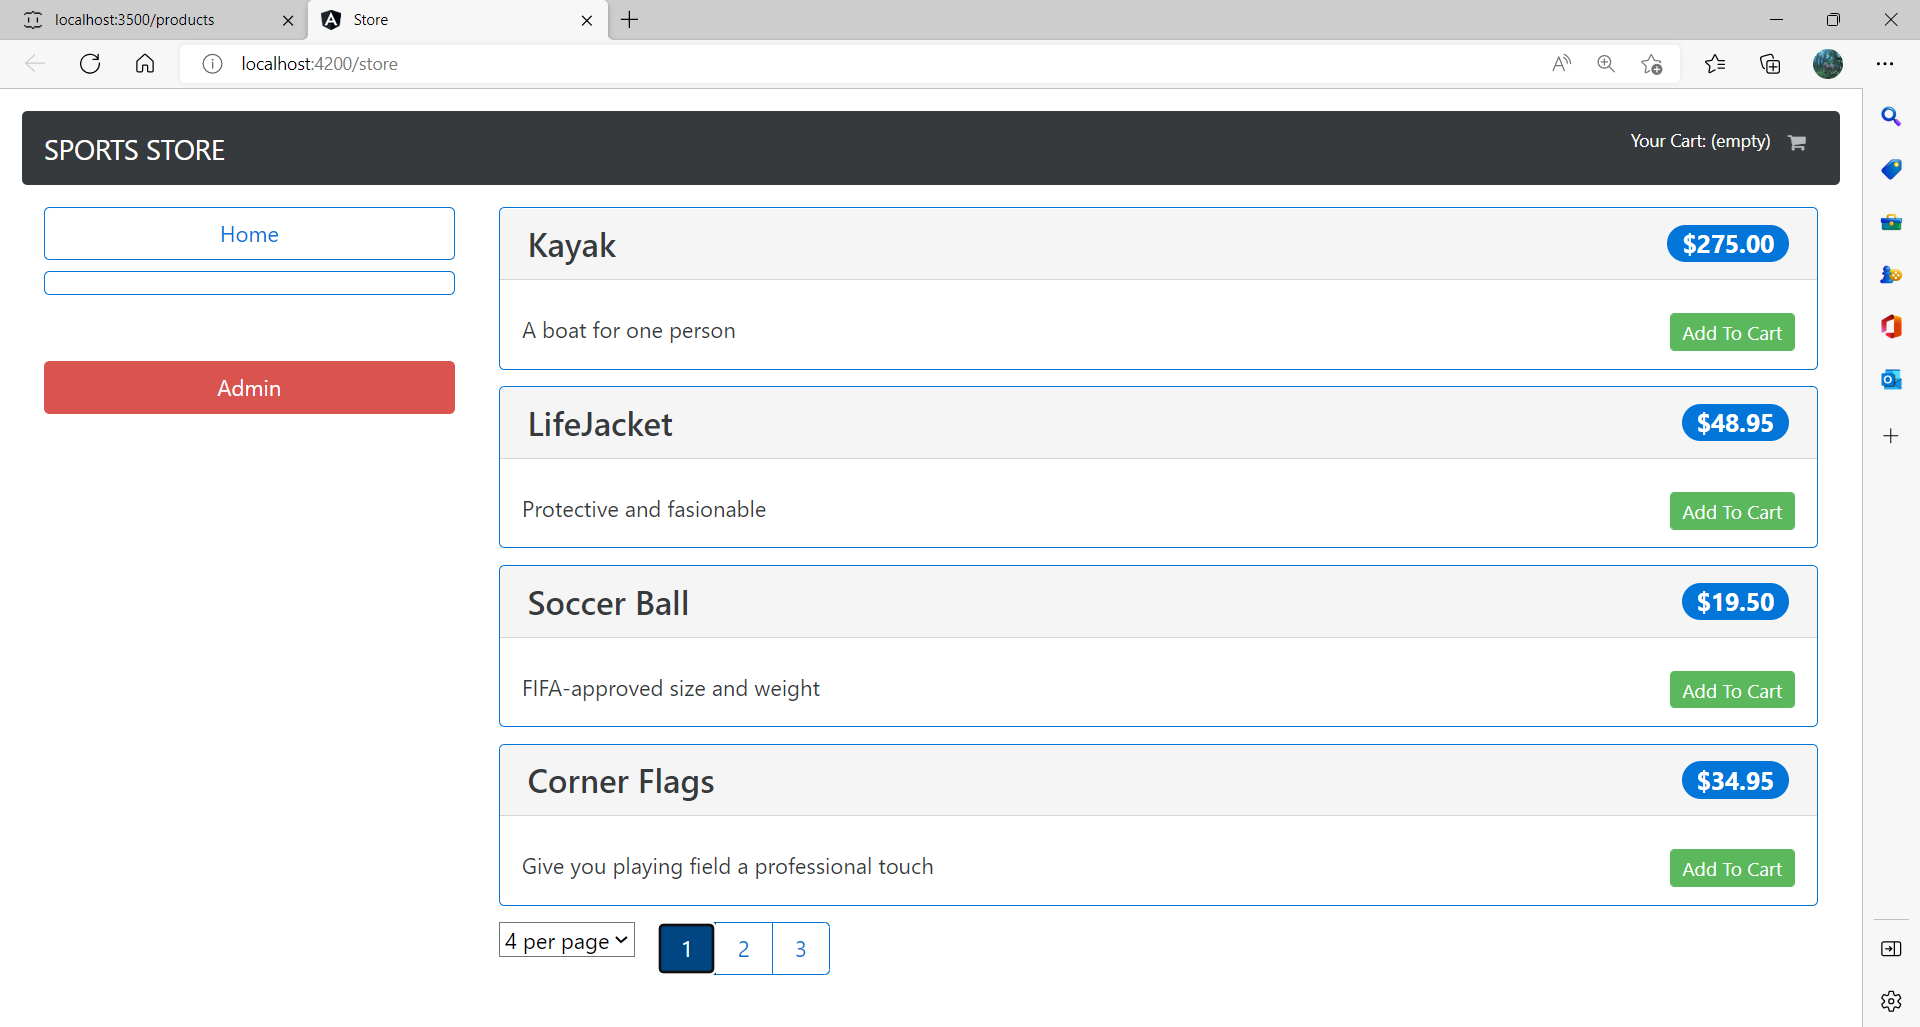
下一篇我们将使用Http模块将上述接口得到的数据加载到我们的商店页面上,效果如下:

 浙公网安备 33010602011771号