pytest-html生成报告
pytest 生成 HTML 报告,这里介绍两个框架:
1、pytest-html
2、allure2。参考如下:Pytest+Allure生成报告
以下主要介绍pytest-html 。
一、pytest-html
1、使用 pip 安装 pytest-html
pip install pytest-html
2、执行方法:
(1)在当前目录下生成一个 report.html 的报告文件,如下:
pytest --html=report.html
(2)指定报告路径:
直接执行”pytest --html=report.html”生成的报告会在当前脚本的同一路径,如果想指定报告的存放位置,放到当前脚本的同一目录下的report文件夹里,可以加上要存放的目录路径:
pytest --html=xx/xx/report.html
(3)报告独立显示
上面方法生成的报告,css是独立的,分享报告的时候样式会丢失,为了更好的分享发邮件展示报告,可以把css样式合并到html里:
pytest --html=report.html --self-contained-html
在pycharm中编写如下:
# 在当前目录下生成html报告
pytest.main(["-s","-q","--html=report.html"])

# 指定报告路径
pytest.main(["-s","-q","--html", "./report/pytest-html/report.html"])

# 以上执行并利用pytest-html生成html报告,这种方法生成的报告css是独立的,分享报告时样式会丢失;
# 为了更好的分享邮件展示报告,可以把css样式合并到html中,如下:
pytest.main(["-s","-q","--html=./report/pytest-html-combine/report.html", "--self-contained-html"])
二、失败重试
失败重跑需要依赖pytest-rerunfailures插件,使用pip安装就行。
pip install pytest-rerunfailures
用例失败再重跑1次,命令行加个参数--reruns就行了
py.test --reruns 1 --html=report.html --self-contained-html
pycharm运行如下:
pytest.main(["-s", "-v","--reruns=1","--html=./report/pytest-html-combine/report.html", "--self-contained-html"])
pytest.main(["-s", "-v","--reruns=2","--reruns-delay=1","--html=./report/pytest-html-combine/report.html", "--self-contained-html"])
结果如下:
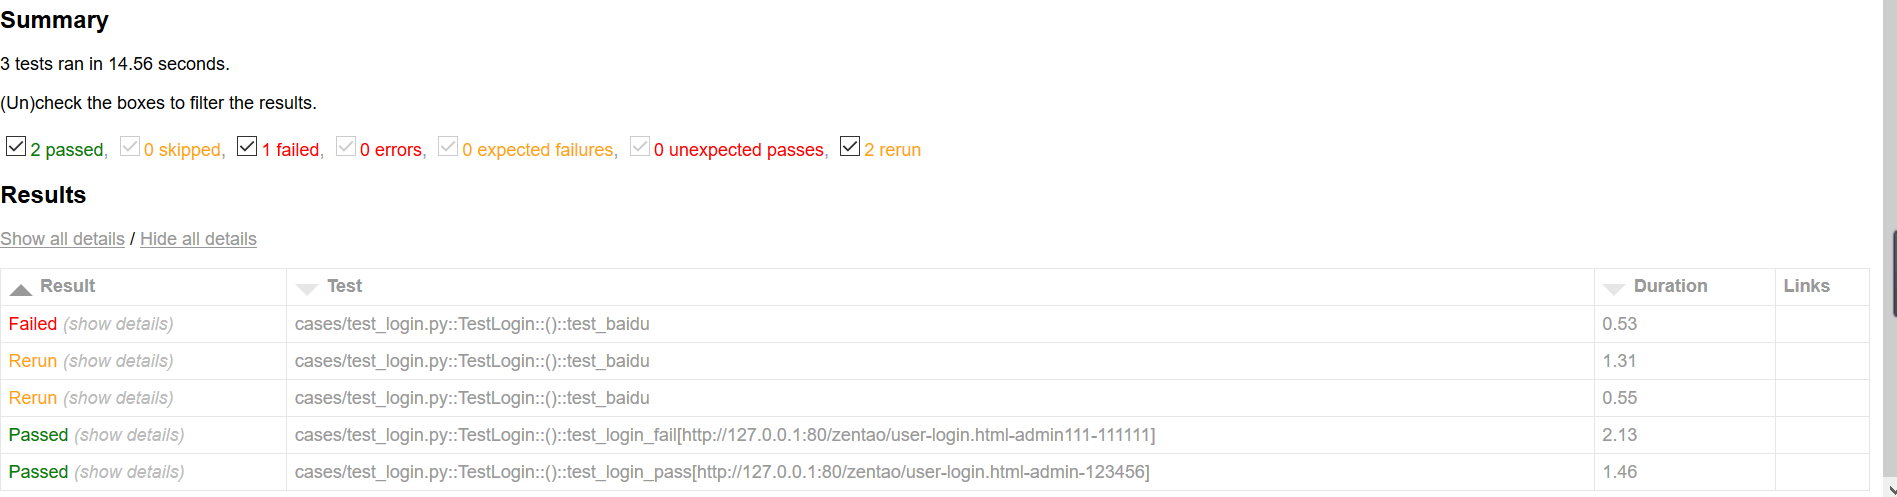
关于reruns参数的2个用法:
--reruns=RERUNS       RERUNS参数是失败重跑的次数,默认为0
--reruns-delay=RERUNS_DELAY      RERUNS_DELAY 是失败后间隔多少s重新执行,时间单位是s
三、pytest-html报告添加Description
pytest-html 测试报告默认是不展示用例描述 Description 内容,之前用unittest生成的报告是可以展示用例的描述,也就是test开头的用例下三个引号里面的注释(docstring)内容。
pytest-html 框架是可以修改生成的报告内容的,可以自己添加和删除html报告的table内容。
修改报告:
可以通过为标题行实现自定义钩子来修改列,下面的示例在conftest.py脚本中使用测试函数docstring添加描述(Description)列,添加可排序时间(Time)列,并删除链接(Link)列。 官方文档如下:
@pytest.mark.optionalhook
def pytest_html_results_table_header(cells):
    cells.insert(2, html.th('Description'))
    cells.insert(1, html.th('Time', class_='sortable time', col='time'))
    cells.pop()

@pytest.mark.optionalhook
def pytest_html_results_table_row(report, cells):
    cells.insert(1, html.td(report.description))
    cells.insert(1, html.td(datetime.utcnow(), class_='col-time'))
    cells.pop()

@pytest.mark.hookwrapper
def pytest_runtest_makereport(item, call):
    outcome = yield
    report = outcome.get_result()
    report.description = str(item.function.__doc__)
可在官方文档的基础上修改下测试报告,在报告里面添加一列的内容,添加到第二列,于是修改如下,注释掉部分代码。
由于第三个@pytest.mark.hookwrapper,这个在之前测试报告里面添加截图时候,已经写过了,只需在截图最后加一句代码即可:report.description = str(item.function.__doc__)。如下:
@pytest.mark.optionalhook
def pytest_html_results_table_header(cells):
    cells.insert(2, html.th('Description'))
    # cells.insert(1, html.th('Time', class_='sortable time', col='time'))
    # cells.pop()

@pytest.mark.optionalhook
def pytest_html_results_table_row(report, cells):
    cells.insert(1, html.td(report.description))
    # cells.insert(1, html.td(datetime.utcnow(), class_='col-time'))
    # cells.pop()

# @pytest.mark.hookwrapper
# def pytest_runtest_makereport(item, call):
#     outcome = yield
#     report = outcome.get_result()
#     report.description = str(item.function.__doc__)
注:
还可以通过pytest_html_results_table_row 挂钩删除所有单元格来删除结果。下面的示例从报表中删除所有测试通过的结果:
import pytest

@pytest.mark.optionalhook
def pytest_html_results_table_row(report, cells):
    if report.passed:
      del cells[:]
日志输出和附加HTML可以通过pytest_html_results_table_html挂钩来修改。下面的示例清空测试通过的日志输出:
import pytest

@pytest.mark.optionalhook
def pytest_html_results_table_html(report, data):
    if report.passed:
        del data[:]
        data.append(html.div('No log output captured.', class_='empty log'))
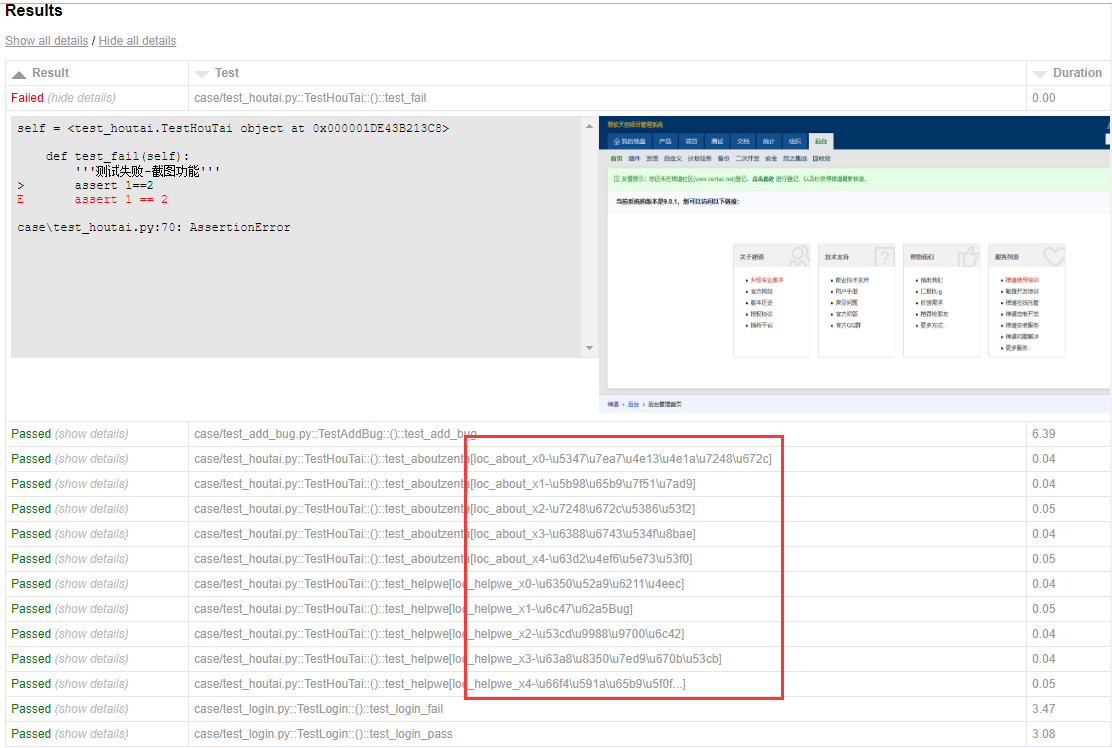
四、pytest-html报告nodeid中文显示问题
pytest-html报告中当用到参数化时候,获取用例的nodeid里面有中文时候,会显示[\u6350\u52a9\u6211\u4eec]这种编码(再次声明,这个不叫乱码,这是unicode编码)
遇到问题如下:
编码转换:
相关转换参考这篇:【python笔记6-%u60A0和\u60a0类似unicode解码】
# a是str类型
a = r"case/test_houtai.py::TestHouTai::()::test_aboutzenta[\u6350\u52a9\u6211\u4eec]"
print(type(a))
# 转码
print(a.encode("utf-8").decode("unicode_escape"))

运行结果:
<class 'str'>
case/test_houtai.py::TestHouTai::()::test_aboutzenta[捐助我们]
pytest-html报告优化
源码地址【https://github.com/pytest-dev/pytest-html/blob/master/pytest_html/plugin.py】
Test这一列显示的内容是用例的nodeid,nodeid获取方法从源码可以看出是通过report.nodeid获取到的。
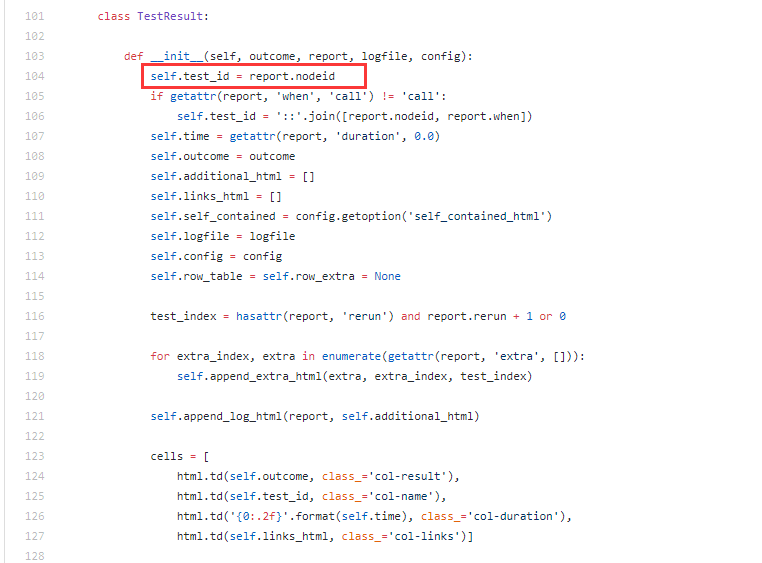
于是我们可以在conftest.py里面新增一列,重新命名Test_nodeid,然后删除原有的Test列,具体参考前面的 三、pytest-html报告添加Description 。

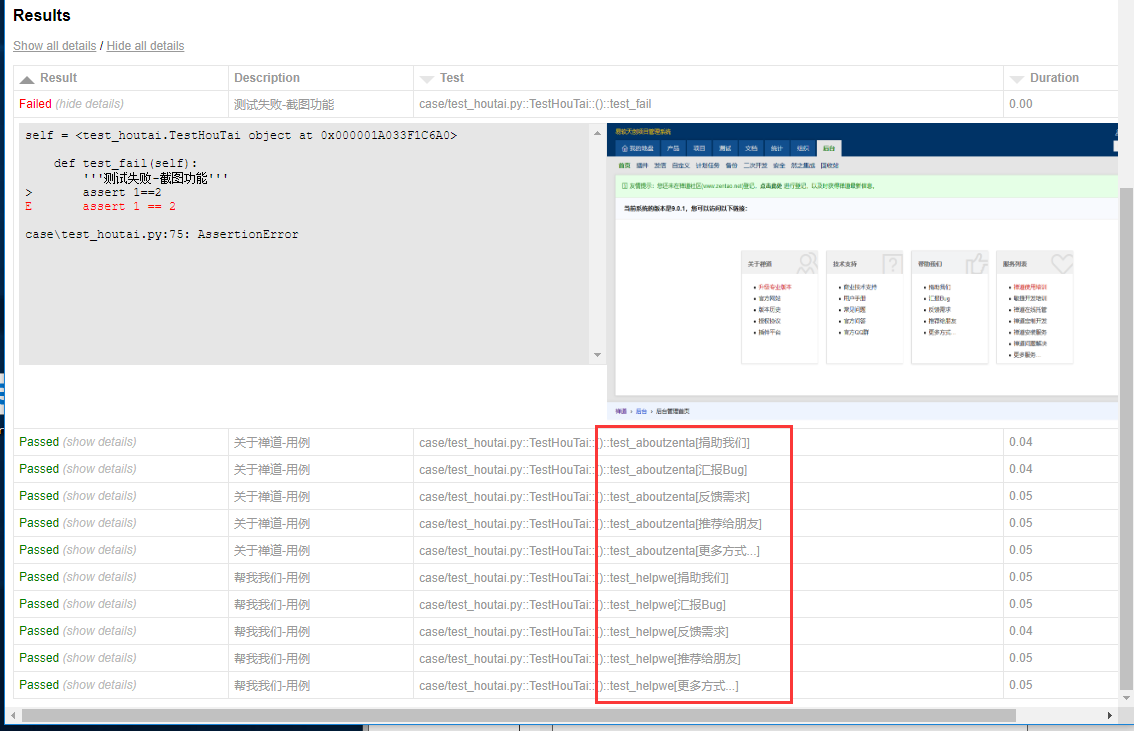
结果展示:

 浙公网安备 33010602011771号