
Avalonia中的SVG使用
004 Avalonia 中 SVG 的使用
由于版本的变化,新版本的 SVG 支持请参考 https://www.nuget.org/packages/Svg.Controls.Skia.Avalonia ,它和 Avalonia.Svg.Skia 的用法是完全一致的,在本文下载 NuGet 包的地方将包替换为
Svg.Controls.Skia.Avalonia是更现代的选择,对于Avalonia 版本比较旧的版本,这里还是建议Avalonia.Svg.Skia。(修订日期:2025/09/05)
0. 引用
1. 前言
在 WPF 中,我们会使用 SVG 来处理图标,如果 Avalonia 像 MAUI 一样能够自带 SVG 的处理的话,那会变得非常厉害,可惜没有,而且也没有在 WPF 里面非常知名的 SharpVectors.Wpf。
我们采用的库是 Avalonia.Svg.Skia,安装的话我就不提了,你可以在 NuGet 里面下到,库的 NuGet 的首页在这里:https://www.nuget.org/packages/Avalonia.Svg.Skia 。
我们的素材是这样的:

2. 显示 SVG
2.1 在工程中加入素材
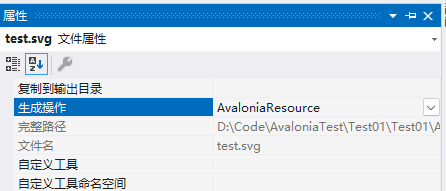
我们将 svg 文件姑且放在 Assets 文件夹下,其属性中的生成操作为 AvaloniaResource。

2.2 在 xaml 中显示 svg 文件
只需要加入下面这种写法就完全可以了,不需要引入什么别的命名空间,还挺轻量的。
<Svg Path="/Assets/test.svg" />
测试
<Window x:Class="Test01.Views.MainWindow"
        xmlns="https://github.com/avaloniaui"
        xmlns:x="http://schemas.microsoft.com/winfx/2006/xaml"
        xmlns:d="http://schemas.microsoft.com/expression/blend/2008"
        xmlns:mc="http://schemas.openxmlformats.org/markup-compatibility/2006"
        xmlns:views="clr-namespace:Test01.Views"
        xmlns:vm="using:Test01.ViewModels"
        Title="Test01"
        Width="300"
        Height="200"
        Icon="/Assets/avalonia-logo.ico"
        mc:Ignorable="d">

    <Svg Path="/Assets/test.svg" />

</Window>

3. 在 Image 控件中显示 svg
这个库很让我意外的是可以在 Image 控件中显示 svg,具体是这样的:
<Image Source="{SvgImage /Assets/test.svg}" />
所以具体的使用是这样的:
<Window x:Class="Test01.Views.MainWindow"
        xmlns="https://github.com/avaloniaui"
        xmlns:x="http://schemas.microsoft.com/winfx/2006/xaml"
        xmlns:d="http://schemas.microsoft.com/expression/blend/2008"
        xmlns:mc="http://schemas.openxmlformats.org/markup-compatibility/2006"
        xmlns:views="clr-namespace:Test01.Views"
        xmlns:vm="using:Test01.ViewModels"
        Title="Test01"
        Width="300"
        Height="200"
        Icon="/Assets/avalonia-logo.ico"
        mc:Ignorable="d">

    <Image Source="{SvgImage /Assets/test.svg}" />

</Window>

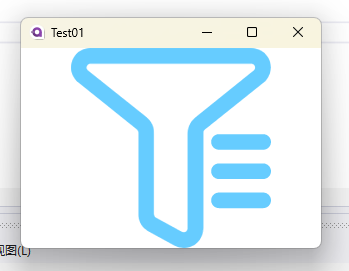
4. 通过内置 Css 属性来进行颜色的更改
因为是 css 嘛,所以下面的写法就是一个全局的 path 的填充的更改。
Css 这个属性无法得到编辑器的智能提示,只能硬写,不太友好。
<Svg Css="path {fill:#66CCFF;}" Path="/Assets/test.svg" />
代码的全貌就是这样的。
<Window x:Class="Test01.Views.MainWindow"
        xmlns="https://github.com/avaloniaui"
        xmlns:x="http://schemas.microsoft.com/winfx/2006/xaml"
        xmlns:d="http://schemas.microsoft.com/expression/blend/2008"
        xmlns:mc="http://schemas.openxmlformats.org/markup-compatibility/2006"
        xmlns:views="clr-namespace:Test01.Views"
        xmlns:vm="using:Test01.ViewModels"
        Title="Test01"
        Width="300"
        Height="200"
        Icon="/Assets/avalonia-logo.ico"
        mc:Ignorable="d">

    <Svg Css="path {fill:#66CCFF;}" Path="/Assets/test.svg" />

</Window>
效果如下;

5. Image 控件中 svg 素材的样式更改
Svg 控件中的 Css 可以进行样式的更改,但是仅使用 Svg 控件在进行一些控件的设计时存在一些问题,很多时候,用 Image 控件来承担 svg 素材的显示是更好的选择。
下面这种是有bug的,css无法响应,虽然 svg 出来了,但是不能改样式的话,作用非常有限:
<Image>
    <Image.Source>
        <SvgImage Css="path{ fill: #66CCFF;}" Path="/Assets/test.svg" />
    </Image.Source>
</Image>
正确的方式是使用这种写法,在 Image 中套这样的一大块内容:
<Image>
    <Image.Source>
        <SvgImage>
            <SvgImage.Source>
                <SvgSource Css="path { fill: #66CCFF;}" Path="/Assets/test.svg" />
            </SvgImage.Source>
        </SvgImage>
    </Image.Source>
</Image>
效果如下:

 浙公网安备 33010602011771号