
【原创】使用Geth搭建单节点测试环境Build Ethereum single node local private networking with Geth
- Brief
geth(go-ethereum)is an Ethereum client implemented in Go, can be used as a local client to connect to ethereum chain, a light client of ethereum or build a local ethereum test environment etc.
“An Ethereum network is private if the nodes are not connected to the main network. In this context private only means reserved or isolated, rather than protected or secure. A fully controlled, private Ethereum network is useful as a backend for core developers working on issues relating to networking/blockchain syncing etc. Private networks are also useful for Dapp developers testing multi-block and multi-user scenarios.”
- Installation
-
-
Env: Ubuntu-20.04, “Focal”
-
Way: via PPAs
-
enable launchpad repository:
sudo add-apt-repository -y ppa:ethereum/ethereum -
install the stable version:
sudo apt-get update sudo apt-get install ethereum -
install the develop version:
sudo apt-get update
sudo apt-get install ethereum-unstable
-
These above commands will install the core Geth software and the following developer tools: clef, devp2p, abigen, bootnode, evm, rlpdump and puppeth. The binaries for each of these tools are saved in /usr/local/bin/.
- Configuration
-
-
choose a chain ID
A list of current network IDs is available at Chainlist.org, you can check it to avoid confict with used chain IDs. The network ID is controlled using the
networkidflag, e.g.geth --networkid 66666 -
choose a consensus algorithm
there are two kinds of algorithms are in using by Ethereum, ‘Clique’(PoA) and ‘Ethash’(PoW):
- Ethash is Geth’s PoW algorithm, it means the system needs a miner, more resource-intensive.
- Clique consensus is a PoA system where new blocks can be created by authorized ‘signers’ only.Signers can be authorized and de-authorized using a voting mechanism, thus allowing the set of signers to change while the blockchain operates. So, it’s far less resource-intensive than PoW, is strongly recommended for private testnets. Here we choose Clique.
-
creating the genesis block
- my Clique e.g.:
{
  "config": {
    "chainId": 66666,
    "homesteadBlock": 0,
    "eip150Block": 0,
    "eip155Block": 0,
    "eip158Block": 0,
    "byzantiumBlock": 0,
    "constantinopleBlock": 0,
    "petersburgBlock": 0,
    "istanbulBlock": 0,
    "berlinBlock": 0,
    "londonBlock":0,
    "clique": {
      "period": 5,
      "epoch": 30000
    }
  },
  "difficulty": "1",
  "gasLimit": "8000000",
  "extradata": "0x000000000000000000000000000000000000000000000000000000000000000056e2e4610271a8d8d688933327743476affe74270000000000000000000000000000000000000000000000000000000000000000000000000000000000000000000000000000000000000000000000000000000000",
  "alloc": {
   "e802b671367dd060b89f518217e732f7c74025f5":{"balance":"10000000000000000000000000"}
  },
  "coinbase": "0x0000000000000000000000000000000000000000"
}
The
configsection ensures that all known protocol changes are available and configures the ‘clique’ engine to be used for consensus.alloc is short for allocation account, in this field we pre-fund a few accounts.
extradata filed configured the initial signer, this field is required for Clique to work.
-
initialize database
To create a blockchain node that uses this genesis block, first use
geth initto import and sets the canonical genesis block for the new chain. This requires the path togenesis.jsonto be passed as an argument.mkdir ./node1 geth init --datadir node1 genesis.json -
run the one-node network
$ geth --datadir node1
-
- Usage
-
create account
$ geth account newThis returns the following to the terminal:
Your new account is locked with a password. Please give a password. Do not forget this password.
Passphrase:
Repeat Passphrase:
Address: {168bc315a2ee09042d83d7c5811b533620531f67}
The newly generated key files can be viewed in
<datadir>/keystore/. The file naming format isUTC--<date>--<address>wheredateis the date and time of key creation formatted according to UTC 8601 with zero time offset and seconds precise to eight decimal places.addressis the 40 hexadecimal characters that make up the account address without a leading0x, for example:UTC--2022-05-19T12-34-36.47413510Z--0b85e5a13e118466159b1e1b6a4234e5f9f784bb-
import account
$ echo “password” > password
$ geth account import --datadir node ./password
information like the following will be displayed in the terminal, indicating a successful import:
Please enter a passphrase now. Passphrase: Repeat Passphrase: Address: {7f444580bfef4b9bc7e14eb7fb2a029336b07c9d}-
pre-fund account
configure your accounts like below into the alloc field in the genesis.json file:
"alloc": { "56e2e4aabbc1a8d8d688933327743476affe7427": { "balance": "300000000000000000000" }, "97638c443f979a7cc46354gdalf9ab2ebcbb1800": { "balance": "400000000000000000000" }, "e802b671367dd060b89f518217e732f7c74025f5":{"balance":"10000000000000000000000"} } -
attatch to javascript console
$ geth attach node1/geth.ipc -
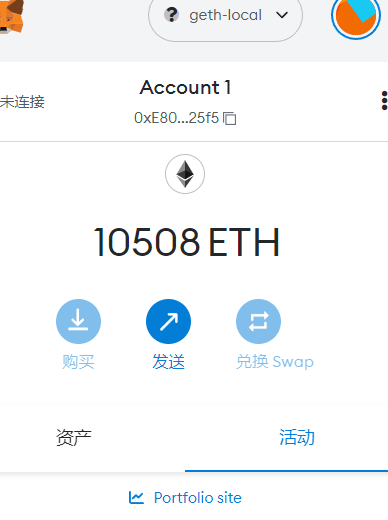
check balance, you can get your account balance through web3 app, rpc methods, or java console:
web3 app:
![]()
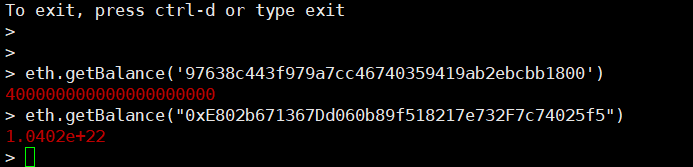
js console:
![]()
rpc methods:
![]()
-
transaction
// unlock account
personal.unlockAccount(eth.accounts[0])

// send some Wei
eth.sendTransaction({to: "0xc94d95a5106270775351eecfe43f97e8e75e59e8", from: eth.accounts[0], value: 25000})

//check the transaction was successful by querying Node 2's account balance
eth.getBalance("0xc94d95a5106270775351eecfe43f97e8e75e59e8")
-

posted on 2022-10-26 14:56 fRe_Bourne 阅读(280) 评论(0) 收藏 举报

 浙公网安备 33010602011771号