Spring5.x源码分析 | 从踩坑到放弃之环境搭建
Spring5.x源码分析——从踩坑到放弃之环境搭建
前言
自从Spring发行4.x后,很久没去好好看过Spring源码了,加上最近半年工作都是偏管理和参与设计为主,在技术细节上或多或少有点疏忽,最近心血来潮想重新看下Spring源码,对以往Spring知识点做下回顾,但是在构建环境的过程中出现了各种问题,经过把一个个坑修复后,最终还是成功把单测运行起来,没有报编译错误或者其他异常,总结了以下一些环境搭建步骤,希望大家搭建过程都顺顺利利,踏上Spring源码分析之旅!
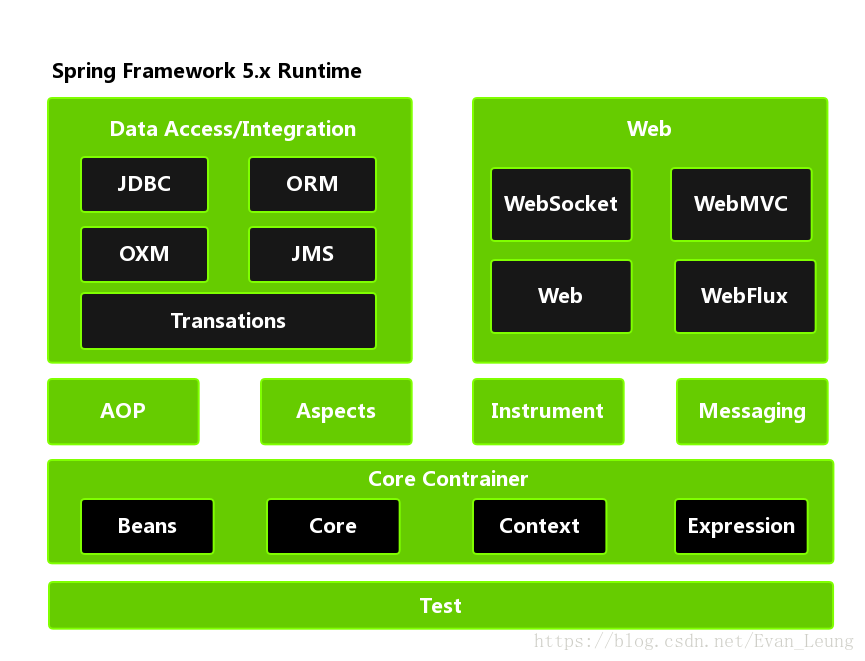
Spring5.x整体架构回顾
第一、前期运行环境与工具准备
- JDK版本:1.8.0_161
- 下载地址:http://www.oracle.com/technetwork/java/javase/downloads/jdk8-downloads-2133151.html
- GRADLE版本:4.9
- 下载地址:https://gradle.org/releases/
- 配置教程:https://www.cnblogs.com/linkstar/p/7899191.html
- Spring源码版本:v5.0.8.RELEASE
- 下载地址:https://github.com/spring-projects/spring-framework/releases
- IntelliJ IDEA版本:IntelliJ IDEA 2018.2.1 (Ultimate Edition)
- 下载地址:https://www.jetbrains.com/idea/download/
- 系统:WINDOWS 10
第二、下载源码
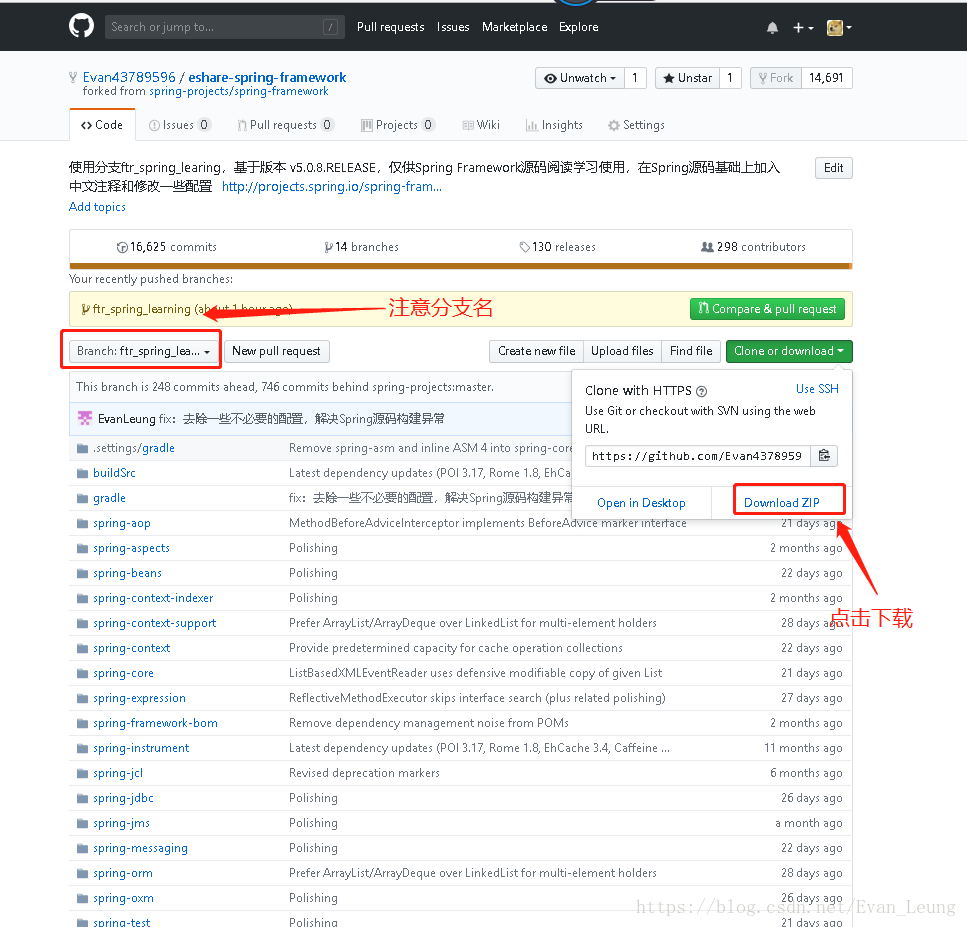
下载源码可以直接到Spring源码仓库 下载v5.0.8.RELEASE版本的zip包在本地解压,也可以通过fork方式把它fork到自己仓库,方便后续更新维护。
我已经配置好了,如果不想麻烦的同学可以直接到我的github拉取Spring源码https://github.com/Evan43789596/eshare-spring-framework,记得切换到 ftr_spring_learning分支
下载到本地解压如下:
上图用红框圈出来的几个文件要重点关注下:-
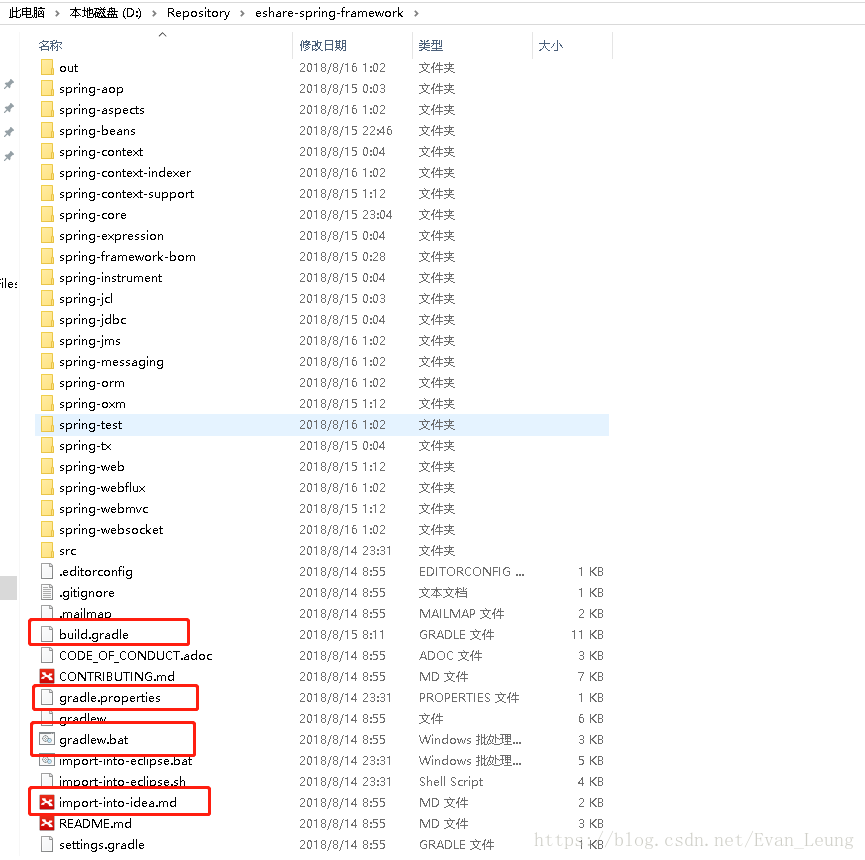
- build.gradle 放了一些依赖配置,有点像maven的pom文件
- gradle.properties 存放当前Spring的版本,可以对比下看看是不是5.0.8版本
- gradlew.bat 放的是项目的构建脚本,不过在本章用不上,本章是使用IDEA去构建
- import-into-idea.md 这个是Spring导入IDEA的说明文件,可以根据里面的步骤去导入
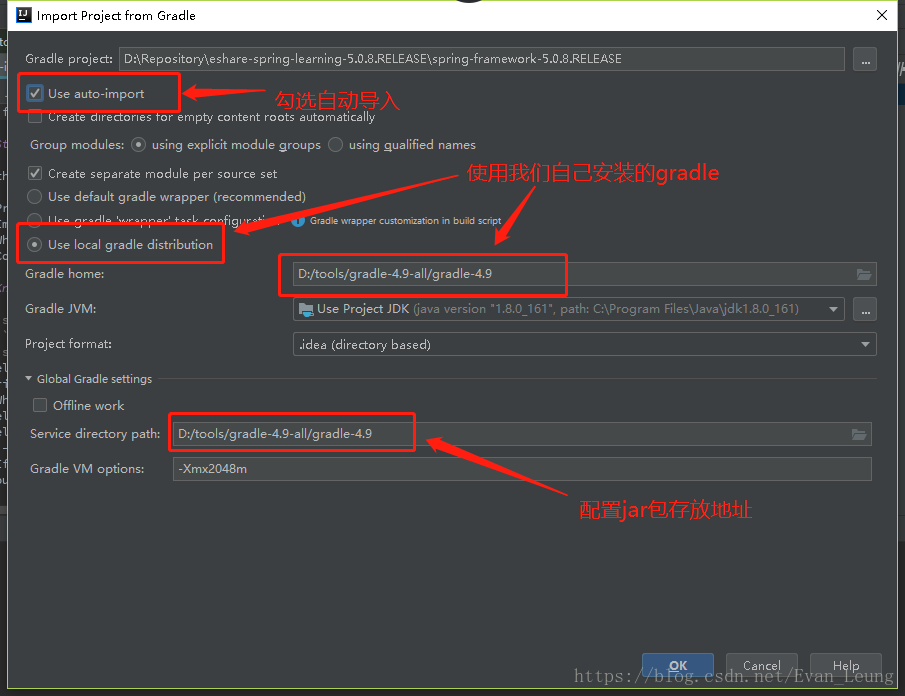
第三、导入IDEA
1.点击File->Open打开项目
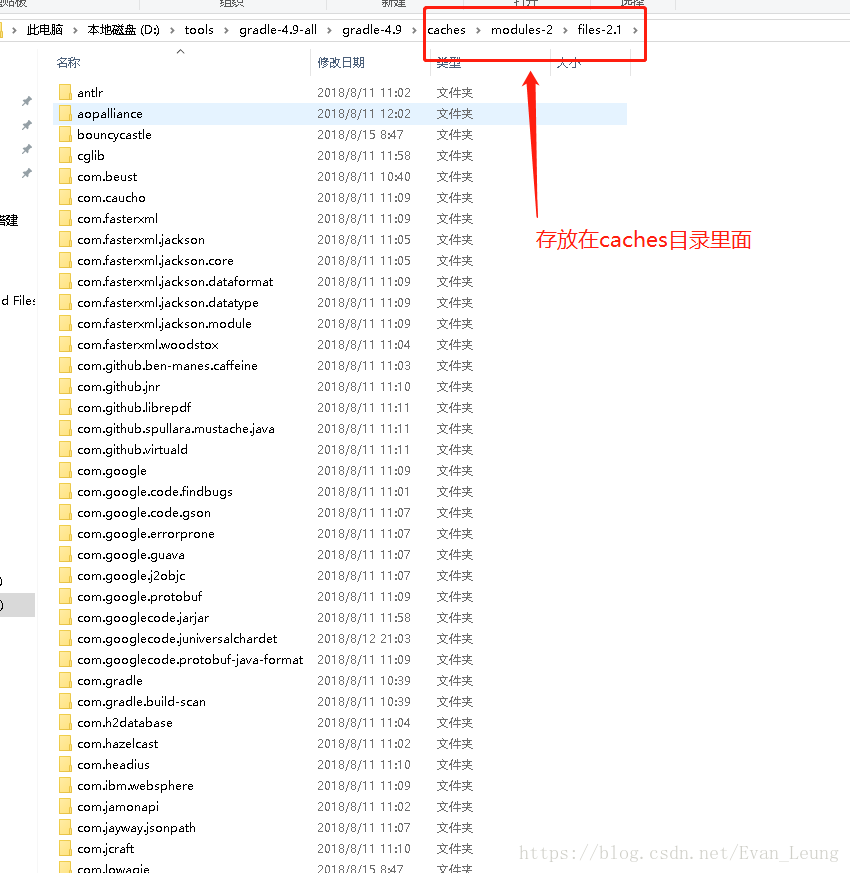
下载的jar包会存放在上图配置的路径:
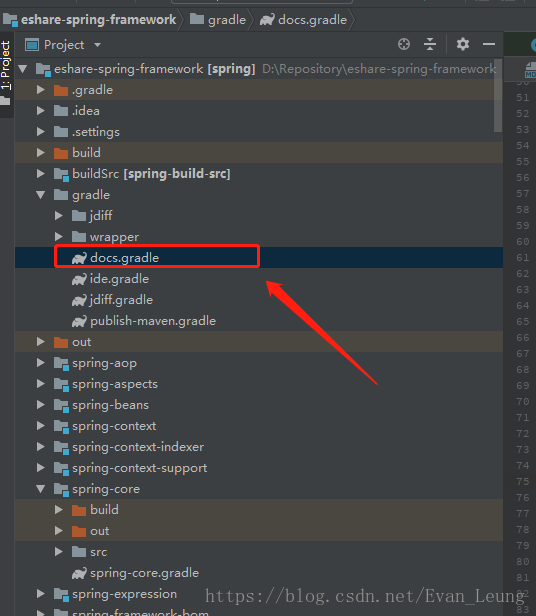
2.修改docs.gradle文件
如果是在我的github仓库下载的源代码包,可以忽略这一步,我已经配置好了。
打开docs.gradle文件
3.注释掉dokka和asciidoctor两个配置项
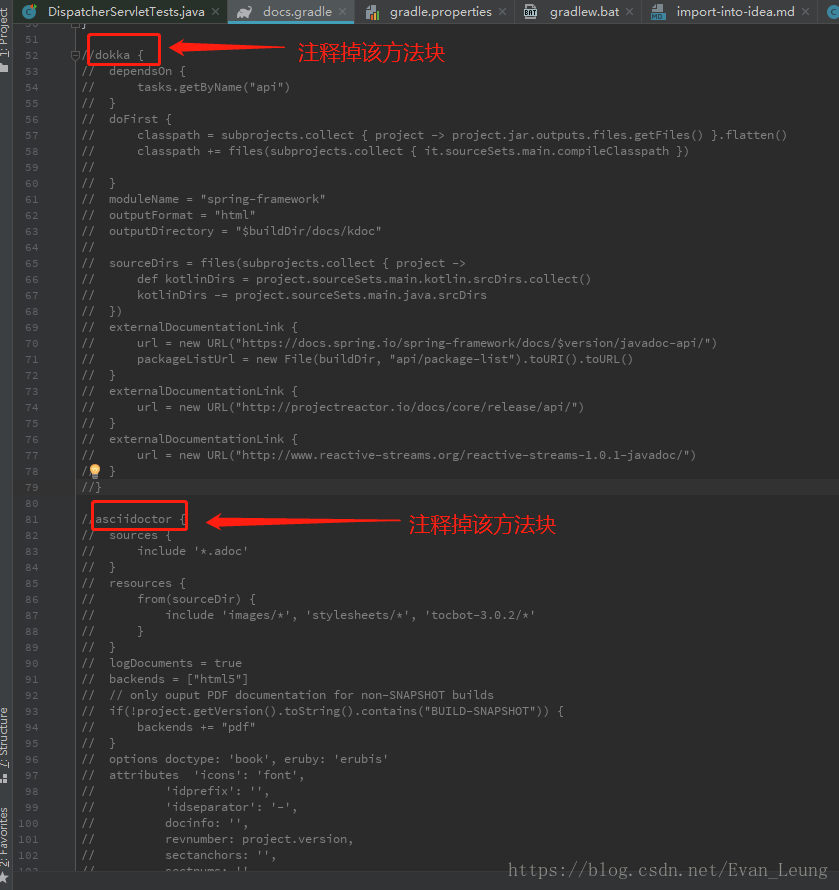
为什么要注释掉这两项配置?
因为这个版本的源代码在我本地构建过程中执行这两个任务时会导致构建失败,这两个任务主要是用来生成文档使用,对主流程并没有任何影响,可以直接忽略,当然如果大家本地没有这个问题,也可以不注释。
4.替换docs.gradle文件中的task schemaZip配置
在gradle的构建脚本,只针对Linux系统做了适配,需要把task schemaZip替换成下面代码,因为原有代码的路径符号“/”是针对Linux的,windows使用会有问题,在windows环境需要替换成"\\",否则会出现如下异常:
* What went wrong:
Failed to capture snapshot of input files for task ':distZip' property 'rootSpec$1$3' during up-to-date check.
> Failed to create MD5 hash for file 'D:\repository\spring-framework-5.0.8.RELEASE\build\distributions\spring-framework-5.0.8.RELEASE-schema.zip'.

* Try:
Run with --stacktrace option to get the stack trace. Run with --info or --debug option to get more log output. Run with --scan to get full insights.

* Get more help at https://help.gradle.org

BUILD FAILED in 1m 43s
254 actionable tasks: 3 executed, 251 up-to-date
参考如下代码,注释部分是原有的代码:
//task schemaZip(type: Zip) {
//	group = "Distribution"
//	baseName = "spring-framework"
//	classifier = "schema"
//	description = "Builds -${classifier} archive containing all " +
//			"XSDs for deployment at http://springframework.org/schema."
//	duplicatesStrategy 'exclude'
//	moduleProjects.each { subproject ->
//		def Properties schemas = new Properties();
//
//		subproject.sourceSets.main.resources.find {
//			it.path.endsWith("META-INF/spring.schemas")
//		}?.withInputStream { schemas.load(it) }
//
//		for (def key : schemas.keySet()) {
//			def shortName = key.replaceAll(/http.*schema.(.*).spring-.*/, '$1')
//			assert shortName != key
//			File xsdFile = subproject.sourceSets.main.resources.find {
//				it.path.endsWith(schemas.get(key))
//			}
//			assert xsdFile != null
//			into (shortName) {
//				from xsdFile.path
//			}
//		}
//	}
//}
task schemaZip(type: Zip) {
	group = "Distribution"
	baseName = "spring-framework"
	classifier = "schema"
	description = "Builds -${classifier} archive containing all " +
			"XSDs for deployment at http://springframework.org/schema."
	duplicatesStrategy 'exclude'
	moduleProjects.each { subproject ->
		def Properties schemas = new Properties();

		subproject.sourceSets.main.resources.find {
			it.path.endsWith("META-INF\\spring.schemas")
		}?.withInputStream { schemas.load(it) }

		for (def key : schemas.keySet()) {
			def shortName = key.replaceAll(/http.*schema.(.*).spring-.*/, '$1')
			assert shortName != key
			File xsdFile = subproject.sourceSets.main.resources.find {
				it.path.endsWith(schemas.get(key).replaceAll('\\/','\\\\'))
			}
			assert xsdFile != null
			into (shortName) {
				from xsdFile.path
			}
		}
	}
}
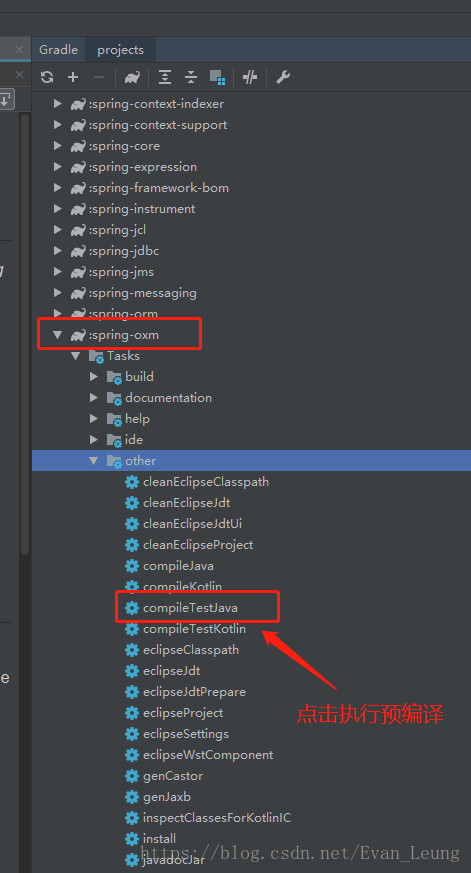
5.根据import-into-idea.md文档步骤去构建
根据import-into-idea.md文档里面介绍,我们需要对spring-core和spring-oxm做预编译,可以通过以下命令./gradlew :spring-oxm:compileTestJava,在IDEA比较简单,对这两个包分别按下图操作即可:
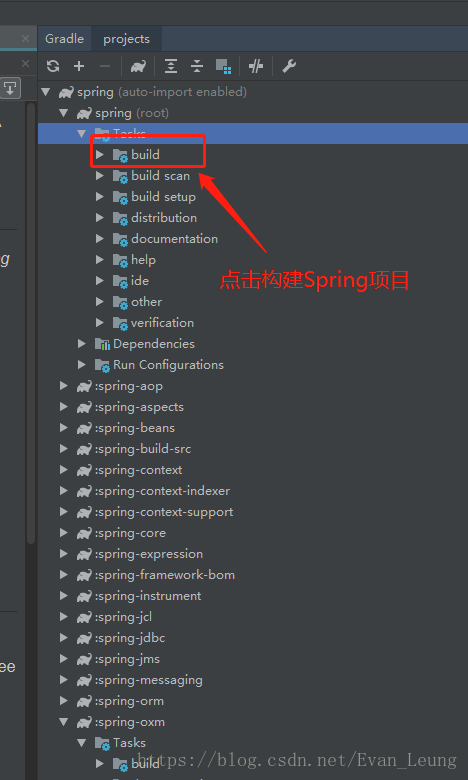
6.终极构建Spring项目
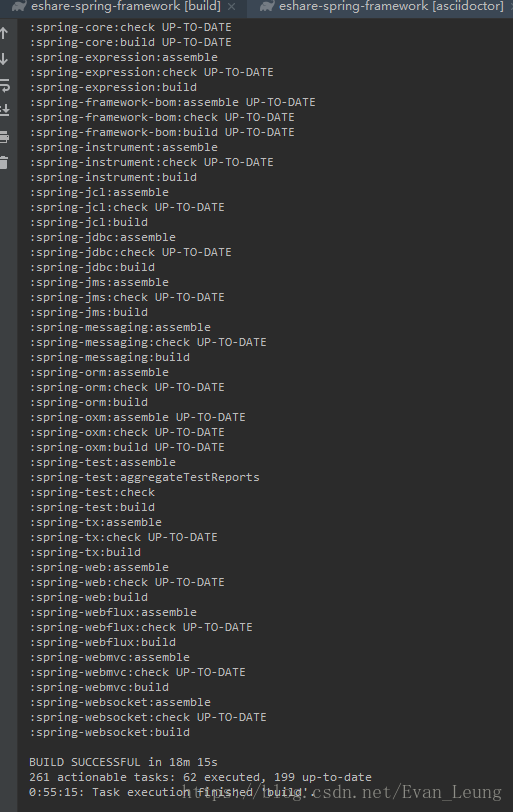
最后一步,对整个Spring项目构建,这个时候它会自动下载依赖包,如果有异常,会在控制台抛出并停止操作。
构建成功在控制台可以看到下图提示
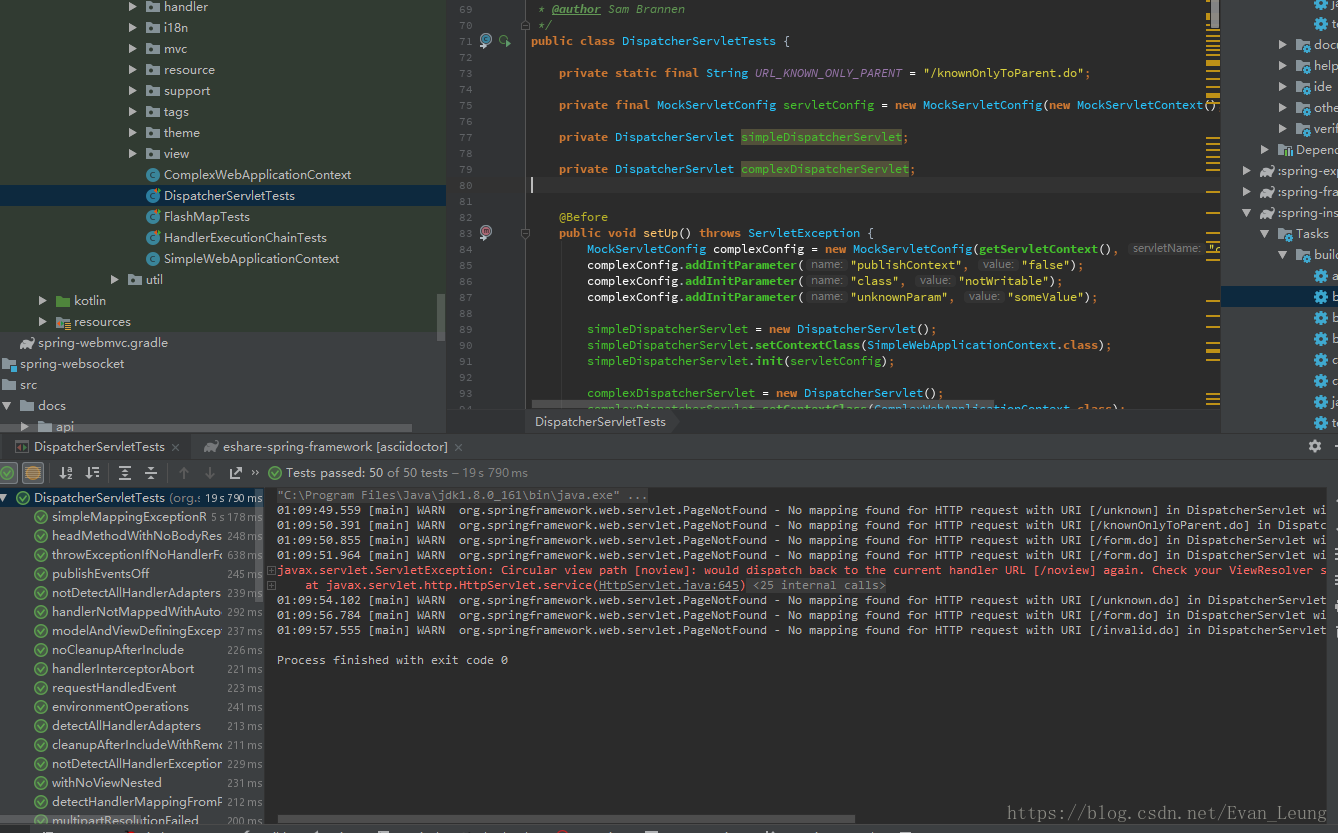
第四、执行单元测试
即使整个项目没有error或者红点,也不代表项目已经成功构建好了,我们还需要执行个单元测试试下,如果能顺利执行单元测试,那证明该项目已经构建成功,这里我用到的是DispatcherServletTests这个类,直接运行查看结果:
很明显,上面单元测试类的所有单测执行成功,证明该项目已经构建完毕,可以开始开启Spring源码分析旅程啦!!!
第五、可能遇到的坑点回顾
- 构建成功没报错,但运行单元测试有异常 ,提示类找不到
- **方案1:**尝试点击右边菜单栏projects刷新项目,然后对Spring(Root)模块先clean再build一次
- **方案2:**针对找不到类的模块重新build一次
- **方案3:**点击Spring(root)模块下的Tasks->other->compileTestJava 执行一遍,针对test类编译一次即可
- 构建失败,缺少依赖包
- **方案1:**对Spring(Root)模块先clean再build一次(建议打开VPN,有可能存在某些包下载不成功导致)
- **方案2:**尝试针对当前模块执行
buildDependents
- 构建失败,执行gradle task失败
- **方案1:**可能是当前运行环境版本不支持问题,如果不重要的问题,可以注释掉,保证构建正常
- 构建失败,编码异常
- **方案1:**可以通过idea工具设置:Editor-File encodings 全部设置为UTF-8
可以参考我另一篇文章:
https://blog.csdn.net/Evan_Leung/article/details/95903083

 浙公网安备 33010602011771号