vue3 + vite + ts基础
import x from xxx.vue报错
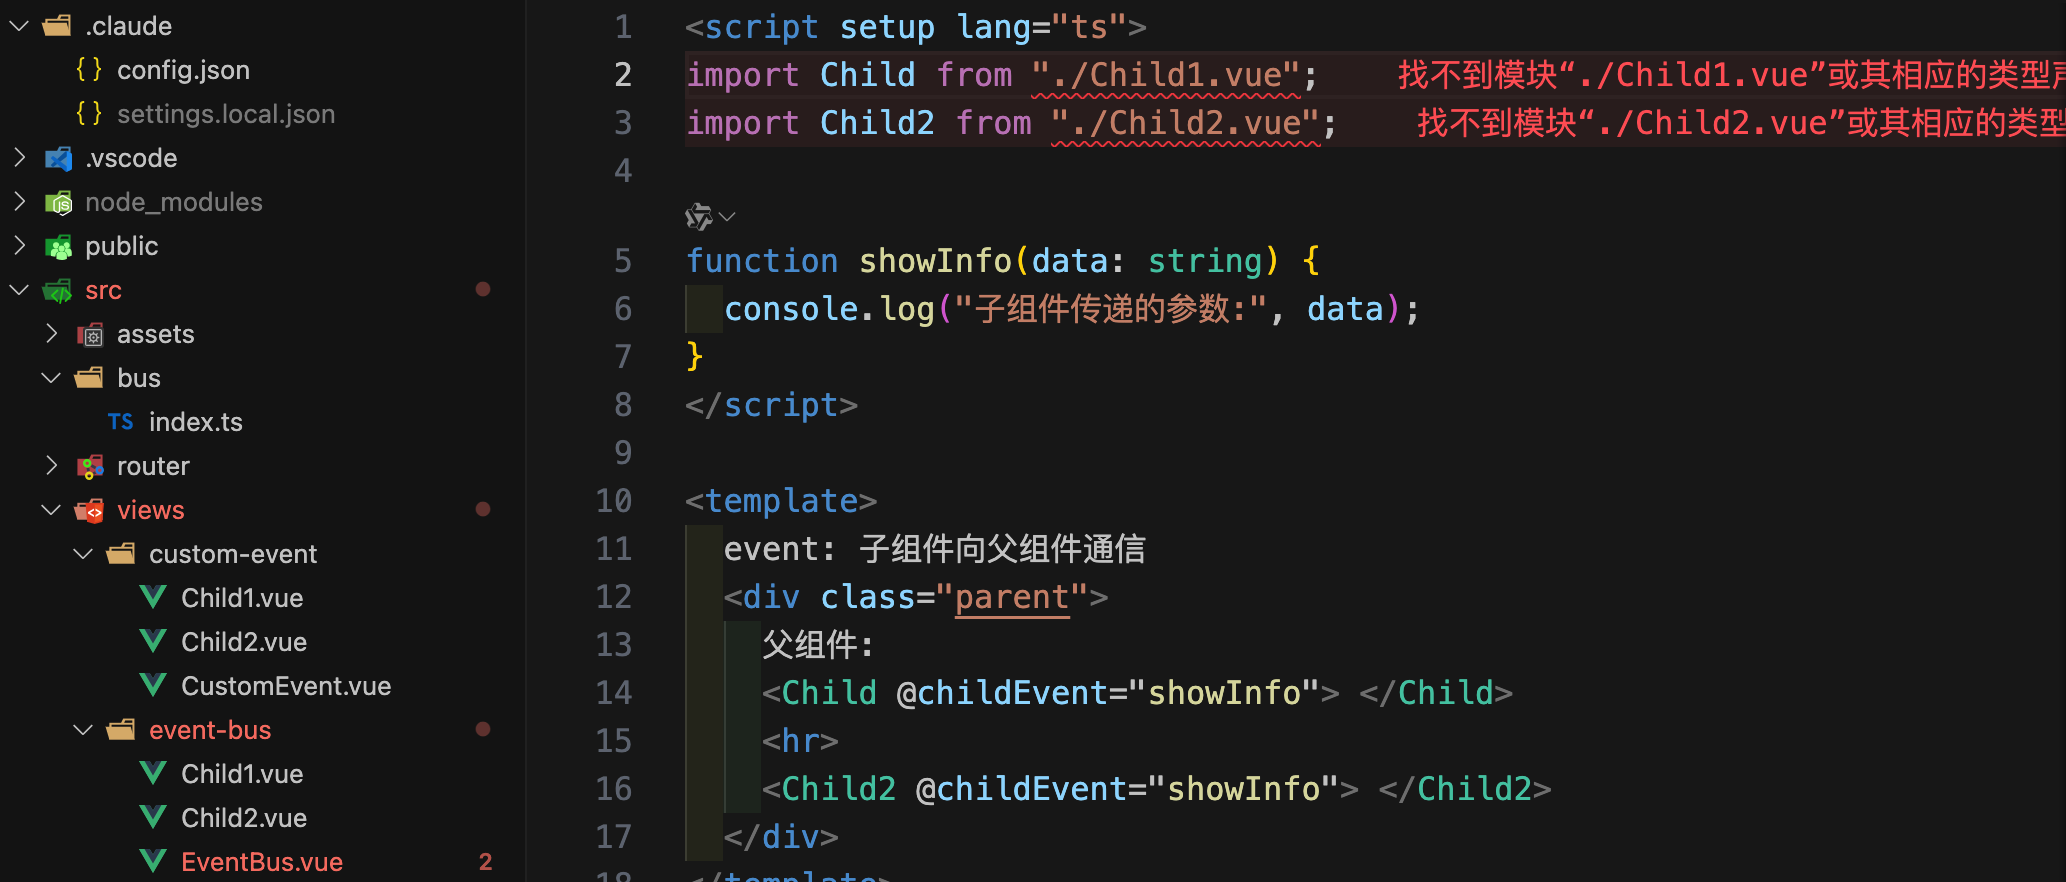
在vite-env.d.ts文件中添加如下代码:
/// <reference types="vite/client" />
declare module '*.vue' {
  import { ComponentOptions } from 'vue'
  const componentOptions: ComponentOptions
  export default componentOptions
}
组件通信
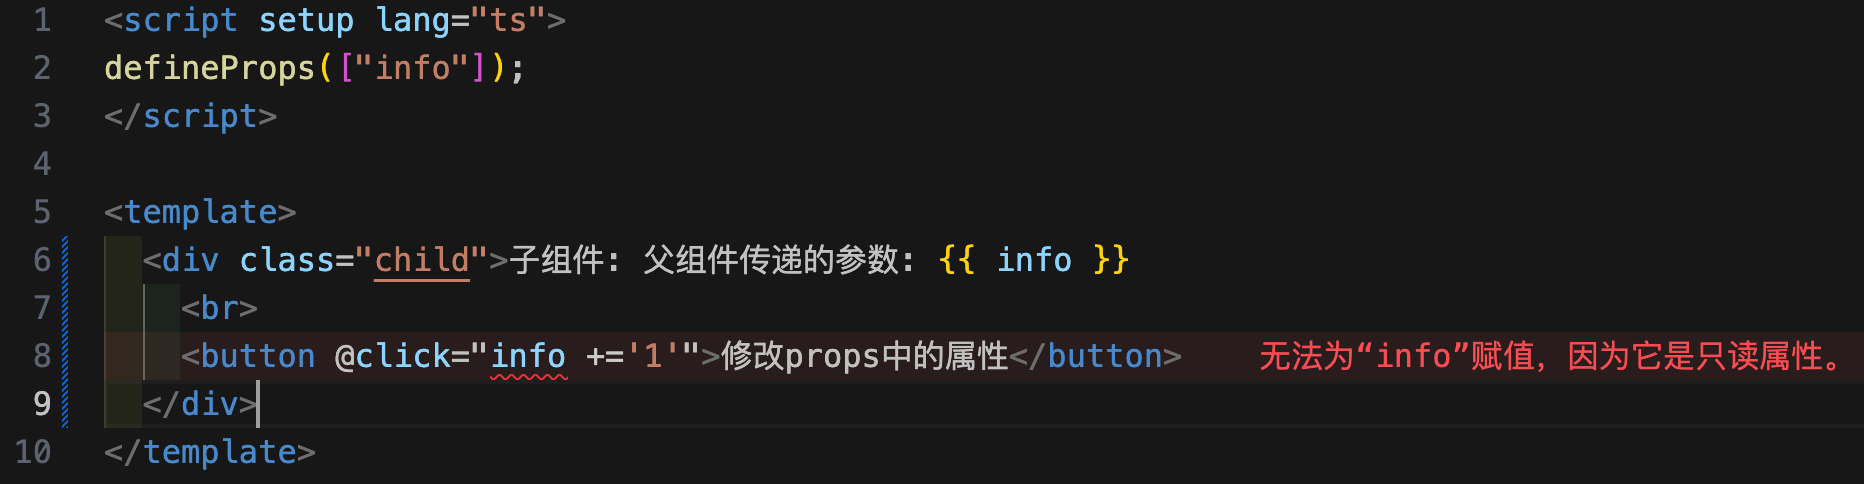
defineProps中的属性只读
在vue2中props中属性允许修改,但是提示警告,而vue3中的props属性是只读的,不能修改。
defineEmits: 声明触发的事件
<script setup lang="ts">
// 通过defineEmits声明自定义事件,如果包含了click事件,那么子组件的click事件将无法触发,而是将click事件作为自定义事件触发
let $emits = defineEmits(["childEvent"]);
const childEvent = () => {
  $emits("childEvent", "子组件参数");
};
</script>
mitt: 全局事件总线插件
vue2中全局事件总线通过对Vue原型对象添加一个vm实例,通过该vm实例实现全局事件,各组件使用this获取到该vm从而实现事件通信,而vue3中无法对Vue实例操作,且setup中无法通过this获取vm,因此需要借助插件实现全局事件总线。
mitt插件是一个轻量级的事件总线插件,使用起来非常简单,只需要在main.ts中引入并注册即可,然后在组件中使用即可。
bus/index.ts
import mitt from "mitt";
const $mitt = mitt();
export default $mitt;
// 组件定义事件
import $mitt from '../../bus';

$mitt.on('childEvent1', (data) => {
  console.log('子组件1中接收子组件2传递的参数:', data);
});
// 其他组件触发事件
import $mitt from "../../bus";
const childEvent1 = (data: { info: string }) => {
  $mitt.emit("childEvent1", data);
};
v-model: 父子组件双向数据同步
通过props + 自定义事件实现父子组件数据同步
父组件:
<script setup lang="ts">
import Child from "./Child1.vue";
import { ref } from "vue";
let money = ref(1000);
// 父组件中修改v-model数据
function updateMoney(addMoney: number) {
  money.value += addMoney;
}
</script>

<template>
  v-model: 父子组件双向通信
  <div class="parent">
    父组件:
    <div>账户金额: <input type="text" v-model="money" /></div>
    <div>
      <Child :money="money" @update:money="updateMoney"> </Child>
    </div>
  </div>
</template>
子组件:
<script setup lang="ts">
// 声明自定义事件
let $emits = defineEmits<{
  (e: "update:money", money: number): void;
}>();
// 声明props属性
defineProps<{
  money: number;
}>();
// 子组件自定义事件中触发父组件自定义事件
const addMoney = (money: number) => {
  $emits("update:money", money);
};
</script>

<template>
  <div class="child">
    子组件1: 父组件的账号金额: {{ money }}

    <button @click="addMoney(100)">修改父组件金额+100</button>
  </div>
</template>
通过v-model实现父子组件数据同步
父组件:
<script setup lang="ts">
import Child from "./Child1.vue";
import { ref } from "vue";
let money = ref(1000);
</script>

<template>
  v-model: 父子组件双向通信
  <div class="parent">
    父组件:
    <div>
      账户金额:
      <input type="text" v-model="money" />
      <div>
        <!-- <Child
          :modelValue="money"
          @update:modelValue="(newValue: number) => money = newValue"
        >
        </Child>-->
        <Child v-model="money"></Child>
      </div>
    </div>
  </div>
</template>
子组件:
<script setup lang="ts">
// 定义 emit
let $emits = defineEmits<{
  (e: "update:modelValue", value: number): void;
}>();
// 定义 props
let props = defineProps<{
  modelValue: number;
}>();

const addMoney = (money: number) => {
  $emits("update:modelValue", props.modelValue + money);
};
</script>

<template>
  <div class="child">
    子组件1: 父组件的账号金额: {{ modelValue }}

    <button @click="addMoney(100)">修改父组件金额+100</button>
  </div>
</template>
v-model原理
<Child v-model="money" />原理:
1.通过props向子组件传递一个固定为modelValue的属性,即 <Child modelValue="money" />
2.为子组件绑定一个固定为update:modelValue自定义事件,回调逻辑也是固定的,就是把双向绑定的属性值替换为新值,即 <Child @update:modelValue="(newValue) => {money = newValue}" />
3.子组件声明modelValue属性,并触发update:modelValue自定义事件,将新的值传递给父组件
4.父组件接收到子组件传递的值,替换掉双向绑定的属性值,从而触发vue从新解析模板,更新父组件和子组件使用的双向绑定属性值
vue3.4版本使用v-model更为简洁
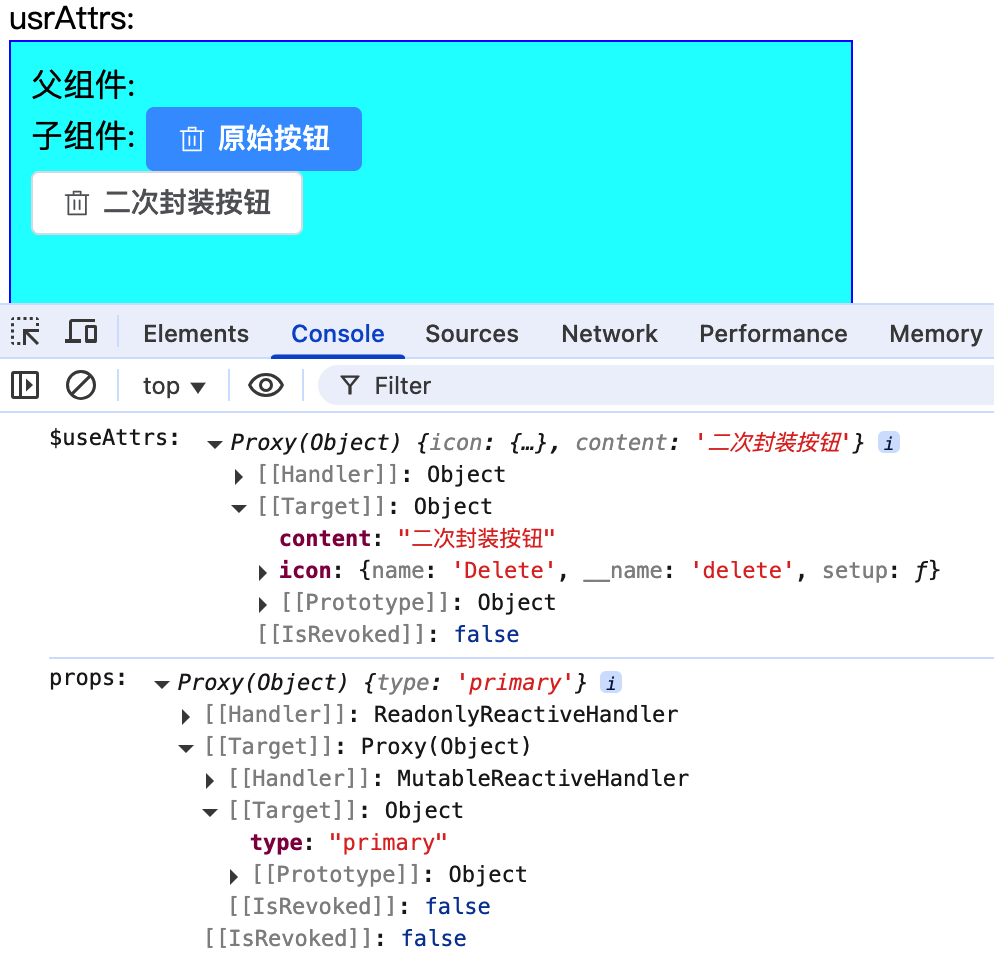
useAttrs辅助函数
作用1: 子组件未使用props接收父组传递的属性,将会被添加到attrs属性中,可以通过useAttrs辅助函数获取
使用场景: 组件二次封装
对按钮组件二次封装
封装一个HintButton组件,
<script setup lang="ts">
import { useAttrs } from 'vue'
let $useAttrs = useAttrs();
console.log('$useAttrs:',$useAttrs);

let $props = defineProps<{
  type: string
}>();
console.log('props:', $props);
</script>

<template>
  <div class="hint-button">
    <el-button :icon="$attrs.icon" :type="$attrs.type">{{
      $attrs.content
    }}</el-button>
  </div>
</template>
使用二次封装的按钮组件HintButton
<script setup lang="ts">
import { Delete } from "@element-plus/icons-vue";
import HintButtoon from "./HintButton.vue";
</script>

<template>
  <div>
    子组件:
    <el-button type="primary" :icon="Delete">原始按钮</el-button>
    <HintButtoon :icon="Delete" type="primary" content="二次封装按钮" />
  </div>
</template>

<style scoped>
.child {
  background-color: rgb(222, 189, 189);
  width: 200px;
  height: 200px;
  border: 1px solid blue;
  padding: 10px;
  margin: 5px;
}
</style>
v-bind绑定属性简写形式
$attrs对象中属性值有
{
  icon: Delete,
  type: 'primary',
}
<el-button v-bind:="$attrs"></el-button>
<el-button :="$attrs"></el-button>
<!-- 等价于 -->
<el-button :icon="$attrs.icon" :type="$attrs.type"></el-button>
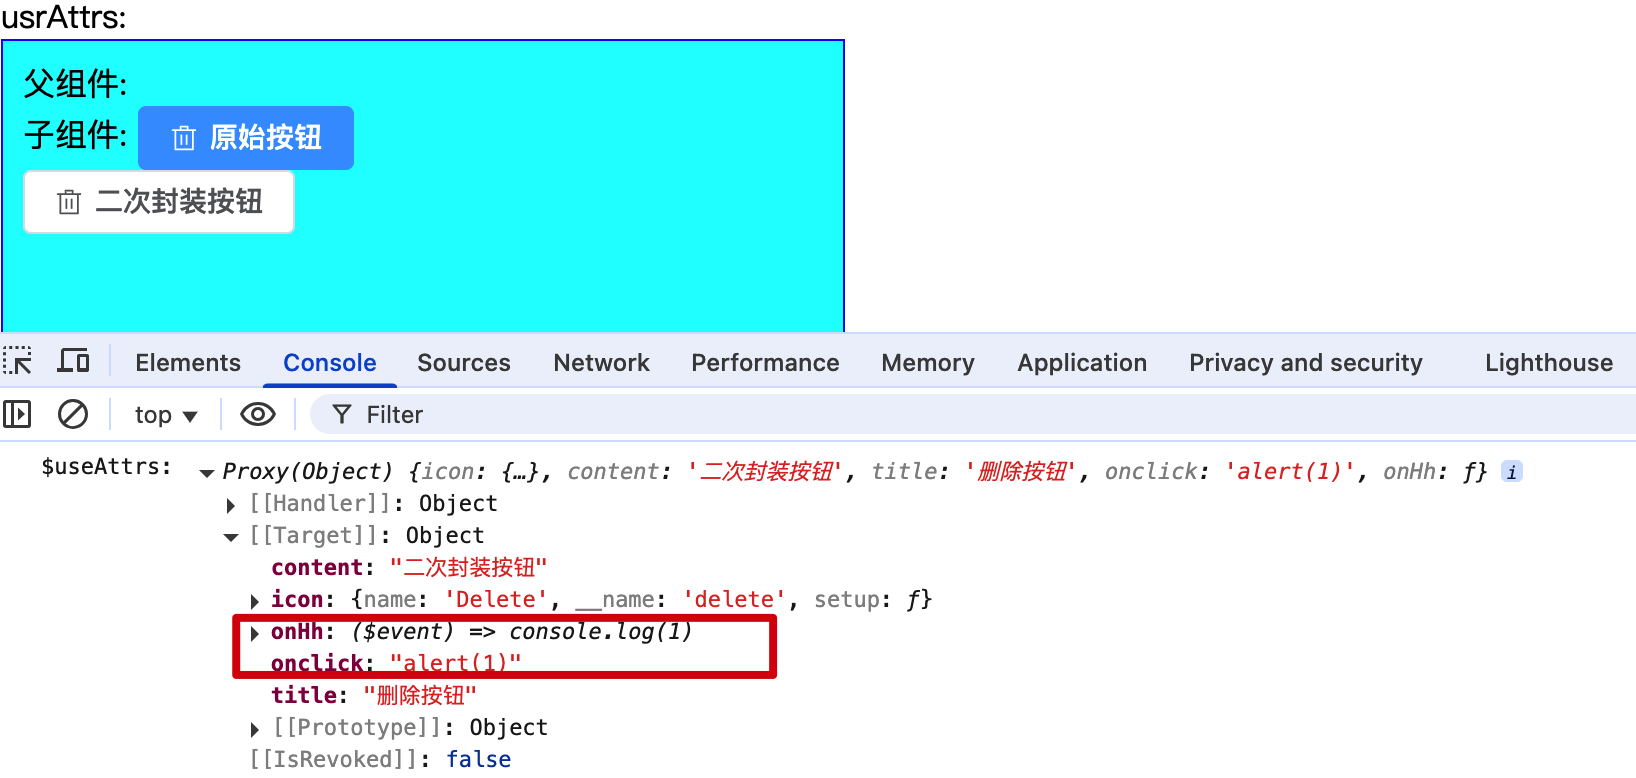
作用2: 接收自定义事件和系统事件
<HintButtoon :icon="Delete" type="primary" content="二次封装按钮" title="删除按钮" @click="alert(1)" @hh="console.log(1)" />
1.当子组件只有一个根元素时,那么该元素继承父组件中为其添加的系统事件
2.子组件元素上使用:="$attrs": $attrs接收父组件为其添加的事件,并应用在该元素上
ref和$parent
ref作用: 作为dom的属性,用于获取dom节点或组件的VC实例,前提定义的获取组件变量名必须和ref属性值相同
$parent作用: 子组件内部获取父组件VC实例对象
ref函数
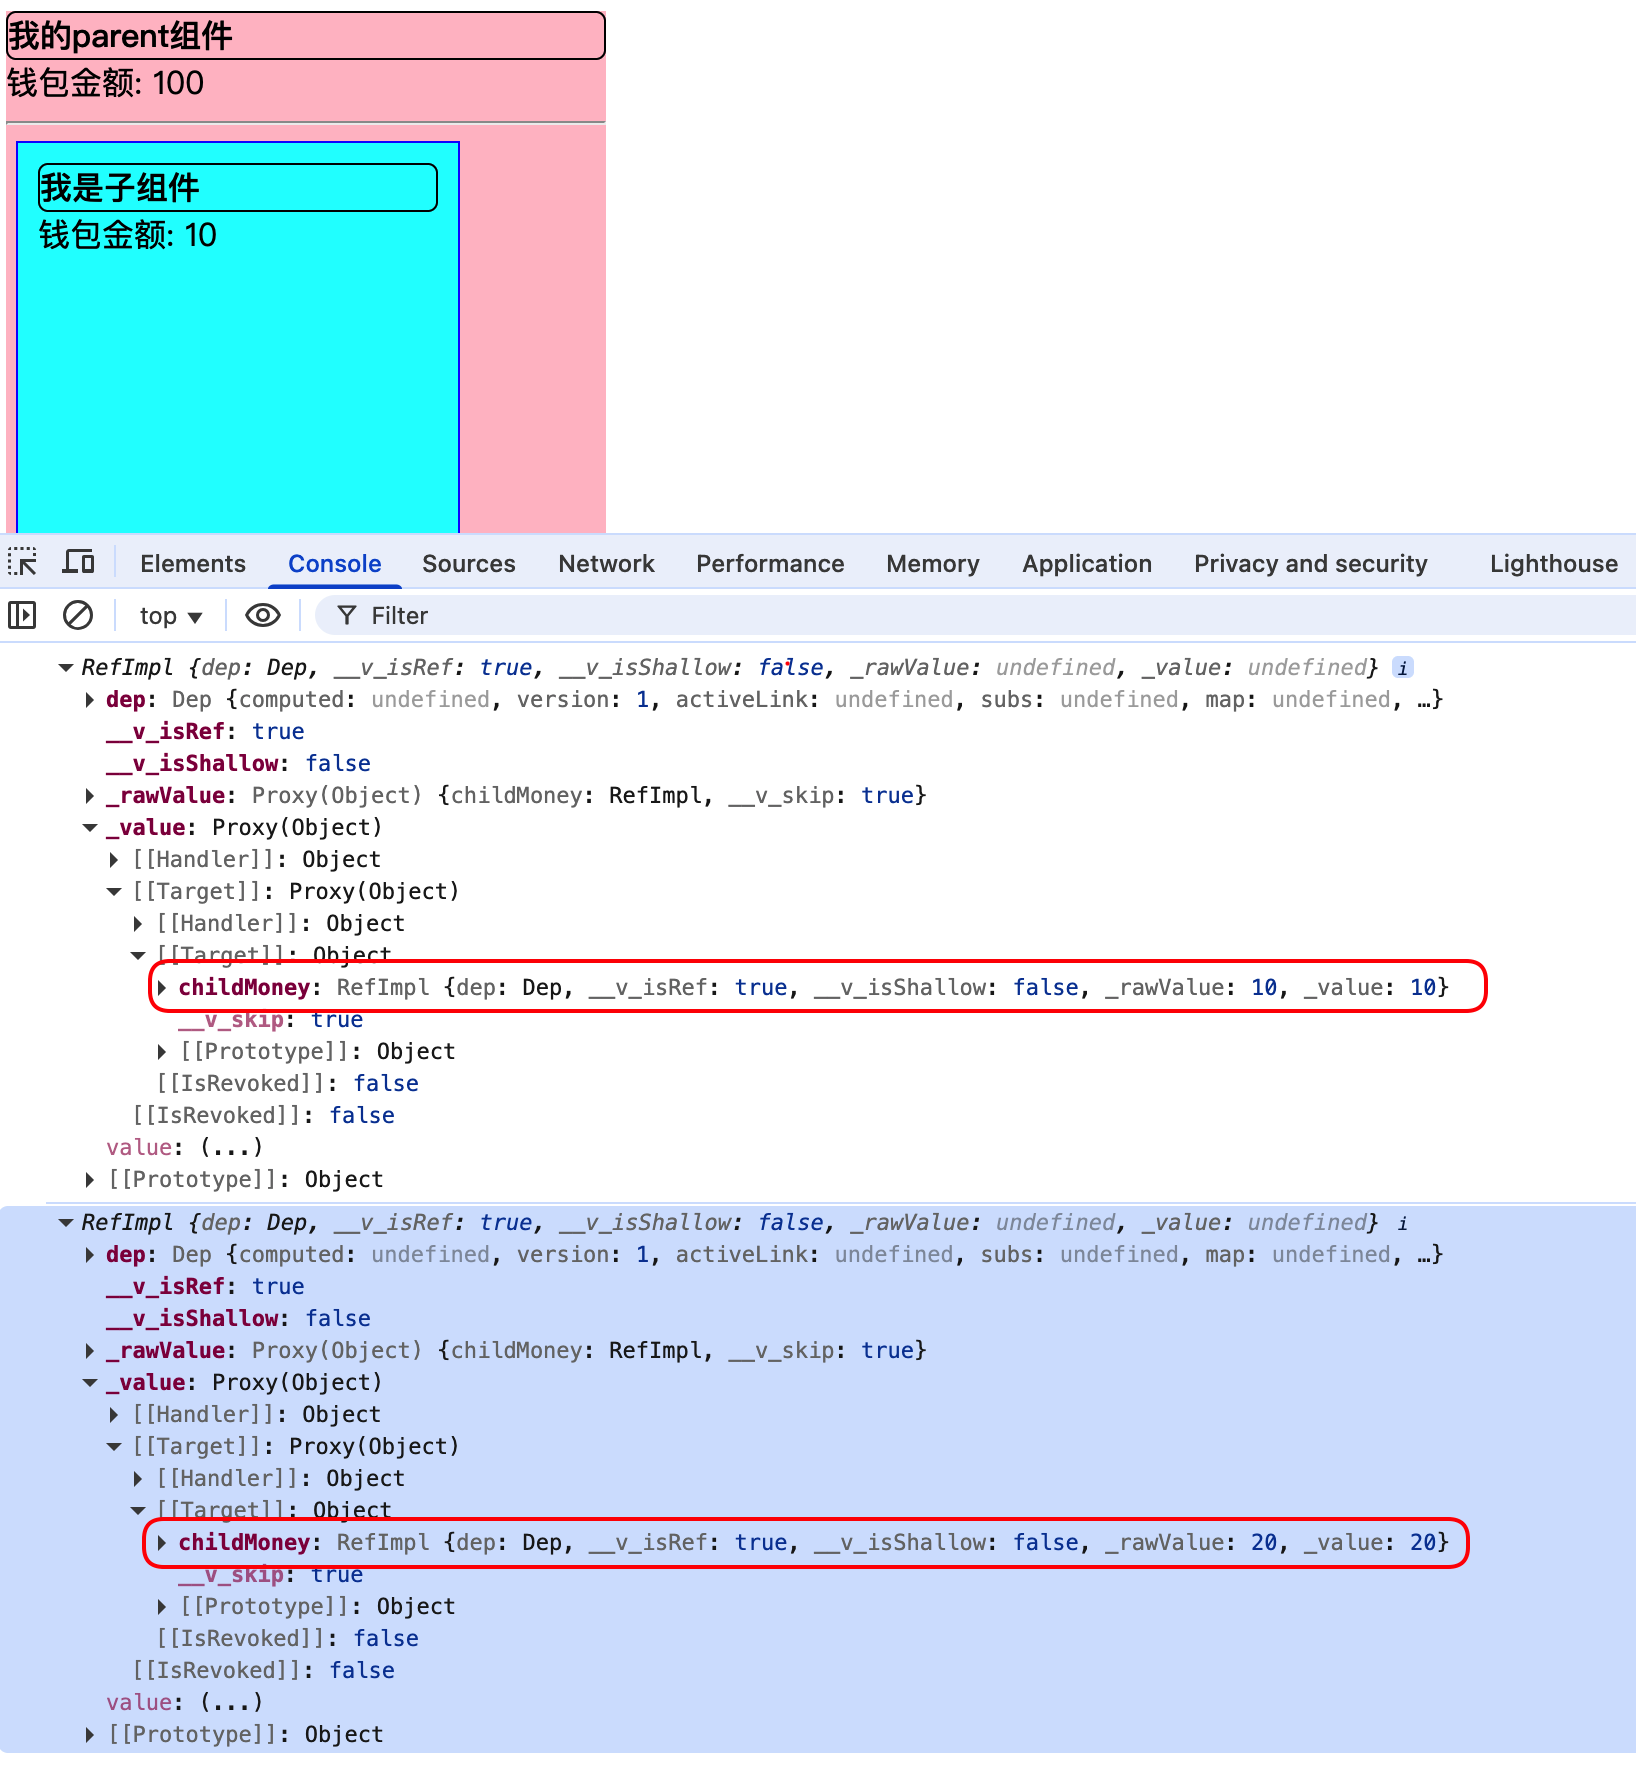
子组件通过defineExpose暴露属性和方法
<script setup lang="ts">
import { ref } from "vue";
const childMoney = ref(10);

const changeChildMoney = () => {
  childMoney.value -= 10;
};

defineExpose({
  childMoney,
  changeChildMoney,
});
</script>

<template>
  <div class="child">
    <div class="title">我是子组件</div>
    钱包金额: {{ childMoney }}
  </div>
</template>
父组件通过ref获取子组件VC实例对象暴露的属性和方法
<script setup lang="ts">
import { ref } from "vue";
import Child from "./Child.vue";
let parentMoney = ref(100);
let child = ref();
const changeMoney = () => {
  parentMoney.value += 2;
  console.log(child);
  child.value.changeChildMoney();
}
</script>

<template>
  <div class="parent">
    <div class="title">
      我的parent组件
    </div>
    钱包金额: {{ parentMoney }}
    <button @click="changeMoney">借子组件2块钱</button>
    <hr />
    <Child ref="child"></Child>
  </div>
</template>
父组件通过子组件的ref属性,获取子组件VC实例的属性和方法,并调用
使用ref属性值来区分多个相同组件的引用实例对象
<script setup lang="ts">
import { ref } from "vue";
import Child from "./Child.vue";
import Child2 from "./Child2.vue";
let parentMoney = ref(100);
// child变量名和组件Child中ref属性值相同
let child = ref();
let child2 = ref();
console.log(child);
console.log(child2);
</script>

<template>
  <div class="parent">
    <div class="title">
      我的parent组件
    </div>
    钱包金额: {{ parentMoney }}
    <hr />
    <Child ref="child"></Child>
    <Child2 ref="child2"></Child2>
  </div>
</template>
通过对相同组件的ref赋值不同值,且接收变量也不同,用来获取相同组件不同引用实例对象
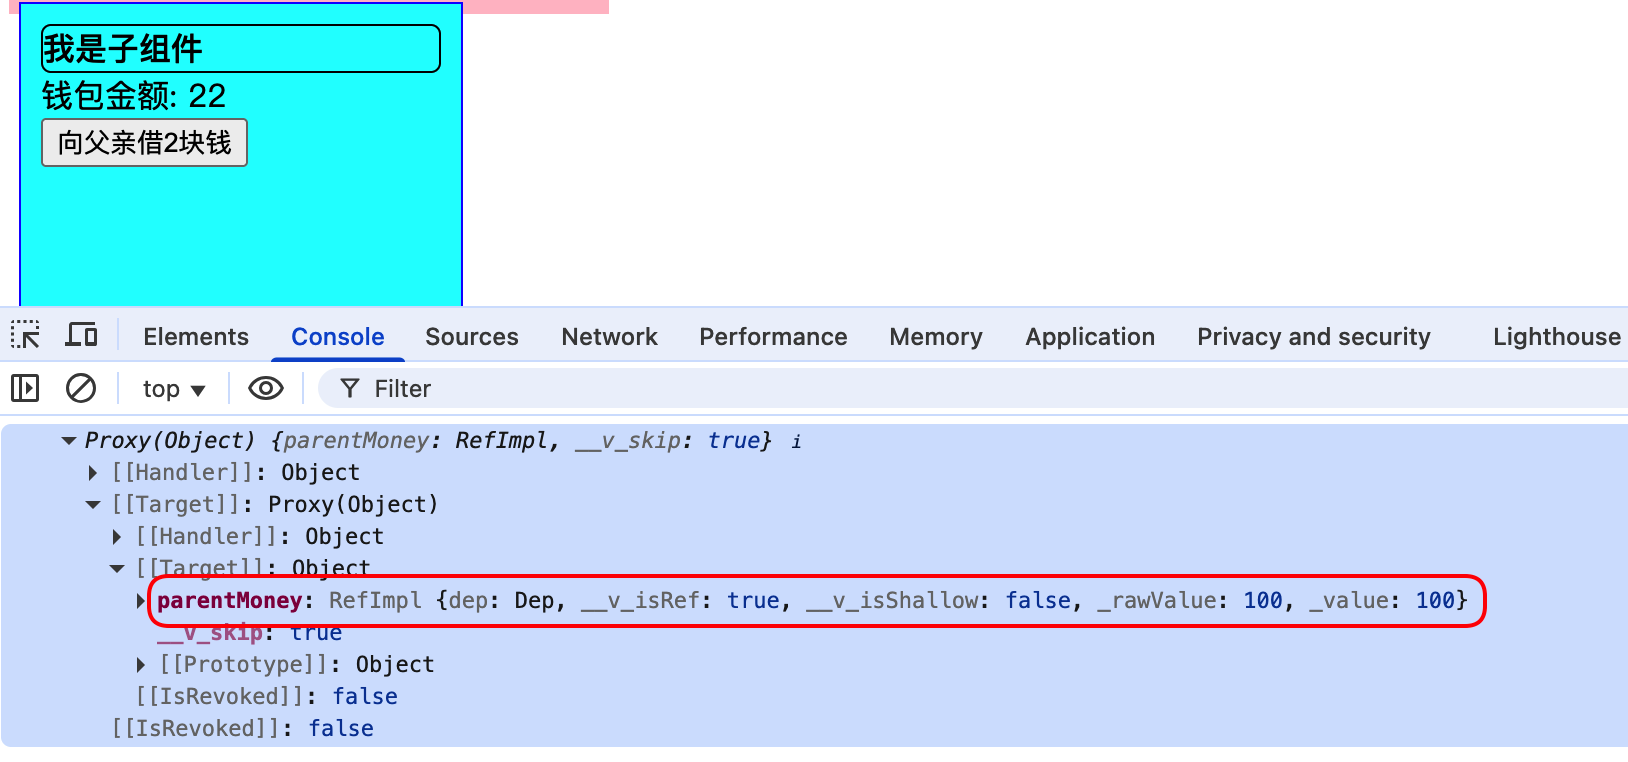
$parent
$parent作用: 在当前子组件中获取直接父组件暴露的属性和方法
父组件暴露parentMoney属性:
<script setup lang="ts">
import { ref } from "vue";
import Child from "./Child.vue";
import Daughter from "./Daughter.vue";
let parentMoney = ref(100);
// child变量名和组件Child中ref属性值相同
let child = ref();
const changeMoney = () => {
  parentMoney.value += 2;
  console.log(child);
  child.value.changeChildMoney();
}
defineExpose({
  parentMoney
});
</script>

<template>
  <div class="parent">
    <div class="title">
      我的parent组件
    </div>
    钱包金额: {{ parentMoney }}
    <button @click="changeMoney">借子组件2块钱</button>
    <hr />
    <Child ref="child"></Child>
    <Daughter></Daughter>
  </div>
</template>
子组件事件方法中可以直接将$parent作为参数
<script setup lang="ts">
import { ref } from "vue";
const childMoney = ref(20);

const changeMoney = ($parent: any) => {
  childMoney.value += 2;
  console.log($parent);
};
defineExpose({
  childMoney
});
</script>

<template>
  <div class="child">
    <div class="title">我是子组件</div>
    钱包金额: {{ childMoney }}
    <br />
    <button @click="changeMoney($parent)">向父亲借2块钱</button>
  </div>
</template>
总结
ref: 父组件中获取子组件暴露的属性和方法
$parent: 子组件事件方法中将$parent作为事件参数,获取子组件的父组件暴露的属性和方法
provide和inject
vue3中提供了provide和inject方法,用于隔辈组件相互通信
爷爷组件:
<script setup lang="ts">
import { ref } from "vue";
import Son from "./Son.vue";
import { provide } from "vue";
let car = ref("奔驰");
provide("car", car);
</script>

<template>
  <div class="parent">
    <div class="title">我是parent组件</div>
    我的车: {{ car }}
    <Son></Son>
  </div>
</template>
孩子组件:
<script setup lang="ts">
import GrandSon from "./GrandSon.vue";
import { inject } from "vue";
const car = inject("car");
</script>

<template>
  <div class="son">
    <div class="title">我是子组件</div>
    <div>父组件的车辆: {{ car }}</div>
    <GrandSon></GrandSon>
  </div>
</template>
孙子组件:
<script setup lang="ts">
import { inject, Ref } from "vue";
let car = inject<Ref<string>>("car");

let changeCar = () => {
  console.log(car);
  if (car) {
    car.value = "保时捷";
  }
};
</script>

<template>
  <div class="grandson">
    <div class="title">我是孙子组件</div>
    <div>
      爷爷组件的车: {{ car }}
      <button @click="changeCar">修改父组件和爷爷组件的车辆</button>
    </div>
  </div>
</template>
爷爷组件提供数据,孩子和孙子都能够使用,且共享同一个内存引用,孙子修改改地址值时,爷爷和孩子的数据也会同步修改
pinia
选项式API简单使用(配置对象)
安装插件: npm install pinia
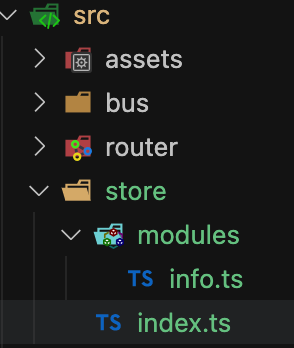
创建store文件夹,并在文件夹中创建index.ts文件,用于创建pinia实例对象
import { createPinia } from "pinia";
const pinia = createPinia();
export default pinia;
在main.ts中引入pinia实例对象,并注册到app实例中
import { createApp } from "vue";
import App from "./App.vue";
import pinia from "./store";
const app = createApp(App);
app.use(pinia);
app.mount("#app");
在store文件夹中创建modules目录,模块化区分每一个store,在modules目录下创建一个小的store名称为info.ts
import { defineStore } from 'pinia';
const infoStore = defineStore('info', {
  state: () => {
    return {
      info: {
        name: '测试',
        count: 100,
      }
    };
  },
  actions: {
    updateCount() {
      console.log('pinia实例对象方法中this', this);
    },
  },
  getters: {},
});
export { infoStore };
组件中使用infoStore:
import {infoStore} from '../../store/modules/info';
console.log(infoStore);
console.log(infoStore());
每一个小的store本质上是一个很函数,调用函数会返回一个proxy代理对象

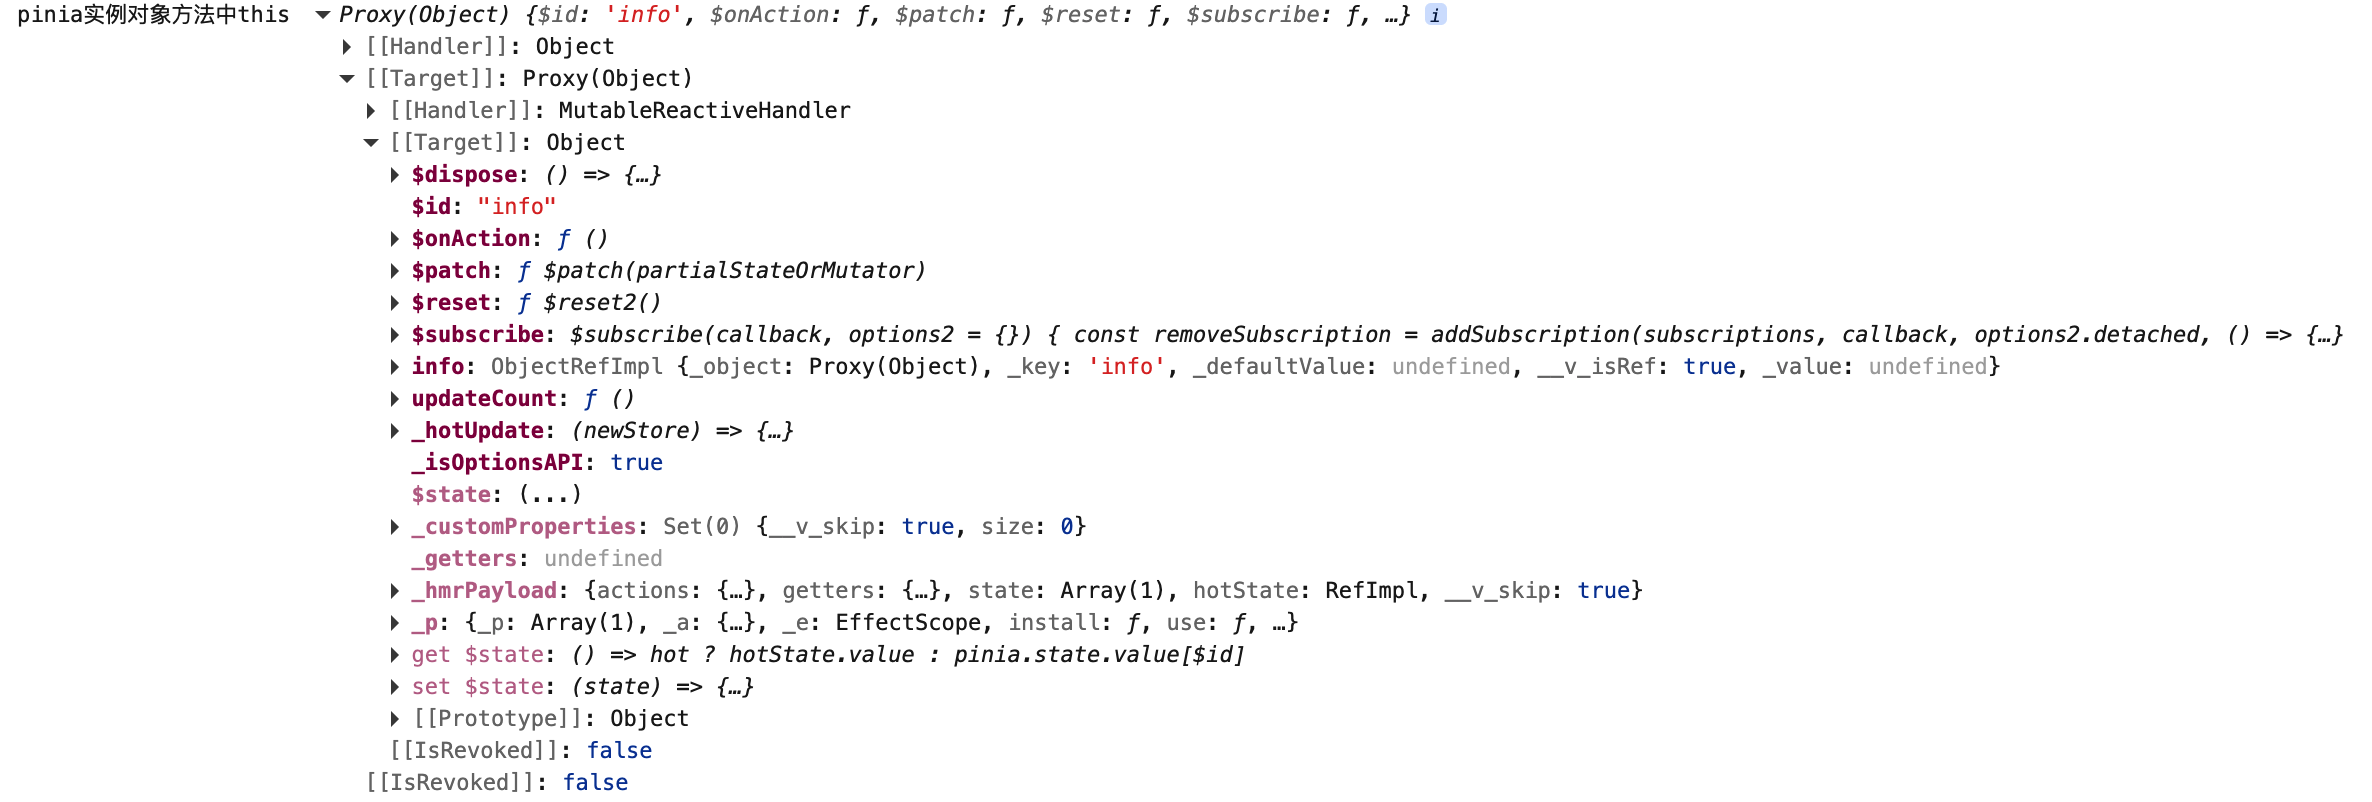
调用sotre中的自定义的方法,查看方法中this数据结构
import { infoStore } from "../../store/modules/info";
const store = infoStore();
const changeInfoStore = () => {
  console.log(store);
  store.updateCount();
};
pinia方法中的this其实就是store的代理实例对象,可以通过this访问store中的数据
组合式API简单使用(配置函数)
创建一个store共享仓库数据对象,并导出
store/modules/useInfo.ts
import { defineStore } from 'pinia';
import { ref, computed } from 'vue';
type info = {
  id: number;
  name?: string;
  age?: number;
  sex?: string;
  phone?: string;
  address?: string;
};
const useInfoStore = defineStore('useInfo', () => {
  let item = ref([
    {
      id: 1,
      name: '张三',
      age: 18,
      sex: '男',
      phone: '123456789',
      address: '北京市',
    },
    {
      id: 2,
      name: '李四',
      age: 20,
      sex: '女',
      phone: '987654321',
    },
  ]);
  const updateName = (id: number, name: string) => {
    item.value.forEach((i: info) => {
      if (i.id === id) {
        i.name = name;
      }
    });
  };
  let allName = computed(() => {
    return item.value.reduce((prev, next) => {
      return prev + next.name;
    }, '');
  });
  // 箭头函数必须返回一个对象,对象中的数据可以提供给各个组件使用
  return {
    item,
    allName,
    updateName,
  };
});
export { useInfoStore };
组件中引用useInfoStore共享对象:
<script setup lang="ts">
import { useInfoStore } from "../../store/modules/useInfo";
const infoStore = useInfoStore();
const updateName = () => {
  infoStore.updateName(1, "李四");
};
</script>

<template>
  <div class="son2">
    <div class="title">我是子组件2</div>
    <div>获取组合式store数据: {{ infoStore.item[0].name }}</div>
    <div>更新组合式store数据: <button @click="updateName">更新</button></div>
    {{ infoStore.allName }}
  </div>
</template>
注意
创建的store对象时,参数ID值全局不能重复,否则无法成功创建store对象
例如: const infoStore = defineStore('info', {}),info是store的ID值,全局不能重复,否则不能成功创建
插槽
插槽: 父组件中的模板内容填充子组件插槽位置,这个过程中父组件可以向子组件进行通信。
父组件:
<script setup lang="ts">
import SlotDefault from "./SlotDefault.vue";
import SlotName from "./SlotName.vue";
</script>
<template>
<div>
<SlotDefault>
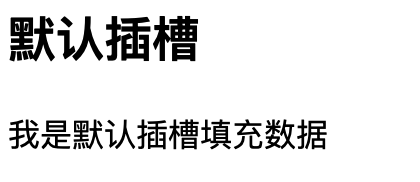
<p>我是默认插槽填充数据</p>
</SlotDefault>
<hr />
<SlotName>
<!-- <template #header>
<h1>标题</h1>
</template> -->
<template v-slot:header>
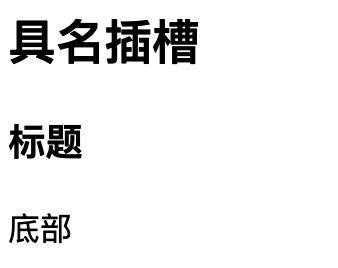
<h3>标题</h3>
</template>
<template #footer>
<p>底部</p>
</template>
</SlotName>
<hr />
</div>
</template>
默认插槽
子组件定义默认插槽:
<script lang="ts" setup></script>
<template>
  <div>
    <h2>默认插槽</h2>
    <slot></slot>
  </div>
</template>
具名插槽
子组件定义具名插槽:
<script lang="ts" setup></script>
<template>
  <div>
    <h2>具名插槽</h2>
    <slot name="header"></slot>
    <slot name="footer"></slot>
  </div>
</template>
子组件使用name属性定义插槽名称,父组件使用v-slot指令: <template v-slot:name>将模板中的内容填充到指定插槽中,
v-slot:name指令缩写形式: #name。
作用域插槽
作用域插槽: 子组件中的插槽可以像props一样将该组件中的数据传递给父组件,父组件接收到数据处理模板场景,从而实现相同的插槽由父组件决定填充不同的模板。
子组件定义插槽并传递数据给父组件:
<script lang="ts" setup>
import { ref } from "vue";
let users = ref([
  { name: "张三", age: 18, sex: 1, size: 15 },
  { name: "李四", age: 19, sex: 0, size: 17 },
  { name: "王五", age: 20, sex: 1, size: 20 },
]);
</script>
<template>
  <div>
    <h2>作用域插槽</h2>
    <ul>
      <li v-for="user in users" :key="user.name">
        <slot :user="user"></slot>
      </li>
    </ul>
  </div>
</template>
父组件使用v-slot指令接收子组件传递的props数据:
<script setup lang="ts">
import SlotScop from "./SlotScop.vue";

</script>
<template>
    <SlotScop>
      <template v-slot="{user}">
        <p :style="{fontSize: user.size + 'px'}" >{{user}}</p>
      </template>
    </SlotScop>
  </div>
</template>

具名作用域插槽
具名作用域插槽的工作方式也是类似的,插槽props可以作为v-slot指令的值被访问到:v-slot:name="slotProps"
<template #footer="footerProps">
  {{ footerProps }}
</template>

 浙公网安备 33010602011771号