Udemy - Nuxt JS with Laravel API - Building SSR Vue JS Apps 笔记8 Nuxt - Deployment
Deploy Static Site to Firebase Hosting
官方文档: https://nuxtjs.org/guide/commands
先示例 https://nuxtjs.org/guide/commands#static-generated-deployment-pre-rendered-
需要注意的是,静态站点不能使用nuxtServerInit方法,所以,store/index.js需要先配置修改为:
import axios from 'axios';
//create a store
export const state = () => ({
  posts: [],
});

//getters
export const getters = {
  posts(state) {
    return state.posts;
  },
}


//mutations
export const mutations = {
  SET_POSTS(state, posts) {
    state.posts = posts;
  },
}

//actions
export const actions = {
  setPosts({commit}, posts) {
    commit("SET_POSTS", posts);
  },
  // async nuxtServerInit({commit}) {
  //   let {data} = await axios.get('https://jsonplaceholder.typicode.com/posts');
  //   commit('SET_POSTS', data);
  // }
}
pages/posts/index.vue修改为:
<template>
  <div>
    <h2>Making API request - the Vue way</h2>
    <div class="container row">
      <Card class="ml-auto mr-auto" v-for="post in posts" :key="post.id" :post="post"></Card>
      <button class="btn btn-danger" v-scroll-to="'body'">Back to Top</button>
    </div>
  </div>
</template>

<script>
  import axios from 'axios';
  import Card from "../../components/Card";

  import {mapGetters} from 'vuex';

  export default {
    name: "index.vue",
    components: {
      Card,
    },
    // data() {
    //   return {
    //     posts: [],
    //   }
    // },
    computed: {
      ...mapGetters(['posts']),
      // allPosts() {
      //   return this.$store.getters.posts;
      // }
    },
    // mounted() {
    //   axios.get('https://jsonplaceholder.typicode.com/todos')
    //     .then(response => {
    //       console.log(response);
    //       this.posts = response.data;
    //     })
    //     .catch(function (error) {
    //       console.log(error);
    //     })
    // },
    // async asyncData(context) {
    //   let {data} = await axios.get('https://jsonplaceholder.typicode.com/posts');
    //   return {posts: data};
    // },

    // async asyncData({store}) {
    //   let {data} = await axios.get('https://jsonplaceholder.typicode.com/posts');
    //   store.dispatch('setPosts', data);
    // },
    async fetch({store}) {
      let {data} = await axios.get('https://jsonplaceholder.typicode.com/posts');
      store.dispatch('setPosts', data);
    },
    head: {
      title: 'List of posts',
    }
  }
</script>

<style scoped>

</style>
接下来执行:
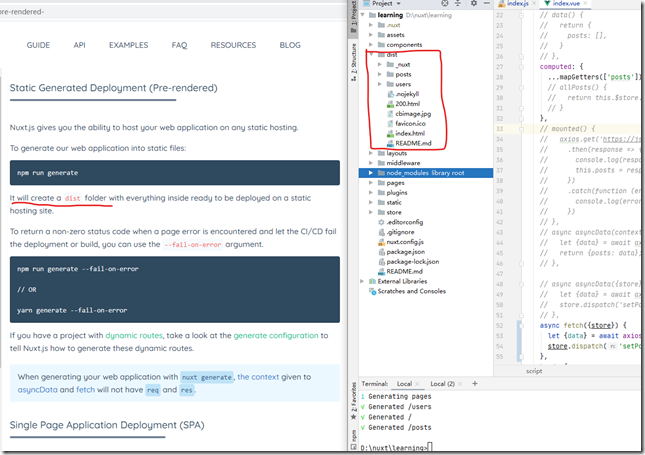
npm run generate
完成后,会生成dist文件夹:
现在可以发布到firebase了。
注册gmail开启firebase服务过程略,firebase是免费的。
步骤可以参考 https://firebase.google.com/docs/hosting/quickstart
参考https://firebase.google.com/docs/cli#mac-linux-npm安装Firebase CLI ,执行:
npm install -g firebase-tools
安装完成后 登录到firebase 执行:
firebase login
登录成功后
参考 https://firebase.google.com/docs/hosting/quickstart 执行【在firebase root即根目录执行】
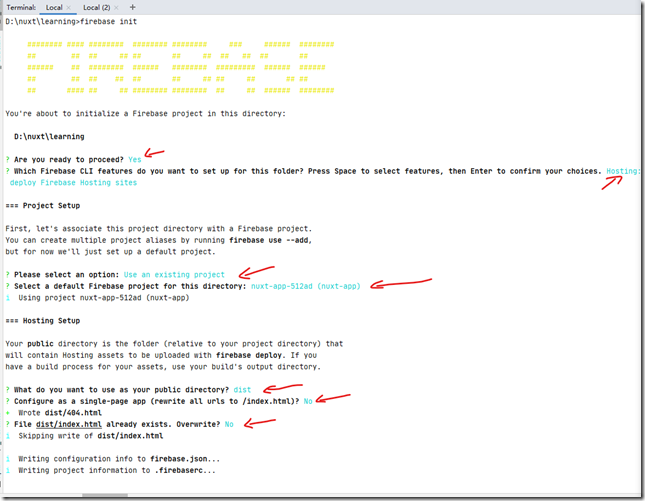
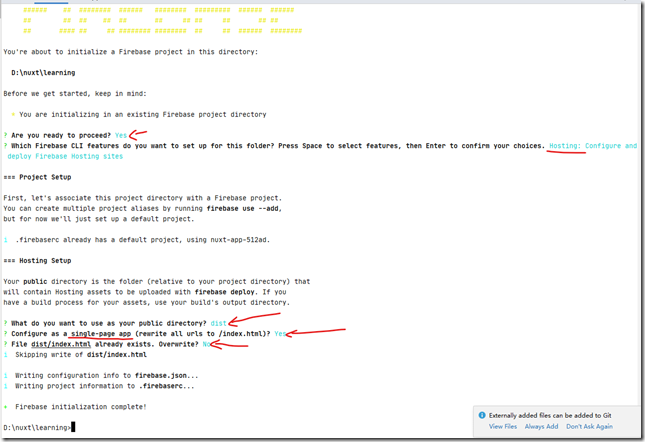
firebase init
如果事先创建了app就按照自己需要选择;
目录选择dist,因为nuxt静态站生成的是dist目录。
接下来发布,执行:
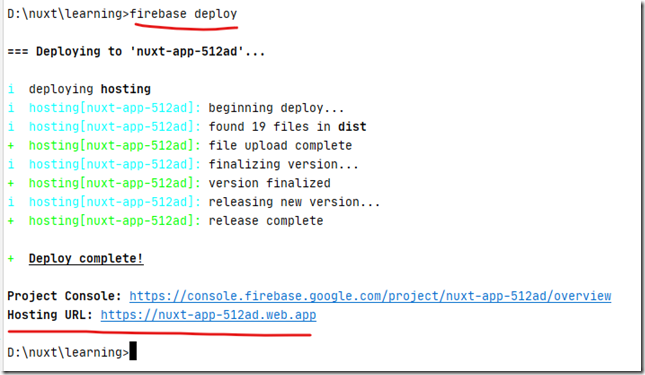
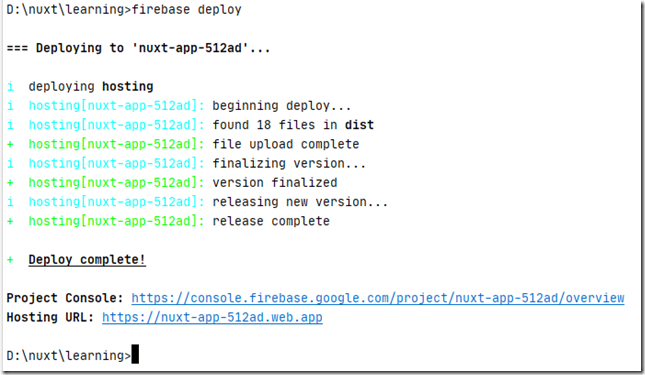
firebase deploy
完成后按照提示,站点URL:
打开 https://nuxt-app-512ad.web.app/ 效果:
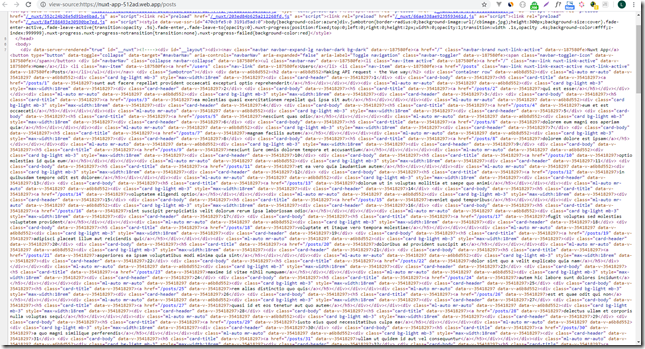
静态站查看page source
同样也是SEO友好的。
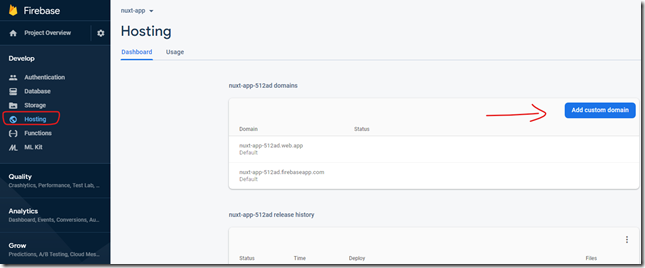
如果需要使用自己的域名:
Deploy SPA to Firebase Hosting
上面是静态站,这次是SPA,SPA也不会用到nuxtServerInit方法,所以上面的代码改动保留。
nuxt.config.js需要改一下:
export default {
  mode: 'spa',
  /*
  ** Headers of the page
  */
  head: {
    title: process.env.npm_package_name || '',
    meta: [
      {charset: 'utf-8'},
      {name: 'viewport', content: 'width=device-width, initial-scale=1'},
      {hid: 'description', name: 'description', content: process.env.npm_package_description || ''}
    ],
    link: [
      {rel: 'icon', type: 'image/x-icon', href: '/favicon.ico'},
      {rel: 'stylesheet', href: "https://stackpath.bootstrapcdn.com/bootstrap/4.4.1/css/bootstrap.min.css"}
    ],
    script: [
      {
        src: "https://code.jquery.com/jquery-3.4.1.slim.min.js",
        type: "text/javascript",
      },
      {
        src: "https://cdn.jsdelivr.net/npm/popper.js@1.16.0/dist/umd/popper.min.js",
        type: "text/javascript",
      },
      {
        src: "https://stackpath.bootstrapcdn.com/bootstrap/4.4.1/js/bootstrap.min.js",
        type: "text/javascript",
      },
    ]
  },
  /*
  ** Customize the progress-bar color
  */
  loading: {color: '#fff'},
  /*
  ** Global CSS
  */
  css: [
    '@/assets/styles/main.css',
  ],

  transition: {
    name: 'fade',
    mode: 'out-in',
  },
  /*
  ** Plugins to load before mounting the App
  */
  plugins: [
    '@/plugins/scrollto.js',
    // '@/plugins/vueselect.js',
    {
      src: "@/plugins/vueselect.js",
      ssr: false,//SSR服务端渲染为false
    }
  ],
  /*
  ** Nuxt.js dev-modules
  */
  buildModules: [],
  /*
  ** Nuxt.js modules
  */
  modules: [],
  /*
  ** Build configuration
  */
  build: {
    /*
    ** You can extend webpack config here
    */
    extend(config, ctx) {
    }
  }
}
参考 https://nuxtjs.org/guide/commands#single-page-application-deployment-spa- 执行:
npm run build
然后发布的流程和上面一样,
新建一个project,然后执行:
因为已经安装了firebase也已经登录所以省略这两个执行代码,接下来
firebase init
然后执行发布命令:
firebase deploy
发布成功后:
效果如下:
源代码:
https://github.com/dzkjz/nuxt-learning-lesson
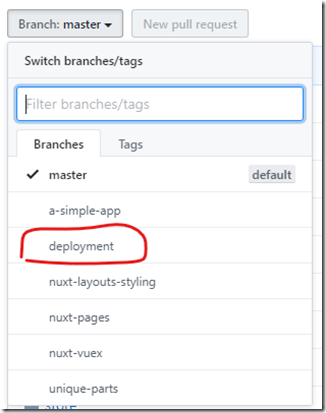
branch选择deployment:






 浙公网安备 33010602011771号