( 三十二 )、SpringBoot 自定义 Starter
( 三十二 )、SpringBoot 自定义 Starter
1、简介
Springboot是有提供了很多starter的,starter翻译过来可以理解为场景启动器,所谓场景启动器配置了自动配置等等对应业务模块的一个工程,有需要时候直接引入项目就可以,比如需要使用rabbitMQ,直接引入spring-boot-starter-activemq既可,详细介绍可以参考Springboot官方文档关于starters的介绍、自定义Starter官网介绍。
您的 starter 都必须直接或间接引用核心 Spring Boot starter ( spring-boot-starter)(如果您的 starter 依赖于另一个 starter,则无需添加它)。
Stater命名规范:
- SpringBoot官方的starter命名要定义为:spring-boot-starter-*
- 自定义或者说第三方的要命名为: thirdpartyproject-spring-boot-starter
2、自定义Starter 示例
新建一个没有过多依赖的SpringBoot工程,spring-boot-starter必须引入,其它的可以Junit可以去掉,application类等等都不用,建议先新建一个Empty project,再引入对应配置的方式进行工程创建
1、pom.xml参考:
<?xml version="1.0" encoding="UTF-8"?>
<project xmlns="http://maven.apache.org/POM/4.0.0" xmlns:xsi="http://www.w3.org/2001/XMLSchema-instance"
         xsi:schemaLocation="http://maven.apache.org/POM/4.0.0 https://maven.apache.org/xsd/maven-4.0.0.xsd">
    <modelVersion>4.0.0</modelVersion>
    <parent>
        <groupId>org.springframework.boot</groupId>
        <artifactId>spring-boot-starter-parent</artifactId>
        <version>2.2.1.RELEASE</version>
        <relativePath/> <!-- lookup parent from repository -->
    </parent>
    <groupId>com.example.springboot</groupId>
    <artifactId>custom-spring-boot-starter-autoconfigurer</artifactId>
    <version>0.0.1-SNAPSHOT</version>
    <name>custom-spring-boot-starter-autoconfigurer</name>
    <description>Demo project for Spring Boot</description>

    <properties>
        <java.version>1.8</java.version>
    </properties>

    <dependencies>
        <dependency>
            <groupId>org.springframework.boot</groupId>
            <artifactId>spring-boot-starter</artifactId>
        </dependency>

    </dependencies>


</project>
2、模仿其它starter,新建Properties配置类:
@ConfigurationProperties(prefix = "custom.hello")
public class HelloProperties {
    private String prefix;
    private String suffix;

    public String getPrefix() {
        return prefix;
    }

    public void setPrefix(String prefix) {
        this.prefix = prefix;
    }

    public String getSuffix() {
        return suffix;
    }

    public void setSuffix(String suffix) {
        this.suffix = suffix;
    }
}
3、编写业务测试类:
public class HelloService {

    HelloProperties helloProperties;

    public HelloProperties getHelloProperties() {
        return helloProperties;
    }

    public void setHelloProperties(HelloProperties helloProperties) {
        this.helloProperties = helloProperties;
    }

    public String sayHello(String name){
        return helloProperties.getPrefix()+"-"+name+helloProperties.getSuffix();
    }
}
4、编写自定义的自动配置类:
@Configuration
@ConditionalOnWebApplication
@EnableConfigurationProperties(HelloProperties.class)
public class HelloServiceAutoConfiguration {

    @Autowired
    HelloProperties helloProperties;

    @Bean
    public HelloService helloService(){
        HelloService helloService = new HelloService();
        helloService.setHelloProperties(helloProperties);
        return helloService;
    }
}
5、配置生效
starter集成应用有两种方式:
1、被动生效:其他springboot项目集成该Starter的包后自动生效。
在 resource 目录下新建: META-INF/spring.factories,然后加入如下配置,自动配置类才可以被扫描到(注意:记得去掉前后的空格, 否则不生效)。
org.springframework.boot.autoconfigure.EnableAutoConfiguration=\
  com.example.springboot.starter.HelloServiceAutoConfiguration
2、主动生效
在starter组件集成到我们的Spring Boot应用时需要主动声明启用该starter才生效,通过自定义一个@EnableCustomStarter注解然后在把自动配置类通过Import注解引入进来。
@Target({ElementType.TYPE})
@Retention(RetentionPolicy.RUNTIME)
@Documented
@Import({HelloServiceAutoConfiguration.class})
public @interface EnableCustomStarter {
}
starter就创建好了。
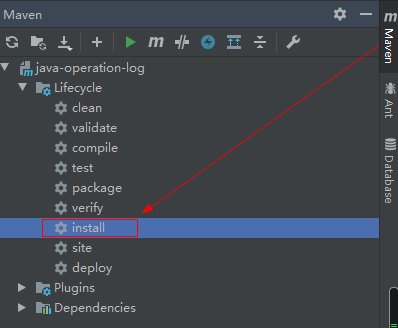
6、打包项目
执行命令: mvn clean install 或使用 idea 工具打包:
7、新建一个项目测试
新建一个web工程来实践,如图maven配置,引入custom-spring-boot-starter-autoconfigurer依赖
<dependencies>
        <dependency>
            <groupId>org.springframework.boot</groupId>
            <artifactId>spring-boot-starter-web</artifactId>
        </dependency>
        <dependency>
            <groupId>com.example.springboot</groupId>
            <artifactId>custom-spring-boot-starter-autoconfigurer</artifactId>
            <version>0.0.1-SNAPSHOT</version>
        </dependency>
</dependencies>
新建一个接口测试一下即可:
@Autowired
    HelloService helloService;

@GetMapping(value = {"/sayHello/{name}"})
    @ResponseBody
    public String sayHello(@PathVariable("name")String name){
        return helloService.sayHello(name);
    }
3、注意事项
自定义Stater 项目一般不需要启动类,如果需要启动类,打包后的项目会在BOOT-INF目录下, 会导致找不到类。打包插件作如下修改:
<plugin>
    <groupId>org.springframework.boot</groupId>
    <artifactId>spring-boot-maven-plugin</artifactId>
       <configuration>
         <classifier>exec</classifier>
       </configuration>
</plugin>
如果不需要启动类, 请不要添加 该Maven 插件到 pom 文件中, 否则打包时会报错:找不到主类。

 浙公网安备 33010602011771号