1、基本概念
为了方便管理和集成jenkins,k8s、harbor、jenkins均使用openLDAP统一认证。
2、部署openLDAP
此处将openLDAP部署在k8s上,openLDAP可以在集群之外存在,不一定非要在k8s上部署openLDAP。
根据之前的文档,openLDAP使用GFS进行数据持久化。
下载对应的openLDAP文件
git clone https://github.com/dotbalo/k8s.git
cd k8s/openldap
创建openLDAP
[root@k8s-master01 openldap]# kubectl apply -f .
deployment.extensions/ldap created
persistentvolumeclaim/openldap-data created
secret/ldap-secret created
service/ldap-service created
deployment.extensions/phpldapadmin created
service/phpldapadmin created
此处参考的是:https://github.com/osixia/docker-openldap,更新DN可以更改environment下的yaml文件,默认的example.org
创建ldap-ui-ingress
[root@k8s-master01 traefik]# kubectl create -f traefik-ldap.yaml
ingress.extensions/ldap-ui created
[root@k8s-master01 traefik]# cat traefik-ldap.yaml
apiVersion: extensions/v1beta1
kind: Ingress
metadata:
  name: ldap-ui
  namespace: public-service
  annotations:
    kubernetes.io/ingress.class: traefik
spec:
  rules:
  - host: ldap.xxx.net
    http:
      paths:
      - backend:
          serviceName: phpldapadmin
          servicePort: 8080
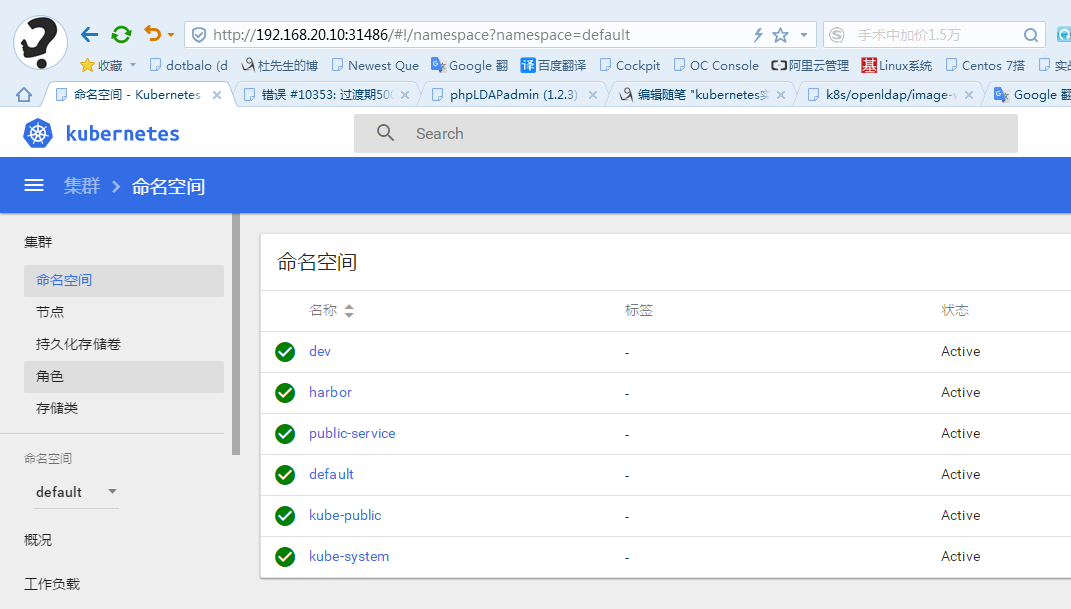
3、查看验证
[root@k8s-master01 openldap]# kubectl get po,svc,pvc -n public-service | grep ldap
pod/ldap-944645448-pqj8b            1/1       Running   0          4m
pod/phpldapadmin-6c99c76cb6-knmpf   1/1       Running   0          4m

service/glusterfs-dynamic-openldap-data   ClusterIP   10.111.198.83    <none>        1/TCP             3m
service/ldap-service                      ClusterIP   10.98.153.44     <none>        389/TCP,636/TCP   4m
service/phpldapadmin                      ClusterIP   10.109.141.207   <none>        8080/TCP          4m

persistentvolumeclaim/openldap-data                              Bound     pvc-f251128b-ec17-11e8-8a89-000c293ad492   1Gi        RWX            gluster-heketi                4m
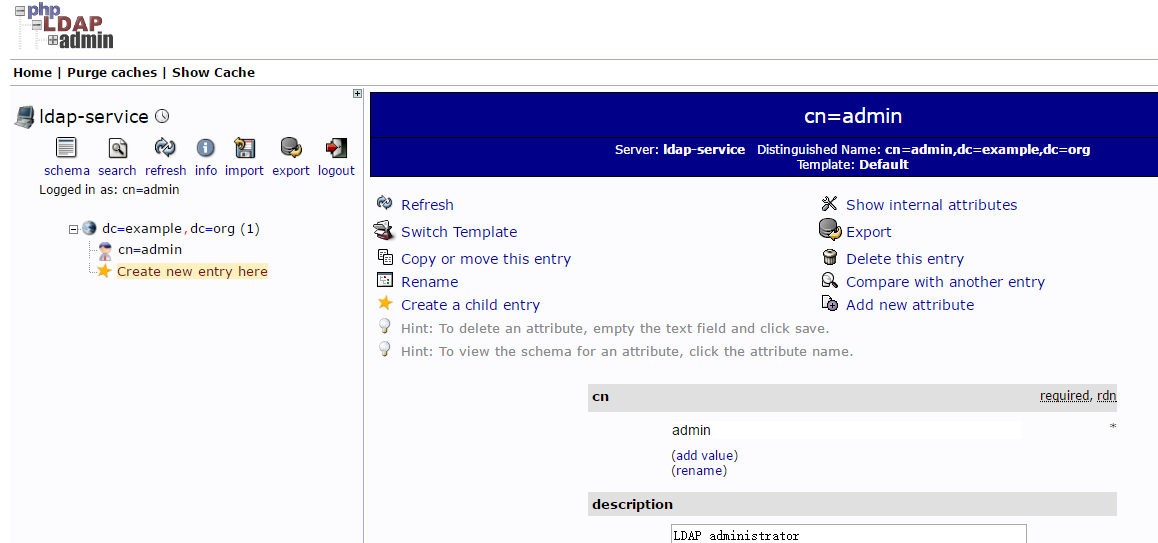
访问phpldapadmin:ldap.xxx.net

默认DN:cn=admin,dc=example,dc=org,默认Password:admin(线上系统需自定义修改)
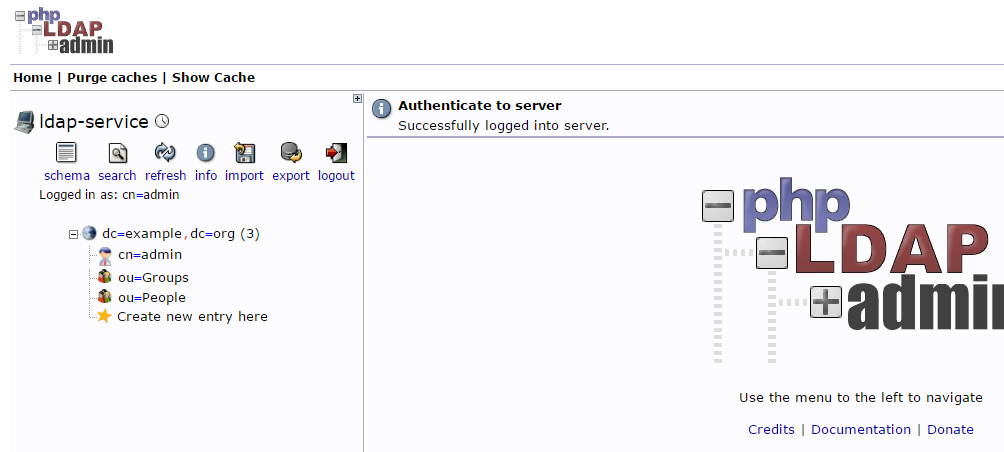
登录成功如下:
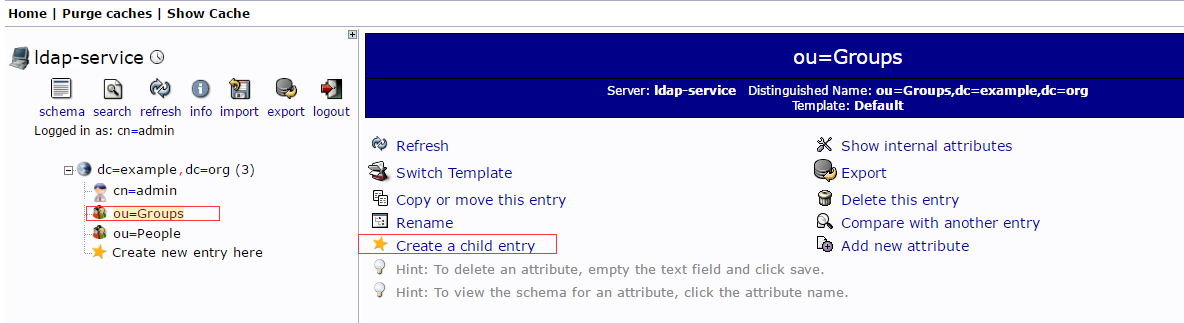
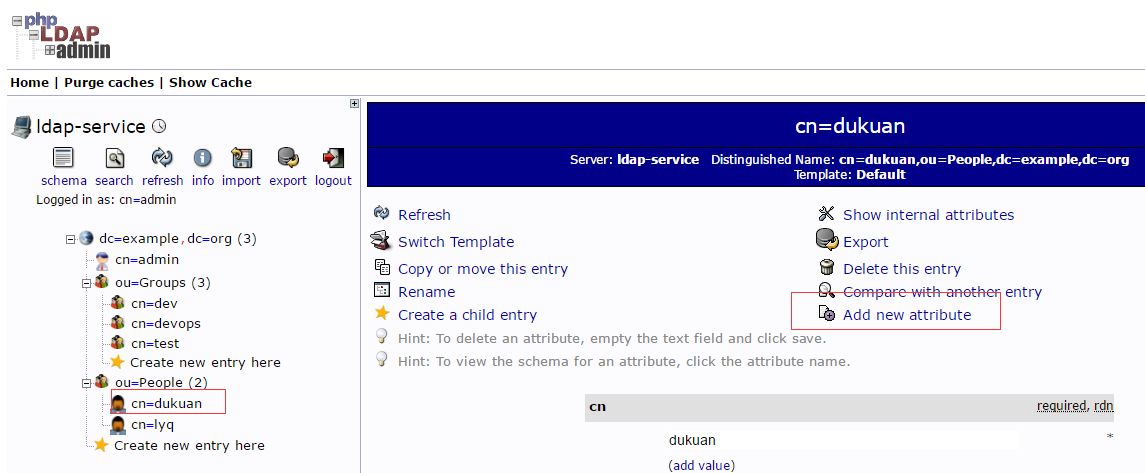
4、添加用户和组
创建Groups和People OU


相同方式创建Groups
创建组和用户
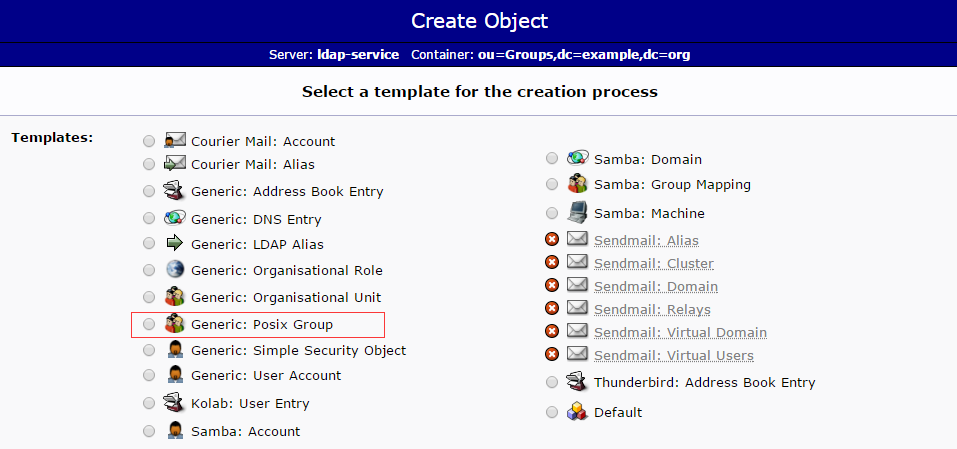
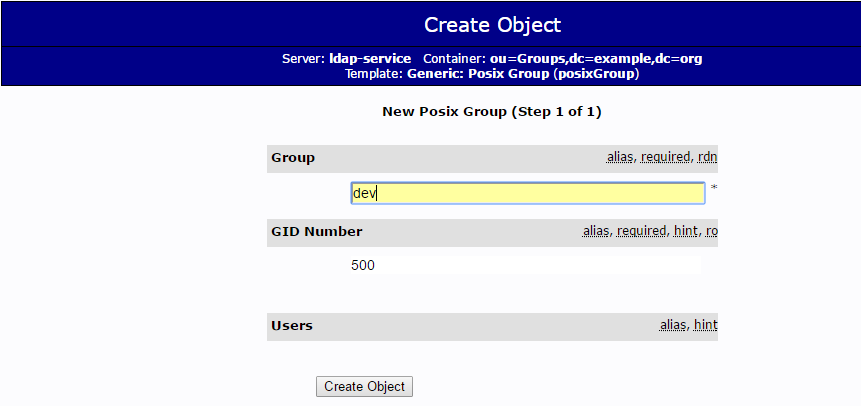
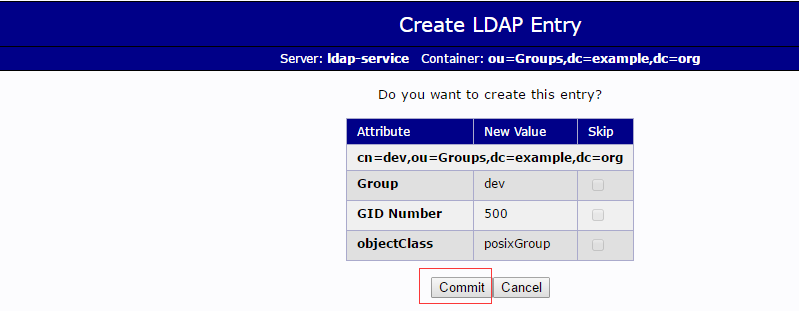
相同方式创建测试组,devops组
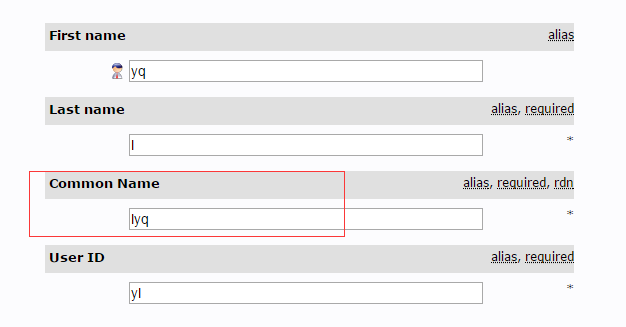
创建用户


填写基本信息,选择组和Login Shell
注意修改Common Name

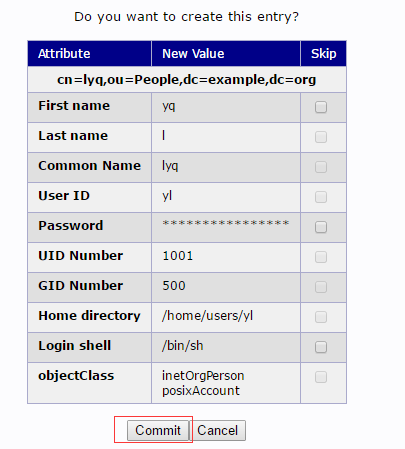
为每个用户添加Email,没有Email无法登陆gitlab


5、配置k8s使用ldap登录
PS:由于当时提交代码时忘记提交k8s-ldap目录,导致此目录已丢失。以下操作可以直接直接修改dotbalo/k8s-nginx-ldap镜像里面的nginx配置文件,然后自行创建deployment文件即可。
修改openldap/k8s-ldap的nginx配置,server为k8s dashboard的地址

制作镜像
[root@k8s-master01 k8s-ldap]# docker build -t dotbalo/k8s-nginx-ldap .
Sending build context to Docker daemon 22.02 kB
Step 1/10 : FROM python:2-alpine
 ---> f901fc789b69
Step 2/10 : COPY nginx-ldap-auth-daemon.py /usr/src/app/
 ---> Using cache
 ---> 2c09e174dc92
Step 3/10 : WORKDIR /usr/src/app/
 ---> Using cache
 ---> 80b2344aff04
Step 4/10 : RUN apk --no-cache add openldap-dev &&     apk --no-cache add --virtual build-dependencies build-base &&     pip install python-ldap &&     apk del build-dependencies
 ---> Using cache
 ---> 562bd91f40e4
Step 5/10 : ENV NGINX_VERSION 1.14.1
 ---> Using cache
 ---> ebeed109cb40
Step 6/10 : RUN set -x  && mkdir -p       /tmp/src/nginx       /usr/lib/nginx/modules       /var/cache/nginx  && apk add --no-cache --virtual .build-deps       curl       gcc       gd-dev       geoip-dev       gnupg       libc-dev       libxslt-dev       linux-headers       make       openldap-dev       pcre-dev       tar       unzip       zlib-dev  && curl -fsSL http://nginx.org/download/nginx-${NGINX_VERSION}.tar.gz | tar vxz --strip=1 -C /tmp/src/nginx  && curl -fsSL https://github.com/kvspb/nginx-auth-ldap/archive/master.zip -o /tmp/nginx-auth-ldap-master.zip  && unzip -d /tmp/src /tmp/nginx-auth-ldap-master.zip  && cd /tmp/src/nginx  && addgroup -S nginx  && adduser -D -S -h /var/cache/nginx -s /sbin/nologin -G nginx nginx  && ./configure     --prefix=/usr/share/nginx     --sbin-path=/usr/sbin/nginx     --modules-path=/usr/lib/nginx/modules     --conf-path=/etc/nginx/nginx.conf     --error-log-path=/var/log/nginx/error.log     --http-log-path=/var/log/nginx/access.log     --pid-path=/var/run/nginx.pid     --lock-path=/var/run/nginx.lock     --http-client-body-temp-path=/var/cache/nginx/client_temp     --http-proxy-temp-path=/var/cache/nginx/proxy_temp     --http-fastcgi-temp-path=/var/cache/nginx/fastcgi_temp     --http-uwsgi-temp-path=/var/cache/nginx/uwsgi_temp     --http-scgi-temp-path=/var/cache/nginx/scgi_temp     --user=nginx     --group=nginx     --with-http_ssl_module     --with-http_realip_module     --with-http_addition_module     --with-http_sub_module     --with-http_dav_module     --with-http_flv_module     --with-http_mp4_module     --with-http_gunzip_module     --with-http_gzip_static_module     --with-http_random_index_module     --with-http_secure_link_module     --with-http_stub_status_module     --with-http_auth_request_module     --with-http_xslt_module=dynamic     --with-http_image_filter_module=dynamic     --with-http_geoip_module=dynamic     --with-threads     --with-stream     --with-stream_ssl_module     --with-stream_ssl_preread_module     --with-stream_realip_module     --with-stream_geoip_module=dynamic     --with-http_slice_module     --with-mail     --with-mail_ssl_module     --with-compat     --with-file-aio     --with-http_v2_module     --add-module=/tmp/src/nginx-auth-ldap-master  && make -j$(getconf _NPROCESSORS_ONLN)  && make install  && mkdir -vp       /etc/nginx/conf.d/       /usr/share/nginx/html/  && install -m644 html/index.html /usr/share/nginx/html/  && install -m644 html/50x.html /usr/share/nginx/html/  && ln -sf /dev/stdout /var/log/nginx/access.log  && ln -sf /dev/stderr /var/log/nginx/error.log  && apk add --no-cache --virtual .gettext gettext  && mv /usr/bin/envsubst /tmp/  && runDeps="$(     scanelf --needed --nobanner /usr/sbin/nginx /usr/lib/nginx/modules/*.so /tmp/envsubst       | awk '{ gsub(/,/, "\nso:", $2); print "so:" $2 }'       | sort -u       | xargs -r apk info --installed       | sort -u     )"  && apk add --no-cache --virtual .nginx-rundeps $runDeps  && apk del .build-deps  && apk del .gettext  && rm -fr     /etc/nginx/*.default     /tmp/*     /var/tmp/*     /var/cache/apk/*
 ---> Using cache
 ---> 3283f6c81d18
Step 7/10 : COPY start.sh /bin/
 ---> Using cache
 ---> c2204e898bb8
Step 8/10 : COPY nginx.conf /etc/nginx/
 ---> d99a904b384d
Removing intermediate container 5f086340c1e5
Step 9/10 : EXPOSE 8888
 ---> Running in 1b52b272eeda
 ---> 72825fcd8ea5
Removing intermediate container 1b52b272eeda
Step 10/10 : EXPOSE 8081
 ---> Running in fdce8ba84145
 ---> f4f3866e01b1
Removing intermediate container fdce8ba84145
Successfully built f4f3866e01b1
修改k8s-ldap的ldap-deployment.yaml镜像名称
[root@k8s-master01 k8s-ldap]# kubectl create -f ldap-deployment.yaml
[root@k8s-master01 k8s-ldap]# kubectl get po,svc -n public-service | grep k8s-nginx

pod/k8s-nginx-ldap-5c5bf9595d-8pqw2   1/1       Running   0          4m
service/k8s-nginx-ldap                    NodePort    10.100.70.192   <none>        8081:31486/TCP    14m
[root@k8s-master01 k8s-ldap]#
访问:IP:NODEPORT
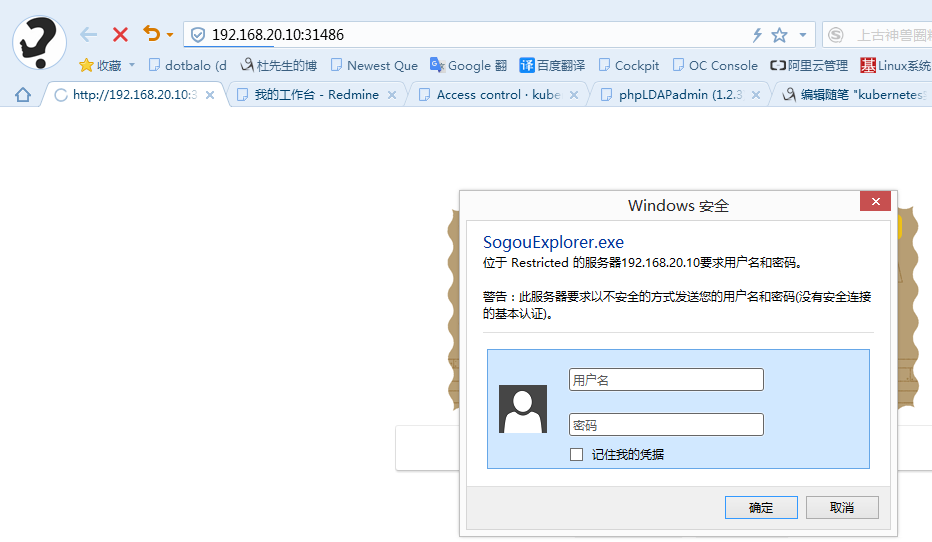
输入刚才创建的账号密码,注意此时是没有权限的
官网的解释如下
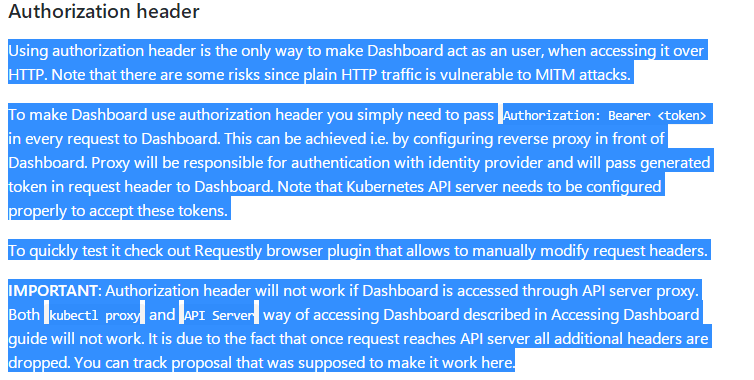
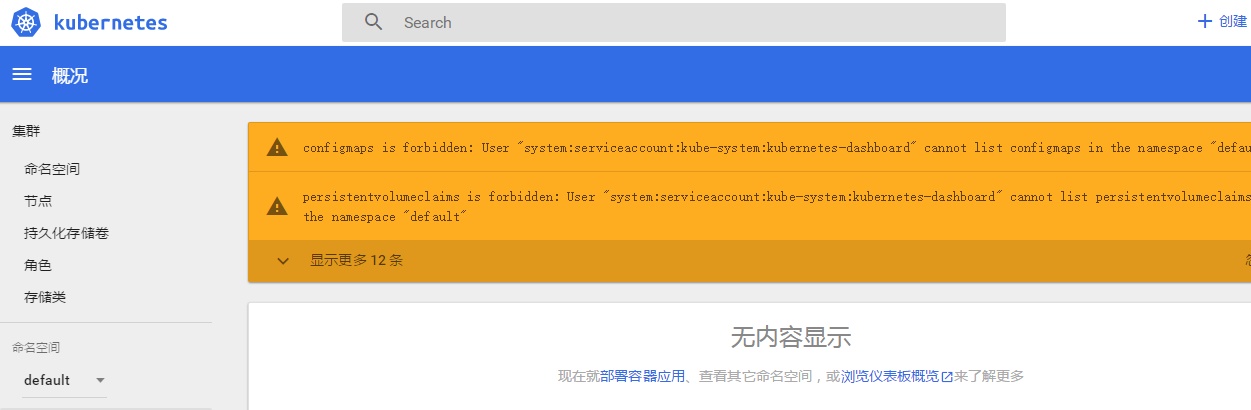
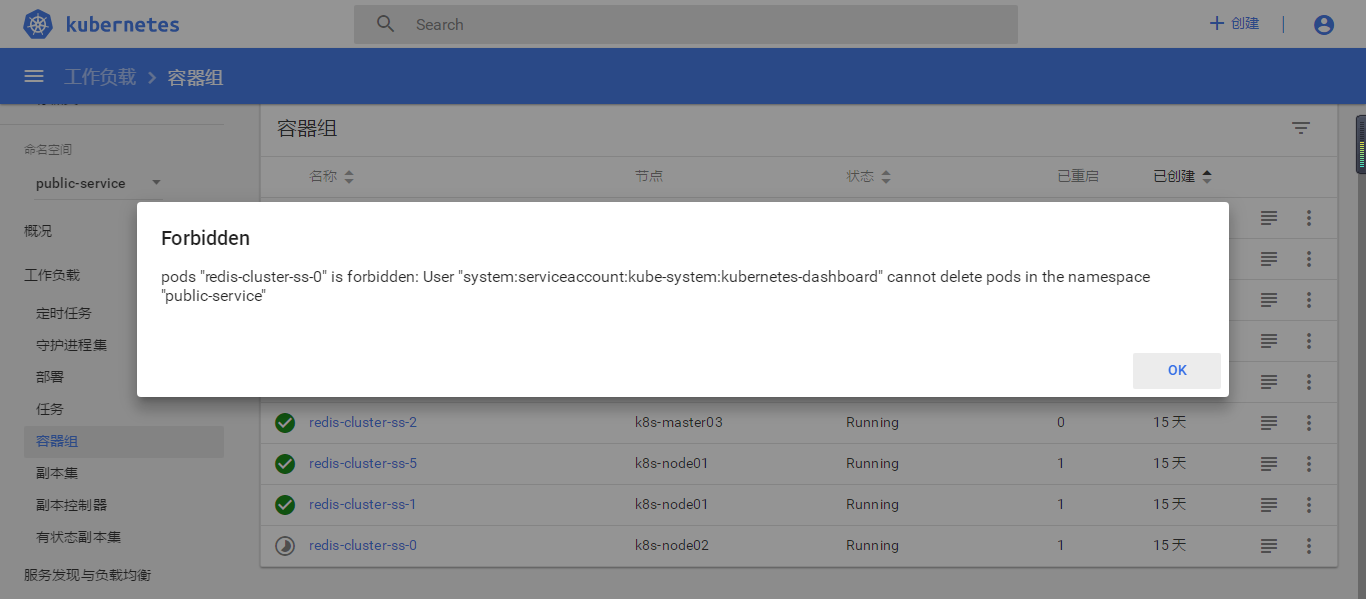
貌似所有的请求头都被清空,都变成了system:serviceaccount:kube-system:kubernetes-dashboard这个用户
6、授权访问
在k8s安装后,会自动创建一个有全局读权限的clusterrole:view,将此权限授权给system:serviceaccount:kube-system:kubernetes-dashboard用户
[root@k8s-master01 k8s-ldap]# kubectl create -f k8s-ldap-user-crb.yaml
clusterrolebinding.rbac.authorization.k8s.io/k8s-ldap-user created
创建完成后刷新dashboard,可以看到有了只读权限(secret和role没有权限)
7、总结
1) 与容器云相比,容器云的权限控制更为完善,可是实现基于用户的验证,可以区分openLDAP中不同的用户不同的权限,而k8s被统一成了kubernetes-dashboard这个用户,也有可能是自己没有配置成功,后期需要再次确认。
2) 可以限制openLDAP中的用户只访问某些namespace,需要自行定义权限。
3) 公司没有需要无需让非ops员工访问k8s。
4) k8s使用openLDAP登录非必须。
5) 网上也有大神使用schema登录的:https://icicimov.github.io/blog/virtualization/Kubernetes-LDAP-Authentication/,看了一下不是自己需要的。
参考:
https://github.com/osixia/
https://icicimov.github.io/blog/virtualization/Kubernetes-LDAP-Authentication/
https://github.com/nginxinc/nginx-ldap-auth.git
赞助作者: