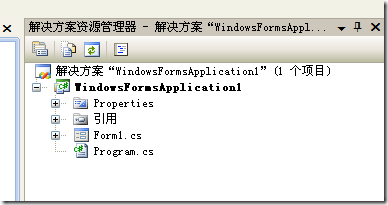
1,新建窗体应用程序,在解决方案资源管理器中,双击Program.cs文件。
2,打开Program.cs文件如下。
using System;
using System.Collections.Generic;
using System.Linq;
using System.Windows.Forms;

namespace WindowsFormsApplication1
{
    static class Program
    {
        /// <summary>
        /// 应用程序的主入口点。
        /// </summary>
        [STAThread]
        static void Main()
        {
            Application.EnableVisualStyles();
            Application.SetCompatibleTextRenderingDefault(false);
            Application.Run(new Form1());
        }
    }
}
3,可以看出这里是应用程序的入口点,将Main函数中的语句屏蔽,由自己来创建窗体。
using System;
using System.Collections.Generic;
using System.Linq;
using System.Windows.Forms;

namespace WindowsFormsApplication1
{
    static class Program
    {
        /// <summary>
        /// 应用程序的主入口点。
        /// </summary>
        [STAThread]
        static void Main()
        {
            Form myForm = new Form();
            myForm.Show();

            //Application.EnableVisualStyles();
            //Application.SetCompatibleTextRenderingDefault(false);
            //Application.Run(new Form1());
        }
    }
}
4,这时创建的为非模式窗体,闪一下就没了,因为Main函数已经返回,可以用模式的窗体试试看。
using System;
using System.Collections.Generic;
using System.Linq;
using System.Windows.Forms;

namespace WindowsFormsApplication1
{
    static class Program
    {
        /// <summary>
        /// 应用程序的主入口点。
        /// </summary>
        [STAThread]
        static void Main()
        {
            Form myForm = new Form();
            myForm.ShowDialog();

            //Application.EnableVisualStyles();
            //Application.SetCompatibleTextRenderingDefault(false);
            //Application.Run(new Form1());
        }
    }
}
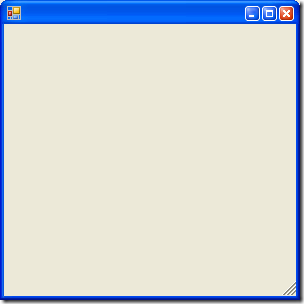
5,这时产生空白窗体,但Main函数阻塞,直到产生的窗体关闭。
6,为了让这个窗体在应用程序其余部分可以访问,我们将指定一个窗体作为主窗体。可以用System.Windows.Forms命名空间的Application对象的静态方法Run方法。
using System;
using System.Collections.Generic;
using System.Linq;
using System.Windows.Forms;

namespace WindowsFormsApplication1
{
    static class Program
    {
        /// <summary>
        /// 应用程序的主入口点。
        /// </summary>
        [STAThread]
        static void Main()
        {
            Form myForm = new Form();
            Application.Run(myForm);

            //Application.EnableVisualStyles();
            //Application.SetCompatibleTextRenderingDefault(false);
            //Application.Run(new Form1());
        }
    }
}
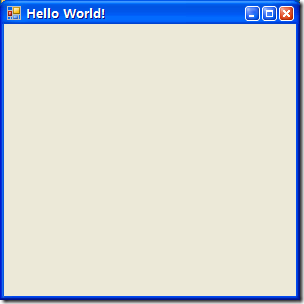
7,当然,还可以设置窗体的属性
代码:
using System;
using System.Collections.Generic;
using System.Linq;
using System.Windows.Forms;

namespace WindowsFormsApplication1
{
    static class Program
    {
        /// <summary>
        /// 应用程序的主入口点。
        /// </summary>
        [STAThread]
        static void Main()
        {
            Form myForm = new Form();
            myForm.Text = "Hello World!";
            Application.Run(myForm);

            //Application.EnableVisualStyles();
            //Application.SetCompatibleTextRenderingDefault(false);
            //Application.Run(new Form1());
        }
    }
}
运行结果:
8,一般的,可以自定义窗体派生自Form类,在这个派生类中初始化自身的属性
添加新类:
Class1.cs 代码:
using System;
using System.Collections.Generic;
using System.Linq;
using System.Text;
using System.Windows.Forms;

namespace WindowsFormsApplication1
{
    class Class1:Form
    {
        public Class1()
        {
            this.Text = "Hello World";
        }
    }
}
Program.cs 代码:
using System;
using System.Collections.Generic;
using System.Linq;
using System.Windows.Forms;

namespace WindowsFormsApplication1
{
    static class Program
    {
        /// <summary>
        /// 应用程序的主入口点。
        /// </summary>
        [STAThread]
        static void Main()
        {
            Form myForm = new Class1();
            Application.Run(myForm);

            //Application.EnableVisualStyles();
            //Application.SetCompatibleTextRenderingDefault(false);
            //Application.Run(new Form1());
        }
    }
}
运行结果同上例。
9,在窗体上添加一个按钮,并添加Click处理函数
Class1.cs 代码:
using System;
using System.Collections.Generic;
using System.Linq;
using System.Text;
using System.Windows.Forms;

namespace WindowsFormsApplication1
{
    class Class1:Form
    {
        public Class1()
        {
            this.Text = "Hello World";
            Button button = new Button();
            button.Text = "Click Me";
            button.Click += new EventHandler(button_Click);
            this.Controls.Add(button);
        }
        void button_Click(object sender, EventArgs e)
        {
            MessageBox.Show("Hello World!");
        }
    }
}
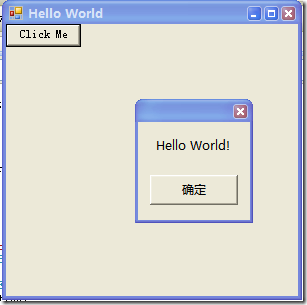
运行结果:点击按钮,弹出 Hello World 字样的消息框。
以上代码订阅事件部分可以简单的方式。如下代码:
using System;
using System.Collections.Generic;
using System.Linq;
using System.Text;
using System.Windows.Forms;

namespace WindowsFormsApplication1
{
    class Class1:Form
    {
        public Class1()
        {
            this.Text = "Hello World";
            Button button = new Button();
            button.Text = "Click Me";
            button.Click += button_Click;  //注意这里
            this.Controls.Add(button);
        }
        void button_Click(object sender, EventArgs e)
        {
            MessageBox.Show("Hello World!");
        }
    }
}
到此为止,都是手工方式书写代码,一般的,这些工作大部分都可以由IDE辅助完成。
10,现在可以使用IDE来完成,点击顶端具有闪电图标的Event按钮来打开对应的事件列表。找到希望处理的事件(如Click),输入事件触发式希望调用的函数的名称(如button_Click函数),然后按Enter键(注:如果只想默认指定函数名称,则不用输入直接双击空白处即可产生)。这样IDE就帮我们生成了事件处理的框架,如下:
private void button_Click(object sender, EventArgs e)
{
}
这样就可以添加事件的处理了。如果添加第二个Button的时候,可以同样可以再Click下拉列表中找到上面的处理函数,这样,两个Button可以共享同一个事件处理函数,而不用重新定义了,通过sender参数,可以确定到底是哪个Button的触发的事件。例子代码:
private void button_Click(object sender, EventArgs e)
{
    Button button = sender as Button; //必要的类型转换
    MessageBox.Show(button.Text + " was clicked!");
}
【END】


 浙公网安备 33010602011771号