图像阈值与平滑处理
- 阈值简介
ret, dst = cv2.threshold(src, thresh, maxval, type)

src: 输入图,只能输入单通道图像,通常来说为灰度图
thresh: 阈值
dst: 输出图
ret: 阈值
maxval: 当像素值超过了阈值 ( 或者小于阈值,根据 type 来决定 ),所赋予的值
type:二值化操作的类型,包含以下5种类型:
cv2.THRESH_BINARY 超过阈值部分取maxval ( 最大值 ),否则取0
cv2.THRESH_BINARY_INV THRESH_BINARY的反转
cv2.THRESH_TRUNC 大于阈值部分设为阈值,否则不变
cv2.THRESH_TOZERO 大于阈值部分不改变,否则设为0
cv2.THRESH_TOZERO_INV THRESH_TOZERO的反转
- 代码案例
import cv2 #opencv的缩写为cv2
import matplotlib.pyplot as plt # matplotlib库用于绘图展示
import numpy as np   # numpy数值计算工具包

# 魔法指令,直接展示图,Jupyter notebook特有
%matplotlib inline

img = cv2.imread('01_Picture/01_cat.jpg',cv2.IMREAD_COLOR)
img_gray = cv2.imread('01_Picture/01_cat.jpg',cv2.IMREAD_GRAYSCALE)
ret, thresh1 = cv2.threshold(img_gray, 127, 255, cv2.THRESH_BINARY)
print(ret)
ret, thresh2 = cv2.threshold(img_gray, 127, 255, cv2.THRESH_BINARY_INV) # THRESH_BINARY_INV 相对 THRESH_BINARY 黑的变成白的,白的变成黑的
print(ret)
ret, thresh3 = cv2.threshold(img_gray, 127, 255, cv2.THRESH_TRUNC)
print(ret)
ret, thresh4 = cv2.threshold(img_gray, 127, 255, cv2.THRESH_TOZERO)
print(ret)
ret, thresh5 = cv2.threshold(img_gray, 127, 255, cv2.THRESH_TOZERO_INV)
print(ret)

titles = ['original Image','BINARY','BINARY_INV','TRUNC','TOZERO','TOZERO_INV']
images = [img, thresh1, thresh2, thresh3, thresh4, thresh5]

for i in range(6):
    plt.subplot(2,3,i+1), plt.imshow(images[i],'gray')
    plt.title(titles[i])
    plt.xticks([]),plt.yticks([])
plt.show()
-
执行结果

-
平滑处理:均值滤波
import cv2 #opencv的缩写为cv2
import matplotlib.pyplot as plt # matplotlib库用于绘图展示
import numpy as np # numpy数值计算工具包
# 魔法指令,直接展示图,Jupyter notebook特有
%matplotlib inline
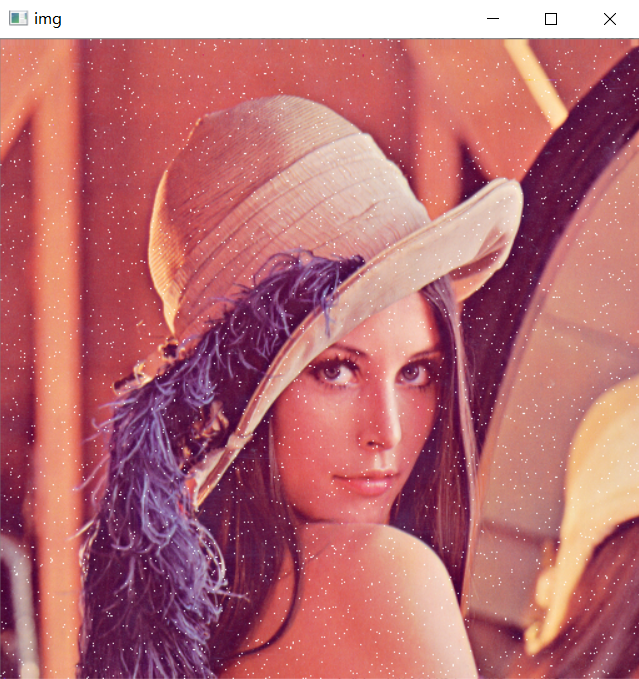
img = cv2.imread('01_Picture/04_LenaNoise.png')
cv2.imshow('img',img)
cv2.waitKey(0)
cv2.destroyAllWindows()
# 均值滤波
# 简单的平均卷积操作,方框中的值相加,取平均,替换掉中心204的值
blur = cv2.blur(img,(3,3)) # (3,3) 为核的大小,通常情况核都是奇数 3、5、7
cv2.imshow('blur',blur)
cv2.waitKey(0)
cv2.destroyAllWindows()
- 执行结果

- 方框滤波
# 方框滤波
# 基本和均值一样,可以选择归一化

# 在 Python 中 -1 表示自适应填充对应的值,这里的 -1 表示与颜色通道数自适应一样
box = cv2.boxFilter(img,-1,(3,3),normalize=True)  # 方框滤波如果做归一化,得到的结果和均值滤波一模一样
cv2.imshow('box',box)
cv2.waitKey(0)
cv2.destroyAllWindows()
- 执行结果

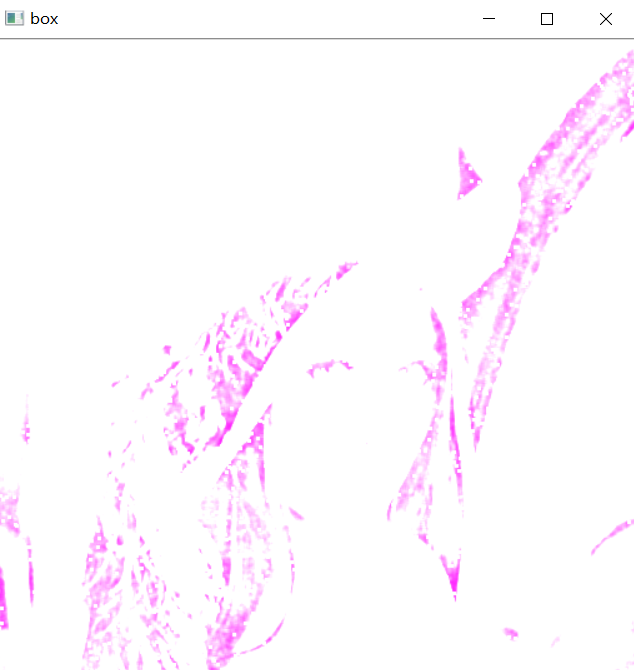
# 方框滤波
# 基本和均值一样,可以选择归一化,容易越界

box = cv2.boxFilter(img,-1,(3,3),normalize=False)  # 越界的值取 255
cv2.imshow('box',box)
cv2.waitKey(0)
cv2.destroyAllWindows()
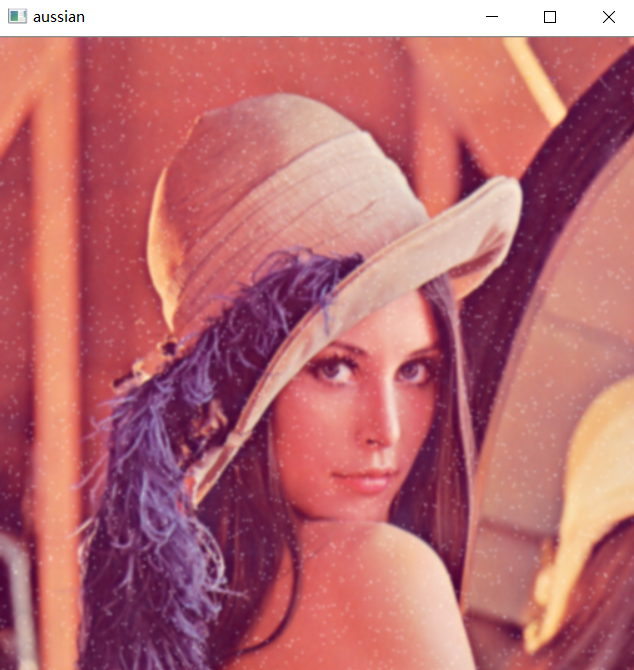
- 高斯滤波
# 高斯函数,越接近均值时,它的概率越大。
# 离中心值越近的,它的权重越大,离中心值越远的,它的权重越小。

aussian = cv2.GaussianBlur(img,(5,5),1)
cv2.imshow('aussian',aussian)
cv2.waitKey(0)
cv2.destroyAllWindows()
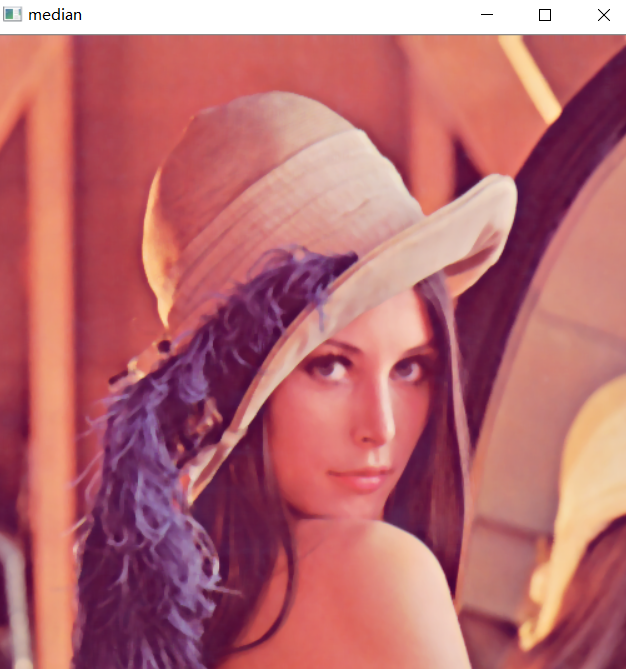
- 中值滤波
# 中值滤波
# 排序后拿中值替代中间元素值的大小

median = cv2.medianBlur(img,5)
cv2.imshow('median',median)
cv2.waitKey(0)
cv2.destroyAllWindows()
- 显示所有
# 展示所有的

res = np.hstack((blur,aussian,median)) # 矩阵横着拼接
#res = np.vstack((blur,aussian,median)) # 矩阵竖着拼接
print(res)
cv2.imshow('median vs average', res)
cv2.waitKey(0)
cv2.destroyAllWindows()
- 执行结果
[[[125 137 226]
  [128 137 225]
  [129 137 224]
  ...,
  [122 145 230]
  [110 130 221]
  [ 90  99 200]]

 [[125 137 226]
  [128 137 225]
  [129 137 224]
  ...,
  [122 145 230]
  [110 130 221]
  [ 90  99 200]]

 [[125 137 226]
  [128 137 225]
  [129 137 224]
  ...,
  [122 145 230]
  [110 130 221]
  [ 90  99 200]]

 ...,
 [[ 81  47 103]
  [ 81  50 106]
  [ 60  25  90]
  ...,
  [ 79  67 173]
  [ 79  67 174]
  [ 81  68 177]]

 [[ 80  47 102]
  [ 81  50 106]
  [ 74  26  90]
  ...,
  [ 81  70 177]
  [ 81  70 177]
  [ 81  71 179]]

 [[ 57  22  82]
  [ 59  25  87]
  [ 75  27  90]
  ...,
  [ 81  71 177]
  [ 81  71 179]
  [ 81  73 181]]]
点击查看详情


 浙公网安备 33010602011771号