阿里云配置
一、创建远程密钥
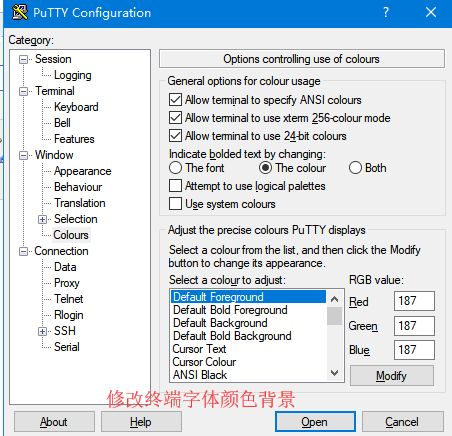
下载后利用puttygen工具将gem格式密钥转换成ppk格式,修改putty配置。


二、hostnamectl修改主机名为lancer
三、安装redis
wget http://download.redis.io/releases/redis-5.0.0.tar.gz
tar -zvxf redis-5.0.0.tar.gz
cd redis-5.0.0
make
3.1 配置redis.conf
将 bind 127.0.0.1 使用#注释掉,改为# bind 127.0.0.1(bind配置的是允许连接的ip,默认只允许本机连接;若远程连接需注释掉,或改为0.0.0.0)
将 protected-mode yes 改为 protected-mode no(3.2之后加入的新特性,目的是禁止公网访问redis cache,增强redis的安全性)
将 requirepass foobared 注释去掉,foobared为密码,也可修改为别的值(可选,建议设置)
3.2 设置iptables规则,允许外部访问6379端口
iptables -I INPUT 1 -p tcp -m state --state NEW -m tcp --dport 6379 -j ACCEPT
临时生效,重启后失效。若想永久生效,请参考另一篇文章:http://www.cnblogs.com/jinjiyese153/p/8600855.html
3.3 启动redis,并指定配置文件
./redis-server ../redis.conf
四、安装JDK1.8
下载jdk1.8.0_181.tar.gz解压即可
export JAVA_HOME=/usr/java/jdk1.8.0_181(为解压后的路径)
export PATH=$JAVA_HOME/bin:$PATH
export CLASSPATH=.:$JAVA_HOME/lib/dt.jar:$JAVA_HOME/lib
五、安装Mysql
1、官方安装文档
http://dev.mysql.com/doc/mysql-yum-repo-quick-guide/en/
2、下载 Mysql yum包
http://dev.mysql.com/downloads/repo/yum/
下载到本地再上传到服务器,或者使用wget 直接下载
wget http://repo.mysql.com/mysql57-community-release-el7-10.noarch.rpm
3、安转软件源
将platform-and-version-specific-package-name 替换为你下载的rpm名
sudo rpm -Uvh platform-and-version-specific-package-name.rpm
例如
rpm -Uvh mysql57-community-release-el7-10.noarch.rpm

4、安装mysql服务端
yum install -y mysql-community-server
如果网络环境不是很好,执行完命令就可以去泡杯茶🍵或者荣耀杀一局
5、启动mysql
service mysqld startsystemctl start mysqld.service
6、检查mysql 的运行状态
service mysqld statussystemctl status mysqld.service
7、修改临时密码
Mysql5.7默认安装之后root是有密码的。
7.1 获取MySQL的临时密码
为了加强安全性,MySQL5.7为root用户随机生成了一个密码,在error log中,关于error log的位置,如果安装的是RPM包,则默认是/var/log/mysqld.log。
只有启动过一次mysql才可以查看临时密码
grep 'temporary password' /var/log/mysqld.log

YdsGaxOq>2n!
7.2 登陆并修改密码
使用默认的密码登陆
mysql -uroot -p
用该密码登录到服务端后,必须马上修改密码,不然会报如下错误:
mysql> select @@log_error;
ERROR 1820 (HY000): You must reset your password using ALTER USER statement before executing this statement.
mysql>
修改密码
ALTER USER 'root'@'localhost' IDENTIFIED BY 'root123';
如果密码设置太简单出现以下的提示

如何解决ERROR 1819 (HY000): Your password does not satisfy the current policy requirements呢? 这里直接提供解决方案文末有详细的说明
必须修改两个全局参数:
首先,修改validate_password_policy参数的值
mysql> set global validate_password_policy=0;
再修改密码的长度
set global validate_password_length=1;
再次执行修改密码就可以了
ALTER USER 'root'@'localhost' IDENTIFIED BY 'root123';
8、授权其他机器登陆
GRANT ALL PRIVILEGES ON *.* TO 'root'@'%' IDENTIFIED BY 'mypassword' WITH GRANT OPTION;

FLUSH  PRIVILEGES;
9、关于密码设置的详细说明
ERROR 1819 (HY000): Your password does not satisfy the current policy requirements
六、安装OpenResty
附:./configure make make install 讲解
这些都是典型的使用GNU的AUTOCONF和AUTOMAKE产生的程序的安装步骤
一、基本信息
1、./configure 是用来检测你的安装平台的目标特征的。比如它会检测你是不是有CC或GCC,并不是需要CC或GCC,它是个shell脚本。
2、make 是用来编译的,它从Makefile中读取指令,然后编译。
3、make install是用来安装的,它也从Makefile中读取指令,安装到指定的位置。
注意:AUTOMAKE和AUTOCONF是非常有用的用来发布C程序的东西。
二、详细解释
1、configure命令
这一步一般用来生成 Makefile,为下一步的编译做准备,你可以通过在 configure 后加上参数来对安装进行控制,比如代码:./configure –prefix=/usr 意思是将该软件安装在 /usr 下面,执行文件就会安装在 /usr/bin (而不是默认的 /usr/local/bin),资源文件就会安装在 /usr/share(而不是默认的/usr/local/share)。同时一些软件的配置文件你可以通过指定 –sys-config= 参数进行设定。有一些软件还可以加上 –with、–enable、–without、–disable 等等参数对编译加以控制,你可以通过允许 ./configure –help 察看详细的说明帮助。

2、make
这一步就是编译,大多数的源代码包都经过这一步进行编译(当然有些perl或python编写的软件需要调用perl或python来进行编译)。如果 在 make 过程中出现 error ,你就要记下错误代码(注意不仅仅是最后一行),然后你可以向开发者提交 bugreport(一般在 INSTALL 里有提交地址),或者你的系统少了一些依赖库等,这些需要自己仔细研究错误代码。
可能遇到的错误:make *** 没有指明目标并且找不到 makefile。 停止。问题很明了,没有Makefile,怎么办,原来是要先./configure 一下,再make。
3、make insatll
这条命令来进行安装(当然有些软件需要先运行 make check 或 make test 来进行一些测试),这一步一般需要你有 root 权限(因为要向系统写入文件)。
三、扩展说明
Linux的用户可能知道,在Linux下安装一个应用程序时,一般先运行脚本configure,然后用make来编译源程序,在运行make install,最后运行make clean删除一些临时文件。使用上述三个自动工具,就可以生成configure脚本。运行configure脚本,就可以生成Makefile文件,然后就可以运行make、make install和make clean。
configure是一个shell脚本,它可以自动设定源程序以符合各种不同平台上Unix系统的特性,并且根据系统叁数及环境产生合适的Makefile文件或是C的头文件(header file),让源程序可以很方便地在这些不同的平台上被编译连接。
这时,就可运行configure脚本了,运行configure脚本,就可产生出符合GNU规范的Makefile文件了: $ ./configure
到此时,就可以运行make进行编译,在运行make install进行安装了,最后运行make clean删除临时文件。
$ make
$ make install           (注:运行这个要有足够的权限)
$ make clean
利用configure所产生的Makefile文件有几个预设的目标可供使用,其中几个重要的简述如下:
make all:产生我们设定的目标,即此范例中的可执行文件。只打make也可以,此时会开始编译原始码,然后连结,并且产生可执行文件。
make clean:清除编译产生的可执行文件及目标文件(object file,*.o)。
make distclean:除了清除可执行文件和目标文件外,把configure所产生的Makefile也清除掉。
make install:将程序安装至系统中。如果原始码编译无误,且执行结果正确,便可以把程序安装至系统预设的可执行文件存放路径。如果用bin_PROGRAMS宏的话,程序会被安装至/usr/local/bin这个目录。
make dist:将程序和相关的档案包装成一个压缩文件以供发布。执行完在目录下会产生一个以PACKAGE-VERSION.tar.gz为名称的文件。 PACKAGE和VERSION这两个变数是根据configure.in文件中AM_INIT_AUTOMAKE(PACKAGE,VERSION)的定义。在此范例中会产生test-1.0.tar.gz的档案。
make distcheck:和make dist类似,但是加入检查包装后的压缩文件是否正常。这个目标除了把程序和相关文件包装成tar.gz文件外,还会自动把这个压缩文件解开,执行 configure,并且进行make all 的动作,确认编译无误后,会显示这个tar.gz文件可供发布了。这个检查非常有用,检查过关的包,基本上可以给任何一个具备GNU开发环境-的人去重新编译。
下载
从下载页 Download下载最新的 OpenResty® 源码包,并且像下面的示例一样将其解压:
wget https://openresty.org/download/openresty-1.13.6.2.tar.gz
安装前的准备
必须将这些库 perl 5.6.1+, libpcre, libssl安装在您的电脑之中。 对于 Linux来说, 您需要确认使用 ldconfig 命令,让其在您的系统环境路径中能找到它们。
推荐您使用yum安装以下的开发库:
yum install pcre-devel openssl-devel gcc curl -y
安装
tar -zxvf openresty-1.13.6.2.tar.gz
cd openresty-1.13.6.2
./configure
make
make install
如果您的电脑支持多核 make 工作的特性, 您可以这样编译:
make -j2
默认, --prefix=/usr/local/openresty 程序会被安装到/usr/local/openresty目录。您可以指定各种选项,比如:
./configure --prefix=/opt/openresty \
            --with-luajit \
            --without-http_redis2_module \
            --with-http_iconv_module \
            --with-http_postgres_module
试着使用 ./configure --help 查看更多的选项。
配置
第一种常规配置方案
修改nginx.conf配置文件
cd /usr/local/openresty/nginx/conf
mv nginx.conf nginx.conf.$(date +%Y%m%d)
vim nginx.conf
worker_processes  1;
error_log logs/error.log;
events {
    worker_connections 1024;
}
http {
    server {
        listen 8080;
        location / {
            default_type text/html;
            content_by_lua '
                ngx.say("<p>hello, world</p>")
            ';
        }
    }
}
添加环境变量
echo "export PATH=$PATH:/usr/local/openresty/nginx/sbin" >> /etc/profile
source /etc/profile
然后启动openresty,启动命令和nginx一致。
nginx -c /usr/local/openresty/nginx/conf/nginx.conf
启动后查看一下服务
ps -ef | grep nginx
访问 Web 服务
curl http://localhost:8080/
如果一切正常,我们应该得到输出
<p>hello, world</p>
重启 Web 服务
nginx -s reload
第二种lua配置方案
添加lua.conf配置文件
server {
        listen 8080;
        location / {
            default_type text/html;
            content_by_lua '
                ngx.say("<p>hello, world Lua!</p>")
            ';
        }
    }
修改nginx.conf配置文件
cd /usr/local/openresty/nginx/conf
mv nginx.conf nginx.conf.$(date +%Y%m%d)
vim nginx.conf
worker_processes  1;
error_log logs/error.log;
events {
    worker_connections 1024;
}
http {
    #lua模块路径,多个之间”;”分隔,其中”;;”表示默认搜索路径,默认到/usr/servers/nginx下找
    lua_package_path "/usr/local/openresty/lualib/?.lua;;";  #lua模块
    lua_package_cpath "/usr/local/openresty/lualib/?.so;;";  #c模块
    include lua.conf; #lua.conf和nginx.conf在同一目录下
}
添加环境变量
echo "export PATH=$PATH:/usr/local/openresty/nginx/sbin" >> /etc/profile
source /etc/profile
然后启动openresty,启动命令和nginx一致。
nginx -c /usr/local/openresty/nginx/conf/nginx.conf
#启动后查看一下服务
ps -ef | grep nginx
访问 Web 服务
curl http://localhost:8080/
如果一切正常,我们应该得到输出
<p>hello, world Lua!</p>
配置lua代码文件
我们把lua代码放在nginx配置中会随着lua的代码的增加导致配置文件太长不好维护,因此我们应该把lua代码移到外部文件中存储。
在conf文件夹下创建lua文件夹,专门用来存放lua文件
mkdir /usr/local/openresty/nginx/conf/lua
创建test.lua文件
cd /usr/local/openresty/nginx/conf/lua
vim test.lua
ngx.say("test lua");
修改conf/lua.conf文件
vim /usr/local/openresty/nginx/conf/lua.conf
server {
        listen 8080;
        location / {
            default_type text/html;
            lua_code_cache off; #关闭lua代码缓存,调试时关闭,正式环境开启
            content_by_lua_file conf/lua/test.lua; #相对于nginx安装目录
        }
    }
关闭缓存后会看到如下报警(忽略不管)
nginx: [alert] lua_code_cache is off; this will hurt performance in /usr/local/openresty/nginx/conf/lua.conf:5
重启 Web 服务
nginx -s reload
测试性能
安装压力测试工具ab
yum -y install httpd-tools
压力测试
- -c:每次并发数为10个
- -n:共发送50000个请求
ab -c10 -n50000 http://localhost:8080/
测试报详解
Server Software:        Apache          #服务器软件
Server Hostname:        localhost       #域名
Server Port:            80              #请求端口号

Document Path:          /               #文件路径
Document Length:        40888 bytes     #页面字节数

Concurrency Level:      10              #请求的并发数
Time taken for tests:   27.300 seconds  #总访问时间
Complete requests:      1000            #请求成功数量
Failed requests:        0               #请求失败数量
Write errors:           0
Total transferred:      41054242 bytes  #请求总数据大小(包括header头信息)
HTML transferred:       40888000 bytes  #html页面实际总字节数
Requests per second:    36.63 [#/sec] (mean)  #每秒多少请求,这个是非常重要的参数数值,服务器的吞吐量
Time per request:       272.998 [ms] (mean)     #用户平均请求等待时间
Time per request:       27.300 [ms] (mean, across all concurrent requests)
                                                # 服务器平均处理时间,也就是服务器吞吐量的倒数
Transfer rate:          1468.58 [Kbytes/sec] received  #每秒获取的数据长度

Connection Times (ms)
              min  mean[+/-sd] median   max
Connect:       43   47   2.4     47      53
Processing:   189  224  40.7    215     895
Waiting:      102  128  38.6    118     794
Total:        233  270  41.3    263     945

Percentage of the requests served within a certain time (ms)
  50%    263    #50%用户请求在263ms内返回
  66%    271    #66%用户请求在271ms内返回
  75%    279    #75%用户请求在279ms内返回
  80%    285    #80%用户请求在285ms内返回
  90%    303    #90%用户请求在303ms内返回
  95%    320    #95%用户请求在320ms内返回
  98%    341    #98%用户请求在341ms内返回
  99%    373    #99%用户请求在373ms内返回
 100%    945 (longest request)
启动脚本
添加启动脚本
vim /etc/init.d/openresty
脚本内容如下
#!/bin/sh
#
# openresty - this script starts and stops the openresty daemin
#
# chkconfig:   - 85 15
# description:  OpenResty is a full-fledged web platform that integrates \
#        the standard Nginx core, LuaJIT, many carefully written Lua libraries, \
#        lots of high quality 3rd-party Nginx modules, and most of their external dependencies.
# processname: openresty
# config:      /usr/local/openresty/nginx/conf/nginx.conf
# pidfile:     /usr/local/openresty/nginx/logs/nginx.pid
# Url http://www.cnblogs.com/wushuaishuai/
# Last Updated 2018.07.15

# Source function library.
. /etc/rc.d/init.d/functions

# Source networking configuration.
. /etc/sysconfig/network

# Check that networking is up.
[ "$NETWORKING" = "no" ] && exit 0

nginx="/usr/local/openresty/nginx/sbin/nginx"
prog=$(basename $nginx)

NGINX_CONF_FILE="/usr/local/openresty/nginx/conf/nginx.conf"
NGINX_PID="/usr/local/openresty/nginx/logs/nginx.pid"

[ -f /etc/sysconfig/nginx ] && . /etc/sysconfig/nginx

lockfile=/var/lock/subsys/nginx

start() {
    [ -x $nginx ] || exit 5
    [ -f $NGINX_CONF_FILE ] || exit 6
    echo -n $"Starting $prog: "
    daemon $nginx -c $NGINX_CONF_FILE
    retval=$?
    echo
    #service php-fpm start
    [ $retval -eq 0 ] && touch $lockfile
    return $retval
}
stop() {
    echo -n $"Stopping $prog: "
    $nginx -s stop
    echo_success
    retval=$?
    echo
    #service php-fpm stop
    [ $retval -eq 0 ] && rm -f $lockfile
    return $retval
}

restart() {
    stop
    start
}

reload() {
    configtest || return $?
    echo -n $"Reloading $prog: "
    $nginx -s reload
    RETVAL=$?
    echo
}

force_reload() {
    restart
}

configtest() {
  $nginx -t -c $NGINX_CONF_FILE
}

rh_status() {
    status $prog
}

rh_status_q() {
    rh_status >/dev/null 2>&1
}

case "$1" in
    start)
        rh_status_q && exit 0
        $1
        ;;
    stop)
        rh_status_q || exit 0
        $1
        ;;
    restart|configtest)
        $1
        ;;
    reload)
        rh_status_q || exit 7
        $1
        ;;
    force-reload)
        force_reload
        ;;
    status)
        rh_status
        ;;
    condrestart|try-restart)
        rh_status_q || exit 0
            ;;
    *)
        echo $"Usage: $0 {start|stop|status|restart|condrestart|try-restart|reload|force-reload|configtest}"
        exit 2
esac
赋予执行权限
chmod u+x /etc/init.d/openresty
使用systemctl来管理openresty
#查看openresty状态
systemctl status openresty.service

#启动openresty
systemctl start openresty.service

#设置openresty开机自启动
systemctl enable openresty.service

#重启openresty
systemctl restart openresty.service

#停止openresty
systemctl stop openresty.service

#取消openresty开机自启动
systemctl disable openresty.service

 浙公网安备 33010602011771号