
第四天.展示公户私户、公户变私户、模糊检索、展示添加沟通记录
 今日内容
    1. 展示公户和私户
        1. 公户和私户的区别
            1. 没有招生的老师的客户就是放公户里
            2. 有招生老师的客户就是私户
        2. request.user
            1. auth中间件做的事儿(详见群内截图)
    2. 公户 <--> 私户
        1. form表单就像一个盆,把用户需要提交的数据包起来,就能实现提交
        2. 通过 action 反射执行相应的私有方法
    3. 模糊检索
        1. CBV中
            1. self.request 其实就是request对象
            2. Q对象里面的参数是元祖
            3. Q查询的用法
                1. Q(name__icontains='帅')
                2. Q(('name__icontains', '帅'))
                3. 多个Q查询的话可以使用Q对象方式
                    1. q = Q()
                    2. q.connector = 'OR'
                    3. q.children.append(Q(('name__icontains', '帅')))
    4. 分页携带检索参数
        想办法把查询的键值对添加到页码a标签的href属性中
        1. QueryDict对象 from django.http import QueryDict
            1. 本质上是dict
            2. querydict_obj._mutable=False   --> 不能修改
            3. querydict_obj['page'] = 1      --> 字典key赋值
            4. querydict_obj.urlencode()      --> 把字典类型的转换成urlencode
        2. 深浅拷贝                           --> 回去复习下基础吧(痛心疾首的呐喊!)

    5. 新增和编辑跳转回原页面(明天说)
    6. 展示、添加和编辑沟通记录
        1. 展示沟通记录
            1. 数据:必须是我的客户并且删除状态为False
        2. 添加沟通记录
            1. ModelForm --> 把重复的操作提取到BaseForm中
            2. 如何给ModelForm设置默认值
            3. 如何限制客户字段的选项必须是我的客户
一.展示公户和私户
(1)crm_urls.py中:
两个url(公户列表和私户列表)用同一个视图函数
from django.conf.urls import url
from crm import views
urlpatterns = [
    url(r'customer_list/$', views.customer_list,name='customer_list'),#所有客户列表
    url(r'my_customer/$', views.customer_list,name='my_customer'),#我的客户列表
    url(r'add/$', views.customer,name='add_customer'),
    url(r'edit/(\d+)/$', views.customer,name='edit_customer'),
]
(2)views.py:
区分:什么时候返回公户数据,什么时候返回私户数据。(在视图中拿到当前访问的url,访问此customer_list url则返回公户信息,访问my_customer时返回私户信息)。--request.path_info
@login_required()
def customer_list(request):
    url_prefix = request.path_info
    current_page = request.GET.get('page', 1)

    # 获取私户信息---  销售字段
    if request.path_info == reverse('my_customer'): #反转对象
        query_set = Customer.objects.filter(consultant=request.user)  # 我是谁?--request.user(拿到当前登录的人)
    # 获取所有的公户信息---没有招生老师的
    else:
        query_set = Customer.objects.filter(consultant__isnull=True)#单表查询神奇的双下划线
    page_obj = Pagination(current_page, query_set.count(), url_prefix, per_page=3)
    data = query_set[page_obj.start:page_obj.end]
    # 2. 在页面上展出出来
    return render(request, 'customer_list.html', {'customer_list': data, 'page_html': page_obj.page_html()})
(3)customer_list.html:没变
(4)base.html中:
母版中添加一个我的客户菜单。
 <li><a href="{% url 'customer_list' %}">客户列表</a>{# url反转映射 #}

 <li><a href="{% url 'my_customer' %}">我的客户</a>{# url反转映射 #}
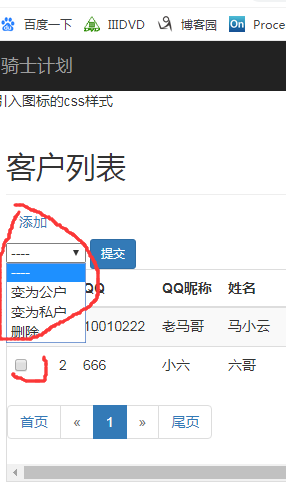
最后效果如下图:

二.公户变为私户
怎么把公户客户列表中的某客户变成我的客户,且能批量添加,也能变公户,多个动作
(1)customoer_list.html中:
前面加添加一列勾选框。--作用能批量操作
再加一select标签表示多个动作,旁边放一按钮提交。
效果如下图:
{% extends 'base.html' %}

{% block page-main %}
    <h2 class="sub-header">客户列表</h2>
    <div class="col-md-12">
        <a href="{% url 'add_customer' %}" class="btn btn-success btn-sm">添加</a>
    </div>
    <form action="" method="post">
        {% csrf_token %}
        <div>
            <select name="action">
                <option value="">---------</option>
                <option value="to_public">变为公户</option>
                <option value="to_private">变为私户</option>
                <option value="delete">删除</option>
            </select>
            <button type="submit" class="btn btn-primary">提交</button>
        </div>
        <div class="table-responsive">
            <table class="table table-striped table-bordered">
                <thead>
                <tr>
                    <th style="width: 20px">选择</th>
                    <th style="width: 20px">#</th>
                    <th style="width: 80px">QQ</th>
                    <th style="width: 80px">QQ昵称</th>
                    <th style="width: 60px">姓名</th>
                    <th style="width: 80px">电话</th>
                    <th style="width: 90px">客户来源</th>
                    <th style="width: 120px">咨询课程</th>
                    <th style="width: 60px">招生老师</th>
                    <th style="width: 60px">班级类型</th>
                    <th style="width: 60px">状态</th>
                    <th style="width: 100px">咨询日期</th>
                    <th style="width: 120px!important;">已报班级</th>
                    <th style="width: 20px!important;">操作</th>
                </tr>
                </thead>
                <tbody>
                {% for customer in customer_list %}
                    <tr>
                        <td><input type="checkbox" name="cid" value="{{ customer.id }}"></td>
                        <td>{{ forloop.counter }}</td>
                        <td>{{ customer.qq }}</td>
                        <td>{{ customer.qq_name }}</td>
                        <td>{{ customer.name }}</td>
                        <td>{{ customer.phone|default:'暂无' }}</td>
                        <td>{{ customer.get_source_display }}</td>
                        <td>{{ customer.course }}</td>
                        <td>{{ customer.consultant }}</td>
                        <td>{{ customer.get_class_type_display }}</td>
                        <td>{{ customer.show_status }}</td>
                        <td>{{ customer.date|date:'Y-m-d' }}</td>
                        <td>{{ customer.show_class_list|default:'暂无' }}</td>
                        <td><a href="{% url 'edit_customer' customer.id %}"><i class="fa fa-edit"
                                                                               aria-hidden="true"></i></a></td>
                    </tr>
                {% endfor %}
                </tbody>
            </table>
            <div>
                {{ page_html|safe }}
            </div>
        </div>
    </form>
{% endblock %}
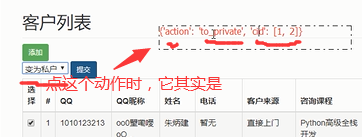
怎么实现这个逻辑?一种是ajax,取到你前端的值,找到被选中的项,提交到后端。还可以全部用form表单来提交(那得把所有获取用户输入的input,select等标签都包一下---即就是把上图中tabel表格(因为表格中有input标签)和select都包起来在form表单中),那些时checkbox的input标签要设置value值。---form就是一容器,包装那些需要获取用户输入的标签。
form表单要提交数据前提三大条件:要有action,获取用户输入的那些标签要有name属性,submit按钮要有。这样就可往后端提交数据了。
逻辑如下图:一点提交的话,它其实是提交此几数据:action:to_private,cid:checi_box的值.,那后端拿到这些数据就能干活了。---就是把表中销售字段值变了
(2)views.py中:
customer_list方法中要发post请求,但此前写的是fbv---只能接好get请求,所以还得写判断,那这样就复杂了。所以我把它改成cbv.再在里边定义一post请求方法做批量变户---
那随之url也要改,且@login_required也不能写了,导入from django.utils.decorators import method_decorator此装饰器(把一个函数的装饰器变成方法的装饰器)。
且post请求发过来的话,还得在form表单中加一个csrf_token.from django.utils.decorators import method_decoratoclass CustomerListView(views.View): @method_decorator(login_required)#把一个函数的装饰器变成方法的装饰器 def get(self,request):
        url_prefix = request.path_info
        current_page = request.GET.get('page', 1)

        # 获取私户信息---  销售字段
        if request.path_info == reverse('my_customer'): #反转对象
            query_set = Customer.objects.filter(consultant=request.user)  # 我是谁?--request.user(拿到当前登录的人)
        # 获取所有的公户信息---没有招生老师的
        else:
            query_set = Customer.objects.filter(consultant__isnull=True)#单表查询神奇的双下划线
        page_obj = Pagination(current_page, query_set.count(), url_prefix, per_page=3)
        data = query_set[page_obj.start:page_obj.end]
        # 2. 在页面上展出出来
        return render(request, 'customer_list.html', {'customer_list': data, 'page_html': page_obj.page_html()})

    @method_decorator(login_required)  # 把一个函数的装饰器变成方法的装饰器
    def post(self,request):
        """批量操作变公户/变私户"""
        cid = request.POST.getlist('cid')#要操作的客户的id#从多选的selecet和多选的check_box中取值时要用getlist方法,get的话只能取到最后一个
        action = request.POST.get('action')
        if action == 'to_private':
            # 方法1从找到所有要操作的客户数据,把他们变成我的客户
           #filter得到的是一个query_set对象,所以用update方法可更新,且consultant字段是外键关联userprofile对象,所以我也给其赋一userprofile对象即可(request.user就是当前登录用户对象)
            #Customer.objects.filter(id__in=cid).update(consultant=request.user) #根据一堆id去找值 #单表查询神奇双下划线
           #方法2:把要操作的客户添加到我的客户列表里
            request.user.customers.add(*Customer.objects.filter(id__in=cid))#add方法得打散

        return redirect(reverse('customer_list'))
同理把私户变公户则:把如下代码段加到return前即可.
elif action == 'to_public':
            # 方法1:找到所有要操作的客户数据,把他们的销售字段设置为空
            Customer.objects.filter(id__in=cid).update(consultant=None)
            # 方法2:从我的客户列表里面把指定的客户删除掉
            # request.user.customers.remove(*Customer.objects.filter(id__in=cid))
(3)crm_urls.py中:
from django.conf.urls import url
from crm import views

urlpatterns = [
    url(r'customer_list/$', views.CustomerListView.as_view(),name='customer_list'),#所有客户列表
    url(r'my_customer/$', views.CustomerListView.as_view(),name='my_customer'),#我的客户列表
    url(r'add/$', views.customer,name='add_customer'),
    url(r'edit/(\d+)/$', views.customer,name='edit_customer'),
]
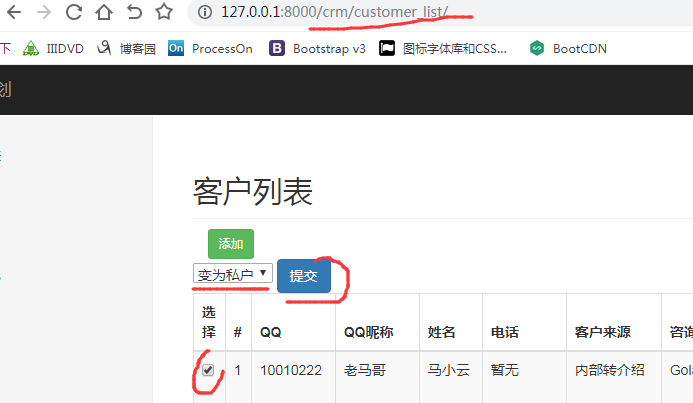
如下图:这样就实现公变私了。
三. 利用action反射操作
这里我的select框中就只有两个动作:把公变私和私变公,那如果有多7,8个动作,那视图中挨个if去判断,代码就有点沉重--所以用反射。因为你上传过来的action是一个具体的动作的字符串,相当于要用字符串去找你同名的方法并去执行它。
(1)views.py中:通过action反射执行相应私有方法。--根据不同的动作执行不同方法
视图函数类中再加一自定义方法(用_,因为它不是对外提供的,表示私有方法)。
class CustomerListView(views.View):
    @method_decorator(login_required)#把一个函数的装饰器变成方法的装饰器
    def get(self,request):
        url_prefix = request.path_info
        current_page = request.GET.get('page', 1)

        # 获取私户信息---  销售字段
        if request.path_info == reverse('my_customer'): #反转对象
            query_set = Customer.objects.filter(consultant=request.user)  # 我是谁?--request.user(拿到当前登录的人)
        # 获取所有的公户信息---没有招生老师的
        else:
            query_set = Customer.objects.filter(consultant__isnull=True)#单表查询神奇的双下划线
        page_obj = Pagination(current_page, query_set.count(), url_prefix, per_page=3)
        data = query_set[page_obj.start:page_obj.end]
        # 2. 在页面上展出出来
        return render(request, 'customer_list.html', {'customer_list': data, 'page_html': page_obj.page_html()})

    @method_decorator(login_required)  # 把一个函数的装饰器变成方法的装饰器
    def post(self,request):
        """批量操作变公户/变私户"""
        cid = request.POST.getlist('cid')#要操作的客户的id#从多选的selecet和多选的check_box中取值时要用getlist方法,get的话只能取到最后一个
        action = request.POST.get('action')
        #拿到action后判断self(当前类实例)中是否有一个下划线开头的action方法_action,如果有就执行无就
        if not hasattr(self,'_{}'.format(action)):
            return HttpResponse('没有这个操作')
        getattr(self,'_{}'.format(action))(cid)
        return redirect(reverse('customer_list'))

    def _to_private(self,cid):
        # 方法1从找到所有要操作的客户数据,把他们变成我的客户
        # filter得到的是一个query_set对象,所以用update方法可更新,且consultant字段是外键关联userprofile对象,所以我也给其赋一userprofile对象即可(request.user就是当前登录用户对象)
        # Customer.objects.filter(id__in=cid).update(consultant=request.user) #根据一堆id去找值 #单表查询神奇双下划线
        # 方法2:把要操作的客户添加到我的客户列表里
        self.request.user.customers.add(*Customer.objects.filter(id__in=cid))  # add方法得打散
    def _to_public(self,cid):
        # 方法1:找到所有要操作的客户数据,把他们的销售字段设置为空
        Customer.objects.filter(id__in=cid).update(consultant=None)
        # 方法2:从我的客户列表里面把指定的客户删除掉
        # request.user.customers.remove(*Customer.objects.filter(id__in=cid))
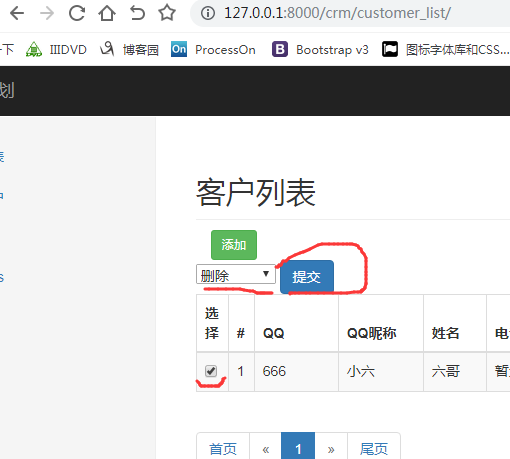
效果如下图:因为views.py中没定义删除方法,所以选删除操作时就会弹出“没有此操作”
四.模糊检索
当客户列表中客户多时,我通过搜索qq名称,昵称,姓名等,只我要查的关键词在这几个任一字段中有就可返回此客户。
添加搜索框--搜索框里的条件就是对当前页面中数据做检索-相当于原来customer_list是返回所有数据,现在只返回和搜索条件匹配的数据,所以其实还是对CustomerLIstView类中get方法返回的数据做手脚。
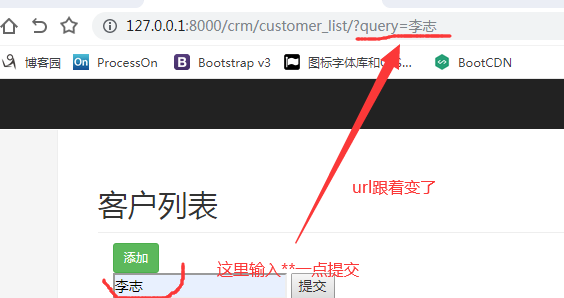
怎样实现在页面中点搜索时还访问/crm/customer_list/这个url.--->/crm/customer_list/?query=***就可
即form表单中放get请求,一点就在后面拼接了一个url。这个url在后端只是拿着url前缀不带参数(?query)去匹配。
(1)customer_list.html中:
放一form表单检索框。加下图中标红代码块:

效果如下图:
(2)views.py中:
从url中取到query参数
找到name,qq,qq_name字段包含query_value的那些数据就是搜索的结果或或所以是Q查询

views.py中加入上述代码也可实现检索。但这里我用把Q查询写成一元组,先生成一个个Q对象,并指定Q对象的连接符,且写成for循环动态使用检索字段(上述代码中检索哪些字段写死了)--定义模糊检索方法(接收一个想要检索的字段).
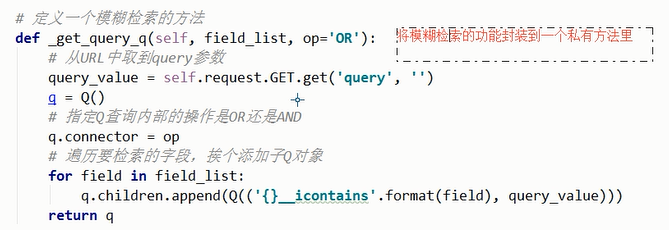
class CustomerListView(views.View):
    @method_decorator(login_required)#把一个函数的装饰器变成方法的装饰器
    def get(self,request):
        url_prefix = request.path_info
        current_page = request.GET.get('page', 1)

        # 获取私户信息---  销售字段
        if request.path_info == reverse('my_customer'): #反转对象
            query_set = Customer.objects.filter(consultant=request.user)  # 我是谁?--request.user(拿到当前登录的人)
        # 获取所有的公户信息---没有招生老师的
        else:
            query_set = Customer.objects.filter(consultant__isnull=True)#单表查询神奇的双下划线
        #根据你模糊检索的条件对query_set再做一个过滤

        #2.找到name,qq,qq_name字段包含query_value的那些数据就是搜索的结果或或所以是Q查询
        q = Q()#生成一Q对象
        q.connector = 'OR'#Q对象中可指定你的连接符
        q = self._get_query_q(['name','qq','qq_name'])
        query_set = query_set.filter(q)
        #query_set = query_set.filter(Q(('name__icontains',query_value))|Q(('qq__icontains',query_value))|Q(('qq_name__contains',query_value)))

        page_obj = Pagination(current_page, query_set.count(), url_prefix, per_page=5)
        data = query_set[page_obj.start:page_obj.end]
        # 2. 在页面上展出出来
        return render(request, 'customer_list.html', {'customer_list': data, 'page_html': page_obj.page_html()})

    @method_decorator(login_required)  # 把一个函数的装饰器变成方法的装饰器
    def post(self,request):
        """批量操作变公户/变私户"""
        cid = request.POST.getlist('cid')#要操作的客户的id#从多选的selecet和多选的check_box中取值时要用getlist方法,get的话只能取到最后一个
        action = request.POST.get('action')
        #拿到action后判断self(当前类实例)中是否有一个下划线开头的action方法_action,如果有就执行无就
        if not hasattr(self,'_{}'.format(action)):
            return HttpResponse('没有这个操作')
        getattr(self,'_{}'.format(action))(cid)
        return redirect(reverse('customer_list'))

    def _to_private(self,cid):
        # 方法1从找到所有要操作的客户数据,把他们变成我的客户
        # filter得到的是一个query_set对象,所以用update方法可更新,且consultant字段是外键关联userprofile对象,所以我也给其赋一userprofile对象即可(request.user就是当前登录用户对象)
        # Customer.objects.filter(id__in=cid).update(consultant=request.user) #根据一堆id去找值 #单表查询神奇双下划线
        # 方法2:把要操作的客户添加到我的客户列表里
        self.request.user.customers.add(*Customer.objects.filter(id__in=cid))  # add方法得打散
    def _to_public(self,cid):
        # 方法1:找到所有要操作的客户数据,把他们的销售字段设置为空
        Customer.objects.filter(id__in=cid).update(consultant=None)
        # 方法2:从我的客户列表里面把指定的客户删除掉
        # request.user.customers.remove(*Customer.objects.filter(id__in=cid))
    #定义一模糊检索的方法:
    def _get_query_q(self,field_list,op='OR'):#接收检索字段和默认连接符
        # 从url中取到query参数
        query_value = self.request.GET.get('query', '')
        q = Q()#生成Q对象
        q.connector = op #指定Q查询内部的连接符
        for field in field_list:#遍历要检索的字段,挨个添加子Q对象到元组中
            q.children.append(Q(('{}__icontains'.format(field), query_value)))
        return q
五.带模糊检索参数跳转页码(分页携带检索的参数)
上述效果中我一搜小字会有好几个含小字的客户。一页显示不完,当我点下一页检索结果时它跳出的是未检索的所有客户的第二页。因为分页的url代码被我写死了,它没带?query=****此个参数。
(1)views.py中:
它应该是http://127.0.0.1:8000/crm/customer_list/?query=****&page=2这样才能跳到第二页检索结果上。
所以我分页器的a标签的url要考虑参数的情况(含查询词参数)。应该在生成html字符代码那个功能中加参数(当前url的参数)。
修改源码:把request中的_mutable改成True---让QueryDict对象可修改作用可支持我把两个字典拼接一起。request.Get.urlencode()方法可把检索参数编码成url
我想要实现的效果是:在生成分页对象时除了要传url前缀,还要传参数中的字典
from django.shortcuts import render, redirect, HttpResponse
from django import views
from django.contrib import auth
from django.contrib.auth.decorators import login_required
from crm.forms import RegForm,CustomerForm #导入我自己写的forms文件
from crm.models import UserProfile,Customer
from django.urls import reverse
from utils.mypage import Pagination
from django.utils.decorators import method_decorator
from django.db.models import Q
from django.http import QueryDict
from copy import deepcopy

class LoginView(views.View):
    def get(self, request):
        return render(request,'login.html')

    def post(self,request):
        # 1. 获取用户输入的内容
        email = request.POST.get('email')
        pwd = request.POST.get('password')
        is_check = (request.POST.get('is_check',None) == '777')
        # 2. 校验用户名密码是否正确
        user_obj = auth.authenticate(request, email=email, password=pwd)
        if user_obj:
            # 登录成功
            # 存Session数据并且回写Cookie
            auth.login(request, user_obj)  # auth认证中间件的源码
            if is_check:
                request.session.set_expiry(7*24*60*60)
            else:
                request.session.set_expiry(0)
            # 跳转到首页
            return redirect('/index/')
        else:
            # 登录失败
            return render(request, 'login.html', {'error_msg': '邮箱或密码错误'})


@login_required
def index(request):
    return HttpResponse('不错')

class RegView(views.View):
    def get(self,request):
        form_obj = RegForm()  #实例化
        return render(request,'reg.html',{'form_obj':form_obj}) #把想展示的字段传到前端

    def post(self,request):
        form_obj = RegForm(request.POST)
        if form_obj.is_valid():
            # 校验通过
            # 方法一:
            # 1. 先把re_password字段去掉
            # form_obj.cleaned_data.pop('re_password')
            # # 2. 去数据库创建新用户
            # UserProfile.objects.create_user(**form_obj.cleaned_data)
            # 方法二:现在的form_obj是一个ModelForm对象而不是普通form了,它和数据库里面的Model类是对应的
            user_obj = form_obj.save()  #这样就直接能在数据库中创建用户对象 -->相当于执行了 UserProfile.objects.create(**form_obj.cleaned_data)
            user_obj.set_password(user_obj.password) #设成密文保存
            user_obj.save()
            return redirect('/login/')
        else:
            return render(request, 'reg.html', {'form_obj': form_obj})


class CustomerListView(views.View):
    @method_decorator(login_required)#把一个函数的装饰器变成方法的装饰器
    def get(self,request):
        url_prefix = request.path_info
        qd = deepcopy(request.GET) #深拷贝目的是我这里修改后原来它值不变
        qd._mutable = True #让querydict对象可修改
        current_page = request.GET.get('page', 1)

        # 获取私户信息---  销售字段
        if request.path_info == reverse('my_customer'): #反转对象
            query_set = Customer.objects.filter(consultant=request.user)  # 我是谁?--request.user(拿到当前登录的人)
        # 获取所有的公户信息---没有招生老师的
        else:
            query_set = Customer.objects.filter(consultant__isnull=True)#单表查询神奇的双下划线
        #根据你模糊检索的条件对query_set再做一个过滤

        #2.找到name,qq,qq_name字段包含query_value的那些数据就是搜索的结果或或所以是Q查询
        q = Q()#生成一Q对象
        q.connector = 'OR'#Q对象中可指定你的连接符
        q = self._get_query_q(['name','qq','qq_name'])
        query_set = query_set.filter(q)
        #query_set = query_set.filter(Q(('name__icontains',query_value))|Q(('qq__icontains',query_value))|Q(('qq_name__contains',query_value)))

        page_obj = Pagination(current_page, query_set.count(), url_prefix, qd, per_page=3)
        data = query_set[page_obj.start:page_obj.end]
        # 2. 在页面上展出出来
        return render(request, 'customer_list.html', {'customer_list': data, 'page_html': page_obj.page_html()})

    @method_decorator(login_required)  # 把一个函数的装饰器变成方法的装饰器
    def post(self,request):
        """批量操作变公户/变私户"""
        cid = request.POST.getlist('cid')#要操作的客户的id#从多选的selecet和多选的check_box中取值时要用getlist方法,get的话只能取到最后一个
        action = request.POST.get('action')
        #拿到action后判断self(当前类实例)中是否有一个下划线开头的action方法_action,如果有就执行无就
        if not hasattr(self,'_{}'.format(action)):
            return HttpResponse('没有这个操作')
        getattr(self,'_{}'.format(action))(cid)
        return redirect(reverse('customer_list'))

    def _to_private(self,cid):
        # 方法1从找到所有要操作的客户数据,把他们变成我的客户
        # filter得到的是一个query_set对象,所以用update方法可更新,且consultant字段是外键关联userprofile对象,所以我也给其赋一userprofile对象即可(request.user就是当前登录用户对象)
        # Customer.objects.filter(id__in=cid).update(consultant=request.user) #根据一堆id去找值 #单表查询神奇双下划线
        # 方法2:把要操作的客户添加到我的客户列表里
        self.request.user.customers.add(*Customer.objects.filter(id__in=cid))  # add方法得打散
    def _to_public(self,cid):
        # 方法1:找到所有要操作的客户数据,把他们的销售字段设置为空
        Customer.objects.filter(id__in=cid).update(consultant=None)
        # 方法2:从我的客户列表里面把指定的客户删除掉
        # request.user.customers.remove(*Customer.objects.filter(id__in=cid))
    #定义一模糊检索的方法:
    def _get_query_q(self,field_list,op='OR'):#接收检索字段和默认连接符
        # 从url中取到query参数
        query_value = self.request.GET.get('query', '')
        q = Q()#生成Q对象
        q.connector = op #指定Q查询内部的连接符
        for field in field_list:#遍历要检索的字段,挨个添加子Q对象到元组中
            q.children.append(Q(('{}__icontains'.format(field), query_value)))
        return q

def logout(request):
    auth.logout(request)
    return redirect('/login/')

# 新增和编辑二合一的视图函数
def customer(request, edit_id=None):
    # 如果edit_id=None表示是新增操作
    # 如果edit_id有值表示是编辑操作
    # ret = Customer.objects.filter(pk=10000000).first()
    # print(ret)
    customer_obj = Customer.objects.filter(pk=edit_id).first()  # None
    form_obj = CustomerForm(instance=customer_obj)
    if request.method == 'POST':
        # 使用POST提交的数据去更新指定的instance实例
        form_obj = CustomerForm(request.POST, instance=customer_obj)
        if form_obj.is_valid():
            form_obj.save()
            return redirect(reverse('customer_list'))
    return render(request, 'customer.html', {'form_obj': form_obj, 'edit_id': edit_id})
(2)manage.py中:
在自定分页器代码中添加:把当前url里查询的词?query=***携带着放到了此分页器代码中
所以每一次生成页码时除了要加page=几还要加查询词。
""" 自定义分页组件 可以返回分页的数据和分页的HTML代码 """ from django.http import QueryDict class Pagination(object): def __init__(self, current_page, total_count, url_prefix, query_dict=QueryDict(mutable=True), per_page=10, show_page=9): """ 初始化分分页器,把以下这些值封装到此对象中 :param url_prefix: a标签的URL前缀 :param query_dict: #没有查询词参数则是空的QueryDict()对象,并且是可修改的 :param current_page: 当前页码数 :param total_count: 数据总数 :param per_page: 每一页显示多少数据, 默认值是10 :param show_page: 页面显示的页码数, 默认值是9 """ # 0.分页的URL前缀 self.url_prefix = url_prefix #a标签的url前缀 self.query_dict = query_dict # 1. 每一页显示10条数据 assert per_page > 0 # 每页显示多少的数据必须是一个大于0的数 self.per_page = per_page # 2. 计算需要多少页 total_page, more = divmod(total_count, per_page) if more: total_page += 1 self.total_page = total_page # 3. 当前页码 try: current_page = int(current_page) except Exception as e: current_page = 1 current_page = total_page if current_page > total_page else current_page # 页码必须是大于0的数 if current_page < 1: current_page = 1 self.current_page = current_page # 4. 页面最多显示的页码数 self.show_page = show_page # 5. 最多显示页码的一半 self.half_show_page = self.show_page // 2 @property def start(self): # 数据切片的开始位置 return self.per_page * (self.current_page - 1) @property def end(self): # 数据切片的结束为止 return self.current_page * self.per_page # 定义一个返回HTML代码的方法 def page_html(self): if self.total_page == 0: return '' # 如果总页码数小于最大要显示的页码数 if self.total_page < self.show_page: show_page_start = 1 show_page_end = self.total_page # 左边越界 elif self.current_page - self.half_show_page < 1: show_page_start = 1 show_page_end = self.show_page # 右边越界 elif self.current_page + self.half_show_page > self.total_page: show_page_end = self.total_page show_page_start = self.total_page - self.show_page + 1 else: show_page_start = self.current_page - self.half_show_page # 页面显示页码的结束 show_page_end = self.current_page + self.half_show_page # 生成分页的HTML代码 page_list = [] # 添加分页代码的前缀 page_list.append('<nav aria-label="Page navigation"><ul class="pagination">') # 添加首页 self.query_dict['page'] = 1 page_list.append('<li><a href="{}?{}">首页</a></li>'.format(self.url_prefix, self.query_dict.urlencode())) # 添加上一 if self.current_page - 1 < 1: # 已经到头啦,不让点上一页啦 page_list.append( '<li class="disabled"><a href="" aria-label="Previous"><span aria-hidden="true">«</span></a></li>') else: self.query_dict['page'] = self.current_page - 1 page_list.append( '<li><a href="{}?{}" aria-label="Previous"><span aria-hidden="true">«</span></a></li>'.format( self.url_prefix, self.query_dict.urlencode()) ) for i in range(show_page_start, show_page_end + 1): self.query_dict['page'] = i if i == self.current_page: s = '<li class="active"><a href="{1}?{2}">{0}</a></li>'.format(i, self.url_prefix, self.query_dict.urlencode()) else: s = '<li><a href="{1}?{2}">{0}</a></li>'.format(i, self.url_prefix, self.query_dict.urlencode()) page_list.append(s) # 添加下一页 if self.current_page + 1 > self.total_page: page_list.append( '<li class="disabled"><a href="" aria-label="Next"><span aria-hidden="true">»</span></a></li>') else: self.query_dict['page'] = self.current_page + 1 page_list.append( '<li><a href="{}?{}" aria-label="Next"><span aria-hidden="true">»</span></a></li>'.format( self.url_prefix, self.query_dict.urlencode()) ) # 添加尾页 self.query_dict['page'] = self.total_page page_list.append('<li><a href="{}?{}">尾页</a></li>'.format(self.url_prefix, self.query_dict.urlencode())) # 添加分页代码的后缀 page_list.append('</ul></nav>') page_html = ''.join(page_list) return page_html
这样就实现带模糊检索参数跳转页码了!!
六.编辑之后跳转回原页面
如就是点击添加客户完成后点提交跳转原页面而不是跳到第一页。
其实就是点击添加按钮时,把当前的url记下--就是?netx=原url,就是在添加函数的post请求里拿到?next参数对应的值,添加完再跳转回这个值就好了。
我原来的添加按钮是写死的,现是写成活的,就是拿到当前这个页面url并把它拼接到/crm/add/这个url后面。---在添加按钮上做一个拼接。
(1)customer_list.html:修改成如下两图中即可
![]()
所有的编辑按钮后面应该加?netx=**.但我不在前端写我在后端用一个query_dict把它生成,也就是?next=***这个是在后端写。我先生成一个空的query_dict对象后把next传进去添加一next键值对。
![]()
(2)views.py中:添加 如下这段代码即可
作判断:如果能从URL获取到next参数就跳转到制定的URL,没有就默认跳转到客户列表页
并在CustomerListView类中给前端传一a标签的url。

七.展示添加沟通记录
(1)crm_urls.py中:
"""
crm app路由匹配规则
所有以crm开头的请求都会转到这里来做后续的匹配
"""
from django.conf.urls import url
from crm import views

urlpatterns = [
    url(r'customer_list/$', views.CustomerListView.as_view(),name='customer_list'),#所有客户列表
    url(r'my_customer/$', views.CustomerListView.as_view(),name='my_customer'),#我的客户列表
    url(r'add/$', views.customer,name='add_customer'),
    url(r'edit/(\d+)/$', views.customer,name='edit_customer'),
    #沟通记录
    # 沟通记录
    url(r'^consult_record/$', views.consult_record_list, name='consult_record'),
    url(r'^add_consult_record/$', views.consult_record, name='add_record'),
    url(r'^edit_consult_record/(\d+)$', views.consult_record, name='edit_record'),
]
(2)views.py中:
先导入consultRecord跟进记录表。查询此表即可。
只能拿到自己客户的沟通记录。
添加跟进记录页面中展示跟进人只能是自己---给form表单中字段设置默认值用initial={字段:值}
且所咨询客户只能在自己客户中选。--在modelform中自定__init__方法--把customer字段的choice设置成我的客户
用同一个视图函数处理添加和编辑沟通记录--视图函数中用edit_id=来标识,所以路由中也要指定编辑的是谁。
from django.shortcuts import render, redirect, HttpResponse
from django import views
from django.contrib import auth
from django.contrib.auth.decorators import login_required
from crm.forms import RegForm, CustomerForm, ConsultRecordForm
from crm.models import UserProfile, Customer, ConsultRecord
from django.urls import reverse
from utils.mypage import Pagination
from django.utils.decorators import method_decorator
from django.db.models import Q
from django.http import QueryDict
from copy import deepcopy


# Create your views here.


class LoginView(views.View):
    def get(self, request):
        return render(request, 'login.html')

    def post(self, request):
        # 1. 获取用户输入的内容
        email = request.POST.get('email')
        pwd = request.POST.get('password')
        is_check = (request.POST.get('is_check', None) == '777')
        # 2. 校验用户名密码是否正确
        user_obj = auth.authenticate(request, email=email, password=pwd)  # 去数据库的UserProfile表校验
        if user_obj:
            # 登录成功
            # 存Session数据并且回写Cookie
            auth.login(request, user_obj)  # auth认证中间件的源码
            if is_check:
                request.session.set_expiry(7 * 24 * 60 * 60)
            else:
                request.session.set_expiry(0)
            # 跳转到首页
            return redirect('/index/')
        else:
            # 登录失败
            return render(request, 'login.html', {'error_msg': '邮箱或密码错误'})


@login_required
def index(request):
    return HttpResponse('index')


class RegView(views.View):
    def get(self, request):
        form_obj = RegForm()
        return render(request, 'reg.html', {'form_obj': form_obj})

    def post(self, request):
        form_obj = RegForm(request.POST)
        if form_obj.is_valid():
            # 校验通过
            # 方法一:
            # 1. 先把re_password字段去掉
            # form_obj.cleaned_data.pop('re_password')
            # # 2. 去数据库创建新用户
            # UserProfile.objects.create_user(**form_obj.cleaned_data)

            # 方法二:form_obj是一个ModelForm对象,它和数据库里面的Model类对应的
            user_obj = form_obj.save()  # --> UserProfile.objects.create(**form_obj.cleaned_data)
            user_obj.set_password(user_obj.password)
            user_obj.save()

            #

            return redirect('/login/')
        else:
            return render(request, 'reg.html', {'form_obj': form_obj})


class CustomerListView(views.View):
    @method_decorator(login_required)
    def get(self, request):
        url_prefix = request.path_info
        print(request.get_full_path())
        print(request.GET)
        qd = deepcopy(request.GET)  # <QueryDict: {'query': ['了']}>
        qd._mutable = True  # 让QueryDict对象可修改
        # qd['age'] = 18
        # print(request.GET.urlencode())  # 把检索参数都编码成URL
        # print('#' * 120)
        current_page = request.GET.get('page', 1)
        if request.path_info == reverse('my_customer'):
            # 2. 获取私户信息
            query_set = Customer.objects.filter(consultant=request.user)  # 我是谁? --> request.user(当前登录的人)
        else:
            # 1. 获取所有的公户信息
            query_set = Customer.objects.filter(consultant__isnull=True)  # 单表查询神奇的双下划线
        # 根据模糊检索的条件对query_set再做过滤
        # 2. 找到 name、qq、qq_name字段包含query_value的那些数据就是一搜索的结果
        q = self._get_query_q(['name', 'qq', 'qq_name'])
        query_set = query_set.filter(q)

        page_obj = Pagination(current_page, query_set.count(), url_prefix, qd, per_page=3)
        print(page_obj.start, page_obj.end)
        print('=' * 120)
        data = query_set[page_obj.start:page_obj.end]
        # 2. 在页面上展出出来
        a_href = request.GET.urlencode()
        return render(request, 'customer_list.html',
                      {'customer_list': data, 'a_href': a_href, 'page_html': page_obj.page_html()})

    @method_decorator(login_required)
    def post(self, request):
        """批量操作(变公户/变私户)"""
        print(request.POST)
        cid = request.POST.getlist('cid')  # 要操作的客户的id
        action = request.POST.get('action')
        # 判断 self 是否有一个 _action 的方法,如果有就执行,否则就回个 滚
        if not hasattr(self, '_{}'.format(action)):
            return HttpResponse('滚')
        getattr(self, '_{}'.format(action))(cid)
        return redirect(reverse('customer_list'))

    def _to_private(self, cid):
        # 方法1:找到所有要操作的客户数据,把他们变成给我的客户
        # Customer.objects.filter(id__in=cid).update(consultant=request.user)
        # 方法2:把要操作的客户添加到我的客户列表里
        self.request.user.customers.add(*Customer.objects.filter(id__in=cid))

    def _to_public(self, cid):
        # 方法1:找到所有要操作的客户数据,把他们的销售字段设置为空
        Customer.objects.filter(id__in=cid).update(consultant=None)
        # 方法2:从我的客户列表里面把指定的客户删除掉
        # request.user.customers.remove(*Customer.objects.filter(id__in=cid))

    # 定义一个模糊检索的方法
    def _get_query_q(self, field_list, op='OR'):
        # 从URL中取到query参数
        query_value = self.request.GET.get('query', '')
        q = Q()
        # 指定Q查询内部的操作是OR还是AND
        q.connector = op
        # 遍历要检索的字段,挨个添加子Q对象
        for field in field_list:
            q.children.append(Q(('{}__icontains'.format(field), query_value)))
        return q


def logout(request):
    auth.logout(request)
    return redirect('/login/')


# --------------------- day75 ↓ ---------------------------
# 新增和编辑二合一的视图函数
def customer(request, edit_id=None):
    # 如果edit_id=None表示是新增操作
    # 如果edit_id有值表示是编辑操作
    # ret = Customer.objects.filter(pk=10000000).first()
    # print(ret)
    customer_obj = Customer.objects.filter(pk=edit_id).first()  # 找不到就是None
    form_obj = CustomerForm(instance=customer_obj)
    if request.method == 'POST':
        # 使用POST提交的数据去更新指定的instance实例
        form_obj = CustomerForm(request.POST, instance=customer_obj)
        if form_obj.is_valid():
            form_obj.save()
            # 如果能从URL获取到next参数就跳转到制定的URL,没有就默认跳转到客户列表页
            next_url = request.GET.get('next', reverse('customer_list'))
            print(next_url)
            print('^' * 120)
            return redirect(next_url)
    return render(request, 'customer.html', {'form_obj': form_obj, 'edit_id': edit_id})


#  -------------------- day75 ↓ -------------------------
@login_required
def consult_record_list(request):
    query_set = ConsultRecord.objects.filter(consultant=request.user, delete_status=False)
    return render(request, 'consult_record_list.html', {'consult_record': query_set})


# 添加和编辑沟通记录
def consult_record(request, edit_id=None):
    record_obj = ConsultRecord.objects.filter(id=edit_id).first()  # 根据edit_id去找
    if not record_obj:
        record_obj = ConsultRecord(consultant=request.user)  # 生成一个销售是我的ConsultRecord对象,此时在form表单中通过instance就能拿到此对象
    form_obj = ConsultRecordForm(instance=record_obj, initial={'consultant': request.user})
    return render(request, 'consult_record.html', {'form_obj': form_obj, 'edit_id': edit_id})
(3)consult_record_list.html中:展示页面
和客户列表页面相似。
一点添加会生成一个form对象,让我去填写--所以要用modelform。
{% extends 'base.html' %}

{% block page-main %}
    <h2 class="sub-header">沟通记录</h2>
    <div class="col-md-12">
        <a href="{% url 'add_record' %}" class="btn btn-success btn-sm">添加</a>
        <div class="col-md-4 pull-right">
            <form action="" method="get" enctype="application/x-www-form-urlencoded">
                <div class="input-group">
                    <input type="text" name="query" class="form-control" placeholder="Search for...">
                    <span class="input-group-btn">
        <button class="btn btn-default" type="submit">搜呀</button>
      </span>
                </div><!-- /input-group -->
            </form>
        </div>
    </div>
    <form action="" method="post">
        {% csrf_token %}
        <div class="col-md-3" style="margin: 5px 0">
            <div class="input-group">
                <select class="form-control" name="action">
                    <option value="">---------</option>
                    <option value="to_public">变为公户</option>
                    <option value="to_private">变为私户</option>
                    <option value="delete">删除</option>
                </select>
                <div class="input-group-btn">
                    <button type="submit" class="btn btn-primary">提交</button>
                </div>
            </div>
        </div>
        <div class="col-md-12">
            <div class="table-responsive">
                <table class="table table-striped table-bordered">
                    <thead>
                    <tr>
                        <th style="width: 20px">选择</th>
                        <th style="width: 20px">#</th>
                        <th style="width: 80px">客户qq</th>
                        <th style="width: 80px">客户姓名</th>
                        <th style="width: 80px">跟进内容</th>
                        <th style="width: 60px">跟进状态</th>
                        <th style="width: 80px">跟进人</th>
                        <th style="width: 90px">跟进日期</th>
                        <th style="width: 20px!important;">操作</th>
                    </tr>
                    </thead>
                    <tbody>
                    {% for record in consult_record %}
                        <tr>
                            <td><input type="checkbox" name="cid" value="{{ record.id }}"></td>
                            <td>{{ forloop.counter }}</td>
                            <td>{{ record.customer.qq }}</td>
                            <td>{{ record.customer.name }}</td>
                            <td>{{ record.note }}</td>
                            <td>{{ record.status }}</td>
                            <td>{{ record.consultant.name }}</td>
                            <td>{{ record.date }}</td>
                            <td><a href="{% url 'edit_record' record.id %}"><i class="fa fa-edit"
                                                                                   aria-hidden="true"></i></a></td>
                        </tr>
                    {% endfor %}
                    </tbody>
                </table>
                <div>
                    {{ page_html|safe }}
                </div>
            </div>
        </div>

    </form>
{% endblock %}
(3)consult_record.html:添加页面
它里面就一个空的表格。
{% extends 'base.html' %}

{% block page-main %}
    <div>
        <h2 class="text-center">{% if edit_id %}编辑沟通记录{% else %}添加沟通记录{% endif %}</h2>
        <form class="form-horizontal" action="" method="post" novalidate>
            {% csrf_token %}
            {% for field in form_obj %}
                <div class="form-group {% if  field.errors.0 %}has-error{% endif %}">
                    <label for="{{ field.id_for_label }}" class="col-sm-2 control-label">{{ field.label }}</label>
                    <div class="col-sm-10">
                        {{ field }}
                        <span class="help-block">{{ field.errors.0 }}</span>
                    </div>
                </div>
            {% endfor %}
            <div class="form-group">
                <div class="col-sm-offset-2 col-sm-10">
                    <button type="submit" class="btn btn-default">提交</button>
                </div>
            </div>
        </form>
    </div>
{% endblock %}
(4)base.html中:
母版中加上跟进记录。

(5)forms.py中:
那我又是用bootstrap,又是用把__init__方法重写一遍(forms.py中三个类都用到了)--所以我把共同的这部分写到一父类中继承。
from django import forms
from crm.models import UserProfile, Customer, ConsultRecord
from django.core.exceptions import ValidationError
from django.core.validators import RegexValidator


# ModelForm
class BootstrapBaseForm(forms.ModelForm):#父类
    def __init__(self, *args, **kwargs):
        super().__init__(*args, **kwargs)
        # 给实例对象的每一个字段添加class
        for field in self.fields.values():
            field.widget.attrs.update({'class': 'form-control'})


class RegForm(BootstrapBaseForm):
    # email = forms.CharField(
    #     validators=[RegexValidator(r"[1-9][0-9]{4,12}@qq\.com", "请输入正确的qq邮箱 heihiehie"), ]
    # )
    re_password = forms.CharField(
        label='确认密码',
        widget=forms.widgets.PasswordInput(),
    )

    class Meta:  # 类的配置信息
        model = UserProfile  # *****
        # fields = '__all__'  # 所有字段都展示
        fields = ['email', 'password', 're_password', 'name', 'mobile']  # 按照顺序展示列表中列出来的字段
        # exclude = ['']  # 把不需要展示的字段排除,展示剩下的字段
        labels = {
            'email': '邮箱',
        }
        error_messages = {
            'password': {
                'min-length': '密码最短多少位',
            }
        }
        widgets = {
            'password': forms.widgets.PasswordInput(),
        }


    def clean_email(self):
        email_value = self.cleaned_data.get('email')
        is_exist = UserProfile.objects.filter(email=email_value)
        if is_exist:
            raise ValidationError('邮箱已被注册')
        else:
            return email_value

    def clean(self):
        pwd_value = self.cleaned_data.get('password')
        re_pwd_value = self.cleaned_data.get('re_password')
        if pwd_value == re_pwd_value:
            return self.cleaned_data
        else:
            self.add_error('re_password', '两次密码不一致')
            raise ValidationError('两次密码不一致')


class CustomerForm(BootstrapBaseForm):

    class Meta:
        model = Customer
        fields = '__all__'
        widgets = {
            'course': forms.widgets.SelectMultiple,
            'birthday': forms.widgets.DateInput(attrs={'type': 'date'}),
        }


# 沟通记录的form
class ConsultRecordForm(BootstrapBaseForm):
    class Meta:
        model = ConsultRecord
        exclude = ['delete_status', ]#排除此字段

    def __init__(self, *args, **kwargs):
        super().__init__(*args, **kwargs)#继承父类方法,给每一字段加class=formcontranl
        # 把customer字段的choice设置成我的客户
        # self.fields['customer'].choices = Customer.objects.filter(consultant=self.instance.consultant).values_list('id','name')
        # 将form表的字段直接修改
        self.fields['customer'] = forms.models.ModelChoiceField(queryset=Customer.objects.filter(consultant=self.instance.consultant))
        self.fields['customer'].widget.attrs.update({'class': 'form-control'})

 浙公网安备 33010602011771号