
实践详细篇-Windows下使用Caffe训练自己的Caffemodel数据集并进行图像分类
三:使用Caffe训练Caffemodel并进行图像分类
上一篇记录的是如何使用别人训练好的MNIST数据做训练测试。上手操作一边后大致了解了配置文件属性。这一篇记录如何使用自己准备的图片素材做图像分类。第一篇《实践详细篇-Windows下使用VS2015编译安装Caffe环境(CPU ONLY) 》有讲过使用Caffe的背景.所以这篇记录使用的素材就是12306的验证码来进行图像识别分类。
1、准备素材
由于这里抓取到的验证码是整合后的大图。就是8张小图片合成的。由于12306的验证码大图并不是固定的,而是每一张验证码图片都是随机使用一些小图组成,所以需要将大图进行切割为八张小图片,这样才能准确的提高识别图。
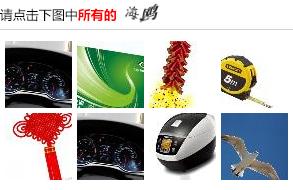
大图:
切割后的小图:
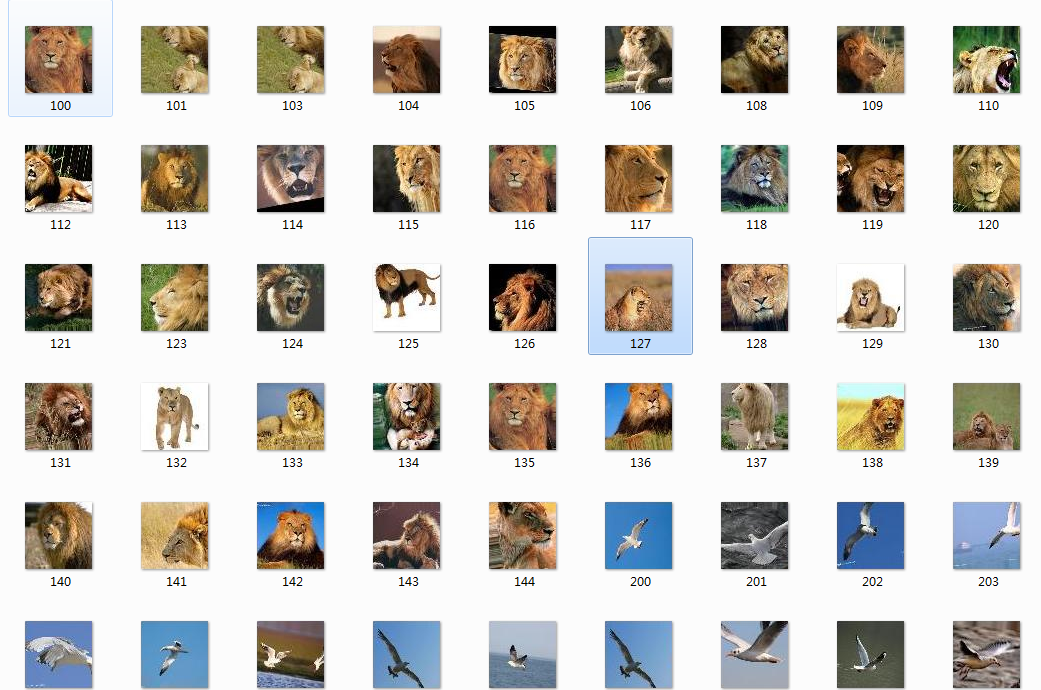
注意:准备的样本图片命名最好有一个格式,比如同一种类型用一种编号,可以是数字或者是数字+字母。比如狮子的编号以100开始,图片编号就是100,101,102....。以此类推。
2、处理样本并将素材转换为leveldb或lmdb数据格式
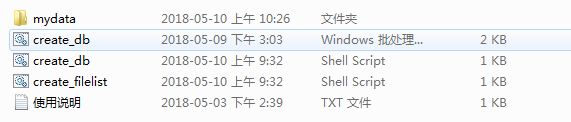
2.1.下载样本处理工具,解压至Caffe根目录。结构如下:
在mydata目录中分别创建train文件夹和test文件夹。train文件夹用于存放训练样本图片,test文件夹用于存放测试样本图片。
注意:
一、train图片资源最好是比测试图片多。
二、图片尺寸需要保持统一并图片名称不能包含特殊字符 有规则的命名,这样便于下一步创建标签
2.2.创建标签样本
首先需要确定自己有几个样本标签。在caffe根目录\examples目录下新建一个文件夹testImg(这个文件夹就是后期用到的训练主目录了,里面将存放均值文件+神经网络等配置主文件。)并在testImg目录下新建一个文本labels.txt 将样本标签内容填写进去,比如我们这里测试用了8个标签样本,分别是:
1 狮子
2 海鸥
3 本子
4 剪纸
5 绿豆
6 啤酒
7 锦旗
8 金字塔
找到create_filelist.sh文件进行编辑
需要修改的地方:
for i in 语句后面对应的就是需要循环的样本编号 需要修改两处,修改完成后直接运行脚本。
- FILETYPE 需要处理的图片类型 我这边使用的是png 如果你是jpg或者其他格式就修改为别的类型即可
#!/usr/bin/env sh
DATA=mydata
FILETYPE=png ##需要处理样本的图片格式
echo "Create train.txt..."
rm -rf $DATA/train.txt
for i in 1 2 3 4 5 6 7 8 ##需要处理几个样本标签就填写几个 我这里处理8个样本  顺序最好是从0开始 我这里以1开始迭代,但是后面我又手动处理了的
do
find $DATA/train -name $i*.$FILETYPE | cut -d '/' -f2-4 | sed "s/$/ $i/">>train.txt
done
echo "Create test.txt..."
rm -rf $DATA/test.txt
for i in 1 2 3 4 5 6 7 8 ##需要处理几个样本标签就填写几个 我这里处理8个样本
do
find $DATA/test -name $i*.$FILETYPE | cut -d '/' -f2-4 | sed "s/$/ $i/">>test.txt
done
echo "All done"
pause
执行脚本进行创建样本文件
Administrator@2T93DQV8MG8N68O MINGW64 /e/shenduxuexi/caffe/create_img_db (windows)
$ sh create_filelist.sh
Create train.txt...
Create test.txt...
All done
执行完成后会在当前脚本目录生成两个文件,分别是train.txt和test.txt样本文件。其中的内容就是使用脚本进行便利图片然后根据图片编号第一位生成了标签编号,标签编号就是用于分类使用的。每一行包含两个内容,分别是图片路径和标签编号。
手动处理:
去掉路径(train/)/(test/),如果将图片分类放置不同的文件夹的话可以不用处理。比如train/老虎/106.png。
将编号-1 也就是 全部替换 将1 改为0 ,2改为1 以此类推,因为标签索引从0开始可以避免一个错误
train.txt文件内容:
train/100.png 1
train/101.png 1
train/103.png 1
train/104.png 1
train/105.png 1
train/106.png 1
train/108.png 1
train/109.png 1
train/110.png 1
train/112.png 1
train/201.png 2
train/202.png 2
train/203.png 2
train/204.png 2
train/205.png 2
train/206.png 2
train/207.png 2
train/208.png 2
........
test.txt内容:
test/100.png 1
test/101.png 1
test/103.png 1
test/104.png 1
test/105.png 1
test/106.png 1
test/108.png 1
test/124.png 1
test/125.png 1
test/200.png 2
test/201.png 2
test/202.png 2
test/203.png 2
test/204.png 2
test/205.png 2
test/206.png 2
test/207.png 2
test/208.png 2
test/209.png 2
test/300.png 3
test/301.png 3
test/302.png 3
test/303.png 3
.......
将两个文件复制到examples/testImg目录下。
2.3.资源转换为数据库文件
找到create_db.sh或create_db.bat文件 进行编辑修改。(如果准备的资源素材图片尺寸不统一则修改resize_height和resize_width表示对图像的尺寸统一转换。自行根据资源决定)我准备的资源尺寸都是67的,所以我在转换的过程就不用附带--resize_height=227 --resize_width=227参数了
#!/usr/bin/env sh
ROOTURL=E:/shenduxuexi/caffe/create_img_db ##当前文件夹绝对路径根目录 根据自己的项目路径修改
BACKEND=lmdb ##需要创建的数据集格式 leveldb或lmdb
echo "Create test $BACKEND.."
rm -rf ./mnist_test_$BACKEND
../scripts/build/tools/Release/convert_imageset --resize_height=227 --resize_width=227 --backend=$BACKEND --shuffle $ROOTURL/mydata/test/  ./test.txt ./mnist_test_$BACKEND
echo "Create train end.."

echo "Create train $BACKEND.."
rm -rf ./mnist_train_$BACKEND
../scripts/build/tools/Release/convert_imageset --resize_height=227 --resize_width=227 --backend=$BACKEND --shuffle $ROOTURL/mydata/train/  ./train.txt ./mnist_train_$BACKEND
echo "All Done.."
修改完成保存后运行create_db.sh文件进行创建图片数据转换,转换成功后会分别创建两个文件夹 mytest_test_lmdb和mytest_train_lmdb。
2.3.1.mytest_test_lmdb文件夹中存放的就是用于测试训练模型的数据集
2.3.2.mytest_train_lmdb文件夹中存放的就是用于训练的数据模型

如两个文件夹中分别包含了以上两个文件表示转换成功了。将转换好的数据模型(mytest_train_lmdb文件夹)和测试数据集(mytest_test_lmdb文件夹)拷贝至examples\testImg文件夹下。
3、计算图像的均值
图片减去均值后再训练会提高训练速度和精度。
caffe程序提供了一个计算均值的工具,所以我们直接使用就可以了
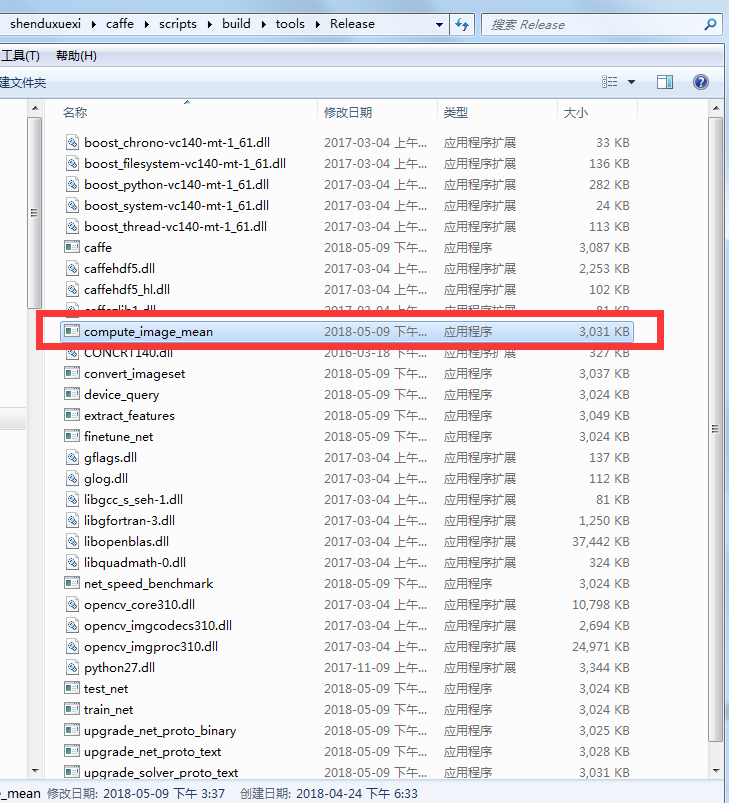
在caffe根目录下新建一个脚本,名为computeImageMean.bat。
第一个是启动均值计算的程序路径(scripts\build\tools\Release\compute_image_mean),
第二个是需要计算均值的数据库文件(examples\testImg\mnist_train_lmdb)
第三个是创建均值保存的路径(examples\testImg\train_mean.binaryproto)。
路径根据自己的项目路径决定
::当前caffe根目录
SET ROOTURL=E:\shenduxuexi\caffe\
%ROOTURL%scripts\build\tools\Release\compute_image_mean %ROOTURL%examples\testImg\mnist_train_lmdb %ROOTURL%examples\testImg\train_mean.binaryproto
pause
创建好脚本后直接双击运行.
E:\shenduxuexi\caffe>E:\shenduxuexi\caffe\scripts\build\tools\Release\compute_image_mean examples\testImg\mnist_train_lmdb examples\testImg\train_mean.binaryproto
I0509 16:23:34.263166 268128 db_lmdb.cpp:40] Opened lmdb examples\testImg\mnist_train_lmdb
I0509 16:23:34.265166 268128 compute_image_mean.cpp:70] Starting iteration
I0509 16:23:34.268167 268128 compute_image_mean.cpp:101] Processed 200 files.
I0509 16:23:34.269166 268128 compute_image_mean.cpp:108] Write to examples\testImg\train_mean.binaryproto
I0509 16:23:34.269166 268128 compute_image_mean.cpp:114] Number of channels: 3
I0509 16:23:34.270167 268128 compute_image_mean.cpp:119] mean_value channel [0]: 113.79
I0509 16:23:34.270167 268128 compute_image_mean.cpp:119] mean_value channel [1]: 138.185
I0509 16:23:34.270167 268128 compute_image_mean.cpp:119] mean_value channel [2]: 160.625
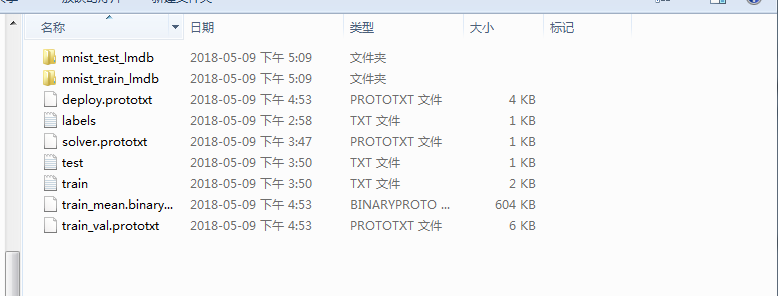
如出现以上反馈即表示运行完成了,均值生成完成后进入examples\testImg文件夹会发现多出一个train_mean.binaryproto文件夹,这个就是均值文件。以上步骤都执行完成后examples\testImg文件下结构如下:
4、训练数据模型
2.2.准备训练神经网络等文件夹(如果豪气的话可以直接点我去下载配置的好的文件,以免出现自己新建文件出现编码格式有误。)
train_val.prototxt文件
name: "CaffeNet"
layer {
  name: "data"
  type: "Data"
  top: "data"
  top: "label"
  include {
    phase: TRAIN
  }
  transform_param {
    mirror: true
    crop_size:227   //训练的图像大小 建议不要太小了 太小会出现识别不出来的,识别度很低,如果设置过高的话又非常浪费时间  我资源是67的 所以我这里修改的是67
    mean_file: "examples/testImg/train_mean.binaryproto"   //均值文件所在的路径,改为你自己的均值文件所在的路径
  }
# mean pixel / channel-wise mean instead of mean image
#  transform_param {
#    crop_size: 227
#    mean_value: 104
#    mean_value: 117
#    mean_value: 123
#    mirror: true
#  }
  data_param {
    source: "examples/testImg/mnist_train_lmdb" //训练样本生成的数据库所在的目录,是训练样本
    batch_size: 50 //每次训练的样本数量 由于我们的训练样本不多,所以我们一次读入50张图片就好
    backend: LMDB //数据模型的格式 lmdb或LEVELDB
  }
}
layer {
  name: "data"
  type: "Data"
  top: "data"
  top: "label"
  include {
    phase: TEST
  }
  transform_param {
    mirror: false
    crop_size:227  //训练的图像大小 建议不要太小了 太小会出现识别不出来的,识别度很低,如果设置过高的话又非常浪费时间  我资源是67的 所以我这里修改的是67
    mean_file: "examples/testImg/train_mean.binaryproto" //均值文件所在的路径,改为你自己的均值文件所在的路径
  }
# mean pixel / channel-wise mean instead of mean image
#  transform_param {
#    crop_size: 227
#    mean_value: 104
#    mean_value: 117
#    mean_value: 123
#    mirror: false
#  }
  data_param {
    source: "examples/testImg/mnist_test_lmdb" //测试样本生成的数据库所在的目录,是测试样本目录
    batch_size: 50 //每次测试的样本数量
    backend: LMDB //数据模型的格式 lmdb或LEVELDB
  }
}
layer {
  name: "conv1"
  type: "Convolution"
  bottom: "data"
  top: "conv1"
  param {
    lr_mult: 1
    decay_mult: 1
  }
  param {
    lr_mult: 2
    decay_mult: 0
  }
  convolution_param {
    num_output: 96
    kernel_size: 11
    stride: 4
    weight_filler {
      type: "gaussian"
      std: 0.01
    }
    bias_filler {
      type: "constant"
      value: 0
    }
  }
}
layer {
  name: "relu1"
  type: "ReLU"
  bottom: "conv1"
  top: "conv1"
}
layer {
  name: "pool1"
  type: "Pooling"
  bottom: "conv1"
  top: "pool1"
  pooling_param {
    pool: MAX
    kernel_size: 3
    stride: 2
  }
}
layer {
  name: "norm1"
  type: "LRN"
  bottom: "pool1"
  top: "norm1"
  lrn_param {
    local_size: 5
    alpha: 0.0001
    beta: 0.75
  }
}
layer {
  name: "conv2"
  type: "Convolution"
  bottom: "norm1"
  top: "conv2"
  param {
    lr_mult: 1
    decay_mult: 1
  }
  param {
    lr_mult: 2
    decay_mult: 0
  }
  convolution_param {
    num_output: 256
    pad: 2
    kernel_size: 5
    group: 2
    weight_filler {
      type: "gaussian"
      std: 0.01
    }
    bias_filler {
      type: "constant"
      value: 1
    }
  }
}
layer {
  name: "relu2"
  type: "ReLU"
  bottom: "conv2"
  top: "conv2"
}
layer {
  name: "pool2"
  type: "Pooling"
  bottom: "conv2"
  top: "pool2"
  pooling_param {
    pool: MAX
    kernel_size: 3
    stride: 2
  }
}
layer {
  name: "norm2"
  type: "LRN"
  bottom: "pool2"
  top: "norm2"
  lrn_param {
    local_size: 5
    alpha: 0.0001
    beta: 0.75
  }
}
layer {
  name: "conv3"
  type: "Convolution"
  bottom: "norm2"
  top: "conv3"
  param {
    lr_mult: 1
    decay_mult: 1
  }
  param {
    lr_mult: 2
    decay_mult: 0
  }
  convolution_param {
    num_output: 384
    pad: 1
    kernel_size: 3
    weight_filler {
      type: "gaussian"
      std: 0.01
    }
    bias_filler {
      type: "constant"
      value: 0
    }
  }
}
layer {
  name: "relu3"
  type: "ReLU"
  bottom: "conv3"
  top: "conv3"
}
layer {
  name: "conv4"
  type: "Convolution"
  bottom: "conv3"
  top: "conv4"
  param {
    lr_mult: 1
    decay_mult: 1
  }
  param {
    lr_mult: 2
    decay_mult: 0
  }
  convolution_param {
    num_output: 384
    pad: 1
    kernel_size: 3
    group: 2
    weight_filler {
      type: "gaussian"
      std: 0.01
    }
    bias_filler {
      type: "constant"
      value: 1
    }
  }
}
layer {
  name: "relu4"
  type: "ReLU"
  bottom: "conv4"
  top: "conv4"
}
layer {
  name: "conv5"
  type: "Convolution"
  bottom: "conv4"
  top: "conv5"
  param {
    lr_mult: 1
    decay_mult: 1
  }
  param {
    lr_mult: 2
    decay_mult: 0
  }
  convolution_param {
    num_output: 256
    pad: 1
    kernel_size: 3
    group: 2
    weight_filler {
      type: "gaussian"
      std: 0.01
    }
    bias_filler {
      type: "constant"
      value: 1
    }
  }
}
layer {
  name: "relu5"
  type: "ReLU"
  bottom: "conv5"
  top: "conv5"
}
layer {
  name: "pool5"
  type: "Pooling"
  bottom: "conv5"
  top: "pool5"
  pooling_param {
    pool: MAX
    kernel_size: 3
    stride: 2
  }
}
layer {
  name: "fc6"
  type: "InnerProduct"
  bottom: "pool5"
  top: "fc6"
  param {
    lr_mult: 1
    decay_mult: 1
  }
  param {
    lr_mult: 2
    decay_mult: 0
  }
  inner_product_param {
    num_output: 4096
    weight_filler {
      type: "gaussian"
      std: 0.005
    }
    bias_filler {
      type: "constant"
      value: 1
    }
  }
}
layer {
  name: "relu6"
  type: "ReLU"
  bottom: "fc6"
  top: "fc6"
}
layer {
  name: "drop6"
  type: "Dropout"
  bottom: "fc6"
  top: "fc6"
  dropout_param {
    dropout_ratio: 0.5
  }
}
layer {
  name: "fc7"
  type: "InnerProduct"
  bottom: "fc6"
  top: "fc7"
  param {
    lr_mult: 1
    decay_mult: 1
  }
  param {
    lr_mult: 2
    decay_mult: 0
  }
  inner_product_param {
    num_output: 4096
    weight_filler {
      type: "gaussian"
      std: 0.005
    }
    bias_filler {
      type: "constant"
      value: 1
    }
  }
}
layer {
  name: "relu7"
  type: "ReLU"
  bottom: "fc7"
  top: "fc7"
}
layer {
  name: "drop7"
  type: "Dropout"
  bottom: "fc7"
  top: "fc7"
  dropout_param {
    dropout_ratio: 0.5
  }
}
layer {
  name: "fc8"
  type: "InnerProduct"
  bottom: "fc7"
  top: "fc8"
  param {
    lr_mult: 1
    decay_mult: 1
  }
  param {
    lr_mult: 2
    decay_mult: 0
  }
  inner_product_param {
    num_output: 8 //样本标签数量 我们这里训练的标签数量是8个 所以我们填写8
    weight_filler {
      type: "gaussian"
      std: 0.01
    }
    bias_filler {
      type: "constant"
      value: 0
    }
  }
}
layer {
  name: "accuracy"
  type: "Accuracy"
  bottom: "fc8"
  bottom: "label"
  top: "accuracy"
  include {
    phase: TEST
  }
}
layer {
  name: "loss"
  type: "SoftmaxWithLoss"
  bottom: "fc8"
  bottom: "label"
  top: "loss"
}
solver.prototxt文件
net: "examples/testImg/train_val.prototxt" //神经网络的配置地址
test_iter: 4 //因为我们的训练图片只有200张,设为4,而batch_size设为50,刚好是200张
test_interval: 50 //每迭代50次, 进行一次测试
base_lr: 0.001
momentum: 0.9
weight_decay: 0.004
lr_policy: "fixed"
display: 1
max_iter: 2000 //最大循环迭代多少次
snapshot: 1000 //每循环多少次生成一次数据模型文件
snapshot_format: HDF5 //输出格式
snapshot_prefix: "examples/testImg/cifar10_quick" //输出文件的前缀
solver_mode: CPU //训练方式
deploy.prototxt文件
name: "CaffeNet"
layer {
  name: "data"
  type: "Input"
  top: "data"
  input_param { shape: { dim: 10 dim: 3 dim: 227 dim: 227 } }  //这里dim 227 两个地方需要对应上你自己训练时候的尺寸,否则会出现以下描述的异常
}
layer {
  name: "conv1"
  type: "Convolution"
  bottom: "data"
  top: "conv1"
  convolution_param {
    num_output: 8
    kernel_size: 11
    stride: 4
  }
}
layer {
  name: "relu1"
  type: "ReLU"
  bottom: "conv1"
  top: "conv1"
}
layer {
  name: "pool1"
  type: "Pooling"
  bottom: "conv1"
  top: "pool1"
  pooling_param {
    pool: MAX
    kernel_size: 3
    stride: 2
  }
}
layer {
  name: "norm1"
  type: "LRN"
  bottom: "pool1"
  top: "norm1"
  lrn_param {
    local_size: 5
    alpha: 0.0001
    beta: 0.75
  }
}
layer {
  name: "conv2"
  type: "Convolution"
  bottom: "norm1"
  top: "conv2"
  convolution_param {
    num_output: 256
    pad: 2
    kernel_size: 5
    group: 2
  }
}
layer {
  name: "relu2"
  type: "ReLU"
  bottom: "conv2"
  top: "conv2"
}
layer {
  name: "pool2"
  type: "Pooling"
  bottom: "conv2"
  top: "pool2"
  pooling_param {
    pool: MAX
    kernel_size: 3
    stride: 2
  }
}
layer {
  name: "norm2"
  type: "LRN"
  bottom: "pool2"
  top: "norm2"
  lrn_param {
    local_size: 5
    alpha: 0.0001
    beta: 0.75
  }
}
layer {
  name: "conv3"
  type: "Convolution"
  bottom: "norm2"
  top: "conv3"
  convolution_param {
    num_output: 384
    pad: 1
    kernel_size: 3
  }
}
layer {
  name: "relu3"
  type: "ReLU"
  bottom: "conv3"
  top: "conv3"
}
layer {
  name: "conv4"
  type: "Convolution"
  bottom: "conv3"
  top: "conv4"
  convolution_param {
    num_output: 384
    pad: 1
    kernel_size: 3
    group: 2
  }
}
layer {
  name: "relu4"
  type: "ReLU"
  bottom: "conv4"
  top: "conv4"
}
layer {
  name: "conv5"
  type: "Convolution"
  bottom: "conv4"
  top: "conv5"
  convolution_param {
    num_output: 256
    pad: 1
    kernel_size: 3
    group: 2
  }
}
layer {
  name: "relu5"
  type: "ReLU"
  bottom: "conv5"
  top: "conv5"
}
layer {
  name: "pool5"
  type: "Pooling"
  bottom: "conv5"
  top: "pool5"
  pooling_param {
    pool: MAX
    kernel_size: 3
    stride: 2
  }
}
layer {
  name: "fc6"
  type: "InnerProduct"
  bottom: "pool5"
  top: "fc6"
  inner_product_param {
    num_output: 4096
  }
}
layer {
  name: "relu6"
  type: "ReLU"
  bottom: "fc6"
  top: "fc6"
}
layer {
  name: "drop6"
  type: "Dropout"
  bottom: "fc6"
  top: "fc6"
  dropout_param {
    dropout_ratio: 0.5
  }
}
layer {
  name: "fc7"
  type: "InnerProduct"
  bottom: "fc6"
  top: "fc7"
  inner_product_param {
    num_output: 4096
  }
}
layer {
  name: "relu7"
  type: "ReLU"
  bottom: "fc7"
  top: "fc7"
}
layer {
  name: "drop7"
  type: "Dropout"
  bottom: "fc7"
  top: "fc7"
  dropout_param {
    dropout_ratio: 0.5
  }
}
layer {
  name: "fc8"
  type: "InnerProduct"
  bottom: "fc7"
  top: "fc8"
  inner_product_param {
    num_output: 8 //配置的标签个数
  }
}
layer {
  name: "prob"
  type: "Softmax"
  bottom: "fc8"
  top: "prob"
}
三个配置文件准备完成

在caffe根目录下新建一个run.bat文件并填写以下代码
scripts/build/tools/Release/caffe.exe train --solver=examples/testImg/solver.prototxt
pause
双击执行脚本。
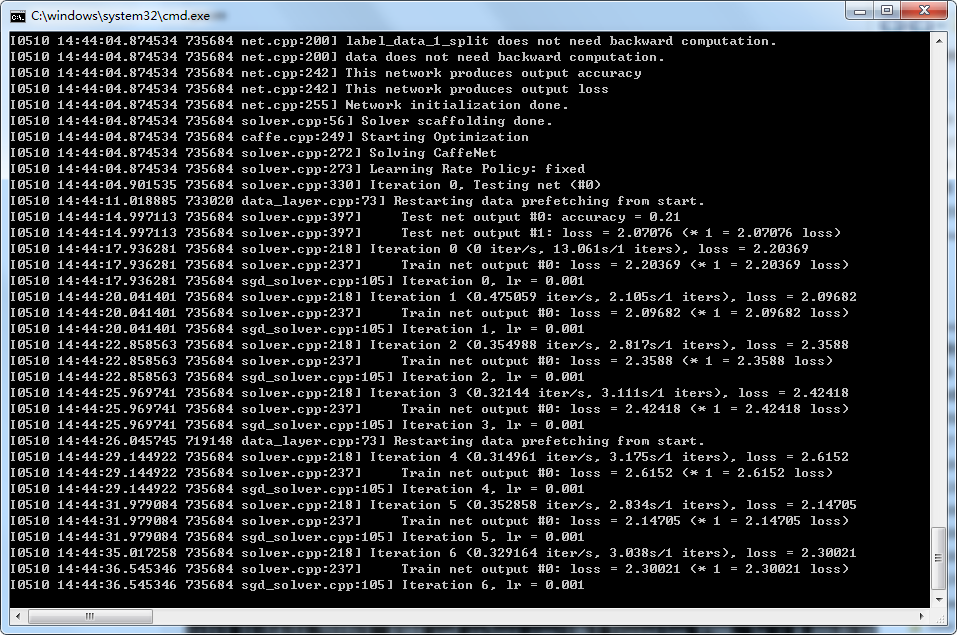
以上就是正在进行训练的过程了,看图片设置的大小以及训练次数决定时间。 Iteration 6就是当前已经训练到的次数,solver.prototxt文件中的max_iter属性决定了最大迭代次数。所以耐心等待训练完成吧。

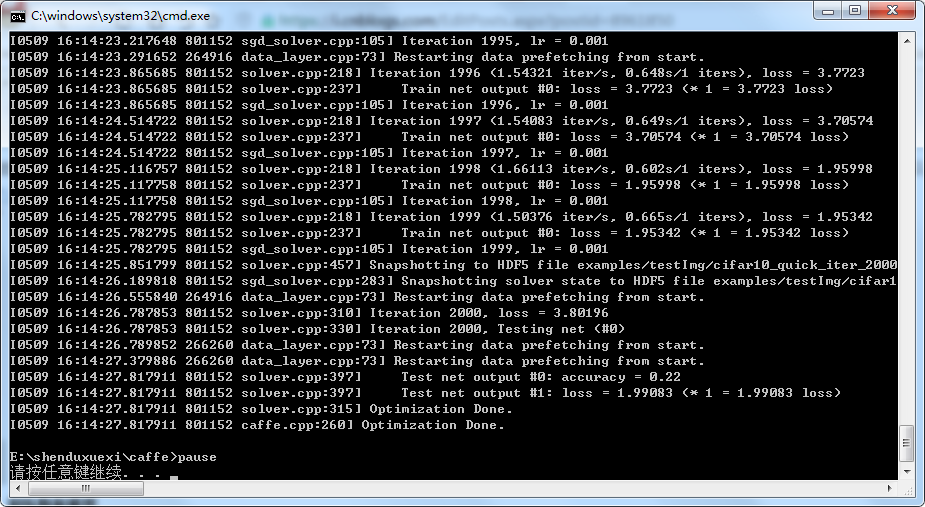
经过几个小时的等待,终于训练完成。
训练过程由于配置信息不同很容易造成失败,以下就是整理了几个异常信息。
异常1:
I0509 15:10:03.983913 158628 layer_factory.cpp:58] Creating layer data
I0509 15:10:03.984913 158628 db_lmdb.cpp:40] Opened lmdb examples/testImg/mnist_train_lmdb
I0509 15:10:03.984913 158628 net.cpp:84] Creating Layer data
I0509 15:10:03.984913 158628 net.cpp:380] data -> data
I0509 15:10:03.984913 158628 net.cpp:380] data -> label
I0509 15:10:03.984913 158628 data_transformer.cpp:25] Loading mean file from: examples/testImg/train_mean.binaryproto
I0509 15:10:03.984913 158628 common.cpp:36] System entropy source not available, using fallback algorithm to generate seed inste
F0509 15:10:03.985913 158628 data_transformer.cpp:466] Check failed: datum_height >= crop_size (32 vs. 227)
*** Check failure stack trace: ***
如执行run.bat出现以上错误的原因是因为train_val.prototxt文件中的 crop_size: 32大小设置的和模型图像大小不一样,确认是否在 2.3.资源转换为数据库文件这一步骤的时候设置的图像大小和train_val.prototxt文件设置的crop_size大小是否一致 不一致的话需要修改crop_size属性值。
异常2:
F0509 15:47:32.350512 263476 data_transformer.cpp:63] Check failed: datum_height == data_mean_.height() (67 vs. 24)
*** Check failure stack trace: ***
出现这种情况的原因是因为在生成数据模型文件(cifar10_quick_iter_2000.caffemodel.h5)的时候和数据均值文件里面的图像高度和宽度不一致导致的。
异常3:
t_format.cc:298] Error parsing text-format caffe.NetParameter: 17:3: Unknown enu
meration value of "lmdb" for field "backend".
F0503 09:41:57.582864  7968 upgrade_proto.cpp:88] Check failed: ReadProtoFromTex
tFile(param_file, param) Failed to parse NetParameter file: examples/mnist/lenet
_train_test.prototxt
*** Check failure stack trace: ***
因为生成的数据格式和训练格式不一致,核对下生成数据库文件时设置的--backend数据格式是否和train_val.prototxt文件中的backend属性配置的一致
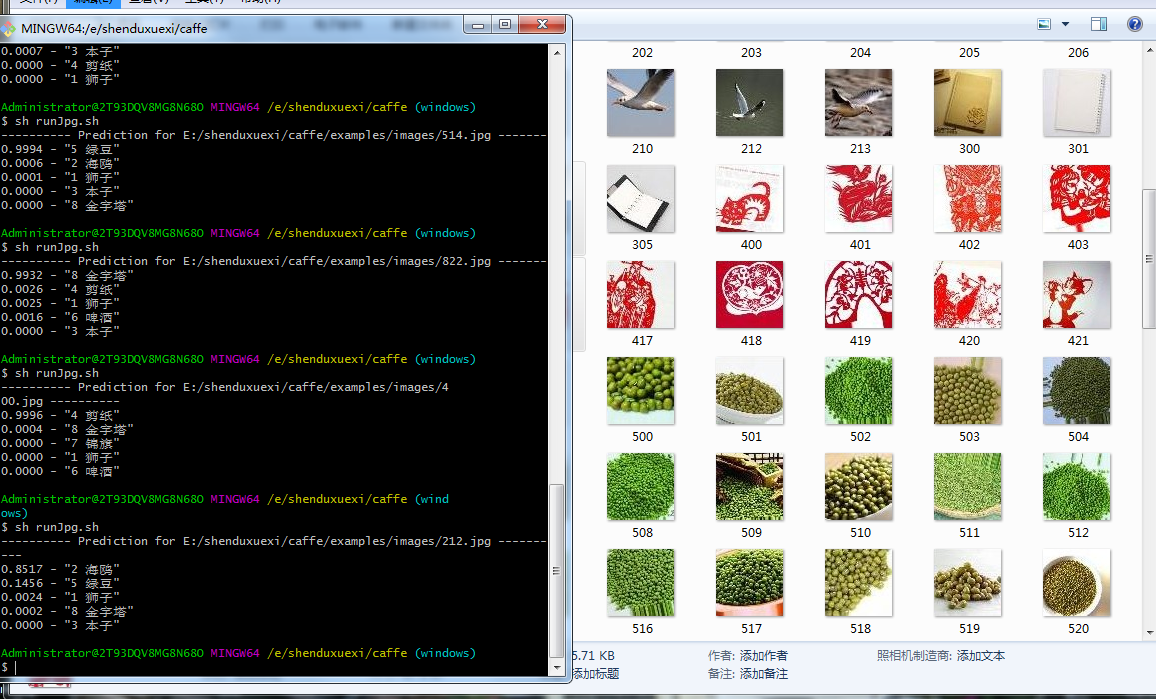
5、进行测试图像分类效果
首先在caffe根目录新建一个sh脚本,然后将以下代码复制进去
./scripts/build/examples/cpp_classification/Release/classification.exe examples/testImg/deploy.prototxt examples/testImg/cifar10_quick_iter_1000.caffemodel.h5 examples/testImg/train_mean.binaryproto examples/testImg/labels.txt E:/shenduxuexi/caffe/examples/images/212.jpg
参数描述:
./scripts/build/examples/cpp_classification/Release/classification.exe 这个是caffe提供的一个C++图像分类工具
examples/testImg/deploy.prototxt 神经网络的配置地址
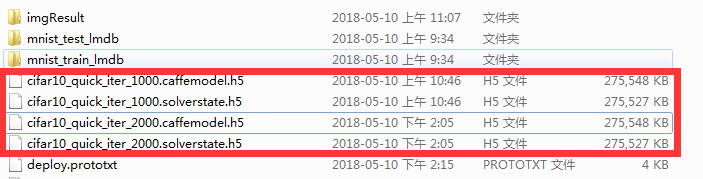
examples/testImg/cifar10_quick_iter_1000.caffemodel.h5 训练出来的数据模型地址
examples/testImg/train_mean.binaryproto 计算的均值文件地址
examples/testImg/labels.txt 标签别名地址 对应的就是样本标签的顺序 比如狮子原图是100.png 编号索引就是1 那labels第一行就是写一个别称 狮子即可 这样识别出来的时候就不是数字顺序
E:/shenduxuexi/caffe/examples/images/212.jpg 需要进行分类的测试图片
以上参数需要根据自己电脑环境地址配置,配置完成双击运行。
效果图如下:
测试过程可能出现的几个异常情况,这边也亲测整理了下。
异常1:
*** Check failure stack trace: ***
F0509 10:19:03.050204 651172 classification.cpp:82] Check failed: labels_.size() == output_layer->channels() (100 vs. 1000) Number of labels is different from the output layer dimension.
生成训练模型的时候配置文件solver.prototxt配置的num_output属性为1000 而设置的测试lables标签只有100,也就是训练标签和测试别名标签不一致导致的
异常2:
*** Check failure stack trace: ***
F0509 19:21:29.603761 359572 hdf5.cpp:79] Check failed: blob_dims == blob->shape() Cannot load blob from h                           df5; shape mismatch. Source shape is 8 4096 (32768) target shape is 1000 4096 (4096000)
分类识别过程出现这个 是因为训练的模型设置标签是8个 但是识别的时候deploy.prototxt配置文件的num_output属性是配置的1000个标签。将num_output: 1000修改为num_output: 8即可
layer {
name: "fc8"
type: "InnerProduct"
bottom: "fc7"
top: "fc8"
inner_product_param {
num_output: 1000
}
}
异常3:
---------- Prediction for E:/shenduxuexi/caffe/examples/images/730 ----------
*** Check failure stack trace: ***
F0510 15:52:47.969362 721856 classification.cpp:251] Check failed: !img.empty()                          Unable to decode image E:/shenduxuexi/caffe/examples/images/730
主要原因是因为需要被识别分类的图片路径有问题,需要附带图片后缀。不知为何我跑PNG的图片做分类也是这个错误,所以如果使用的是.png后缀格式图片出现以上错误的话就将图片进行格式转换即可。点我下载批量转换图片工具
总结:
历经长久的学习和尝试,终于完美的运行了自己想要的结果。三篇博客都是匆匆忙忙记录的,因为我也是初学,刚接触。在安装caffe的过程也是踩了不少坑,做训练自己的图片素材也是,所以我记录这篇博客的主要原因是为了方便自己后期的使用,那么既然自己记录了也顺便分享出来希望能帮助有需要的小伙伴。

 浙公网安备 33010602011771号