Feign远程调用
一、基于Feign的远程调用
1.添加客户端依赖
        <!--feign客户端依赖-->
        <dependency>
            <groupId>org.springframework.cloud</groupId>
            <artifactId>spring-cloud-starter-openfeign</artifactId>
        </dependency>
2.添加注解@EnableFeignClients
@SpringBootApplication
@EnableFeignClients
public class OrderApplication {

    public static void main(String[] args) {
        SpringApplication.run(OrderApplication.class, args);
    }
}
3.编写FeignClient接口
@FeignClient("userservice")
public interface UserClient {

    @GetMapping("/user/{id}")
    User findById(@PathVariable("id") Long id);
}
4.使用FeignClient中定义的方法代替RestTemplate
 1 @Service
 2 public class OrderService {
 3
 4     @Autowired
 5     private OrderMapper orderMapper;
 6
 7     @Autowired
 8     private UserClient userClient;
 9
10     public Order queryOrderById(Long orderId) {
11         // 1.查询订单
12         Order order = orderMapper.findById(orderId);
13         // 2.用feign远程调用
14         User user = userClient.findById(order.getUserId());
15         // 3.封装user到order
16         order.setUser(user);
17         // 4.返回
18         return order;
19     }
20 }
二、自定义Feign的配置
配置Feign日志:
方式一:配置文件方式
1)全局生效
feign:
  client:
      config:
        default:   # default全局的配置
          loggerLevel: BASIC  # 日志级别
2)局部生效
feign:
  client:
      config:
        userservice:   # 服务名称,针对某个微服务的配置
          loggerLevel: BASIC  # 日志级别
方式二:java代码方式
public class DefaultFeignConfiguration {

   @Bean
    public Logger.Level logLevel() {

       return Logger.Level.BASIC;

    }
}
如果是全局变量,放到@EnableFeignClients注解中
@EnableFeignClients(defaultConfiguration = DefaultFeignConfiguration.class)
如果是局部变量,放到@FeignClient注解中
@FeignClient(value = "userservice" ,configuration = FeignClientfiguration.class)
三、Feign的性能优化
Feign底层的客户端实现:
1)URLConnection:默认实现,不连接数据池
2)Apache HttpClient:支持数据池
3)OKHttp:支持数据池
优化Feign的性能主要包括:
1)使用连接池代替默认的URLConnection,使用HttpClient或OKHttp
2)日志级别,最好用basic或none
步骤:
1.引入HttpClient的依赖
       <!--引入HttpClient依赖-->
        <dependency>
            <groupId>io.github.openfeign</groupId>
            <artifactId>feign-httpclient</artifactId>
        </dependency>
2.配置连接池
1 feign:
2   client:
3     config:
4       default:   # default全局的配置
5         loggerLevel: BASIC  # 日志级别
6   httpclient:
7     enabled: true  # 支持HttpClient的开关
8     max-connection: 200  # 最大的连接数
9     max-connection-per-route: 50  # 每个路径的最大连接数
四、Feign的最佳实践
方式一:继承,给消费者的FeignClient和提供者的controller定义统一的父接口
方式二:抽取,将FeignClient抽取为独立模块,并且把接口有关的POJO、默认的Feign配置都放到这个模块中
实现方式二步骤:
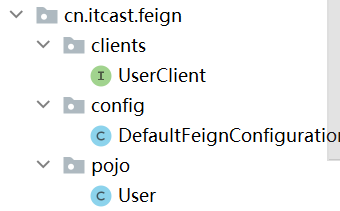
1.首先创建一个Module,命名为feign-api,然后引入feign的依赖
        <dependency>
            <groupId>org.springframework.cloud</groupId>
            <artifactId>spring-cloud-starter-openfeign</artifactId>
        </dependency>
2.将order-service中编写的UserClient、User、DefaultFeignClient都赋值到项目中
3.在order-service中引入feign-api的依赖
        <dependency>
            <groupId>cn.itcast.demo</groupId>
            <artifactId>feign-api</artifactId>
        </dependency>
4.修改order-service中的所有与上述三个组件有关的import部分,改成导入feign-api中的包
5.重启测试
不同包的FeignClient的导入方式:
1)在@EnableFeignClients注解中添加basePackes,指定所在的包
2)在@EnableFeignClients注解中添加clients,指定具体的字节码
@SpringBootApplication
@EnableFeignClients  (clients = UserClient.class,defaultConfiguration = DefaultFeignConfiguration.class)
public class OrderApplication {

    public static void main(String[] args) {
        SpringApplication.run(OrderApplication.class, args);
    }
}

 浙公网安备 33010602011771号