C7N主题切换
需求:
(1)多套主题随意切换
(2)一套主题下的组件有不同的样式可供切换
(3)组件之间的样式相互独立,切换互不影响
思路:
(1)将组件的样式提取出来一套模板,主题数据嵌入模板就形成了一套主题。
抽离模板,通过容器的Context 控制样式:
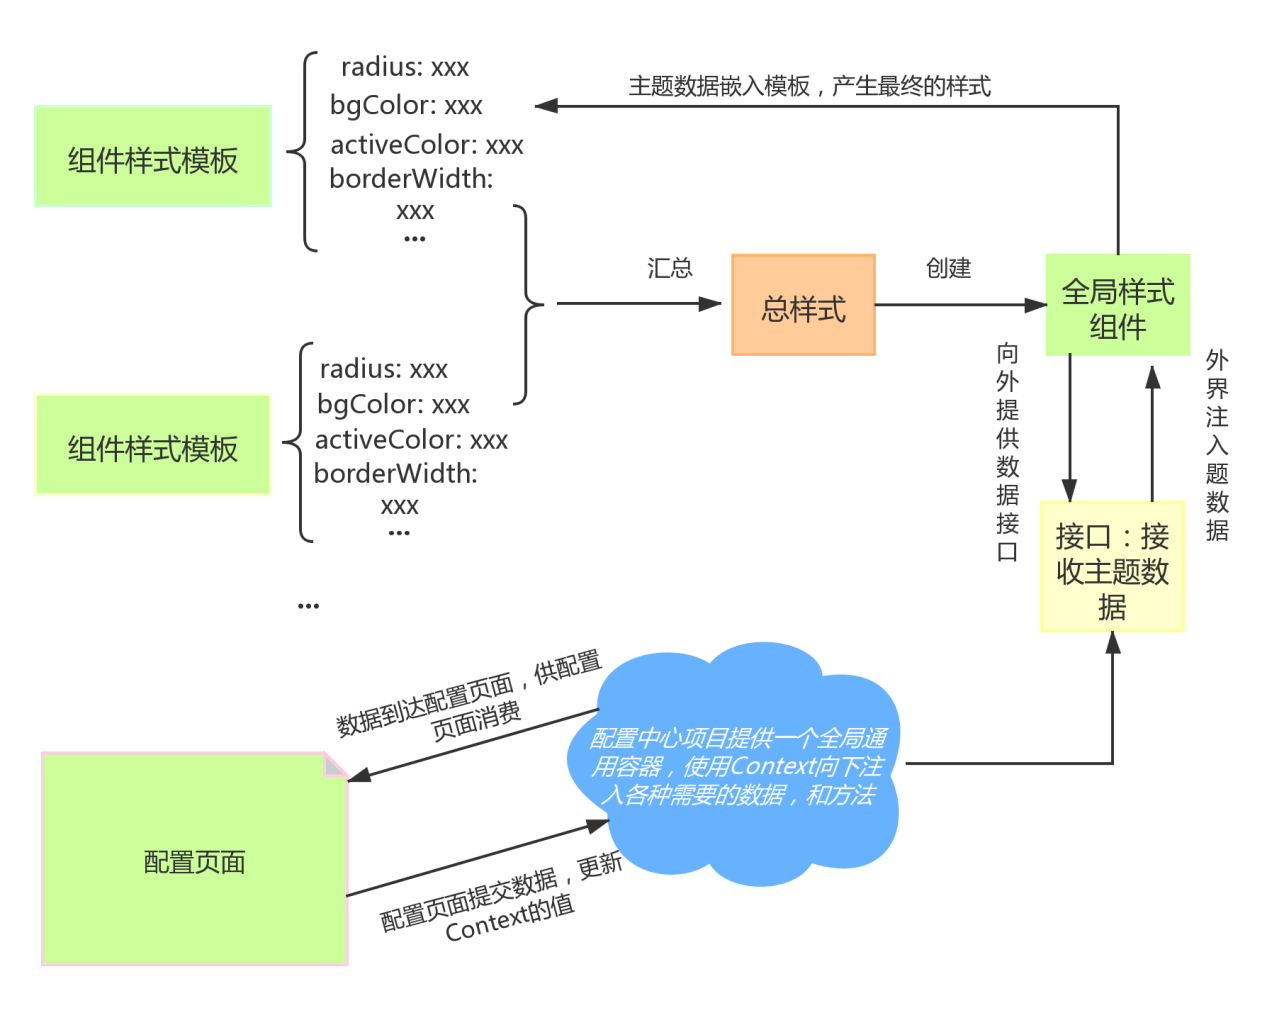
(1)数据与模板对接:
1.利用css辅助函数生成样式片段
例如:
// themes/Button.style.js
import {css} from 'styled-components';
export default css`
  /* 样式实现 */
`;
2.利用 styled-components 里面的 createGlobalStyle 来结合片段,生成全局样式组件
例如:
// themes/index.js
// 在这里将样式汇总,同时创建一个全局样式组件
import {createGlobalStyle} from 'styled-components';
import buttonStyle from 'Button.style.js'
import inputStyle from 'Input.style.js'
export default createGlobalStyle`
  ${buttonStyle}
  ${inputStyle}
  // ...
`;
3.全局样式组件对外提供了一个接口,用于接受外部传来的主题数据,我们只需改变传入的数据,就能实现所以组件的样式切换
4.切换主题的逻辑都在顶级容器内完成
例如:
// Container/index.js
import defaultConfig from 'path/to/config/file';
import themeOneData from 'theme-data/theme1';
import themeTwoData from 'theme-data/theme2';
const themeMap = new Map([
  ['theme1', themeOneData],
  ['theme2', themeTwoData],
]);
export default function Container(props) {
  const [config, setConfig] = useState(defaultConfig);
  const themeData = themeMap.get(config.schema);
  // 出于性能考虑,只有主题配置改变时才去重新解析数据
  const currentTheme = useMemo(() => resolveThemeData(themeData, config), config);
  return (
    <ThemeProvider value={{...theme, setTheme: setConfig}}>
      <ThemeStyle theme={currentTheme} />
      {props.children}
    </ThemeProvider>
  );
}
.

 浙公网安备 33010602011771号