

.NetCore 3.x Signalr JavaScript客户端使用
在尝试.NetCore 3.x SignalR文章中我已经介绍了如何使用signalr,本篇文章就对javascrip客户端做一个简单的示例。
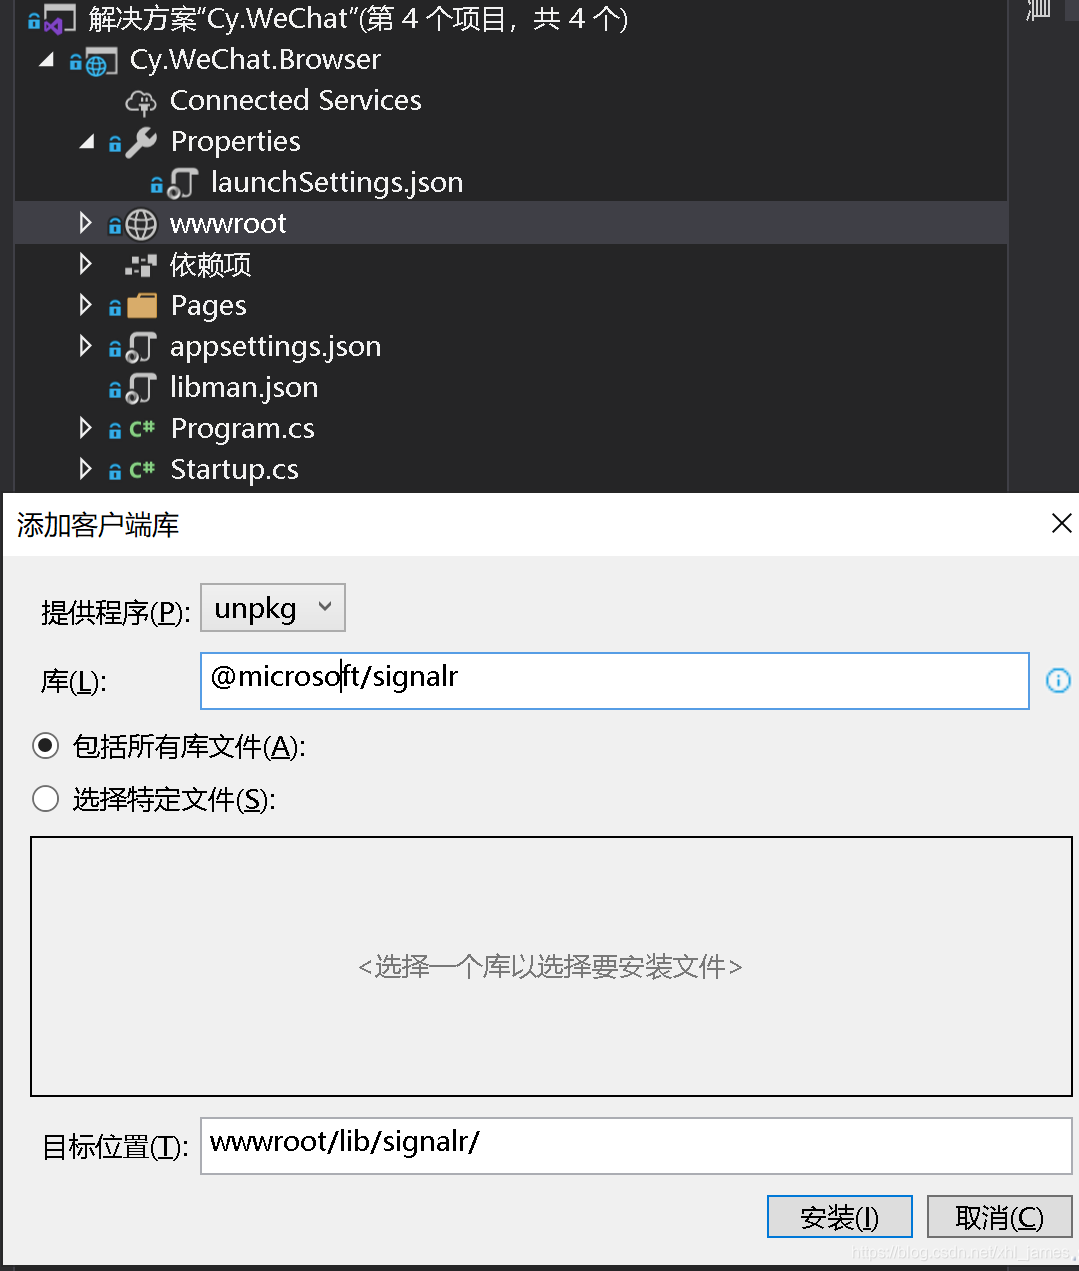
1、安装 SignalR 客户端包
在我的项目中使用libman包管理器进行安装@microsoft/signalr包
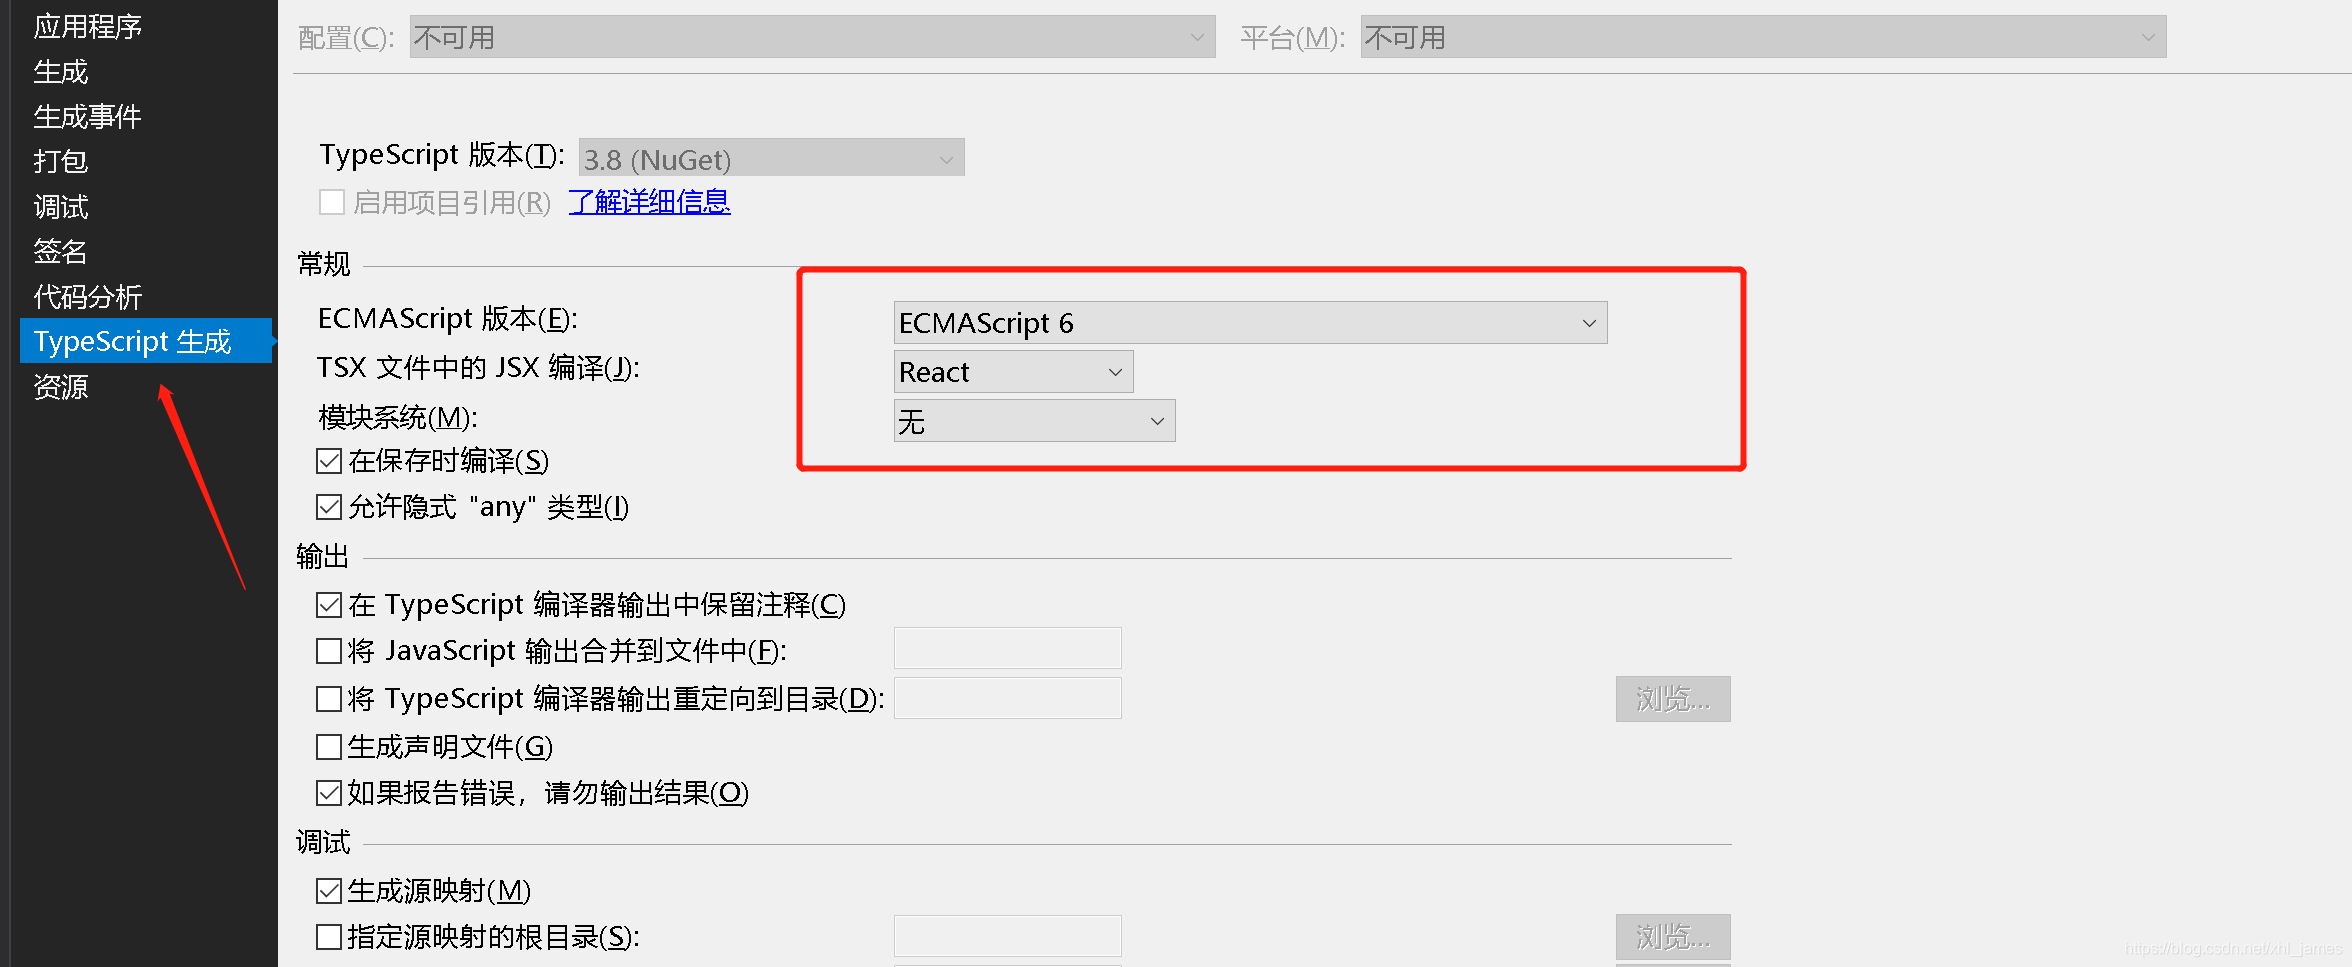
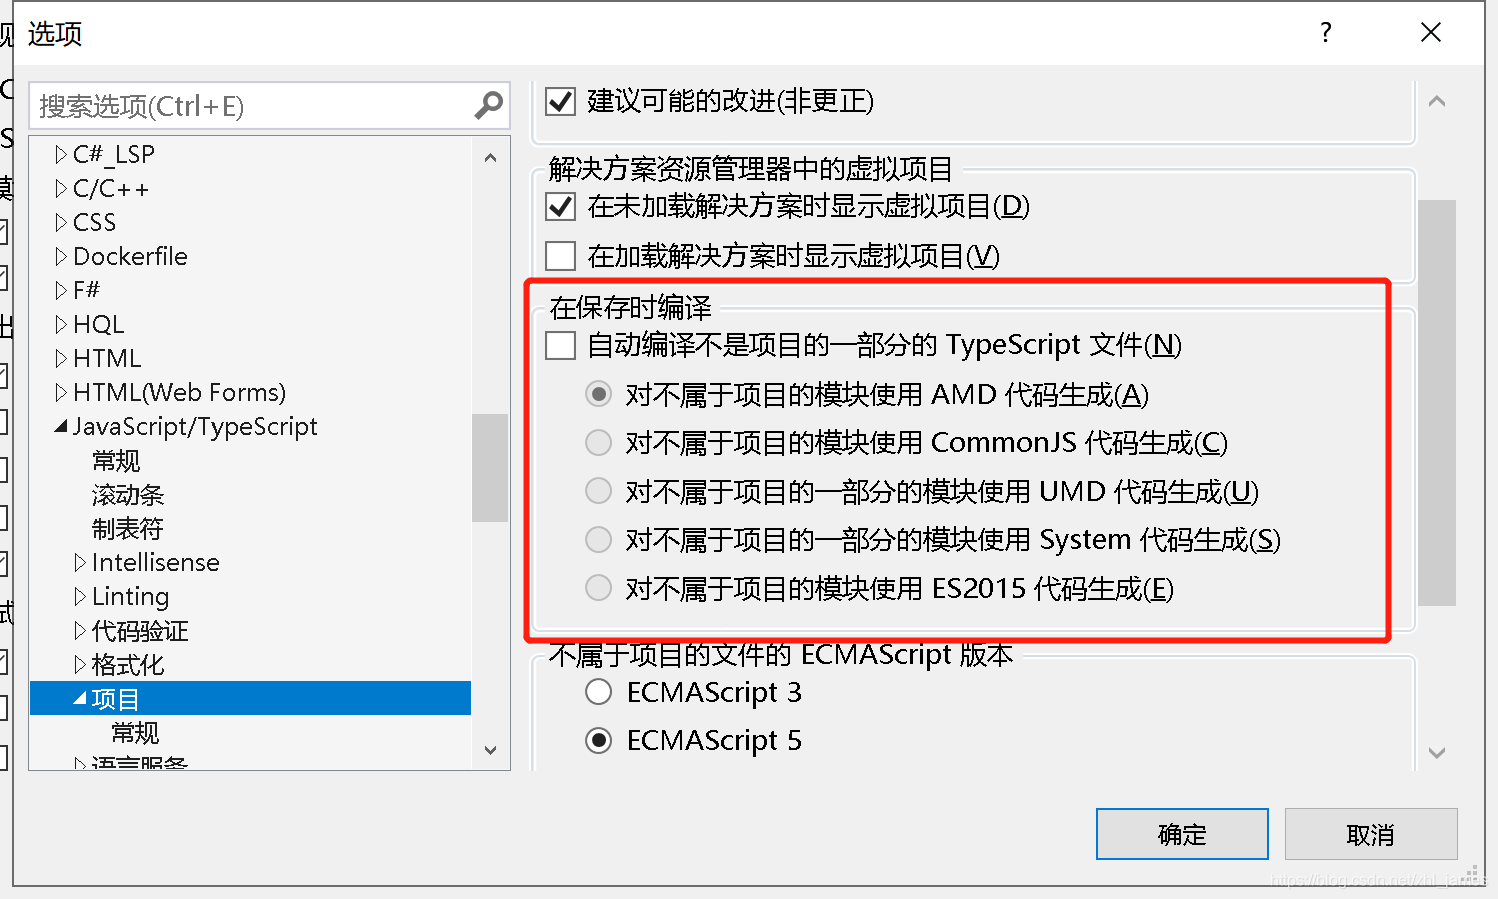
当我安装完成后使用VS编译时TypeScript编译不过,这时需要安装Microsoft.TypeScript.MSBuild,安装后还是有错误编译不过,需要对项目属性进行设置以及VS选项设置。
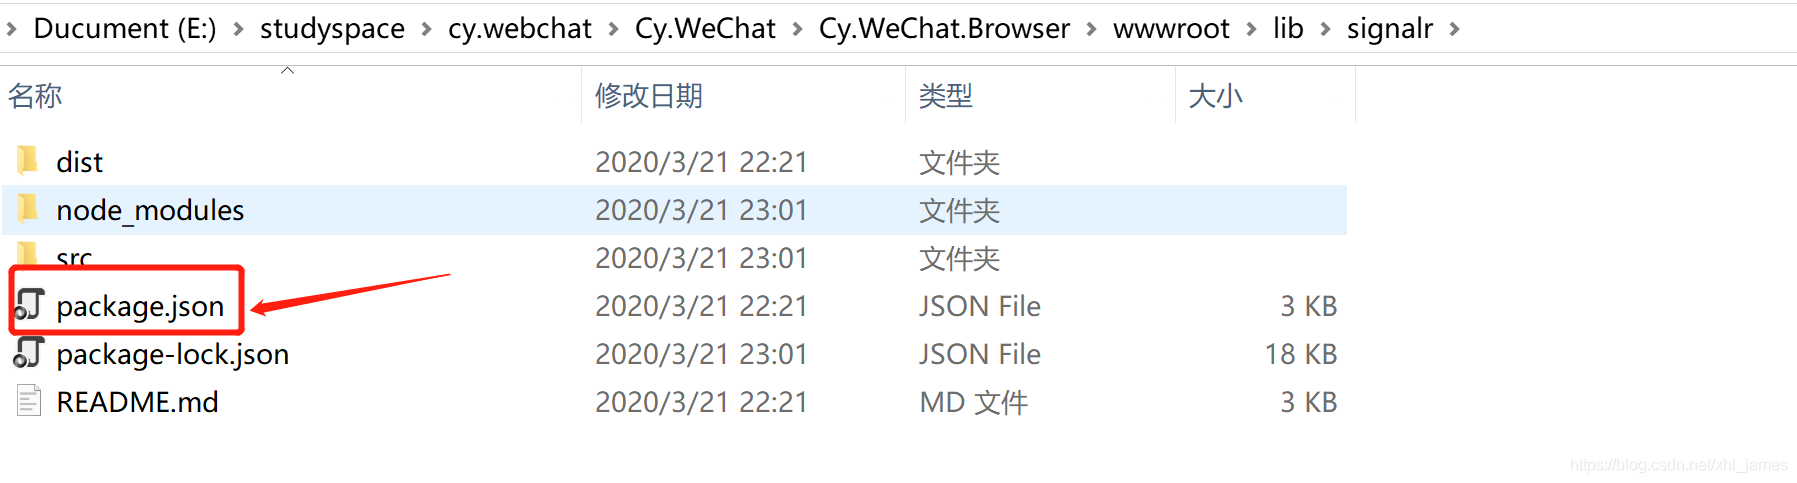
这时编译的时候还是有错,结果瞎捣鼓半天结果是没有初始化npm install,@microsoftsignalr存在其他包依赖,所以需要npm或yarn安装。
使用libman包管理器安装后会出现一个package.json文件,定位到该目录安装。
npm install
到这里项目终于就编译成功了,可以继续撸我们的javascrip客户端代码了
2、引入SignalR JavaScript 客户端
这里根据需要引入,import、CommonJS 、< Script>等,我这里直接< Script>引入。
<script src="~/lib/signalr/dist/browser/signalr.js"></script>
3、连接到集线器中心
<script type="text/javascript">
    window.onload = function () {
        const userid = this.prompt('请输入你的名字')
        // 为后期做扩展
        const user = {
            userId: userid,
            groupName: 'cygroup',
            ip: '127.0.0.1'
        }
        if (user.userId) {
            setTimeout(() => {
                const url = `https://localhost:5001/notify?groupId=${user.groupName}&userId=${user.userId}&ip=${user.ip}`
                const connection = new signalR.HubConnectionBuilder()
                    .withUrl(url)
                    .configureLogging(signalR.LogLevel.Information)
                    .build();

                connection.start().then(function () {
                    appendContent(`${user.userId}登录成功......`);
                });

                connection.on("ReceiveMessage", (message) => {
                    console.log('ReceiveMessage-MESSAGE', message);
                    appendContent(message.content, message.from);
                });

                connection.on("ReceiveConnection", (message) => {
                    console.log('ReceiveConnection-MESSAGE', message);
                    appendContent(message.content);
                });
                connection.on("ReceiveDisConnection", (message) => {
                    console.log('ReceiveDisConnection-MESSAGE', message);
                    appendContent(message.content);
                });

                const btn = document.getElementById("send")
                btn.addEventListener('click', function () {
                    const target = document.getElementById('text')
                    connection.invoke("SendMessage", user.userId, user.groupName, target.value)
                        .then(_ => {
                            target.value = '';
                        })
                        .catch(err => console.error(err.toString()));
                })
            }, 2000);
        }
    }

    function appendContent(content, badge) {
        let li = document.createElement("li");
        li.className = 'list-group-item';
        if (badge) {
            const span = document.createElement('span');
            span.className = 'badge';
            span.innerText = badge+':';
            li.appendChild(span);
        }
        li.innerHTML += content;
        document.getElementById("messagesList").appendChild(li);
    }
</script>
可视化展示代码:
@page
@model IndexModel
@{
    ViewData["Title"] = "Home page";
}
<style type="text/css">
    .content {
        width: 100%;
        height: 100%;
        display: flex;
        justify-content: left;
        border: solid #4cff00 1px;
        margin-top:2rem;
    }
    .badge{
        font-size:large;
        font-weight:bolder;
        color:aquamarine;
    }
    #messagesList {
        width: 100%;
    }
</style>
<div class="container">
    <textarea rows="3" id="text" cols="120" class="text" placeholder="输入要发送的文字信息"></textarea>
    <button id="send" class="btn btn-primary">发送</button>
    <div class="content">
        <ul id="messagesList" class="list-group">
        </ul>
    </div>
</div>
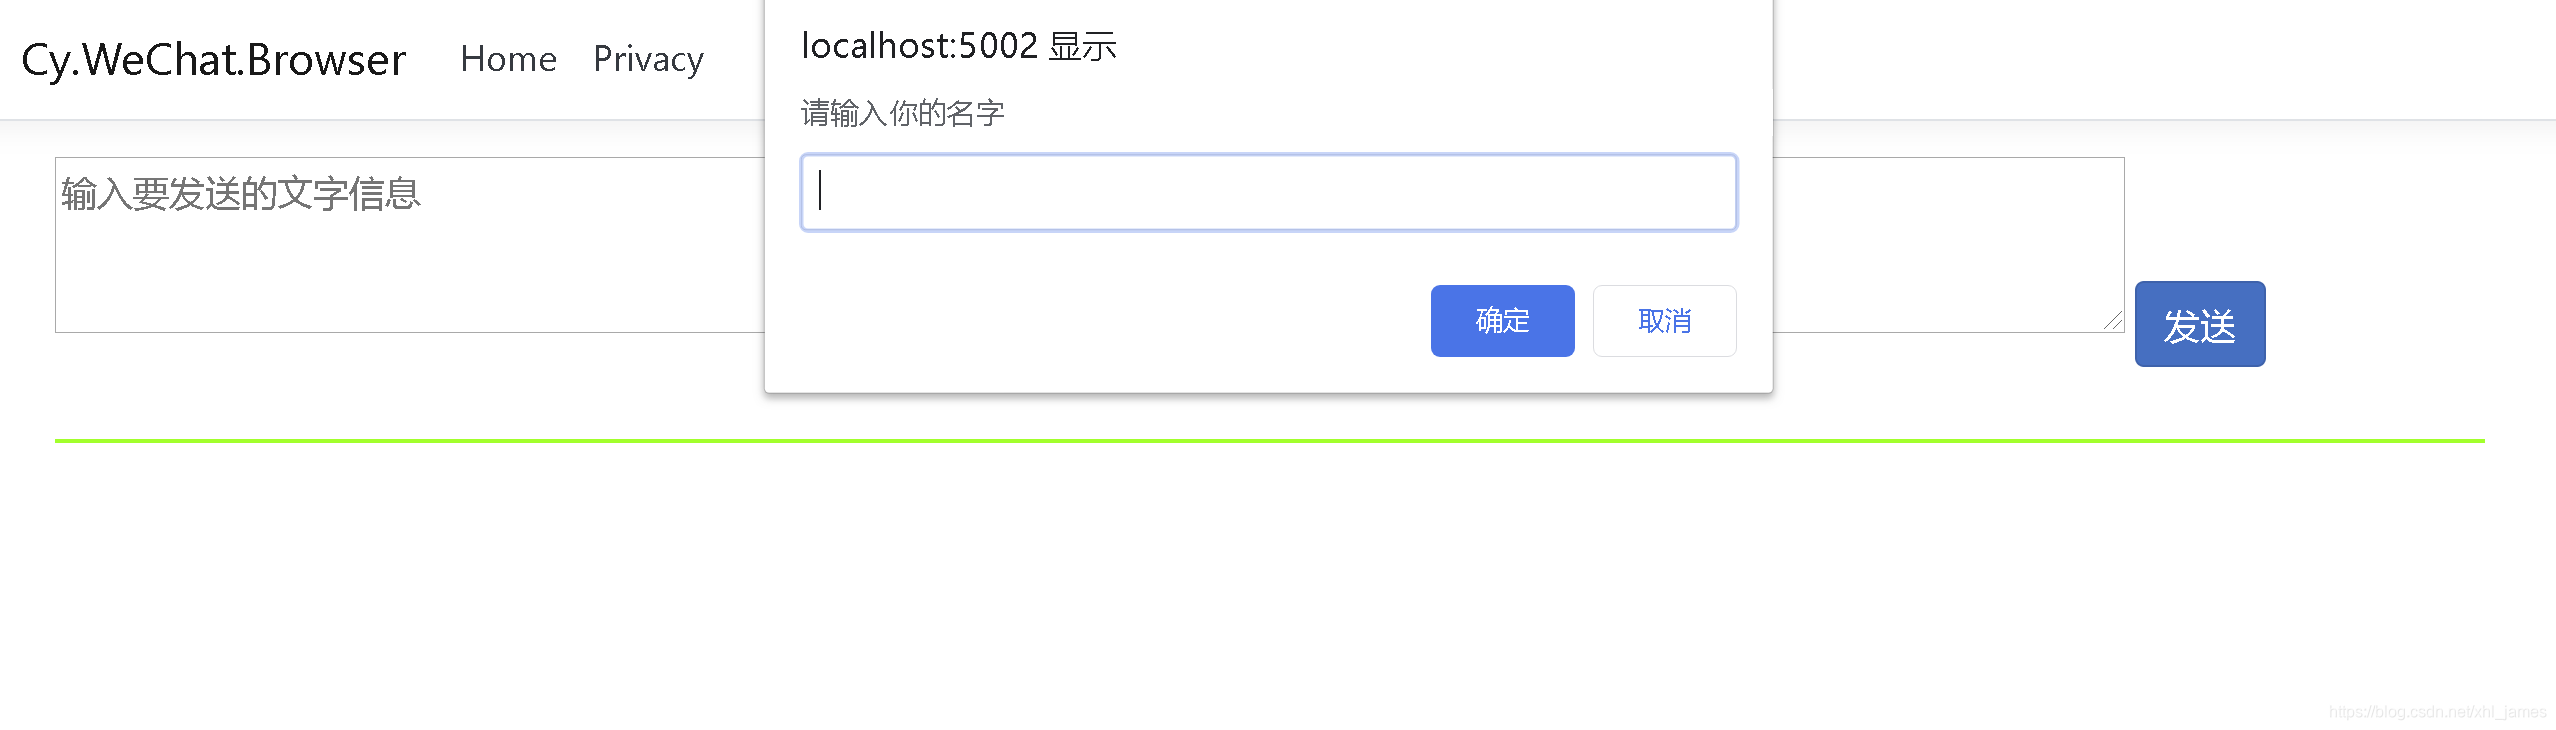
4、效果展示
- 启动主页输入姓名
![在这里插入图片描述]()
- 打开多个窗口进行交互
![在这里插入图片描述]()

这里我只是通过简单的分组进行发送,根据实际的业务场景可以登录的时候直接获取出用户的信息(所属的群、用户Id等)
接下来会讲解下管理 SignalR 中的用户和组
源码地址:https://github.com/jonny-xhl/Cy.WeChat 若给你带来了帮助请欢迎Star
参考文献:
https://docs.microsoft.com/zh-cn/aspnet/core/signalr/introduction?view=aspnetcore-3.1
https://blog.csdn.net/xhl_james/article/details/89235081
https://blog.csdn.net/xhl_james/article/details/105032825
Signalr篇文章目录:
一、尝试.NetCore 3.x SignalR
二、JavaScript客户端使用
三、管理 SignalR 中的用户和组
四、强类型中心详解(Hub< T >)
五、ASP.NET Core 中的身份验证和授权 SignalR

 浙公网安备 33010602011771号