Win10 Ubuntu系统Tensorflow环境的搭建
软件安装
一、在windows中安装WSL2
① 加入windows预览体验计划,并将系统升级到特定版本以上
② 打开“适用于Linux的windows子系统”选项
(这两步请参照官网教程 ,系统版本越新越好)
③ WSL目前有两个版本,如果使用Ubuntu20.04子系统,并且要实现GUI界面,那么必须将其升为WSL2。
以管理员身份打开PowerShell,执行如下的命令:
dism.exe /online /enable-feature /featurename:Microsoft-Windows-Subsystem-Linux /all /norestart
必须保证Windows的版本在1903以上(包括1903),并且Build必须在18362以上(包括18362)。
在打开的PowerShell中执行如下命令:
dism.exe /online /enable-feature /featurename:VirtualMachinePlatform /all /norestart
下载WSL2的内核
注意:这个下载的只适用x64机器,如果是ARM机器,就需要换一个下载源
下载的是msi文件,直接双击安装既可以。弹窗选择是。
设置WSL的版本为WSL2,在PowerShell中执行如下的命令:
wsl --set-default-version 2
原文链接:https://blog.csdn.net/DraemSky/article/details/120123595
④等待安装完成后会自动弹出ubuntu18.04的窗口,之后会要求设置用户名和密码,照做即可。
验证: 到此为止不出错,并且能够正常显示ubuntu命令行即可。
VcXsrv安装
① 在windows中,下载 VcXsrV 并安装,具体流程参见这个网址 中 “VcXsrc 安装”部分
② 在ubuntu的命令行中,输入下面命令,等待安装完成即可。
sudo apt install ubuntu-desktop
首先,在 windows 中
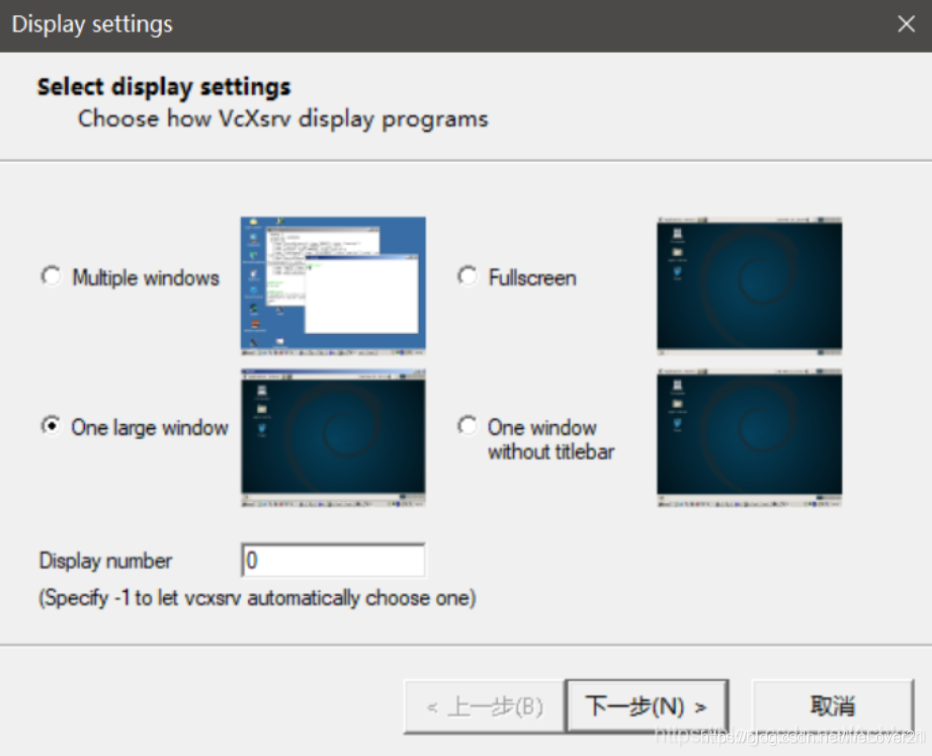
a. 打开 XLaunch ,选 One large window,Display number 设为 0
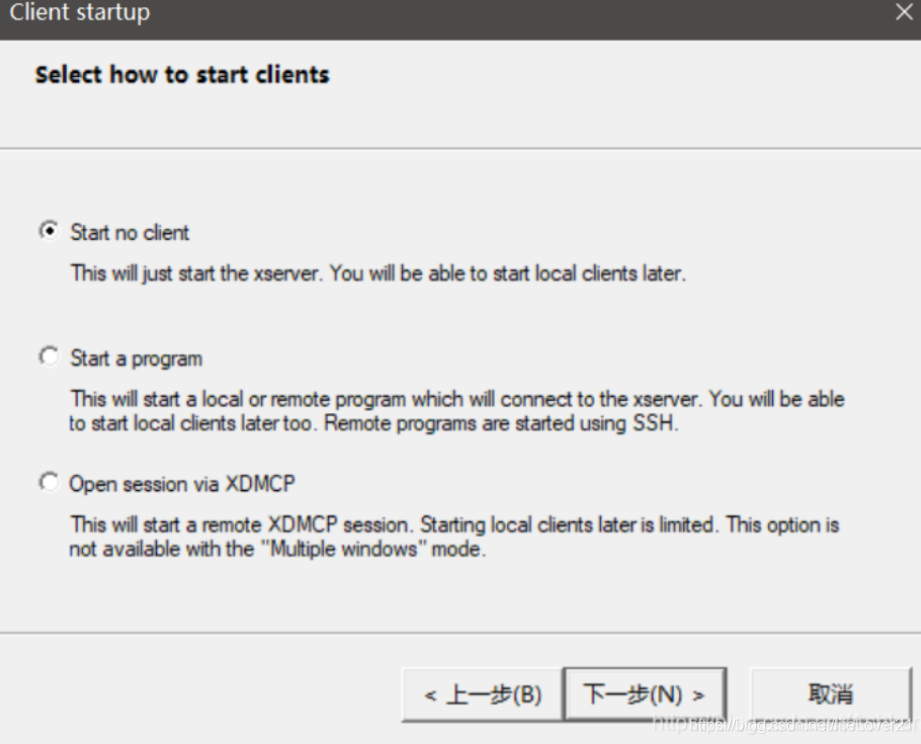
 b. 默认 Start on client 即可
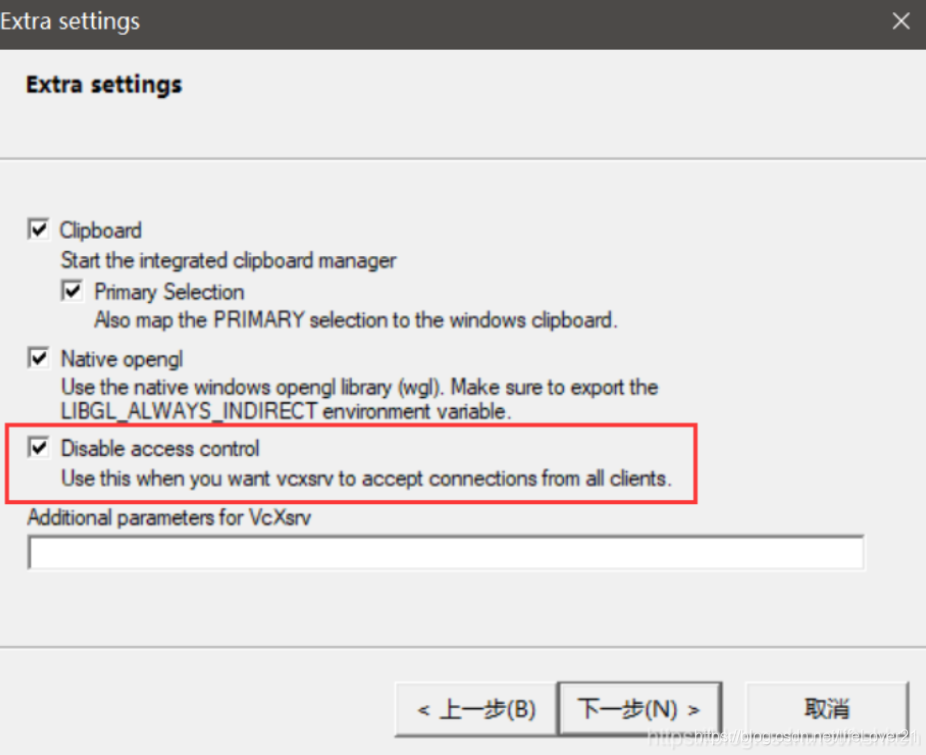
 c. 额外勾选 Disable access control
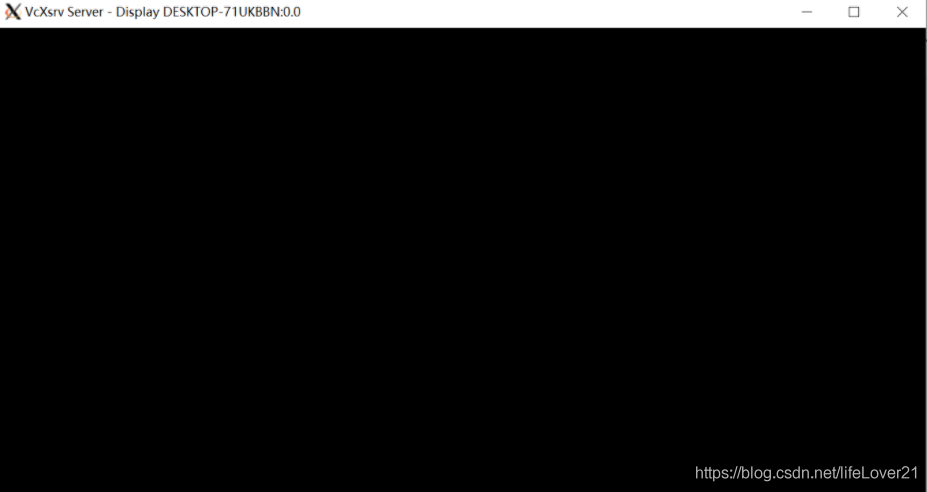
d. 继续下一步后即可看到打开的黑屏,放着备用。
之后,在 ubuntu 的命令中输入如下命令:
sudo service dbus restart

sudo DISPLAY=$(grep -m 1 nameserver /etc/resolv.conf | awk '{print $2}'):0.0 XDG_SESSION_TYPE=x11 gnome-session
也可以在.bashrc文件中导入,这样只需要输入 gnome-session就能进行连接
export DISPLAY=$(grep -m 1 nameserver /etc/resolv.conf | awk '{print $2}'):0.0

export XDG_SESSION_TYPE=x11
二、windows系统下安装显卡驱动
-
搜索对应的显卡驱动并安装:https://developer.nvidia.com/cuda/wsl
![img]()
image.png
-
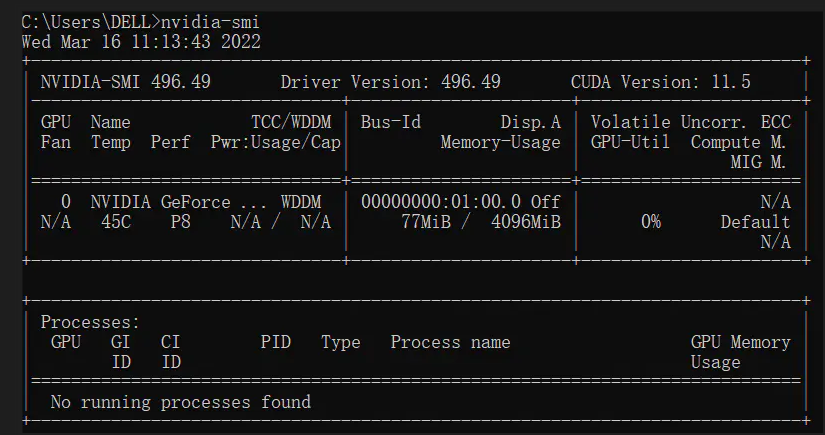
cmd命令行输入:nvidia-smi,如果显示下面类似信息则表示安装成功

三、运行Tersorfolw Docker
在WSL中输入Linux指令
curl https://get.docker.com | sh

# 安装nvidia-docker2
distribution=$(. /etc/os-release;echo $ID$VERSION_ID)

curl -s -L https://nvidia.github.io/nvidia-docker/gpgkey | sudo apt-key add -

curl -s -L https://nvidia.github.io/nvidia-docker/$distribution/nvidia-docker.list | sudo tee /etc/apt/sources.list.d/nvidia-docker.list

curl -s -L https://nvidia.github.io/libnvidia-container/experimental/$distribution/libnvidia-container-experimental.list | sudo tee /etc/apt/sources.list.d/libnvidia-container-experimental.list

sudo apt-get update

sudo apt-get install -y nvidia-docker2
以上就完成了docker的安装工作
后面用以下命令来开启和停用docker
sudo service docker stop

sudo service docker start
运行第一个Container
输入
docker run -it --name=tensorflow --gpus all -p 8889:8888 tensorflow/tensorflow:latest-gpu-py3-jupyter

# 进入docker环境的bash下
docker exec -it tensorflow bash
来运行包含了tensorflow的镜像。第一次运行可能需要下载和安装。
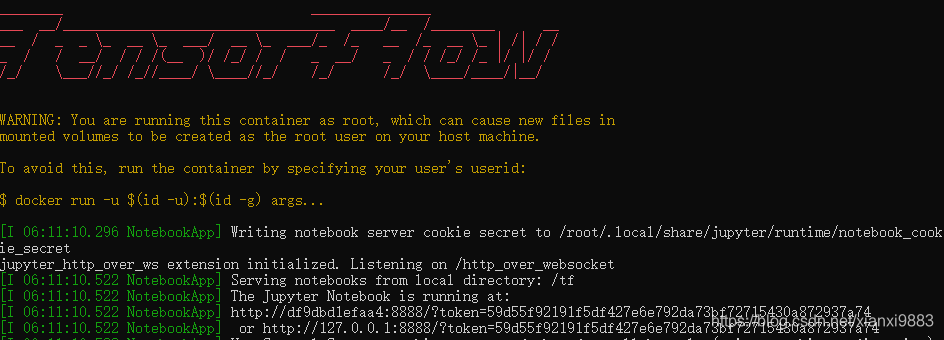
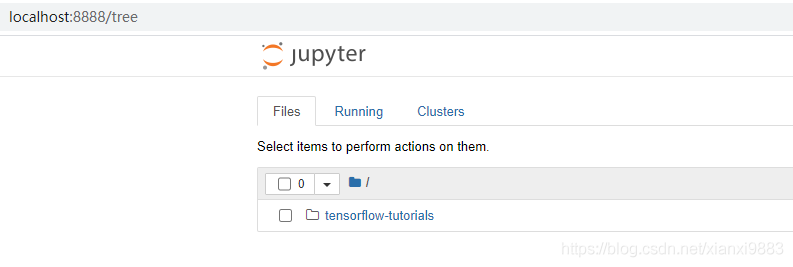
成功运行可以看到以上界面,在windows系统的浏览器中输入localhost:8888/tree
输入token即可
Docker仓库的地址:[tensorflow/tensorflow:latest-gpu-py3-jupyter](Image Layer Details - tensorflow/tensorflow:latest-gpu-py3-jupyter | Docker Hub)
原文链接:https://blog.csdn.net/xianxi9883/article/details/107358445
四、解决jupyter notebook启动需要密码问题终极办法
1、第一种情况(应该是大部分人会遇到的)即要求输入pwd or token
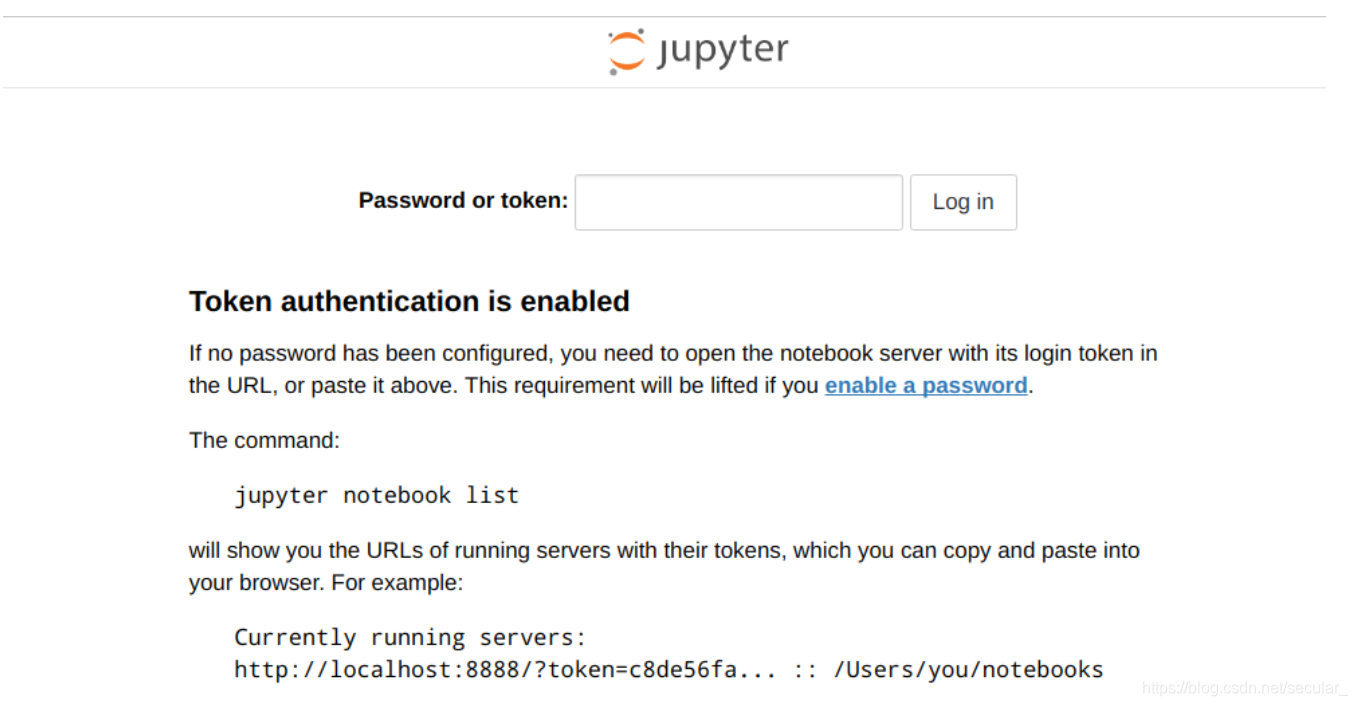
对于这种情况,只需要打开另一个终端(cmd),然后按照图中的输入“jupyter notebook list” ,然后就会看到所需要的token,使用token替代密码登录进去即可。
2、第二种情况 要求输入pwd,没有token选项

这时使用上面那种办法,如下图,则会得到无token的网址。

这种情况需要换一个命令,同样开启一个新的终端,并输入“jupyter notebook password”来修改密码。

然后输入新的密码,看到Wrote hashed pwd to ...json即成功了,接下来只需要在之前页面中输入新的密码即可。(如果不行,则关掉之前的jupyter开启新的即可)
如果不想记那么多的密码,也可以直接在输入新密码的时候输入空值,即什么都不输入直接回车,这样下次登陆时候直接不输入就能登录进去~
3、终极解决办法:取消jupyter notebook 的密码
在终端中输入“jupyter notebook --generate-config”,会生成一个新的py文件用于config,可以看到输入命令以后会有一个路径指示新生成的py文件,我们根据这个路径找到这个文件。

我们找到这句代码#c.NotebookApp.token = '


最后我们保存该文件,重启jupyter即可。
Tools
Win10 Ubuntu子系统用户密码忘记解决方案
1.关闭WSL终端。
2.打开CMD,最好是管理员模式,执行如下命令
ubuntu config --default-user root
3.打开WSL终端,此时直接已经登录为root用户
4.在WSL终端中执行如下命令
passwd 用户名
根据提示输入新密码。
5.关闭WSL终端
6.打开CMD,最好是管理员模式,执行如下命令
ubuntu config --default-user 用户名
7.重新打开WSL终端,此时已【用户名】登录,密码已经变成了修改后的新密码
切换Ubuntu的默认登录用户
C:\Users\corazon\AppData\Local\Microsoft\WindowsApps\ubuntu1804.exe config --default-user root

C:\Users\corazon\AppData\Local\Microsoft\WindowsApps\ubuntu1804.exe config --default-user corazontom

ubuntu1804.exe config --default-user root
Ubuntu - WSL系统更换国内源
背景
新安装了WSL-Ubuntu默认的apt源是国外的源。国内访问速度会很慢。所以更改国内源是非常有必要的。
步骤
备份list文件
cd /etc/apt/
sudo cp sources.list sources.list.bak
备份了,如果下面的哪一步出错了好恢复。
修改list文件
管理员权限,使用 vim 进行修改:
sudo vim sources.list
按理说,是默认自带了vim的,如果提示没有vim可以使用sudo apt-get install vim来安装一个,或者将vim改为vi。
将里面的内容全部删除,然后替换为我下面附件提供的各类源。
阿里云(用的是这个)
deb http://mirrors.aliyun.com/ubuntu/ bionic main restricted universe multiverse
deb http://mirrors.aliyun.com/ubuntu/ bionic-security main restricted universe multiverse
deb http://mirrors.aliyun.com/ubuntu/ bionic-updates main restricted universe multiverse
deb http://mirrors.aliyun.com/ubuntu/ bionic-proposed main restricted universe multiverse
deb http://mirrors.aliyun.com/ubuntu/ bionic-backports main restricted universe multiverse
deb-src http://mirrors.aliyun.com/ubuntu/ bionic main restricted universe multiverse
deb-src http://mirrors.aliyun.com/ubuntu/ bionic-security main restricted universe multiverse
deb-src http://mirrors.aliyun.com/ubuntu/ bionic-updates main restricted universe multiverse
deb-src http://mirrors.aliyun.com/ubuntu/ bionic-proposed main restricted universe multiverse
deb-src http://mirrors.aliyun.com/ubuntu/ bionic-backports main restricted universe multiverse
中科大
deb https://mirrors.ustc.edu.cn/ubuntu/ bionic main restricted universe multiverse
deb-src https://mirrors.ustc.edu.cn/ubuntu/ bionic main restricted universe multiverse
deb https://mirrors.ustc.edu.cn/ubuntu/ bionic-updates main restricted universe multiverse
deb-src https://mirrors.ustc.edu.cn/ubuntu/ bionic-updates main restricted universe multiverse
deb https://mirrors.ustc.edu.cn/ubuntu/ bionic-backports main restricted universe multiverse
deb-src https://mirrors.ustc.edu.cn/ubuntu/ bionic-backports main restricted universe multiverse
deb https://mirrors.ustc.edu.cn/ubuntu/ bionic-security main restricted universe multiverse
deb-src https://mirrors.ustc.edu.cn/ubuntu/ bionic-security main restricted universe multiverse
deb https://mirrors.ustc.edu.cn/ubuntu/ bionic-proposed main restricted universe multiverse
deb-src https://mirrors.ustc.edu.cn/ubuntu/ bionic-proposed main restricted universe multiverse
清华(遇到报错)
deb https://mirrors.tuna.tsinghua.edu.cn/ubuntu/ bionic main restricted universe multiverse
deb-src https://mirrors.tuna.tsinghua.edu.cn/ubuntu/ bionic main restricted universe multiverse
deb https://mirrors.tuna.tsinghua.edu.cn/ubuntu/ bionic-updates main restricted universe multiverse
deb-src https://mirrors.tuna.tsinghua.edu.cn/ubuntu/ bionic-updates main restricted universe multiverse
deb https://mirrors.tuna.tsinghua.edu.cn/ubuntu/ bionic-backports main restricted universe multiverse
deb-src https://mirrors.tuna.tsinghua.edu.cn/ubuntu/ bionic-backports main restricted universe multiverse
deb https://mirrors.tuna.tsinghua.edu.cn/ubuntu/ bionic-security main restricted universe multiverse
deb-src https://mirrors.tuna.tsinghua.edu.cn/ubuntu/ bionic-security main restricted universe multiverse
deb https://mirrors.tuna.tsinghua.edu.cn/ubuntu/ bionic-proposed main restricted universe multiverse
deb-src https://mirrors.tuna.tsinghua.edu.cn/ubuntu/ bionic-proposed main restricted universe multiverse
参考
https://blog.csdn.net/sigmarising/article/details/84778296
更新软件列表
sudo apt-get update
sudo apt-get upgrade
命令
apt-get update是更新软件列表 ,这个命令,会访问源列表里的每个网址,并读取软件列表,然后保存在本地电脑。我们在新立得软件包管理器里看到的软件列表,都是通过update命令更新的。命令
apt-get upgrade是更新软件 ,这个命令,会把本地已安装的软件,与刚下载的软件列表里对应软件进行对比,如果发现已安装的软件版本太低,就会提示你更新。如果源里面有系统更新,直接给你把系统升级。有网友表示会导致原来软件无法使用。
WSL1升级为WSL2
WSL目前有两个版本,如果使用Ubuntu20.04子系统,并且要实现GUI界面,那么必须将其升为WSL2。
以管理员身份打开PowerShell,执行如下的命令:
dism.exe /online /enable-feature /featurename:Microsoft-Windows-Subsystem-Linux /all /norestart
必须保证Windows的版本在1903以上(包括1903),并且Build必须在18362以上(包括18362)。
在打开的PowerShell中执行如下命令:
dism.exe /online /enable-feature /featurename:VirtualMachinePlatform /all /norestart
下载WSL2的内核
注意:这个下载的只适用x64机器,如果是ARM机器,就需要换一个下载源
下载的是msi文件,直接双击安装既可以。弹窗选择是。
设置WSL的版本为WSL2,在PowerShell中执行如下的命令:
wsl --set-default-version 2
原文链接:https://blog.csdn.net/DraemSky/article/details/120123595
问题描述: 从terminal启动ubuntu1804报错: 参考的对象类型不支持尝试的操作. 直接启动ubuntu1804也不行
解决方法: 以管理员身份打开Windows PowerShell, 然后执行netsh winsock reset, 重启电脑即可, 如下图所示

原文链接:https://blog.csdn.net/littlehaes/article/details/104081188
WSL2 是基于虚拟机的,所以可以在后台运行各种任务,比如 Docker 等等,但是带来的相应问题就是会占用一部分内存,使用 wsl --shutdown <分发版名称> 可以再不使用的时候停止它,以节约资源
在学习Docker的过程中,调用Windows PowerShell时,Docker | Docker的安装及配置 | 初学者的详细教程,运行代码报错如下:
错误: 740 需要提升权限才能运行 DISM。 使用提升的命令提示符完成这些任务。
解决方法:
关闭Windows Shell,重新以“管理员身份”打开即可。
ubuntu 换源Could not resolve 'mirrors.aliyun.com'
-
备份原来的更新源
cp /etc/apt/sources.list /etc/apt/sources.list.backup如果提示权限不够就输入下面两行,先进入到超级用户,再备份
sudo -s cp /etc/apt/sources.list /etc/apt/sources.list.backup -
修改更新源
打开sources.list:
vim /etc/apt/sources.list中科大
# 默认注释了源码仓库,如有需要可自行取消注释
deb https://mirrors.ustc.edu.cn/ubuntu/ xenial main restricted universe multiverse
# deb-src https://mirrors.ustc.edu.cn/ubuntu/ xenial main restricted universe multiverse
deb https://mirrors.ustc.edu.cn/ubuntu/ xenial-updates main restricted universe multiverse
# deb-src https://mirrors.ustc.edu.cn/ubuntu/ xenial-updates main restricted universe multiverse
deb https://mirrors.ustc.edu.cn/ubuntu/ xenial-backports main restricted universe multiverse
# deb-src https://mirrors.ustc.edu.cn/ubuntu/ xenial-backports main restricted universe multiverse
deb https://mirrors.ustc.edu.cn/ubuntu/ xenial-security main restricted universe multiverse
# deb-src https://mirrors.ustc.edu.cn/ubuntu/ xenial-security main restricted universe multiverse

# 预发布软件源,不建议启用
# deb https://mirrors.ustc.edu.cn/ubuntu/ xenial-proposed main restricted universe multiverse
# deb-src https://mirrors.ustc.edu.cn/ubuntu/ xenial-proposed main restricted universe multiverse
错误:
Could not resolve 'mirrors.aliyun.com'
1.vim /etc/resolv.conf在文件后面添加:
nameserver 8.8.8.8
nameserver 8.8.4.4
2.重启网络:
sudo /etc/init.d/networking restart
3.再次执行
sudo apt-get update
执行完成,然后:
sudo apt-get upgrade
————————————————
版权声明:本文为CSDN博主「小蚂蚁_CrkRes」的原创文章,遵循CC 4.0 BY-SA版权协议,转载请附上原文出处链接及本声明。
原文链接:https://blog.csdn.net/zang141588761/article/details/101061771
sudo gpg --keyserver hkp://keyserver.ubuntu.com:80 --recv-keys 7EA0A9C3F273FCD8

sudo gpg --export --armor 7EA0A9C3F273FCD8 | sudo apt-key add -
Could not resolve 'archive.ubuntu.com'
修改/etc/hosts 文件,记得用root权限
这个网站查看域名对应的ip###http://ip.tool.chinaz.com/archive.ubuntu.com####(ip可能会更新,所以需要查询)
一般就更新这几个:
91.189.91.23 us.archive.ubuntu.com
91.189.91.23 us.archive.ubuntu.com
91.189.88.152 archive.ubuntu.com
91.189.88.161 security.ubuntu.com
原文链接:https://blog.csdn.net/changer_WE/article/details/82912705
莫名其妙的在apt-get更新源的时候,报了这个错误,尝试卸载。
ubuntu apt update 正在连接download.docker.com
但是在apt-update时候还是会出现,原因是/etc/apt/sources.list.d/中存在文件 docker.list,apt update的时候会读取这个文件并尝试链接,只需要将docker.list删除掉或者重命名成其他即可
原文链接:https://blog.csdn.net/weixin_45348389/article/details/122580679
最简单的教程:在Ubuntu操作系统里安装Docker
-
由于Ubuntu里apt官方库里的docker版本可能比较低,因此先用下面的命令行卸载旧版本(如果有的话)
sudo apt-get remove docker docker-engine docker-ce docker.io -
更新apt包索引:
sudo apt-get update -
执行下列命令行,使apt可以通过HTTPS协议去使用存储库:
sudo apt-get install -y apt-transport-https ca-certificates curl software-properties-common -
添加Docker官方提供的GPG密钥:
curl -fsSL https://download.docker.com/linux/ubuntu/gpg | sudo apt-key add -什么是GPG密钥呢?大家可以从阮一峰老师的博客:GPG入门教程里获得答案:
1991年,程序员Phil Zimmermann为了避开政府监视,开发了加密软件PGP。这个软件非常好用,迅速流传开来,成了许多程序员的必备工具。但是,它是商业软件,不能自由使用。所以,自由软件基金会决定,开发一个PGP的替代品,取名为GnuPG。这就是GPG的由来。
上面的文字出自阮一峰老师的博客链接:http://www.ruanyifeng.com/blog/2013/07/gpg.html
-
设置stable存储库:
sudo add-apt-repository "deb [arch=amd64] https://download.docker.com/linux/ubuntu $(lsb_release -cs) stable"最后再次更新apt包索引:
-
安装最新版本的docker-ce:
sudo apt-get install -y docker-ce
安装完毕后,可以看到Docker服务已经从/lib/systemd/system/docker.service启动了,dockerd进程id为4921:
命令行ps -aux查看进程id为4921的进程路径:/usr/bin/dockerd -H fd://
使用命令sudo docker version可以查看安装docker的版本:
使用命令sudo docker run hello-world,能观察到从远程下载这个测试用的容器:Pulling from library/hello-world:
然后看到打印消息:Hello from Docker! 说明Docker安装成功。
Docker 安装 mysql8
一、下载mysql8镜像
docker pull mysql
二、创建mysql8配置文件
vi /etc/my.cnf #编辑MySQL配置文件
my.cnf文件内容
# Copyright (c) 2017, Oracle and/or its affiliates. All rights reserved.
#
# This program is free software; you can redistribute it and/or modify
# it under the terms of the GNU General Public License as published by
# the Free Software Foundation; version 2 of the License.
#
# This program is distributed in the hope that it will be useful,
# but WITHOUT ANY WARRANTY; without even the implied warranty of
# MERCHANTABILITY or FITNESS FOR A PARTICULAR PURPOSE.  See the
# GNU General Public License for more details.
#
# You should have received a copy of the GNU General Public License
# along with this program; if not, write to the Free Software
# Foundation, Inc., 51 Franklin St, Fifth Floor, Boston, MA  02110-1301 USA
#
# The MySQL  Server configuration file.
#
# For explanations see
# http://dev.mysql.com/doc/mysql/en/server-system-variables.html
[mysqld]
pid-file        = /var/run/mysqld/mysqld.pid
socket          = /var/run/mysqld/mysqld.sock
datadir         = /var/lib/mysql
secure-file-priv= NULL
# Disabling symbolic-links is recommended to prevent assorted security risks
symbolic-links=0
# Custom config should go here
!includedir /etc/mysql/conf.d/
三、创建mysql容器
docker run -p 60306:3306 -e MYSQL_ROOT_PASSWORD=123 -v /etc/my.cnf:/etc/mysql/my.cnf:rw -v /etc/localtime:/etc/localtime:ro --name mysql8 --restart=always -dit mysql
-p 60306:3306 #本机60306端口映射到容器3306端口
-e MYSQL_ROOT_PASSWORD=123 #设置MySQL的root用户密码
-v /etc/my.cnf:/etc/mysql/my.cnf:rw #本机的MySQL配置文件映射到容器的MySQL配置文件
-v /etc/localtime:/etc/localtime:ro #本机时间与数据库时间同步
--name mysql8 #设置容器别名
--restart=always #当重启Docker时会自动启动该容器
-dit mysql #后台运行并可控制台接入
四、进入mysql控制台
docker exec -it b6cfb244d0c0 bash #进入MySQL容器
mysql -uroot -p123 #进入MySQL控制台
ALTER USER 'root'@'%' IDENTIFIED WITH mysql_native_password BY '123456'; #修改root用户密码
CMD常用的命令
# 查看某个端口是否被占用
netstat -aon|findstr 8
Reference
(23条消息) 2021年wsl2中配置Ubuntu18.04+CUDA+Pytorch深度学习环境完全版_生活依然美好的博客-CSDN博客_cuda pytorch
(23条消息) WSL2+Ubuntu18.04+gnome图形界面+docker搭建开发环境_ElasticForce的博客-CSDN博客_wsl2安装gnome
(23条消息) Windows10的Ubuntu20.04子系统安装GUI界面gnome并用远程连接_寒霜陌客的博客-CSDN博客_ubuntu20.04安装gnome桌面
(23条消息) Win10 Ubuntu子系统用户密码忘记解决方案_Xeon-Shao的博客-CSDN博客_win10 子系统 密码

 浙公网安备 33010602011771号