
MvvmLight (.net wpf)在项目中的应用
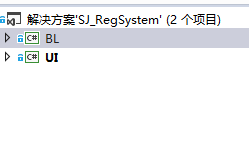
项目用例:实现登录界面(后台是远程JAVA服务),项目结构分层为BL(纯业务逻辑),UI(纯界面显示),
(转载请注明来源:cnblogs coder-fang)
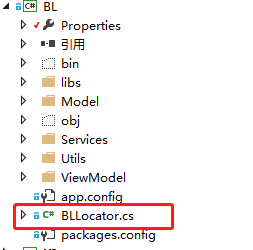
1. 首先在BL层引入 mvvm light包,之后会在BL在自动生成相关Locator,主要用于定位服务与ViewModel
2.我们在项目中创建了一个BaseViewModel,主要是存储共享服务与共享方法等:


 public class BaseVM : ViewModelBase
    {
        //这是其它业务ViewModel可能会用到的服务类,全部在Locator中注册
        public ConfigService configService = ServiceLocator.Current.GetInstance<ConfigService>();
        public BackendService backendService = ServiceLocator.Current.GetInstance<BackendService>();
        public SysInfoService sysInfoService = ServiceLocator.Current.GetInstance<SysInfoService>();
        public ReadCardService readCardService = ServiceLocator.Current.GetInstance<ReadCardService>();

        public BaseVM()
        {

        }

        public void ShowMsg(String msg)
        {
            DispatcherHelper.CheckBeginInvokeOnUI(() =>
            {
                Messenger.Default.Send<String>(msg, "ShowMessage");
            });

        }
        public void SendMsg<T>(String token,T msg)
        {
            DispatcherHelper.CheckBeginInvokeOnUI(() =>
            {
                Messenger.Default.Send<T>(msg, token);
            });

        }
    }
3.创建LoginViewModel:
public class LoginVM:BaseVM
    {
        //登录按钮绑定的命令
        public RelayCommand LoginCmd { get; private set; }

        private string _username;

       //绑定是否在后台登录中,用于前端是否显示进度条
        private bool _isLogining = false;
        public Boolean IsLogining
        {
            get { return _isLogining; }
            set { _isLogining = value;
            RaisePropertyChanged(() => IsLogining);
            }
        }

        public String UserName
        {
            get { return _username; }
            set
            {
                _username = value;
                RaisePropertyChanged(() =>  UserName);
            }
        }
        private string _password;
        public String Password
        {
            get { return _password; }
            set
            {
                _password = value;
                RaisePropertyChanged(() => Password);
            }
        }
        public LoginVM()
        {

            //创建命令绑定的业务逻辑
            LoginCmd = new RelayCommand(() =>
            {
                if (String.IsNullOrEmpty(_username) || String.IsNullOrEmpty(_password))
                {
                    ShowMsg("请正确填写用户名与密码");
                    return;
                }


                IsLogining = true;
                new Task(() => {
                   //这是后台API接口服务,远程调用java服务
                    backendService.Login(_username, _password, (data) =>//接口调用成功
                    {

                        var obj = data as JObject;
                        if (!((string)obj["code"]).Equals("200"))
                        {
                            ShowMsg((string)obj["msg"]);

                        }
                        else
                        {//登录成功
                            JObject result = (JObject)obj["result"];

                            sysInfoService.usertype = (UserType)Int32.Parse((string)result["type"]);

                            //此处通过Mvvmlight机制进行异步消息通知,将成功的消息发送出去
                            SendMsg<String>("LoginOK",sysInfoService.usertype.ToString());


                        }

                        IsLogining = false;

                    }, (err) =>//接口调用失败
                    {
                        ShowMsg(err as String);
                        IsLogining = false;
                    });
                }).Start();


            }, () => { return !IsLogining; });
        }
    }
注:这里关键代码是异步消息通知(mvvmlight的强大机制),将成功消息发送即返回,在UI中或单元测试中进行消息处理,完全解耦了业务。
并且通过消息机制可以使用带回调的消息体,实现通知回调功能(例如寻问用户 点击确定或取消 等类似功能),这里不再演示。
4.在locator中注册服务与viewmodel:
public class BLLocator
    {

        public BLLocator()
        {
            ServiceLocator.SetLocatorProvider(() => SimpleIoc.Default);


            //binding vm
            SimpleIoc.Default.Register<LoginVM>();


            //binding service
            SimpleIoc.Default.Register<BackendService>();
            SimpleIoc.Default.Register<ConfigService>();
            SimpleIoc.Default.Register<SysInfoService>();
            SimpleIoc.Default.Register<ReadCardService>();
        }


        public LoginVM LoginVM
        {
            get
            {
                return ServiceLocator.Current.GetInstance<LoginVM>();
            }
        }


        public static void Cleanup()
        {
            // TODO Clear the ViewModels
        }
    }
注:这里注册了一些系统使用的服务和所有的viewmodel,机制类似于java中的spring,进行实例的管理,UI中直接绑定即可使用。
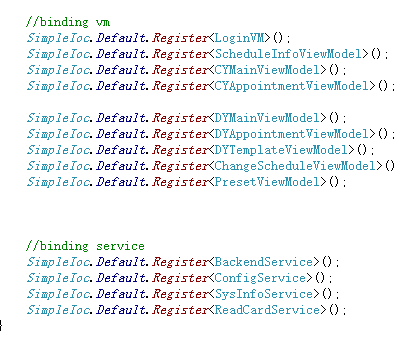
笔者在完成此笔记时,项目中已完成并进行了界面测试的服务与VM(使用的模式是一个UI对应一个VM)如下:
5.在UI项目下的app.xaml加入资源如下:
<!--这里使得在程序初始时实例化locator-->
 <ResourceDictionary>
       <vm:BLLocator x:Key="Locator" d:IsDataSource="True" xmlns:vm="clr-namespace:BL;assembly=BL" />
 </ResourceDictionary>
6.创建Login ui,只需将相关datacontext绑定即可:
<Window x:Class="UI.Login"
        xmlns="http://schemas.microsoft.com/winfx/2006/xaml/presentation"
        xmlns:x="http://schemas.microsoft.com/winfx/2006/xaml"
        xmlns:res="clr-namespace:UI.Properties"
        xmlns:utils="clr-namespace:UI.Utils"

        WindowStartupLocation="CenterScreen"
        Height="270.462" Width="393.461"
        Title="{x:Static res:Resources.LoginTitle}"
        DataContext="{Binding Source={StaticResource Locator},Path=LoginVM}"
        ResizeMode="NoResize" >
    <Window.Resources>
        <ResourceDictionary>
            <ResourceDictionary.MergedDictionaries>

                <ResourceDictionary>
                    <utils:VisibleConvert x:Key="ShownConvert"></utils:VisibleConvert>
                </ResourceDictionary>
            </ResourceDictionary.MergedDictionaries>
        </ResourceDictionary>

    </Window.Resources>


    <StackPanel Orientation="Vertical" Margin="10">
        <Image Source="Resources/logoh.png" Height="80"></Image>
        <StackPanel Orientation="Horizontal" Margin="30,5">
            <Label Width="70" HorizontalContentAlignment="Right">用户名:</Label>
            <TextBox Width="240" Text="{Binding Path=UserName,NotifyOnTargetUpdated=True,UpdateSourceTrigger=PropertyChanged}"></TextBox>
        </StackPanel>
        <StackPanel  Orientation="Horizontal" Margin="30,5">
            <Label Width="70" HorizontalContentAlignment="Right" xml:space="preserve">密  码:</Label>
            <PasswordBox Name="passBox" Width="240" PasswordChanged="PasswordBox_PasswordChanged"></PasswordBox>
        </StackPanel>
        <StackPanel Orientation="Horizontal" Margin="30,5,35,5">

            <Button  Command="{Binding LoginCmd}" Height="26" Width="53"  Content="登录" Margin="80,0,0,0" IsDefault="True"/>
        </StackPanel>
        <StackPanel>
            <ProgressBar  IsIndeterminate="True" Visibility="{Binding Path=IsLogining, Converter={StaticResource ShownConvert}}" SmallChange="1" Maximum="50" EllipseDiameter="10" EllipseOffset="4" RenderTransformOrigin="0,0" Cursor="None"  />
        </StackPanel>
    </StackPanel>
<Window>
注:这里使用了WPF强大的绑定机制,当然password做了一些特殊的处理,因为密码框无法直接做绑定
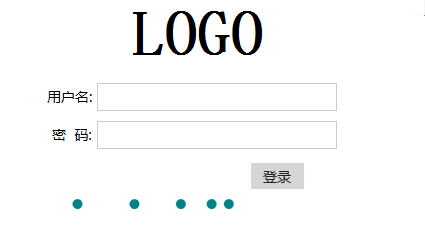
图中的圆点就是进度条
7.最后在Login.xaml.cs中响应VM发来的消息:
public partial class Login : Window
    {
        public Login()
        {
            InitializeComponent();

           //监听ViewModel发来的异步消息
            Messenger.Default.Register<String>(this, "LoginOK", LoginOK); ;

            this.Unloaded+=(s,e)=>{


                Messenger.Default.Unregister<String>("LoginOK");
            };


        }


        private void LoginOK(String msg)
        {
           //根据服务器返回的账号角色进入不同的主界面
            if(msg.Equals("CY"))
            {

                CYViews.MainWindow main = new CYViews.MainWindow();
                this.Close();
                main.Show();
            }
            else if(msg.Equals("DY"))
            {
                DYViews.DYMainWindow main = new DYViews.DYMainWindow();
                this.Close();
                main.Show();
            }
            else
            {
                ShowMessageBox("此角色暂不支持桌面端");
            }
        }


    }
至此,使用Mvvmlight完成Login已经完成,通过代码看出,BL层可以完全不与UI进行耦合,并且可以进行独立的单元测试,包括需要用户确认等对话框也完全可以以消息及回调的形式进行传递,也是可以独立测试的。

 浙公网安备 33010602011771号