Eureka服务注册
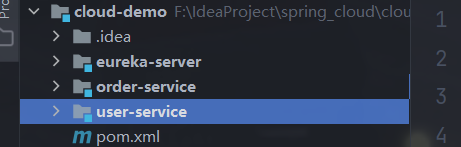
现在有三个模块,一个是用户服务,一个是订单服务,一个是eureka的注册中心服务端(必须是一个独立的微服务)
把eureka-server这个模块当成注册中心服务端,在eureka服务端必须引入spring-cloud-starter-netflix-eureka-server依赖,其他的服务注册则是spring-cloud-starter-netflix-eureka-client依赖,因为eureka也是一个服务,所以它也要配服务名和eureka地址信息,其他的服务也是要有服务名和eureka地址信息,唯一的不同就是服务名不同,这样就完成了服务注册
1.服务注册中心
引入eureka依赖
在eureka-server中引入spring-cloud-starter-netflix-eureka-server依赖
<dependency>
    <groupId>org.springframework.cloud</groupId>
    <artifactId>spring-cloud-starter-netflix-eureka-server</artifactId>
</dependency>
编写启动类
给eureka-server服务编写一个启动类,一定要添加一个@EnableEurekaServer注解,开启eureka的注册中心功能:
import org.springframework.boot.SpringApplication;
import org.springframework.boot.autoconfigure.SpringBootApplication;
import org.springframework.cloud.netflix.eureka.server.EnableEurekaServer;

@SpringBootApplication
@EnableEurekaServer
public class EurekaApplication {
    public static void main(String[] args) {
        SpringApplication.run(EurekaApplication.class, args);
    }
}
编写配置文件
server:
  port: 10086 #服务端口

spring:
  application:
    name: eureka-server #eureka服务名称
eureka:
  client:
    service-url: #eureka地址信息
      defaultZone: http://127.0.0.1:10086/eureka
2.用户服务注册
下面,我们将user-service注册到eureka-server中去。
引入依赖
在user-service的pom文件中,引入下面的eureka-client依赖:
<dependency>
    <groupId>org.springframework.cloud</groupId>
    <artifactId>spring-cloud-starter-netflix-eureka-client</artifactId>
</dependency>
配置文件
server:
  port: 8081
spring:
  application:
    name: userservice #user的服务名称
  datasource:
    url: jdbc:mysql://localhost:3306/cloud_user?useSSL=false
    username: root
    password: root
    driver-class-name: com.mysql.jdbc.Driver
mybatis:
  type-aliases-package: cn.itcast.user.pojo
  configuration:
    map-underscore-to-camel-case: true
logging:
  level:
    cn.itcast: debug
  pattern:
    dateformat: MM-dd HH:mm:ss:SSS


eureka:
  client:
    service-url: #eureka地址信息
      defaultZone: http://127.0.0.1:10086/eureka
3.订单服务注册
下面,我们将order-service注册到eureka-server中去。
引入依赖
在order-service的pom文件中,引入下面的eureka-client依赖:
     <dependency>
            <groupId>org.springframework.cloud</groupId>
            <artifactId>spring-cloud-starter-netflix-eureka-client</artifactId>
        </dependency>
配置文件
server:
  port: 8080
spring:
  application:
    name: orderservice #user的服务名称
  datasource:
    url: jdbc:mysql://localhost:3306/cloud_order?useSSL=false
    username: root
    password: root
    driver-class-name: com.mysql.jdbc.Driver
mybatis:
  type-aliases-package: cn.itcast.user.pojo
  configuration:
    map-underscore-to-camel-case: true
logging:
  level:
    cn.itcast: debug
  pattern:
    dateformat: MM-dd HH:mm:ss:SSS

application:
  name: orderservice #user的服务名称
eureka:
  client:
    service-url: #eureka地址信息
      defaultZone: http://127.0.0.1:10086/eureka
这样两个服务就注册到了注册服务中心了,那如果我们想要搞一个集群但又是在自己的计算机上该怎么办呢?
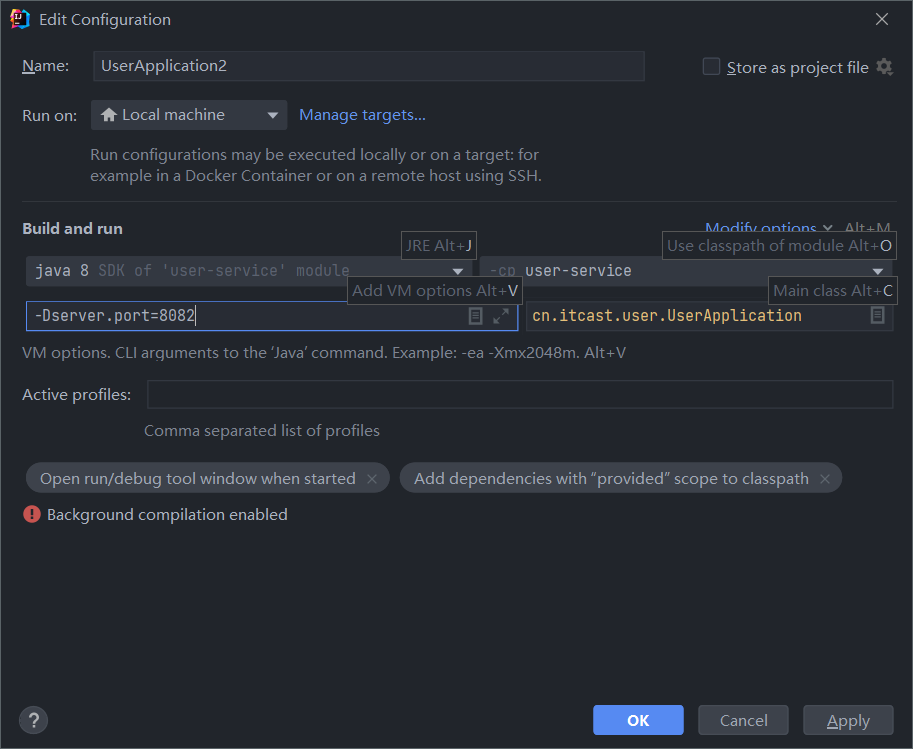
可以使用idea复制服务的配置属性
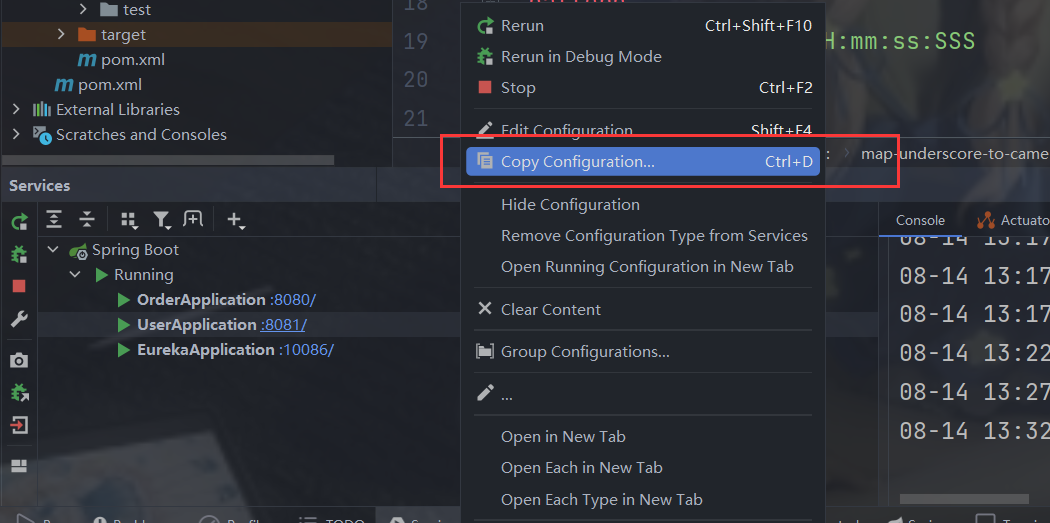
然后,在弹出的窗口中,填写信息:
-Dserver.port=8082覆盖配置文件的端口
然后在eureka注册中心实例中可以看到用户服务有两个实例,这就是成功了


 浙公网安备 33010602011771号