
ET框架服务端部署到Linux
运行环境:Centos7.3 + JetBrains Rider 2020 + ET 5.0 + Mac笔记本 (这里要说一下低于Centos7的没法安装.net core环境)
服务器和资源服务部署到centos上
一:服务器部署
1、Centos安装.Net Core2.2
sudo rpm -Uvh https://packages.microsoft.com/config/centos/7/packages-microsoft-prod.rpm
安装SDK
sudo yum install dotnet-sdk-2.2
验证安装
dotnet --version
2、打包环境配置。
(可以忽略) 在自己的电脑上(Mac笔记本)打开ET-Server服务端代码,安装 CommandLineParserNuGet。并加入到Server.App中

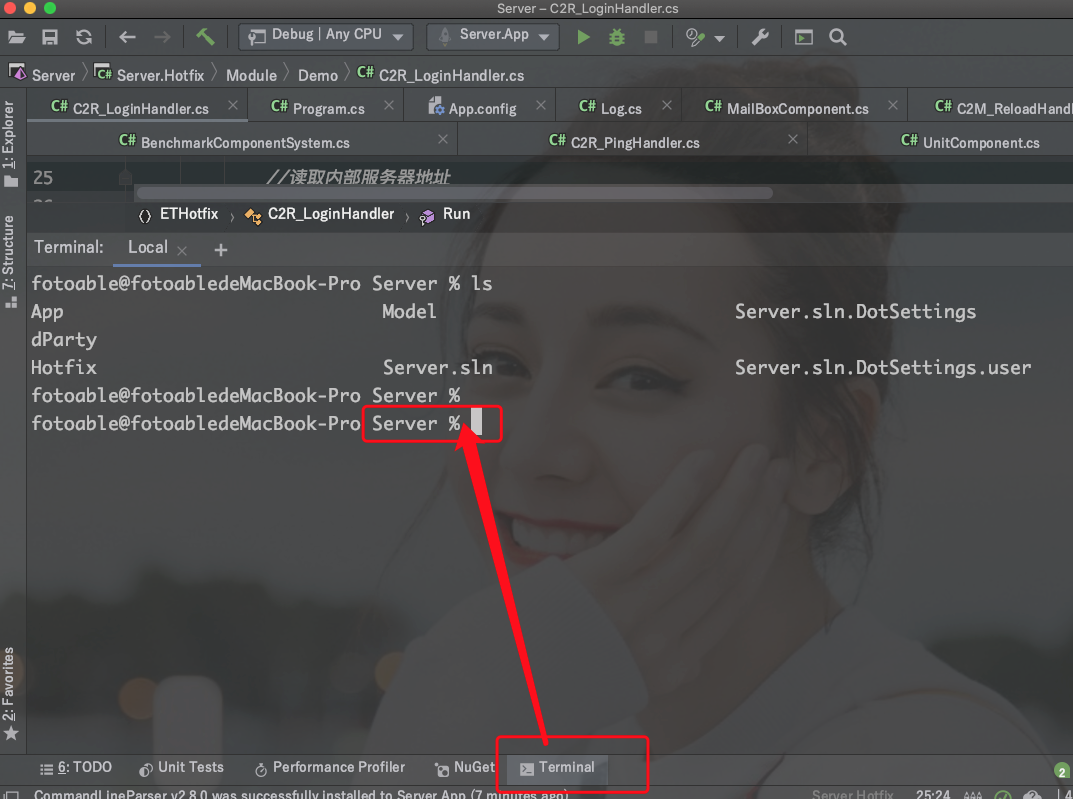
3、打包服务端。打开终端或者打开Rider编辑器Terminal。进入Server文件夹
打包:dotnet publish
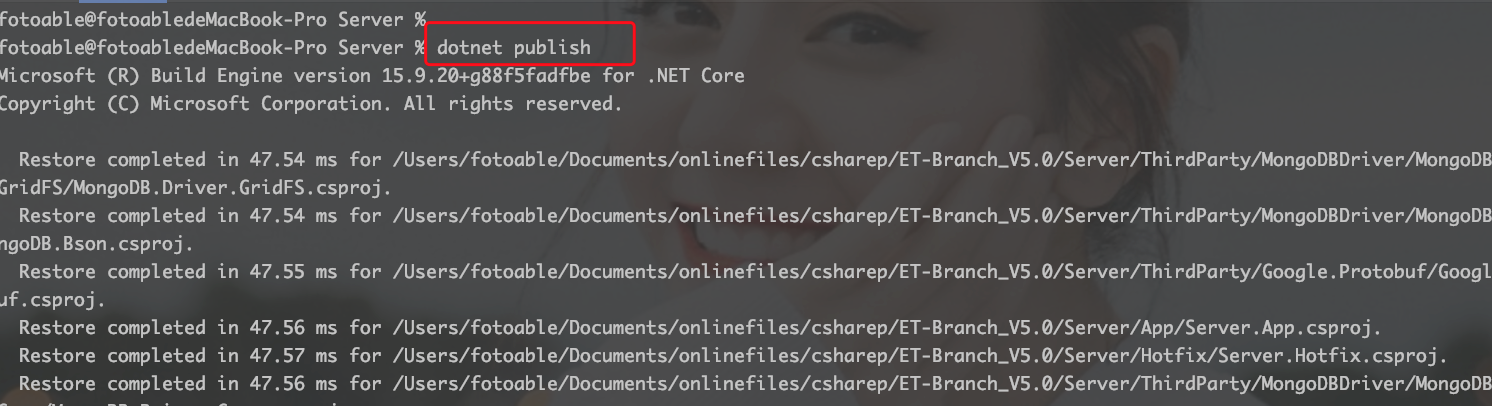
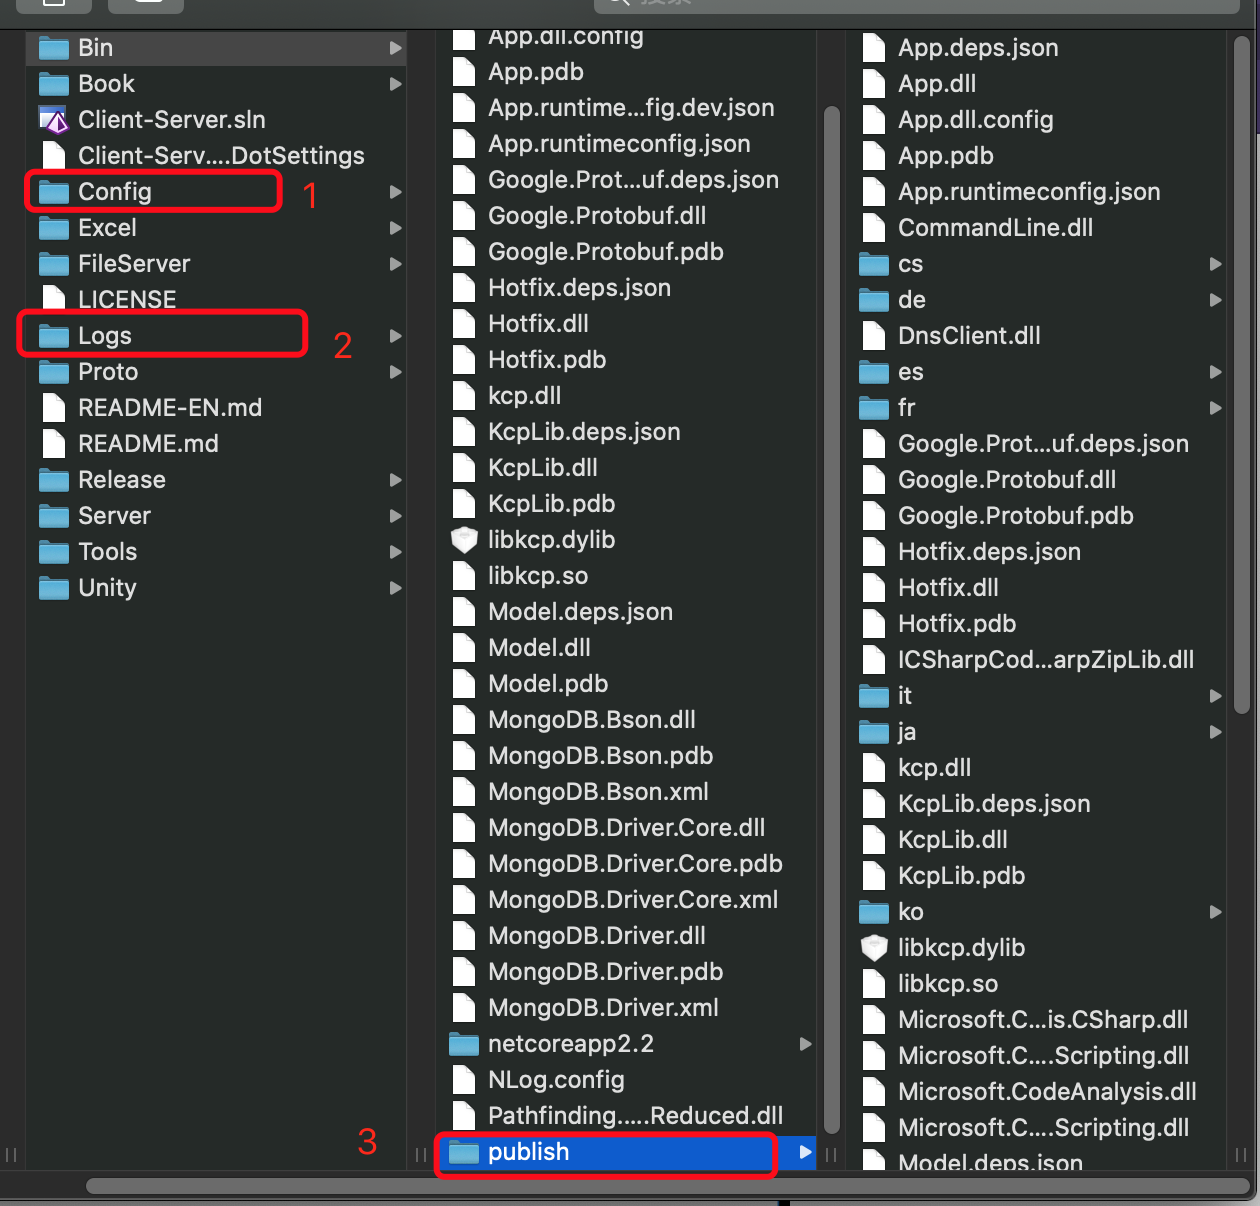
打包内容在 /ET-Branch_V5.0/Bin/publish/ 文件夹下。

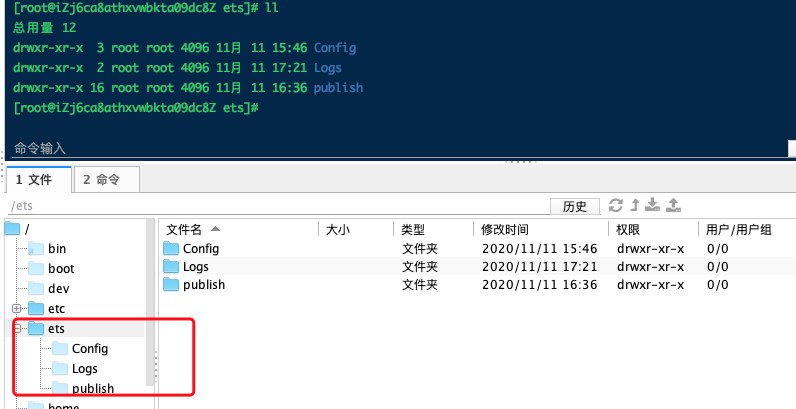
4、文件上传到服务器。在Centos7虚拟机上新建一个文件夹 ets,将Config,Logs,publish 3个文件夹上传到虚拟机上
5、修改配置:注意 Address2 得修改为Centos虚拟机的外网地址。并打开虚拟机10002端口
vim Config/StartConfig/LocalAllServer.txt
{ "_t" : "StartConfig", "_id" : NumberLong("98547768819754"), "C" : [{ "_t" : "OuterConfig", "Address" : "0.0.0.0:10002", "Address2" : "外网地址:10002" }, { "_t" : "InnerConfig", "Address" : "127.0.0.1:20002" }, { "_t" : "HttpConfig", "Url" : "http://*:8080/", "AppId" : 0, "AppKey" : "", "ManagerSystemUrl" : "" }, { "_t" : "DBConfig", "ConnectionString" : "mongodb://127.0.0.1:27017/", "DBName" : "ET" }], "AppId" : 1, "AppType" : "AllServer", "ServerIP" : "*" }
OuterConfig : Address 服务器监听的ip地址(监听本主机所有IP连接), Address2 外网访问的ip地址。两个端口必须一样。
注意:Address 之前是127.0.0.1:10002,如果链接不是改为 0.0.0.0:1002.

6、运行服务器
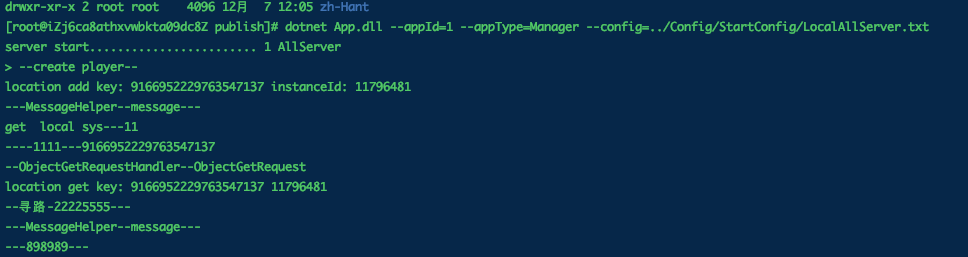
cd publish/
dotnet App.dll --appId=1 --appType=Manager --config=../Config/StartConfig/LocalAllServer.txt
或者
dotnet App.dll

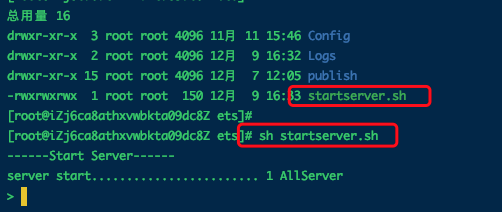
方法2:
在根目录建立文件  startserver.sh 内容如下:


#! /bin/bash
echo "------Start Server------"
cd publish
dotnet App.dll --appId=1 --appType=Manager --config=../Config/StartConfig/LocalAllServer.txt
修改权限:chmod +x startserver.sh
运行:sh startserver.sh
7、验证。
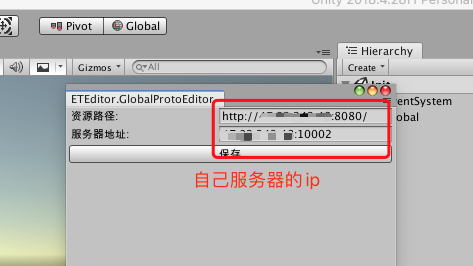
打开Unity修改链接配置

保存运行。

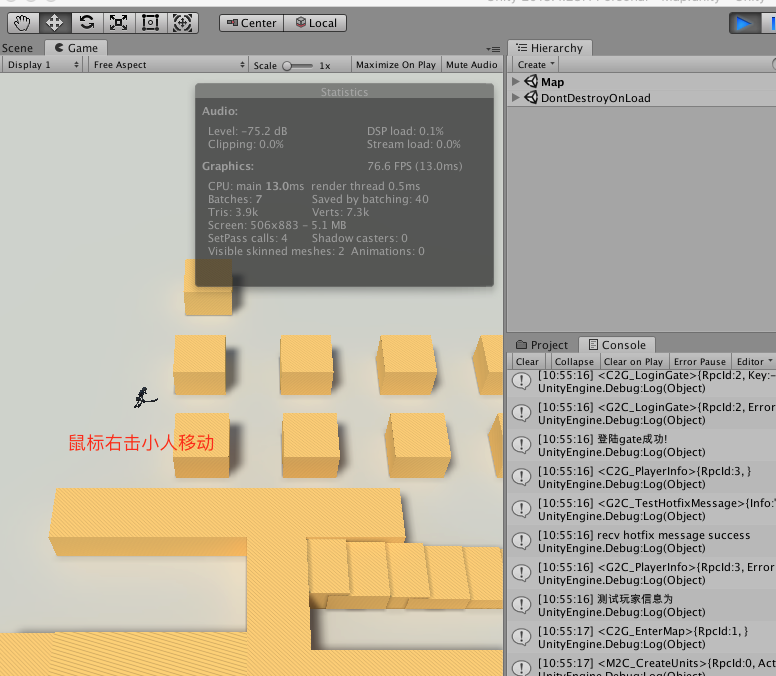
服务端如果有打印log的话会有输出
注意可能的报错:资源服务器没有打开(两种解决方案)
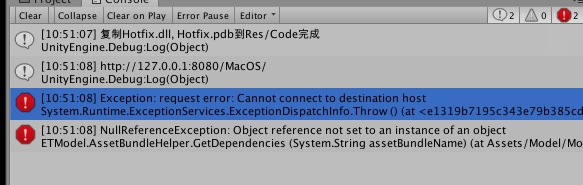
(1):打开资源服务器
参考: https://www.cnblogs.com/cj8988/p/13965074.html
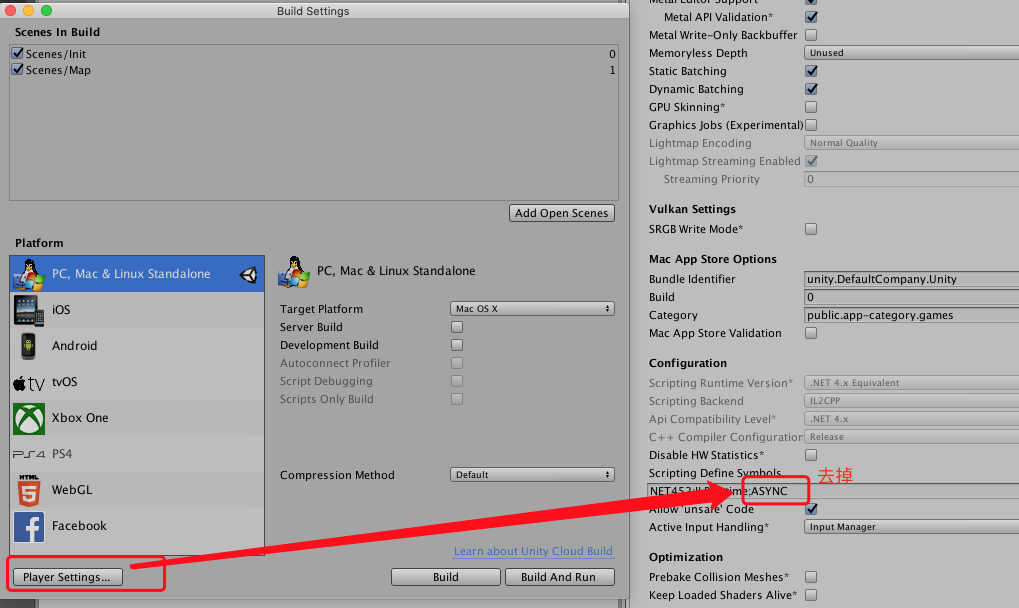
(2):去掉模拟的资源同步
二:资源服务器安装部署
之前的资源服务器在本地,这里将其部署到线上。
1:安装nginx服务器。安装过程网上找找--centos7安装nginx。
2:新建资源文件。在ets同一级文件中新建files文件夹,存放文件。

3:修改nginx配置文件
cd /usr/local/nginx/  #根据自己的安装目录

cd conf

vim nginx.conf
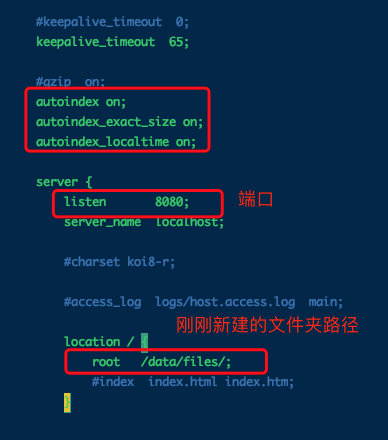
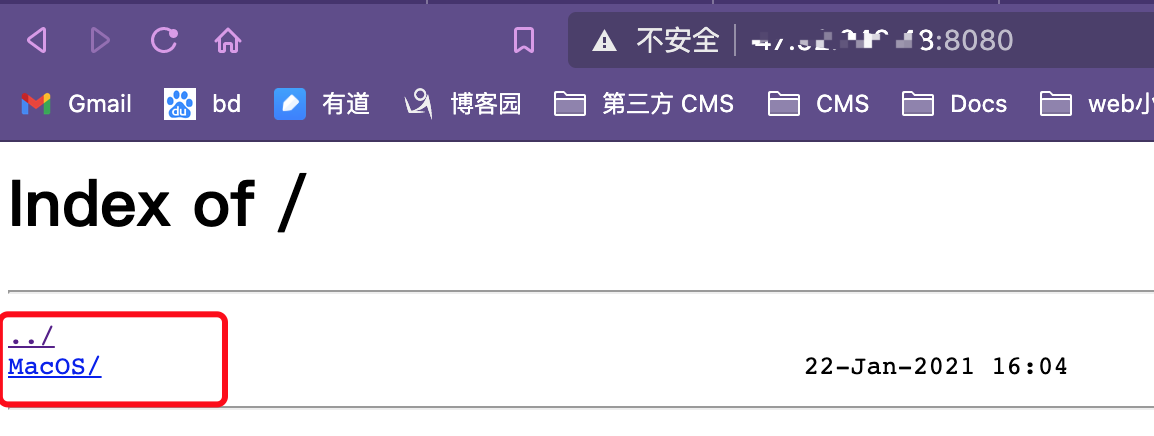
4:重新启动nginx,本地浏览器查看。(注意虚拟机需要打开8080端口)

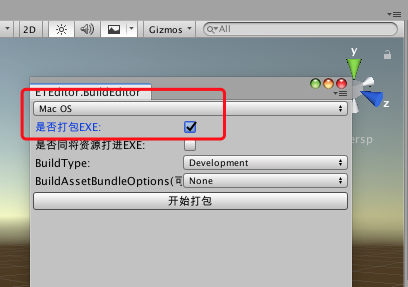
5:打包资源,修改配置-》保存-》打包-》资源上传服务器
将打包的文件夹上传到服务器的files文件夹下

浏览器访问8080,能看到上传的文件
6、运行客户端,测试
参考文档:
https://www.cnblogs.com/tenghao510/p/11988188.html
https://www.lfzxb.top/et_cloud_ecs/
http://www.tinkingli.com/?p=25
https://www.cnblogs.com/cnxkey/articles/9743842.html

 浙公网安备 33010602011771号