
Photon Server初识(五) --- 客户端连接服务端
准备:Unity开开发IDE。
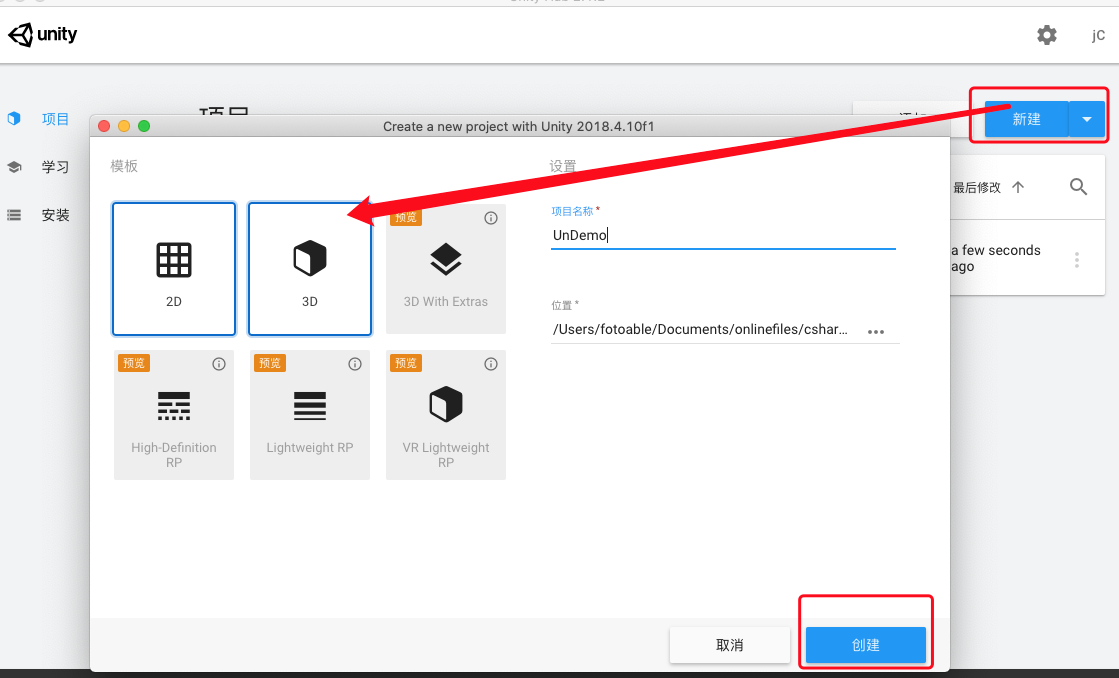
一、新建Unity3D项目
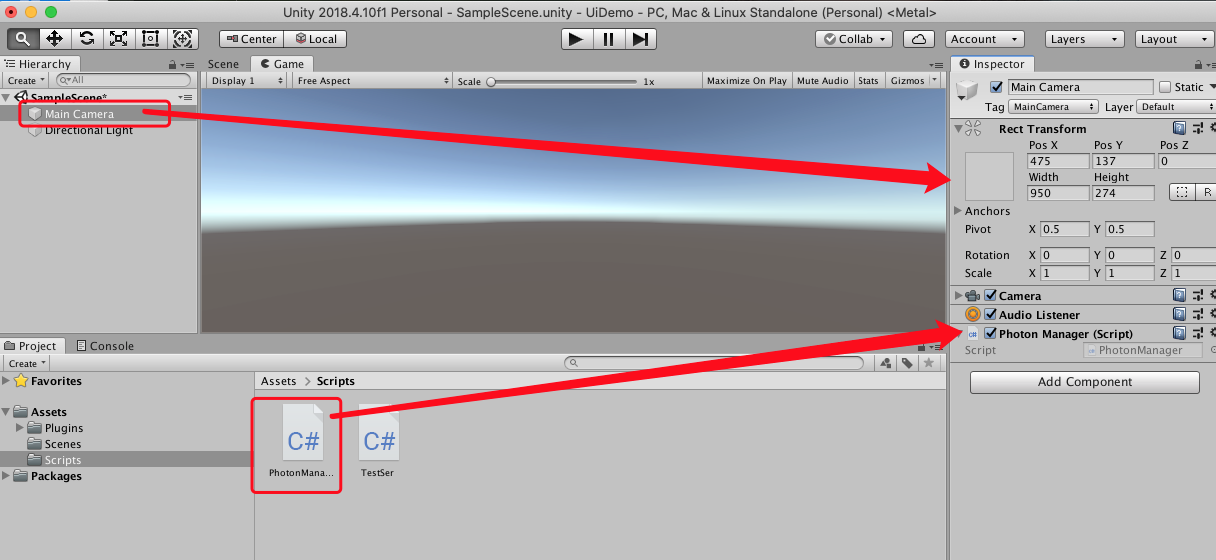
导入包,在资源下新建目录 Plugins 。在之前解压的SDK目录 lib中找到 Photon3Unity3D.dll,拖到新建的目前下


二、新建目录 Scripts ,添加c#文件,PhotonManager.cs 。
注意:如果部署的是云服务,记得开放相应端口。


using System;
using System.Collections;
using System.Collections.Generic;
using UnityEngine;
using ExitGames.Client.Photon;

public class PhotonManager : MonoBehaviour,IPhotonPeerListener
{
    //单例模式,保证只有一个链接服务器
    public static PhotonManager Instance;

    private static PhotonPeer peer;
    private bool connected;

    public static PhotonPeer Peer
    {
        get { return peer; }
    }

    private void Awake()
    {
        if (Instance == null)
        {
            Instance = this;
            DontDestroyOnLoad(this.gameObject);
        }else if (Instance != this)
        {
            Destroy(this.gameObject);
            return;
        }
    }

    // Start is called before the first frame update
    void Start()
    {
        Debug.Log("111------开始连接----");

        peer = new PhotonPeer(this, ConnectionProtocol.Udp);
        peer.Connect("127.0.0.1:5055","MyGame1");
        connected = false;
    }

    // Update is called once per frame
    void Update()
    {
        Debug.Log("update------" + connected);

        peer.Service();
    }

    private void OnDestroy()
    {
        if (peer != null && peer.PeerState == PeerStateValue.Connected)
        {
            peer.Disconnect();
        }
    }

    public void DebugReturn(DebugLevel level, string message)
    {
    }

    /// <summary>
    /// 客户端请求后,服务端响应,返回数据
    /// </summary>
    /// <param name="operationResponse"></param>
    public void OnOperationResponse(OperationResponse operationResponse)
    {

    }

    /// <summary>
    /// 连接状态发生改变时
    /// </summary>
    /// <param name="statusCode"></param>
    public void OnStatusChanged(StatusCode statusCode)
    {
        Debug.Log("serStatus-----" + statusCode.ToString());

        switch (statusCode)
        {
            case StatusCode.Connect:
                connected = true;
                break;
            default:
                connected = false;
                break;
        }
    }

    /// <summary>
    /// 服务端直接给客户端数据时,不需要向服务器请求
    /// </summary>
    /// <param name="eventData"></param>
    public void OnEvent(EventData eventData)
    {

    }
}
三、测试。将脚本挂载到相机上,然后运行。查看相应日志已经服务端日志
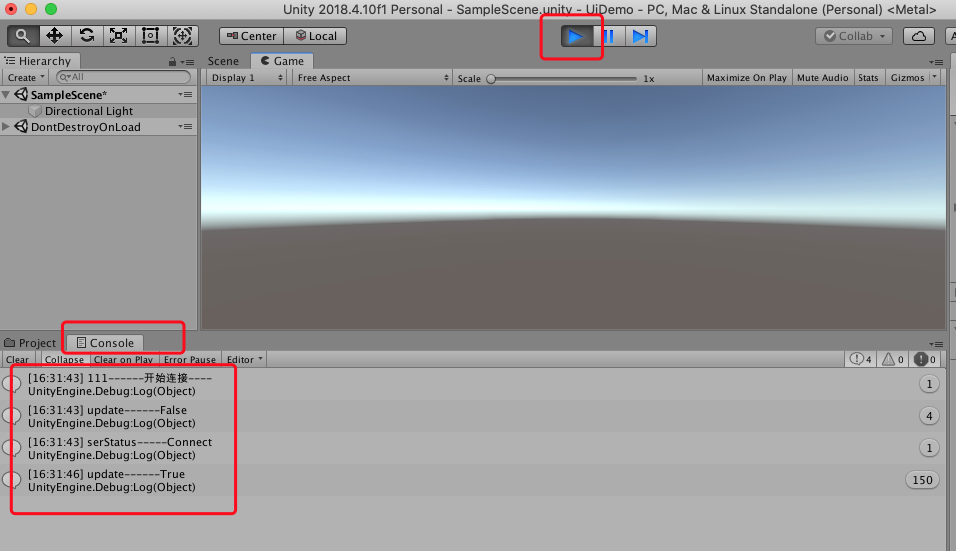
服务端日志:
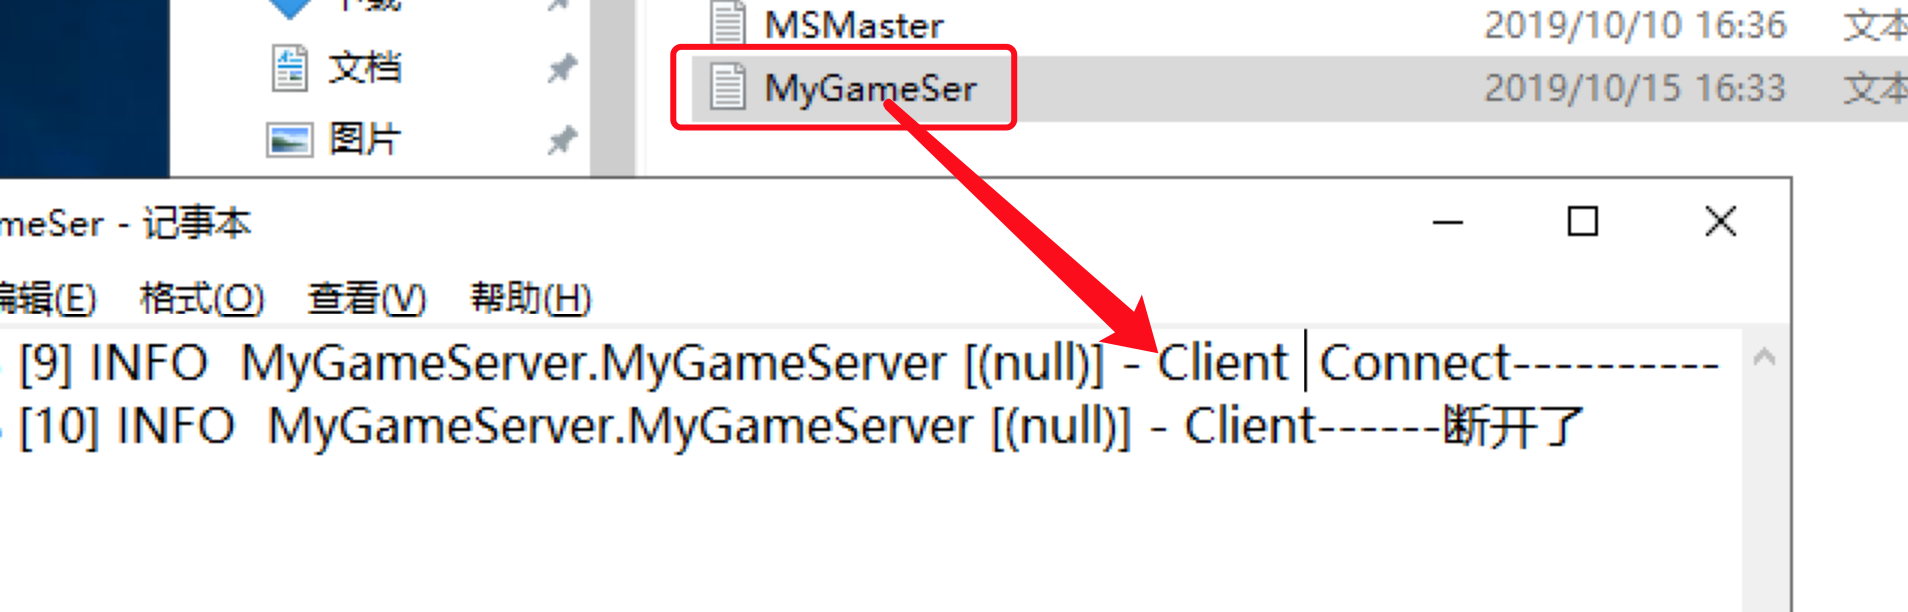
到此前端与后端连接完成 。
查看文件:https://blog.csdn.net/TheRootone/article/details/78812670

 浙公网安备 33010602011771号