DRF的版本控制,认证,权限和频率限制
版本控制
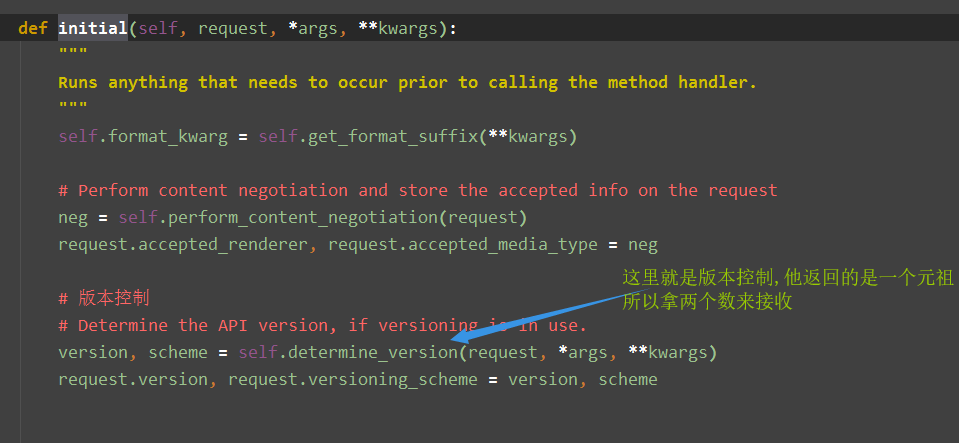
源码解析
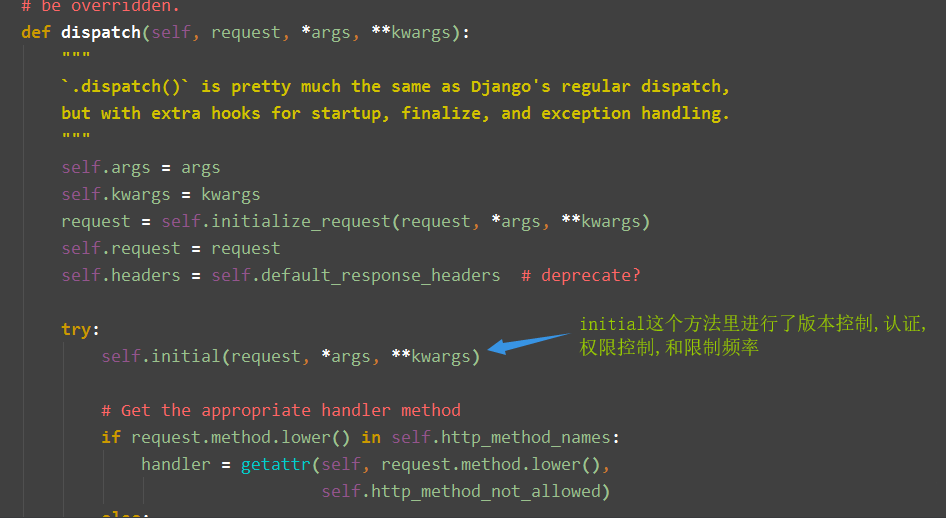


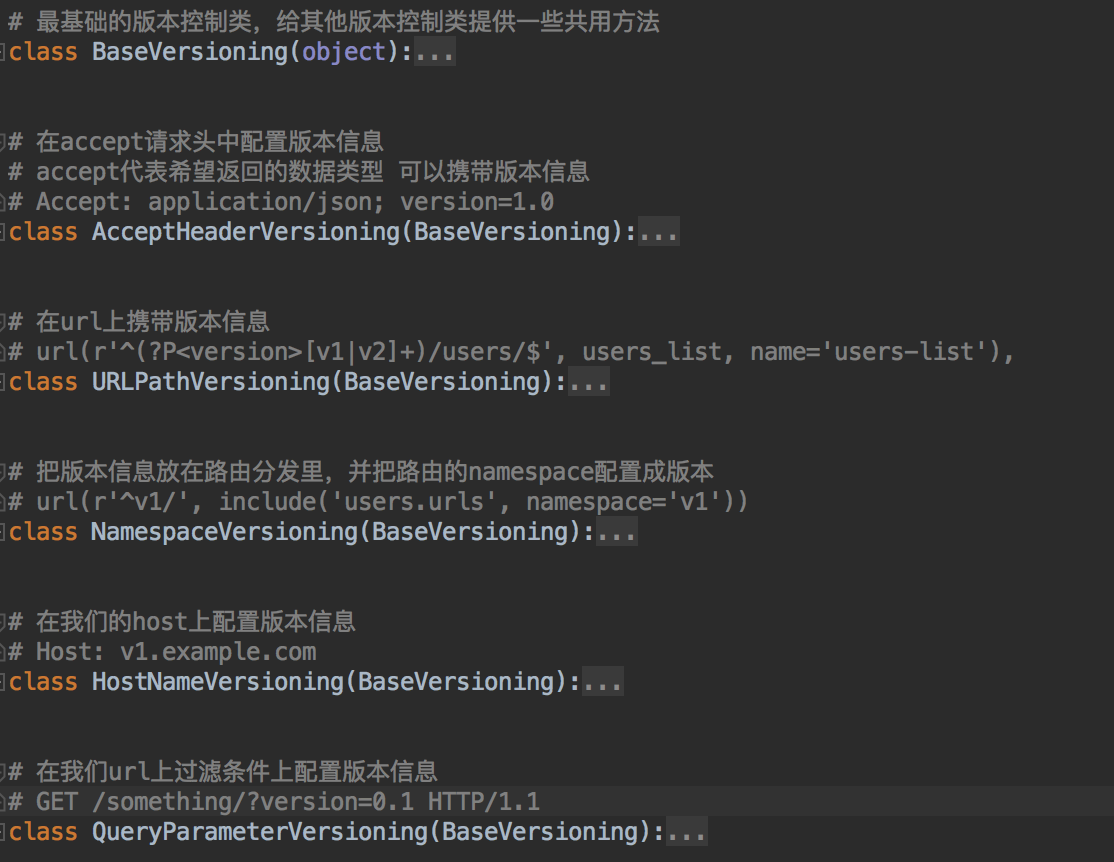
这个框架提供了一些些版本的控制方法就在,rest_framework.versioning里
如何使用:
settings.py里


REST_FRAMEWORK = {
    # 默认使用的版本控制类
    'DEFAULT_VERSIONING_CLASS': 'rest_framework.versioning.URLPathVersioning',
    # 允许的版本
    'ALLOWED_VERSIONS': ['v1', 'v2'],
    # 版本使用的参数名称
    'VERSION_PARAM': 'version',
    # 默认使用的版本
    'DEFAULT_VERSION': 'v1',
}
urls.py

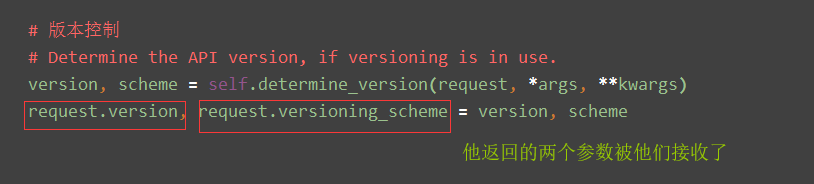
class TestView(APIView):
    def get(self, request, *args, **kwargs):
        print(request.versioning_scheme)
        ret = request.version
        if ret == "v1":
            return Response("版本v1的信息")
        elif ret == "v2":
            return Response("版本v2的信息")
        else:
            return Response("根本就匹配不到这个路由")

request.version:是版本号
request.versioning_scheme:是一个对象,就是settings里配置的那个方法的对象
DRF的认证
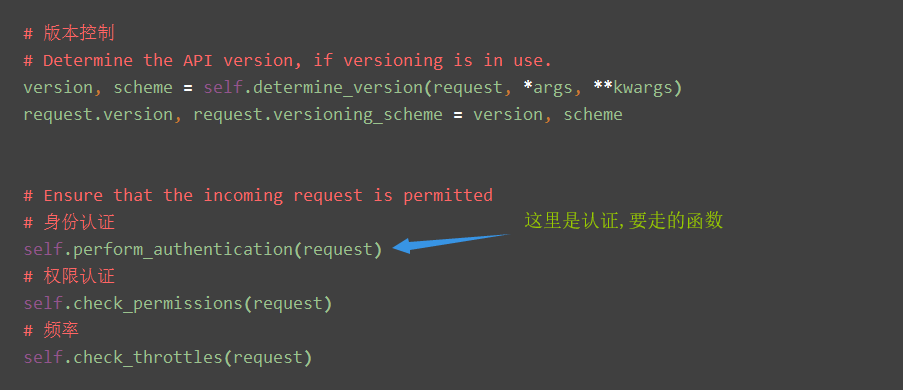
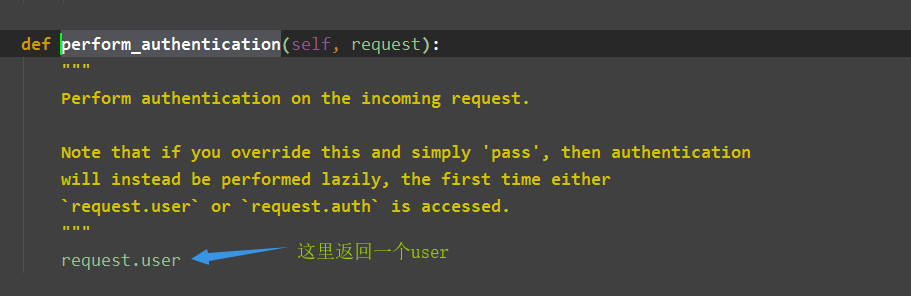
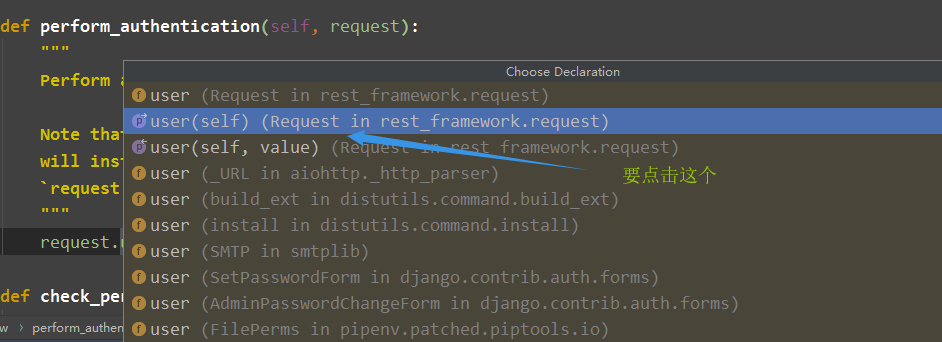
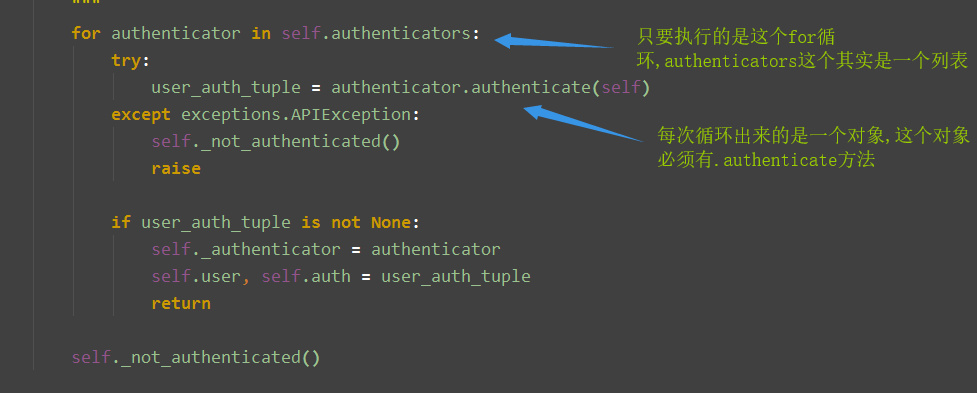
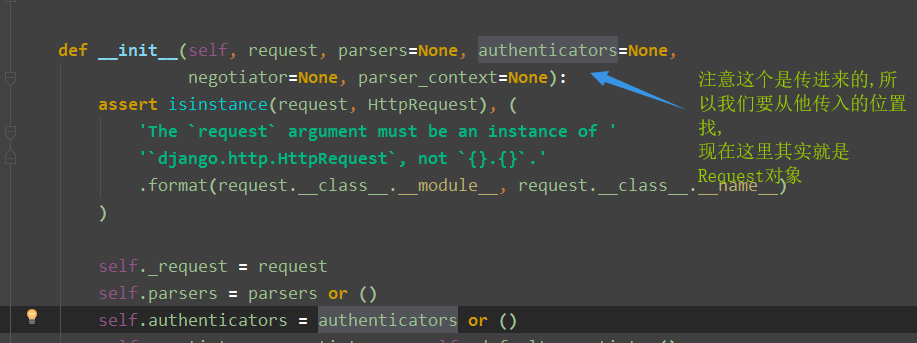
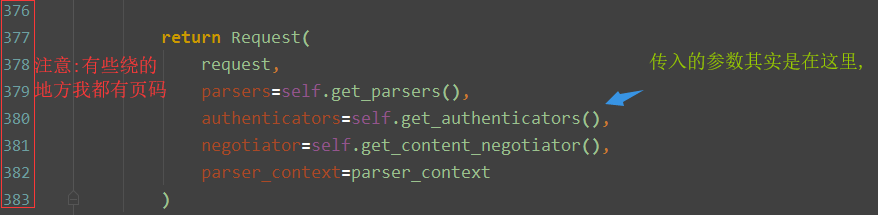
源码解析:


使用方法:
# 先在model中注册模型类
# 并且进行数据迁移
# 测试我就简写了~

class UserInfo(models.Model):
    username = models.CharField(max_length=32)
    token = models.UUIDField()
# 写视图类并且用post请求注册一个用户

class UserView(APIView):
    def post(self, request, *args, **kwargs):
        username = request.data["username"]
        UserInfo.objects.create(username=username, token=uuid.uuid4())
        return Response("注册成功")
写认证
# 注意我们这个认证的类必须实现的方法以及返回值
class MyAuth(BaseAuthentication):

    def authenticate(self, request):
        request_token = request.query_params.get("token", None)
        if not request_token:
            raise AuthenticationFailed({"code": 1001, "error": "缺少token"})
        token_obj = UserInfo.objects.filter(token=request_token).first()
        if not token_obj:
            raise AuthenticationFailed({"code": 1001, "error": "无效的token"})
        return token_obj.username, token_obj
class TestAuthView(APIView):
    authentication_classes = [MyAuth, ]

    def get(self, request, *args, **kwargs):
        return Response("测试认证")
REST_FRAMEWORK = {
    # 默认使用的版本控制类
    'DEFAULT_VERSIONING_CLASS': 'rest_framework.versioning.URLPathVersioning',
    # 允许的版本
    'ALLOWED_VERSIONS': ['v1', 'v2'],
    # 版本使用的参数名称
    'VERSION_PARAM': 'version',
    # 默认使用的版本
    'DEFAULT_VERSION': 'v1',
    # 配置全局认证
    'DEFAULT_AUTHENTICATION_CLASSES': ["BRQP.utils.MyAuth", ]
}
权限
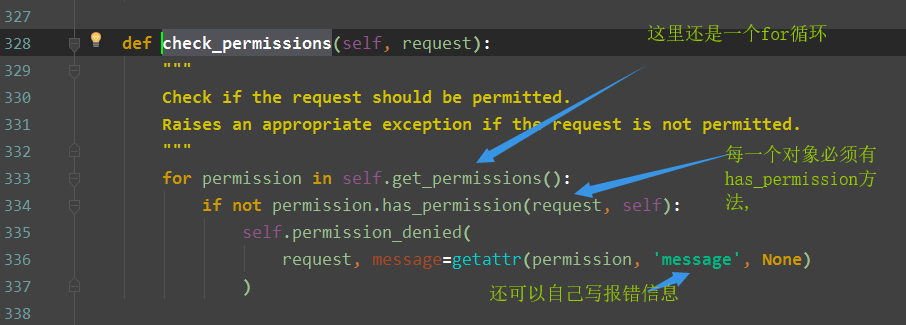
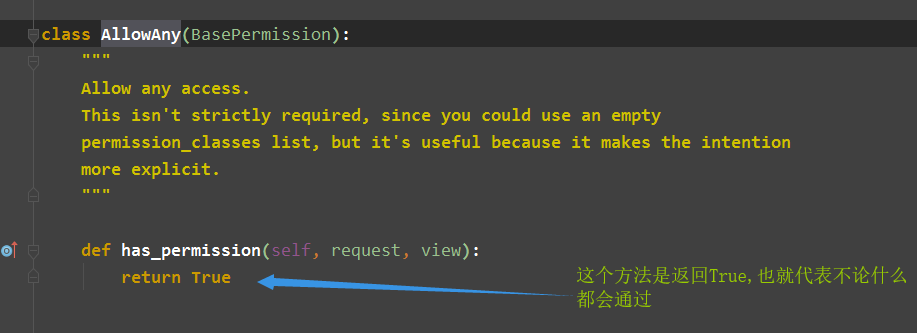
源码解析:


如何使用
class MyPermission(BasePermission):
    message = "VIP用户才能访问"

    def has_permission(self, request, view):
        """
        自定义权限只有vip用户能访问,
        注意我们初始化时候的顺序是认证在权限前面的,所以只要认证通过~
        我们这里就可以通过request.user,拿到我们用户信息
        request.auth就能拿到用户对象
        """
        if request.user and request.auth.type == 2:
            return True
        else:
            return False
class TestAuthView(APIView):
    authentication_classes = [MyAuth, ]
    permission_classes = [MyPermission, ]

    def get(self, request, *args, **kwargs):
        print(request.user)
        print(request.auth)
        username = request.user
        return Response(username)
REST_FRAMEWORK = {
    # 默认使用的版本控制类
    'DEFAULT_VERSIONING_CLASS': 'rest_framework.versioning.URLPathVersioning',
    # 允许的版本
    'ALLOWED_VERSIONS': ['v1', 'v2'],
    # 版本使用的参数名称
    'VERSION_PARAM': 'version',
    # 默认使用的版本
    'DEFAULT_VERSION': 'v1',
    # 配置全局认证
    # 'DEFAULT_AUTHENTICATION_CLASSES': ["BRQP.utils.MyAuth", ]
    # 配置全局权限
    "DEFAULT_PERMISSION_CLASSES": ["BROP.utils.MyPermission"]
}
频率控制
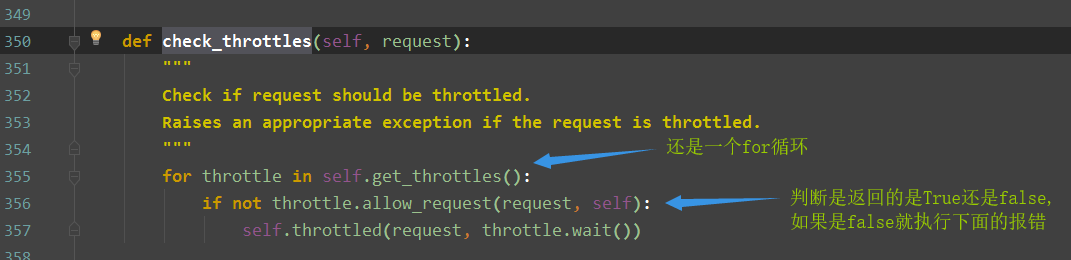
源码解析


如何使用:
自己写的
VISIT_RECORD = {}
class MyThrottle(object):

    def __init__(self):
        self.history = None

    def allow_request(self, request, view):
        """
        自定义频率限制60秒内只能访问三次
        """
        # 获取用户IP
        ip = request.META.get("REMOTE_ADDR")
        timestamp = time.time()
        if ip not in VISIT_RECORD:
            VISIT_RECORD[ip] = [timestamp, ]
            return True
        history = VISIT_RECORD[ip]
        self.history = history
        history.insert(0, timestamp)
        while history and history[-1] < timestamp - 60:
            history.pop()
        if len(history) > 3:
            return False
        else:
            return True

    def wait(self):
        """
        限制时间还剩多少
        """
        timestamp = time.time()
        return 60 - (timestamp - self.history[-1])
REST_FRAMEWORK = {
    # ......
    # 频率限制的配置
    "DEFAULT_THROTTLE_CLASSES": ["Throttle.throttle.MyThrottle"],
    }
}
使用自带的
from rest_framework.throttling import SimpleRateThrottle


class MyVisitThrottle(SimpleRateThrottle):
    scope = "WD"

    def get_cache_key(self, request, view):
        return self.get_ident(request)
REST_FRAMEWORK = {
    # 频率限制的配置
    # "DEFAULT_THROTTLE_CLASSES": ["Throttle.throttle.MyVisitThrottle"],
    "DEFAULT_THROTTLE_CLASSES": ["Throttle.throttle.MyThrottle"],
    "DEFAULT_THROTTLE_RATES":{
        'WD':'5/m',         #速率配置每分钟不能超过5次访问,WD是scope定义的值,

    }
}
from rest_framework.permissions import BasePermission      # 权限认证
from rest_framework.authentication import BaseAuthentication  # 用户认证
from rest_framework.exceptions import AuthenticationFailed  # 用户认证必须使用的报错
from rest_framework.throttling import SimpleRateThrottle    # 设置访问频率
from app01 import models
from rest_framework.versioning import BaseVersioning        # 版本控制
这些是你定义需要引入的相关模块,你也可以使用它里面自带的,一般自带的可以满足大多数情况

 浙公网安备 33010602011771号