

spring快速集成springMvc框架(一)
spring快速集成springMvc框架(一)
本文章将介绍两种快速简易搭建ssm框架的方法,分别是:
- xml方式
- java配置方式
一、xml方式
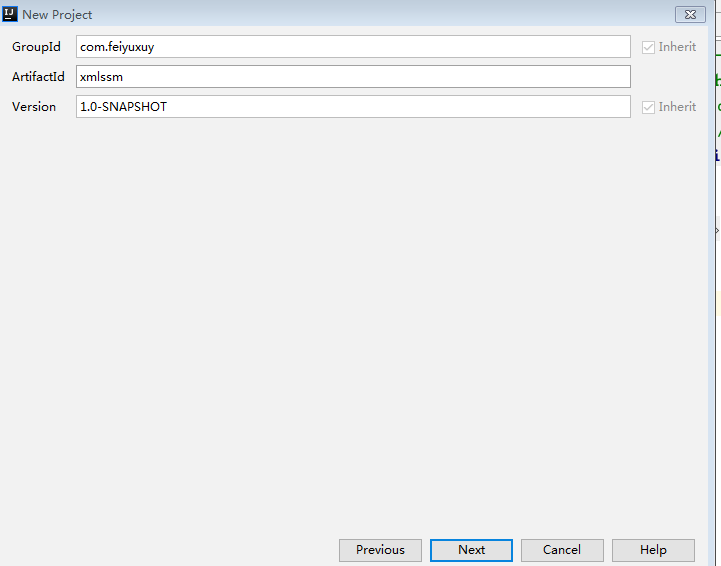
1.使用idea创建maven project
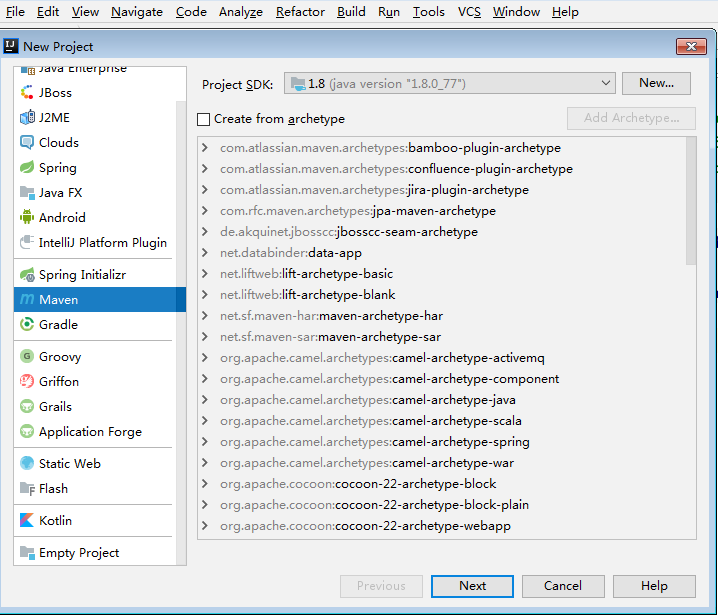
点击next
点击next -->finish。最终生成的工程目录结构如下:
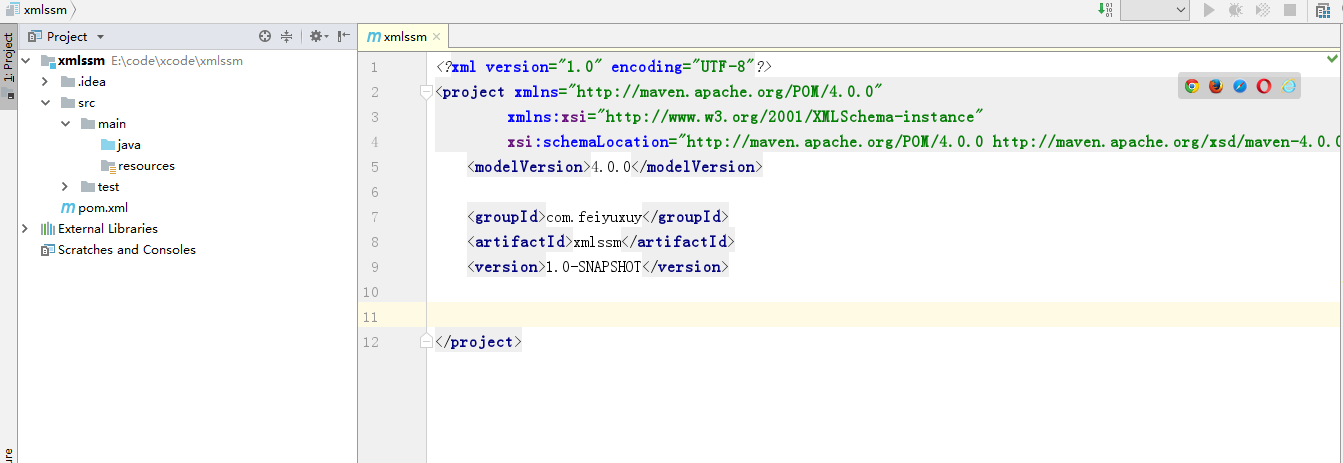
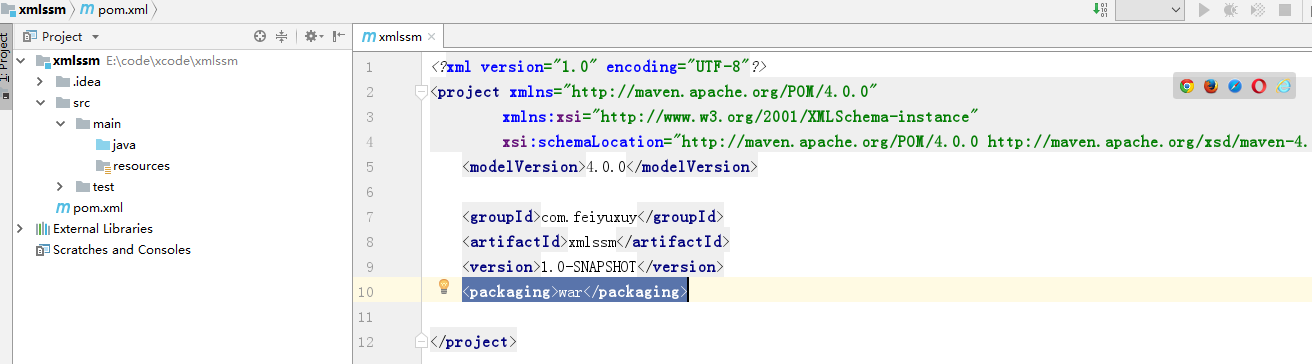
2.修改pom.xml文件
添加
<packaging>war</packaging>
3.添加webapp目录和web.xml
光标放在项目名上,按F4打开project Structure modules ,选中web。
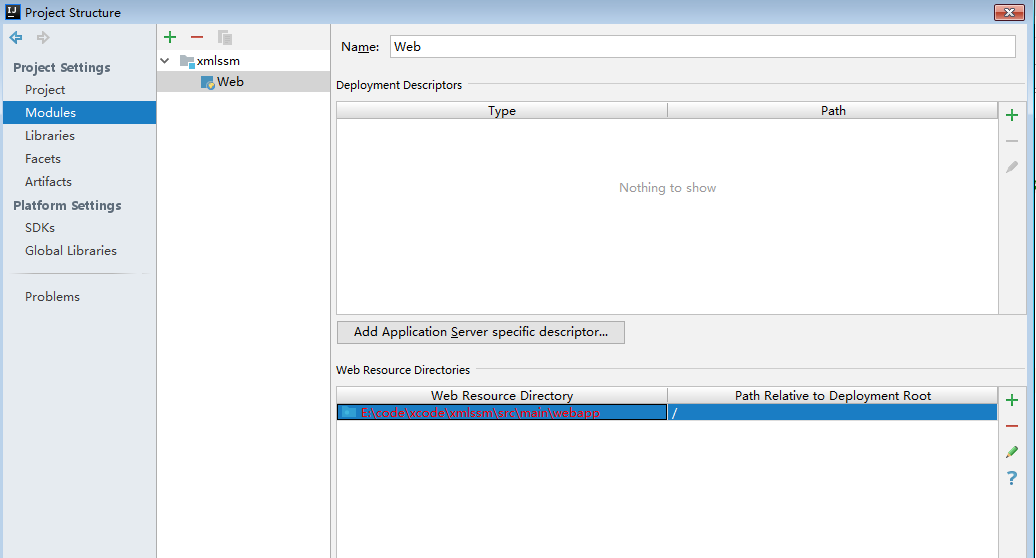
然后双击 Web Resource Dicretory,打开如下图
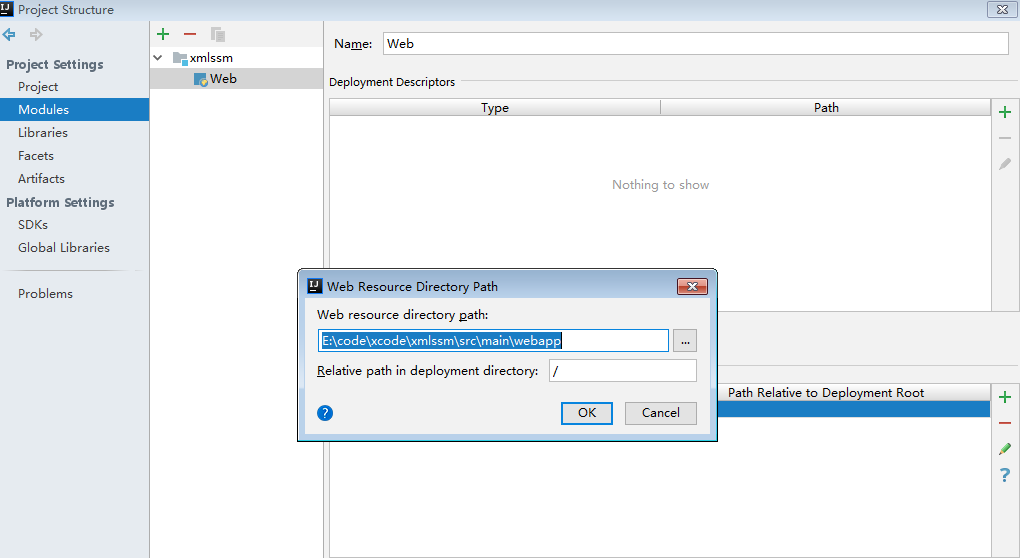
点击ok-->yes,创建webapp目录。然后点击加号,点击web.xml,如下图:
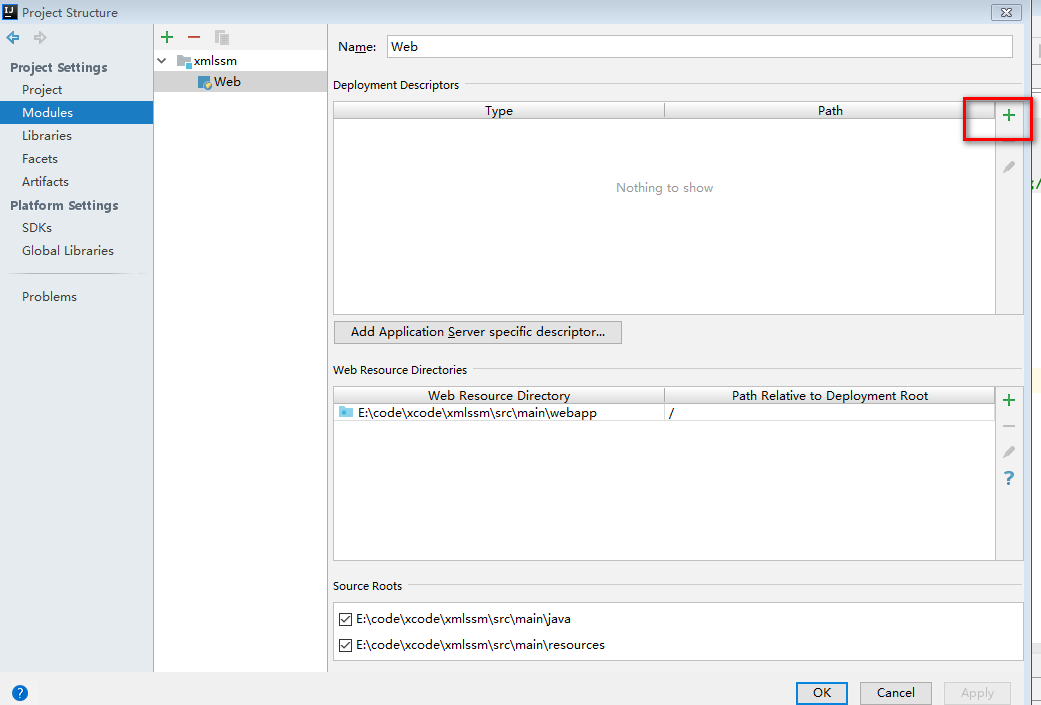

剪切\WEB-INF\web.xml放入webapp目录下

点击ok。此时web结构建好了。如下图:

4 在pom里添加依赖
   <dependencies>
        <dependency>
            <groupId>org.springframework</groupId>
            <artifactId>spring-webmvc</artifactId>
            <version>5.1.6.RELEASE</version>
        </dependency>
    </dependencies>
5 添加xml配置文件
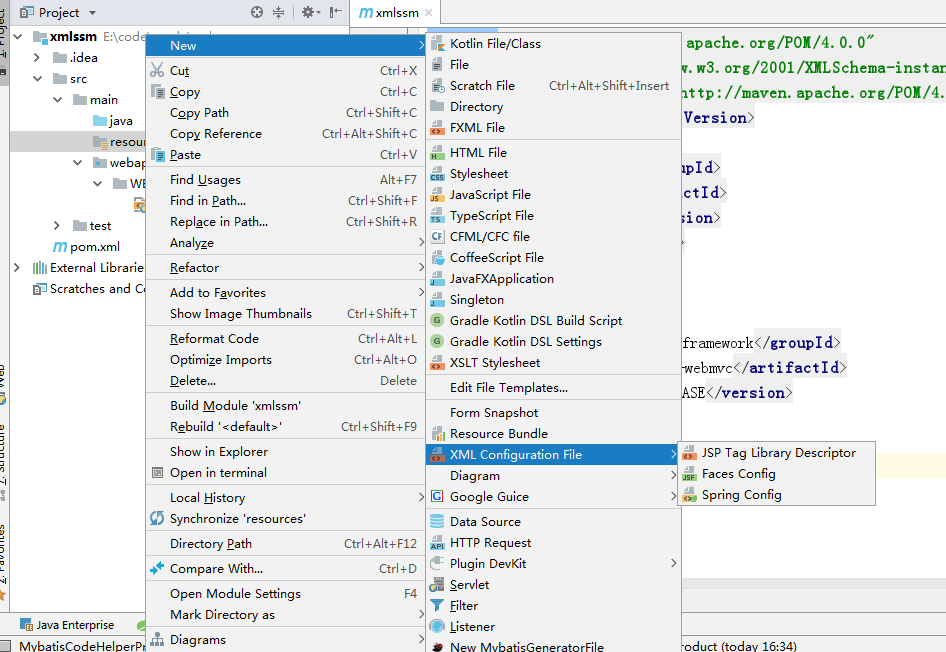
选中resource 右键 new-->XML Configuration File -->Sprin Config 创建 applicationContext.xml和spring-servlet.xml
6.applicationContext.xml配置内容
先在src.main.java下创建包 com.feiyuxuy.controller、 com.feiyuxuy.service
在applicationContext.xml里配置如下:
<?xml version="1.0" encoding="UTF-8"?>
<beans xmlns="http://www.springframework.org/schema/beans"
       xmlns:xsi="http://www.w3.org/2001/XMLSchema-instance"
       xmlns:context="http://www.springframework.org/schema/context"
       xsi:schemaLocation="http://www.springframework.org/schema/beans http://www.springframework.org/schema/beans/spring-beans.xsd http://www.springframework.org/schema/context http://www.springframework.org/schema/context/spring-context.xsd">

    <context:component-scan base-package="com.feiyuxuy" use-default-filters="true">
        <context:exclude-filter type="annotation" expression="org.springframework.stereotype.Controller" />
    </context:component-scan>
</beans>
扫描spring管理包 不包含controller
7.spring-servlet.xml 配置
   <context:component-scan base-package="com.feiyuxuy" use-default-filters="false">
        <context:include-filter type="annotation" expression="org.springframework.stereotype.Controller" />
    </context:component-scan>
    <mvc:annotation-driven/>
springMVC扫描Controller包,不扫描其他的包。
8.在web.xml加载配置
<?xml version="1.0" encoding="UTF-8"?>
<web-app xmlns="http://xmlns.jcp.org/xml/ns/javaee"
         xmlns:xsi="http://www.w3.org/2001/XMLSchema-instance"
         xsi:schemaLocation="http://xmlns.jcp.org/xml/ns/javaee http://xmlns.jcp.org/xml/ns/javaee/web-app_4_0.xsd"
         version="4.0">
    <context-param>
        <param-name>contextConfigLocation</param-name>
        <param-value>classpath:applicationContext.xml</param-value>
    </context-param>
    <listener>
        <listener-class>org.springframework.web.context.ContextLoaderListener</listener-class>
    </listener>
    <servlet>
        <servlet-name>springmvc</servlet-name>
        <servlet-class>org.springframework.web.servlet.DispatcherServlet</servlet-class>
        <init-param>
            <param-name>contextConfigLocation</param-name>
            <param-value>classpath:spring-servlet.xml</param-value>
        </init-param>
    </servlet>
    <servlet-mapping>
        <servlet-name>springmvc</servlet-name>
        <url-pattern>/</url-pattern>
    </servlet-mapping>
</web-app>
9.编写controller、service代码
@RestController
public class HelloController {

    @Autowired
    HelloService helloService;

    @GetMapping(value = "/hello",produces = "text/html;charset=utf-8")
    public String hello(){
        return  helloService.sayHello();
    }


}
@Service
public class HelloService {

    public String sayHello() {
        return  "hello world ! 哈哈";
    }
}
10.部署到tomcat
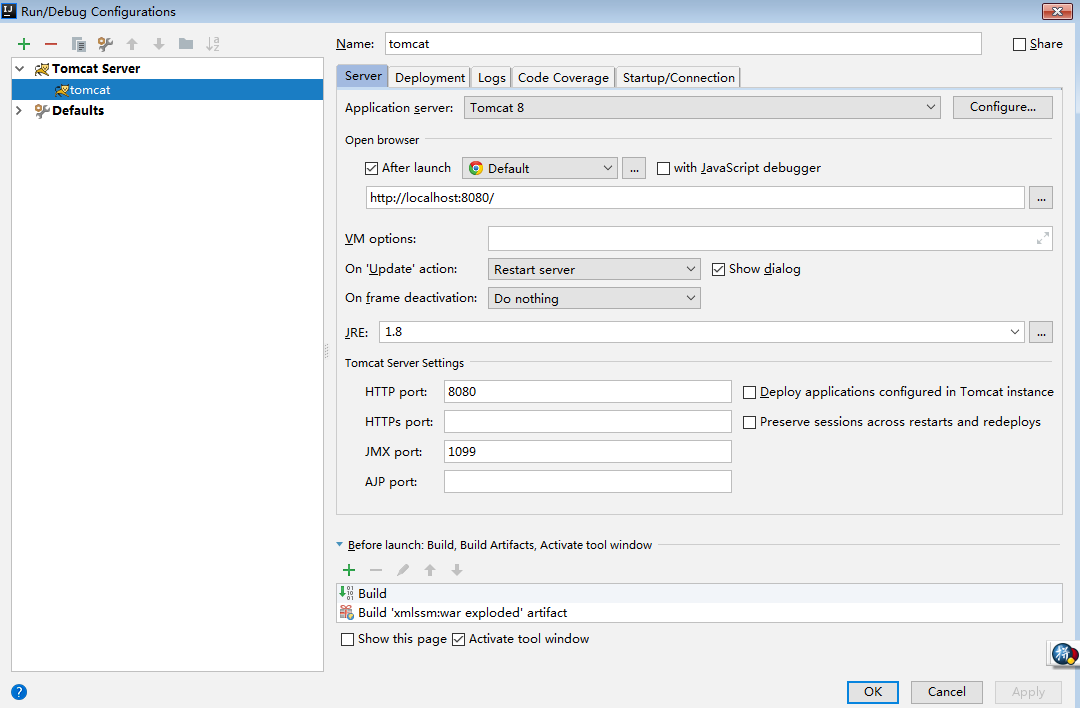
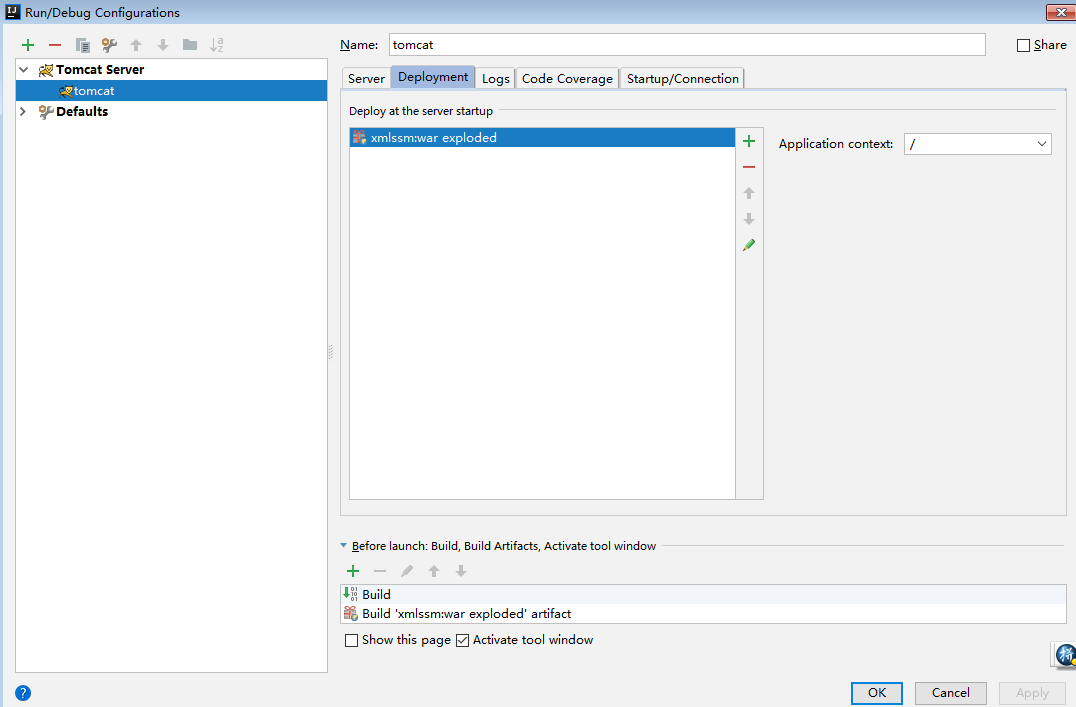
运行tomcat,浏览器输入地址 http://localhost:8080/hello 效果如下,则集成成功。

源码下载地址:https://pan.baidu.com/s/1k5PbvF_pbz_wWSR4WgsYRQ 提取码:xsyu
至此 spring和springMvc简易集成完成。
