CentOS7yum安装LNMP
一、搭建mysql环境
因为是centos7,yum源默认自带的是 mariadb数据库。
1、安装maraidb客户端工具
//安装 mariadb 客户端工具
yum install -y mariadb
2、安装maraidb服务端程序
yum install -y mariadb-server
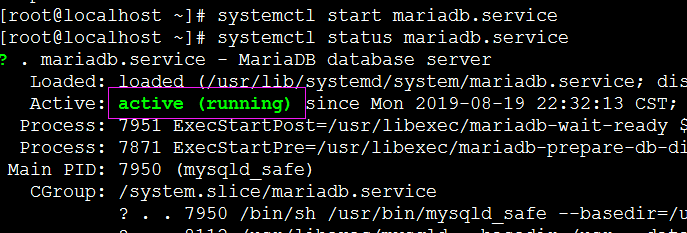
3、启动 mariadb 服务
systemctl start mariadb.service
4、查看3306端口是否已经启用
ss -tunlp | grep 3306

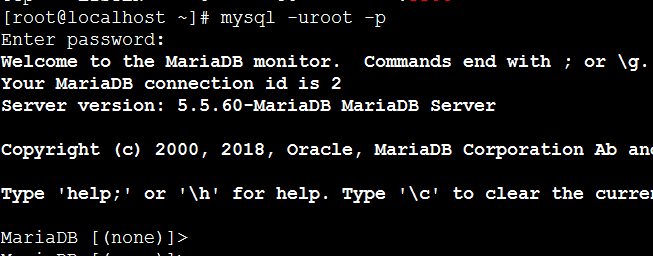
5、登录 mariadb
mysql -uroot -p
//然后直接回车,默认没有密码
二、搭建PHP环境
1、安装php的解释环境
添加支持yum repo源
yum install http://rpms.remirepo.net/enterprise/remi-release-7.rpm
yum install yum-utils //安装管理repository及扩展包的工具 (主要是针对repository)
yum-config-manager --enable remi-php72  //启用php7.2的仓库
拓展:Centos6的系统安装
http://rpms.remirepo.net/enterprise/remi.repo
下载到/etc/yum.repo.d/目录下
http://rpms.remirepo.net/enterprise/
2、搜索PHP7.2的版本
yum search php72
3、安装php7.2
yum install -y php72-php-fpm php72-php-common php72-php-mbstring php72-php-xmlrpc php72-php-soap php72-php-gd php72-php-xml php72-php-intl php72-php-mysql php72-php-cli php72-php-zip php72-php-curl php72-php-pecl-xdebug
php72-php-fpm :phpfastcgi进程管理器。安装了它就可以来启动我们Nginx的fastcgi进程。
4、检查php是否安装成功
php72 --version

5、php的配置文件
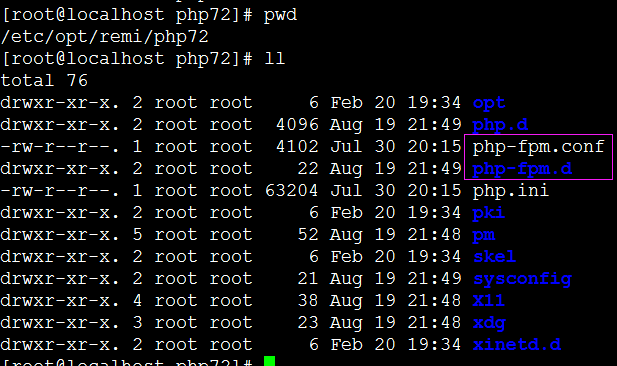
| 文件名 | 作用 |
| /etc/opt/remi/php72/php-fpm.conf | php-fpm的主配置文件 |
|
/etc/opt/remi/php72/php-fpm.d/ /etc/opt/remi/php72/php-fpm.d/www.conf |
php-fpm的从配置文件目录/文件 |
| /etc/opt/remi/php72/php.ini | php主配置文件 |
/etc/opt/remi/php72/php-fpm.d/www.conf 中有一个 listen = 127.0.0.1:9000 是fastcgi所监听的地址和端口。
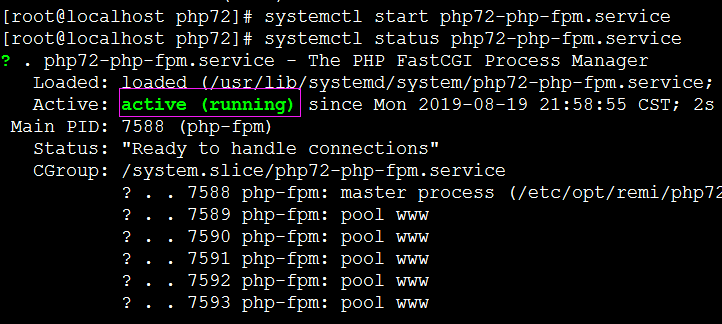
6、查看 php-fpm服务的状态
systemctl status php72-php-fpm.service

7、开启 php-fpm 服务
systemctl start php72-php-fpm.service
三、配置Nginx
1、 配置
vim /etc/nginx/conf.d/wds_server.conf
配置如下:
server {
    listen       8090;
    server_name  localhost;

    #charset koi8-r;
    #access_log  /var/log/nginx/host.access.log  main;
    root /opt/app/code5;

    location / {
        index  index.html index.htm;
    }

    //匹配以 .php 结尾的所有请求
    location ~ \.php$ {
        //把所有的php请求转发给本机的9000端口,即php-fpm的服务。
        fastcgi_pass 127.0.0.1:9000;
        fastcgi_index index.php;
        //这个fastcgi_params文件我们一般都不需要改动,用默认的就好
        include fastcgi_params;
        //$document_root :Nginx自带变量,表示主目录的位置(即/opt/app/code5)
        fastcgi_param SCRIPT_FILENAME $document_root$fastcgi_script_name;
    }
}
2、建立测试页面
在 /opt/app/code5/info.php文件里写入 <?php phpinfo() ?>
3、测试。
在浏览器中输入http://192.168.0.133:8090/info.php 。效果如下:

已经可以正确解析php了,说明我们的Nginx配置正确。
四、部署Wordpress
wordpress官网:https://cn.wordpress.org
1、下载安装包。
wget https://cn.wordpress.org/latest-zh_CN.tar.gz
2、创建一个wds的数据库
create database wordpress;
3、给wordpress库创建一个单独的用户。
grant all privileges on wordpress.* to wordpress@'localhost' identified by '123456';
flush privileges;
4、配置Nginx配置文件
server {
    listen       8090;
    server_name  localhost;

    #charset koi8-r;
    #access_log  /var/log/nginx/host.access.log  main;
    root /opt/app/wdcode/wordpress;

    location / {
        index  index.php;
        //try_files 如果访问的不是 index.php的话,就将请求改写到 index.php + 所传递的参数这种模式中。
        try_files $uri $uri/ /index.php?$args;
    }

    location ~ \.php$ {
        fastcgi_pass 127.0.0.1:9000;
        fastcgi_index index.php;
        include fastcgi_params;
        fastcgi_param SCRIPT_FILENAME $document_root$fastcgi_script_name;
    }
}
4、访问站点
访问192.168.0.133:8090 会看到如下页面:
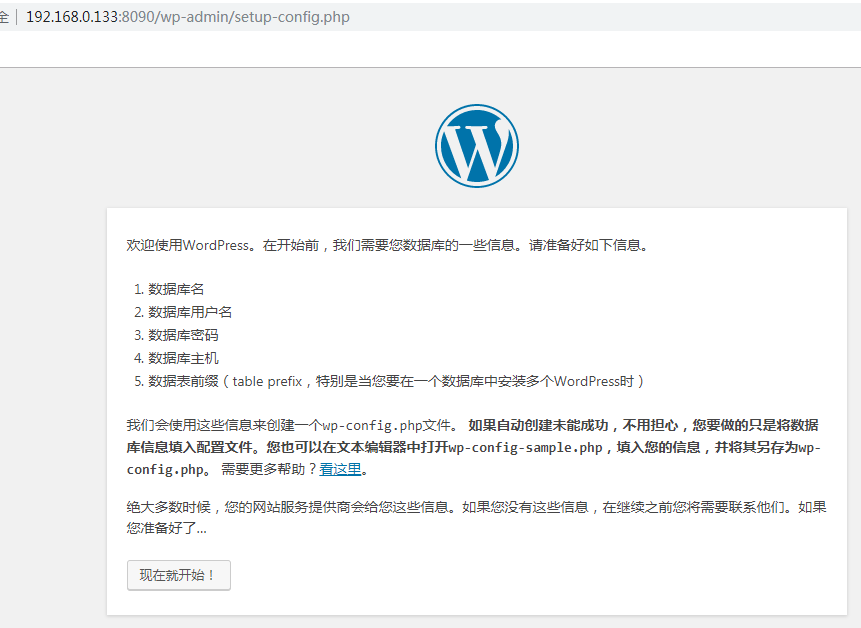
然后根据提示进行安装就可啦。需要注意的就是安装过程中可能会出现写入配置文件失败的问题,那是 wordpress项目文件夹权限问题。
vim /etc/opt/remi/php72/php-fpm.d/www.conf
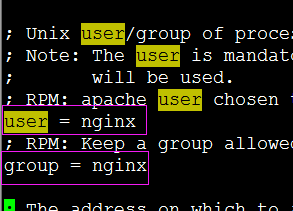
我么会发现 php-fpm的默认用户是 nginx ,故需要将 wordpress 项目的所属者所属组改一下。
本文为袋鼠学习中的总结,如有转载请注明出处:https://www.cnblogs.com/chrdai/p/11379964.html

 浙公网安备 33010602011771号