<七>Consent页面和跳转的实现
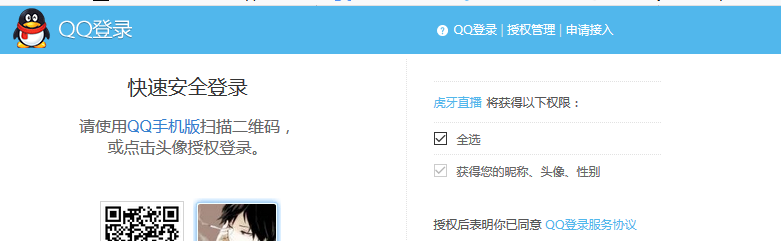
我们利用qq或者微博作为第三方登录一些网站的时候,中间都会出现一个用户确认授权的页面,如下图类似
下面我们来自己实现一个中间的跳转,当用户点击确定后再进行登录成功的跳转。
1、服务端新建一个ConsentController
   public class ConsentController : Controller
    {
        private readonly IClientStore _clientStore;
        private readonly IResourceStore _resourceStore;
        private readonly IIdentityServerInteractionService _identityServerInteractionService;

          public ConsentController(IClientStore clientStore, IResourceStore resourceStore, IIdentityServerInteractionService identityServerInteractionService)
        {
            _clientStore = clientStore;
            _resourceStore = resourceStore;
            _identityServerInteractionService = identityServerInteractionService;
        }

        private async Task<ConsentViewModel> BuildConsentViewModel(string returnUrl)
        {
            var request = await _identityServerInteractionService.GetAuthorizationContextAsync(returnUrl); //通过url获取请求信息
            if (request == null)
                return null;

            var client = await _clientStore.FindEnabledClientByIdAsync(request.Client.ClientId);  //根据id获取客户端信息
            var resources = await _resourceStore.FindEnabledResourcesByScopeAsync(request.Client.AllowedScopes);   //获取resourse 的信息

            return CreateConsentViewModel(request, client, resources);
        }

        private ConsentViewModel CreateConsentViewModel(AuthorizationRequest request, Client client, Resources resources)
        {
            var vm = new ConsentViewModel();
            vm.ClientName = client.ClientName;
            vm.ClientLogoUrl = client.LogoUri;
            vm.ClientUrl = client.ClientUri;
            vm.AllowRememberConsent = client.AllowRememberConsent;

            vm.IdentityScopes = resources.IdentityResources.Select(i => CreateScopeViewModel(i));
            vm.ResourceScopes = resources.ApiScopes.Select(i => CreateScopeViewModel(i));

            return vm;
        }

        private ScopeViewModel CreateScopeViewModel(IdentityResource identityResource)
        {
            return new ScopeViewModel
            {
                Name = identityResource.Name,
                DisplayName = identityResource.DisplayName,
                Description = identityResource.Description,
                Required = identityResource.Required,
                Checked = identityResource.Required,
                Emphasize = identityResource.Emphasize
            };
        }
        private ScopeViewModel CreateScopeViewModel(ApiScope scope)
        {
            return new ScopeViewModel
            {
                Name = scope.Name,
                DisplayName = scope.DisplayName,
                Description = scope.Description,
                Required = scope.Required,
                Checked = scope.Required,
                Emphasize = scope.Emphasize
            };
        }
        [Route("consent")]
        [HttpGet]
        public async Task<IActionResult> Index(string returnUrl)
        {
            var model = await BuildConsentViewModel(returnUrl);
            return View(model);
        }

    }
2、新增Index.cshtml
@using CodeAuthMvc.Models;
@model ConsentViewModel
<p>Consent Page</p>

<div class="row page-header">
    <div class="col-sm-10">
        @if(string.IsNullOrWhiteSpace(Model.ClientLogoUrl))
        {
           <div><img src="@Model.ClientLogoUrl" /></div>
        }
        <h1>
            @Model.ClientName
            <small>希望使用您的账户</small>
        </h1>
    </div>

</div>

<div class="row">
    <div class="=col-sm-8">
        <form asp-action="Index">
            @if (Model.IdentityScopes.Any()) //输出内容
            {
                <div>
                    <div class="panel-heading">
                        <span class="glyphicon glyphicon-user"></span>
                        用户信息
                    </div>
                    <ul class="list-group">
                        @foreach (var scope in Model.IdentityScopes)
                        {
                            @Html.Partial("_ScopeItemList", scope)
                        }
                    </ul>
                </div>
            }
            @if (Model.ResourceScopes.Any())
            {
                <div>
                    <div class="panel-heading">
                        <span class="glyphicon glyphicon-tasks"></span>
                        应用权限
                    </div>
                    <ul class="list-group">
                        @foreach (var scope in Model.ResourceScopes)
                        {
                            @Html.Partial("_ScopeItemList", scope)
                        }
                    </ul>
                </div>
            }
        </form>
    </div>


</div>
3、新增_ScopeItemList.cshtml
@using CodeAuthMvc.Models;
@model ScopeViewModel
<li>
    <label>
        <input type="checkbox" name="ScopesConsented" id="scopes_@Model.Name" value="@Model.Name" checked="@Model.Checked" disabled="@Model.Required" />

        <strong>@Model.Name</strong>
        @if (Model.Emphasize)
        {
            <span class="glyphicon glyphicon-exclamation-sign"></span>
        }
    </label>
    @if (string.IsNullOrWhiteSpace(Model.Description))
    {
        <div>
            <label for="scopes_@Model.Name">@Model.Description</label>
        </div>
    }
</li>
4、新建相关viewmodel
  public class ConsentViewModel
    {
        public string ClientId { get; set; }
        public string ClientName { get; set; }
        public string ClientLogoUrl { get; set; }

        public string ClientUrl { get; set; }
        /// <summary>
        /// 是否允许记住
        /// </summary>
        public bool AllowRememberConsent { get; set; }
        /// <summary>
        /// Identity资源列表
        /// </summary>
        public IEnumerable<ScopeViewModel> IdentityScopes { get; set; }
        /// <summary>
        /// Resource资源列表
        /// </summary>
        public IEnumerable<ScopeViewModel> ResourceScopes { get; set; }
    }
  public class LoginInputModel
    {
        [Required]
        public string Username { get; set; }
        [Required]
        public string Password { get; set; }
        public string ReturnUrl { get; set; }
    }
public class ScopeViewModel
    {
        /// <summary>
        /// scope 名称
        /// </summary>
        public string Name { get; set; }
        /// <summary>
        /// scope显示名称
        /// </summary>
        public string DisplayName { get; set; }
        /// <summary>
        ///描述
        /// </summary>
        public  string Description { get; set; }
        /// <summary>
        /// 是否强调
        /// </summary>
        public bool Emphasize { get; set; }
        /// <summary>
        /// 是否必须
        /// </summary>
        public bool Required { get; set; }
        /// <summary>
        /// 是否选择
        /// </summary>
        public bool Checked { get; set; }

    }
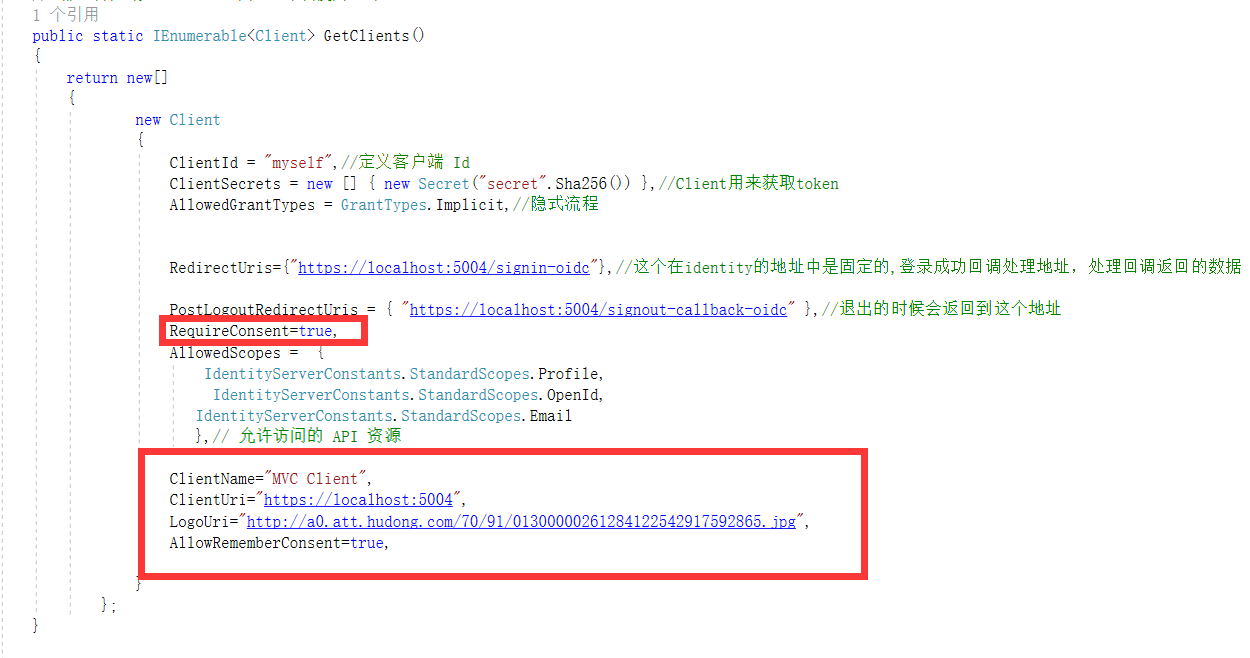
5、修改服务端config文件的client配置
                        ClientName="MVC Client",
                        ClientUri="https://localhost:5004",
                        LogoUri="http://a0.att.hudong.com/70/91/01300000261284122542917592865.jpg",
                        AllowRememberConsent=true,
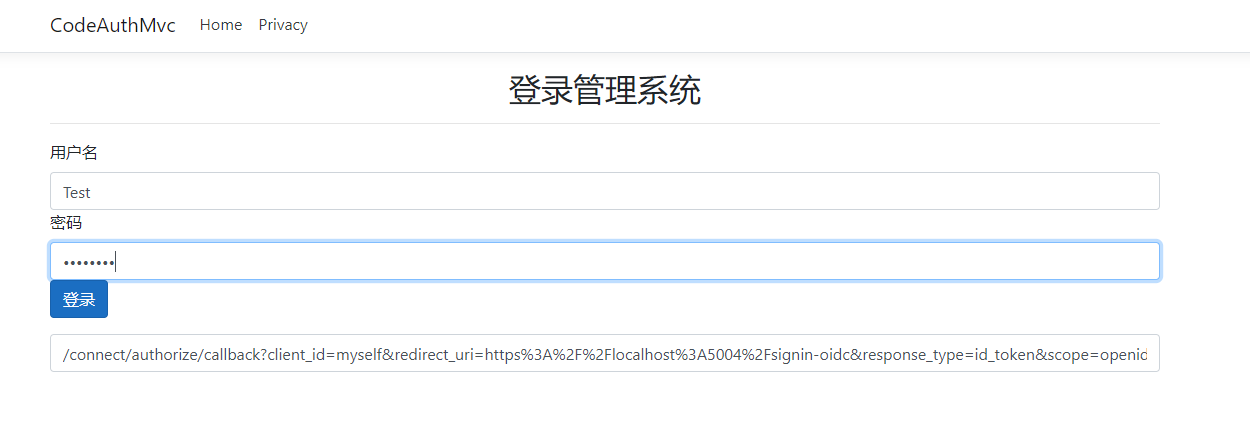
6、启动服务器和客户端,访问5004端口后,进行登录后跳转到consent 页面
点击登录头调到consent 页面。
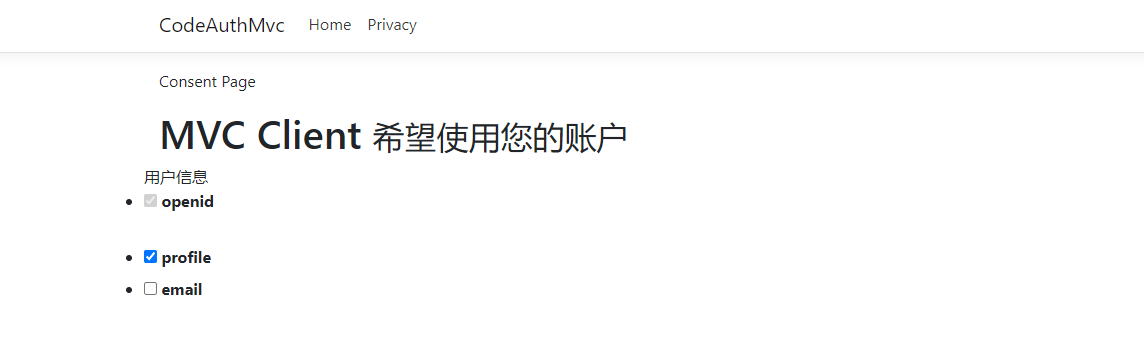
至此consent页面的 跳转已经完成。后面来完成确认的逻辑。
参考文章::

 浙公网安备 33010602011771号