spring 3.0系统集成webservice
spring 3.0系统集成webservice,踩了很多坑以后总算成功了,故写下这篇博客以记录。
1.准备jar包
由于项目是spring3.0,所以应该要使用cxf 2.7版本才可以成功配置,高版本会出现jar包冲突。
具体需要的jar包如下:
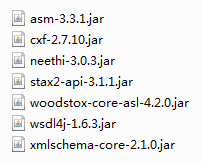
你可以点此下载:cxf 2.7所需jar包
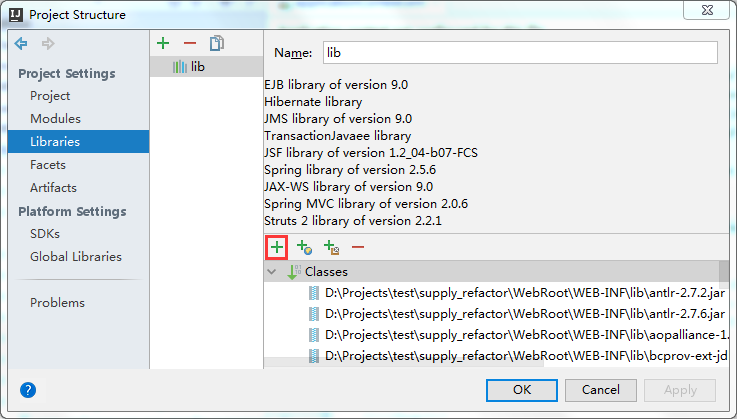
然后在idea中引入这些jar包(对于该项目来说,可以先把这些jar包复制到项目内的lib文件夹内)
idea引入jar包方法见下图(点击图中红框圈出的+号即可添加):
2.配置webService
2.1 web.xml
在web.xml中添加如下代码,用于路由/webservice开始的路径。
记得要加在原来的url配置器上方才能被优先匹配。
    <!-- webservice -->
    <servlet>
        <servlet-name>webservice</servlet-name>
        <servlet-class>org.apache.cxf.transport.servlet.CXFServlet</servlet-class>
        <load-on-startup>1</load-on-startup>
    </servlet>
    <servlet-mapping>
        <servlet-name>webservice</servlet-name>
        <url-pattern>/webservice/*</url-pattern>
    </servlet-mapping>
2.2 applicationContext.xml
首先将头修改如下,自己看实际代码缺啥补啥:
<beans xmlns="http://www.springframework.org/schema/beans"
       xmlns:xsi="http://www.w3.org/2001/XMLSchema-instance"
       xmlns:jdbc="http://www.springframework.org/schema/jdbc"
       xmlns:jaxws="http://cxf.apache.org/jaxws"
       xsi:schemaLocation="http://www.springframework.org/schema/beans http://www.springframework.org/schema/beans/spring-beans-3.0.xsd
       http://www.springframework.org/schema/jdbc http://www.springframework.org/schema/jdbc/spring-jdbc-3.0.xsd
       http://cxf.apache.org/jaxws http://cxf.apache.org/schemas/jaxws.xsd">

</beans>
然后添加cxf的配置,注意必须引入下面三个资源(据说新版本的cxf可以省去第二个配置文件)
    <!--cxf配置-->
    <!-- Import Apache CXF Bean Definition 固定配置 -->
    <import resource="classpath:META-INF/cxf/cxf.xml" />
    <import resource="classpath:META-INF/cxf/cxf-extension-soap.xml" />
    <import resource="classpath:META-INF/cxf/cxf-servlet.xml" />
对,就是这么简单,webservice服务就集成好了。

不过别急,这时候由于还没创建webservice服务,所以如果你这时候访问:
http://localhost:8080/supply_refactor/webservice,是会报错的。它会提示你初始化失败没有webservice服务。
3.数据库中创建测试数据表test
CREATE TABLE `supply`.`test` (
  `id` INT NOT NULL AUTO_INCREMENT,
  `context` VARCHAR(45) NOT NULL,
  PRIMARY KEY (`id`))
ENGINE = MyISAM
DEFAULT CHARACTER SET = utf8;
然后往里面插入一条数据,我这里插入了“测试哈哈哈”
4.创建webservice服务
4.1配置hibernate bean映射文件
Test.java


package com.supply.bean;

public class Test implements java.io.Serializable{
    private long id;
    private String context;

    public Test(){}

    public Test(long id,String context){
        super();
        this.id=id;
        this.context=context;
    }

    @Override
    public String toString() {
        return "Test{" +
                "id=" + id +
                ", context='" + context + '\'' +
                '}';
    }

    public long getId() {
        return id;
    }

    public void setId(long id) {
        this.id = id;
    }

    public String getContext() {
        return context;
    }

    public void setContext(String context) {
        this.context = context;
    }
}
Test.hbm.xml
<?xml version="1.0" encoding="utf-8"?>
<!DOCTYPE hibernate-mapping PUBLIC "-//Hibernate/Hibernate Mapping DTD 3.0//EN"
        "http://hibernate.sourceforge.net/hibernate-mapping-3.0.dtd">

<hibernate-mapping>
    <class catalog="supply" name="com.supply.bean.Test" table="test">
        <id name="id" type="java.lang.Long">
            <column name="id" precision="11" scale="0"/>
            <generator class="increment"/>
        </id>
        <property generated="never" lazy="false" name="context" type="java.lang.String">
            <column length="45" name="context"/>
        </property>
    </class>
</hibernate-mapping>
4.2在applicationContext.xml的mappingResources标签内添加如下:
<value>com/supply/bean/Test.hbm.xml</value>
4.3添加Dao文件TestDao.java
package com.supply.dao;

import com.supply.bean.Test;
import org.apache.log4j.Logger;

public class TestDao extends BaseDao{
    private static Logger log=Logger.getLogger(TestDao.class);

    public Test getDomainById(long id){
        Test test=(Test)this.findById(Test.class,id);
        return test;
    }
}
4.4添加service文件TestService.java
package com.supply.cxf;

import com.supply.bean.Test;

import javax.jws.WebService;

@WebService
public interface TestService {
    public Test getDomainById(long id);
}
4.5添加serviceImpl文件TestServiceImpl.java
package com.supply.cxf.impl;

import com.supply.bean.Test;
import com.supply.cxf.TestService;
import com.supply.dao.TestDao;

import javax.jws.WebService;

@WebService
public class TestServiceImpl  implements TestService{
    private TestDao testDao;

    public TestDao getTestDao() {
        return testDao;
    }

    public void setTestDao(TestDao testDao) {
        this.testDao = testDao;
    }

    public TestServiceImpl(){}

    @Override
    public Test getDomainById(long id){
        Test test=testDao.getDomainById(id);
        return test;
    }
}
5.添加webservice服务至applicationContext.xml
记住,这里有个大坑,implementor中不能写成com.*.*的形式,而是必须引入一个bean!
    <!-- 要发布成webservice的bean -->
    <!--cxf service-->
    <bean id="testDao" class="com.supply.dao.TestDao">
        <property name="sessionFactory" ref="sessionFactory"/>
    </bean>
    <bean id="testService" class="com.supply.cxf.impl.TestServiceImpl">
        <property name="testDao" ref="testDao"/>
    </bean>
    <jaxws:endpoint  id="testWebService" address="/testWebService"
                     implementor="#testService" >
    </jaxws:endpoint>
至此,配置全部完毕,启动Tomcat,然后输入:
http://localhost:8080/supply_refactor/webservice即可看到你配置的testWebService服务。
你也可以输入http://localhost:8080/supply_refactor/webservice/testWebService?wsdl直接查看该接口。
最后的测试
我使用了C#控制台项目进行测试。
具体流程是:创建控制台项目,然后在项目名上右键选择添加服务引用,出现如下窗口:
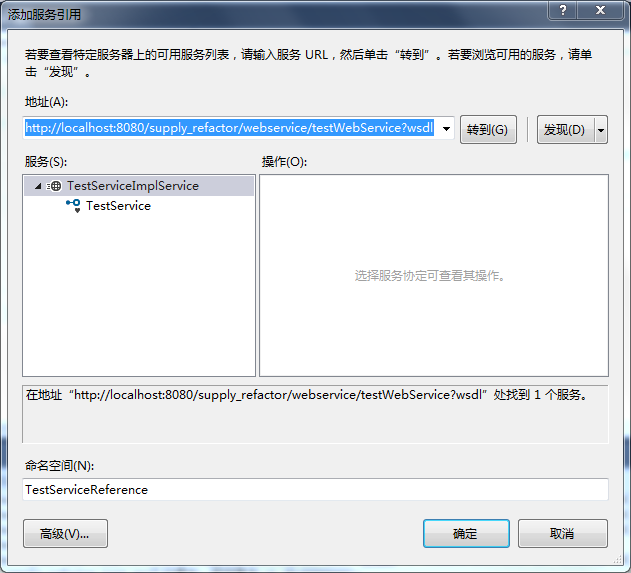
点击确定后,在主程序中写如下代码:
using System;
using System.Collections.Generic;
using System.Linq;
using System.Text;
using System.Threading.Tasks;

namespace supply_refactor_test
{
    class Program
    {
        static void Main(string[] args)
        {
            TestServiceReference.TestServiceClient client = new TestServiceReference.TestServiceClient();
            //调用服务的方法
            TestServiceReference.test test = new TestServiceReference.test();
            test = client.getDomainById(1);
            Console.WriteLine("testId:"+test.id+"  testContext:"+test.context);
            //完成
            Console.WriteLine("调用完成");
            Console.ReadKey();
        }
    }
}
运行成功的界面如下:
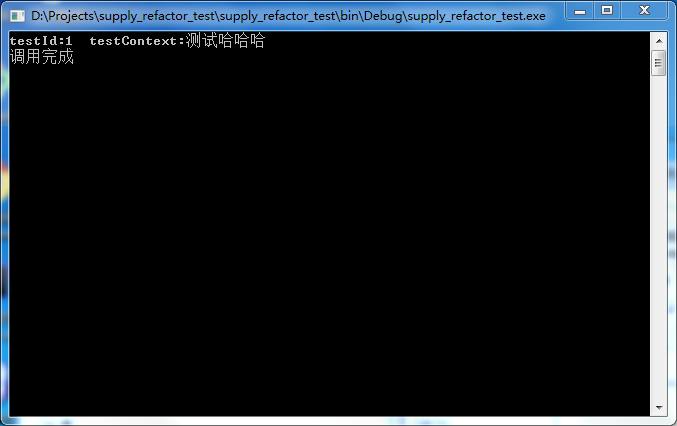
大功告成。
参考资料:
posted on 2018-03-05 18:06 chenyangsocool 阅读(435) 评论(0) 收藏 举报

 浙公网安备 33010602011771号