gem "searchkick"(4500✨) 智能搜索(使用Elastic search)(Gorails:建立一个侧边搜索栏)
Searchkick
🚀 Intelligent search made easy
类似的gem还有ransack
GoRails视频 介绍 和 应用 two episodes
初始化:
首先使用brew安装配套java(用java写的), elasticsearch,
#mac
brew cask install homebrew/cask-versions/java8
#期间提示输入mac通过的密码,成功后再安装elasticsearch
brew install elasticsearch
然后还要启动:brew services start elasticsearch
增加gem 'searchkick'
然后:
class Product < ApplicationRecord
  searchkick
end
然后执行代码: Product.reindex (可以在控制台执行),增加Product数据到search index
然后就可以使用查询语句了。
⚠️部署还要单独设置。
开发环境下,会占用localhost:9200端口。
Querying
fields是用于搜索指定的字段
fields: [:name, :brand]
⚠️: 好像不好用。我设置了一个Television表格,只能搜索默认的:brand字段,其他字段都不管用。不知道❌在哪里?
Result
搜索返回一个Searchkick::Results对象。
This responds like an array to most methods. 这个对象可以使用大多数array的方法。
results = Product.search("milk")
results.size
results.any?
results.each { |result| ... }
默认, ids从Elasticsearch取得,records从你的数据库取得。
Get Everything
使用 "*", 查询,得到所有数据.
Product.search "*"
可以和gem 'kaminari' ‘will_paginate' 良好兼容。
部分匹配搜索
默认,结果会匹配在查询内的完整的单词:(匹配搜索条件option是 :word,即全部单词)
Product.search "fresh honey" # fresh AND honey
可以使用operator: "or"
Product.search "fresh honey", operator: "or" # fresh OR honey
通过设置option,可以改变匹配的方式:
| Option | Matches | Example |
|---|---|---|
:word |
entire word | apple matches apple |
:word_start |
start of word | app matches apple |
:word_middle |
any part of word | ppl matches apple (常用的匹配方式) |
:word_end |
end of word | ple matches apple |
2种设置方法:
- 第一种,在model层: 添加searchkick word_middle: [:field_name]
- 第二种,query语法,添加:
-
Product.search "someword", fields: [:name], match: :word_middle
-
精确匹配
User.search query, fields: [{email: :exact}, :name]

#query是params的值
#fields用来指定搜索的字段。
其他匹配:见(git)
- 还有短语匹配,同意思的词的匹配,语言的匹配。
- 可以设置错误拼写(英文用户)
- 坏匹配(类似模糊匹配)
- 还有标签tag的匹配:如搜索 🍨🍰 ,得到"ice cream cake!"
Indexing
使用search_data方法来控制让什么类型的数据被索引。what data is indexed.
在改变这个方法后,在控制台调用Product.reindex来执行。
⚠️:无需重启app,但每次改变,需要重启控制台或者执行reload!命令。是因为要防止缓存。重新加载环境。
# 2个关联的表格,使用search_data方法,明确指定要加入索引的表格属性:fileds

class Product < ApplicationRecord
  belongs_to :department

  def search_data
    {
      name: name,
      department_name: department.name,
      on_sale: sale_price.present?
    }
  end
end

#文档的习惯写法,因为类是动态声明的,不是一次声明就结束(ruby元编程)。
#所以文档中只写新增的语法语句。
#本块的代码中虽然没写searchkick,但实际上是因为之前的文档已经写了这行代码,
# searchkick是必须存在的。
为了主动加载关联,需要使用search_import scope
让产生的对象中包含关联表格的数据:
class Product < ApplicationRecord
  scope :search_import, -> { includes(:department) }
end
默认所有的records被加上index。 可以控制什么记录加index,什么不加,方式是:
search_import和should_index方法配合使用:
class Product < ApplicationRecord
  scope: :search_import, -> { where(active: true)}

  def should_index?
    active   #只有active records可以被索引index. active是一个字段filed
  end
end
什么时候用Reindex:
- 安装更新searchkick后
- 改变search_data方法后
- 改变searchkick方法后
保持同步:
让索引和数据库同步的4种方法:
第一种: 默认,任何一条记录的修改删除插入。
第二种: 异步,使用backgrounds jobs. 需要修改:
class Product < ApplicationRecord
  searchkick callbacks: :async
end
第三种:人队列Queuing ✅
把要更新的记录的id集合放入队列。然后在后端批量(in batches)reindex。比异步方法更好!
具体见:See how to set up.
第四种,手动。
关联表格的数据同步:
当一个关联的数据被更新,searchkick生成的Data不会自动的同步更新。
如果希望这么做,加一个回调方法来reindex.
class Image < ApplicationRecord
  belongs_to :product

  after_commit :reindex_product

  def reindex_product
    product.reindex
  end
end
实例:仿照视频的代码步骤: (git)
建立rails g scaffold Television brand name display price:float size:integer year:integer
输入数据:rails db:seed,
此时必须事先搭建好 elasticsearch 的环境(见安装和部署)
brands  = 1.upto(10).map{ FFaker::Product.brand }
display = ["LCD", "LED", "QLED"]
sizes   = [42, 50, 55, 60, 65, 75, 80, 85]

Television.delete_all

ApplicationRecord.transaction do
  1000.times do
    Television.create(
      brand: brands.sample,
      name:  FFaker::Lorem.word,
      display: display.sample,
      price: rand(200..4000),
      size: sizes.sample,
      year: rand(2010..2019),
    )
  end
end

Television.reindex
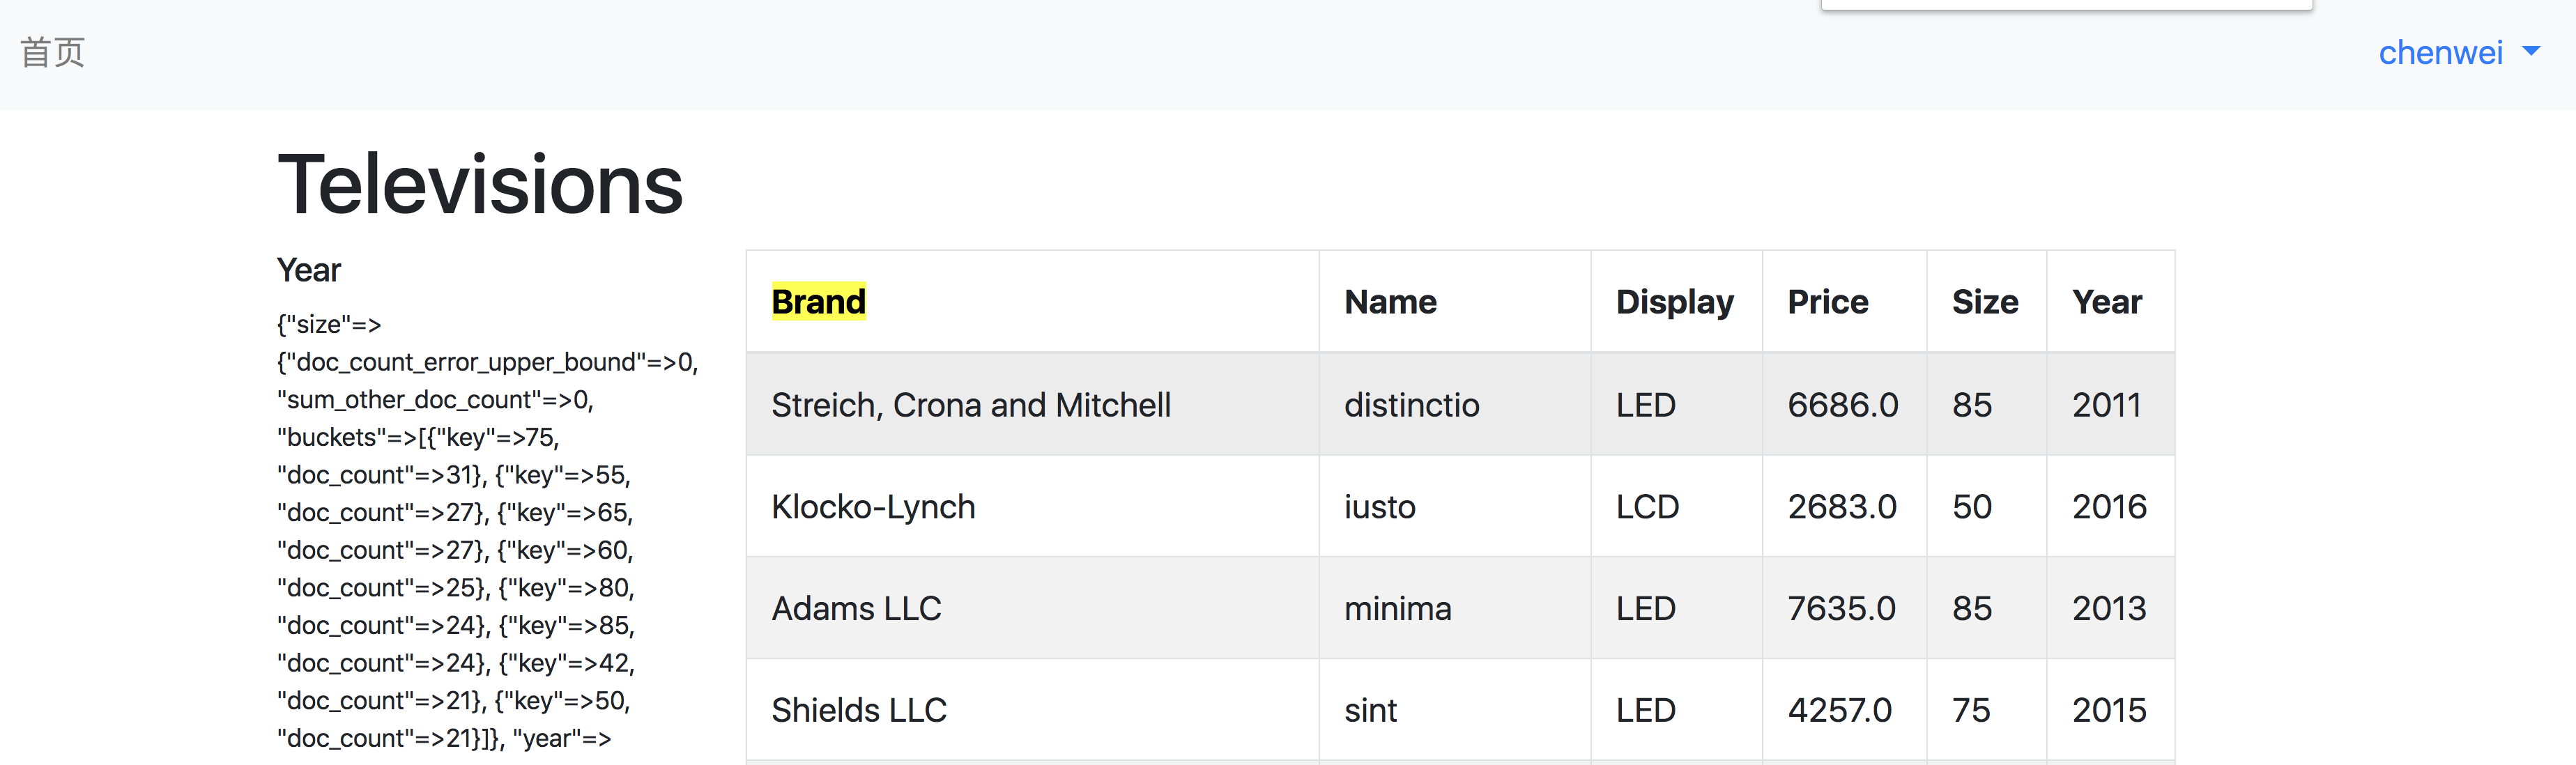
class TelevisionsController < ApplicationController
  before_action :set_television, only: [:show, :edit, :update, :destroy]

  def index
    @televisions = Television.search "*", aggs: {brand:{}, year:{}, size:{}, display:{}}
  end
⚠️ Aggregations provide aggregated search data.提供搜索集合的搜索数据。
在index.html.erb中:
<h6>Year</h6>
 <%= @televisions.aggs%>

 #得到一个对象的结构类似:
 #{ "size":{...}, year:{...}, display:{...}, "brand":{...}}
得到一个对象:
{"size"=>{"doc_count_error_upper_bound"=>0,
"sum_other_doc_count"=>0,
"buckets"=>[{"key"=>75, "doc_count"=>31}, {"key"=>55, "doc_count"=>27}, {"key"=>65, "doc_count"=>27}, {"key"=>60, "doc_count"=>25}, {"key"=>80, "doc_count"=>24}, {"key"=>85, "doc_count"=>24}, {"key"=>42, "doc_count"=>21}, {"key"=>50, "doc_count"=>21}]},
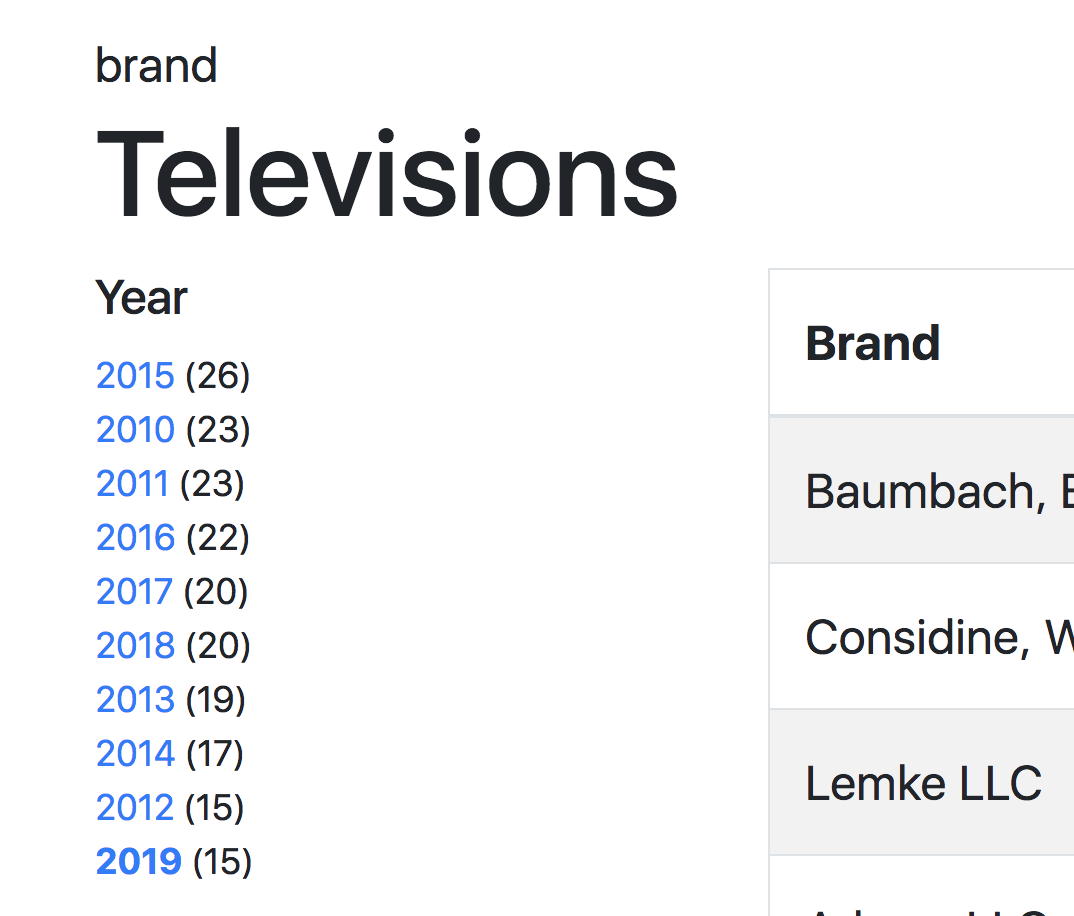
"year"=>{"doc_count_error_upper_bound"=>0, "sum_other_doc_count"=>0, "buckets"=>[{"key"=>2015, "doc_count"=>26}, {"key"=>2010, "doc_count"=>23}, {"key"=>2011, "doc_count"=>23}, {"key"=>2016, "doc_count"=>22}, {"key"=>2017, "doc_count"=>20}, {"key"=>2018, "doc_count"=>20}, {"key"=>2013, "doc_count"=>19}, {"key"=>2014, "doc_count"=>17}, {"key"=>2012, "doc_count"=>15}, {"key"=>2019, "doc_count"=>15}]},
对每个fields都进行了计算:比如size有8个不同值的data, 便设置了8个key, 并计算出每个key的对应的数据的和。结构:
- size
- buckets
- key
- doc_count
- buckets
通过了解aggregatived对象的结构,拿出需要的数据:
    <h6>Year</h6>
    <% @televisions.aggs["year"]["buckets"].each do |bucket| %>
      <div>
        <%= bucket["key"] %>
        (<%= bucket["doc_count"]%>)
      </div>
    <% end %>
然后加上link_to, 这是为了通过添加request的参数year和对应的值,来搜索符合条件的数据:
      <div>
        <%= link_to bucket["key"], request.params.merge(year: bucket["key"]) %>
        (<%= bucket["doc_count"]%>)
      </div>
同时修改index方法,添加上搜索条件where:
  def index
    @televisions = Television.search "*", where: {year: params[:year]}, aggs: {brand:{}, year:{}, size:{}, display:{}}
  end
但是,这样就写死了,我们还要使用其他fileds来增加搜索条件,同时以上写法失去了显示全部的功能。
因此还要修改:
  def index
    args = {}
    args[:year] = params["year"] if params["year"]
    @televisions = Television.search "*", where: args, aggs: {brand:{}, year:{}, size:{}, display:{}}
  end

  #这样会根据args来绝对where子句的值是什么
这样就可以为添加其他fields条件的目的,提供了扩展的代码。
然后修改index.html.erb,添加2个功能:
- 点击某个搜索后,增加可视效果。
- 再次点击这个搜索链接,取消这个搜索条件。
    <% @televisions.aggs["year"]["buckets"].each do |bucket| %>
      <div>
        <% if params["year"] == bucket["key"].to_s %>
          <strong><%= link_to bucket["key"], request.params.except("year") %></strong>
        <% else%>
          <%= link_to bucket["key"], request.params.merge(year: bucket["key"]) %>
        <% end %>
        (<%= bucket["doc_count"]%>)
      </div>
    <% end %>

#如果请求参数的值和搜索结果的值相等,即点击了这个链接后,增加可视觉效果!
#再次点击链接,因为使用except方法,去掉之前的要搜索的条件参数,所以就恢复之前的搜索条件状态了。
view内的其他的搜索条件的代码结构一样。
另外,需要修改index方法
    args[:year] = params["year"] if params["year"]
+    args[:size] = params["size"] if params["size"].present?
+    args[:brand] = params["brand"] if params["brand"].present?

#这样where: args, 就会得到经过多个筛选条件后的搜索结果。
#使用present?确定参数(它是string格式)存在且值不为空。
再次观察发现,搜索的排列顺序不对,增加sort_by方法。
<% @televisions.aggs["brand"]["buckets"].sort_by{ |b| b["key"] }.each do |bucket| %>
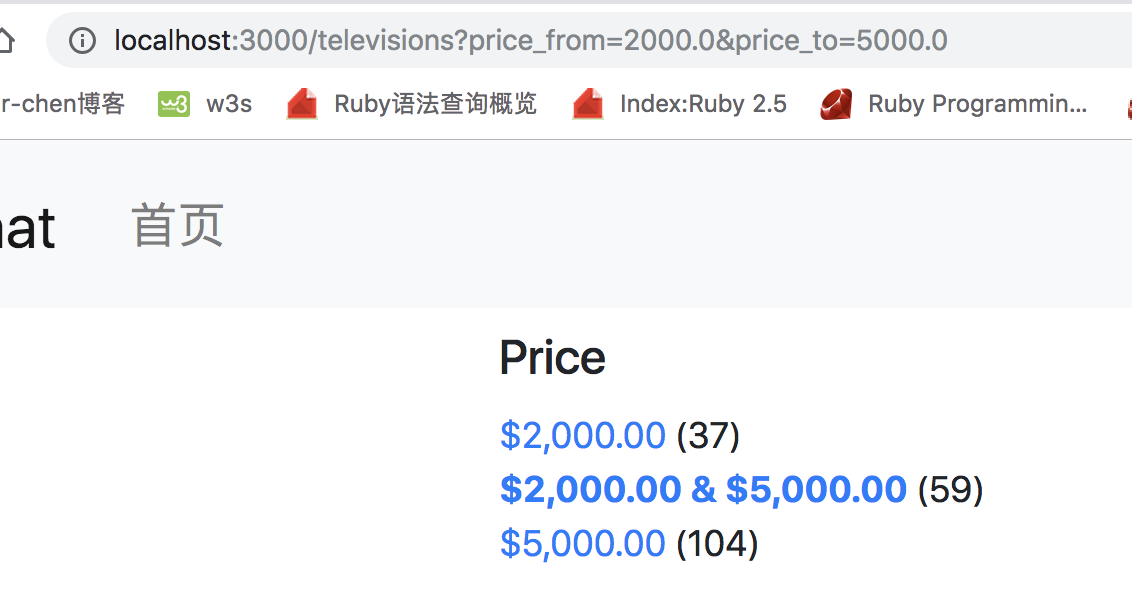
实现新的价格(数字范围)搜索功能 :在index方法中添加:
price_ranges = [{to: 500}, {from: 500, to: 1000}, {from:1000}]
@televisions = Television.search "*", where: args,
  aggs: {brand:{}, year:{}, size:{}, price: {ranges: price_ranges}}
修改index.html.erb:
    <h6>Price</h6>
    <% @televisions.aggs["price"]["buckets"].sort_by{|b| b.fetch("from", 0)}.each do |bucket| %>
      <div>
        <% if (params["price_from"] == bucket["from"].to_s && params["price_to"] == bucket["to"].to_s) ||
              (params["price_from"] == bucket["from"].to_s && bucket["to"] == nil) ||
              (params["price_to"] == bucket["to"].to_s && params.include?("price_from") == false) %>
          <strong><%= link_to price_range_name(bucket), request.params.except("price_from", "price_to")%></strong>
        <% else %>
          <%= link_to price_range_name(bucket), request.params.merge(price_from: bucket["from"], price_to: bucket["to"] ) %>
        <% end %>
        (<%= bucket["doc_count"]%>)
      </div>
    <% end %>
解释:
@televisions.aggs
 => {"size"=>{"doc_count_error_upper_bound"=>0,
"sum_other_doc_count"=>0,
"buckets"=>[{"key"=>75, "doc_count"=>31}, {"key"=>55, "doc_count"=>27}, {"key"=>65, "doc_count"=>27}, {"key"=>60, "doc_count"=>25}, {"key"=>80, "doc_count"=>24}, {"key"=>85, "doc_count"=>24}, {"key"=>42, "doc_count"=>21}, {"key"=>50, "doc_count"=>21}]},
            "year"=>{"doc_count_error_upper_bound"=>0, "sum_other_doc_count"=>0, "buckets"=>[{"key"=>2015, "doc_count"=>26}, {"key"=>2010, "doc_count"=>23}, {"key"=>2011, "doc_count"=>23}, {"key"=>2016, "doc_count"=>22}, {"key"=>2017, "doc_count"=>20}, {"key"=>2018, "doc_count"=>20}, {"key"=>2013, "doc_count"=>19}, {"key"=>2014, "doc_count"=>17}, {"key"=>2012, "doc_count"=>15}, {"key"=>2019, "doc_count"=>15}]},
         "price"=>{"buckets"=>[{"key"=>"*-2000.0", "to"=>2000.0, "doc_count"=>37}, {"key"=>"2000.0-5000.0", "from"=>2000.0, "to"=>5000.0, "doc_count"=>59}, {"key"=>"5000.0-*", "from"=>5000.0, "doc_count"=>104}]},
            ...
1. 由此可知 关键字是每个bucket["from"]和["from"]
把这2个值设置为参数:
-
price_from: bucket["from"] -
price_to: bucket["to"]
2 。链接的名字通过定义一个帮助方法price_range_name来设置。传入bucket对象为参数:
module TelevisionsHelper
  def price_range_name(bucket)
    if bucket["from"] && bucket["to"]
      "#{number_to_currency bucket["from"]} & #{number_to_currency bucket["to"]}"
    elsif bucket["from"]
      "#{number_to_currency bucket["from"]}"
    elsif bucket["to"]
      "#{number_to_currency bucket["to"]}"
    else
      bucket[:key]
    end
  end
end

# 共3种形式,number_to_currency根据locale来自动给予对应的符号$/¥
3. 根据参数是否存在来,完善高亮链接和再次点击链接返回原先的搜索的功能。
添加新功能,自定义输入价格进行查询
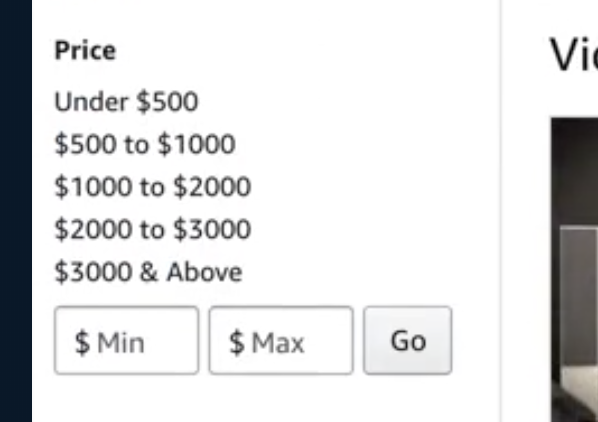
添加一个form。即可。
    <!-- 注意用了local: true -->
    <%= form_with( method: :get, local: true, class: "form-inline") do |f| %>
      <div class="input-group mb-3" style="width: 80%">
        <%= f.number_field "price_from", value: params["price_from"], placeholder: "mix", class:"form-control"%>
        <%= f.number_field "price_to", value: params["price_to"], placeholder: "max", class: "form-control" %>
        <div class="input-group-append">
          <%= f.button "Go"%>
        </div>
      </div>
    <% end %>

 浙公网安备 33010602011771号