FastAPI-请求参数与验证
最近想搞一下接口, 希望能简单上手, 前后端分离, 大致看了一遍 SpringBoot, Gin, NodeJs, Flask, Django, FastAPI 等, 感觉还是用 Python 语言来写比较简单呀, 关键点在于它语法清晰, 能让我直接思考业务逻辑, 而不是各种语法折腾.
FASTAPI 简介
Documentation: https://fastapi.tiangolo.com
Source Code: https://github.com/tiangolo/fastapi
FastAPI is a modern, fast (high-performance), web framework for building APIs with Python 3.8+ based on standard Python type hints.
The key features are:
- Fast: Very high performance, on par with NodeJS and Go (thanks to Starlette and Pydantic). One of the fastest Python frameworks available.
- Fast to code: Increase the speed to develop features by about 200% to 300%. *
- Fewer bugs: Reduce about 40% of human (developer) induced errors. *
- Intuitive: Great editor support. Completion everywhere. Less time debugging.
- Easy: Designed to be easy to use and learn. Less time reading docs.
- Short: Minimize code duplication. Multiple features from each parameter declaration. Fewer bugs.
- Robust: Get production-ready code. With automatic interactive documentation.
- Standards-based: Based on (and fully compatible with) the open standards for APIs: OpenAPI (previously known as Swagger) and JSON Schema.
总结这个 fastapi 框架的特点就是, 运行快, 体量小, BUG少, 代码量少, 自动生成交互文档 很适合写后端接口.
我觉得它和 flask / django 的最大的优势在于利用了 Python3.6+ 的类型验证, 数据校验 ( pydantic 库) 等这样极大地减少了编写各种参数校验等的类重复性代码吧.
项目结构
主要来自慕课网的学习公开课笔记, 目录结构如下:
base
- __ init __.py
- base_01.py
- base_02.py
- base_03.py
- base_04.py
- ...
main.py
其中 main.py 的内容如下:
from fastapi import FastAPI
import uvicorn

from base import app01
from base import app02
from base import app03
from base import app04


app = FastAPI(
  title="FastAPI 基础教程",
  version='1.0.0',
  docs_url='/docs'
)

app.include_router(app01, prefix='/app01', tags=['请求参数和验证'])
app.include_router(app02, prefix='/app02', tags=['响应处理和配置'])
app.include_router(app03, prefix='/app03', tags=['依赖注入和系统'])
app.include_router(app04, prefix='/app04', tags=['安全认证和授权'])


if __name__ == '__main__':
  uvicorn.run('main:app', host='0.0.0.0', port=8000, reload=True, workers=1)
请求参数与验证
关于前端浏览器向后端发送请求, 请求地址一般都会涉及路径参数 和 查询参数
- 无参数: /path
- 路径参数: /path/
- 查询参数: /path?name=youge
一下演示的案例都写在 base_01.py 这个子路由里面:
from fastapi import APIRouter, Path, Query, Cookie, Header
from enum import Enum
from typing import Optional, List
from pydantic import BaseModel, Field
from datetime import date

app01 = APIRouter()

....
无请求参数
@app01.get("/path/parameters")
def path_params01():
  return { 'msg': 'hello, world!' }
http://127.0.0.1:8000/app01/path/parameters
路径参数
# 请求参数是后面带 /xxx 路径的, 参数和处理函数一致, 且函数顺序就是路由的顺序

@app01.get("/path/{parameters}")
def path_params01(parameters: str):
  return { 'msg': parameters }
http://127.0.0.1:8000/app01/path/admin
此例接口的 admin 是一个路径参数变量, 写啥返回啥
请求参数
# 请求参数就是后面带 ? 的, 参数和处理函数一致

@app01.get("/path/parameters")
def path_params01(parameters: str):
  return { 'msg': parameters }
http://127.0.0.1:8000/app01/path/parameters?parameters=youge
枚举参数
# 枚举类
class CityName(str, Enum):
  Beijing = "Beijing China"
  ShangHai = "ShangHai China"


# 枚举参数类型
@app01.get("/enum/{city}")
async def latest(city: CityName):
  if city == CityName.Beijing:
    return { 'cityName': city, 'confirmed': 999, 'death': 10 }

  if city == CityName.ShangHai:
    return { 'cityName': city, 'confirmed': 666, 'death': 6 }

  return { 'cityName': city, "latest": 'unknow'}
http://127.0.0.1:8000/app01/enum/ShangHai%20China
这里的 city 路径变量是一个枚举的, 要么是 Beijing, 要么是 Shanghai, 否则就没法处理啦.
文件参数
# 文件参数类型 path
@app01.get('files/{file_path: path}')
def file_path(file_path: str):
  return f"The file path is {file_path}"
例如我们要上传的的文件路径是: C:\user\Desktop\test.xlsx
http://127.0.0.1:8000/app01files/{file_path: path}?file_path=C%3A%5Cuser%5CDesktop%5Ctest.xlsx
则响应为:
"The file path is C:\\user\\Desktop\\test.xlsx"
参数验证-数字
# 长度和正则表达式的验证, 路径参数

@app01.get("/path_/{age}")
def path_params_validate(
  num: int = Path(..., ge=0, le=100, title='your age', description='您的年龄')
):
  return num
http://127.0.0.1:8000/app01/path_/20
这里要传的路径参数 age, 要求是一个 int 类型, 必填, 值在 0 ~ 100 之间, 含义是 "您的年龄".
如果说传递了一个 200, 则返回的异常响应是 (postman 测):
{
    "detail": [
        {
            "type": "less_than_equal",
            "loc": [
                "path",
                "age"
            ],
            "msg": "Input should be less than or equal to 100",
            "input": "200",
            "ctx": {
                "le": 100
            },
            "url": "https://errors.pydantic.dev/2.4/v/less_than_equal"
        }
    ]
}
参数验证-选填与必填
# 给了默认值就是选填参数, 否则为必填参数

@app01.get('/query')
def page_limit(page: int = 1, limit: Optional[int] = None):
  if limit:
    return { 'page': page, 'limit': limit }
  return { 'page': page }
http://127.0.0.1:8000/app01/query?page=10&limit=100
这里的查询参数 page: int = 1 给了默认值 1 则表明为前端选传, 如果是 page: int 则为必传.
参数验证-Bool 值转换
#  查询参数 bool 值的转换

@app01.get("/query/bool/conversion")
def type_conversion(param: bool = False):
  return param
http://127.0.0.1:8000/app01/query?page=10&limit=100
参数验证 - 多参数列表
# 多个查询参数的列表, 列表别名, 前端正则校验等

@app01.get("/query/validations")
def query_params_validate(
  value: str = Query(..., min_length=8, max_length=16, regex='^a'),
  values: List[str] = Query(default=['v1', 'v2'], alias='alias_name')
):
  return value, values
此接口表示要传两个查询参数 value 和 values
- value: 字符类型, 必传, 长度在 8 ~ 16 之间, 以 "a" 开头
- values: 列表类型, 里面的元素是字符类型, 默认值是 "v1", "v1", 别名是 "alias_name"
http://127.0.0.1:8000/app01/query/validations?value=admin123&alias_name=cj&alias_name=youge&alias_name=18
响应:
{
  "data": {
    "value": "admin123",
    "values": [
      "cj",
      "youge",
      "18"
    ]
  }
}
参数验证 - Body 多参数混合
先建一个模型类:
# 请求体多参数混合

class CityInfo(BaseModel):
  name: str = Field(..., example='Beijing')
  country: str
  country_code: str = None
  country_population: int = Field(default=800, ge=800,
                                  title='人口数量', description='国家人口数量')
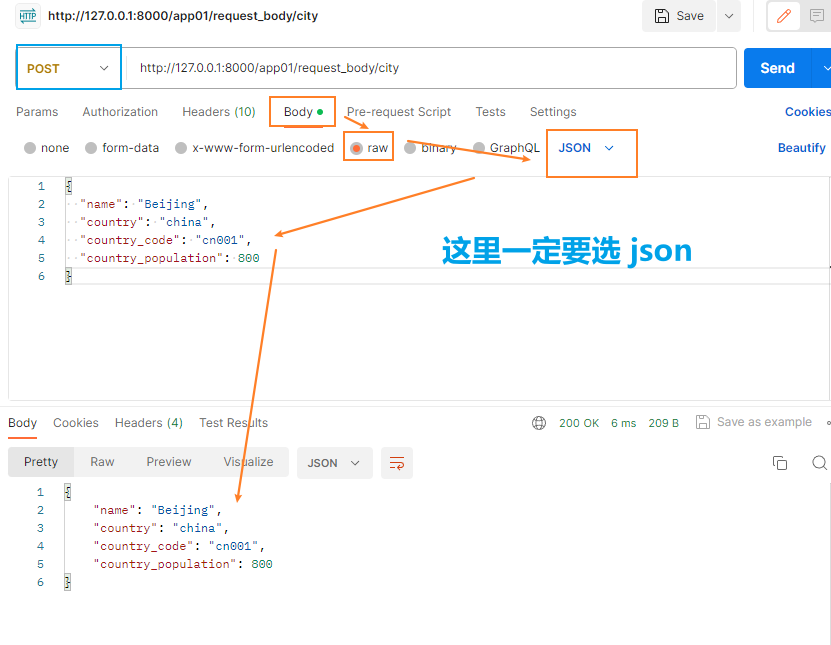
@app01.post("/request_body/city")
def city_info(city: CityInfo):
  print(city.name, city.country)
  return city
这样之间就可以通过属性的方式对模型类进行访问.
请求体:
curl -X 'POST' \
  'http://127.0.0.1:8000/app01/request_body/city' \
  -H 'accept: application/json' \
  -H 'Content-Type: application/json' \
  -d '{
  "name": "Beijing",
  "country": "china",
  "country_code": "cn001",
  "country_population": 800
}'
响应体:
{
  "name": "Beijing",
  "country": "string",
  "country_code": null,
  "country_population": 800
}
也是可以进行混合的验证
# 混合
@app01.put("/request_body/city/{name}")
def mix_city_info(
  name: str,
  city01: CityInfo,
  city02: CityInfo,
  confirmed: int = Query(ge=0, description='确诊数', default=0),
  death: int = Query(ge=0, description='死亡数', default=0)
):
  if name == 'Shanghai':
    return { 'Shanghai': { 'confirmed': confirmed, 'death': death } }
  return city01, city02
用 postman 测试一下 post 请求如下:
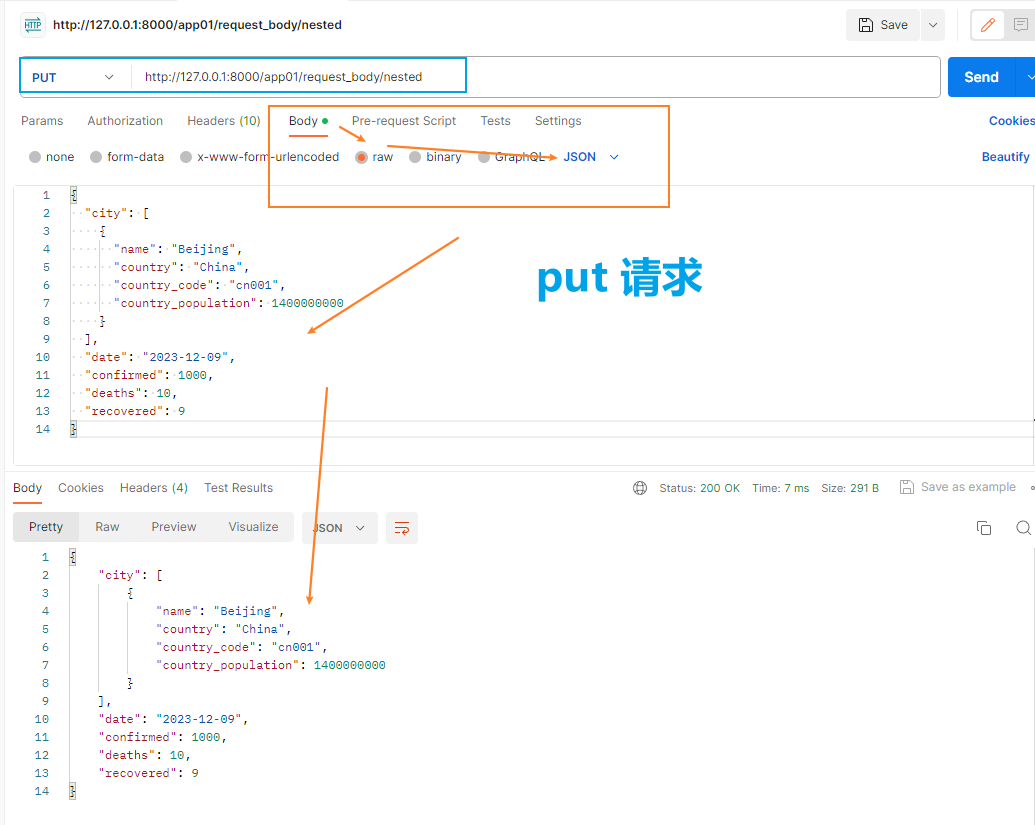
参数验证 - 请求体嵌套
class Data(BaseModel):
  city: List[CityInfo] = None
  date: date
  confirmed: int = Field(ge=0, description='确诊数', default=0)
  deaths: int = Field(ge=0, description='死亡数', default=0)
  recovered: int = Field(ge=0, description='痊愈数', default=0)

@app01.put('/request_body/nested')
def nested_models(data: Data):
  return data
请求体:
curl -X 'PUT' \
  'http://127.0.0.1:8000/app01/request_body/nested' \
  -H 'accept: application/json' \
  -H 'Content-Type: application/json' \
  -d '{
  "city": [
    {
      "name": "Beijing",
      "country": "China",
      "country_code": "cn001",
      "country_population": 1400000000
    }
  ],
  "date": "2023-12-09",
  "confirmed": 1000,
  "deaths": 10,
  "recovered": 9
}'
响应:
{
  "city": [
    {
      "name": "Beijing",
      "country": "China",
      "country_code": "cn001",
      "country_population": 1400000000
    }
  ],
  "date": "2023-12-09",
  "confirmed": 1000,
  "deaths": 10,
  "recovered": 9
}
同样用 postman 测试这个 put 请求:
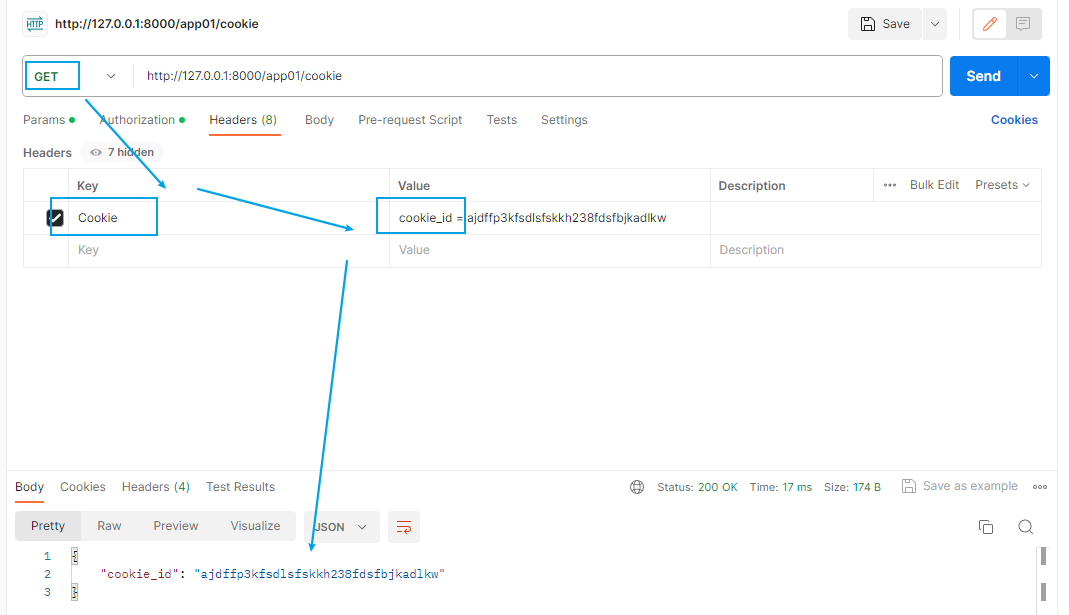
参数验证 - Cookie 和 Header
# 请求头带 Cookie 的效果只能用 Postman 来进行测试哦
@app01.get('/cookie')
def cookie(cookie_id: Optional[str] = Cookie(None)):
return { 'cookie_id': cookie_id }
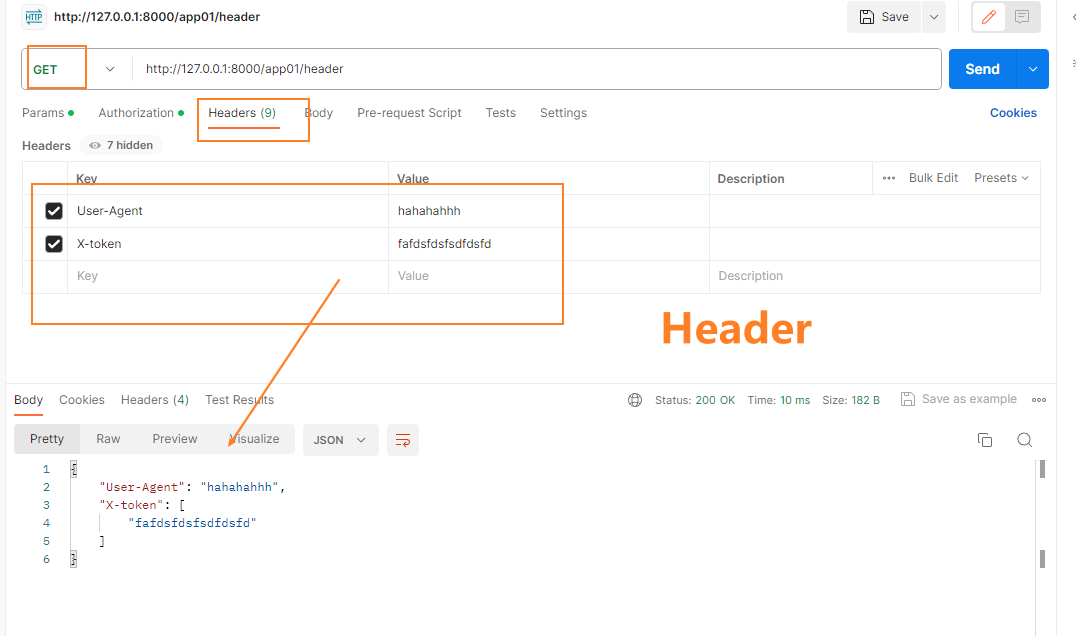
@app01.get('/header')
def header(user_agent: Optional[str] = Header(None, convert_underscores=True),
x_token: List[str] = Header(None)
):
# 有些参数不允许下划线的参数哦
return { 'User-Agent': user_agent, 'X-token': x_token }
至此, 关于 FastAPI 请求相关的基础内容学习就可以了, 其测试接口如下:

后面继续学习响应体相关的内容吧!

 浙公网安备 33010602011771号