
win10下用Linux搭建python&nodejs开发环境
Win10下用自带Linux系统搭建开发环境
Win10下用自带Linux系统搭建开发环境
启用Linux
老版本(win10 1709之前):
新版本(win10 1709之后)
卸载linux
老版本
新版本
安装环境
安装最新版nodejs(库依赖会直接安装python2)
安装pip3
更新apt-get源 (网速快的话不建议更新,各种版本错乱的问题比较烦心)
启用Linux
老版本(win10 1709之前):
新版本(win10 1709之后)
卸载linux
老版本
新版本
安装环境
安装最新版nodejs(库依赖会直接安装python2)
安装pip3
更新apt-get源 (网速快的话不建议更新,各种版本错乱的问题比较烦心)
启用Linux
老版本(win10 1709之前):
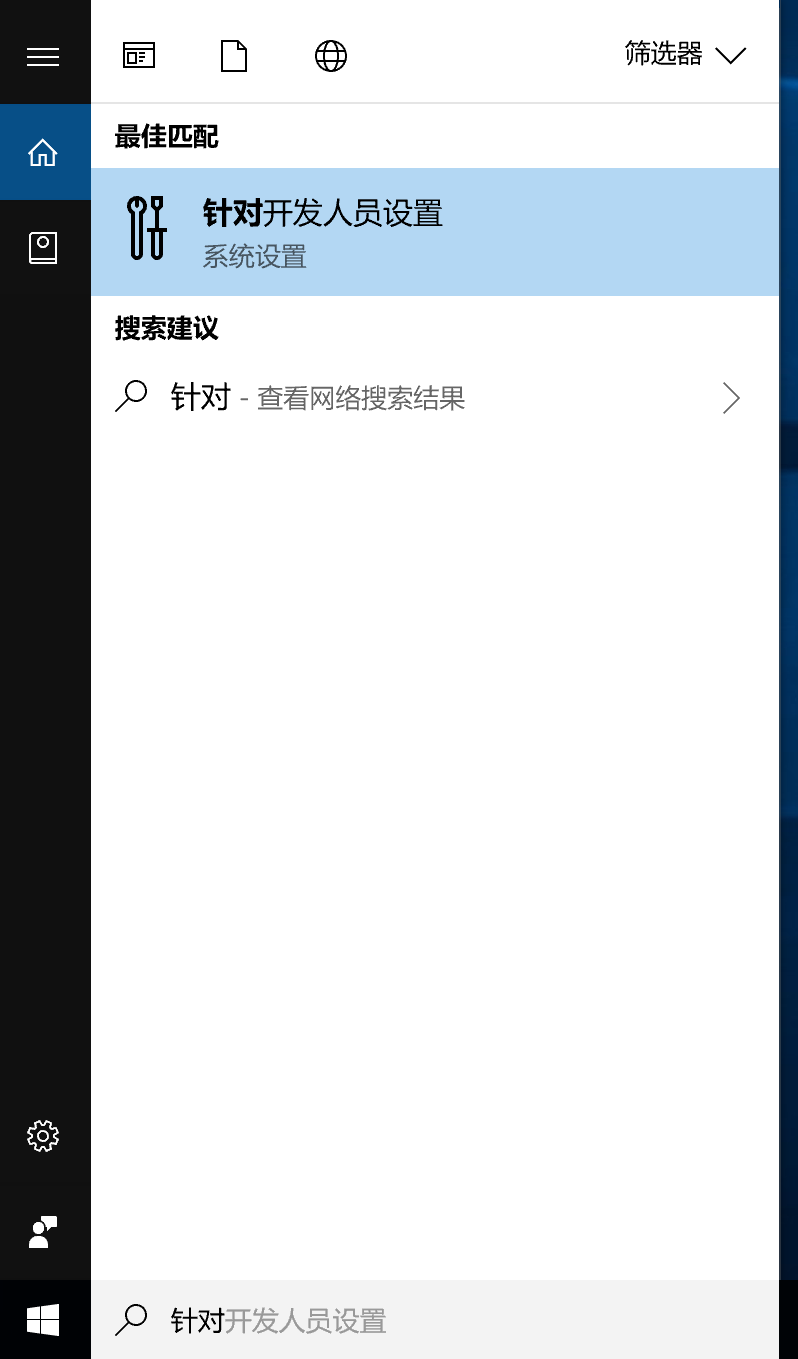
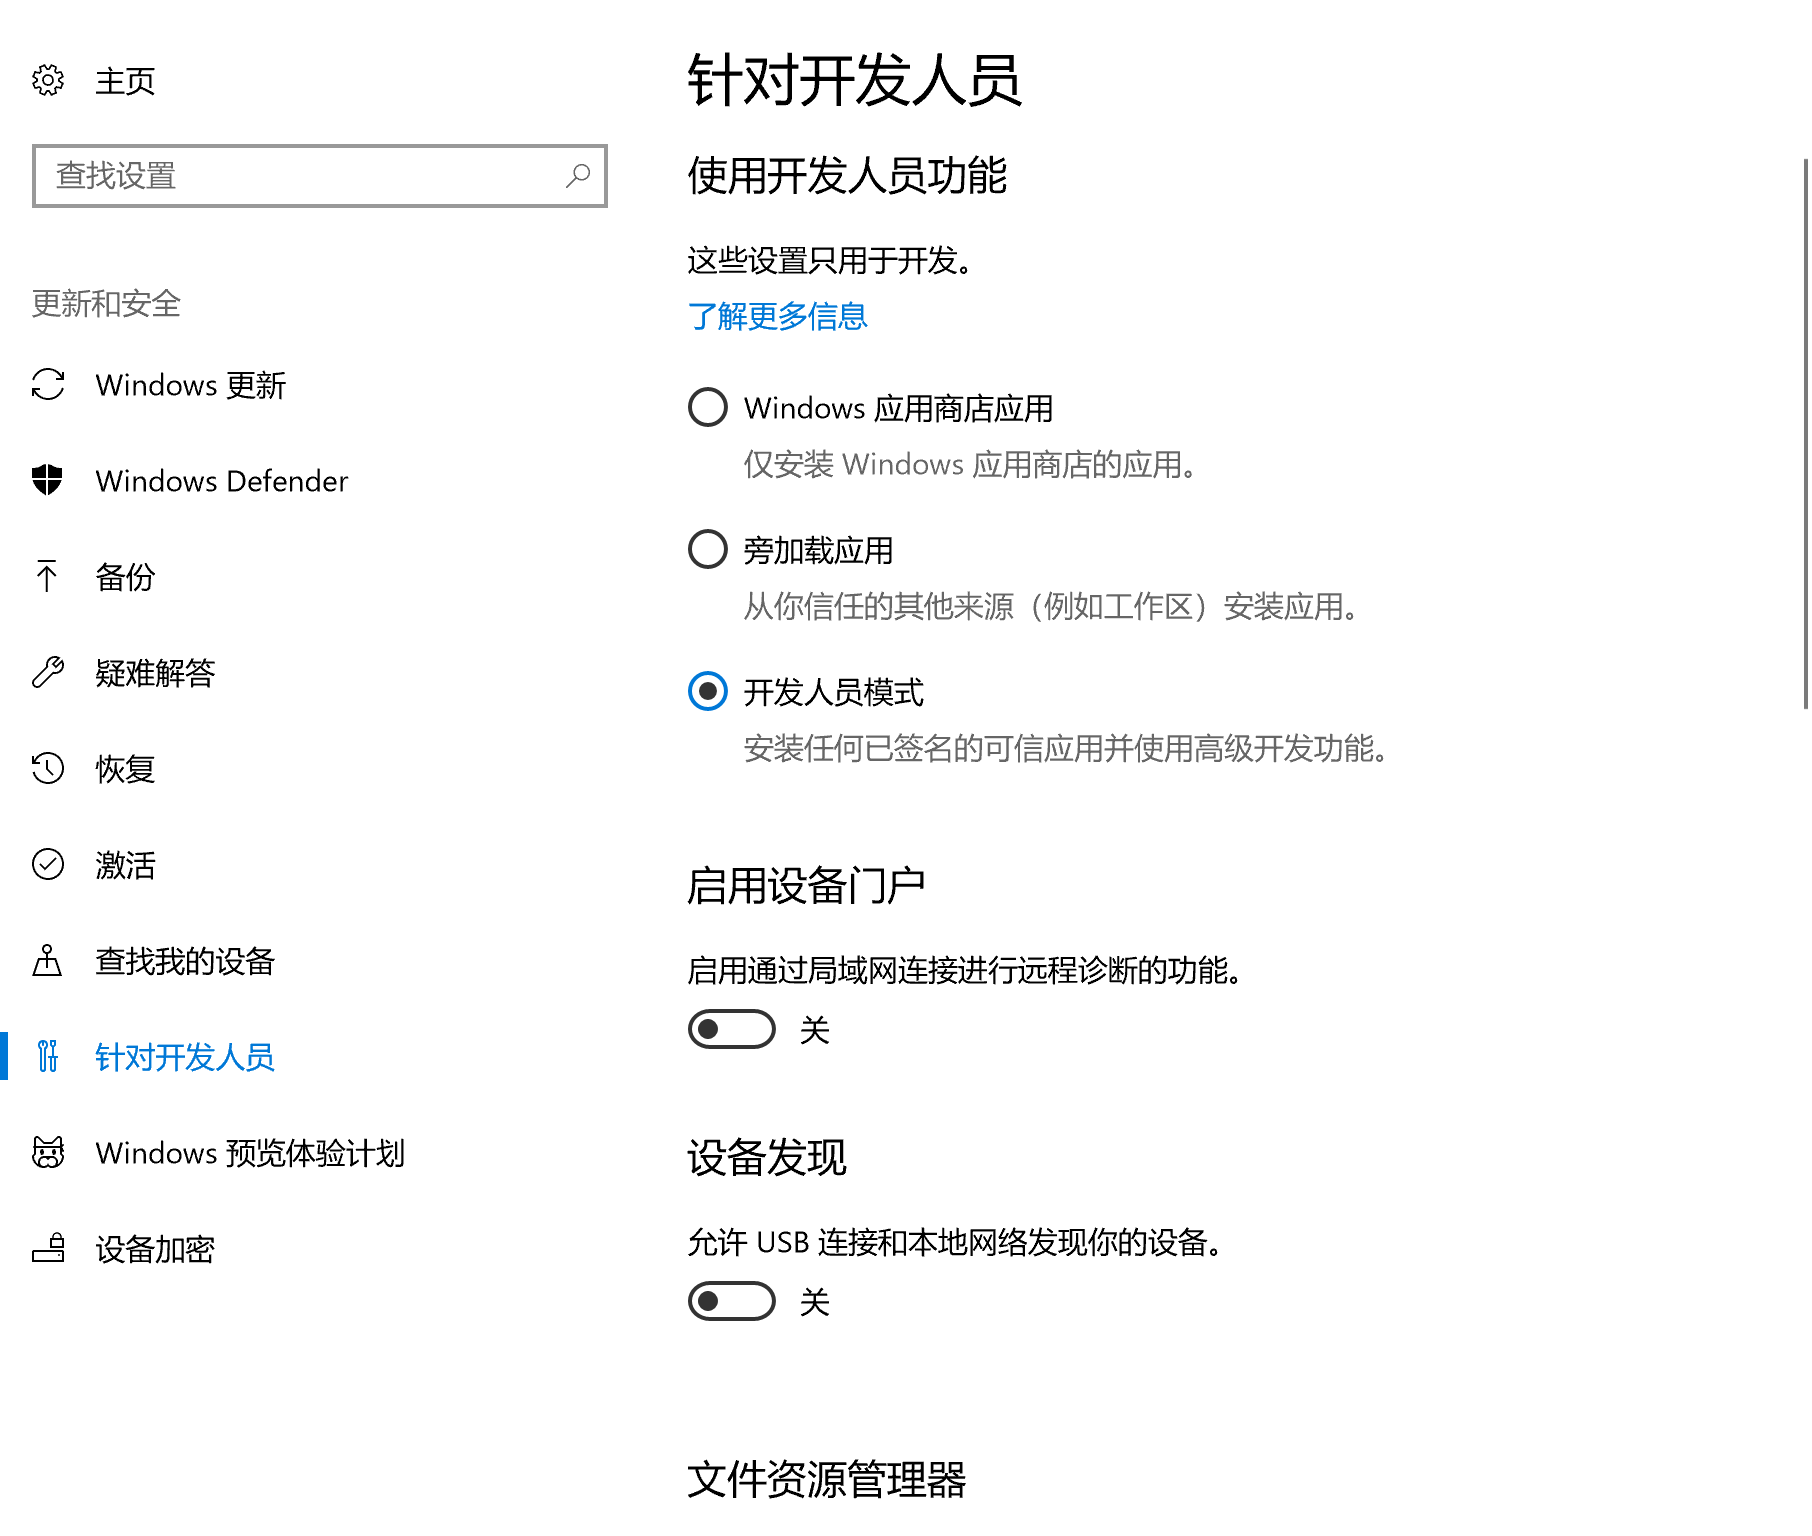
设置——启用针对开发人员模式——启用开发人员模式
![]()
![]()
启用或关闭windows功能——启用适用于Linux的windows子系统
![]()
重启执行命令bash——选择y——漫长的等待安装
![]()


新版本(win10 1709之后)
- 设置——启用针对开发人员模式——启用开发人员模式
- 启用或关闭windows功能——启用适用于Linux的windows子系统
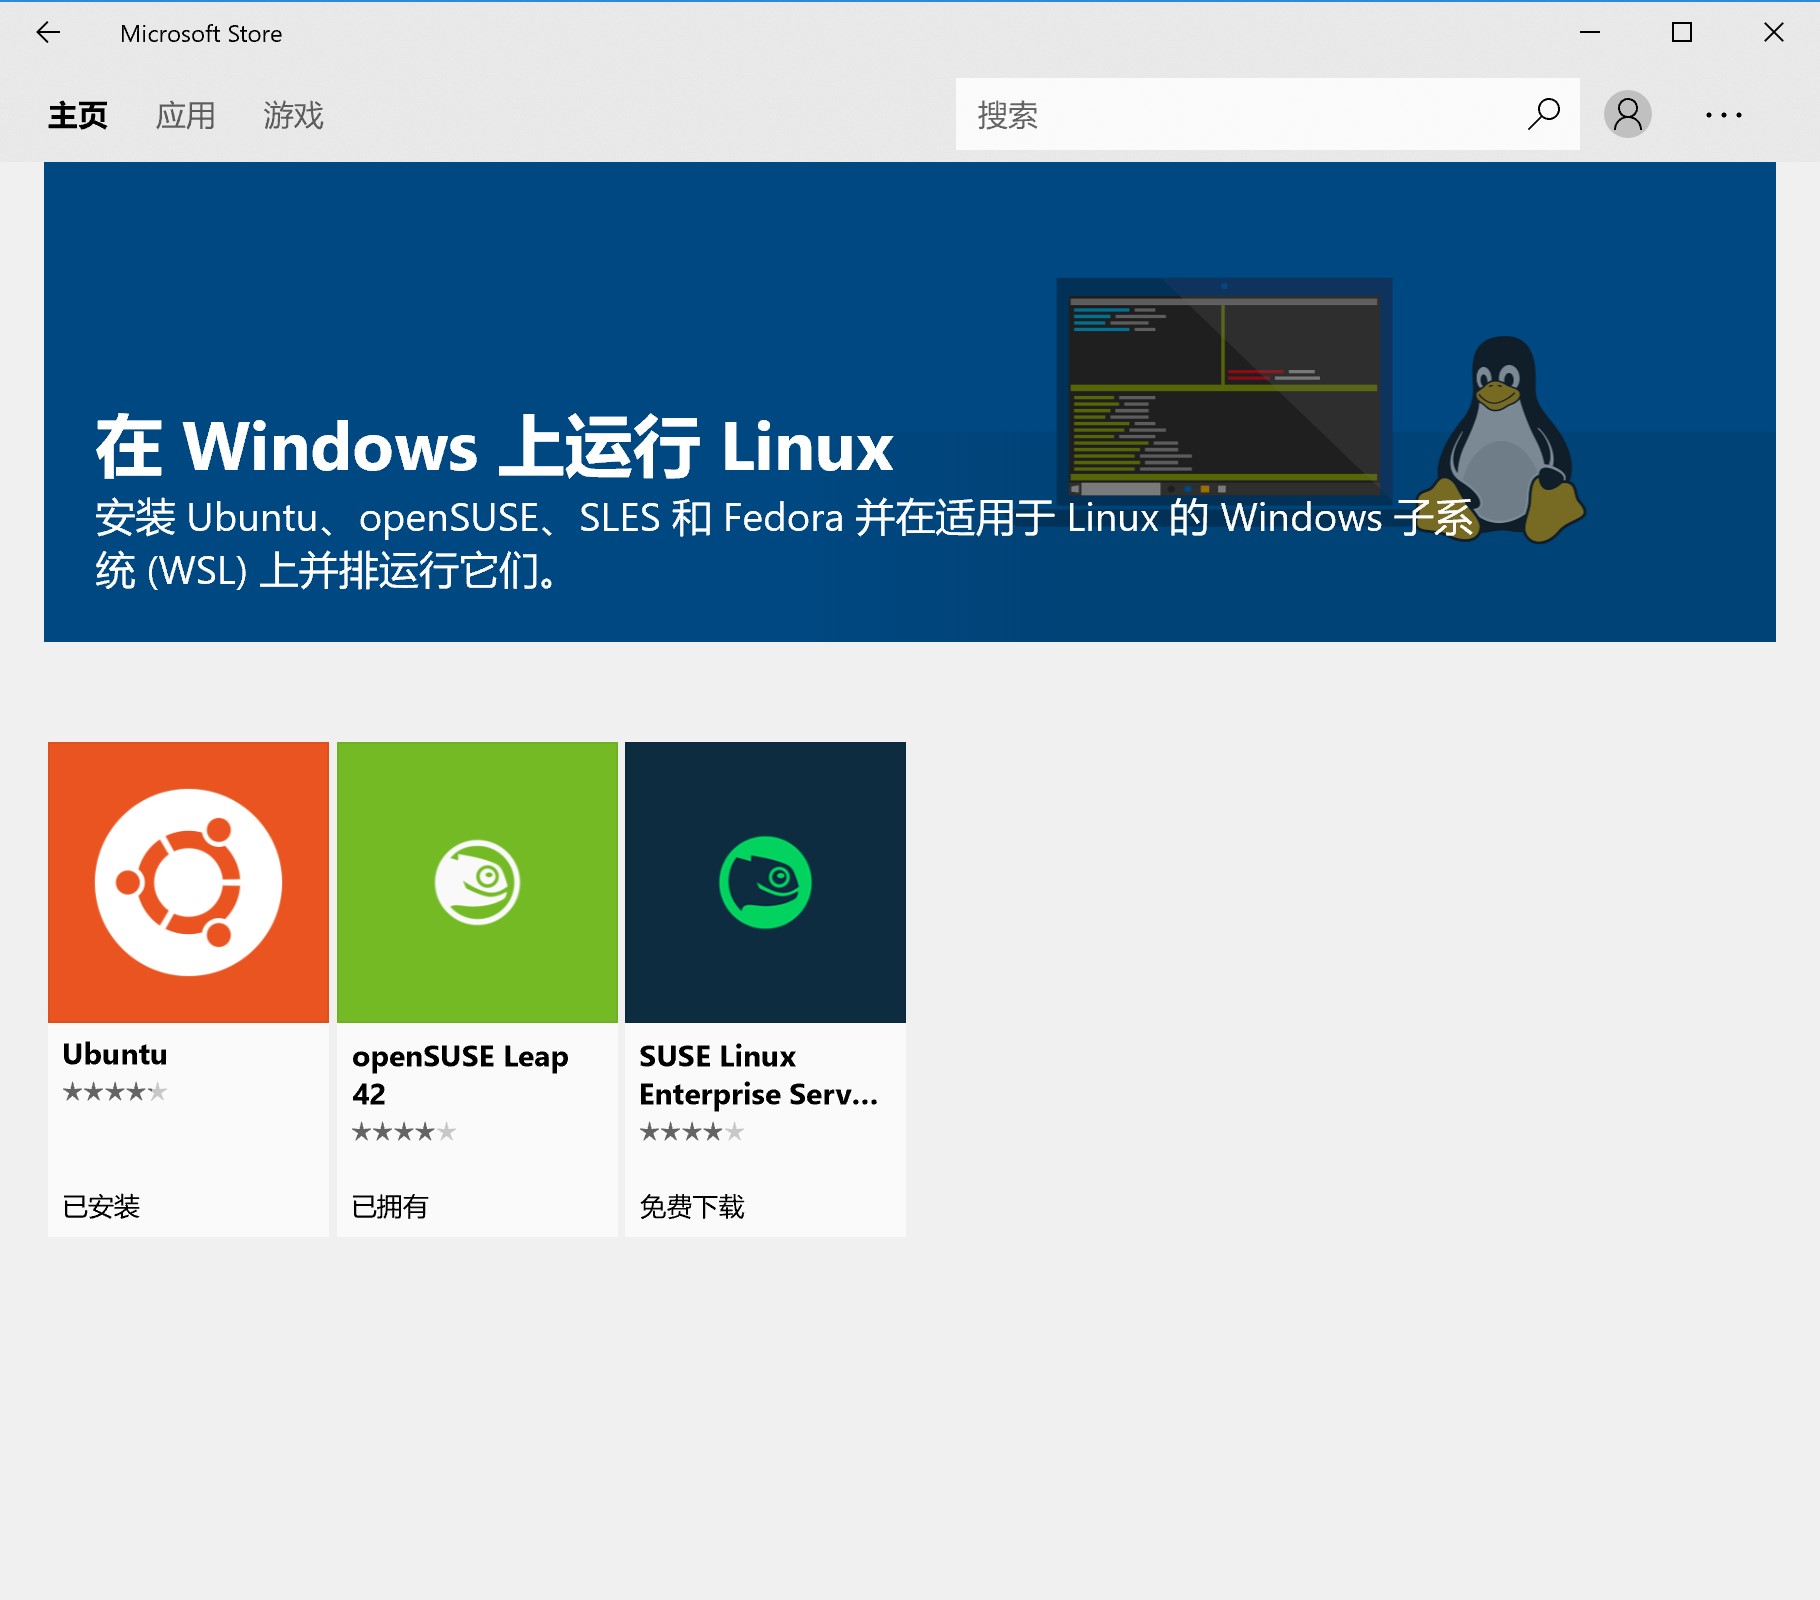
- 应用商店——搜索linux(前两步不要省略,否则会报错)
![]()
- 选择版本——安装
- 命令行wsl或bash或点击新装的Ubuntu打开linux环境(暂无没找到办法默认启用zsh)
![]()
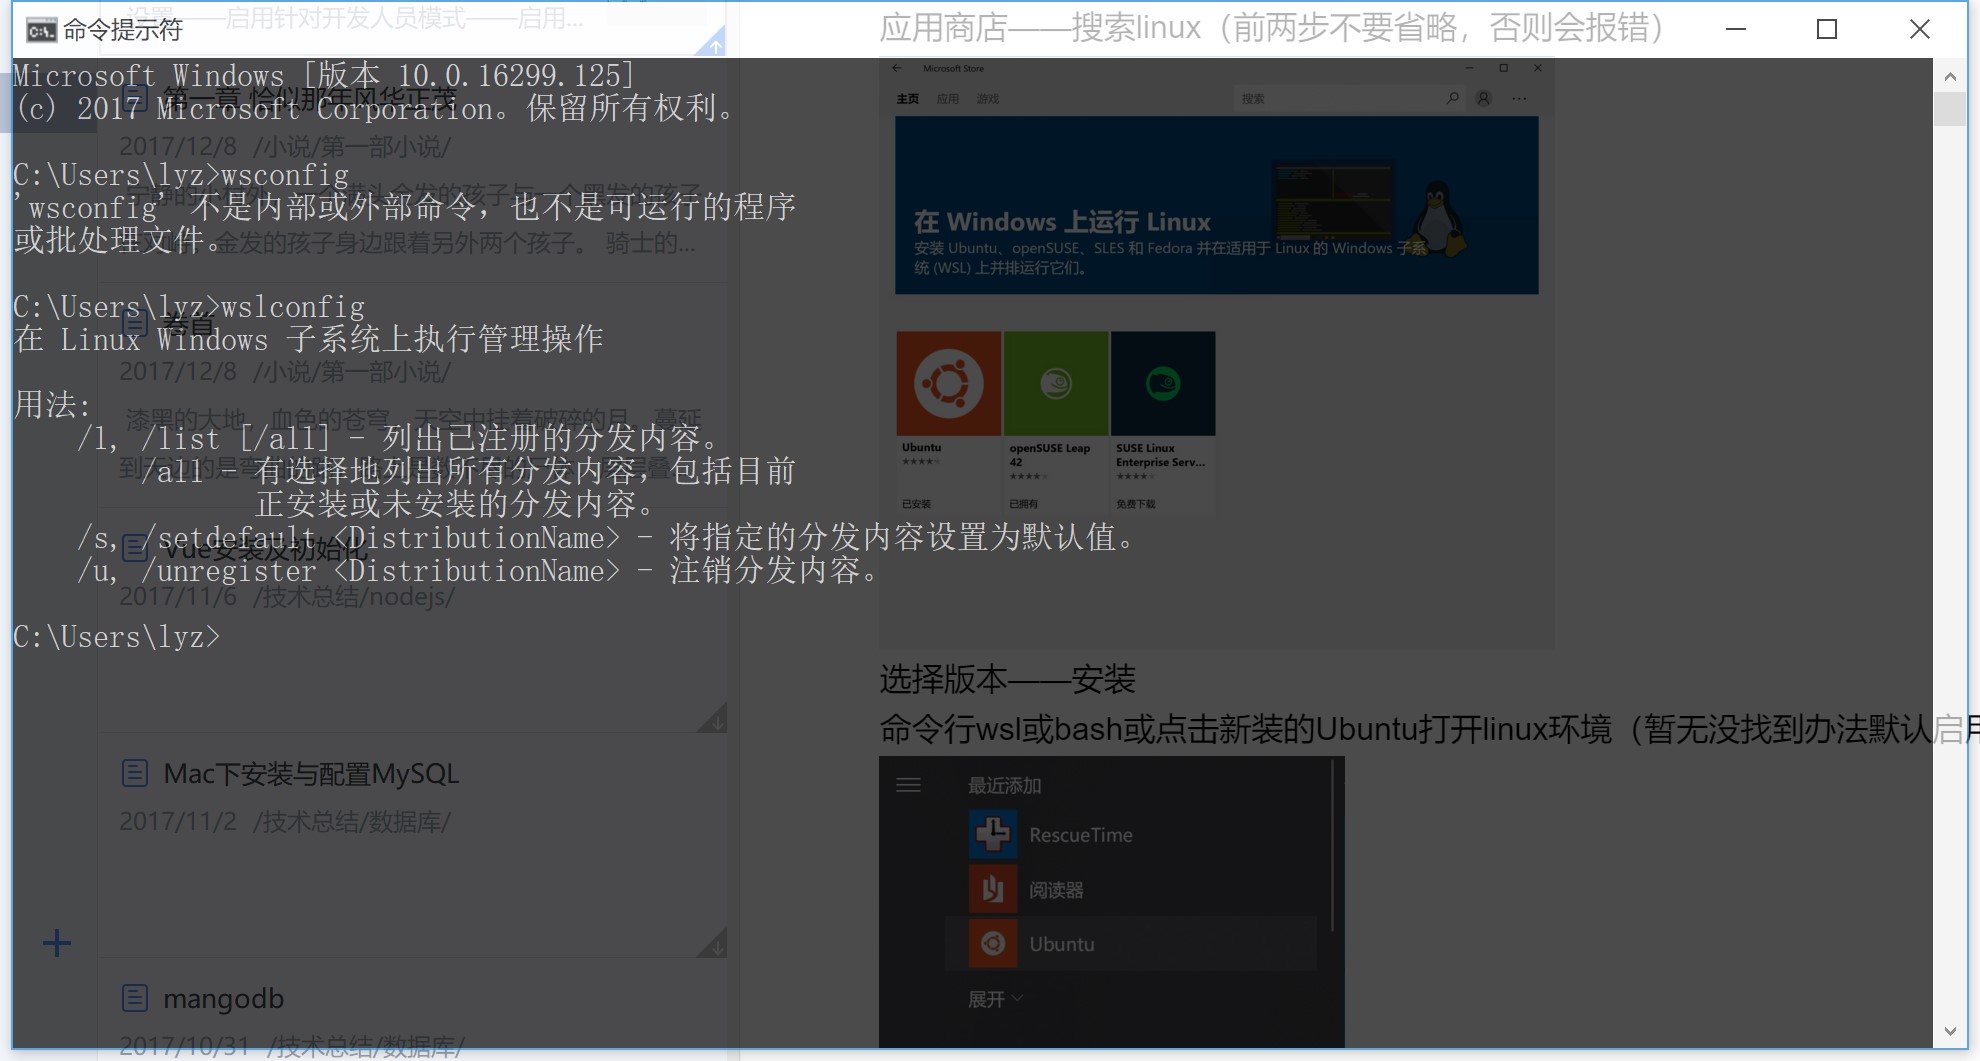
- cmd-wslconfig命令管理linux版本
![]()

卸载linux
老版本
- CMD命令卸载
lxrun /uninstall /fulllxrun /uninstall /full新版本
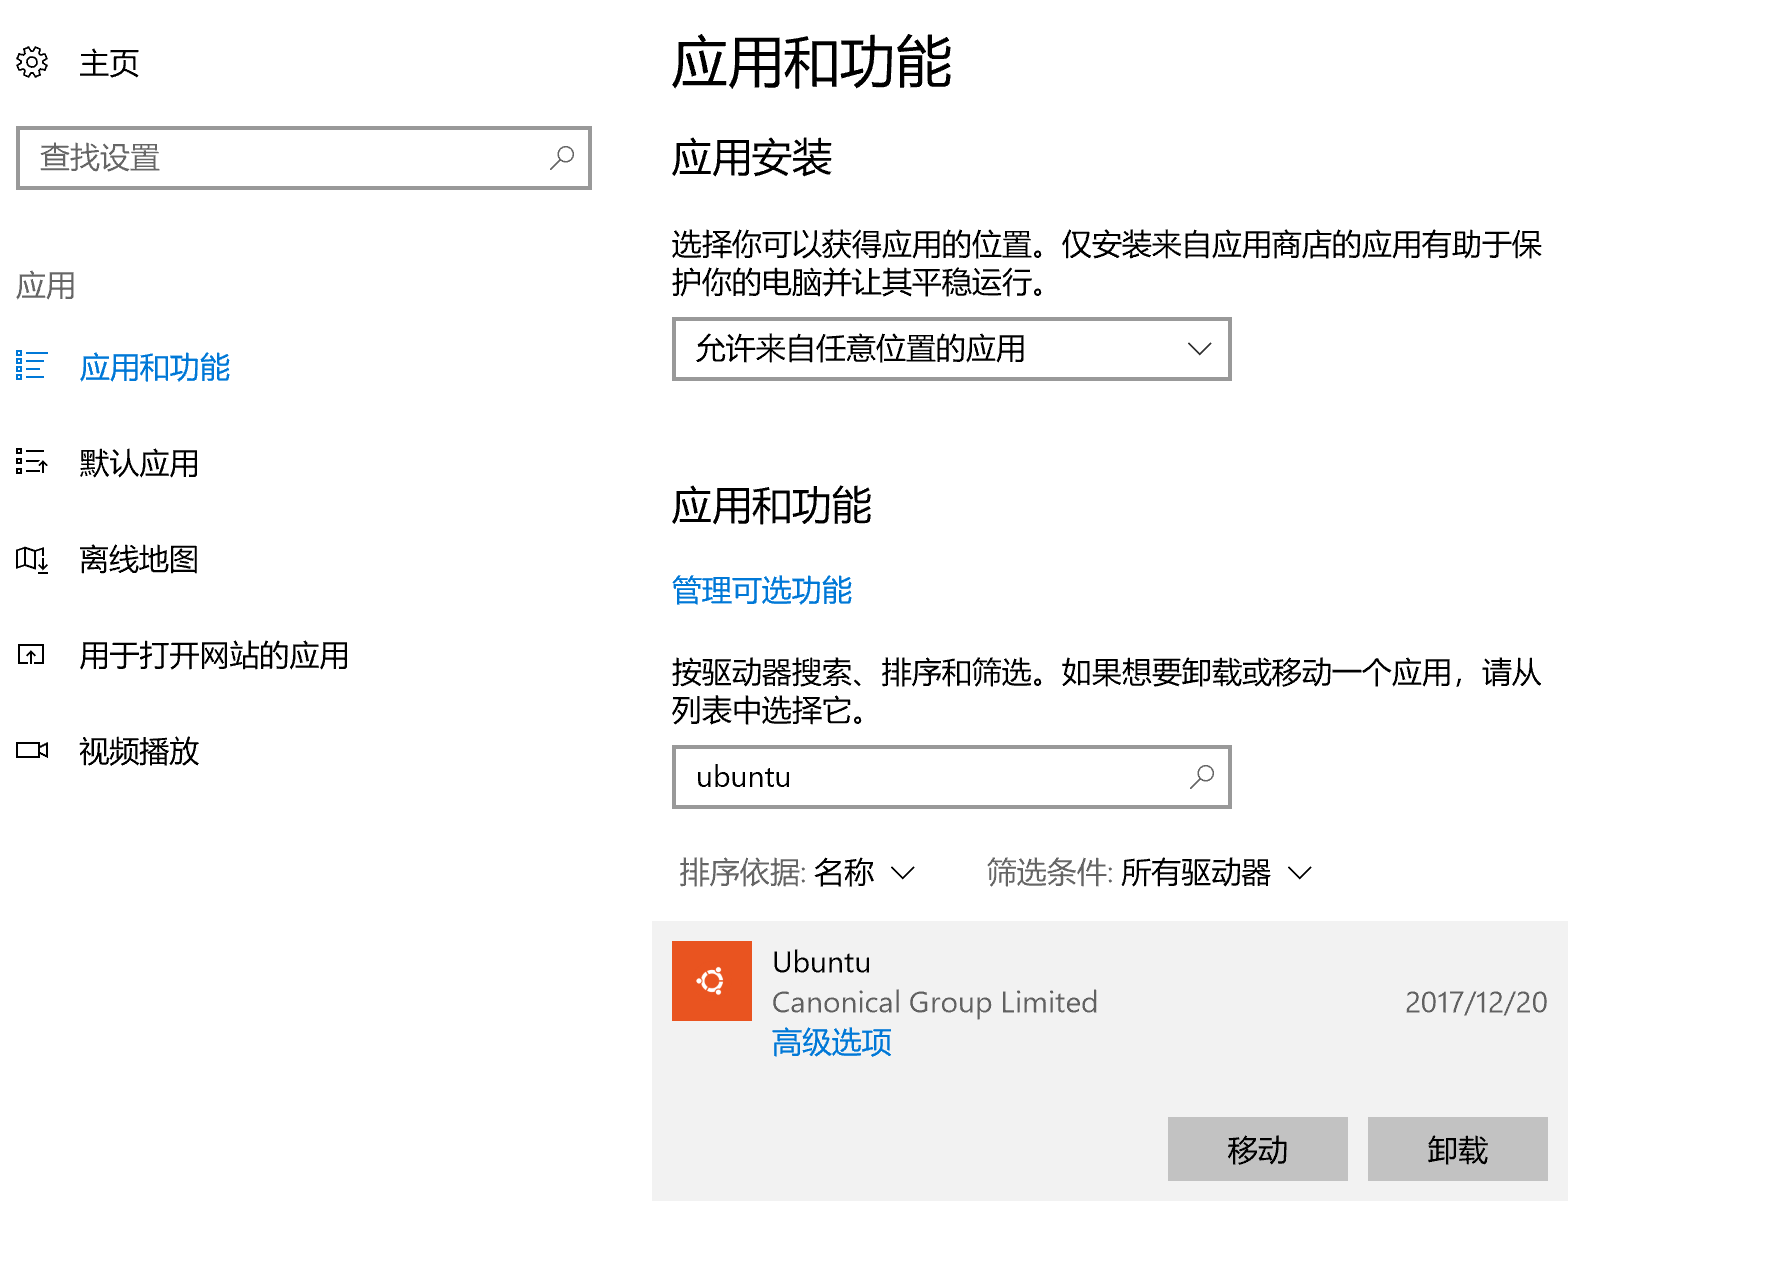
- 设置——应用和功能——linux卸载
![]()
安装环境
安装最新版nodejs(库依赖会直接安装python2)
curl -sL https://deb.nodesource.com/setup_8.x | sudo -E bash -setup_5.xUbuntu默认安装了python3.5 路径在/usr/bin下,将python3修改为默认python (上一步安装了python2,所以python默认为python2)
ubuntu@user~:ln -s /usr/bin/python3.5 /user/bin/python安装pip3
# 安装pip3 命令默认为pip3
sudo apt-get install python3-pip
# 或者
# 安装pip2 命令默认为pip
sudo apt-get install python-pip
更新apt-get源 (网速快的话不建议更新,各种版本错乱的问题比较烦心)
# 1.备份原来的数据源配置文件
cp /etc/apt/sources.list /etc/apt/sources.list_backup
# 2.编辑数据源配置文件
vim /etc/apt/sources.list
# 在这里我使用的是阿里云的数据源:
#============================================================================
deb http://mirrors.aliyun.com/ubuntu/ trusty main restricted universe multiverse
deb http://mirrors.aliyun.com/ubuntu/ trusty-security main restricted universe multiverse
deb http://mirrors.aliyun.com/ubuntu/ trusty-updates main restricted universe multiverse
deb http://mirrors.aliyun.com/ubuntu/ trusty-proposed main restricted universe multiverse
deb http://mirrors.aliyun.com/ubuntu/ trusty-backports main restricted universe multiverse
deb-src http://mirrors.aliyun.com/ubuntu/ trusty main restricted universe multiverse
deb-src http://mirrors.aliyun.com/ubuntu/ trusty-security main restricted universe multiverse
deb-src http://mirrors.aliyun.com/ubuntu/ trusty-updates main restricted universe multiverse
deb-src http://mirrors.aliyun.com/ubuntu/ trusty-proposed main restricted universe multiverse
deb-src http://mirrors.aliyun.com/ubuntu/ trusty-backports main restricted universe multiverse
#============================================================================
# 3.更新配置
apt-get updat
 浙公网安备 33010602011771号