Xamarin.Android再体验之简单的登录Demo
 用VS2015做的一个简单的Android登录Demo
一、前言
在空闲之余,学学新东西
二、服务端的代码编写与部署
这里采取的方式是MVC+EF返回Json数据,(本来是想用Nancy来实现的,想想电脑太卡就不开多个虚拟机了,用用IIS部署也好)
主要是接受客户端的登陆请求,服务器端返回请求的结果
这里的内容比较简单不在啰嗦,直接上代码了:
 1 using System.Linq;
 2 using System.Web.Mvc;
 3 namespace Catcher.AndroidDemo.EasyLogOn.Service.Controllers
 4 {
 5     public class UserController : Controller
 6     {
 7         public ActionResult LogOn(string userName, string userPwd)
 8         {
 9             bool result = IsAuth(userName,userPwd);
10             ReturnModel m = new ReturnModel();
11             if (result)
12             {
13                 m.Code = "00000";
14                 m.Msg = "Success";
15             }
16             else
17             {
18                 m.Code = "00001";
19                 m.Msg = "Failure";
20             }
21             return Json(m, JsonRequestBehavior.AllowGet);
22         }
23         public bool IsAuth(string name, string pwd)
24         {
25             using (Models.DBDemo db = new Models.DBDemo())
26             {
27                 int count = db.UserInfo.Count(u=>u.UserName==name&&u.UPassword==pwd);
28                 return count == 1 ? true : false;
29             }
30         }
31     }
32     public class ReturnModel
33     {
34         public string Code { get; set; }
35         public string Msg { get; set; }
36     }
37 }
发布,测试一下是否可行
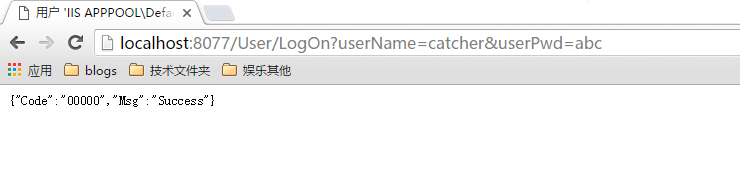
OK
三、客户端(Android)的编码实现
既然是登录,肯定有两个文本框和一个登陆按钮啦~
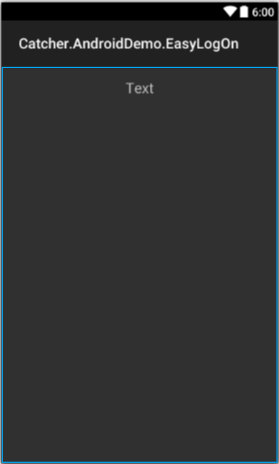
登录之后又要有什么呢,显示一下欢迎就够了,放一个TextView
下面就来布局一下(左边是Main.axml,右边是User.axml)
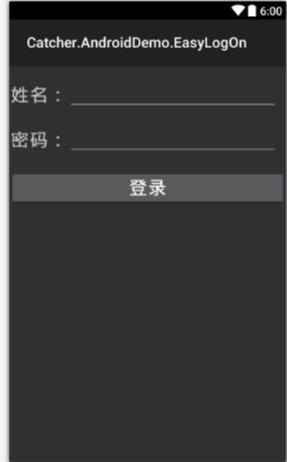
具体的布局代码如下:
Main.axml
 1 <?xml version="1.0" encoding="utf-8"?>
 2 <RelativeLayout xmlns:android="http://schemas.android.com/apk/res/android"
 3     android:orientation="vertical"
 4     android:layout_width="fill_parent"
 5     android:layout_height="fill_parent">
 6     <LinearLayout
 7         android:orientation="horizontal"
 8         android:minWidth="25px"
 9         android:minHeight="80px"
10         android:layout_marginTop="20dp"
11         android:layout_width="match_parent"
12         android:layout_height="wrap_content"
13         android:id="@+id/linearLayoutForName">
14         <TextView
15             android:text="姓名:"
16             android:layout_width="81.5dp"
17             android:layout_height="match_parent"
18             android:id="@+id/textViewName"
19             android:textAllCaps="true"
20             android:textSize="25dp"
21             android:textStyle="bold"
22             android:gravity="center" />
23         <EditText
24             android:layout_width="291.0dp"
25             android:layout_height="match_parent"
26             android:id="@+id/txtName" />
27     </LinearLayout>
28     <LinearLayout
29         android:orientation="horizontal"
30         android:minWidth="25px"
31         android:minHeight="80px"
32         android:layout_width="match_parent"
33         android:layout_height="wrap_content"
34         android:layout_below="@id/linearLayoutForName"
35         android:layout_marginTop="20dp"
36         android:id="@+id/linearLayoutForPwd">
37         <TextView
38             android:text="密码:"
39             android:layout_width="81.5dp"
40             android:layout_height="match_parent"
41             android:id="@+id/textViewPwd"
42             android:textAllCaps="true"
43             android:textSize="25dp"
44             android:textStyle="bold"
45             android:gravity="center" />
46         <EditText
47             android:layout_width="291.0dp"
48             android:layout_height="match_parent"
49             android:id="@+id/txtPwd"
50             android:inputType="textPassword" />
51     </LinearLayout>
52     <Button
53         android:text="登录"
54         android:layout_width="match_parent"
55         android:layout_height="wrap_content"
56         android:layout_marginTop="20dp"
57         android:layout_below="@id/linearLayoutForPwd"
58         android:id="@+id/btnLogin"
59         android:textAllCaps="true"
60         android:textSize="25dp"
61         android:textStyle="bold"
62         android:gravity="center" />
63 </RelativeLayout>
User.axml
 1 <?xml version="1.0" encoding="utf-8"?>
 2 <LinearLayout xmlns:android="http://schemas.android.com/apk/res/android"
 3     android:orientation="vertical"
 4     android:layout_width="match_parent"
 5     android:layout_height="match_parent"
 6     android:minWidth="25px"
 7     android:minHeight="25px">
 8     <TextView
 9         android:text="Text"
10         android:layout_width="match_parent"
11         android:layout_height="wrap_content"
12         android:id="@+id/tvInfo"
13         android:minHeight="60dp"
14         android:gravity="center"
15         android:textSize="20dp" />
16 </LinearLayout>
主要是是相对布局与线性布局的结合
布局好了,就该编写实现代码了!!
MainActivity.cs
主要就是接收用户的输入,进行判断和校验,通过的就跳转到下一页面。这里面还用到了一点网络请求。
因为是演示,所以是一大堆代码。。。
里面有用到json的解析,用的是Newtonsoft.Joson,当然,写法不规范,不要吐槽。
 1 using Android.App;
 2 using Android.Content;
 3 using Android.OS;
 4 using Android.Widget;
 5 using Newtonsoft.Json;
 6 using System;
 7 using System.IO;
 8 using System.Net;
 9 namespace Catcher.AndroidDemo.EasyLogOn
10 {
11     [Activity(Label = "简单的登录Demo", MainLauncher = true, Icon = "@drawable/icon")]
12     public class MainActivity : Activity
13     {
14         protected override void OnCreate(Bundle bundle)
15         {
16             base.OnCreate(bundle);
17             // Set our view from the "main" layout resource
18             SetContentView(Resource.Layout.Main);
19             EditText myName = FindViewById<EditText>(Resource.Id.txtName);
20             EditText myPwd = FindViewById<EditText>(Resource.Id.txtPwd);
21             Button login = FindViewById<Button>(Resource.Id.btnLogin);
22             login.Click += delegate
23            {
24                string name = myName.Text;
25                string pwd = myPwd.Text;
26                if (string.IsNullOrEmpty(name) || string.IsNullOrEmpty(pwd))
27                {
28                    Toast.MakeText(this, "请输入用户名和密码!!", ToastLength.Long).Show();
29                    return;
30                }
31                else
32                {
33                    string loginUrl = string.Format("http://192.168.1.102:8077/User/LogOn?userName={0}&userPwd={1}", name, pwd);
34                    var httpReq = (HttpWebRequest)HttpWebRequest.Create(new Uri(loginUrl));
35                    var httpRes = (HttpWebResponse)httpReq.GetResponse();
36                    if (httpRes.StatusCode == HttpStatusCode.OK)
37                    {
38                        string result = new StreamReader(httpRes.GetResponseStream()).ReadToEnd();
39                        result = result.Replace("\"", "'");
40                        ReturnModel s = JsonConvert.DeserializeObject<ReturnModel>(result);
41                        if (s.Code == "00000")
42                        {
43                            var intent = new Intent(this, typeof(UserActivity));
44                            intent.PutExtra("name", name);
45                            StartActivity(intent);
46                        }
47                        else
48                        {
49                            Toast.MakeText(this, "用户名或密码不正确!!", ToastLength.Long).Show();
50                            return;
51                        }
52                    }
53                }
54            };
55         }
56     }
57     public class ReturnModel
58     {
59         public string Code { get; set; }
60         public string Msg { get; set; }
61     }
62 }
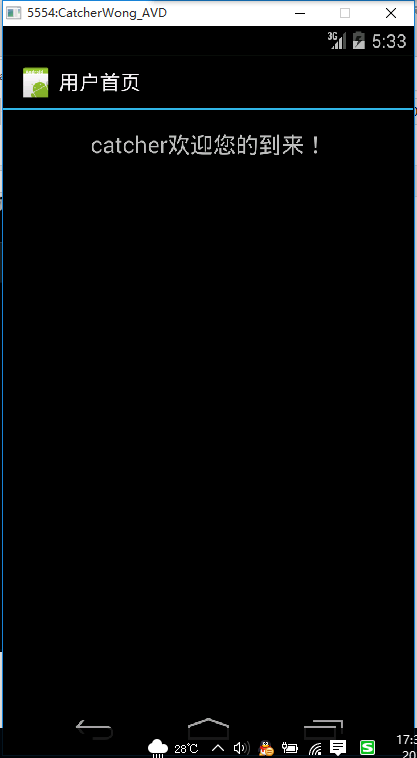
下面就是跳转之后的页面了,就是从MainActivity传过来的用户名显示在TextView那里。
 1 using Android.App;
 2 using Android.Content;
 3 using Android.OS;
 4 using Android.Widget;
 5 namespace Catcher.AndroidDemo.EasyLogOn
 6 {
 7     [Activity(Label = "用户首页")]
 8     public class UserActivity : Activity
 9     {
10         protected override void OnCreate(Bundle savedInstanceState)
11         {
12             base.OnCreate(savedInstanceState);
13             // Create your application here
14             SetContentView(Resource.Layout.User);
15             TextView info = FindViewById<TextView>(Resource.Id.tvInfo);
16             string name = Intent.GetStringExtra("name");
17             info.Text = name + "欢迎您的到来!" ;
18         }
19     }
20 }
然后就OK了,是不是也很Easy呢。
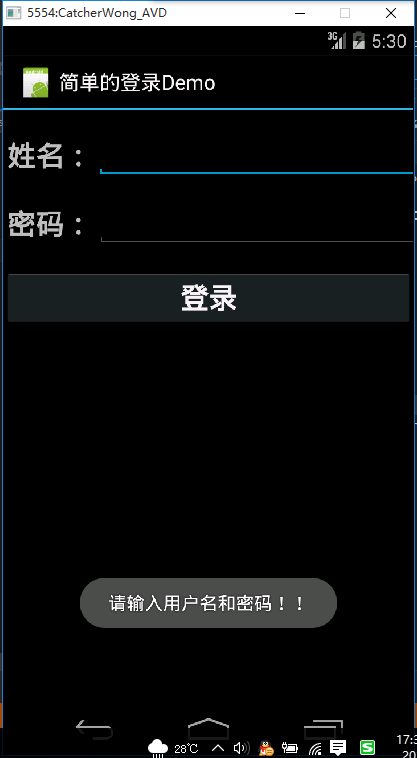
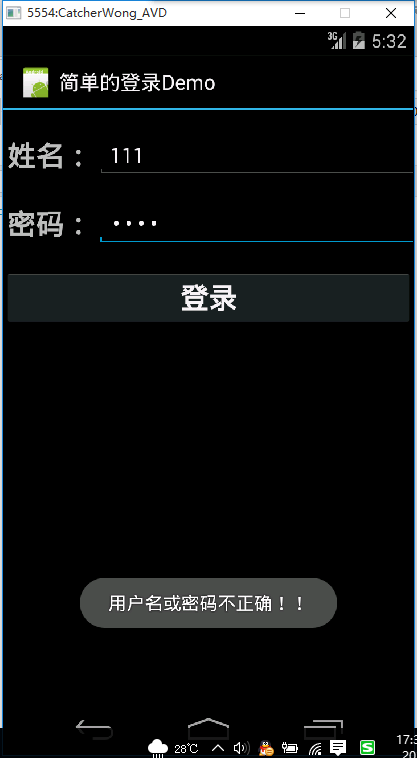
下面来看看效果
什么都不输入的时候,输入错误的时候,输入正确的时候
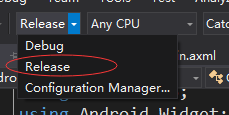
如果想生成apk文件的话,需要将模式调整为Release模式!!!
四、总结对比
跟原生的Android开发(Java)相比,有很多相似的地方也有很多细节区别,适应就好。
做这个Demo的时候,编写界面的时候貌似没发现有智能提示,不知道有没有处理的好办法!
需要注意的是,这个Demo在数据的传输过程中并没有进行加解密的处理,这是不可取的!
其他的话,就两个字的感觉,方便。
最后附上这个Demo的代码:
https://github.com/hwqdt/Demos/tree/master/src/Catcher.AndroidDemo


 浙公网安备 33010602011771号