


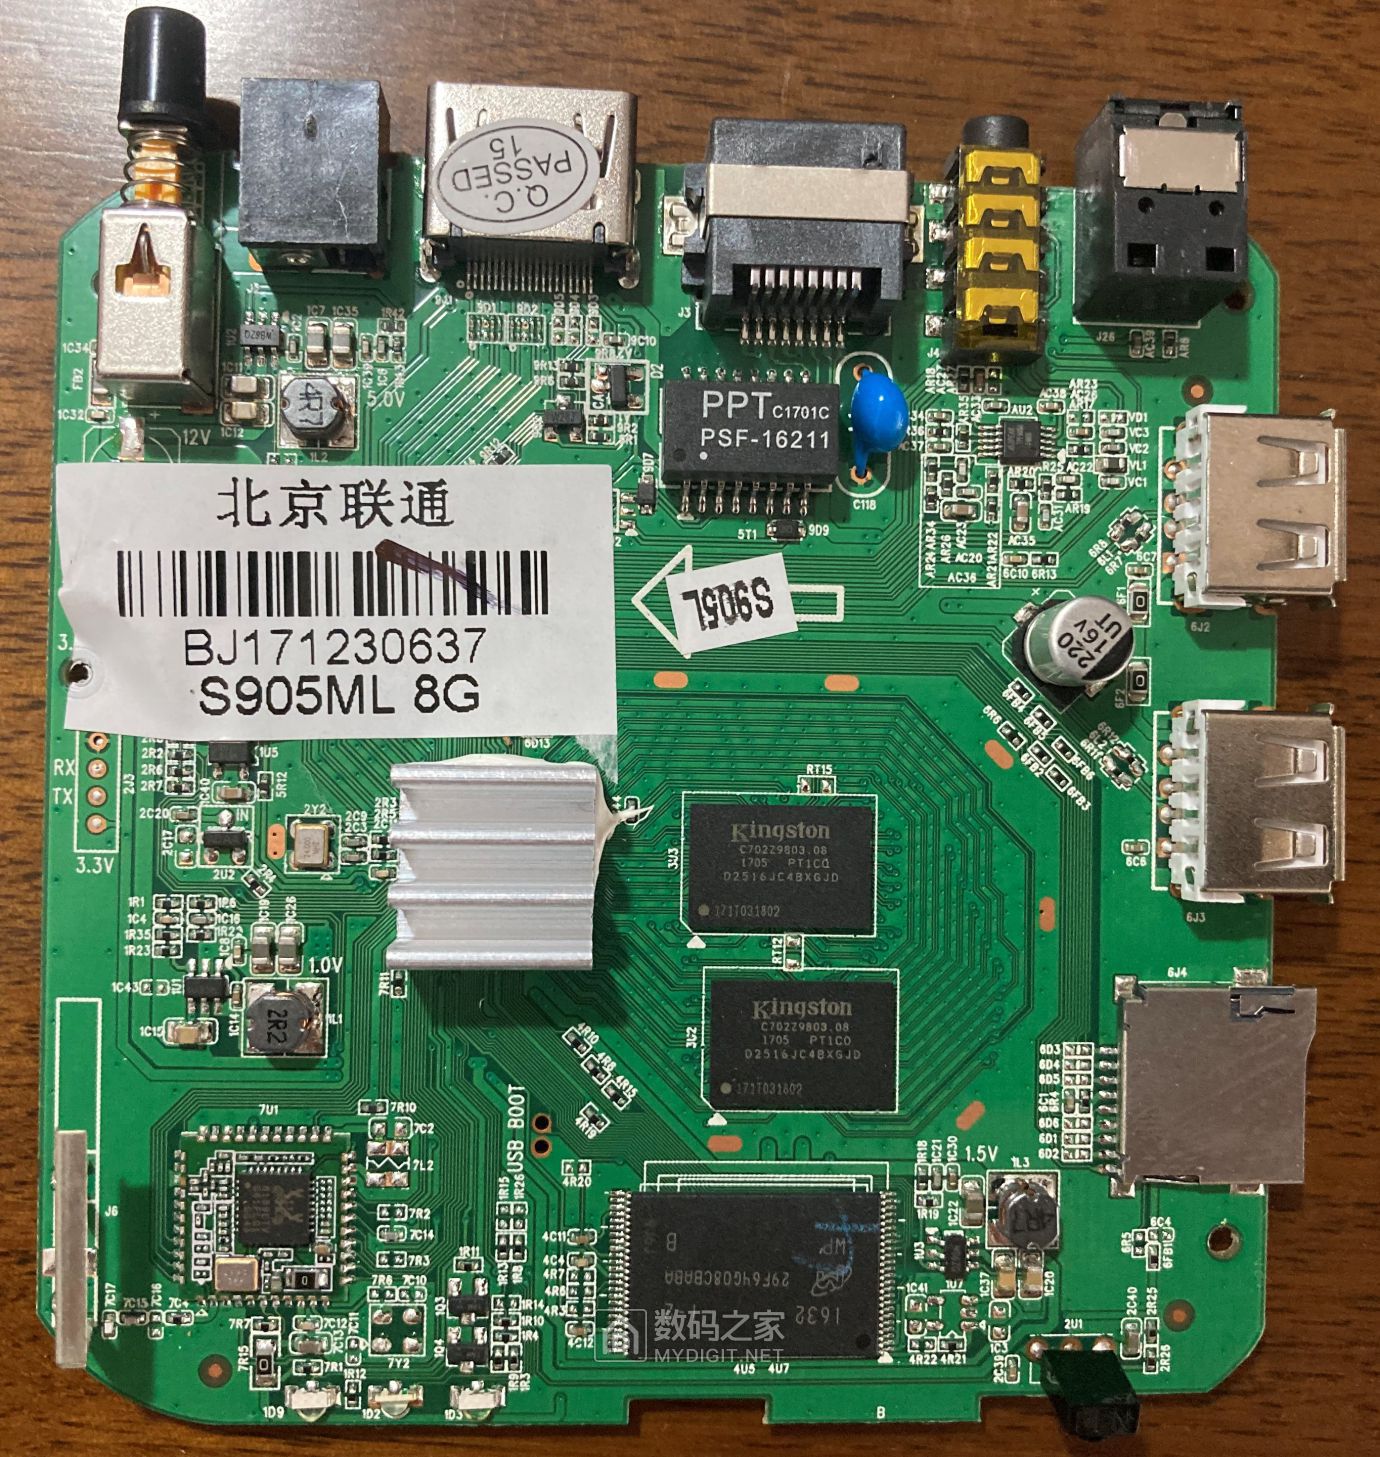
我的数码视讯Q7
配置
- CPU: S905L
- RAM: MIRA P3P4GF4DMF/P3P4GF4BLF DDR3 512MB * 2 = 1GB
- ROM: 镁光29F64G08CBABB(NAND) * 1 = 8GB
- WIFI: RTL8189FTV
- AMP: SGM8905
- Interface: USB2.0 * 2, AV * 1, HDMI * 1, Micro Sdcard Reader * 1, 10/100M eth * 1, IR * 1, PDIF 1
- Q7有两种存储, 一种是NAND, 另一种是eMMC, 对应在板子上前者是长方形针脚的IC, 后者是正方形BGA焊接的IC
![]()
刷机
刷安卓4.4
-
盒子拔电, 开关处于关机的状态, 双公头线一头插在靠近TF卡槽的USB口 (另一个口是否能用不知道, 没试过, 我是看别人的说明这么做的).
-
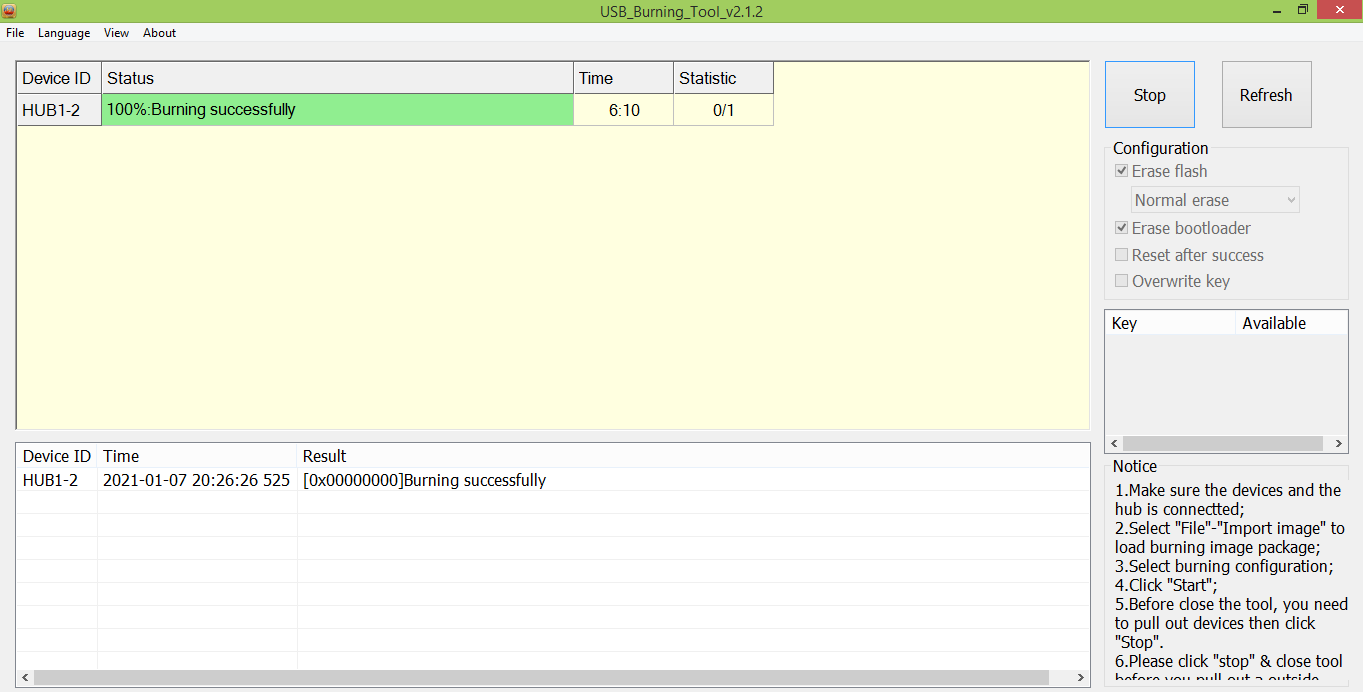
电脑上打开USB Burning Tool 【提取码:9ltl】
![]()
-
用一根漆包线(从网线里拆出来那种), 两头露出两三毫米的铜芯, 插在标有UBOOT USB的两个过孔上, 用手稍微斜摁住. 这个目的是让两个过孔短接, 但是注意露出的铜芯不要太长, 不要误接到四周其他的元件上. 如果是第一次刷, 你得把三个螺丝拧下来, 在电路板正面找到这两个孔. 如果熟悉了, 其实不用拆螺丝也可以, 在电路板背面是直接能看到这两个过孔的, 直接在背面短接就可以了.
-
保持住3的短接状态, 将双公头USB线另一头连上电脑, 此时应该在USB Burning Tool的界面上看到 HUB2-1: Connected Success 之类的提示, 并且盒子的电源灯亮起. 此时板子就已经进入USB调试状态, 可以松开短接了, 把线撤掉.
-
在USB Burning Tool 里选择img 【提取码: 9snj】,Erase Flash和Erase Bootloader两个勾选不动, 点击Start, 正常情况进度条就会自动从0%走到100%
-
点击Stop, 然后关闭USB Burning Tool, 再拔掉USB线, 此时刷机就算完成了.进系统后安装下SU 开启root功能。选常规方式,然后重启。
使用NAND的盒子只能刷特定的固件, 每次刷的时候都会重新进行擦写, 并且提示坏块. 在运行EmuELEC和Armbian时, 也无法识别出NAND设备, 无法使用ddbr进行备份和恢复, 在运行高版本Armbian后, 会再次出现内部存储错误而无法从本机启动的情况.
APK推荐1:高清看直播TiviMate
> 自定义直播源:https://live.fanmingming.com/

APK推荐2:影视Tvbox
> 自定义接口:https://饭太硬.top/tv

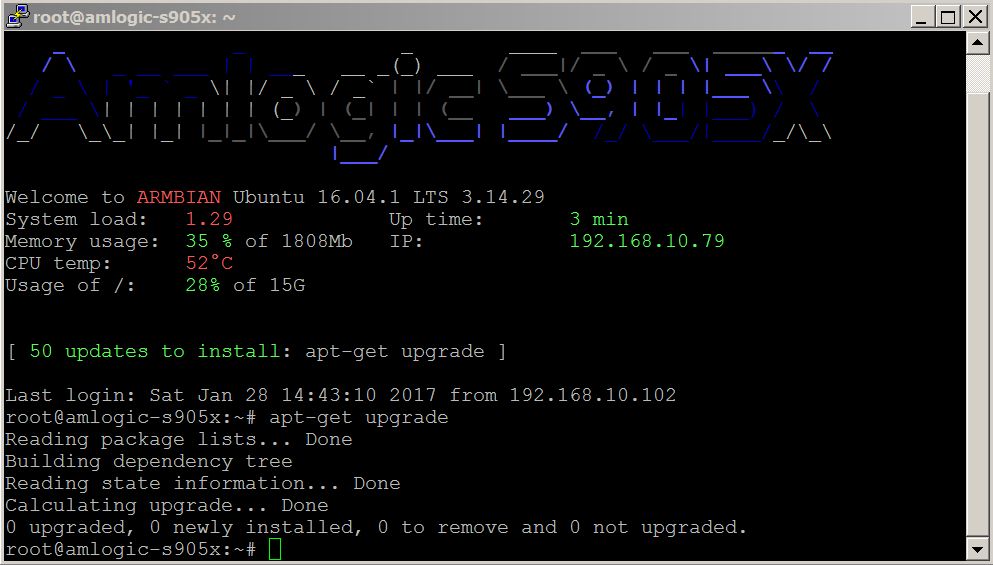
刷Armbian5.44 K3.14
-
下载5.44->Kernel 3.14->20180729 下面的镜像【提取码:mivmcn 】
-
或者Armbian_5.44_S9xxx_Ubuntu_bionic_3.14.29_icewm_20180729.img【提起码:vs5g】
-
Rufus写入TF卡, 可以直接插入盒子启动.
注意: 这里和EmuELEC不一样,
不需要自己去复制dtb文件, 如果自己复制并改名为dtb.img, 反而会造成无法启动
不需要自己resize TF卡的分区, armbian启动后会自己把分区扩张为全部剩余空间
- 目前能完美使用的是 Armbian_5.44_S9xxx_Ubuntu_bionic_3.14.29_server_20180729.img.xz 这个镜像, 启动后网卡默认可用, WIFI需要手动添加
上面的百度盘里 Armbian_5.99_Aml-g12_Ubuntu_bionic_default_5.3.0_rtl8189ftv.tar 这个镜像是较高内核版本(5.3.0)且带WIFI的镜像
- 第一次启动,默认的账号是 root / 1234, 登录后会提示添加普通用户
刷Armbian_Aml_jammy K5.15.62
cat /boot/extlinux/extlinux.conf
LINUX=/zImage
INITRD=/uInitrd

# 下列 dtb,用到哪个就把哪个的#删除,其它的则加上 # 在行首
# 用于 Phicomm N1
# FDT=/dtb/amlogic/meson-gxl-s905d-phicomm-n1.dtb
# 用于 Phicomm N1 (thresh)
#FDT=/dtb/amlogic/meson-gxl-s905d-phicomm-n1-thresh.dtb

FDT=/dtb/amlogic/meson-gxl-s905x-p212.dtb
APPEND=root=UUID=f749c540-4103-41f5-8dd4-fb372fa00df0 rootfstype=btrfs rootflags=compress=zstd:6 console=ttyAML0,115200n8 console=tty0 no_console_suspend consoleblank=0 fsck.fix=yes fsck.repair=yes net.ifnames=0 cgroup_enable=cpuset cgroup_memory=1 cgroup_enable=memory swapaccount=1
AdguardHome 去广告
curl -s -S -L https://raw.githubusercontent.com/AdguardTeam/AdGuardHome/master/scripts/install.sh | sh -s -- -v
starting AdGuard Home installation script
channel: release
operating system: linux
cpu type: amd64
AdGuard Home will be installed into /opt/AdGuardHome
checking curl
checking tar
note that AdGuard Home requires root privileges to install using this script
restarting with root privileges
starting AdGuard Home installation script
channel: release
operating system: linux
cpu type: amd64
AdGuard Home will be installed into /opt/AdGuardHome
checking curl
checking tar
script is executed with root privileges
no need to uninstall
downloading package from https://static.adguard.com/adguardhome/release/AdGuardHome_linux_amd64.tar.gz -> AdGuardHome_linux_amd64.tar.gz
unpacking package from AdGuardHome_linux_amd64.tar.gz into /opt
2021/07/01 09:54:32 [info] Service control action: install
2021/07/01 09:54:32 [info] Service has been started
2021/07/01 09:54:32 [info] Almost ready!
AdGuard Home is successfully installed and will automatically start on boot.
There are a few more things that must be configured before you can use it.
Click on the link below and follow the Installation Wizard steps to finish setup.
2021/07/01 09:54:32 [info] AdGuard Home is available on the following addresses:
2021/07/01 09:54:32 [info] Go to http://127.0.0.1:3000
2021/07/01 09:54:32 [info] Go to http://[::1]:3000
2021/07/01 09:54:32 [info] Go to http://192.168.1.229:3000
2021/07/01 09:54:32 [info] Go to http://[240e:3b2:d0c8:3750::1fb]:3000
2021/07/01 09:54:32 [info] Go to http://[240e:3b2:d0c7:fb60:bd4b:c908:7ccc:3759]:3000
2021/07/01 09:54:32 [info] Go to http://[240e:3b2:d0c8:3750:a805:b188:fef6:c6fc]:3000
2021/07/01 09:54:32 [info] Action install has been done successfully on linux-systemd
AdGuard Home is now installed and running
you can control the service status with the following commands:
sudo /opt/AdGuardHome/AdGuardHome -s start|stop|restart|status|install|uninstall
设置及优化参考P3TERX大神:优化增强设置详解

zsh的加速及美化
apt install zsh

cat /etc/shells
# /etc/shells: valid login shells
/bin/sh
/bin/bash
/usr/bin/bash
/bin/rbash
/usr/bin/rbash
/bin/dash
/usr/bin/dash
/usr/bin/screen
/bin/zsh
/usr/bin/zsh
chsh -s /bin/zsh

zsh

git clone https://github.com/zdharma/zinit.git ~/.zinit/bin
nano ~/.zshrc
source ~/.zinit/bin/zinit.zsh
# 快速目录跳转
#zinit ice lucid wait='1'
#zinit light skywind3000/z.lua
# 语法高亮
zinit ice lucid wait='0' atinit='zpcompinit'
zinit light zdharma/fast-syntax-highlighting
# 自动建议
zinit ice lucid wait="0" atload='_zsh_autosuggest_start'
zinit light zsh-users/zsh-autosuggestions
# 补全
zinit ice lucid wait='0'
zinit light zsh-users/zsh-completions
# 加载 OMZ 框架及部分插件
zinit snippet OMZ::lib/completion.zsh
zinit snippet OMZ::lib/history.zsh
zinit snippet OMZ::lib/key-bindings.zsh
zinit snippet OMZ::lib/theme-and-appearance.zsh
zinit snippet OMZ::plugins/colored-man-pages/colored-man-pages.plugin.zsh
zinit snippet OMZ::plugins/sudo/sudo.plugin.zsh
#zinit ice svn
#zinit snippet OMZ::plugins/extract
zinit ice lucid wait='1'
zinit snippet OMZ::plugins/git/git.plugin.zsh
# 加载 pure 主题
# zinit ice pick"async.zsh" src"pure.zsh"
# zinit light sindresorhus/pure
zinit ice depth=1
zinit light romkatv/powerlevel10k
alias ad='sudo apt update && sudo apt upgrade -y'
alias ai='sudo apt install -y'
alias aar='sudo apt autoremove -y'
source ~/.zshrc

LNMP
screen -S lnmp
wget http://soft.vpser.net/lnmp/lnmp1.8.tar.gz -cO lnmp1.8.tar.gz && tar zxf lnmp1.8.tar.gz && cd lnmp1.8 && ./install.sh lnmp
CTRL+A+D
MySQL/MariaDB 重置root密码的工具,直接运行tools文件夹下的 ./reset_mysql_root_password.sh
Dokuwiki
git clone https://github.com/splitbrain/dokuwiki.git /home/wwwroot/default/dokuwiki
chmod 755 /home/wwwroot/default/dokuwiki
Pi Dashboard
git clone https://github.com/nxez/pi-dashboard.git /home/wwwroot/default/pi
chmod 755 /home/wwwroot/default/pi

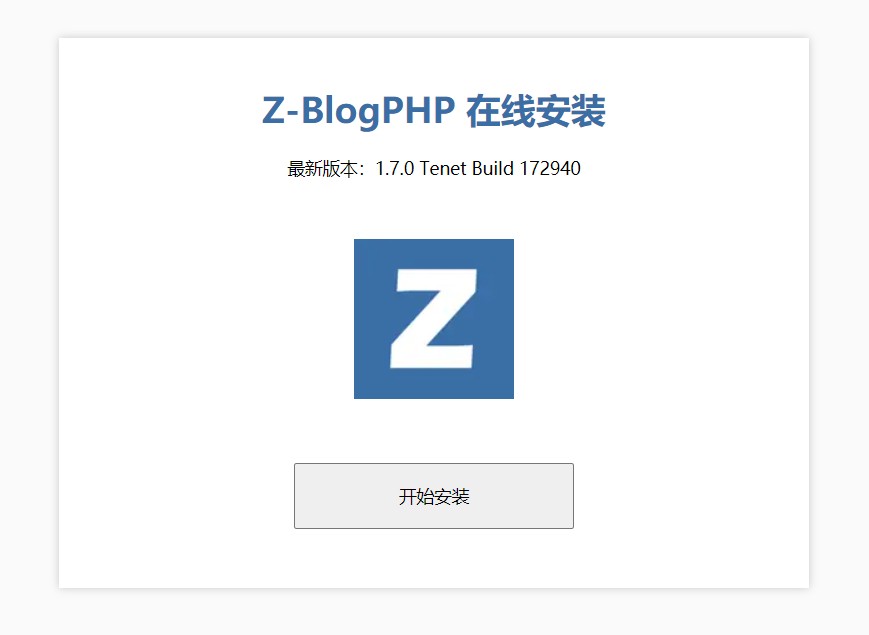
zblog
ssh root@IP
wget https://update.zblogcn.com/onlinephp/install.tar.gz && tar -xf ./install.tar.gz /home/wwwroot/default/
Chrome
http://IP/install.sh
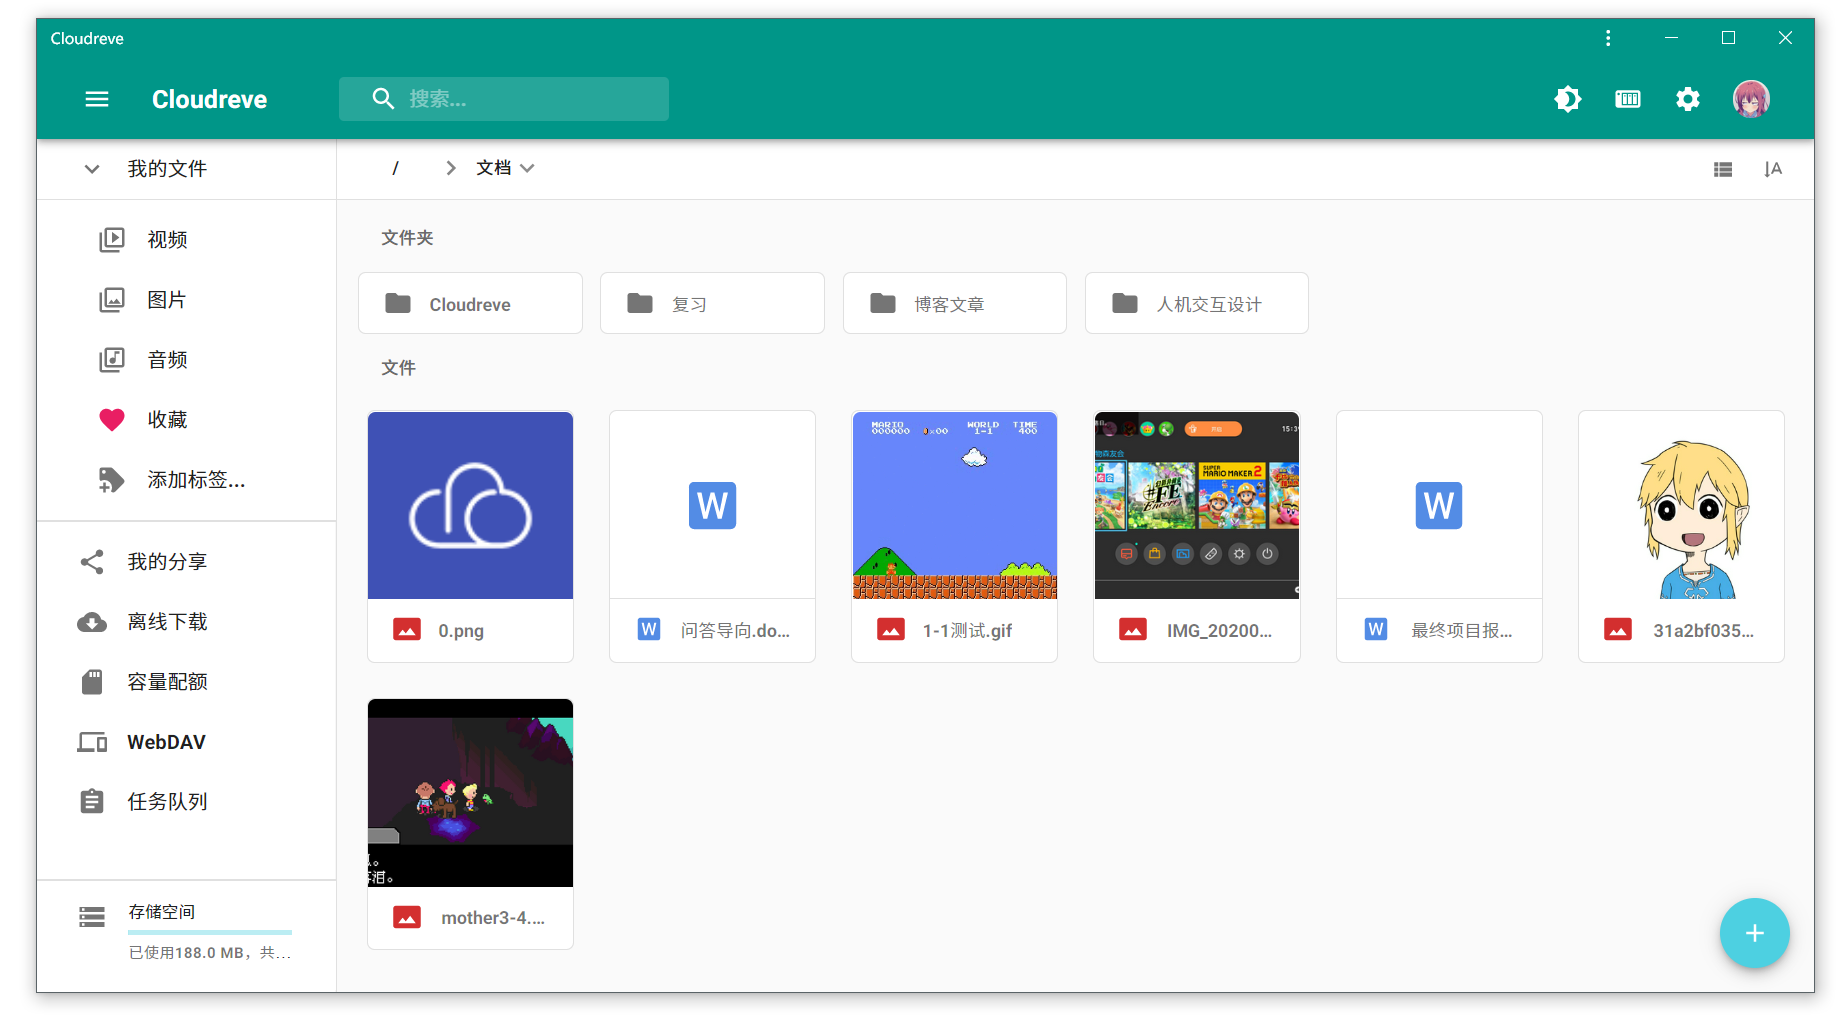
Cloudreve
mkdir -p /home/cloudreve
cd /home/cloudreve
wget https://github.com/cloudreve/Cloudreve/releases/download/3.3.1/cloudreve_3.3.1_linux_arm64.tar.gz -O cloudreve.tar.gz
tar -xzf cloudreve.tar.gz
chmod +x cloudreve
./cloudreve
[Info]    2021-04-01 10:31:47 初始化数据库连接

[Info]    2021-04-01 10:31:47 开始进行数据库初始化...

[Info]    2021-04-01 10:31:48 初始管理员账号:admin@cloudreve.org

[Info]    2021-04-01 10:31:48 初始管理员密码:myNKSMlT

[Info]    2021-04-01 10:31:50 数据库初始化结束

[Info]    2021-04-01 10:31:50 初始化任务队列,WorkerNum = 10

[Info]    2021-04-01 10:31:50 初始化定时任务...

[Info]    2021-04-01 10:31:50 当前运行模式:Master

[Info]    2021-04-01 10:31:50 开始监听 :5212
CTRL+C
nano /usr/lib/systemd/system/cloudreve.service
[Unit]
Description=Cloudreve
Documentation=https://docs.cloudreve.org
After=network.target
Wants=network.target

[Service]
WorkingDirectory=/home/cloudreve
ExecStart=/home/cloudreve/cloudreve
Restart=on-abnormal
RestartSec=5s
KillMode=mixed

StandardOutput=null
StandardError=syslog

[Install]
WantedBy=multi-user.target
CTRL+X Y enter
systemctl daemon-reload
systemctl start cloudreve
systemctl enable cloudreve
Created symlink /etc/systemd/system/multi-user.target.wants/cloudreve.service → /lib/systemd/system/cloudreve.service.
Docker
curl -fsSL https://get.docker.com -o get-docker.sh
sh get-docker.sh --mirror Aliyun
mkdir -p /etc/docker
tee /etc/docker/daemon.json <<-'EOF'
{
  "registry-mirrors": ["https://docker.mirrors.ustc.edu.cn/"]
}

EOF
systemctl daemon-reload
systemctl restart docker
Docker openwrt
ip link set eth0 promisc on
docker network create -d macvlan --subnet=192.168.31.0/24 --gateway=192.168.31.1 -o parent=eth0 macnet
docker pull dickhub/openwrt
docker run --restart always --name openwrt -d --network macnet --privileged dickhub/openwrt:latest /sbin/init
docker exec -it openwrt bash

Docker clash
mkdir -p /root/clash
ls ~/clash
config.yaml
docker pull dreamacro/clash
docker run -d --name=clash -v "/root/clash/config.yaml:/root/.config/clash/config.yaml" -p "7890:7890" -p "9090:9090" --restart=unless-stopped dreamacro/clash
或者:

cd /home/wwwroot/default/
git clone https://github.com/haishanh/yacd.git
nano /root/clash/config.yaml

external-ui: /root/.config/clash/yacd
external-controller: '0.0.0.0:9090'
secret: 'passwd'

docker run -d --name clash --restart always -p 7890:7890 -p 9090:9090 -v /root/clash/config.yaml:/root/.config/clash/config.yaml -v /home/wwwroot/default/yacd:/root/.config/clash/yacd dreamacro/clash
Chrome
http://192.168.31.67/yacd
input
http://192.168.31.67:9090	passwd

Terminal proxy
apt install proxychains4
nano /etc/proxychains4.conf
socks5 127.0.0.1 7890
nano ~/.zshrc
alias pc='proxychains4 '
souce ~/.zshrc
pc git clone XXX

Docker frp
mkdir /etc/frp
ls /etc/frp
	frpc1.ini  frpc2.ini  frpc.ini
docker pull snowdreamtech/frpc
docker run --restart=always --network host -d -v /etc/frp/frpc.ini:/etc/frp/frpc.ini --name frpc snowdreamtech/frpc
docker run --restart=always --network host -d -v /etc/frp/frpc1.ini:/etc/frp/frpc.ini --name frpc1 snowdreamtech/frpc
docker run --restart=always --network host -d -v /etc/frp/frpc2.ini:/etc/frp/frpc.ini --name frpc2 snowdreamtech/frpc
Systemd frp
wget -O frpc https://getfrp.sh/d/frpc_linux_arm64 /usr/local/bin/
chmod 755 /usr/local/bin/frpc
nano /lib/systemd/system/frpc@.service
[Unit]
Description=SakuraFrp Service
After=network.target

[Service]
Type=idle
User=nobody
Restart=on-failure
RestartSec=60s
ExecStart=/usr/local/bin/frpc -f %i

[Install]
WantedBy=multi-user.target
systemctl daemon-reload
systemctl start frpc@wdnmdtoken666666:12345
systemctl enable frpc@wdnmdtoken666666:12345
systemctl list-units --all frpc@*

NodeJS
curl -sL https://deb.nodesource.com/setup_12.x | sudo bash -
apt install nodejs
node -v
v12.8.1
npm -v
6.14.12
git --version
git version 2.20.1
Hexo
npm install -g hexo-cli
hexo -v
hexo-cli: 4.2.0
os: Linux 5.9.0-arm-64 linux arm64
node: 12.22.1
v8: 7.8.279.23-node.46
uv: 1.40.0
zlib: 1.2.11
brotli: 1.0.9
ares: 1.16.1
modules: 72
nghttp2: 1.41.0
napi: 8
llhttp: 2.1.3
http_parser: 2.9.4
openssl: 1.1.1k
cldr: 37.0
icu: 67.1
tz: 2019c
unicode: 13.0
cd ~
hexo init blog
cd ~/blog
hexo g
hexo s
Vuepress
npm install -g yarn
cd ~
mkdir vuepress && cd vuepress
yarn init
yarn add -D vuepress
mkdir docs && echo '# Hello VuePress' > docs/README.md
nano ~/vuepress/package.json
{
  "scripts": {
    "docs:dev": "vuepress dev docs",
    "docs:build": "vuepress build docs"
  }
}
yarn docs:dev

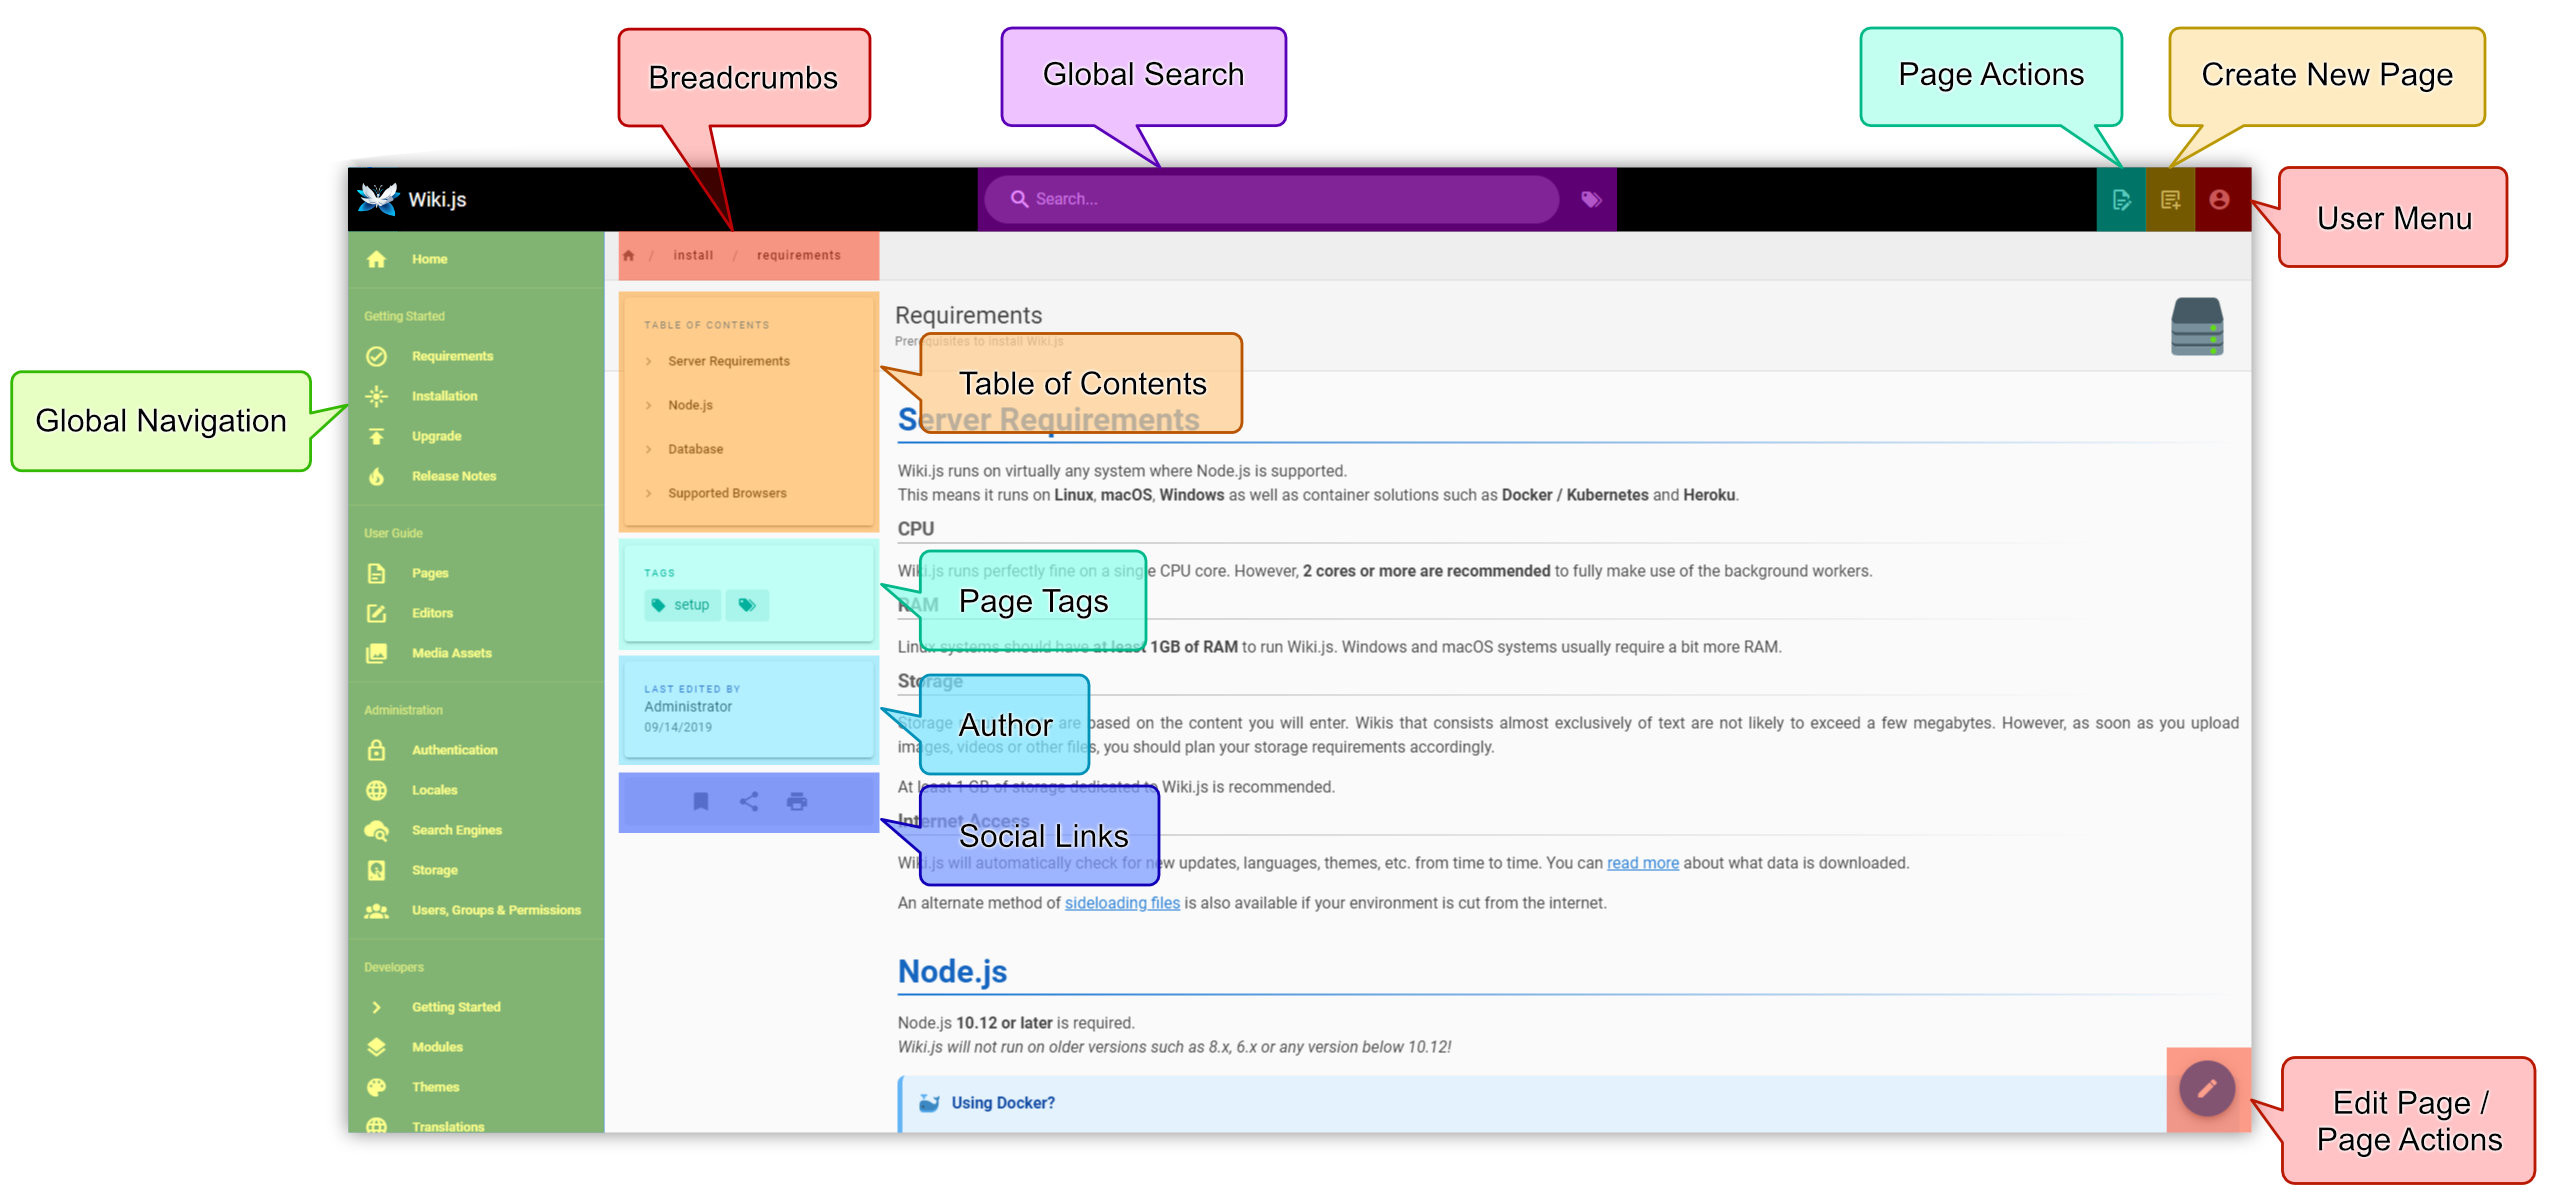
Wikijs
Download the latest version of Wiki.js:
wget https://github.com/Requarks/wiki/releases/download/2.5.201/wiki-js.tar.gz
Extract the package to the final destination of your choice:
mkdir wiki
tar xzf wiki-js.tar.gz -C ./wiki
cd ./wiki
Rename the sample config file to config.yml:
mv config.sample.yml config.yml
Edit the config file and fill in your database and port settings (Configuration Reference):
nano config.yml
For SQLite installations only: (skip this step otherwise) Fetch native bindings for SQLite3:
npm rebuild sqlite3
Run Wiki.js
node server
Wait until you are invited to open to the setup page in your browser.
Complete the setup wizard to finish the installation.
Run as service
There are several solutions to run Wiki.js as a background service. We'll focus on systemd in this guide as it's available in nearly all linux distributions.
Create a new file named wiki.service inside directory /etc/systemd/system.
nano /etc/systemd/system/wiki.service
Paste the following contents (assuming your wiki is installed at /var/wiki):
[Unit]
Description=Wiki.js
After=network.target

[Service]
Type=simple
ExecStart=/usr/bin/node server
Restart=always
# Consider creating a dedicated user for Wiki.js here:
User=nobody
Environment=NODE_ENV=production
WorkingDirectory=/var/wiki

[Install]
WantedBy=multi-user.target
Save the service file (CTRL+X, followed by Y).
Reload systemd:
systemctl daemon-reload
Run the service:
systemctl start wiki
Enable the service on system boot.
systemctl enable wiki


 浙公网安备 33010602011771号