ANTLR 环境准备
基本环境:
- JDK8
- Maven
- IntelliJ IDEA
IntelliJ IDEA中安装ANTLR v4插件
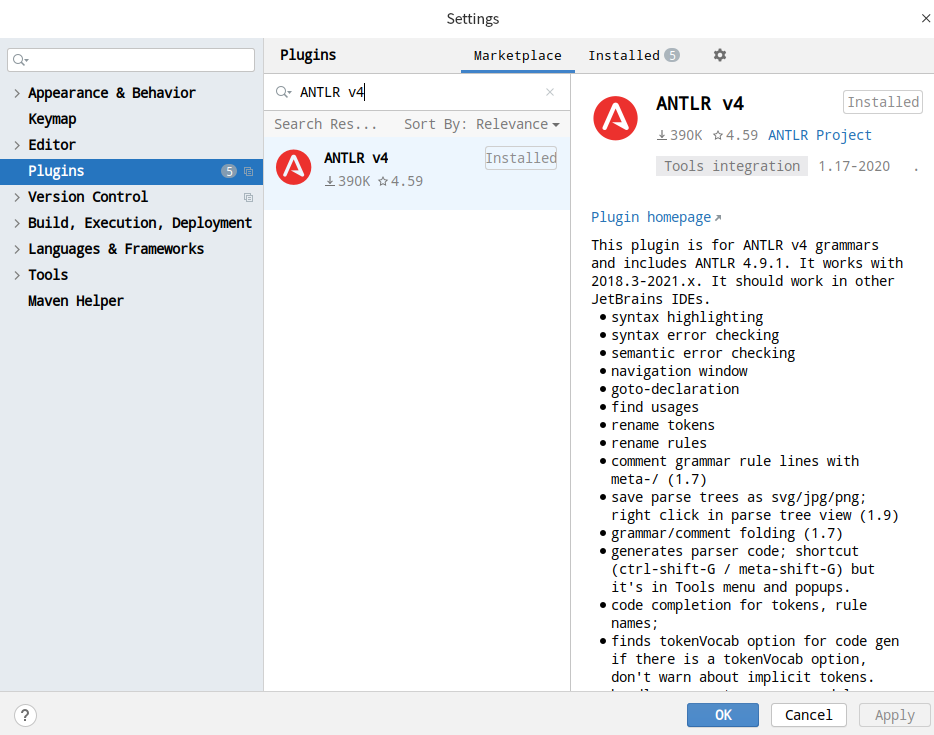
在IntelliJ IDEA插件仓库中搜索ANTLR v4插件并安装,如下图:
看个简单的例子,感受一下。
- 在
IntelliJ IDEA中新建Hello.g4文件,内容如下:
grammar Hello;            // Define a grammar called Hello
r  : 'hello' ID ;         // match keyword hello followed by an identifier
ID : [a-z]+ ;             // match lower-case identifiers
WS : [ \t\r\n]+ -> skip ; // skip spaces, tabs, newlines, \r (Windows)
- 在rule
r处选中r并右击鼠标后,右键选择Test Rule r,如下图所示:
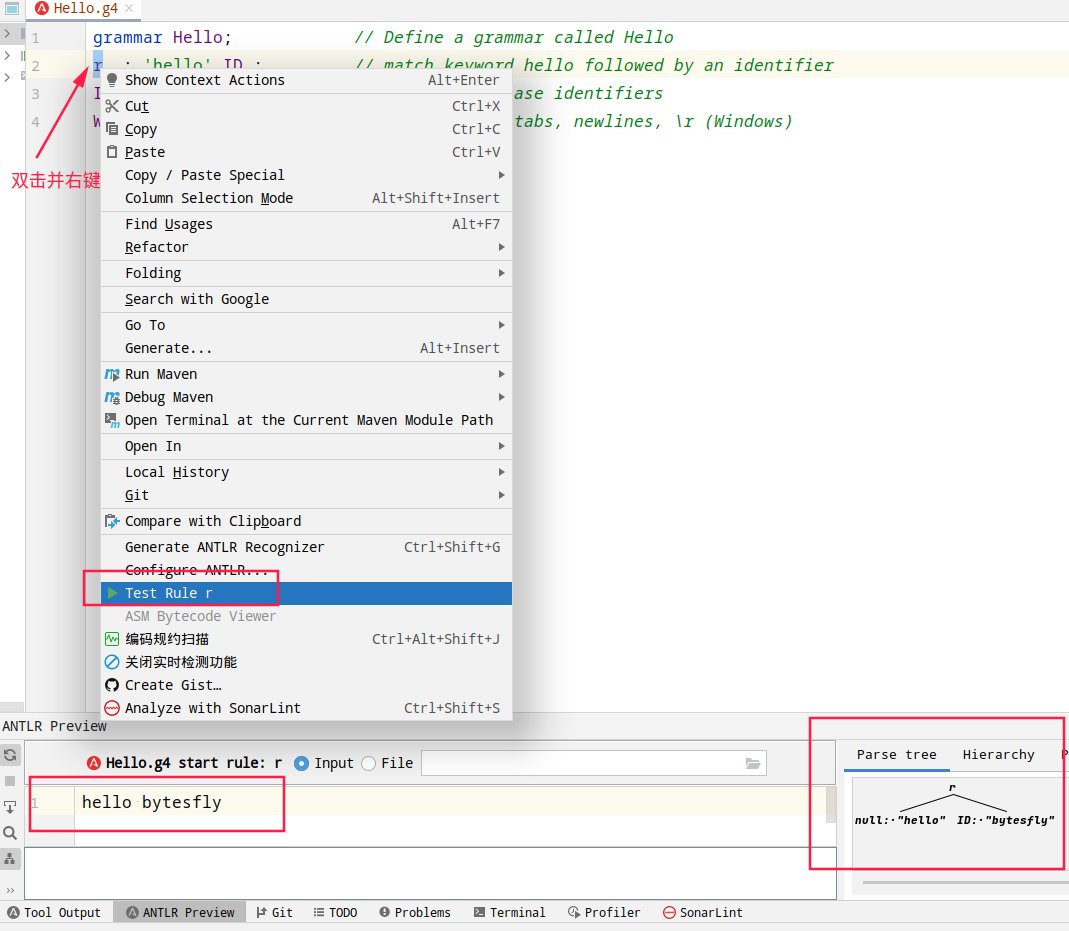
图中可以看到,ANTLR能够基于语法中的规则名自动创建出这样的一棵语法分析树。
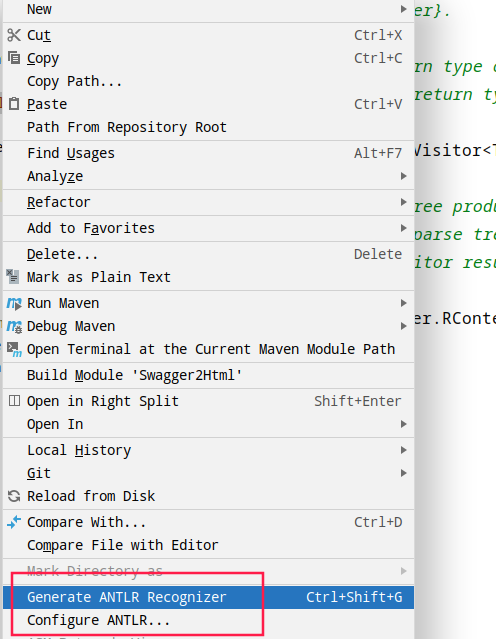
另外在Hello.g4文件上右键可以看到Configure ANTLR…和Generate ANTLR Recognizer。
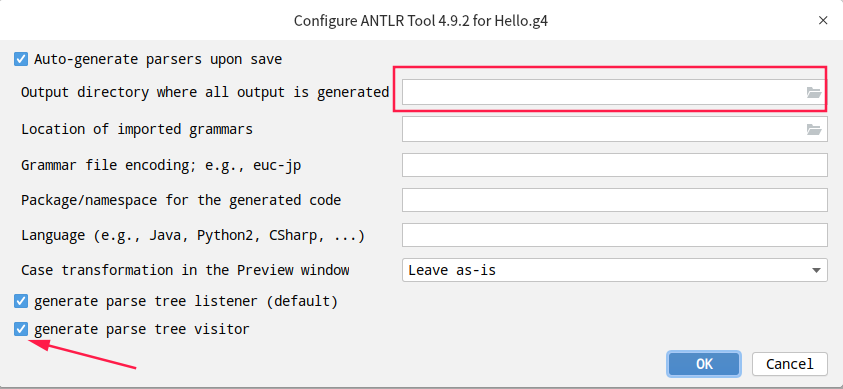
点击Configure ANTLR…,可对从grammar自动生成对应的ANTLR API的Java代码进行配置。 其中,Output directory where all output is generated表示指定随后生成的Java代码所存放的路径。 勾选generate parse tree vistor表示生成ANTLR中用于遍历parse tree的visitor类相关API。
Maven依赖与插件
引入依赖和插件,最新版本查看: https://github.com/antlr/antlr4/releases
<properties>
    <antlr.version>4.9.3</antlr.version>
</properties>

<dependencies>

    <dependency>
        <groupId>org.antlr</groupId>
        <artifactId>antlr4-runtime</artifactId>
        <version>${antlr.version}</version>
    </dependency>

</dependencies>

<build>
    <plugins>
        <plugin>
            <groupId>org.antlr</groupId>
            <artifactId>antlr4-maven-plugin</artifactId>
            <version>${antlr.version}</version>
            <configuration>
                <sourceDirectory>src/main/java/com/github/bytesfly/arr/antlr</sourceDirectory>
                <outputDirectory>src/main/java/com/github/bytesfly/arr/antlr</outputDirectory>
                <listener>true</listener>
                <visitor>true</visitor>
                <treatWarningsAsErrors>true</treatWarningsAsErrors>
            </configuration>
            <executions>
                <execution>
                    <id>antlr</id>
                    <goals>
                        <goal>antlr4</goal>
                    </goals>
                </execution>
            </executions>
        </plugin>

    </plugins>
</build>
另外注意.g4语法文件中应添加@header指定包名,如下:
@header {package com.github.bytesfly.arr.antlr;}
然后在项目模块目录下执行: mvn antlr4:antlr4
这样ANTLR就能根据.g4语法文件并在上面指定的outputDirectory目录下自动生成代码。


 浙公网安备 33010602011771号