
WeBase部署
一键部署会搭建:节点(FISCO-BCOS 2.0+)、管理平台(WeBASE-Web)、节点管理子系统(WeBASE-Node-Manager)、节点前置子系统(WeBASE-Front)、签名服务(WeBASE-Sign)。其中,节点的搭建是可选的,可以通过配置来选择使用已有链或者搭建新链。

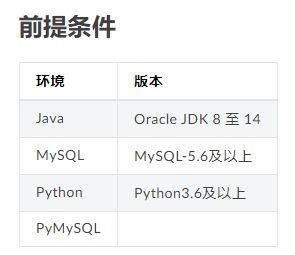
平台要求
推荐使用CentOS 7.2+, Ubuntu 16.04及以上版本, 一键部署脚本将自动安装openssl, curl, wget, git, nginx, dos2unix相关依赖项。
其余系统可能导致安装依赖失败,可自行安装openssl, curl, wget, git, nginx, dos2unix依赖项后重试
我这里选择的环境是centos7,由于我这里是离线环境的,我需要先在能联网的虚拟机下载好依赖环境的安装包
在虚拟机下面命令下载相应的rpm包
yumdownloader openssl curl wget git nginx dos2unix

然后把对应的rpm包传到我们的离线服务器上面,并通过以下命令安装下载好的包
rpm -ivh *.rpm --force --nodeps
检查Java

检查mysql环境
mysql数据库我这里是通过docker-compose部署的
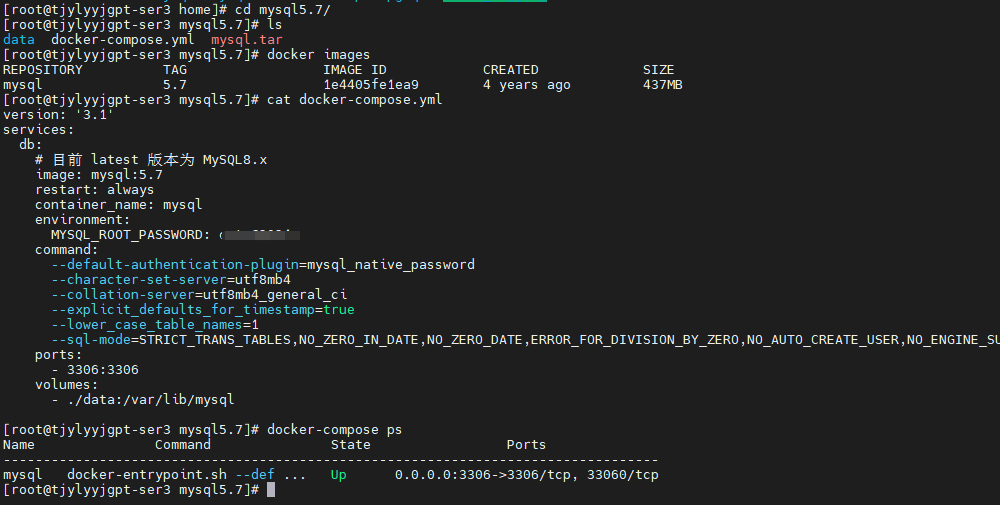
[root@tjylyyjgpt-ser3 mysql5.7]# ls
data  docker-compose.yml  mysql.tar
[root@tjylyyjgpt-ser3 mysql5.7]# docker images
REPOSITORY          TAG                 IMAGE ID            CREATED             SIZE
mysql               5.7                 1e4405fe1ea9        4 years ago         437MB
[root@tjylyyjgpt-ser3 mysql5.7]# cat docker-compose.yml
version: '3.1'
services:
  db:
    # 目前 latest 版本为 MySQL8.x
    image: mysql:5.7
    restart: always
    container_name: mysql
    environment:
      MYSQL_ROOT_PASSWORD: 你的mysql密码
    command:
      --default-authentication-plugin=mysql_native_password
      --character-set-server=utf8mb4
      --collation-server=utf8mb4_general_ci
      --explicit_defaults_for_timestamp=true
      --lower_case_table_names=1
      --sql-mode=STRICT_TRANS_TABLES,NO_ZERO_IN_DATE,NO_ZERO_DATE,ERROR_FOR_DIVISION_BY_ZERO,NO_AUTO_CREATE_USER,NO_ENGINE_SUBSTITUTION
    ports:
      - 3306:3306
    volumes:
      - ./data:/var/lib/mysql

[root@tjylyyjgpt-ser3 mysql5.7]# docker-compose ps
Name               Command               State                 Ports
----------------------------------------------------------------------------------
mysql   docker-entrypoint.sh --def ...   Up      0.0.0.0:3306->3306/tcp, 33060/tcp
检查Python
使用Python3.6或以上版本:
先在虚拟机下载离线依赖环境包
yumdownloader install zlib-devel bzip2-devel openssl-devel ncurses-devel sqlite-devel readline-devel tk-devel gdbm-devel db4-devel libpcap-devel xz-devel gcc libffi-devel
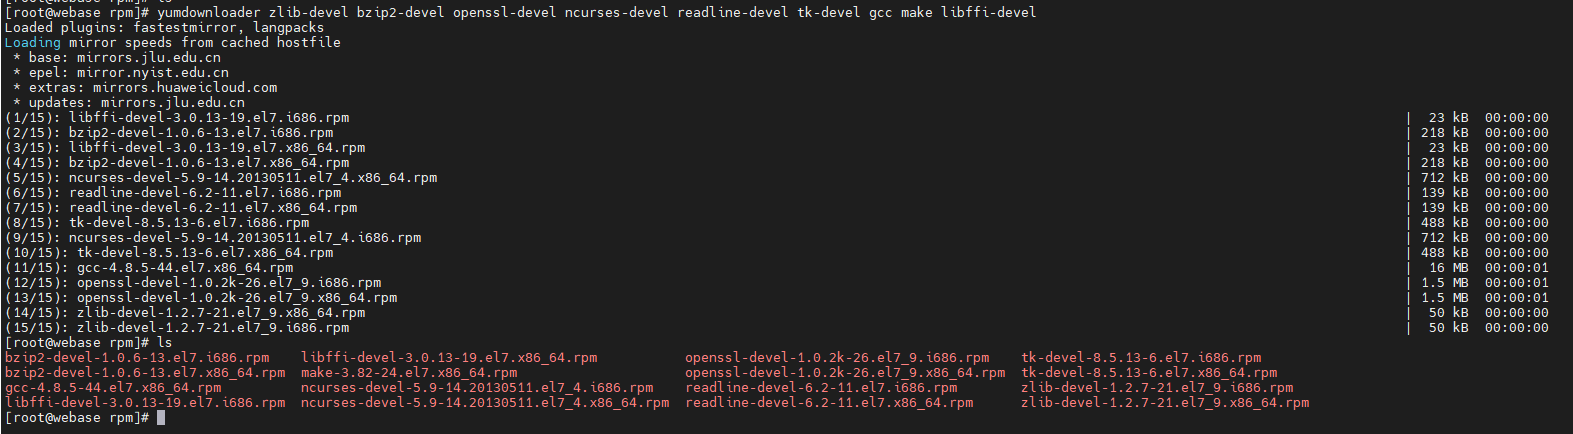
然后把离线包上传到我们的离线服务器并安装:
rpm -ivh *.rpm --force --nodeps

下载Python3需要的rpm包
yumdownloader python3-setuptools python3-libs python3 python3-pip
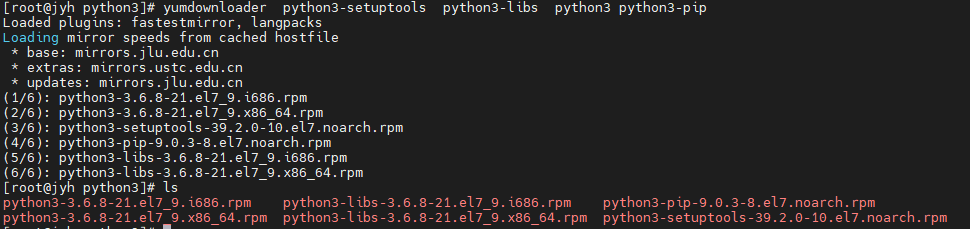
上传到服务器,然后安装
rpm -ivh *.rpm --force --nodeps

温馨提示,在离线环境下,特别不推荐通过源码编译的方式安装python3,虽然网上很多教程,但是编译时候会报各种环境问题的错误,解决起来非常麻烦。
PyMySQL部署(Python3.6+)
Python3.6及以上版本,需安装PyMySQL依赖包
还是先通过虚拟机把相应的安装包下载过来
pip3 download -d /opt/PyMySQL PyMySQL

同样的方式把安装包传到服务器上,并安装
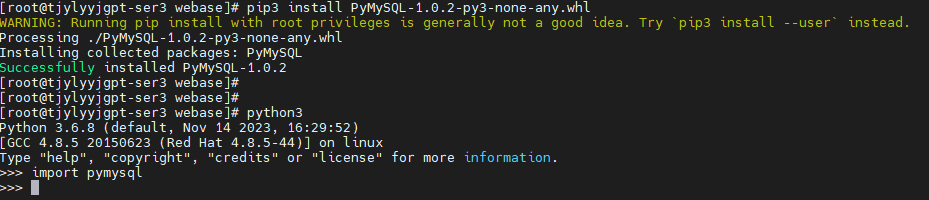
pip3 install PyMySQL-1.0.2-py3-none-any.whl
同时需要校验一下我们是否安装成功
检查服务器网络策略
网络策略检查:
- 开放WeBASE管理平台端口:检查webase-web管理平台页面的端口
webPort(默认为5000)在服务器的网络安全组中是否设置为开放。如,云服务厂商如腾讯云,查看安全组设置,为webase-web开放5000端口。若端口未开放,将导致浏览器无法访问WeBASE服务页面 - 开放节点前置端口:如果希望通过浏览器直接访问webase-front节点前置的页面,则需要开放节点前置端口
frontPort(默认5002);由于节点前置直连节点,不建议对公网开放节点前置端口,建议按需开放

可以看到我们的5000端口没有被占用
获取部署安装包
wget https://osp-1257653870.cos.ap-guangzhou.myqcloud.com/WeBASE/releases/download/v1.5.5/webase-deploy.zip
解压
unzip webase-deploy.zip
修改配置
① mysql数据库需提前安装,已安装直接配置即可,
② 修改配置文件(vi common.properties);
- 若使用可视化部署,则忽略下文,将修改
visual-deploy.properties,并进行可视化部署依赖服务的一键安装,
③ 一键部署支持使用已有链或者搭建新链。通过参数”if.exist.fisco”配置是否使用已有链,以下配置二选一即可:
- 当配置”yes”时,需配置已有链的路径
fisco.dir。路径下要存在sdk目录,sdk目录中包含ca.crt, sdk.crt, sdk.key及gm目录,gm目录中包含国密SSL所需证书,包含gmca.crt、gmsdk.crt、gmsdk.key、gmensdk.crt和gmensdk.key - 当配置”no”时,需配置节点fisco版本和节点安装个数,搭建的新链默认两个群组
注:使用国密版需要修改设置配置项encrypt.type=1。前置SDK与节点默认使用非国密SSL,如果需要使用国密SSL,需要修改设置配置项encrypt.sslType=1。
④ 服务端口不能小于1024
⑤ 部署时,修改 common.properties 配置文件
# WeBASE子系统的最新版本(v1.1.0或以上版本)
webase.web.version=v1.5.5
webase.mgr.version=v1.5.5
webase.sign.version=v1.5.5
webase.front.version=v1.5.5

#####################################################################
## 使用Docker启用Mysql服务,则需要配置以下值

# 1: enable mysql in docker
# 0: mysql run in host, required fill in the configuration of webase-node-mgr and webase-sign
docker.mysql=1

# if [docker.mysql=1], mysql run in host (only works in [installDockerAll])
# run mysql 5.6 by docker
docker.mysql.port=23306
# default user [root]
docker.mysql.password=123456

#####################################################################
## 不使用Docker启动Mysql,则需要配置以下值

# 节点管理子系统mysql数据库配置
mysql.ip=127.0.0.1
mysql.port=3306
mysql.user=dbUsername
mysql.password=dbPassword
mysql.database=webasenodemanager

# 签名服务子系统mysql数据库配置
sign.mysql.ip=localhost
sign.mysql.port=3306
sign.mysql.user=dbUsername
sign.mysql.password=dbPassword
sign.mysql.database=webasesign


# 节点前置子系统h2数据库名和所属机构
front.h2.name=webasefront
front.org=fisco

# WeBASE管理平台服务端口
web.port=5000
# 启用移动端管理平台 (0: disable, 1: enable)
web.h5.enable=1

# 节点管理子系统服务端口
mgr.port=5001
# 节点前置子系统端口
front.port=5002
# 签名服务子系统端口
sign.port=5004


# 节点监听Ip
node.listenIp=127.0.0.1
# 节点p2p端口
node.p2pPort=30300
# 节点链上链下端口
node.channelPort=20200
# 节点rpc端口
node.rpcPort=8545

# 加密类型 (0: ECDSA算法, 1: 国密算法)
encrypt.type=0
# SSL连接加密类型 (0: ECDSA SSL, 1: 国密SSL)
# 只有国密链才能使用国密SSL
encrypt.sslType=0

# 是否使用已有的链(yes/no)
if.exist.fisco=no

# 使用已有链时需配置
# 已有链的路径,start_all.sh脚本所在路径
# 路径下要存在sdk目录(sdk目录中包含了SSL所需的证书,即ca.crt、sdk.crt、sdk.key和gm目录(包含国密SSL证书,gmca.crt、gmsdk.crt、gmsdk.key、gmensdk.crt和gmensdk.key)
fisco.dir=/data/app/nodes/127.0.0.1
# 前置所连接节点,在127.0.0.1目录中的节点中的一个
# 节点路径下要存在conf文件夹,conf里存放节点证书(ca.crt、node.crt和node.key)
node.dir=node0

# 搭建新链时需配置
# FISCO-BCOS版本
fisco.version=2.9.1
# 搭建节点个数(默认两个)
node.counts=nodeCounts
这个是我的配置:
[common]

# Webase Subsystem Version (v1.1.0 or above)
webase.web.version=v1.5.5
webase.mgr.version=v1.5.5
webase.sign.version=v1.5.5
webase.front.version=v1.5.5

#####################################################################
# if use [installDockerAll] to install WeBASE by docker
# if use [installAll] or [installWeBASE], ignore configuration here

# 1: enable mysql in docker
# 0: mysql run in host, required fill in the configuration of webase-node-mgr and webase-sign
docker.mysql=1

# if [docker.mysql=1], mysql run in host (only works in [installDockerAll])
# run mysql 5.6 by docker
docker.mysql.port=3306
# default user [root]
docker.mysql.password=cetc@2024
#####################################################################

# Mysql database configuration of WeBASE-Node-Manager
mysql.ip=172.16.119.58
mysql.port=3306
mysql.user=root
mysql.password=cetc@2024
mysql.database=webasenodemanager

# Mysql database configuration of WeBASE-Sign
sign.mysql.ip=172.16.119.58
sign.mysql.port=3306
sign.mysql.user=root
sign.mysql.password=cetc@2024
sign.mysql.database=webasesign
# if docker mysql disabled[docker.mysql=0] above

# H2 database name of WeBASE-Front (docker mode ignore this)
front.h2.name=webasefront
front.org=fisco

# WeBASE-Web service port
web.port=5000
# enable WeBASE-Web overview pages for mobile phone(docker mode not support h5 yet)
# (0: disable, 1: enable)
web.h5.enable=1

# WeBASE-Node-Manager service port
mgr.port=5001

# WeBASE-Front service port
front.port=5002

# WeBASE-Sign service port
sign.port=5004

# Node listening IP
node.listenIp=172.16.119.58
# Node p2p service port
node.p2pPort=30300
# Node channel service port
node.channelPort=20200
# Node rpc service port
node.rpcPort=8545

# Encrypt type (0: standard, 1: guomi)
encrypt.type=0
# ssl encrypt type (0: standard ssl, 1: guomi ssl)
# only guomi type support guomi ssl
encrypt.sslType=0

# Use existing chain or not (yes/no)
if.exist.fisco=no

### if build new chain, [if.exist.fisco=no]
# Configuration required when building a new chain
# Fisco-bcos version
fisco.version=2.9.1
# Number of building nodes (default value: 2)
node.counts=nodeCounts

### if using exited chain, [if.exist.fisco=yes]
# The path of the existing chain, the path of the start_all.sh script
# Under the path, there should be a 'sdk' directory where the SDK certificates (ca.crt, sdk.crt, node.key and gm directory(gm ssl)) are stored
fisco.dir=/data/app/nodes/127.0.0.1
# Node directory in [fisco.dir] for WeBASE-Front to connect
# example: 'node.dir=node0' would auto change to '/data/app/nodes/127.0.0.1/node0'
# Under the path, there is a conf directory where node certificates (ca.crt, node.crt and node.key) are stored
node.dir=node0
部署
- 执行installAll命令,部署服务将自动部署FISCO BCOS节点,并部署 WeBASE 中间件服务,包括签名服务(sign)、节点前置(front)、节点管理服务(node-mgr)、节点管理前端(web)
备注:
- 部署脚本会拉取相关安装包进行部署,需保持网络畅通
- 首次部署需要下载编译包和初始化数据库,重复部署时可以根据提示不重复操作
- 部署过程中出现报错时,可根据错误提示进行操作,或根据本文档中的常见问题进行排查
- 不要用sudo执行脚本,例如
sudo python3 deploy.py installAll(sudo会导致无法获取当前用户的环境变量如JAVA_HOME)
# 部署并启动所有服务
python3 deploy.py installAll
部署完成后可以看到deploy has completed的日志:
$ python3 deploy.py installAll
...
============================================================
              _    _     ______  ___  _____ _____
             | |  | |    | ___ \/ _ \/  ___|  ___|
             | |  | | ___| |_/ / /_\ \ `--.| |__
             | |/\| |/ _ | ___ |  _  |`--. |  __|
             \  /\  |  __| |_/ | | | /\__/ | |___
              \/  \/ \___\____/\_| |_\____/\____/
...
...
============================================================
==============      deploy  has completed     ==============
============================================================
==============    webase-web version  v1.5.5        ========
==============    webase-node-mgr version  v1.5.5   ========
==============    webase-sign version  v1.5.3       ========
==============    webase-front version  v1.5.5      ========
============================================================
服务部署后,需要对各服务进行启停操作,可以使用以下命令:
# 一键部署
部署并启动所有服务        python3 deploy.py installAll
停止一键部署的所有服务    python3 deploy.py stopAll
启动一键部署的所有服务    python3 deploy.py startAll
# 各子服务启停
启动FISCO-BCOS节点:      python3 deploy.py startNode
停止FISCO-BCOS节点:      python3 deploy.py stopNode
启动WeBASE-Web:          python3 deploy.py startWeb
停止WeBASE-Web:          python3 deploy.py stopWeb
启动WeBASE-Node-Manager: python3 deploy.py startManager
停止WeBASE-Node-Manager: python3 deploy.py stopManager
启动WeBASE-Sign:        python3 deploy.py startSign
停止WeBASE-Sign:        python3 deploy.py stopSign
启动WeBASE-Front:        python3 deploy.py startFront
停止WeBASE-Front:        python3 deploy.py stopFront
# 可视化部署
部署并启动可视化部署的所有服务  python3 deploy.py installWeBASE
停止可视化部署的所有服务  python3 deploy.py stopWeBASE
启动可视化部署的所有服务  python3 deploy.py startWeBASE
当然啦,从前面的解压
unzip webase-deploy.zip
这步开始,确实是服务器在联网环境下的,如果说,你遇到的环境就是离线的,不能联网的,我这里分享一下我个人在完全离线环境下安装的一个方法,给大家相互交流学习
准备好安装包
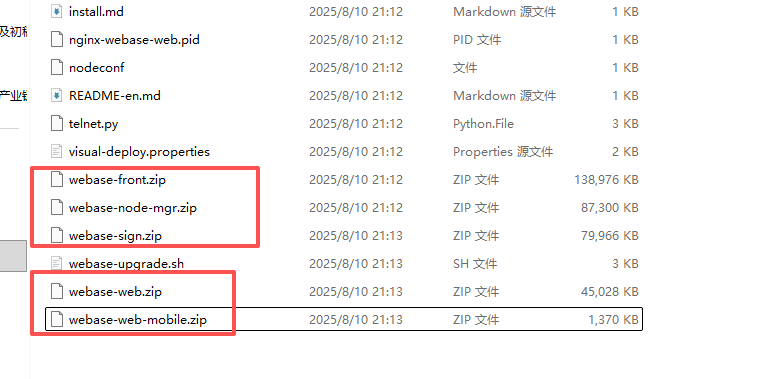
这几个安装包是在一个联网的环境下用一键部署的方式下载的,或者到官网找到相应的下载地址下载也可以
还有一个联盟链的安装包
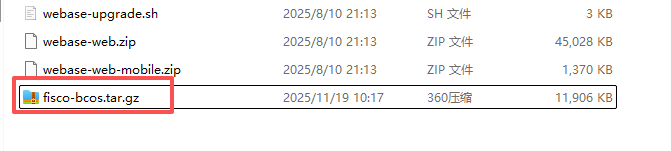
下载地址:https://github.com/FISCO-BCOS/FISCO-BCOS/releases/download/v2.11.0/fisco-bcos.tar.gz
大家根据自己的版本号下载不同的包,把这些包都上传到离线服务器的webase-deploy目录下,
独立安装一条多节点的联盟链
解压联盟链的安装包
tar -xzf fisco-bcos.tar.gz
生成4节点的联盟链
bash build_chain.sh -l 127.0.0.1:4 -p 30300,20200,8545 -e ./fisco-bcos

在这个命令中:

-l 127.0.0.1:4:表示在本地搭建4节点联盟链。

-p 30300,20200,8545:分别指定了P2P、Channel和JSON-RPC服务的起始端口。

-e ./fisco-bcos:关键所在,指定了预编译二进制文件的路径,脚本会直接使用它
这个联盟链生成在./webase-deploy/nodes
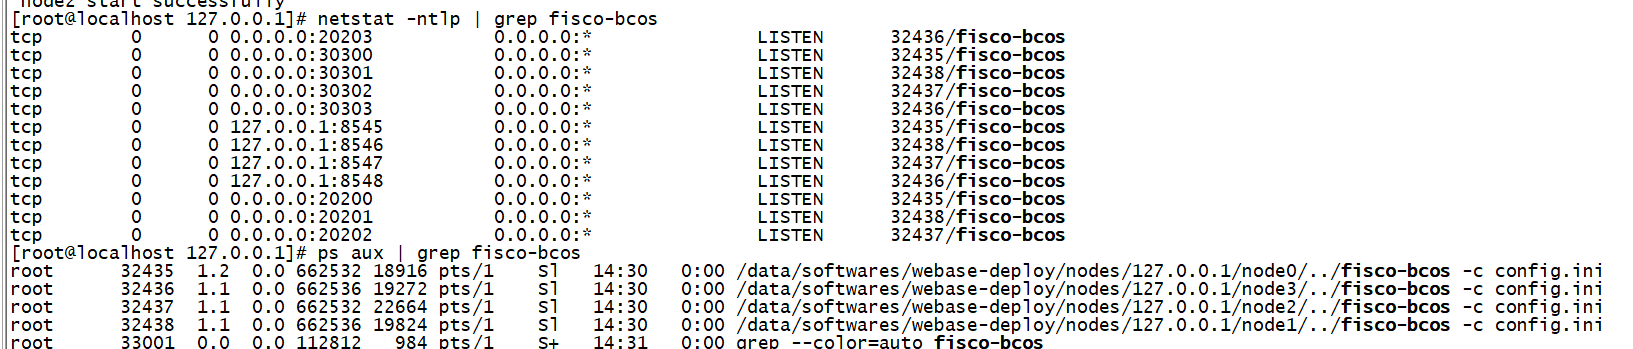
启动联盟链
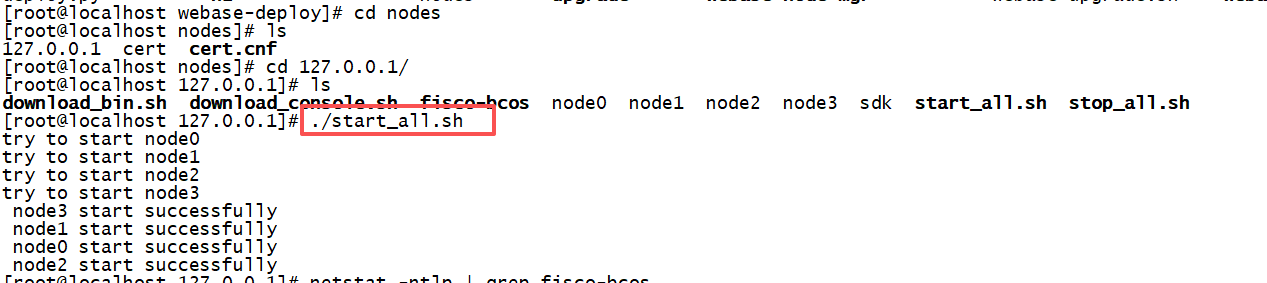
通过这两个命令来监控联盟链启动的状态
netstat -ntlp | grep fisco-bcos

ps aux | grep fisco-bcos
修改配置文件common.properties

上面改成yes,表示我们已经部署好联盟链,下面是把联盟链的目录配置进去
回到./webase-deploy目录下执行
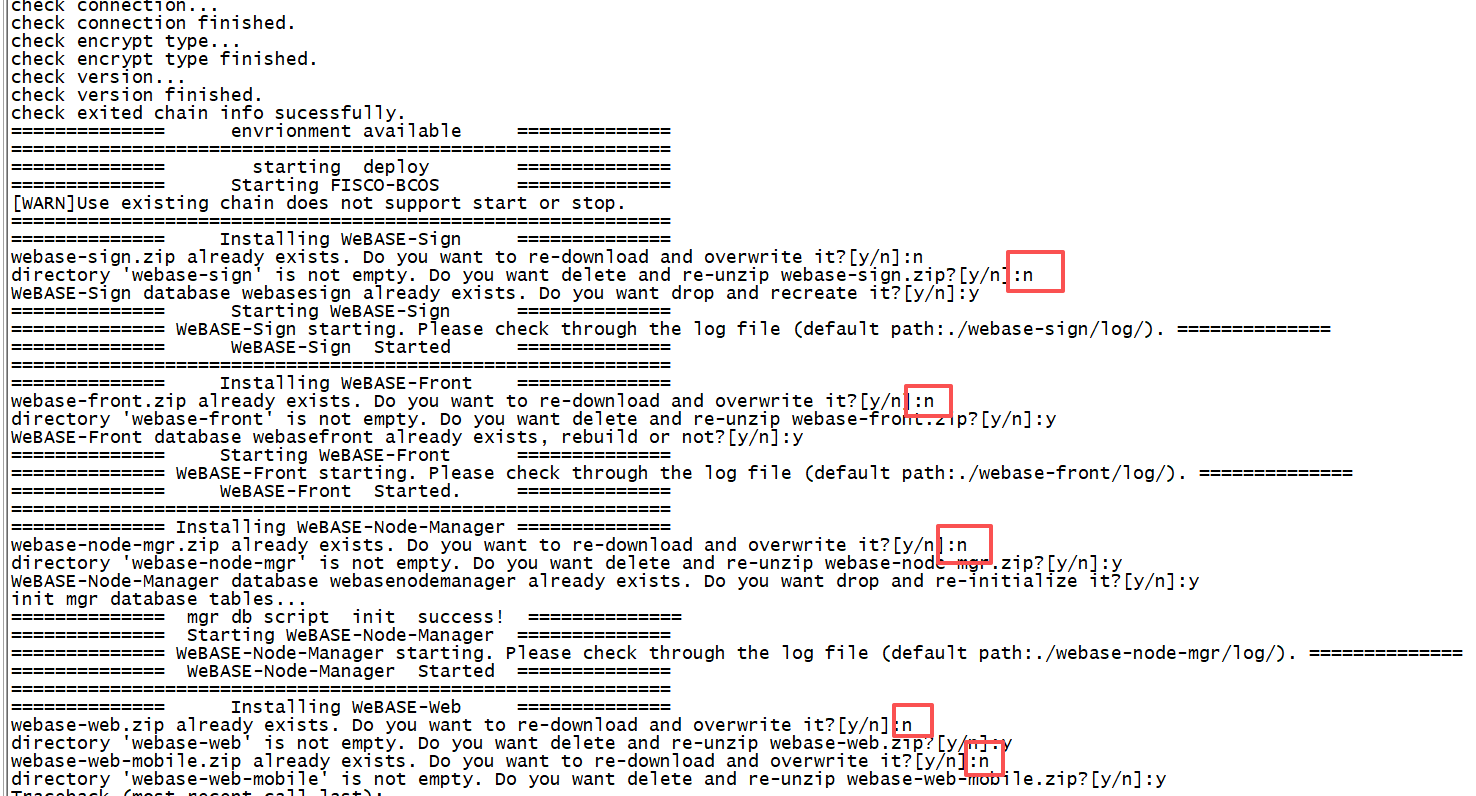
python3 deploy.py installAll
这里需要注意了,提示压缩包已存在,是否要删除重新下载,一定要选择否,因为我们是离线环境,不能联网下载,其他的可以选择是
在这个安装过程中,遇到两个环境缺失依赖包和一个nginx权限的问题,缺失依赖包问题描述如下:
Traceback (most recent call last):
  File "deploy.py", line 127, in <module>
    do()
  File "deploy.py", line 25, in do
    commBuild.do()
  File "/data/softwares/webase-deploy/comm/build.py", line 23, in do
    installWeb()
  File "/data/softwares/webase-deploy/comm/build.py", line 343, in installWeb
    changeWebConfig()
  File "/data/softwares/webase-deploy/comm/build.py", line 311, in changeWebConfig
    res2 = doCmd("sudo " + res["output"] + " -t ")
  File "/data/softwares/webase-deploy/comm/utils.py", line 111, in doCmd
    raise Exception("execute cmd  error ,cmd : {}, status is {} ,output is {}".format(cmd,status, output))
Exception: execute cmd  error ,cmd : sudo /usr/sbin/nginx -t , status is 127 ,output is /usr/sbin/nginx: error while loading shared libraries: libssl.so.1.1: cannot open shared object file: No such file or directory


Traceback (most recent call last):
  File "deploy.py", line 127, in <module>
    do()
  File "deploy.py", line 25, in do
    commBuild.do()
  File "/data/softwares/webase-deploy/comm/build.py", line 23, in do
    installWeb()
  File "/data/softwares/webase-deploy/comm/build.py", line 343, in installWeb
    changeWebConfig()
  File "/data/softwares/webase-deploy/comm/build.py", line 311, in changeWebConfig
    res2 = doCmd("sudo " + res["output"] + " -t ")
  File "/data/softwares/webase-deploy/comm/utils.py", line 111, in doCmd
    raise Exception("execute cmd  error ,cmd : {}, status is {} ,output is {}".format(cmd,status, output))
Exception: execute cmd  error ,cmd : sudo /usr/sbin/nginx -t , status is 127 ,output is /usr/sbin/nginx: error while loading shared libraries: libprofiler.so.0: cannot open shared object file: No such file or directory
这两个问题解决起来,思路跟前面一样,到一个有网络的服务器,把对应的rpm包下载过来
yumdownloader install  openssl11-libs

yumdownloader install  gperftools-libs

然后把这三个rpm包上传到我们的离线服务器上,执行命令
rpm -ivh *.rpm --force --nodeps
还有一个nginx权限的问题:
Traceback (most recent call last):
  File "deploy.py", line 127, in <module>
    do()
  File "deploy.py", line 25, in do
    commBuild.do()
  File "/data/softwares/webase-deploy/comm/build.py", line 23, in do
    installWeb()
  File "/data/softwares/webase-deploy/comm/build.py", line 343, in installWeb
    changeWebConfig()
  File "/data/softwares/webase-deploy/comm/build.py", line 311, in changeWebConfig
    res2 = doCmd("sudo " + res["output"] + " -t ")
  File "/data/softwares/webase-deploy/comm/utils.py", line 111, in doCmd
    raise Exception("execute cmd  error ,cmd : {}, status is {} ,output is {}".format(cmd,status, output))
Exception: execute cmd  error ,cmd : sudo /usr/sbin/nginx -t , status is 1 ,output is nginx: [emerg] getpwnam("nginx") failed in /etc/nginx/nginx.conf:5
nginx: configuration file /etc/nginx/nginx.conf test failed
这个问题解决起来也不难,这个错误表明 Nginx 配置中指定的 nginx 用户不存在。这是一个常见的权限配置问题。
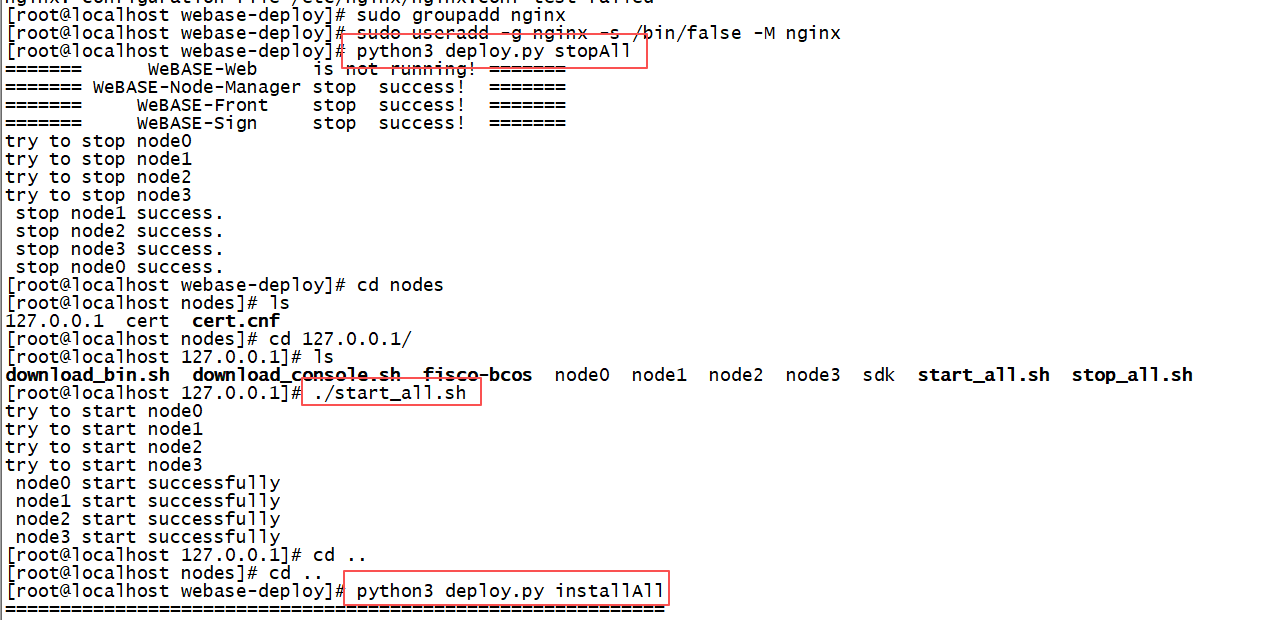
# 创建 nginx 用户和组
sudo groupadd nginx
sudo useradd -g nginx -s /bin/false -M nginx

# 验证用户是否创建成功
id nginx
解决完以上问题后,我们需要把所有服务停止,先把联盟链启动了,再执行python3 deploy.py installAll重新安装
[root@localhost webase-deploy]# python3 deploy.py installAll
============================================================

              _    _     ______  ___  _____ _____
             | |  | |    | ___ \/ _ \/  ___|  ___|
             | |  | | ___| |_/ / /_\ \ `--.| |__
             | |/\| |/ _ | ___ |  _  |`--. |  __|
             \  /\  |  __| |_/ | | | /\__/ | |___
              \/  \/ \___\____/\_| |_\____/\____/

============================================================
==============      checking envrionment      ==============
check git...
check finished sucessfully.
check openssl...
check finished sucessfully.
check curl...
check finished sucessfully.
check wget...
check finished sucessfully.
check dos2unix...
check finished sucessfully.
check host free memory and cpu core...
check finished sucessfully.
check nginx...
check finished sucessfully.
check java...
check finished sucessfully.
check WeBASE-Web port...
check finished sucessfully.
check WeBASE-Node-Manager port...
check finished sucessfully.
check WeBASE-Sign port...
check finished sucessfully.
check WeBASE-Front port...
check finished sucessfully.
check database connection...
check finished sucessfully.
check database connection...
check finished sucessfully.
check mgr database user/password...
check finished sucessfully.
check sign database user/password...
check finished sucessfully.
check mgr mysql version...
node-mgr's mysql version is [5.7.36]
check finished sucessfully.
check sign mysql version...
sign's mysql version is [5.7.36]
check finished sucessfully.
check exited chain info...
check connection...
check connection finished.
check encrypt type...
check encrypt type finished.
check version...
check version finished.
check exited chain info sucessfully.
==============      envrionment available     ==============
============================================================
==============        starting  deploy        ==============
==============      Starting FISCO-BCOS       ==============
[WARN]Use existing chain does not support start or stop.
============================================================
==============     Installing WeBASE-Sign     ==============
webase-sign.zip already exists. Do you want to re-download and overwrite it?[y/n]:n
directory 'webase-sign' is not empty. Do you want delete and re-unzip webase-sign.zip?[y/n]:y
WeBASE-Sign database webasesign already exists. Do you want drop and recreate it?[y/n]:y
==============      Starting WeBASE-Sign      ==============
============== WeBASE-Sign starting. Please check through the log file (default path:./webase-sign/log/). ==============
==============      WeBASE-Sign  Started      ==============
============================================================
==============     Installing WeBASE-Front    ==============
webase-front.zip already exists. Do you want to re-download and overwrite it?[y/n]:n
directory 'webase-front' is not empty. Do you want delete and re-unzip webase-front.zip?[y/n]:y
WeBASE-Front database webasefront already exists, rebuild or not?[y/n]:y
==============     Starting WeBASE-Front      ==============
============== WeBASE-Front starting. Please check through the log file (default path:./webase-front/log/). ==============
==============     WeBASE-Front  Started.     ==============
============================================================
============== Installing WeBASE-Node-Manager ==============
webase-node-mgr.zip already exists. Do you want to re-download and overwrite it?[y/n]:n
directory 'webase-node-mgr' is not empty. Do you want delete and re-unzip webase-node-mgr.zip?[y/n]:y
WeBASE-Node-Manager database webasenodemanager already exists. Do you want drop and re-initialize it?[y/n]:y
init mgr database tables...
==============  mgr db script  init  success!  ==============
==============  Starting WeBASE-Node-Manager  ==============
============== WeBASE-Node-Manager starting. Please check through the log file (default path:./webase-node-mgr/log/). ==============
==============  WeBASE-Node-Manager  Started  ==============
============================================================
==============      Installing WeBASE-Web     ==============
webase-web.zip already exists. Do you want to re-download and overwrite it?[y/n]:n
directory 'webase-web' is not empty. Do you want delete and re-unzip webase-web.zip?[y/n]:y
webase-web-mobile.zip already exists. Do you want to re-download and overwrite it?[y/n]:n
directory 'webase-web-mobile' is not empty. Do you want delete and re-unzip webase-web-mobile.zip?[y/n]:y
onelineOutput: nginx: the configuration file /etc/nginx/nginx.conf syntax is ok
Defualt nginx config path: /etc/nginx
==============      Starting WeBASE-Web       ==============
==============      WeBASE-Web Started        ==============
==============  Init Front for Mgr start...   ==============
== 100%
==============  Init Front for Mgr end...     ==============
============================================================
==============      deploy  has completed     ==============
============================================================
==============    webase-web version  v1.5.5        ========
==============    webase-node-mgr version  v1.5.5   ========
==============    webase-sign version  v1.5.5       ========
==============    webase-front version  v1.5.5      ========
============================================================
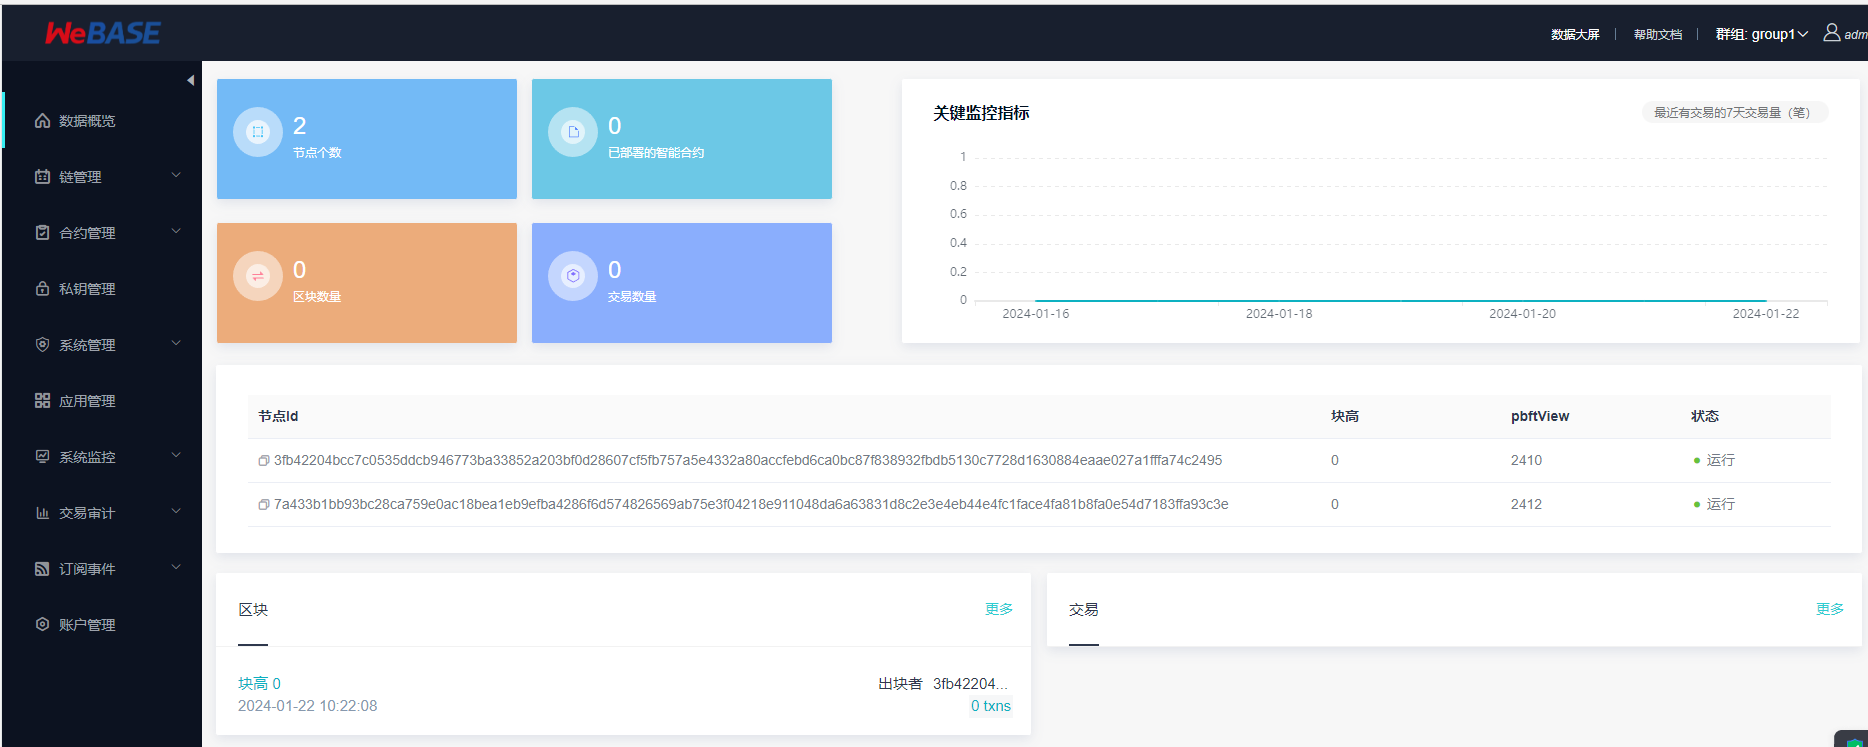
访问
WeBASE管理平台:
- 一键部署完成后,打开浏览器(Chrome Safari或Firefox)访问
http://{deployIP}:{webPort}
示例:http://localhost:5000
备注:
- 部署服务器IP和管理平台服务端口需对应修改,网络策略需开通
- 使用云服务厂商的服务器时,需要开通网络安全组的对应端口。如开放webase使用的5000端口
- WeBASE管理平台使用说明请查看使用手册(获取WeBASE管理平台默认账号和密码,并初始化系统配置)
- 默认账号为
admin,默认密码为Abcd1234。首次登陆要求重置密码 - 添加节点前置WeBASE-Front到WeBASE管理平台;一键部署时,节点前置与节点管理服务默认是同机部署,添加前置则填写IP为
127.0.0.1,默认端口为5002。参考上文中common.properties的配置项front.port={frontPort}
- 默认账号为
- 检查节点前置是否启动,可以通过访问
http://{frontIp}:{frontPort}/WeBASE-Front(默认端口5002);访问前,确保服务端已对本地机器开放端口,如开放front的5002端口。(不建议节点前置的端口对公网开放访问权限,应对部分机器IP按需开放)

 浙公网安备 33010602011771号