vue实战_从头开始搭建vue工程
写在前面:vue工程入口文件分析
/index.html,/src/main.js,/src/APP.vue
/index.html文件示例:


<!DOCTYPE html>
<html>
<head>
    <meta charset="utf-8">
    <meta http-equiv="X-UA-Compatible" content="IE=edge,chrome=1">
    <meta name="renderer" content="webkit">
    <meta name="viewport" content="width=device-width, initial-scale=1, maximum-scale=1, user-scalable=no">
    <title>Juicy</title>
</head>
<body>
<script src=<%= htmlWebpackPlugin.options.path %>jquery.min.js></script>
<script src=<%= htmlWebpackPlugin.options.path %>tinymce/tinymce.min.js></script>
<div id="app"></div>
<!-- built files will be auto injected -->
</body>

</html>
/src/App.vue文件示例
<template>
    <div id="app">
        <router-view></router-view>
    </div>
</template>
<script>
export default {
    name: 'app'
};
</script>
<style>
</style>
一个简单的main.js示例(通过vue init webpack [project]新生成的)
import Vue from 'vue'
import App from './App'
import router from './router'
import store from './store/index.js';
import router from './router'

// 以下两种方法是类似的
// el或者$mount的作用是提供挂载点,两者必须有一个
// template,render的作用是提供模版,两者必须有一个,模版将会替换挂载的元素,挂载元素的内容将会被忽略,除非模版的内容有分发插槽
// 如果render函数存在,则vue构造函数不会从template选择中编译渲染函数
// new Vue({
//   el: '#app', // 对应应该是index.html中的#app元素
//   template: '<App/>',
//   components: {App},
//   store,
//   router
// });

new Vue({
  router,
  store,
  render: h => h(App)
}).$mount('#app');
为了理解着三个文件是如何联系起来的,先看webpack的配置:
  entry: {
    app: './src/main.js'
  },
  output: {
    path: config.build.assetsRoot,
    filename: '[name].js',
    publicPath: process.env.NODE_ENV === 'production' ?
      config.build.assetsPublicPath :
      config.dev.assetsPublicPath
  },
  new HtmlWebpackPlugin({
      filename: config.build.index,
      template: 'index.html',
      inject: true,
      minify: {
        removeComments: true,
        collapseWhitespace: true,
        removeAttributeQuotes: true,
        favicon: 'liantong.ico'
        // more options:
        // https://github.com/kangax/html-minifier#options-quick-reference
      },
      // necessary to consistently work with multiple chunks via CommonsChunkPlugin
      chunksSortMode: 'dependency'
    }),
可见
1)main.js是整个vue工程的入口文件,由它引入各种依赖和模块
2)index.html提供最终生成的html的模版文件(其中的#app元素提供了挂载点?)
html-webpack-plugin会帮助自动生成一个html文件,提供了title(设置生成的html文件标题),filename:生成文件名,template选项用于指定模版文件来生成特定的html文件
3)根据main.js中new vue()的配置项可知,app.vue其实是提供了渲染的模版,一般情况下,其中包含的router-view元素提供了路由最顶层的出口,渲染最高级路由匹配到的组件,当然,其他被渲染的组件也可以包含自己的router-view嵌套构成嵌套路由。
一、项目初始化
执行如下命令:
vue init webpack [projectName]
npm install
二、必要的依赖安装
一般项目中都会安装vue-router(默认已经安装),axios,并提供对sass的支持。执行如下命令:
npm install --save-dev node-sass
npm install --save-dev sass-loader
npm install --save axios
npm install --save vuex
其他常用的依赖,请视实际情况安装。
比如:
1.element-ui
npm install --save element-ui
并在main.js中写入如下内容
import Vue from 'vue'
import App from './App'
import router from './router'
import ElementUI from 'element-ui';
import 'element-ui/lib/theme-chalk/index.css';

Vue.config.productionTip = false

// 使用相关的插件
Vue.use(ElementUI);

/* eslint-disable no-new */
new Vue({
  el: '#app',
  router,
  render: h => h(App)
})
2. js-cookie
npm install --save js-cookie
3.nprogress
npm install --save nprogress
并在main.js中写入
import Vue from 'vue'
import App from './App'
import router from './router'
import ElementUI from 'element-ui';
import 'element-ui/lib/theme-chalk/index.css';
import NProgress from 'nprogress'; // Progress 进度条
import 'nprogress/nprogress.css'; // Progress 进度条 样式

Vue.config.productionTip = false

// 使用相关的插件
Vue.use(ElementUI);


// 路由跳转控制
router.beforeEach((to, from, next) => {
  NProgress.start();
  // 中间可以是一系列的路由跳转控制逻辑
  //...

  next();
});
router.afterEach(() => {
  NProgress.done();
});
/* eslint-disable no-new */
new Vue({
  el: '#app',
  router,
  render: h => h(App)
})
三、项目目录结构搭建
├── build                      // 构建相关
├── config                     // 配置相关
├── src                        // 源代码
│   ├── api                    // 所有请求,建议将api与views两个模块一一对应,便于维护
│   ├── assets                 // 主题 字体等静态资源,如iconfont.js
│   ├── components             // 全局公用组件,比如上传组件,富文本等
│   ├── directive              // 全局指令
│   ├── filtres                // 全局 filter
│   ├── icons                  // 项目所有 svg icons
│   ├── lang                   // 国际化 language
│   ├── mock                   // 项目mock 模拟数据
│   ├── router                 // 路由
│   ├── store                  // 全局 store管理
│   ├── styles                 // 全局样式
│   ├── utils                  // 全局公用方法,比如axios的封装等
│   ├── vendor                 // 公用vendor
│   ├── views                   // view,相关页面
│   ├── App.vue                // 入口页面
│   ├── main.js                // 入口 加载组件 初始化等
│   └── permission.js          // 权限管理
├── static                     // 第三方不打包资源,jquery.js等,该目录也asserts目录的区别就在于不会通过诸如vue-loader等加载器的处理
│   └── Tinymce                // 富文本
├── .babelrc                   // babel-loader 配置
├── eslintrc.js                // eslint 配置项
├── .gitignore                 // git 忽略项
├── favicon.ico                // favicon图标
├── index.html                 // html模板
└── package.json               // package.json
四、axios封装
import axios from 'axios'
import { Message } from 'element-ui'
import store from '@/store'
import { getToken } from '@/utils/auth'

// 创建axios实例
const service = axios.create({
  baseURL: process.env.BASE_API, // api的base_url
  timeout: 5000 // 请求超时时间
})

// request拦截器
service.interceptors.request.use(config => {
  // Do something before request is sent
  if (store.getters.token) {
    config.headers['X-Token'] = getToken() // 让每个请求携带token--['X-Token']为自定义key 请根据实际情况自行修改
  }
  return config
}, error => {
  // Do something with request error
  console.log(error) // for debug
  Promise.reject(error)
})

// respone拦截器
service.interceptors.response.use(
  response => response,
  /**
  * 下面的注释为通过response自定义code来标示请求状态,当code返回如下情况为权限有问题,登出并返回到登录页
  * 如通过xmlhttprequest 状态码标识 逻辑可写在下面error中
  */
  //  const res = response.data;
  //     if (res.code !== 20000) {
  //       Message({
  //         message: res.message,
  //         type: 'error',
  //         duration: 5 * 1000
  //       });
  //       // 50008:非法的token; 50012:其他客户端登录了;  50014:Token 过期了;
  //       if (res.code === 50008 || res.code === 50012 || res.code === 50014) {
  //         MessageBox.confirm('你已被登出,可以取消继续留在该页面,或者重新登录', '确定登出', {
  //           confirmButtonText: '重新登录',
  //           cancelButtonText: '取消',
  //           type: 'warning'
  //         }).then(() => {
  //           store.dispatch('FedLogOut').then(() => {
  //             location.reload();// 为了重新实例化vue-router对象 避免bug
  //           });
  //         })
  //       }
  //       return Promise.reject('error');
  //     } else {
  //       return response.data;
  //     }
  error => {
    console.log('err' + error)// for debug
    Message({
      message: error.message,
      type: 'error',
      duration: 5 * 1000
    })
    return Promise.reject(error)
  })

export default service
具体使用:
import request from '@/utils/request'

//使用
export function getInfo(params) {
  return request({
    url: '/user/info',
    method: 'get',
    params
  });
}
这里的api是通过env环境变量动态切换的,如果以后线上出现了bug,我们只需配置一下 @/config/dev.env.js 再重启一下服务,就能在本地模拟线上的环境了。
module.exports = {
    NODE_ENV: '"development"',
    BASE_API: '"https://api-dev"', //修改为'"https://api-prod"'就行了
    APP_ORIGIN: '"https://wallstreetcn.com"'
}
五、数据mock
简单的本地模拟可以使用mock.js生成响应数据以及拦截请求
1.安装mockjs
npm install --save mockjs
2.模拟后台的返回数据(可以是函数,也可以是模版)
目录:@/mock/login.js
const userData = {
  role: ['admin'],
  token: 'admin',
  introduction: '我是超级管理员',
  avatar: 'https://wpimg.wallstcn.com/f778738c-e4f8-4870-b634-56703b4acafe.gif',
  name: 'Super Admin'
};

export default {
  login: function(config) {
    console.log('config', config);
    const {
      username,
      password
    } = JSON.parse(config.body);
    if (username === 'admin' && password === '123456') {
      return userData;
    } else {
      return Promise.reject(new Error('用户名或密码错误'));
    }
  },
  logout: function() {
    return 'success';
  }
};
3.定义相关的拦截规则
目录:@/mock/index.js
import Mock from 'mockjs';
import loginAPI from './login.js';

Mock.mock(/\/api\/login/, 'post', loginAPI.login);
Mock.mock(/\/api\/logout/, 'post', loginAPI.logout);
4.实现相关api
目录:@/api/login.js
import axios from '@/utils/fetch.js';

export function login() {
  return axios.request({
    method: 'POST',
    data: {
      'username': 'admin',
      'password': '123456'
    },
    url: '/api/login'
  });
};

export function logout() {
  return axios.request({
    url: '/api/logout',
    method: 'post'
  });
};
5.请求调用
在对应页面.vue文件中调用
export default {
  name: 'App',
  created: function() {
    login().then((res) => {
      console.log('loginRes', res);
    })
  }
}
</script>
可以看到,应当发送的请求被拦截,并返回Mock规则函数中定义的数据,注意这时候浏览器的network选项卡是看不到相关请求的,这也说明了请求已经被拦截
更规范的接口文档管理+数据mock可以使用rap+mock.js,详情请参见rap官方网站的视频教程
六、ICON图标引入
以阿里的iconfont图标库为例,一般icon图标有三种引入方式:
unicode引用:浏览器兼容性好,但可读性不好,且不支持多色图标
font-class引用:目前主流,同样不支持多色图标
svg方式引用:未来发展方向,目前浏览器支持到IE9+,支持多色图标,扩展和缩放条件下不会失真
下面分别介绍font-class方式引入和svg方式引入
1)font-class方式引入
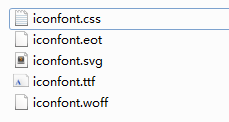
A.将iconfont网站下载的下列资源文件都放置到相关目录下,如@/icons
B.在main.js中引入样式文件iconfont.css
import Vue from 'vue'
import App from './App'
import router from './router'
import ElementUI from 'element-ui';
import 'element-ui/lib/theme-chalk/index.css';
import NProgress from 'nprogress'; // Progress 进度条
import 'nprogress/nprogress.css'; // Progress 进度条 样式
import '@/mock/index.js'; // 加载项目中所有的mock借口模拟
// 引入icon对应的样式文件
import '@/icons/iconfont.css';

Vue.config.productionTip = false

// 使用相关的插件
Vue.use(ElementUI);

// 路由跳转控制
router.beforeEach((to, from, next) => {
  NProgress.start();
  // 中间可以是一系列的路由跳转控制逻辑
  // ...
  next();
});
router.afterEach(() => {
  NProgress.done();
});
/* eslint-disable no-new */
new Vue({
  el: '#app',
  router,
  render: h => h(App)
})
C.直接在相关页面中使用相关的 样式类即可
<template>
<div id="app">
  <img src="./assets/logo.png">
  <i class="iconfont icon-emoji-1"></i>
  <router-view/>
</div>
</template>

<script>
export default {
  name: 'App'
}
</script>

<style>
#app {
  font-family: 'Avenir', Helvetica, Arial, sans-serif;
  -webkit-font-smoothing: antialiased;
  -moz-osx-font-smoothing: grayscale;
  text-align: center;
  color: #2c3e50;
  margin-top: 60px;
}
</style>
2)svg方式引入
方法一:通过iconfont.js引入
A.将iconfont网站下载的资源文件iconfont.js放置在相关目录下。如@/icons.
B.创建icon-svg公共组件
<template lang="html">
  <svg class="icon-svg" aria-hidden="true">
    <use :xlink:href="iconName"></use>
  </svg>
</template>

<script>
export default {
  name: 'icon-svg',
  props: {
    iconClass: {
      type: String,
      requried: true
    }
  },
  computed: {
    iconName() {
      return `#icon-${this.iconClass}`;
    }
  }
}
</script>

<style lang="scss" scoped>
.icon-svg {
    width: 1em;
    height: 1em;
    vertical-align: -0.15em;
    fill: currentColor;
    overflow: hidden;
}
</style>
C.在main.js中引入iconfont.js,并全局注册IconSvg组件
import IconSvg from '@/components/iconSvg/index.vue'; // 加载图标组件
import '@/icons/iconfont.js'; // 引入svg图标对应的symbol js代码

Vue.config.productionTip = false
// 全局注册svg组件
Vue.component('icon-svg', IconSvg);
D.在相关页面使用即可
<template>
<div id="app">
  <img src="./assets/logo.png">
  <div>
    <icon-svg icon-class="emoji-1"></icon-svg>
  </div>
  <router-view/>
</div>
</template>

<script>
export default {
  name: 'App'
}
</script>

<style>
#app {
  font-family: 'Avenir', Helvetica, Arial, sans-serif;
  -webkit-font-smoothing: antialiased;
  -moz-osx-font-smoothing: grayscale;
  text-align: center;
  color: #2c3e50;
  margin-top: 60px;
}
</style>
这种方法存在的问题是所有的svg-sprite都是通过iconfont的iconfont.js生成的,所有的图标icon都不直观,如果没有网站提供的demo.html完全不知道哪个图标对应哪个名称,并且每次增删图标都只能整个js文件一起替换,也做不到按需加载。
方法二、直接引入.svg文件
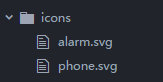
A.从iconfont网站下载所需图标的svg资源(分图标单独下载),统一放置在项目相关文件夹下,如@/icons,可以修改其命名为更语义化的形式
B.安装svg-sprite-loader依赖,并且修改build/webpack.base.conf.js
npm install -D svg-sprite-loader
vue-cli默认的webpack配置,svg文件使用url-loader进行加载,如下所示:
//默认`vue-cli` 对svg做的处理,正则匹配后缀名为.svg的文件,匹配成功之后使用 url-loader 进行处理。
 {
    test: /\.(png|jpe?g|gif|svg)(\?.*)?$/,
    loader: 'url-loader',
    options: {
      limit: 10000,
      name: utils.assetsPath('img/[name].[hash:7].[ext]')
    }
}
解决方案有两种,最简单的可以将test中的svg去掉,但是这样做很不友善,因为不能确保所有svg都是用来做icon的,有的可能确实是用来作为图片资源的。因此安全合理的做法是使用exclude和include,让svg-sprite-loader仅仅处理指定文件夹下的svg,如下所示:
  {
        test: /\.(png|jpe?g|gif|svg)(\?.*)?$/,
        loader: 'url-loader',
        exclude: [resolve('src/icons')],
        options: {
          limit: 10000,
          name: utils.assetsPath('img/[name].[hash:7].[ext]')
        }
      },
      {
        test: /.svg$/,
        loader: 'svg-sprite-loader',
        include: [resolve('src/icons')],
        options: {
          symbolId: 'icon-[name]'
        }
      },
C.在main.js中添加如下代码实现icons目录下的svg文件批量自动导入(这里用到了webpack的require.context,具体用法可以自行百度),这样以后增删改图标就直接操作此文件夹下的对应的图标文件就行了。
// 自动导入icons下的所有svg
const req = require.context('./icons', false, /\.svg$/);
const requrieAll = reqContext => reqContext.keys().map(reqContext);
requrieAll(req);
// 当然,如果你想的话,也可以一个个引入单个svg文件
// import '@/icons/alarm.svg';
D.创建icon-svg公共组件(此步骤和通过iconfont.js方式引入的方法一致)
<template lang="html">
  <svg class="icon-svg" aria-hidden="true">
    <use :xlink:href="iconName"></use>
  </svg>
</template>

<script>
export default {
  name: 'icon-svg',
  props: {
    iconClass: {
      type: String,
      requried: true
    }
  },
  computed: {
    iconName() {
      return `#icon-${this.iconClass}`;
    }
  }
}
</script>

<style lang="scss" scoped>
.icon-svg {
    width: 1em;
    height: 1em;
    vertical-align: -0.15em;
    fill: currentColor;
    overflow: hidden;
}
</style>
在main.js中全局注册icon-svg组件
// 注册icon全局插件
Vue.component('icon-svg', IconSvg);
E.在相关文件中直接使用就好啦
<template>
<div id="app">
  <img src="./assets/logo.png">
  <icon-svg icon-class="alarm"></icon-svg>
  <router-view/>
</div>
</template>

<script>
export default {
  name: 'App'
}
</script>

<style>
#app {
  font-family: 'Avenir', Helvetica, Arial, sans-serif;
  -webkit-font-smoothing: antialiased;
  -moz-osx-font-smoothing: grayscale;
  text-align: center;
  color: #2c3e50;
  margin-top: 60px;
}
</style>
七、静态资源的引入位置
关于webpack的资源打包与构建,首先搞清楚几个核心概念与整体流程:
Entry: 入口,webpakc执行构建的第一步将从entry开始,可抽象为输入。在vue-cli搭建的项目中,这个入口通常是main.js
Module:模块,在webpack中一切皆模块,包括js/css等文件,图片,其他静态资源等等。一个模块对应着一个文件,wepack会从配置的entry开始递归找出所有依赖的模块。
Chunk:代码块,一个chunk由多个模块组合而成,用于代码合并与分割。同一个入口通常打包生成一个chunk.
loader:模块转换器,用于将模块原内容按照需求转换为新内容。
plugin:扩展插件,在webpack构建流程的特定时机注入扩展逻辑来改变构建结果或想做的事情。
output: 输出结果,在webpack经过系列处理并得到最终想要的代码后输出结果。在vue-cli搭建的工程中,通常是app.js
webpack工作的流程如下:
webpack启动后会从entry里引入的module开始递归解析出所有entry依赖的module,每找到一个module,就会根据配置的loader找到对应的转换规则,对module进行转换后,再解析出当前module依赖的module。这些模块会以entry为单位进行分组,一个entry和其所有依赖的module被分到一个组,也就是一个chunk。最后webpack会把所有chunk转换为文件输出,在整个流程中webpack会在恰当的时机执行plugin中的逻辑。
理解上述核心概念和流程后,对webpack如何打包资源文件应当容易了解:
1)在模版文件index.html中直接引入
这里引入的文件不会被webpack构建与加载流程转换,因此只是原样引入,通常这些静态文件放置在/static目录下。
<!DOCTYPE html>
<html>
  <head>
    <meta charset="utf-8">
    <title>2imis</title>
    <link rel="stylesheet" href="./static/reset.css">
  </head>
  <body>
    <div id="app"></div>
    <!-- built files will be auto injected -->
<script src=<%= htmlWebpackPlugin.options.path %>jquery.min.js></script>
<script src=<%= htmlWebpackPlugin.options.path %>tinymce/tinymce.min.js></script>
  </body>
</html>
2)在main.js中引入
3)在app.vue中引入
这两个地方都可以引入全局的样式文件,静态资源等。不同的是,对应的加载器处理方式可能有所不同,详细可见webpack配置:
{ test: /\.vue$/,
                loader: 'vue-loader',
                options: vueLoaderConfig
            },
            {
                test: /\.js$/,
                loader: 'babel-loader?cacheDirectory',
                include: [resolve('src'), resolve('test')]
            },

 浙公网安备 33010602011771号