
1、编译源码
1.1安装makeme工具
下载makeme源码:去网址https://embedthis.com/makeme/download.html下载makeme源码,我下载的版本是makeme-0.10.4-src.tgz。
编译及安装makeme(我的安装位置/usr/local/src):
第一步解压:tar -zxvf makeme-0.10.4-src.tgz
第二步编译:make
第三步安装:make install
第四步检查是否安装成功:执行"me --version",显示makeme版本成功即安装成功。
root@ubuntu:/usr/local/src# me --version
0.10.4
1.2安装Appweb
i)下载Appweb源码:去网址:https://embedthis.com/appweb/download.html下载Appweb源码,我下载的版本是appweb-6.2.2-src.tgz。
编译及安装Appweb(我的安装位置/usr/local/src):
ii)解压缩源码文件
iii)通过configure配置Appweb
root@ubuntu:/usr/local/src/appweb-6.2.2# ./configure
iv)编译:me
v)安装:me install
vi)检查是否安装成功:执行"appweb --version",显示appweb版本成功即安装成功。
root@ubuntu:/usr/local/src/appweb-6.2.2# appweb --version
6.2.2
2、运行Appweb服务
2.1 启动服务
root@ubuntu:/usr/local/src/appweb-6.2.2# /etc/init.d/appweb start
Starting Embedthis Appweb: OK
2.2 关闭服务
root@ubuntu:/usr/local/src/appweb-6.2.2# /etc/init.d/appweb stop
Stopping Embedthis Appweb: OK
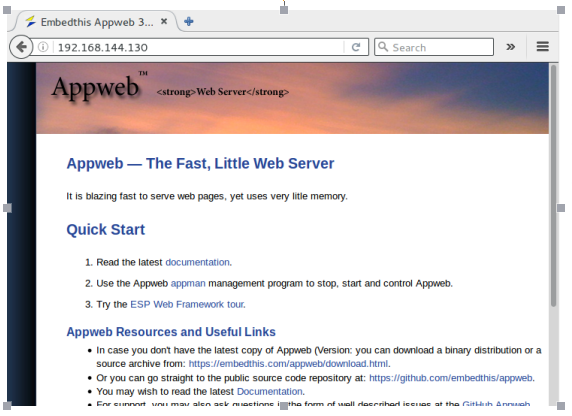
2.2 浏览器访问页面效果截图
二、ESP框架及页面开发
1、简单的ESP页面
ESP页面就是在” <%”与” %>”之间嵌入C代码的html页面。例如:
<h1>Hello World</h1>
<h2>Today is <%= mprGetDate(0); %></h2>
%$variables1与%!variables2的区别:
%$variables1是获取页面请求参数,%!variables2是获取ESP页面中定义的C字符串变量。
ESP页面脚本指令:
|
指令 |
功能 |
|
<%^ include "file" %> |
Include the named file at this location |
|
<%^ global ... |
Specify that the code from this block must be at a "global" C scope. This is useful for global declarations, extern statements and #include statements. |
|
<%^ start ... |
Specify that the code from this block will be positioned at the start of the generated function for the template. This is useful for local variable declarations. |
|
<%^ end ... |
Specify that the code from this block will be positioned at the end of the generated function for the template. |
|
<%= expression %> |
C expression |
|
<%= [%fmt] expression %> |
Formatted C expression. The expression is passed through a "printf" style formatter. Use "%S" for HTML-escaped safe strings. |
|
<% statements %> |
C statements |
|
-%> |
Trim the trailing newline for the generated block. |
|
%$name |
Request parameter or session variable. This is equivalent to "renderVar(variable)" |
|
%!variable |
C string variable |
|
%#field |
Record field variable. This is equivalent to "ediGetField(getRec(), field))" |
|
%~ |
Top level application URL. Use this to create relative URLs without having to hard code URI prefixes in your application. |
2、ESP 控制器controller
ESP控制器是C源文件,可以接收来自浏览器端的请求,也可以管理应用响应。ESP控制器可以是ESP MVC应用模式的构成部分,也可以单独使用。
2.1 定义一个控制器ebang.c
#include "esp.h"
static void myaction(HttpConn *conn)
{
render("Hello World\n");
}
/*
Initialize the "helloaction" loadable module
*/
ESP_EXPORT int esp_controller_app_ebang(HttpRoute *route, MprModule *module) {
/*
Define the "helloaction" action that will run when the "test/echo" URI is invoked
*/
espDefineAction(route, "ebang/myaction", myaction);
return 0;
}
Myaction为定义的action名称;
esp_controller_app_ebang为注册控制器,命令规则可以为esp_controller_app_XXX,XXX为控制器名;
espDefineAction为定义URL路由到控制器action的映射关系。
2.2 配置控制器路由
在appweb.conf配置文件中增加控制器ebang路由信息配置
<Route /ebang/{action}$>
Reset pipeline
AddHandler espHandler
source ebang.c
Target run ebang/$1
RequestTimeout 30mins
InactivityTimeout 10mins
</Route>
2.3浏览器访问页面效果截图

3、页面跳转redirect
使用redirect方法可以URL跳转设置,例如:
redirect("/public/login.html");
4、页面渲染espRenderView
使用espRenderView方法可以通过URL访问渲染后的ESP页面,例如:
espRenderView(conn, "ebang/eblist.esp", 0);
5、SSL配置
Appweb支持SSL协议来认证系统和加密数据。支持SSL的Appweb可以通过https://开头的URL访问页面。
SSL配置示例:
ListenSecure 192.168.144.130:4443
SSLCertificateFile "self.crt"
SSLCertificateKeyFile "self.key"
6、用户身份认证authentication
Appweb有一个强大而可配置的认证框架,这个认证框架基于角色来验证用户名密码以及角色能力(viewer/administrator)。
6.1公共路由配置
一般而言,用户登录login页面是不需要认证用户就可以访问的,我们将不需要认证的URL以public/开头,并通过AuthType none指令去使能该路由的认证访问。因此,我们可以定义一个公共路由。
公共路由配置示例:
AuthType form example.com https:///public/login.html https:///login /logout http:///
#
# Create a secure route for scripts, stylesheets and images to bypass authentication.
# Needed for /login.html. If accessed via /public, then no auth.
#
<Route /public>
Prefix /public
Documents web/public
AuthType none
</Route>
6.2 auth.conf配置文件
#
# auth.conf - Authorization data
#
User sa 1be5aaff4deb210a7fc6e062a50f8129 user
User admin 24acc4b5f77f1ff51cd39935f3c9b26c administrator
User定义用户名称、密码(MD5加密)和用户角色。
6.3 相关接口API
HttpLogin:根据用户输入的用户名和密码完成登录,如果用户名称和密码不是auth.conf中定义的用户则返回失败,否则登录成功。
httpLogout:退出当前登录状态。
7、Session使用
setSessionVar:设置session参数。
getSessionVar:获取session参数。
示例:
setSessionVar("username", param("username"));
getSessionVar("username");
8、使用websocket完成读文件操作
8.1 WebSockets类型控制器output定义
/*
output.c - WebSockets output sample.
This sample demonstrates writing large, streaming response without blocking, buffering or consuming excessive memory.
This sends a large file as a single web socket message using multiple frames.
*/
#include "esp.h"
#define OUTPUT_FILE "file.txt"
typedef struct Output {
MprFile *file; /* Open file handle */
MprPath info; /* File stat - size */
ssize written; /* Number of bytes written so far */
} Output;
/*
Event callback. Invoked for incoming web socket messages and other events of interest.
We're interested in the WRITABLE event.
*/
static void output_callback(HttpConn *conn, int event, int arg)
{
Output *output;
ssize len, wrote;
int flags, type;
char buf[ME_MAX_BUFFER];
/*
Get a writable event when the socket can absorb more data
*/
if (event == HTTP_EVENT_WRITABLE) {
output = getData();
do {
if ((len = mprReadFile(output->file, buf, sizeof(buf))) > 0) {
/*
Set the HTTP_MORE flag on every write except the last. This means each write is sent as
a separate frame. The first frame has the type of WS_MSG_TEXT, all others must be
continuation frames.
*/
flags = HTTP_NON_BLOCK;
if ((output->written + len) < output->info.size) {
flags |= HTTP_MORE;
}
type = output->written == 0 ? WS_MSG_TEXT : WS_MSG_CONT;
/*
Send the next chunk as a WebSockets frame using a non-blocking write.
This may return having written only a portion of the requested data.
*/
if ((wrote = httpSendBlock(conn, type, buf, len, flags)) < 0) {
httpError(conn, HTTP_CODE_INTERNAL_SERVER_ERROR, "Cannot send message of %d bytes", len);
return;
}
output->written += wrote;
if (wrote < len) {
/* Reposition if the send returned having written less than requested */
mprSeekFile(output->file, SEEK_CUR, wrote - len);
break;
}
} else {
httpSendClose(conn, WS_STATUS_OK, "OK");
break;
}
} while (len > 0);
} else if (event == HTTP_EVENT_APP_CLOSE) {
mprLog("info output", 0, "close event. Status status %d, orderly closed %d, reason %s", arg,
httpWebSocketOrderlyClosed(conn), httpGetWebSocketCloseReason(conn));
} else if (event == HTTP_EVENT_ERROR) {
mprLog("info output", 0, "error event");
}
}
static void manageOutput(Output *output, int flags)
{
if (flags & MPR_MANAGE_MARK) {
mprMark(output->file);
} else if (flags & MPR_MANAGE_FREE) {
/* Let GC close the file for us automatically */
}
}
/*
Action to run in response to the "test/output" URI
*/
static void output_action()
{
Output *output;
/*
Don't automatically finalize (complete) the request when this routine returns. This keeps the connection open.
*/
dontAutoFinalize();
/*
Define the event notifier. We're interested in WRITABLE events
*/
setNotifier(output_callback);
/*
Open a file for output. Could use open/write, but we use the MPR equivalents for cross-platform I/O.
*/
output = mprAllocObj(Output, manageOutput);
if ((output->file = mprOpenFile("/home/ebangweb/controllers/file.txt", O_RDONLY, 0)) == 0) {
httpError(getConn(), HTTP_CODE_INTERNAL_SERVER_ERROR, "Cannot open huge.txt");
return;
}
mprGetPathInfo("/home/ebangweb/controllers/file.txt", &output->info);
/*
Save a reference to our output state
*/
setData(output);
}
/*
Initialize the "output" loadable module
*/
ESP_EXPORT int esp_controller_app_output(HttpRoute *route, MprModule *module) {
/*
Define the "output" action that will run when the "test/output" URI is invoked
*/
espDefineAction(route, "test/output", output_action);
return 0;
}
Demo程序中有示例,测试可访问URL: http://192.168.144.130:8080/AlarmLog/testshowlogfile.html

8.2 配置路由
<Route ^/ws/{controller}/{action}$>
Reset pipeline
Prefix /ws
Documents controllers
AddFilter webSocketFilter
AddHandler espHandler
Source output.c
Target run $1/$2
RequestTimeout 10mins
InactivityTimeout 1min
WebSocketsProtocol chat
LimitWebSocketsMessage 400MB
LimitWebSocketsPacket 40MB
</Route>
8.3页面js调用方法
<script>
ws = new WebSocket('ws://192.168.144.130:8080/ws/test/output', ['chat']);
ws.onopen = function (event) {
/*
$('#log').append('<p>Open message received</p>');
$('#log').append('<p>Send: <b>"Hello Server"</b> to server</p>');
ws.send("Hello Server");
*/
};
ws.onmessage = function (event) {
$('#log').append('<p>Received: <b>' + event.data + '</b></p>');
};
ws.onclose = function (event) {
$('#log').append('<p>Close message received</p>');
};
ws.onerror = function (event) {
$('#log').append('<p>Error message received: ' + event + '</p>');
};
</script>
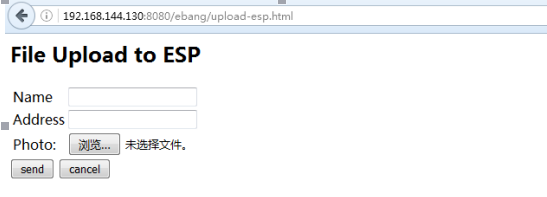
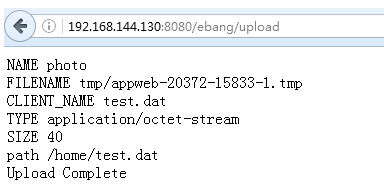
9、使用uploadFilter完成图片或文件上传
配置Upload相关项即可。
LimitFiles 0
LimitUpload 1GB
UploadDir tmp
UploadAutoDelete on
AddInputFilter uploadFilter
AddHandler fileHandler html gif jpeg jpg png pdf ico css js txt ""
Demo程序中有示例,测试可访问URL: http://192.168.144.130:8080/ebang/upload-esp.html
10、如何使用log
通过配置项--log,完成log启动配置。
[root@localhost bin]# ./appweb --config /etc/appweb/appweb.conf --log stdout:4 &
[root@localhost bin]# appweb: 2: Configuration for Embedthis Appweb
appweb: 2: ---------------------------------------------
appweb: 2: Host: localhost.localdomain
appweb: 2: CPU: i686
appweb: 2: OS: LINUX
appweb: 2: Distribution: unspecified unspecified
appweb: 2: Version: 3.4.2-0
appweb: 2: BuildType: DEBUG
appweb: 2: ---------------------------------------------
appweb: 4: Already logging. Ignoring ErrorLog directive
appweb: 4: Already logging. Ignoring LogLevel directive
appweb: 2: Server Root "/etc/appweb"
11、如何使用trace完成页面调试
通过配置项--trace,完成trace启动配置。
root@ubuntu:/home/ebangweb# appweb --config appweb.conf --trace trace.log:5
Security risk /home/ebangweb is writeable by others
Started HTTP service on 192.168.144.130:8080
Started HTTPS service on 192.168.144.130:4443
trace.log日志片段:
Cache-Control: max-age=0
----
23:33:35 1-0-1-1 request.pipeline route='^/session/{action}$' handler='espHandler' target='run' endpoint='192.168.144.130:8080' host='default' referrer='' filename=''
23:33:35 1-0-1-1 esp.handler msg= 'Load module /home/ebangweb/esp/session/session.c'
23:33:35 1-0-1-1 esp.handler msg= 'Invoke controller action session/list'
23:33:35 1-0-1-1 esp.handler msg= 'Render view session/list.esp'
23:33:35 1-0-1-1 esp.handler msg= 'Load module /home/ebangweb/esp/session/session/list.esp'
23:33:35 1-1-1-1 request.session.create cookie='-http-session-' session='1::http.session::7c7758413a7d93215664e0448d4f97a1'
23:33:35 1-1-1-1 request.document filename='/home/ebangweb/esp/session/session/list.esp'
23:33:35 1-1-1-1 tx
三、移植Appweb到Arm开发板上
第一步,通过configure配置交互编译工具链(本文使用的交叉工具为arm-none-linux-gnueabi-gcc);
指令为:CC=arm-none-linux-gnueabi-gcc ./configure --platform linux-arm-debug
第二步编译,依次输入指令me clean和me;
第三步,将/usr/local/src/appweb-6.2.2/build/linux-arm-debug/bin目录下的appweb、libappweb.so、libesp.so、libhttp.so、libmpr.so、libpcre.so到ARM开发板的/test目录下:
[root@ERCW test]# ls -l
total 3148
-rw-r--r-- 1 root root 62312 Jan 1 05:14 appweb
-rw-r--r-- 1 root root 201317 Jan 1 05:15 libappweb.so
-rw-r--r-- 1 root root 327170 Jan 1 05:16 libesp.so
-rw-r--r-- 1 root root 822820 Jan 1 05:18 libhttp.so
-rw-r--r-- 1 root root 1605649 Jan 1 05:23 libmpr.so
-rw-r--r-- 1 root root 189834 Jan 1 05:19 libpcre.so
[root@ERCW test]# chmod 777 appweb
[root@ERCW test]# ./appweb --version
6.2.2
[root@ERCW test]# file appweb
appweb: ELF 32-bit LSB executable, ARM, version 1 (SYSV), dynamically linked (uses shared libs), for GNU/Linux 2.6.16, not stripped
四、Appweb开发示例Demo介绍
1、目录结构介绍
web目录是部署页面相关的包括js/css/html/esp等内容;
controllers目录是部署控制器,其中控制器user.c是完成用户登录注销功能,其他控制器主要是实现业务相关的功能;
output.c是用websocket实现的文件读操作功能控制器;
appweb.conf是Appweb系统配置文件;
auth.conf是SSL用户身份认证配置文件(用户admin密码是123456,用户sa密码是123456);
self.crt和self.key是SSL证书;
trace.log是trace日志文件;
error.log是error错误日志文件。
ebweb/
ebweb/web/
ebweb/web/img/
ebweb/web/logo/
ebweb/web/css/
ebweb/web/graph/
ebweb/web/js/
ebweb/web/favicon.ico
ebweb/web/ebang/
ebweb/web/Managerment/
ebweb/web/Managerment/SystemTimeConfigRpm.esp
ebweb/web/Managerment/SiteInfo.esp
ebweb/web/Managerment/IPConfig.esp
ebweb/web/Status/
ebweb/web/Status/images/
ebweb/web/Status/images/SystemStatusRpm_03.gif
ebweb/web/Status/images/SystemStatusRpm_01.gif
ebweb/web/Status/images/SystemStatusRpm_02.gif
ebweb/web/Status/SystemStatusRpm.esp
ebweb/web/public/
ebweb/web/public/img/
ebweb/web/public/img/empty.gif
ebweb/web/public/img/arc.gif
ebweb/web/public/login.html
ebweb/web/public/css/
ebweb/web/public/css/css_main.css
ebweb/web/ConfigWizard/
ebweb/web/ConfigWizard/SiteInfo.esp
ebweb/web/ConfigWizard/IPConfig.esp
ebweb/web/index.esp
ebweb/web/arc.html
ebweb/web/logo.html
ebweb/web/banner.esp
ebweb/web/MenuRpm.esp
ebweb/web/begin.esp
ebweb/tmp/
ebweb/controllers/
ebweb/controllers/user.c
ebweb/controllers/Status.c
ebweb/controllers/ConfigWizard.c
ebweb/controllers/Managerment.c
ebweb/controllers/ipccom.c
ebweb/controllers/ebang.c
ebweb/output.c
ebweb/file.txt
ebweb/appweb.conf
ebweb/auth.conf
ebweb/self.crt
ebweb/self.key
ebweb/trace.log
ebweb/error.log
2、user.c文件功能介绍
user.c文件完成用户登录注销功能。
loginUser是用户登录action实现,logoutUser是用户注销action实现,modifyUser是用户密码修改action实现(可以借鉴该action实现增加新用户action实现)。
3、status.c文件功能介绍
status.c文件完成ERCW设备相关状态信息获取功能。
SystemStatusRpm是ERCW设备状态获取action实现。
4、ConfigWizard.c文件功能介绍
ConfigWizard.c主要是完成配置向导设置功能。
IPConfig是完成IP相关配置获取action实现,SiteInfo是完成网站相关配置获取action实现。
5、Managerment.c文件功能介绍
PostIPConfig是完成IP相关配置设置action实现,PostSiteInfo是完成网站相关配置设置action实现。这两个aciton都是在页面中通过ajax post的方式访问。
6、ipccom.c文件功能介绍
目前web与ERCW设备采用UDP通信,ipccom.c主要提供单条参数获取和单条参数设置功能相关APIs。
UIRequest:实现单条参数信息查询或单条参数信息设置的ERCW通信协议打包发送到服务器端;
UIReqGetWithResponseRenderString:实现从服务器端获取单条参数信息查询结果,并将解析后结果传值到页面前端;
UIReqSetWithResponseRenderJson::实现从服务器端获取单条参数信息设置执行结果,并解析和返回命令执行结果;
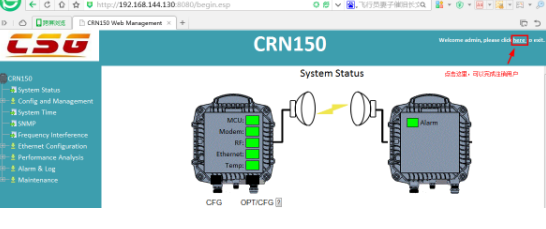
7、web运行效果截图
浏览器输入:http://192.168.144.130:8080/
页面跳转至用户登录界面:
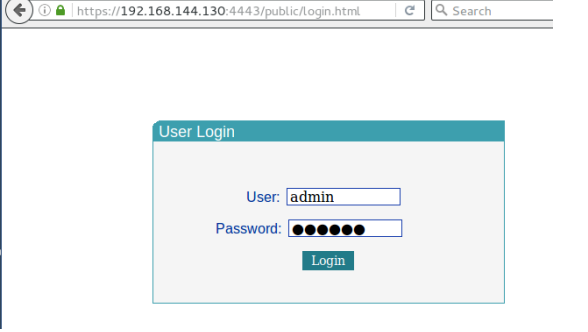
用户输入用户名admin和密码123456(auth.conf定义)后登录成功后跳转至后面主页面:
附录:
Appweb文档参考:https://embedthis.com/appweb/doc/
Appweb APIs参考:https://embedthis.com/appweb/doc/ref/native.html
ESP文档参考:https://embedthis.com/esp/doc/

 浙公网安备 33010602011771号