[译]Vulkan教程(22)创建顶点buffer
[译]Vulkan教程(22)创建顶点buffer
Vertex buffer creation 创建顶点buffer
Introduction 入门
Buffers in Vulkan are regions of memory used for storing arbitrary data that can be read by the graphics card. They can be used to store vertex data, which we'll do in this chapter, but they can also be used for many other purposes that we'll explore in future chapters. Unlike the Vulkan objects we've been dealing with so far, buffers do not automatically allocate memory for themselves. The work from the previous chapters has shown that the Vulkan API puts the programmer in control of almost everything and memory management is one of those things.
Vulkan中的buffer是一块内存-用于保存任何数据that可以被图形卡读取。它可用于保存顶点数据,which我们将在本章这样做,但是它也可以用于许多其他用途that我们将在后续章节探索。不像我们处理过的其他Vulkan对象,buffer不会自动给自己分配内存。前几章的工作已经表明,Vulkan API让程序员控制几乎所有事,内存管理就是其中之一。
Buffer creation 创建buffer
Create a new function createVertexBuffer and call it from initVulkan right before createCommandBuffers.
创建新函数createVertexBuffer ,在initVulkan 中调用它before createCommandBuffers。
 1 void initVulkan() {
 2     createInstance();
 3     setupDebugCallback();
 4     createSurface();
 5     pickPhysicalDevice();
 6     createLogicalDevice();
 7     createSwapChain();
 8     createImageViews();
 9     createRenderPass();
10     createGraphicsPipeline();
11     createFramebuffers();
12     createCommandPool();
13     createVertexBuffer();
14     createCommandBuffers();
15     createSyncObjects();
16 }
17
18 ...
19
20 void createVertexBuffer() {
21
22 }
Creating a buffer requires us to fill a VkBufferCreateInfo structure.
创建buffer需要我们填入VkBufferCreateInfo 结构体。
VkBufferCreateInfo bufferInfo = {};
bufferInfo.sType = VK_STRUCTURE_TYPE_BUFFER_CREATE_INFO;
bufferInfo.size = sizeof(vertices[0]) * vertices.size();
The first field of the struct is size, which specifies the size of the buffer in bytes. Calculating the byte size of the vertex data is straightforward with sizeof.
第一个字段是size,其指定buffer的字节数。用sizeof计算顶点数据的字节数很直接。
bufferInfo.usage = VK_BUFFER_USAGE_VERTEX_BUFFER_BIT;
The second field is usage, which indicates for which purposes the data in the buffer is going to be used. It is possible to specify multiple purposes using a bitwise or. Our use case will be a vertex buffer, we'll look at other types of usage in future chapters.
第二个字段是usage,其表明buffer中的数据用于什么目的。可以用位或指定多个目的。我们的案例中用的是顶点buffer,我们将在以后的章节中看其他的类型。
bufferInfo.sharingMode = VK_SHARING_MODE_EXCLUSIVE;
Just like the images in the swap chain, buffers can also be owned by a specific queue family or be shared between multiple at the same time. The buffer will only be used from the graphics queue, so we can stick to exclusive access.
像交换链image一样,buffer也可以被一个特定的队列家族拥有,或同时被多个共享。Buffer只会被图形queue使用,所以我们可以继续选择互斥存取。
The flags parameter is used to configure sparse buffer memory, which is not relevant right now. We'll leave it at the default value of 0.
flags 参数用于配置稀疏buffer内存,which现在不关我们的事。我们让它保持默认的0即可。
We can now create the buffer with vkCreateBuffer. Define a class member to hold the buffer handle and call it vertexBuffer.
现在我们可以用vkCreateBuffer创建buffer。定义一个类成员to记录buffer句柄,称其为vertexBuffer。
VkBuffer vertexBuffer;

...

void createVertexBuffer() {
    VkBufferCreateInfo bufferInfo = {};
    bufferInfo.sType = VK_STRUCTURE_TYPE_BUFFER_CREATE_INFO;
    bufferInfo.size = sizeof(vertices[0]) * vertices.size();
    bufferInfo.usage = VK_BUFFER_USAGE_VERTEX_BUFFER_BIT;
    bufferInfo.sharingMode = VK_SHARING_MODE_EXCLUSIVE;

    if (vkCreateBuffer(device, &bufferInfo, nullptr, &vertexBuffer) != VK_SUCCESS) {
        throw std::runtime_error("failed to create vertex buffer!");
    }
}
The buffer should be available for use in rendering commands until the end of the program and it does not depend on the swap chain, so we'll clean it up in the original cleanup function:
Buffer应当一直能够让渲染命令使用,直到程序结束。它不依赖交换链,所以我们在最初的cleanup 函数里清理它:
void cleanup() {
    cleanupSwapChain();

    vkDestroyBuffer(device, vertexBuffer, nullptr);

    ...
}
Memory requirements 内存需求
The buffer has been created, but it doesn't actually have any memory assigned to it yet. The first step of allocating memory for the buffer is to query its memory requirements using the aptly named vkGetBufferMemoryRequirements function.
Buffer已经创建,但还没有实际占有任何内存。为buffer分配内存的第一步是查询它的内存需求usingvkGetBufferMemoryRequirements 函数。
VkMemoryRequirements memRequirements;
vkGetBufferMemoryRequirements(device, vertexBuffer, &memRequirements);
The VkMemoryRequirements struct has three fields:
VkMemoryRequirements 结构体有3个字段:
size: The size of the required amount of memory in bytes, may differ frombufferInfo.size. 需要的内存的字节数,可能与bufferInfo.size不同。alignment: The offset in bytes where the buffer begins in the allocated region of memory, depends onbufferInfo.usageandbufferInfo.flags. buffer在分配的内存中开始的偏移量,依赖于bufferInfo.usage和bufferInfo.flags。memoryTypeBits: Bit field of the memory types that are suitable for the buffer. 位字段,适合这个buffer的内存类型。
Graphics cards can offer different types of memory to allocate from. Each type of memory varies in terms of allowed operations and performance characteristics. We need to combine the requirements of the buffer and our own application requirements to find the right type of memory to use. Let's create a new function findMemoryType for this purpose.
图形卡可以提供不同类型的内存供分配。每个内存类型的可用操作和性能特定都不同。我们需要结合buffer和应用程序的需求to找到正确的内存类型。为此我们创建一个新函数findMemoryType。
uint32_t findMemoryType(uint32_t typeFilter, VkMemoryPropertyFlags properties) {

}
First we need to query info about the available types of memory using vkGetPhysicalDeviceMemoryProperties.
首先我们需要用vkGetPhysicalDeviceMemoryProperties查询可用的内存类型。
VkPhysicalDeviceMemoryProperties memProperties;
vkGetPhysicalDeviceMemoryProperties(physicalDevice, &memProperties);
The VkPhysicalDeviceMemoryProperties structure has two arrays memoryTypes and memoryHeaps. Memory heaps are distinct memory resources like dedicated VRAM and swap space in RAM for when VRAM runs out. The different types of memory exist within these heaps. Right now we'll only concern ourselves with the type of memory and not the heap it comes from, but you can imagine that this can affect performance.
VkPhysicalDeviceMemoryProperties 结构体有2个数组memoryTypes 和memoryHeaps。Memory heaps are distinct memory resources like dedicated VRAM and swap space in RAM for when VRAM runs out. 不同类型的内存存在于这些堆里。现在我们只关心内存类型,不关心堆,但是你可以想象that这会影响性能。
Let's first find a memory type that is suitable for the buffer itself:
让我们首先找到一个内存类型that适合这个buffer:
for (uint32_t i = 0; i < memProperties.memoryTypeCount; i++) {
    if (typeFilter & (1 << i)) {
        return i;
    }
}

throw std::runtime_error("failed to find suitable memory type!");
The typeFilter parameter will be used to specify the bit field of memory types that are suitable. That means that we can find the index of a suitable memory type by simply iterating over them and checking if the corresponding bit is set to 1.
typeFilter 参数用于指定合适的内存类型的位字段。这意味着,我们可以找到适合的内存类型的索引by简单地枚举它们,检查对应位是否为1。
However, we're not just interested in a memory type that is suitable for the vertex buffer. We also need to be able to write our vertex data to that memory. The memoryTypes array consists of VkMemoryType structs that specify the heap and properties of each type of memory. The properties define special features of the memory, like being able to map it so we can write to it from the CPU. This property is indicated with VK_MEMORY_PROPERTY_HOST_VISIBLE_BIT, but we also need to use the VK_MEMORY_PROPERTY_HOST_COHERENT_BIT property. We'll see why when we map the memory.
但是,我们不止对适合顶点buffer的内存类型感兴趣。我们也需要将顶点数据写入那块内存。memoryTypes 数组由VkMemoryType 结构体组成,其指定每个内存类型的堆和属性。属性定义内存的特殊特性(例如能够映射),这样我们就可以从CPU写入它。这个属性用VK_MEMORY_PROPERTY_HOST_VISIBLE_BIT表示,但是我们也需要用VK_MEMORY_PROPERTY_HOST_COHERENT_BIT属性。当我们映射内存时将看到原因。
We can now modify the loop to also check for the support of this property:
我们现在可以修改循环to检查对此属性的支持:
for (uint32_t i = 0; i < memProperties.memoryTypeCount; i++) {
    if ((typeFilter & (1 << i)) && (memProperties.memoryTypes[i].propertyFlags & properties) == properties) {
        return i;
    }
}
We may have more than one desirable property, so we should check if the result of the bitwise AND is not just non-zero, but equal to the desired properties bit field. If there is a memory type suitable for the buffer that also has all of the properties we need, then we return its index, otherwise we throw an exception.
我们可能有不止一个需要的属性,所以我们应该检查位AND的结果不止是非零,而且是等于需要的属性的位值。如果有内存类型适合buffer且也有所有我们需要的属性,那么我们就返回其索引,否则就抛出异常。
Memory allocation 分配内存
We now have a way to determine the right memory type, so we can actually allocate the memory by filling in the VkMemoryAllocateInfo structure.
我们现在有个办法to决定正确的内存类型,所以我们实际上可以分配内存by填入VkMemoryAllocateInfo 结构体。
VkMemoryAllocateInfo allocInfo = {};
allocInfo.sType = VK_STRUCTURE_TYPE_MEMORY_ALLOCATE_INFO;
allocInfo.allocationSize = memRequirements.size;
allocInfo.memoryTypeIndex = findMemoryType(memRequirements.memoryTypeBits, VK_MEMORY_PROPERTY_HOST_VISIBLE_BIT | VK_MEMORY_PROPERTY_HOST_COHERENT_BIT);
Memory allocation is now as simple as specifying the size and type, both of which are derived from the memory requirements of the vertex buffer and the desired property. Create a class member to store the handle to the memory and allocate it with vkAllocateMemory.
内存分配现在只需简单地指定大小和类型,它们都来自顶点buffer的内存需求和需要的属性。创建类成员to保存内存的句柄,用vkAllocateMemory分配之。
VkBuffer vertexBuffer;
VkDeviceMemory vertexBufferMemory;

...

if (vkAllocateMemory(device, &allocInfo, nullptr, &vertexBufferMemory) != VK_SUCCESS) {
    throw std::runtime_error("failed to allocate vertex buffer memory!");
}
If memory allocation was successful, then we can now associate this memory with the buffer using vkBindBufferMemory:
如果内存分配成功,那么我们就可以将此内存与buffer关联usingvkBindBufferMemory:
vkBindBufferMemory(device, vertexBuffer, vertexBufferMemory, 0);
The first three parameters are self-explanatory and the fourth parameter is the offset within the region of memory. Since this memory is allocated specifically for this the vertex buffer, the offset is simply 0. If the offset is non-zero, then it is required to be divisible by memRequirements.alignment.
前3个参数是不言自明的,第4个参数是内存的偏移量。既然这个内存是特地为这个顶点buffer分配的,其偏移量就是个0。如果偏移量是非零数字,那么它必须可被memRequirements.alignment分割。
Of course, just like dynamic memory allocation in C++, the memory should be freed at some point. Memory that is bound to a buffer object may be freed once the buffer is no longer used, so let's free it after the buffer has been destroyed:
当然,像C++的动态内存分配一样,这个内存应当在某刻被释放。绑定到buffer对象的内存可在buffer不再使用后就被释放,所以我们在buffer被销毁后释放它。
void cleanup() {
    cleanupSwapChain();

    vkDestroyBuffer(device, vertexBuffer, nullptr);
    vkFreeMemory(device, vertexBufferMemory, nullptr);
Filling the vertex buffer 填入顶点buffer
It is now time to copy the vertex data to the buffer. This is done by mapping the buffer memory into CPU accessible memory with vkMapMemory.
现在是时候将顶点数据复制到buffer了。这是通过用vkMapMemory函数映射buffer内存 到CPU内存完成的。
void* data;
vkMapMemory(device, vertexBufferMemory, 0, bufferInfo.size, 0, &data);
This function allows us to access a region of the specified memory resource defined by an offset and size. The offset and size here are 0 and bufferInfo.size, respectively. It is also possible to specify the special value VK_WHOLE_SIZE to map all of the memory. The second to last parameter can be used to specify flags, but there aren't any available yet in the current API. It must be set to the value 0. The last parameter specifies the output for the pointer to the mapped memory.
这个函数允许我们读写一块特定的内存资源-由偏移量和大小定义。这里的偏移量和大小分别是0和bufferInfo.size。也可以指定特殊值VK_WHOLE_SIZE to映射所有内存。第2到最后一个参数可以被用于指定flag,但是当前API还没有任何可用的flag。它必须是0。最后一个参数指定了映射的内存的目标位置。
void* data;
vkMapMemory(device, vertexBufferMemory, 0, bufferInfo.size, 0, &data);
    memcpy(data, vertices.data(), (size_t) bufferInfo.size);
vkUnmapMemory(device, vertexBufferMemory);
You can now simply memcpy the vertex data to the mapped memory and unmap it again using vkUnmapMemory. Unfortunately the driver may not immediately copy the data into the buffer memory, for example because of caching. It is also possible that writes to the buffer are not visible in the mapped memory yet. There are two ways to deal with that problem:
现在你可以简单地memcpy 顶点数据到映射的内存,然后用vkUnmapMemoryunmap它。不幸的是驱动可能不会立即复制数据到buffer内存,例如由于缓存的关系。也可能在映射的内存中对buffer的写入还不可见。有2个方式来解决这个问题:
- Use a memory heap that is host coherent, indicated with
VK_MEMORY_PROPERTY_HOST_COHERENT_BIT用宿主相关的内存堆,以VK_MEMORY_PROPERTY_HOST_COHERENT_BIT标志。 - Call
vkFlushMappedMemoryRangesto after writing to the mapped memory, and callvkInvalidateMappedMemoryRangesbefore reading from the mapped memory 写入映射的内存后调用vkFlushMappedMemoryRanges,从映射的内存读取前调用vkInvalidateMappedMemoryRanges。
We went for the first approach, which ensures that the mapped memory always matches the contents of the allocated memory. Do keep in mind that this may lead to slightly worse performance than explicit flushing, but we'll see why that doesn't matter in the next chapter.
我们选择第一个方式,其确保了映射的内存总数与分配的内存有相同的内容。记住,这可能导致轻微的糟糕性能that显式地flush,但是我们会在下一章看到为什么这不要紧。
Flushing memory ranges or using a coherent memory heap means that the driver will be aware of our writes to the buffer, but it doesn't mean that they are actually visible on the GPU yet. The transfer of data to the GPU is an operation that happens in the background and the specification simply tells us that it is guaranteed to be complete as of the next call to vkQueueSubmit.
Flush内存或使用相关内存堆意味着,驱动会知道我们对buffer的写入,但是这不意味着它们对GPU可见。转移数据到GPU是个在后台发生的操作,说明书告诉我们,它被保证在调用vkQueueSubmit后会被完成。
Binding the vertex buffer 绑定顶点buffer
All that remains now is binding the vertex buffer during rendering operations. We're going to extend the createCommandBuffers function to do that.
现在剩下的就是,在渲染操作期间绑定顶点buffer。为此我们要扩展createCommandBuffers 函数。
vkCmdBindPipeline(commandBuffers[i], VK_PIPELINE_BIND_POINT_GRAPHICS, graphicsPipeline);

VkBuffer vertexBuffers[] = {vertexBuffer};
VkDeviceSize offsets[] = {0};
vkCmdBindVertexBuffers(commandBuffers[i], 0, 1, vertexBuffers, offsets);

vkCmdDraw(commandBuffers[i], static_cast<uint32_t>(vertices.size()), 1, 0, 0);
The vkCmdBindVertexBuffers function is used to bind vertex buffers to bindings, like the one we set up in the previous chapter. The first two parameters, besides the command buffer, specify the offset and number of bindings we're going to specify vertex buffers for. The last two parameters specify the array of vertex buffers to bind and the byte offsets to start reading vertex data from. You should also change the call to vkCmdDraw to pass the number of vertices in the buffer as opposed to the hardcoded number 3.
vkCmdBindVertexBuffers 函数用于绑定顶点buffer到binding,和我们在上一章设置的一样。前2个参数,除了命令buffer外,指定我们要指定的顶点buffer的偏移量和绑定数量。最后2个参数指定要绑定的顶点buffer数组及其字节偏移量to从其开始读取顶点数据。你也应当修改对vkCmdDraw 的调用to传入buffer中的顶点数量,而不是硬编码的3。
Now run the program and you should see the familiar triangle again:
现在运行程序,你应该会再次见到这个熟悉的三角形了:

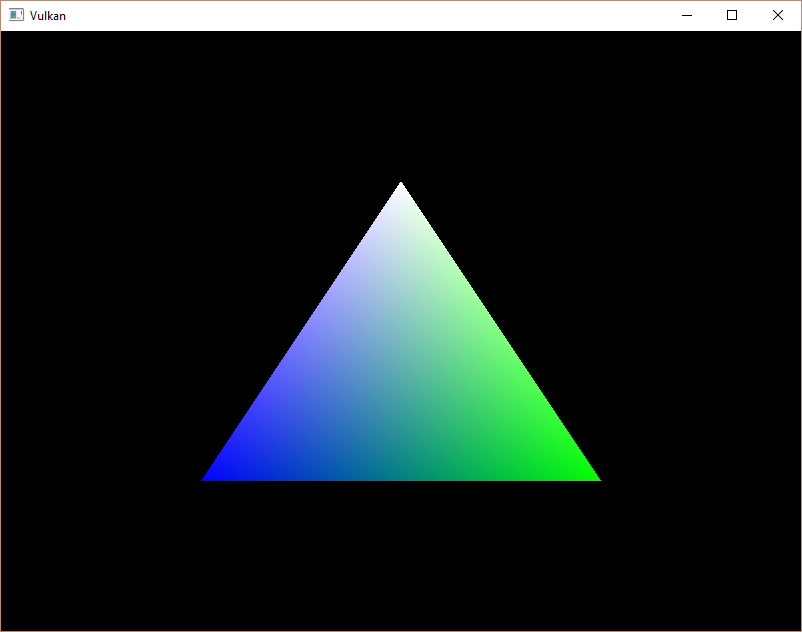
Try changing the color of the top vertex to white by modifying the vertices array:
尝试修改上边顶点的颜色为白色by修改vertices 数组:
const std::vector<Vertex> vertices = {
    {{0.0f, -0.5f}, {1.0f, 1.0f, 1.0f}},
    {{0.5f, 0.5f}, {0.0f, 1.0f, 0.0f}},
    {{-0.5f, 0.5f}, {0.0f, 0.0f, 1.0f}}
};
Run the program again and you should see the following:
再次运行程序,你应该会看到这个:
In the next chapter we'll look at a different way to copy vertex data to a vertex buffer that results in better performance, but takes some more work.
下一章,我们将看一下另一个复制顶点数据到顶点buffer的方法that性能更高,但所需工作更多。
C++ code / Vertex shader / Fragment shader

|
微信扫码,自愿捐赠。四海同道,共谱新篇。
微信捐赠不显示捐赠者个人信息,如需要,请注明联系方式。 |

 浙公网安备 33010602011771号