CICD - Sonarqube 【四】
官网地址:Sonarqube.org
sonarQube是一款代码质量检查工具,在项目中已经广泛使用,尤其在自动化运维devops中,会集成sonarQube组件,
用于代码质量检查,保证CICD的稳定性。
下载地址:https://www.sonarsource.com/products/sonarqube/downloads/
2023/07/01-下载最新版本:Download SonarQube 9.9.1 LTS-CommunityEdition
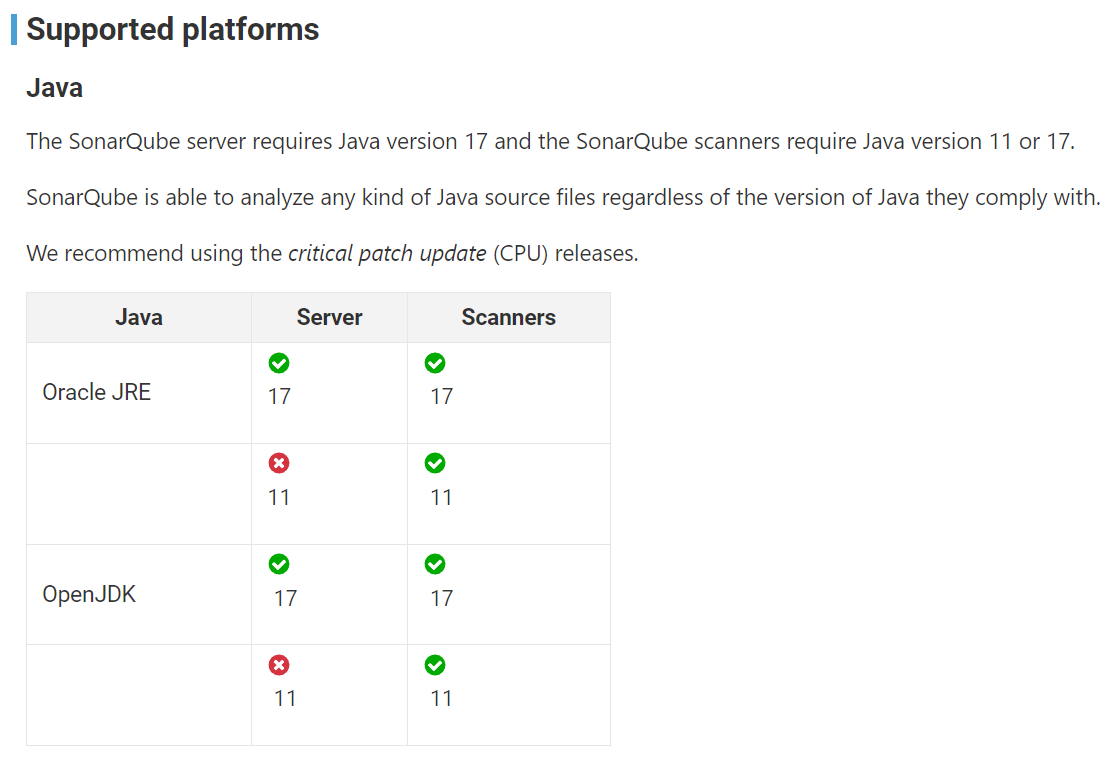
官方文档:https://docs.sonarqube.org/latest/requirements/prerequisites-and-overview/
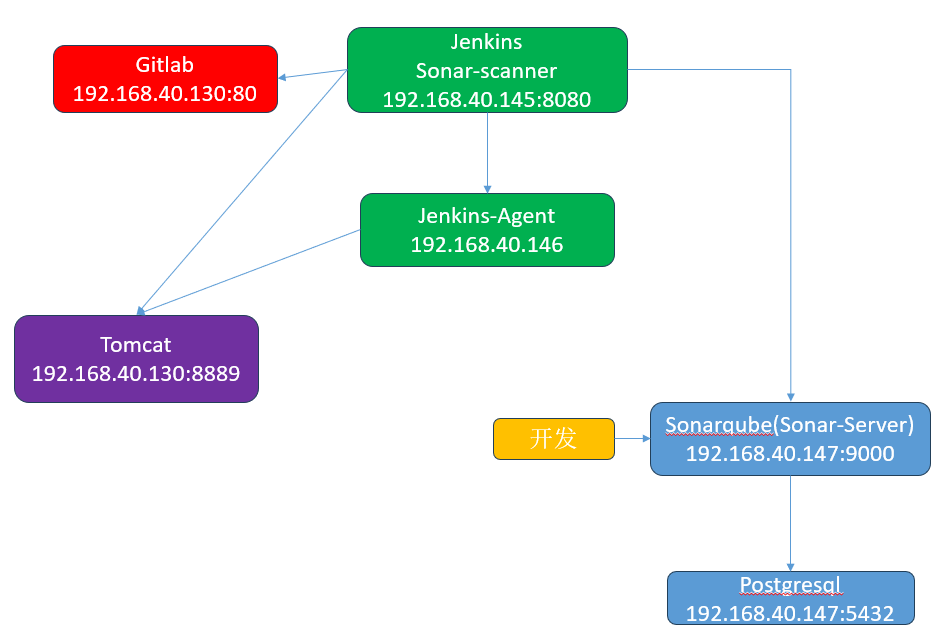
网络拓扑
版本
#【Sonarqube-Sonar-Server】
IP:192.168.40.147 9000
JDK:17
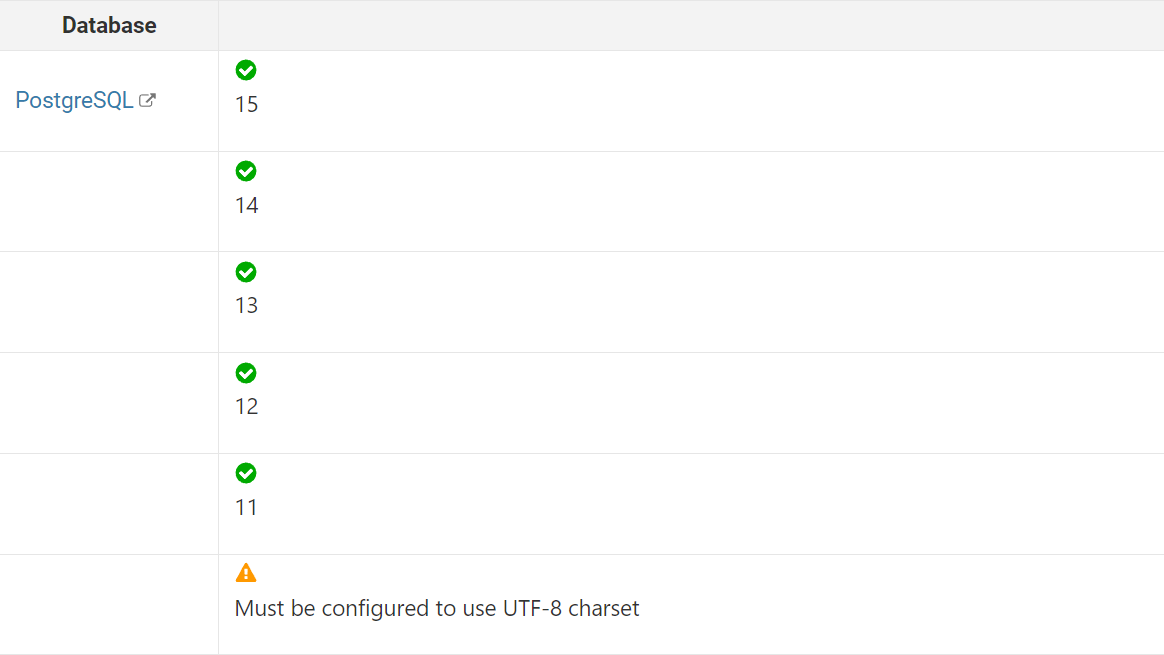
pstgresql:Postgresql12
sonarqube:sonarqube-9.9.1.69595.zip
#【Sonar-Scanner】
IP:192.168.40.145
sonar-scanner:sonar-scanner-cli-4.8.0.2856-linux.zip安装JDK17
JDK17:https://download.oracle.com/java/17/latest/jdk-17_linux-x64_bin.tar.gz

#jdk-17_linux-x64_bin.tar.gz

[root@sonarqube Java]# tar zxvf jdk-17_linux-x64_bin.tar.gz -C /usr/local/src/

[root@sonarqube jdk-17.0.7]# vim /etc/profile
#JAVA PARAMETERS
export JAVA_HOME=/usr/local/src/jdk-17.0.7
export PATH=$JAVA_HOME/bin:$PATH
export CLASSPATH=.:$JAVA_HOME/lib/dt.jar:$JAVA_HOME/lib/tool.jar

[root@sonarqube jdk-17.0.7]# source /etc/profile

[root@sonarqube jdk-17.0.7]# java --version
java 17.0.7 2023-04-18 LTS
Java(TM) SE Runtime Environment (build 17.0.7+8-LTS-224)
Java HotSpot(TM) 64-Bit Server VM (build 17.0.7+8-LTS-224, mixed mode, sharing)
安装Postgresql12
https://www.postgresql.org/

[root@sonarqube jdk-17.0.7]# yum install -y https://download.postgresql.org/pub/repos/yum/reporpms/EL-7-x86_64/pgdg-redhat-repo-latest.noarch.rpm
[root@sonarqube jdk-17.0.7]# yum install -y postgresql12-server
[root@sonarqube jdk-17.0.7]# /usr/pgsql-12/bin/postgresql-12-setup initdb
[root@sonarqube jdk-17.0.7]# systemctl start postgresql-12
[root@sonarqube jdk-17.0.7]# systemctl status postgresql-12
● postgresql-12.service - PostgreSQL 12 database server
   Loaded: loaded (/usr/lib/systemd/system/postgresql-12.service; enabled; vendor preset: disabled)
   Active: active (running) since Sat 2023-07-01 13:48:53 CST; 12s ago
     Docs: https://www.postgresql.org/docs/12/static/
  Process: 10610 ExecStartPre=/usr/pgsql-12/bin/postgresql-12-check-db-dir ${PGDATA} (code=exited, status=0/SUCCESS)
 Main PID: 10616 (postmaster)
   CGroup: /system.slice/postgresql-12.service
           ├─10616 /usr/pgsql-12/bin/postmaster -D /var/lib/pgsql/12/data/
           ├─10618 postgres: logger
           ├─10620 postgres: checkpointer
           ├─10621 postgres: background writer
           ├─10622 postgres: walwriter
           ├─10623 postgres: autovacuum launcher
           ├─10624 postgres: stats collector
           └─10625 postgres: logical replication launcher


[root@sonarqube jdk-17.0.7]# ps -ef | grep postgre
postgres  10616      1  0 13:48 ?        00:00:00 /usr/pgsql-12/bin/postmaster -D /var/lib/pgsql/12/data/
postgres  10618  10616  0 13:48 ?        00:00:00 postgres: logger
postgres  10620  10616  0 13:48 ?        00:00:00 postgres: checkpointer
postgres  10621  10616  0 13:48 ?        00:00:00 postgres: background writer
postgres  10622  10616  0 13:48 ?        00:00:00 postgres: walwriter
postgres  10623  10616  0 13:48 ?        00:00:00 postgres: autovacuum launcher
postgres  10624  10616  0 13:48 ?        00:00:00 postgres: stats collector
postgres  10625  10616  0 13:48 ?        00:00:00 postgres: logical replication launcher
root      10738   9873  0 13:58 pts/0    00:00:00 grep --color=auto postgre

1.#创建数据目录
[root@sonarqube data]# mkdir -p /data/postgresql-12/

2.#修改目录的属主属组
[root@sonarqube data]# chown postgres:postgres -R /data/postgresql-12/

3.#初始化pgsql
[root@sonarqube data]# sudo -u postgres /usr/pgsql-12/bin/initdb --encoding=UTF-8 --username=postgres --pgdata=/data/postgresql-12/data
The files belonging to this database system will be owned by user "postgres".
This user must also own the server process.

The database cluster will be initialized with locale "en_US.UTF-8".
The default text search configuration will be set to "english".

Data page checksums are disabled.

creating directory /data/postgresql-12/data ... ok
creating subdirectories ... ok
selecting dynamic shared memory implementation ... posix
selecting default max_connections ... 100
selecting default shared_buffers ... 128MB
selecting default time zone ... Asia/Shanghai
creating configuration files ... ok
running bootstrap script ... ok
performing post-bootstrap initialization ... ok
syncing data to disk ... ok

initdb: warning: enabling "trust" authentication for local connections
You can change this by editing pg_hba.conf or using the option -A, or
--auth-local and --auth-host, the next time you run initdb.

Success. You can now start the database server using:

    /usr/pgsql-12/bin/pg_ctl -D /data/postgresql-12/data -l logfile start

# --encoding 字符集
# --username 启动用户
# --pgdata 数据目录

4.#配置监听地址
vim /data/postgresql-12/data/postgresql.conf...
# - Connection Settings
listen_addresses = '*'

5.#定义哪些服务器、可以用什么样的方式,访问postgresql
/data/postgresql-12/data/pg_hba.conf...
# IPv4 local connections:
host    all             all              0.0.0.0/0              trust


6.#修改service文件中数据目录
vim /usr/lib/systemd/system/postgresql-12.service...
# Location of database directory
Environment=PGDATA=/data/postgresql-12/data/

#重载服务
systemctl daemon-reload

7.#启动postgresql
systemctl start postgresql-12
systemctl enable postgresql-12


#连接数据库(此命令会用postgres用户,默认连入postgres数据库。-U指定用户 -d指定数据库)
psql -U postgres
#新建用户sonarqube,密码xxxxxx
create user sonarqube with password 'sheca';
#创建数据库sonarqube并指定owner为sonarqube
create database sonarqube with owner sonarqube;
#授权sonarqube用户在数据库sonarqube拥有所有权限
grant all on database sonarqube to sonarqube;

#测试连接Navicat
链接:https://pan.baidu.com/s/14t2MTbyB3A72H7NcNBLcjQ
提取码:e6o0
系统配置参数
#用root查看参数
[root@sonarqube jdk-17.0.7]# sysctl vm.max_map_count
vm.max_map_count = 65530

[root@sonarqube jdk-17.0.7]# sysctl fs.file-max
fs.file-max = 292756

[root@sonarqube jdk-17.0.7]# ulimit -n
1024

[root@sonarqube jdk-17.0.7]# ulimit -u
11609

#用root设置参数
[root@sonarqube jdk-17.0.7]# sysctl -w vm.max_map_count=524288
vm.max_map_count = 524288
[root@sonarqube jdk-17.0.7]# sysctl -w fs.file-max=131072
fs.file-max = 131072
[root@sonarqube jdk-17.0.7]# ulimit -n 131072
[root@sonarqube jdk-17.0.7]# ulimit -u 8192

#limits.conf
[root@sonarqube jdk-17.0.7]# vim /etc/security/limits.conf
sonarqube   -   nofile   131072
sonarqube   -   nproc    8192
安装Sonarqube
#下载包到/opt下
sonarqube-9.9.1.69595.zip
#创建用户sonar,因为sonarqube会用到ES,ES不能用root用户启动
[root@sonarqube conf]# useradd sonar
[root@sonarqube conf]# passwd sonar
#解压包
[root@sonarqube conf]# unzip sonarqube-9.9.1.69595.zip
#修改目录的属主属组
[root@sonarqube conf]# chown -R sonar:sonar sonarqube-9.9.1.69595/
#备份原始配置文件
[root@sonarqube conf]# cd sonarqube-9.9.1.69595/conf/
[root@sonarqube conf]# cp sonar.properties sonar.properties.bak
[root@sonarqube conf]# vim sonar.properties
[root@sonarqube conf]# grep -Ev "^$|^[#;]" sonar.properties
sonar.jdbc.username=sonarqube
sonar.jdbc.password=sheca
#主要是这条,要用ip地址,否则web.log会一直报错这台设置有问题,数据库连接不上
sonar.jdbc.url=jdbc:postgresql://192.168.40.147:5432/sonarqube
sonar.web.port=9000
#启动/opt/sonarqube-9.9.1.69595/bin/linux-x86-64/sonar.sh
[root@sonarqube conf]# su - sonar
[sonar@sonarqube conf]# /opt/sonarqube-9.9.1.69595/bin/linux-x86-64/sonar.sh start
#查看/opt/sonarqube-9.9.1.69595/logs/web.log 是否有报错
[sonar@sonarqube conf]# tail -f /opt/sonarqube-9.9.1.69595/logs/web.log
[root@sonarqube opt]# netstat -ntlp| grep 9000
tcp6 0 0 :::9000 :::* LISTEN 30819/java
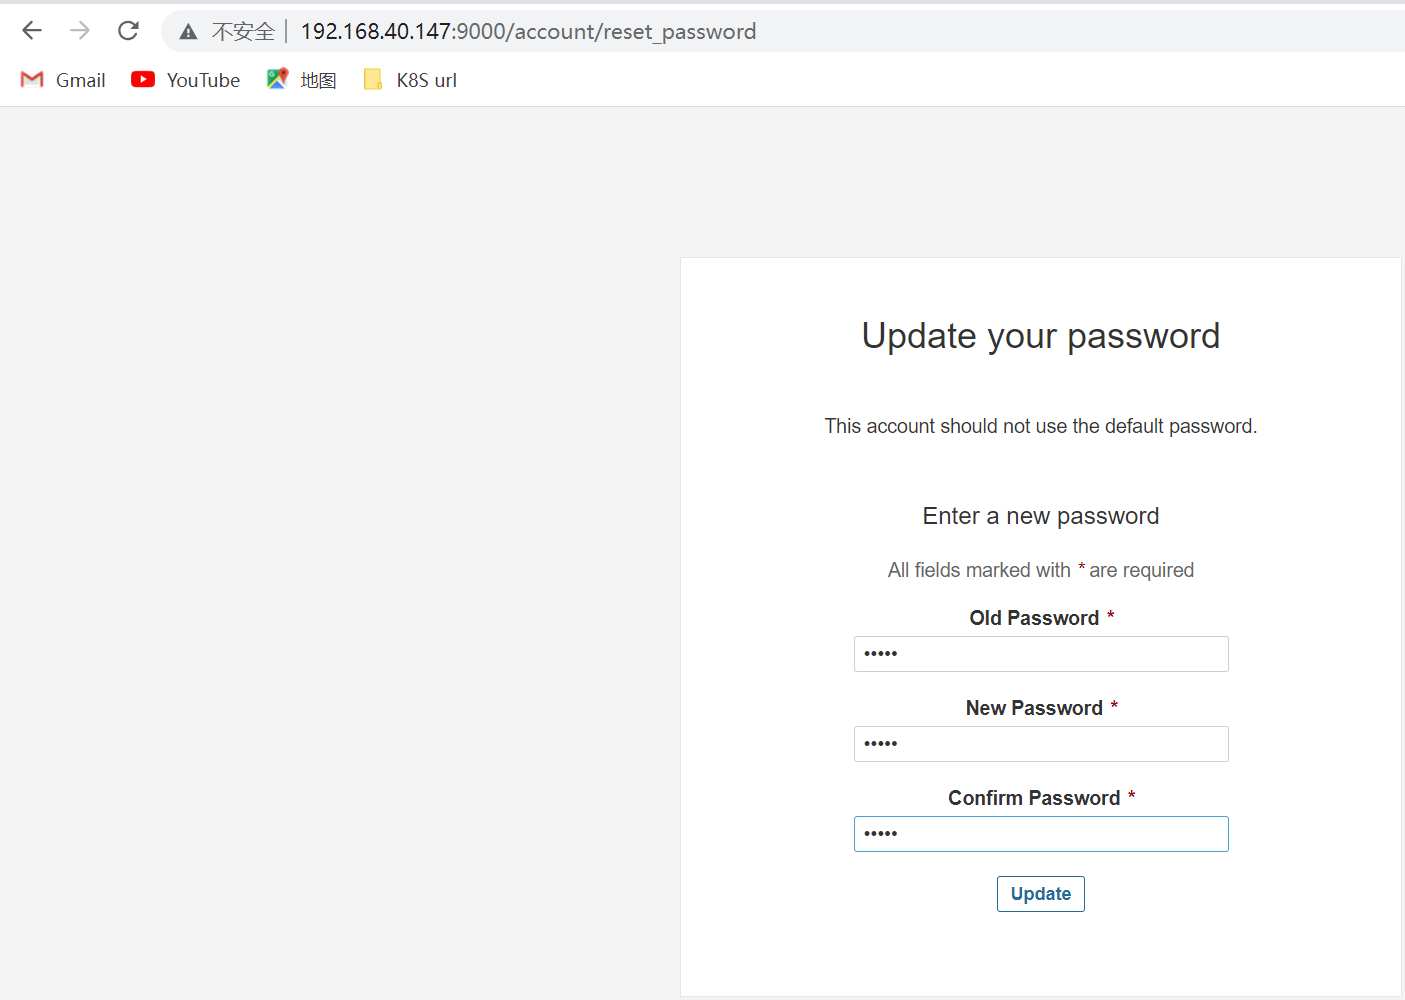
#web端配置
初始用户名密码:admin/admin
#命令
Start:
$SONARQUBE_HOME/bin/linux-x86-64/sonar.sh start
Graceful shutdown:
$SONARQUBE_HOME/bin/linux-x86-64/sonar.sh stop
Hard stop:
$SONARQUBE_HOME/bin/linux-x86-64/sonar.sh force-stop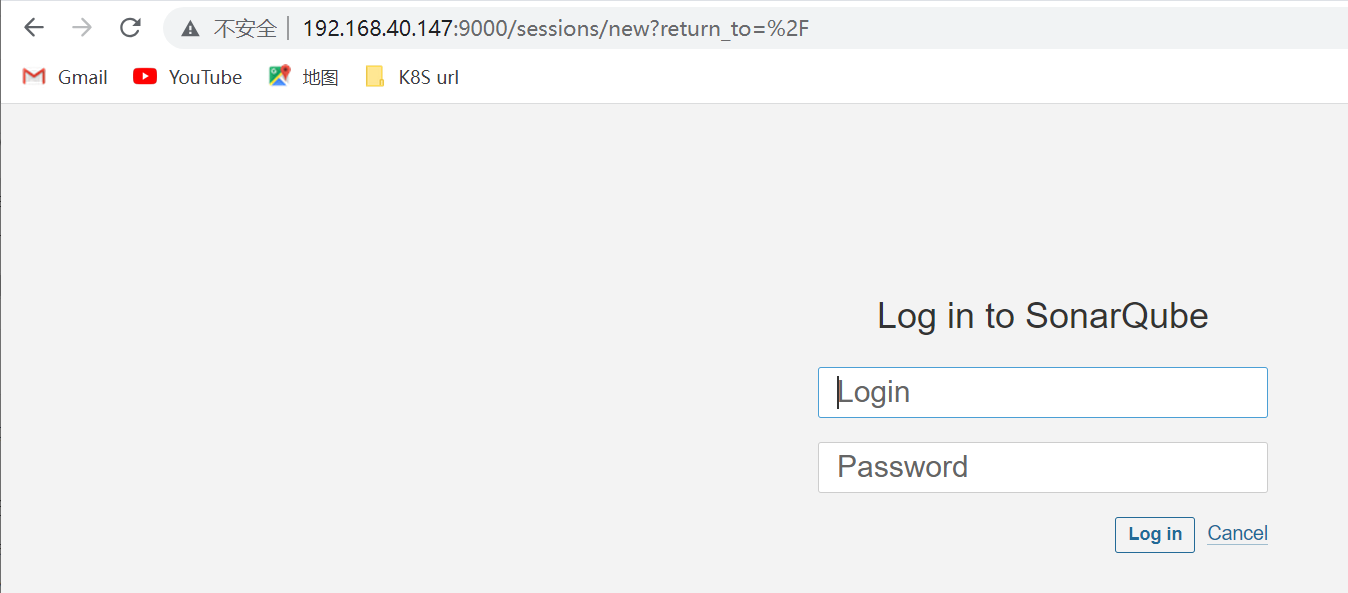
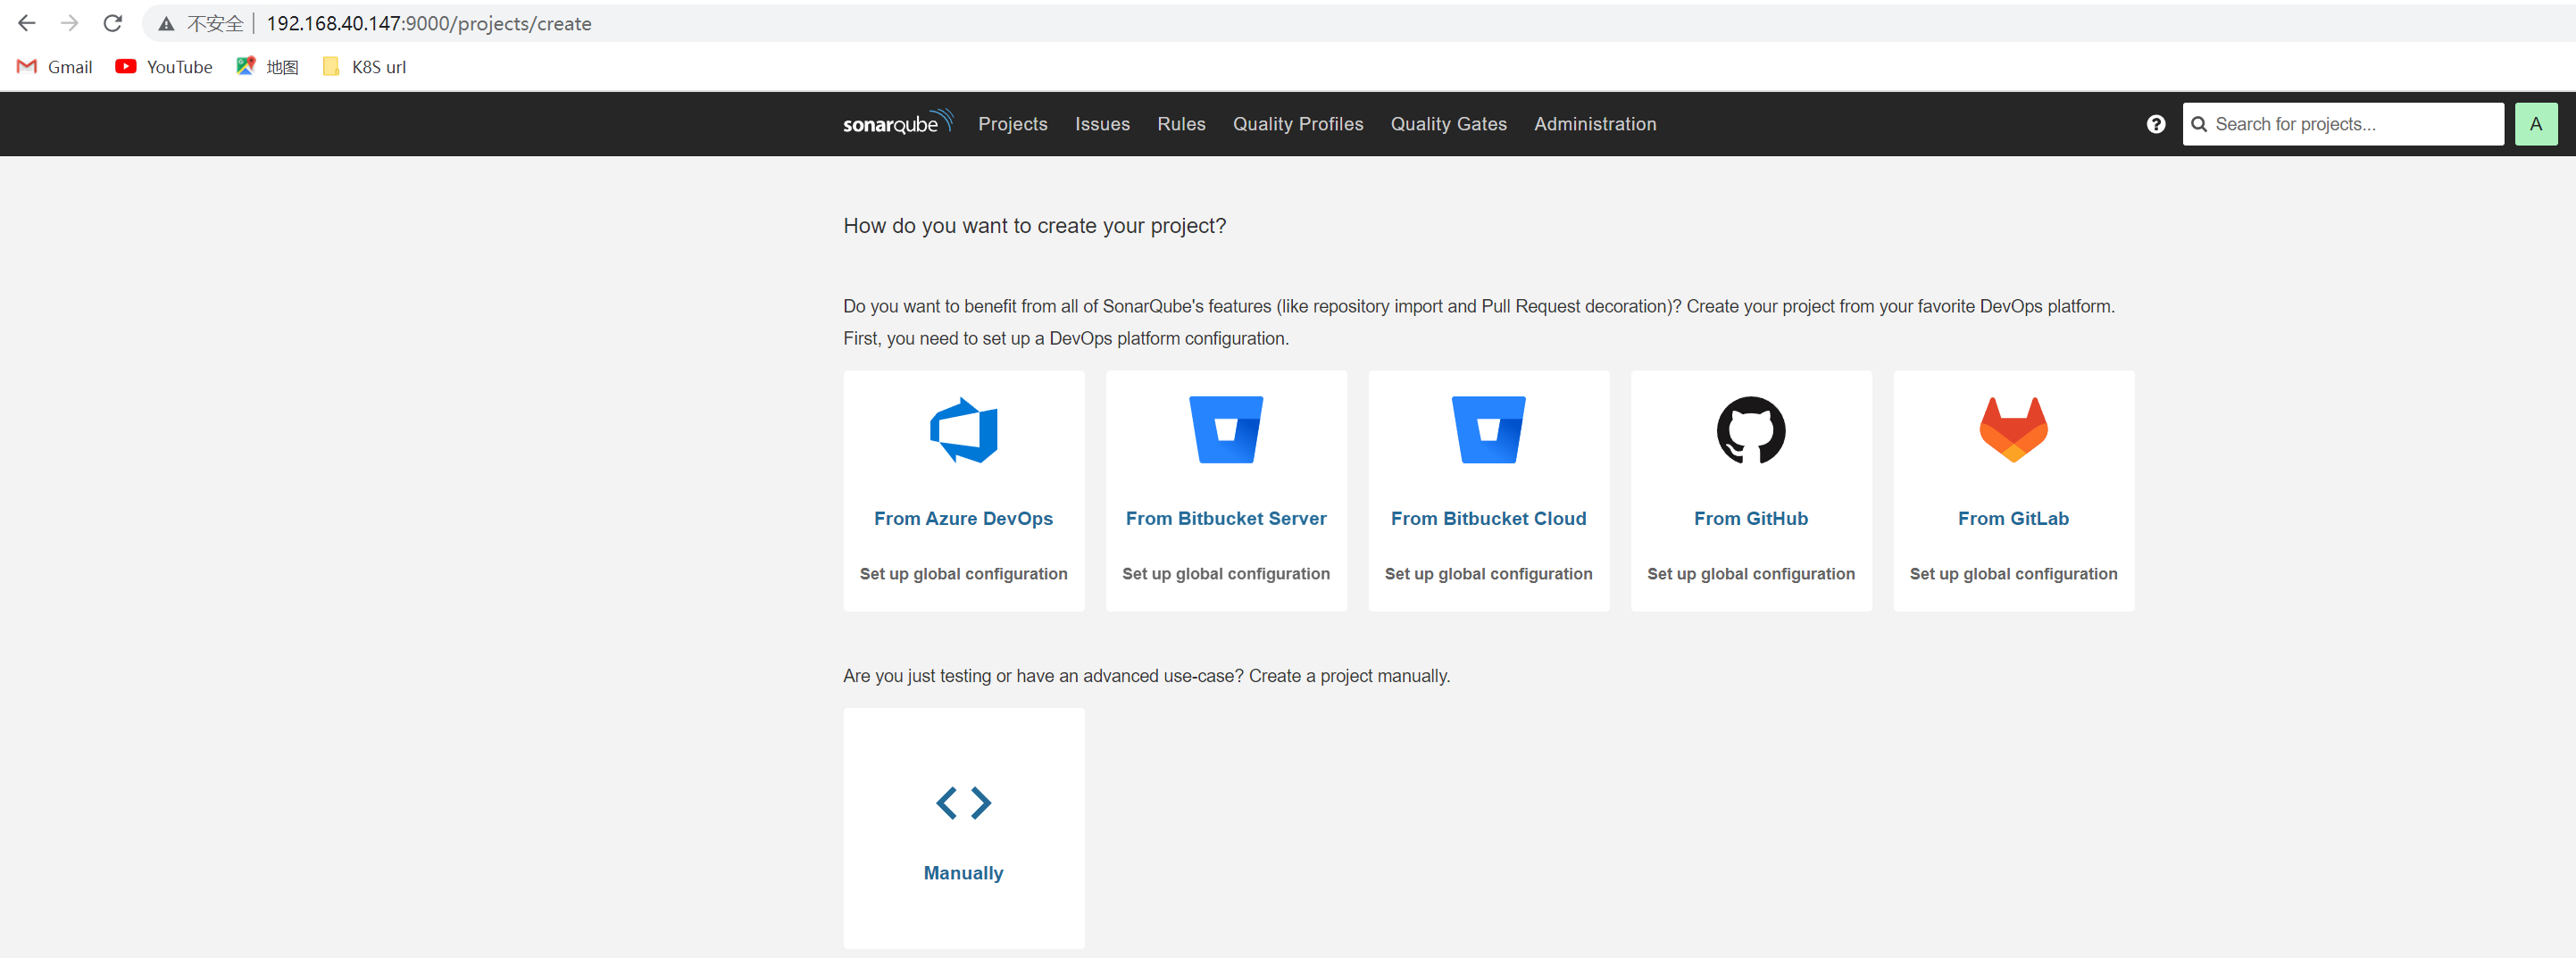
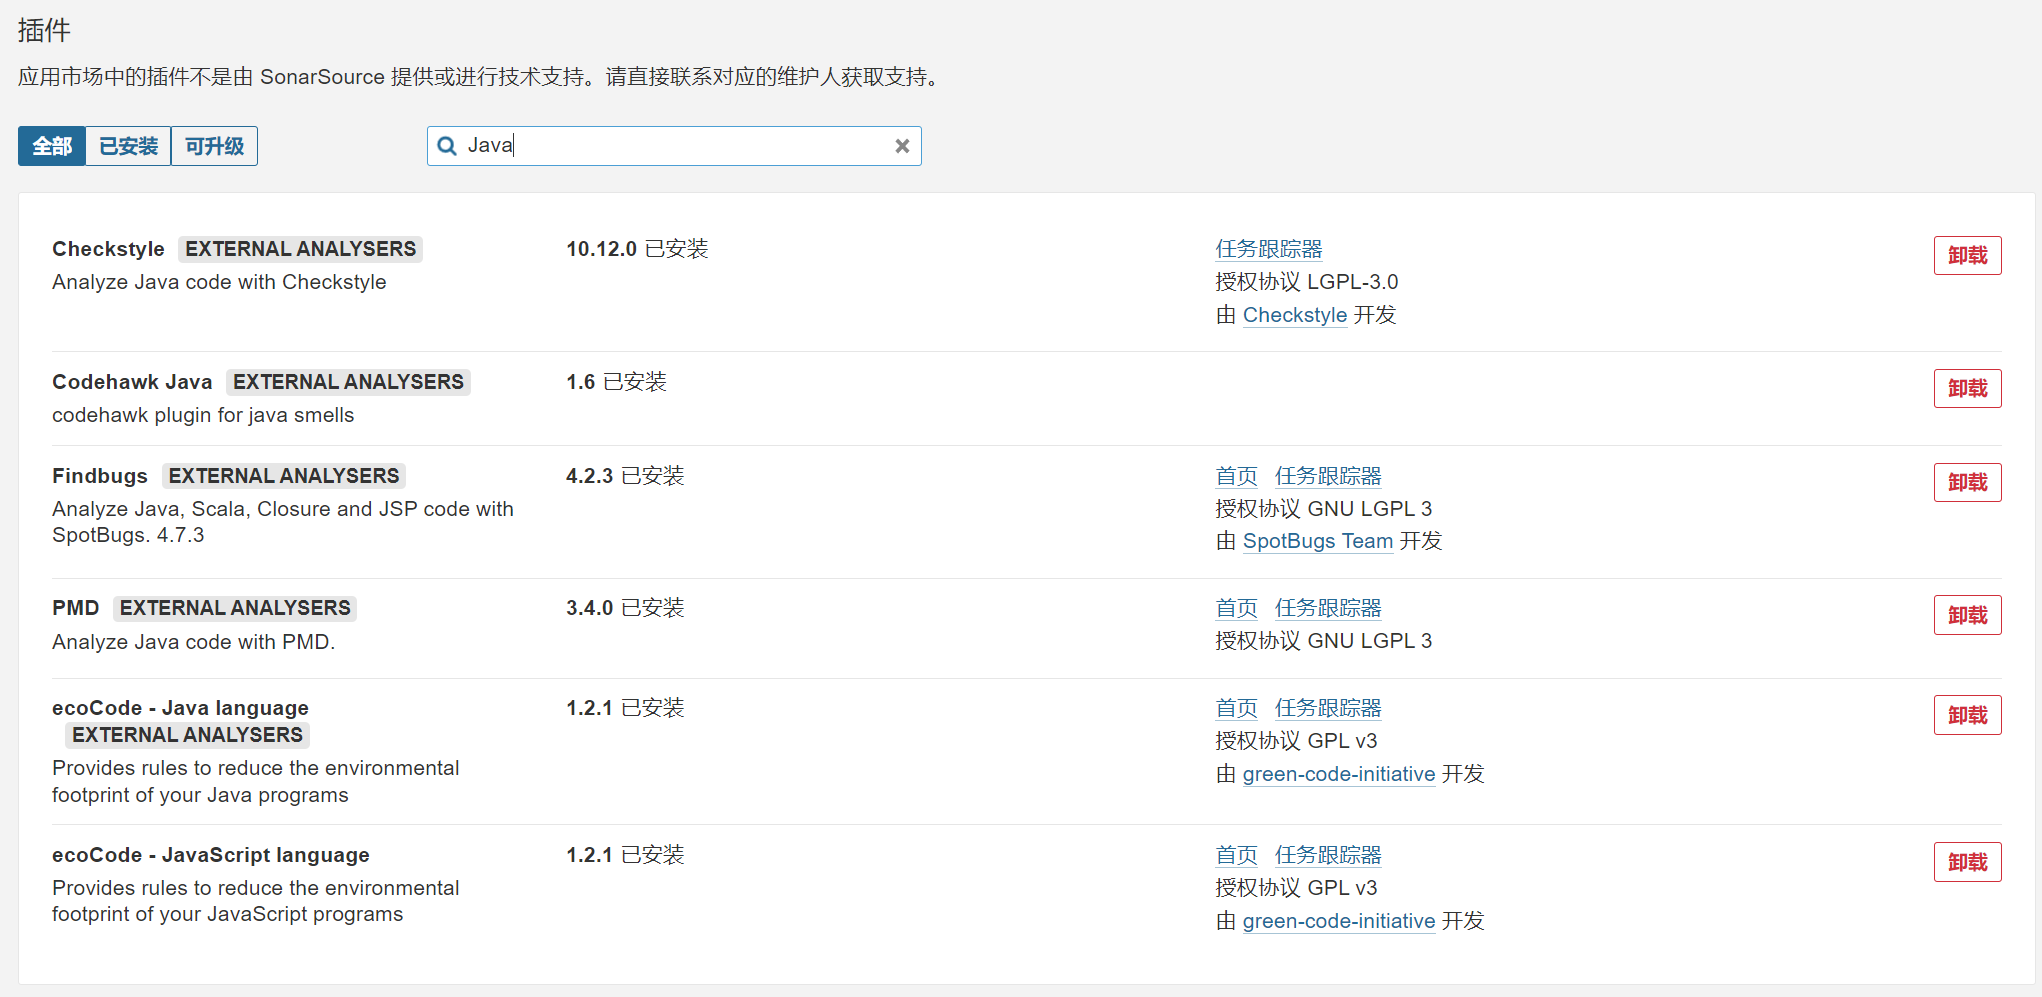
安装插件
Install a plugin
There are two ways to install plugins in SonarQube:
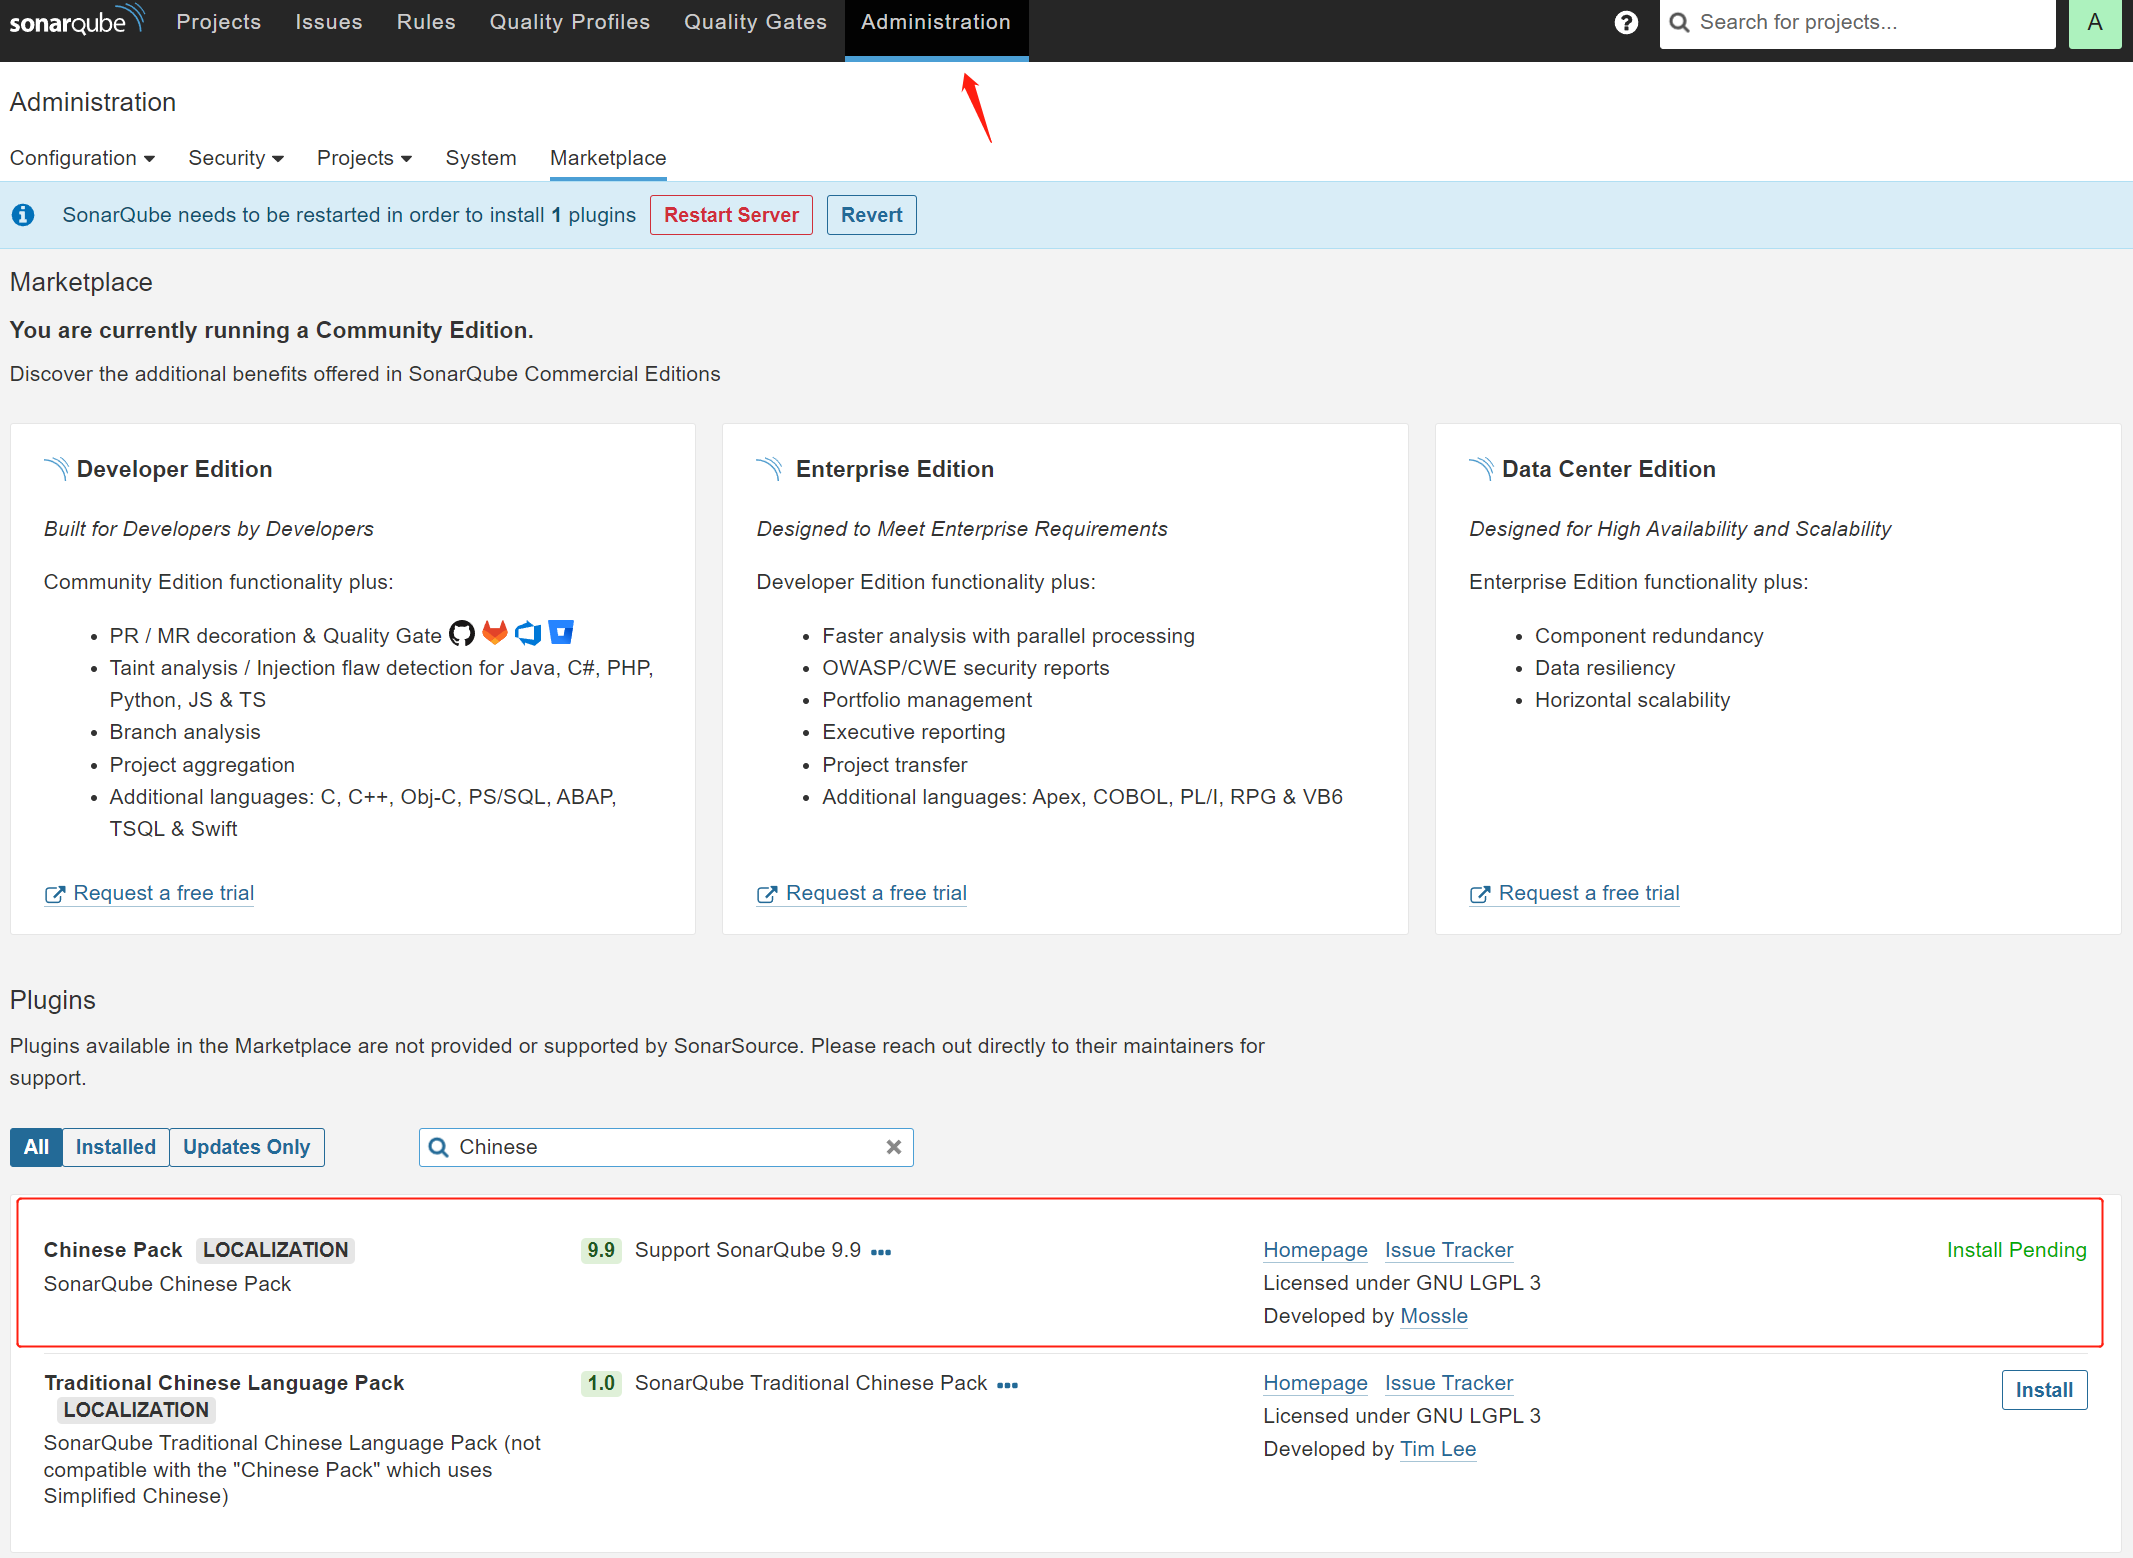
Marketplace: With Community Edition, you can automatically install plugins from the Administration > Marketplace tab. With Commercial Editions, you can browse plugins in the Marketplace, but you must manually install and update your plugins.
Manual Installation: You need to manually install plugins when using any commercial edition of SonarQube. You can also manually install plugins if your SonarQube instance doesn't have internet access, or if the plugin you're installing isn't in the SonarQube Marketplace.此时点击安装Pending状态 网络不行 自行下载:点击Homepage 有git地址 进行vpn下在放到 <SONARQUBE_HOME>/extensions/plugins
=====================================================================
安装下载不了软件
#自己VPN 下载地址 放到指定位置 <SONARQUBE_HOME>/extensions/plugins
Manually installing plugins
To manually install a plugin:

Download the plugin you want to install. The version needs to be compatible with your SonarQube version.
Put the downloaded jar in <SONARQUBE_HOME>/extensions/plugins, and remove any previous versions of the same plugins.
Restart your SonarQube server.
=====================================================================

汉化插件下载地址:https://github.com/xuhuisheng/sonar-l10n-zh
AEM Rules for SonarQube:https://github.com/wttech/AEM-Rules-for-SonarQube
CheckstyleEXTERNAL ANALYSERS:https://github.com/checkstyle/sonar-checkstyle
FindbugsEXTERNAL ANALYSERS:https://github.com/spotbugs/sonar-findbugs/
PMDEXTERNAL ANALYSERS:https://github.com/jborgers/sonar-pmd
ecoCode - Java language:https://github.com/green-code-initiative/ecoCode

放到指定为进行重启<SONARQUBE_HOME>/extensions/plugins

#启动/opt/sonarqube-9.9.1.69595/bin/linux-x86-64/sonar.sh
[root@sonarqube conf]# su - sonar
[sonar@sonarqube conf]# /opt/sonarqube-9.9.1.69595/bin/linux-x86-64/sonar.sh restart 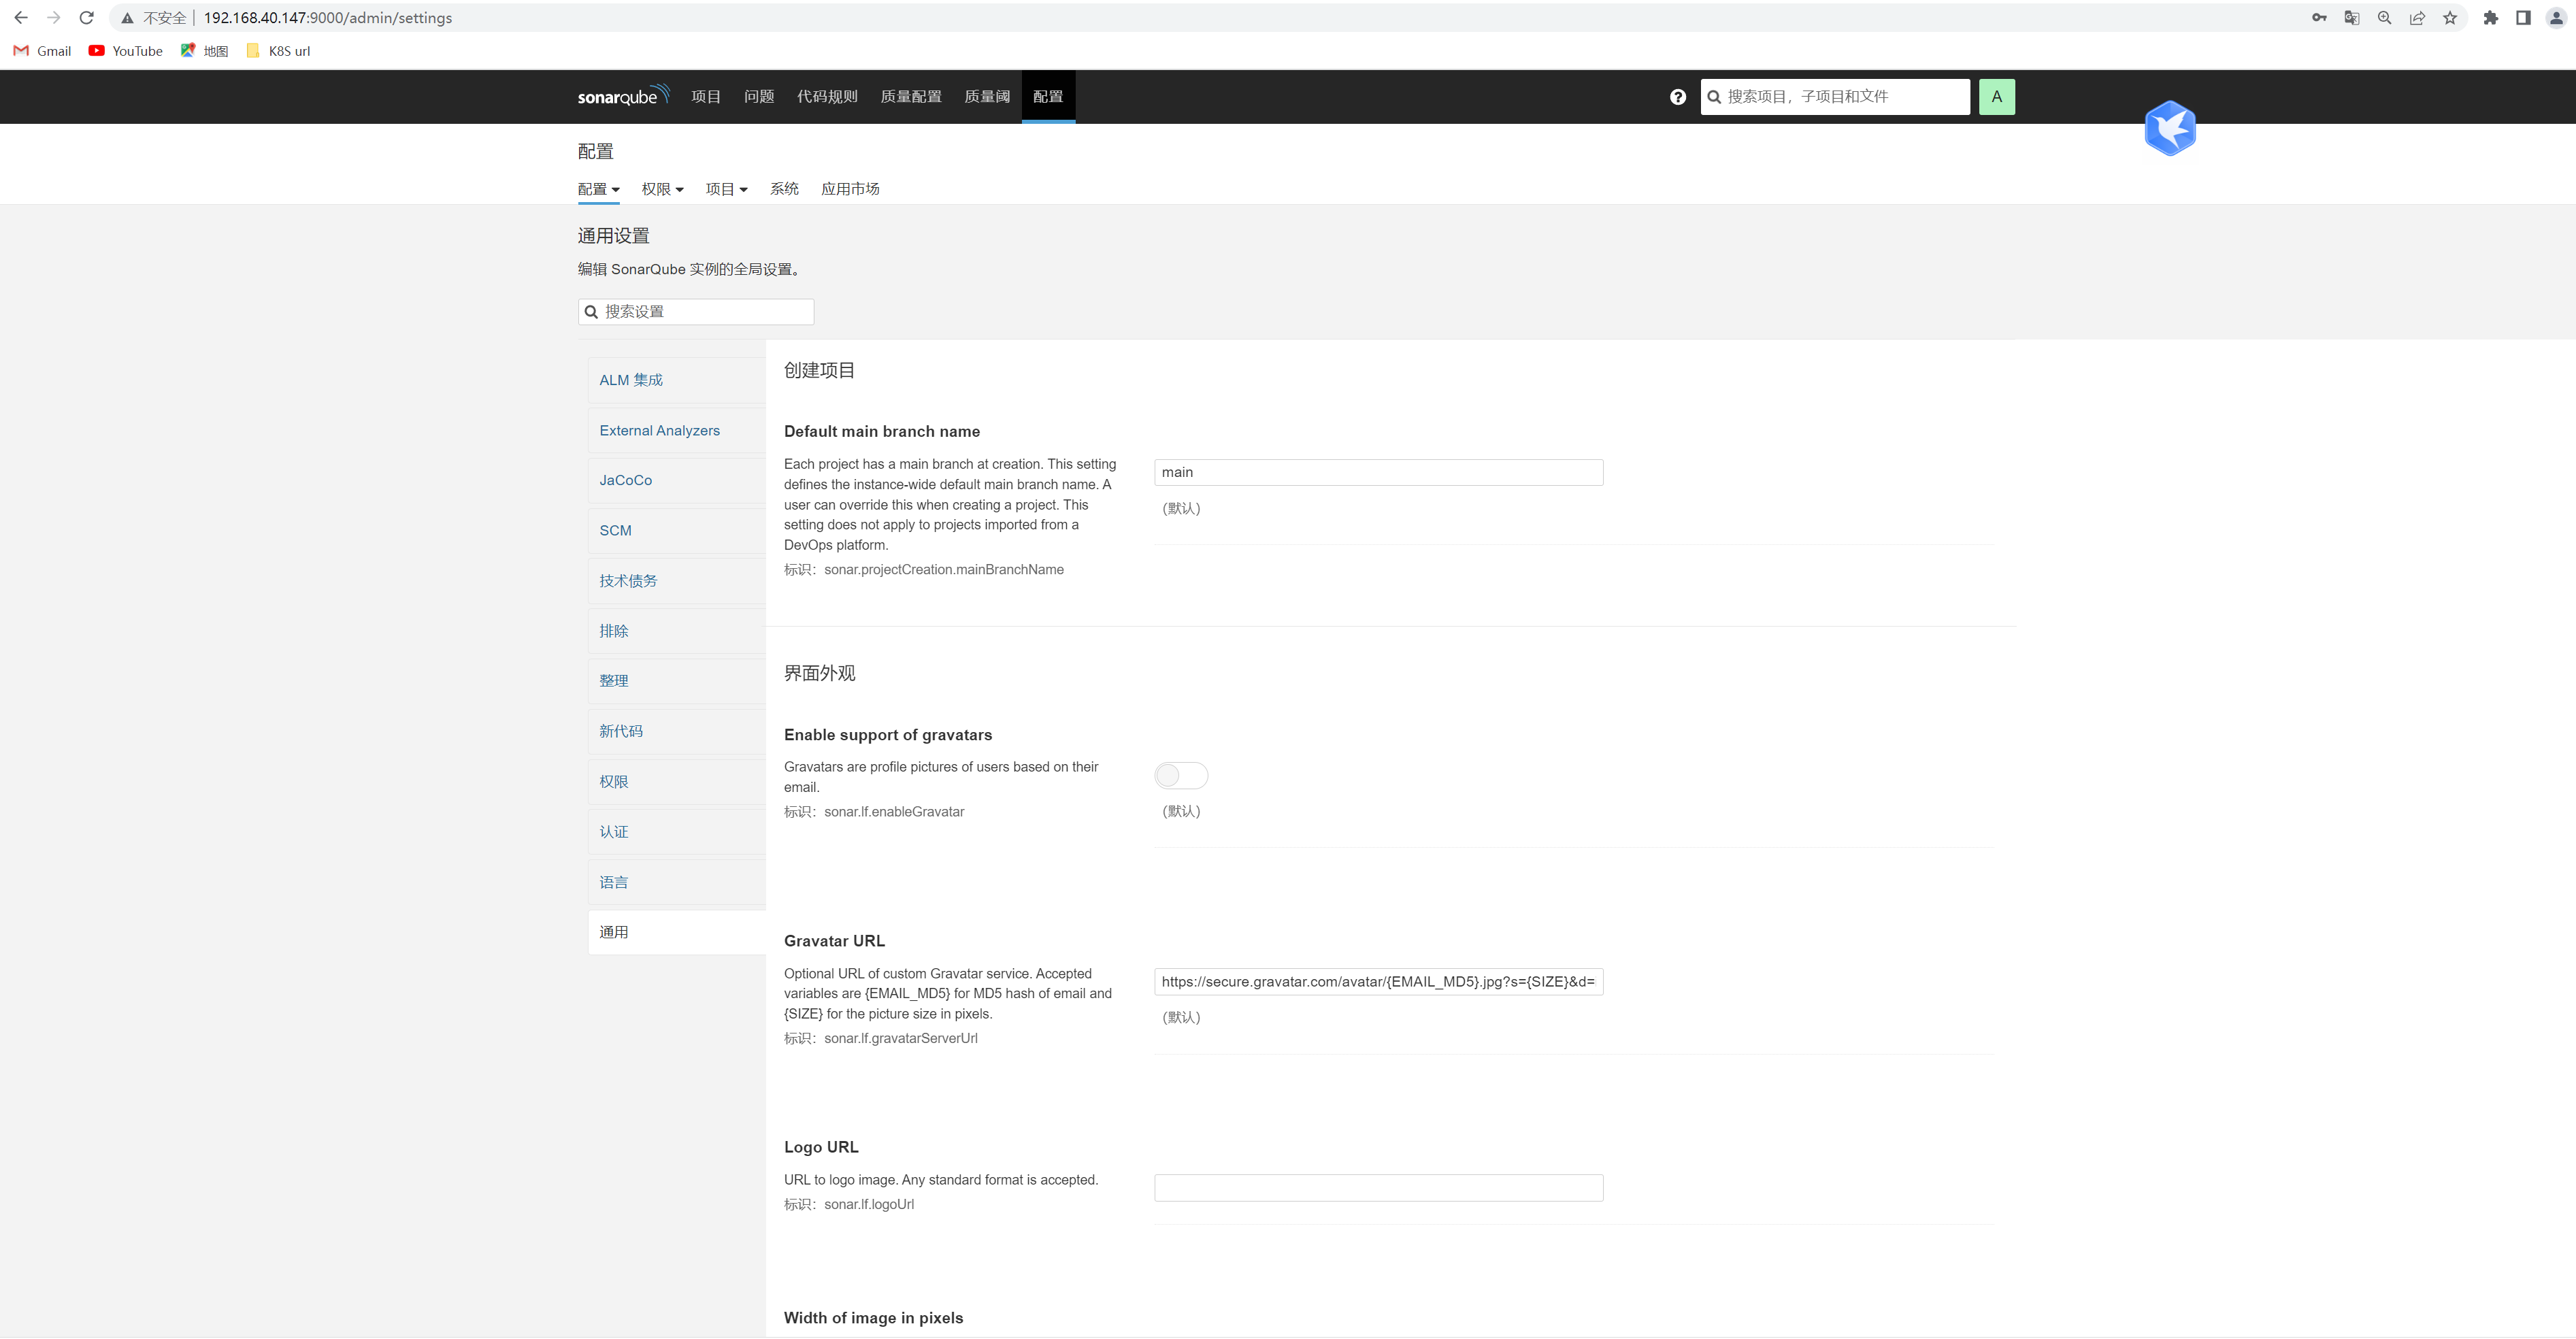
Sonar-Scanner
安装sonar-scanner 用于扫描分析项目
不一定要和sonarqube装到一个系统下,在哪扫就装哪
https://docs.sonarqube.org/9.8/analyzing-source-code/scanners/sonarscanner/

https://binaries.sonarsource.com/Distribution/sonar-scanner-cli/sonar-scanner-cli-4.8.0.2856-linux.zip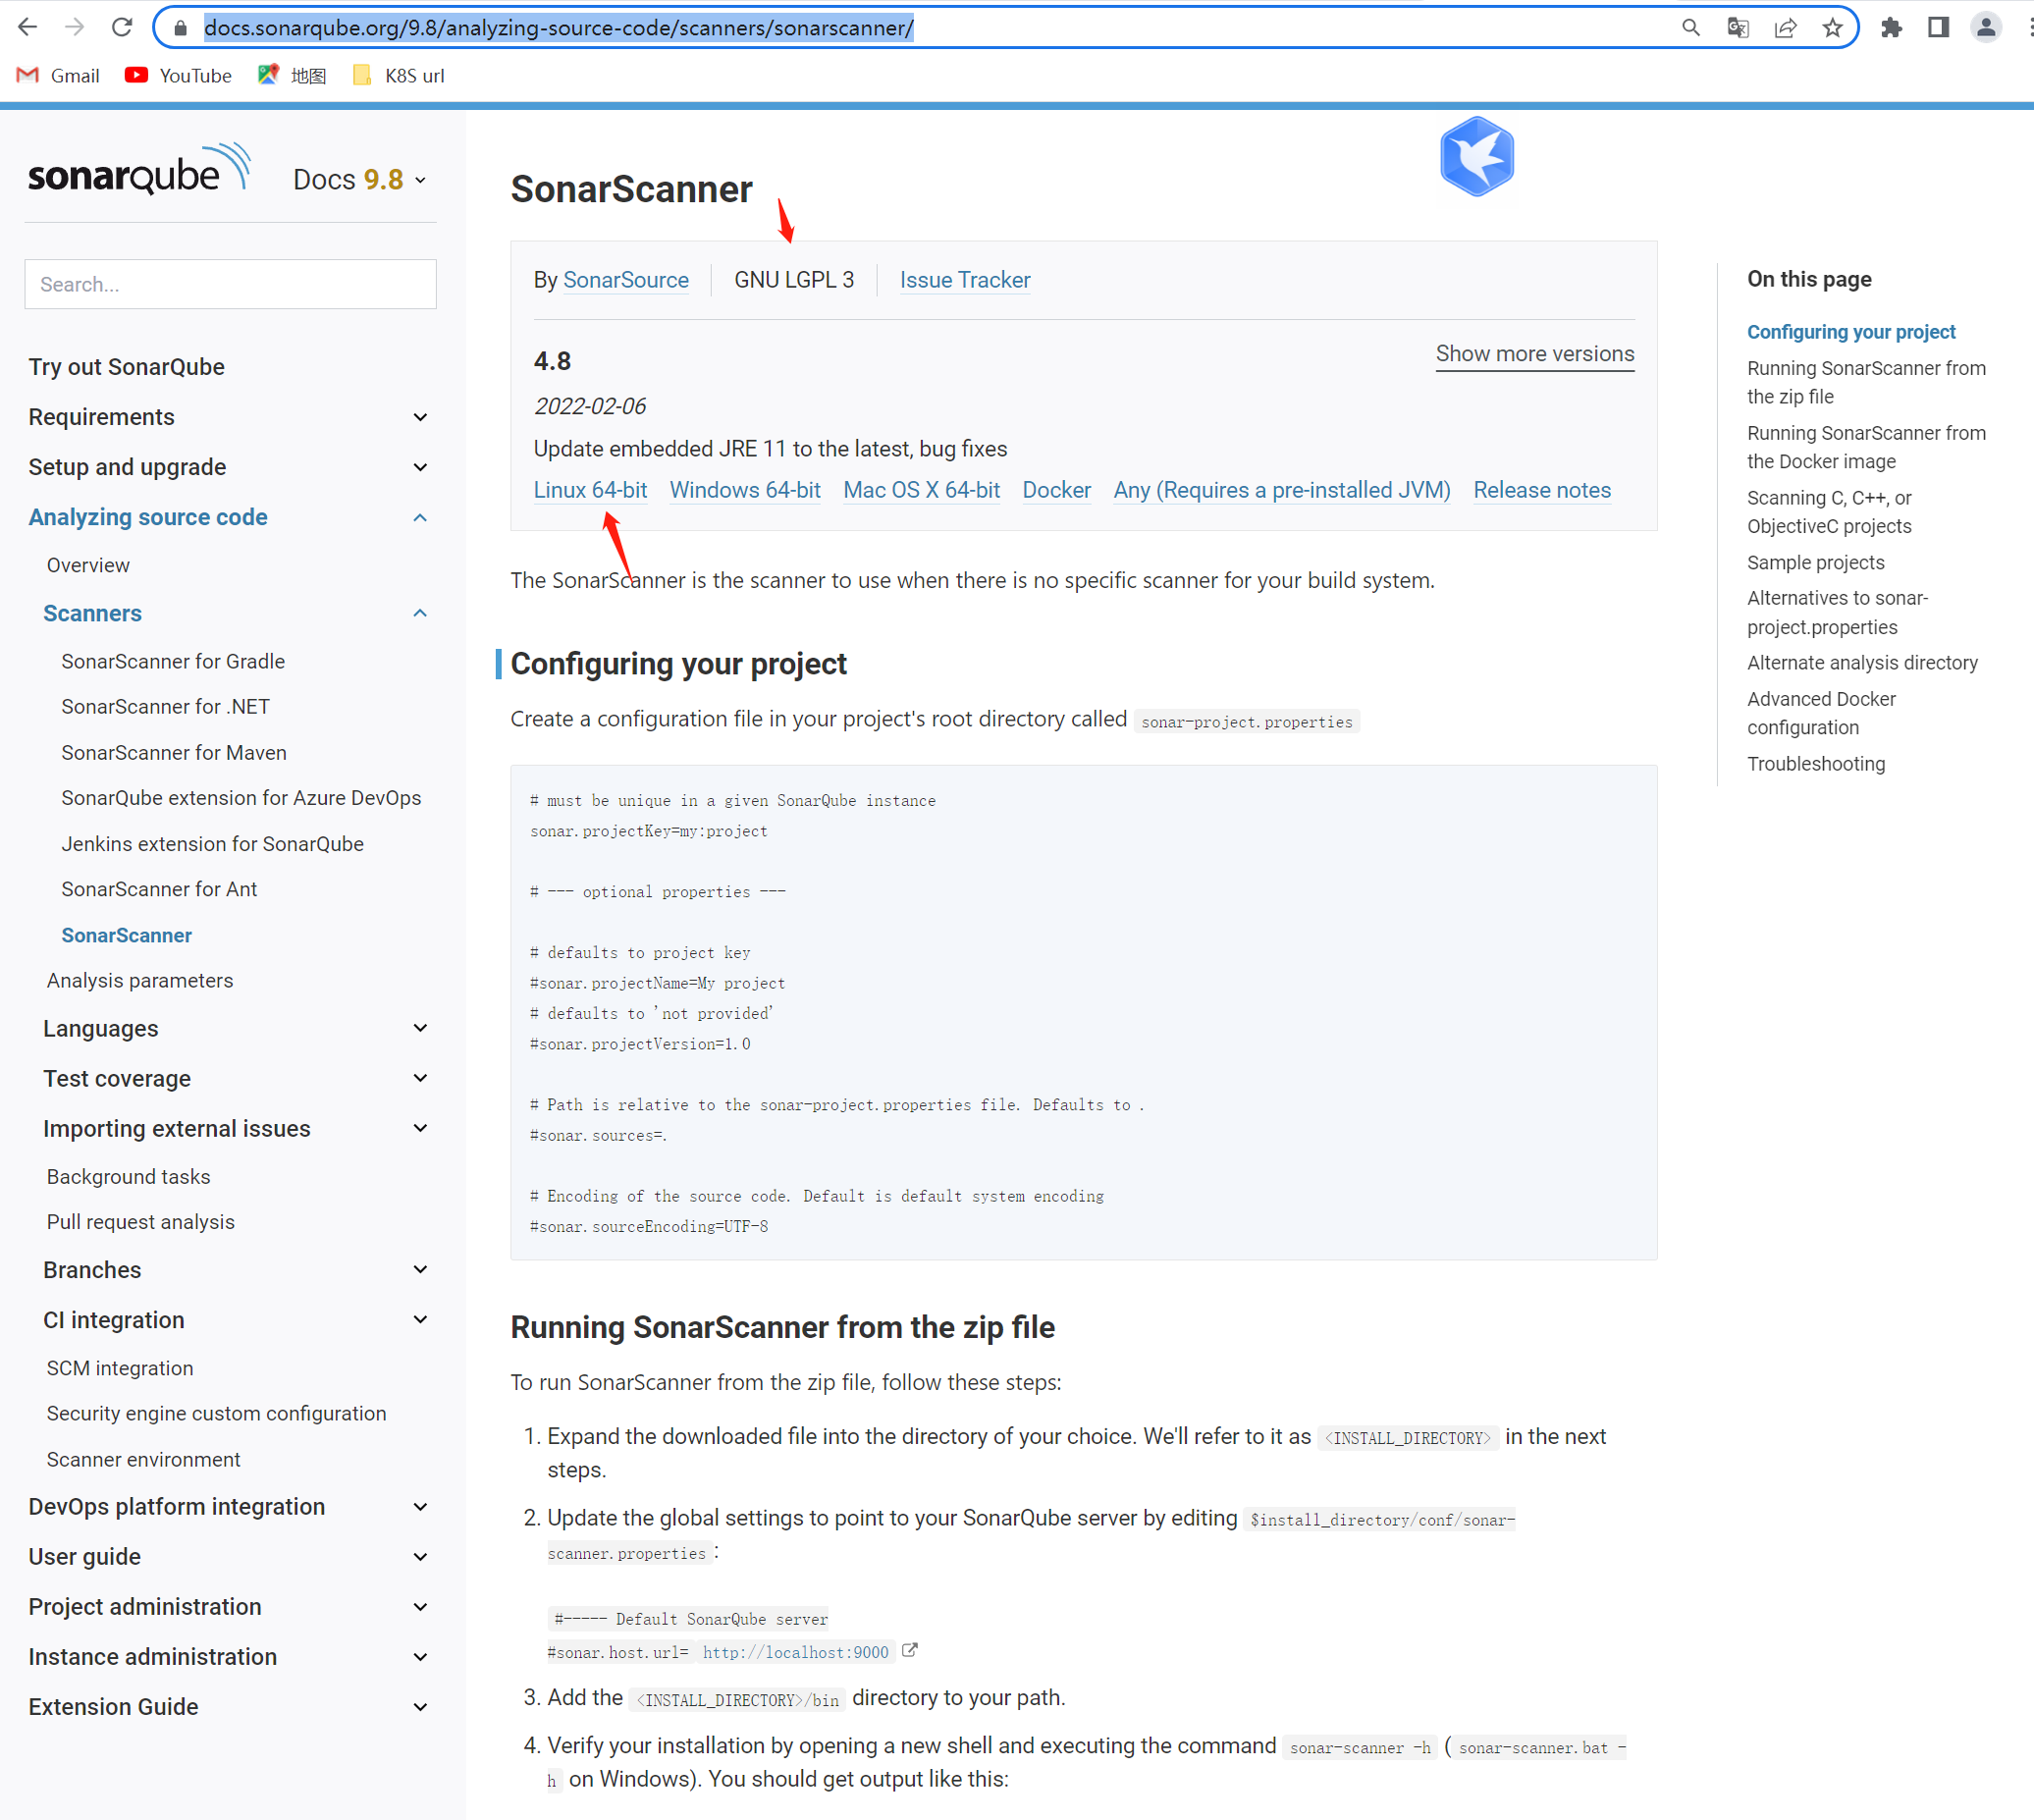
安装Sonarqube-scanner及配置环境
#下载sonar-scanner-cli-4.8.0.2856-linux.zip
[root@jenkinsnew Jenkins]# ll
total 208020
-rw-r--r--. 1 root root 169440335 Jun 30 11:55 jdk-11.0.19_linux-x64_bin.tar.gz
-rw-r--r--. 1 root root  43565694 Jul  1 16:13 sonar-scanner-cli-4.8.0.2856-linux.zip

#解压sonar-scanner-cli-4.8.0.2856-linux.zip
[root@jenkinsnew Jenkins]# unzip sonar-scanner-cli-4.8.0.2856-linux.zip

[root@jenkinsnew Jenkins]# ll
total 208020
-rw-r--r--. 1 root root 169440335 Jun 30 11:55 jdk-11.0.19_linux-x64_bin.tar.gz
drwxr-xr-x. 6 root root        51 Dec 22  2022 sonar-scanner-4.8.0.2856-linux
-rw-r--r--. 1 root root  43565694 Jul  1 16:13 sonar-scanner-cli-4.8.0.2856-linux.zip

#将sonar-scanner-cli-4.8.0.2856-linux 移动到/usr/local/src
[root@jenkinsnew Jenkins]# mv sonar-scanner-4.8.0.2856-linux/ /usr/local/src/
[root@jenkinsnew Jenkins]# cd /usr/local/src/
[root@jenkinsnew src]# ll
total 0
drwxr-xr-x. 9 root root 126 Jun 30 11:56 jdk-11.0.19
drwxr-xr-x. 6 root root  51 Dec 22  2022 sonar-scanner-4.8.0.2856-linux

#重新命名sonar-scanner-4.8.0.2856-linux => sonar-scanner
[root@jenkinsnew src]# mv sonar-scanner-4.8.0.2856-linux/ sonar-scanner/

[root@jenkinsnew src]# ll
total 0
drwxr-xr-x. 9 root root 126 Jun 30 11:56 jdk-11.0.19
drwxr-xr-x. 6 root root  51 Dec 22  2022 sonar-scanner

[root@jenkinsnew src]# cd sonar-scanner/

[root@jenkinsnew sonar-scanner]# pwd
/usr/local/src/sonar-scanner

#配置环境变量
[root@jenkinsnew sonar-scanner]# vim /etc/profile
#Sonar-scanner
export SONAR_HOME=/usr/local/src/sonar-scanner/
export PATH=$PATH:$SONAR_HOME/bin

[root@jenkinsnew sonar-scanner]# source /etc/profile
[root@jenkinsnew sonar-scanner]# sonar-scanner -x
ERROR: Unrecognized option: -x
INFO:
INFO: usage: sonar-scanner [options]
INFO:
INFO: Options:
INFO:  -D,--define <arg>     Define property
INFO:  -h,--help             Display help information
INFO:  -v,--version          Display version information
INFO:  -X,--debug            Produce execution debug output

#配置sonar-scanner.properties 要配置 login名称和password 否则后面启动会报错
[root@jenkinsnew ~]# cat /usr/local/src/sonar-scanner/conf/sonar-scanner.properties
#Configure here general information about the environment, such as SonarQube server connection details for example
#No information about specific project should appear here

#----- Default SonarQube server
sonar.host.url=http://192.168.40.147:9000

#----- Default source code encoding
sonar.sourceEncoding=UTF-8
sonar.login=admin
sonar.password=sheca
配置扫码测试代码
#sonar-project.properties、src/test.py
[root@jenkinsnew ~]# pwd
/root
[root@jenkinsnew ~]# ll
total 8
-rw-------. 1 root root 1401 Jun 30 11:30 anaconda-ks.cfg
drwxr-xr-x. 2 root root 92 Jul 2 09:11 Jenkins
drwxr-xr-x. 2 root root 6 Jul 2 00:32 python_script
-rw-r--r--. 1 root root 280 Jul 2 09:28 sonar-project.properties
drwxr-xr-x. 2 root root 21 Jul 2 09:04 src
#sonar-project.propertie配置
[root@jenkinsnew ~]# cat sonar-project.properties
#Required metadata
sonar.projectKey=birkhoff-project
sonar.projectName=birkhoff-project
sonar.projectVersion=1.0
# Comma-separated paths to diirectories with source(required)
sonar.sources=src
#Lanaguge
sonar.language=py
#Encoding of the source file
sonar.sourceEncoding=UTF-8
#src/test.py
[root@jenkinsnew ~]# cat src/test.py
#!/usr/bin/env python
#coding:utf-8
#Author:zhang shijie
def func1():
print("func1")
def func2():
print("func2")
def main ():
func1()
func2()
main()
#启动
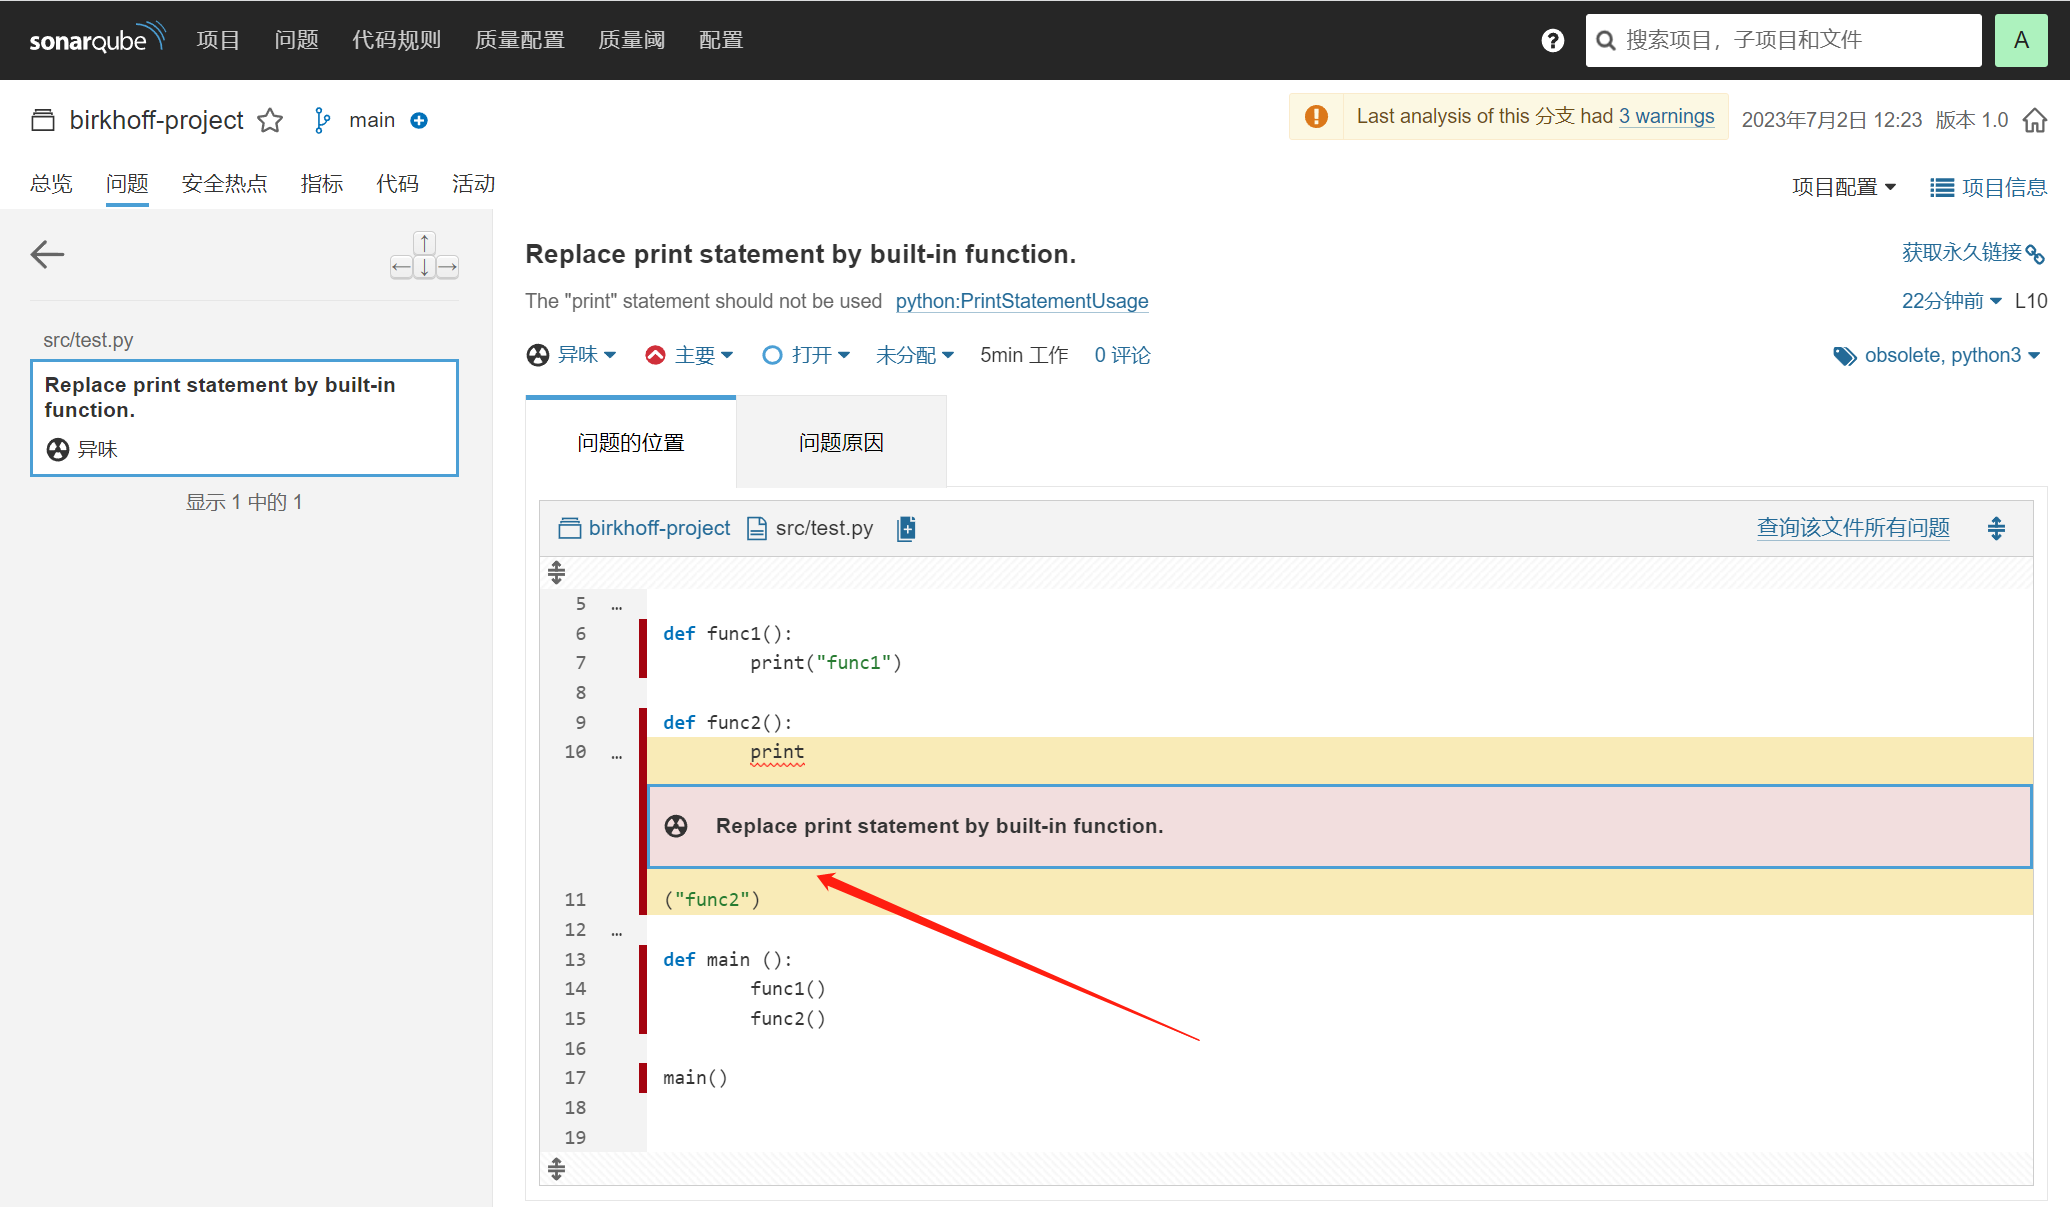
[root@jenkinsnew ~]# sonar-scanner配置错误测试代码扫描
[root@jenkinsnew ~]# cat src/test.py
#!/usr/bin/env python
#coding:utf-8
#Author:zhang shijie


def func1():
                print("func1")

def func2():
#此处故意写错
                print
("func2")

def main ():
                func1()
                func2()

main()

#启动
[root@jenkinsnew ~]# sonar-scanner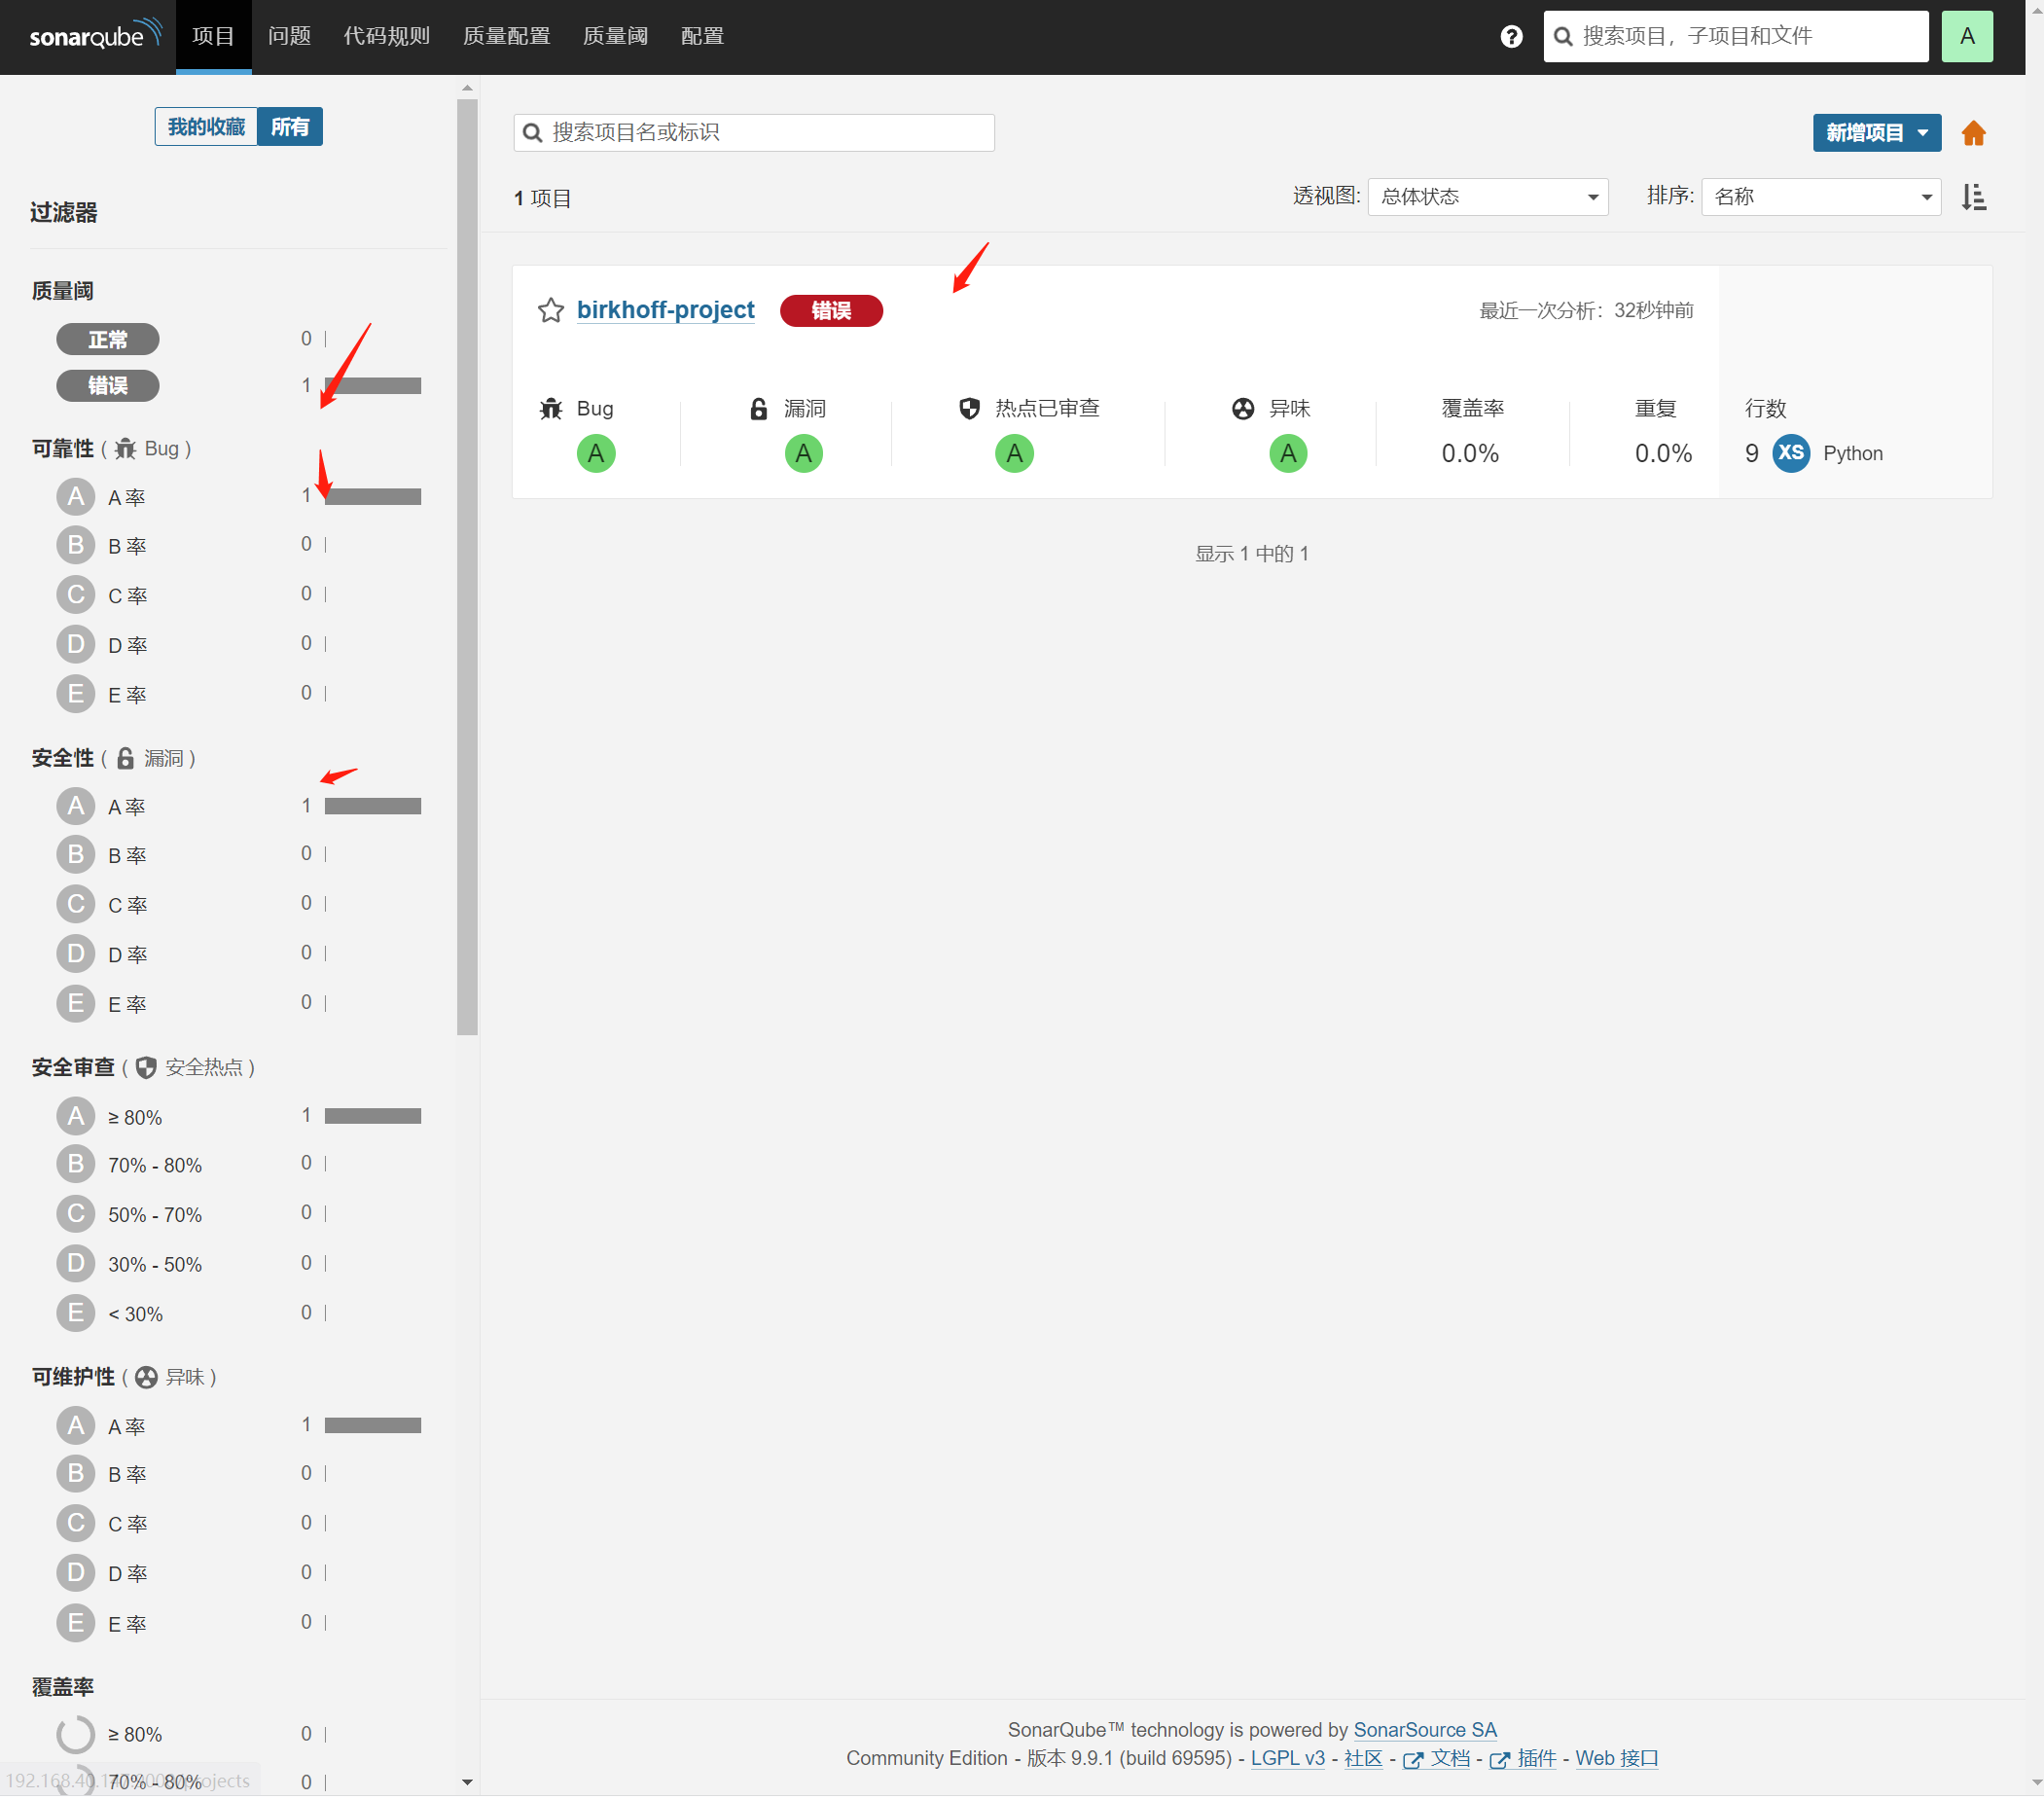
灰度部署、蓝绿环境、A/B测试等代码部署方式介绍
灰度部署:
也叫金丝雀发布,是指在两个版本之间能够平滑过渡的一种发布方式,灰度发布是增量发布的-种类型,灰度发布是在原有版本可用的情况下,同时部署一个新版本应用作为“金丝雀”(小白鼠测试新版本的性能和表现,以保障整体系统稳定的情况下,尽早发现、调整问题。

金丝雀发布、灰度发布步骤组成:
1、准备好部署各个阶段的工件,包括: 构建工件,测试脚本,配置文件和部署清单文件。
2、从负载均衡列表中移除掉“金丝雀”服务器。
3、升级“金丝雀”应用 (排掉原有流量并进行部署)。
4、对应用进行自动化测试。
5、将“金丝雀”服务器重新添加到负载均衡列表中 (连通性和健康检查)。
6、如果“金丝雀”在线使用测试成功,升级剩余的其他服务器。 (否则就回滚)灰度发布可以保证整体系统的稳定,在初始灰度的时候就可以发现、调整问题,以保证其影响度。

 浙公网安备 33010602011771号