CentOS 7 部署GitLab
GitLab概述 : 是一个利用 Ruby on Rails 开发的开源应用程序,实现一个自托管的Git项目仓库,可通过 Web 界面进行访问公开的戒者私人项目。Ruby on Rails 是一个可以使你开发、部署、维护 web 应用程序变得简单的框架 GitLab拥有与Github类似的功能,能够浏览源代码,管理缺陷和注释。可以管理团队对仓库的访问, 它非常易于浏览提交过的版本并提供一个文件历史库。它还提供一个代码片段收集功能可以轻松实现代码复用,便于日后有需要的时候进行查找
官方网站 :https://about.gitlab.com/

GitHub和GitLab的区别 :

相同点 : 二者都是基于web的Git仓库,在很大程度上GitLab是仿照GitHub来做的,它们都提供了分享开源项目的平台,为开发团队提供了存储、分享、发布和合作开发项目的中心化云存储的场所
不同点 :
1、GitHub如果要使用私有仓库,是需要付费的 GitLab可以在上面创建私人的克费仓库
2、GitLab让开发团队对他们的代码仓库拥有更多的控制,相比于GitHub,它有不少的特色 :
允许克费设置仓库权限;
允许用户选择分享一个project的部分代码
允许用户设置project的获取权限,进一步的提升安全性
可以设置获取到团队整体的改进进度;通过 innersourcing让不在权限范围内的人访问不到该资源
总结 :从代码私有性方面来看,有时公司并不希望员工获取到全部的代码,这个时候GitLab无疑是更好的选择但对于开源项目而言,GitHub依然是代码托管的首选
git相关概念 :
git 是一种版本控制系统,是一个命令,是一种工具
gitlib 是用于实现git功能的开发库
github 是一个基于git实现的在线代码托管仓库,包含一个网站界面,向互联网开放
gitlab 是一个基于git实现的在线代码仓库托管软件,一般用于在企业内部网络搭建git私服
gitlab-ce 社区版(免费)
gitlab-ee是企业版(收费)
搭建GitLab平台
环境 : 最少4G内存 , 不然后期访问 gitlab web页面可能会报错
[root@gitlab ~]# cat /etc/centos-release
CentOS Linux release 7.5.1804 (Core)
[root@gitlab ~]# free -h
              total        used        free      shared  buff/cache   available
Mem:           7.6G        194M        7.2G         11M        208M        7.2G
Swap:          2.0G          0B        2.0G
安装Gitlab的依赖包 :
[root@gitlab ~]# yum -y install curl policycoreutils openssh-server openssh-clients postfix
[root@gitlab ~]# systemctl enable postfix
[root@gitlab ~]# systemctl start postfix
[root@gitlab ~]#  iptables -F
[root@gitlab ~]#  systemctl stop firewalld
[root@gitlab ~]#  systemctl disable firewalld
安装Gitlab-ce版
# 下载 gitlab-ce版yum源
[root@gitlab ~]# curl https://packages.gitlab.com/install/repositories/gitlab/gitlab-ce/script.rpm.sh |bash
[root@gitlab ~]# yum -y install gitlab-ce

配置gitlab域名
[root@gitlab ~]# vim /etc/gitlab/gitlab.rb
# 13行 external_url 'http://gitlab.example.com' 改为 http://IP
加载配置文件并启动gitlab(加载配置文件需要点时间)
[root@gitlab ~]#  gitlab-ctl reconfigure
[root@gitlab ~]#  gitlab-ctl status
run: alertmanager: (pid 12585) 70s; run: log: (pid 12700) 69s
run: gitaly: (pid 12509) 72s; run: log: (pid 12597) 70s
run: gitlab-monitor: (pid 12543) 71s; run: log: (pid 12695) 70s
run: gitlab-workhorse: (pid 12490) 72s; run: log: (pid 12564) 71s
run: logrotate: (pid 12051) 149s; run: log: (pid 12562) 71s
run: nginx: (pid 12033) 155s; run: log: (pid 12561) 71s
run: node-exporter: (pid 12223) 137s; run: log: (pid 12598) 70s
run: postgres-exporter: (pid 12688) 70s; run: log: (pid 12702) 69s
run: postgresql: (pid 11762) 205s; run: log: (pid 12546) 71s
run: prometheus: (pid 12563) 71s; run: log: (pid 12697) 69s
run: redis: (pid 11702) 211s; run: log: (pid 12545) 71s
run: redis-exporter: (pid 12266) 120s; run: log: (pid 12554) 71s
run: sidekiq: (pid 12001) 162s; run: log: (pid 12548) 71s
run: unicorn: (pid 11963) 168s; run: log: (pid 12547) 71s
[root@gitlab ~]# netstat -antup | grep :80
tcp 0 0 0.0.0.0:8060 0.0.0.0:* LISTEN 12033/nginx: master
tcp 0 0 127.0.0.1:8080 0.0.0.0:* LISTEN 11981/unicorn maste
tcp 0 0 0.0.0.0:80 0.0.0.0:* LISTEN 12033/nginx: master # 默认使用nginx作为web服务器
tcp 0 0 127.0.0.1:8082 0.0.0.0:* LISTEN 12001/sidekiq 5.1.3
[root@gitlab ~]# free -h
total used free shared buff/cache available
Mem: 7.6G 3.3G 1.5G 90M 2.8G 3.8G
Swap: 2.0G 0B 2.0G
# 真的很吃内存
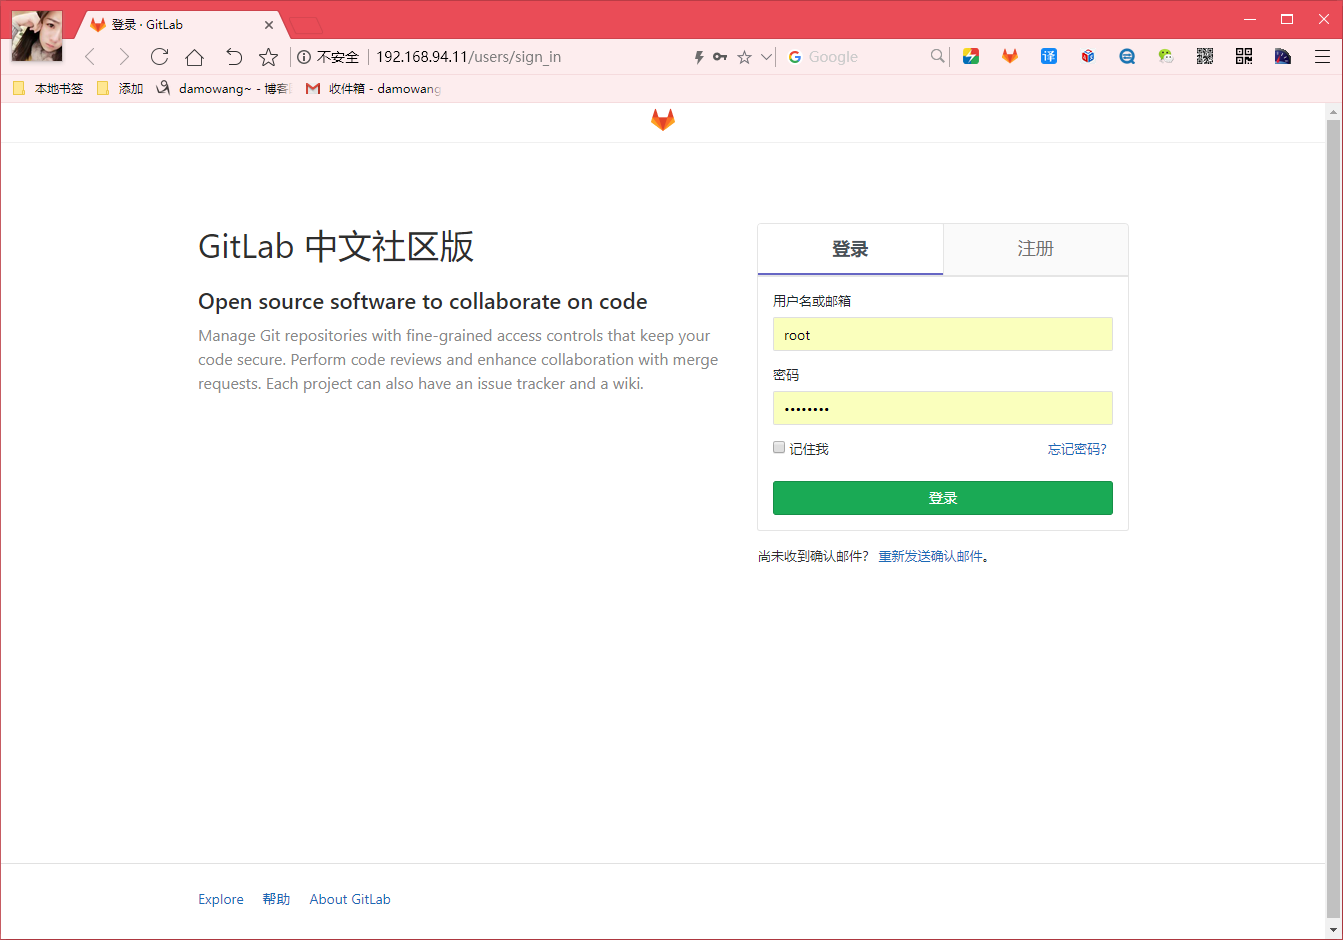
登录gitlab
第一次登录 gitlab,需要为root 用户修改密码,root用户也是gitlab的超级管理员
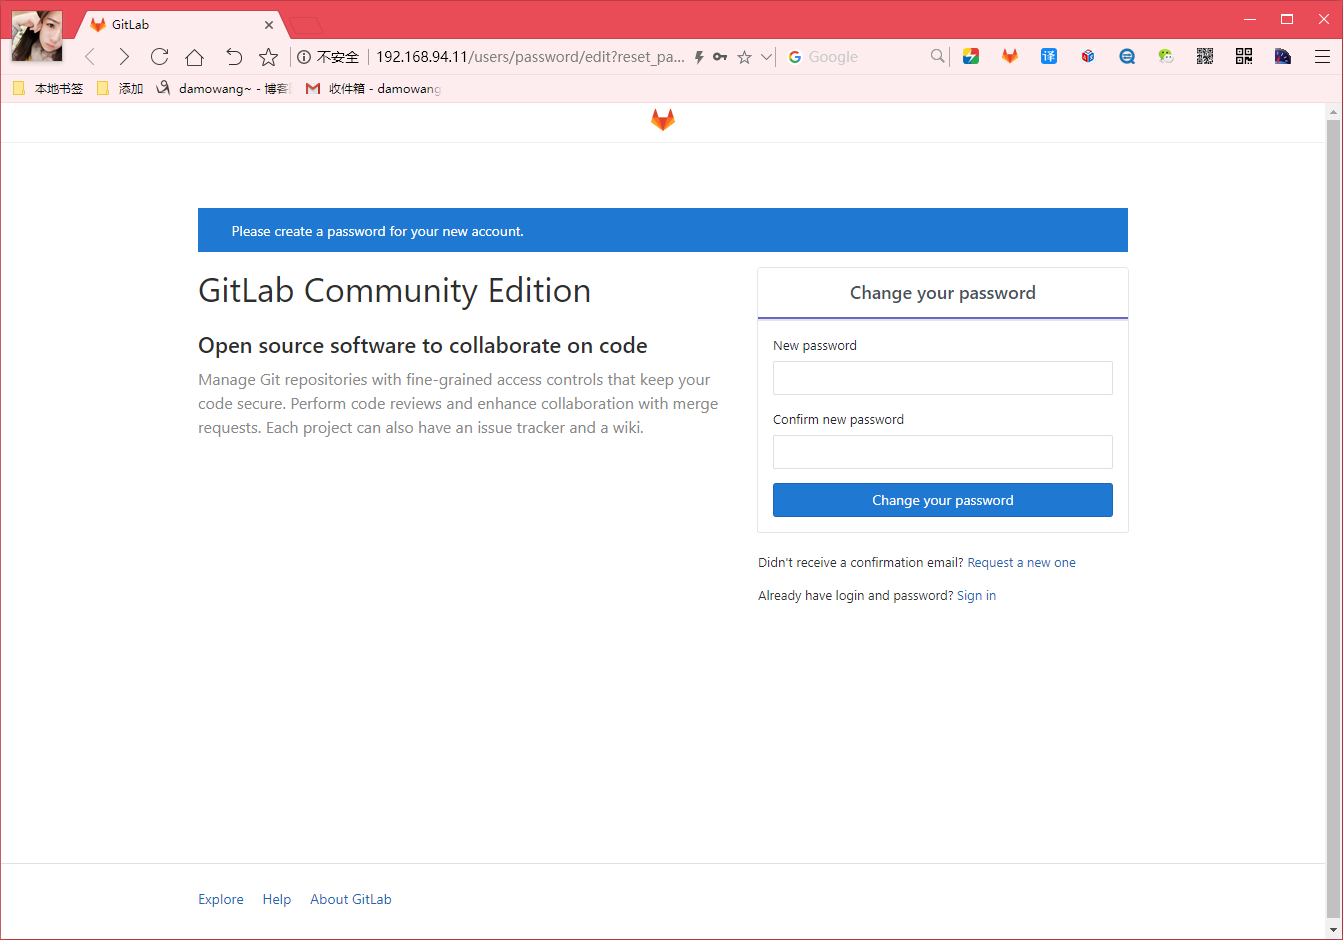
改成密码后, 登录 http://192.168.94.11/ 用户名 :root
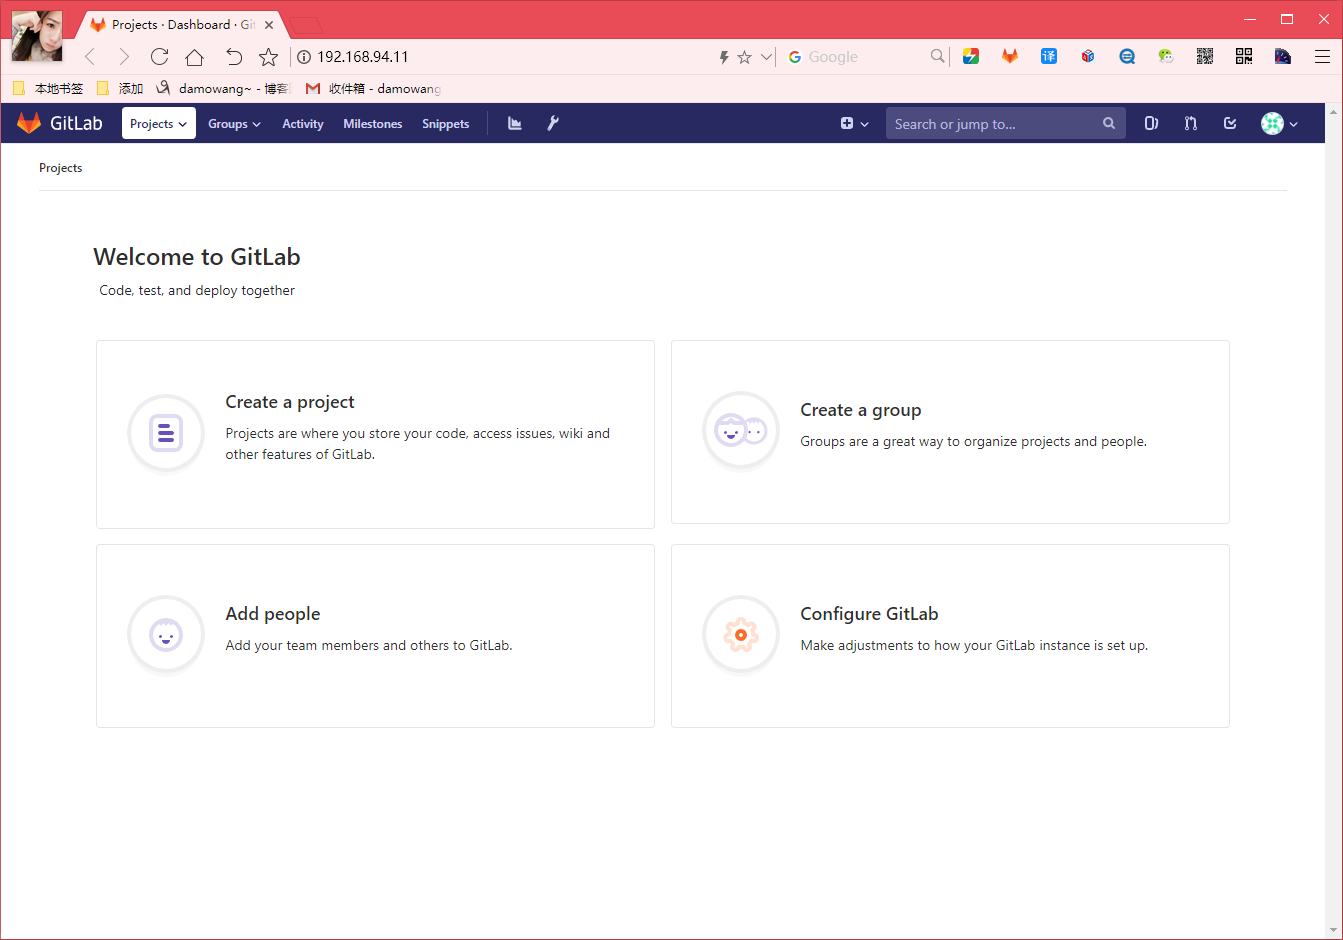
gitlab搭建成功
gitlab主配置文件:/etc/gitlab/gitlab.rb # 可以自定义一些邮件服务等
日志目录:/var/log/gitlab/ # 对应各服务
服务目录:/var/opt/gitlab/ # 对应各服务的主目录
仓库目录:/var/opt/gitlab/git-data # 记录项目仓库等提交信息
重启服务:gitlab-ctl stop/start/restart # 启动命令
注册新用户和关闭 gitlab注册功能 :
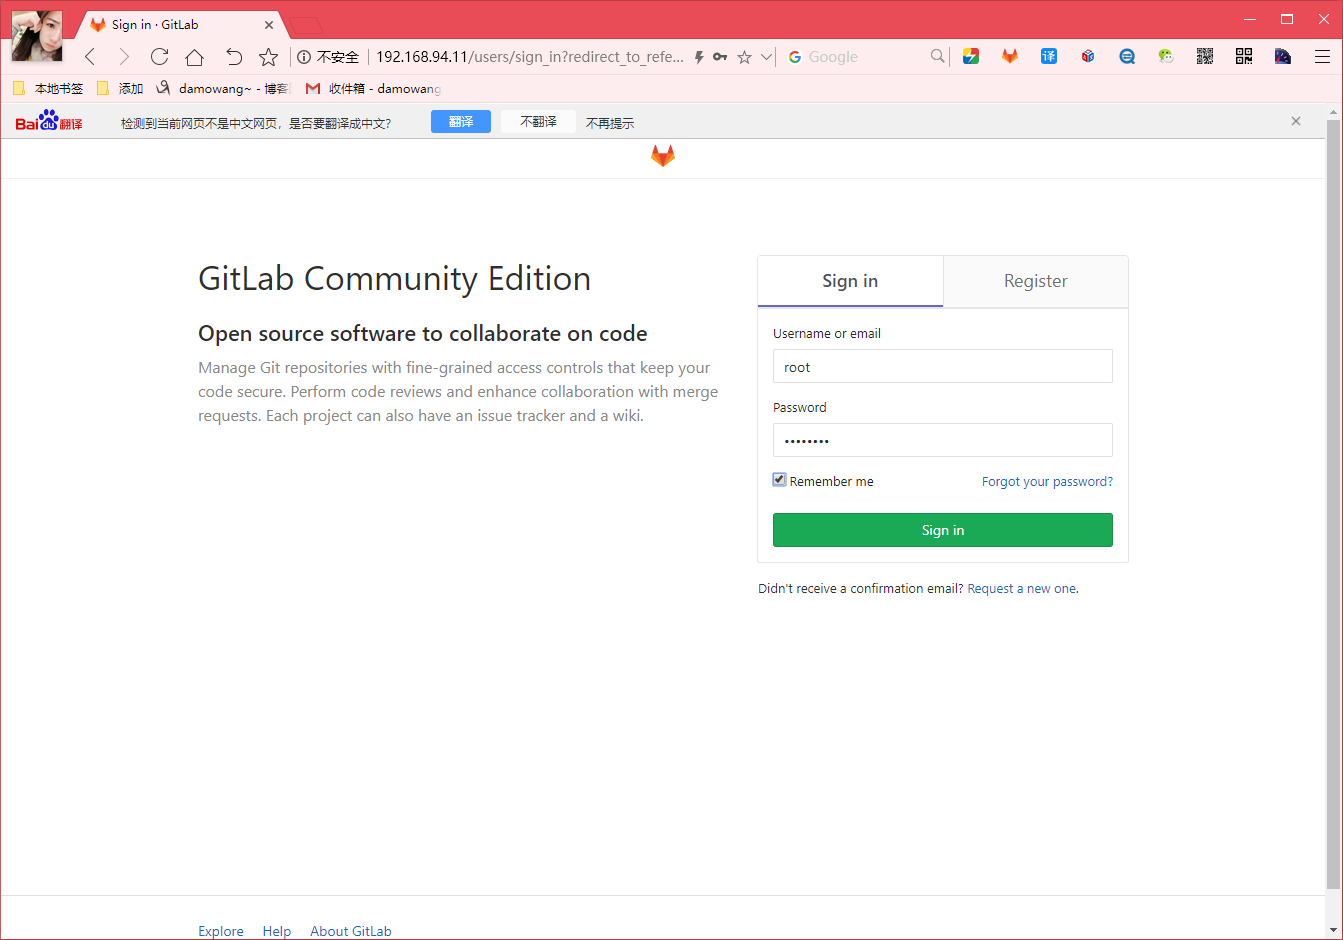
退出root用户 默认情况下可以直接注册账号 http://192.168.94.11/users/sign_in 开始注册

可以关闭注册功能
用管理员用户登录 Admin Area→setting→取消Sing-up enabled 选项对勾
然后下拉网页 , 在Sign-up restrictions 配置项的末尾有 保存修改
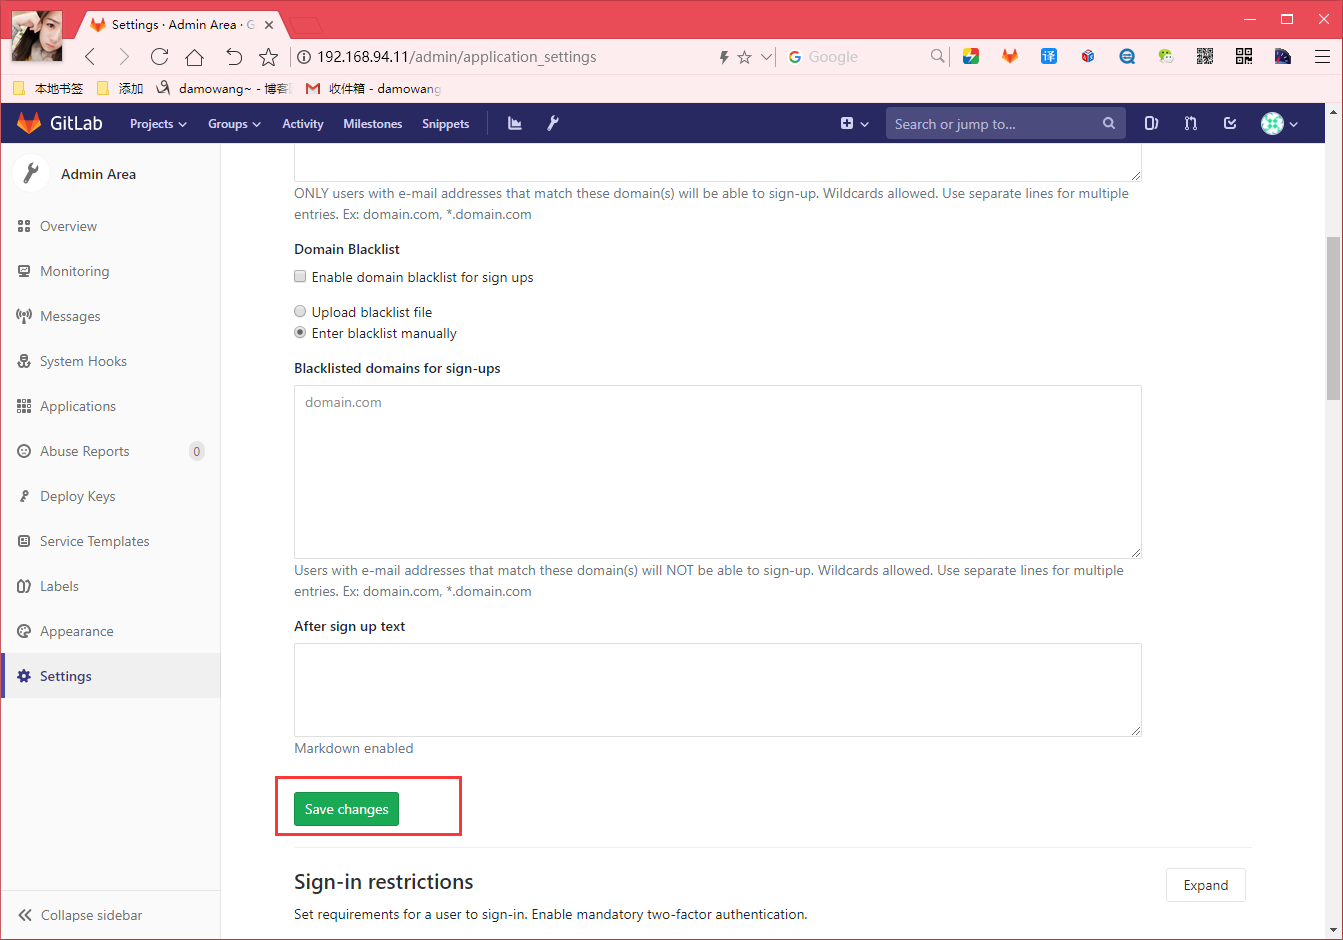
这样就关闭了注册功能
centos7 部署汉化版gitlab
gitlab中文社区版的项目 :
v7-v8.8是由 Larry Li发起的“GitLab 中文社区版项目” (https://gitlab.com/larryli/gitlab)
从 v8.9 之后,@xhang 开始继续该汉化项目 (https://gitlab.com/xhang/gitlab)
下载汉化包:
# 上面下载的是gitlab-ce 11.2.1 这里下载对应版本的汉化包
[root@gitlab ~]# git clone https://gitlab.com/xhang/gitlab.git -b v11.2.1-zh
汉化的方法就是把下载的汉化包替换现有的web页面
[root@gitlab ~]# gitlab-ctl stop
[root@gitlab ~]# /usr/bin/cp -rvf /root/gitlab/* /opt/gitlab/embedded/service/gitlab-rails/
# gitlab-rails下面存放的都是web 界面相关的文件
重启服务
[root@gitlab ~]# gitlab-ctl restart
登录gitlab查看
gitlab的使用 :
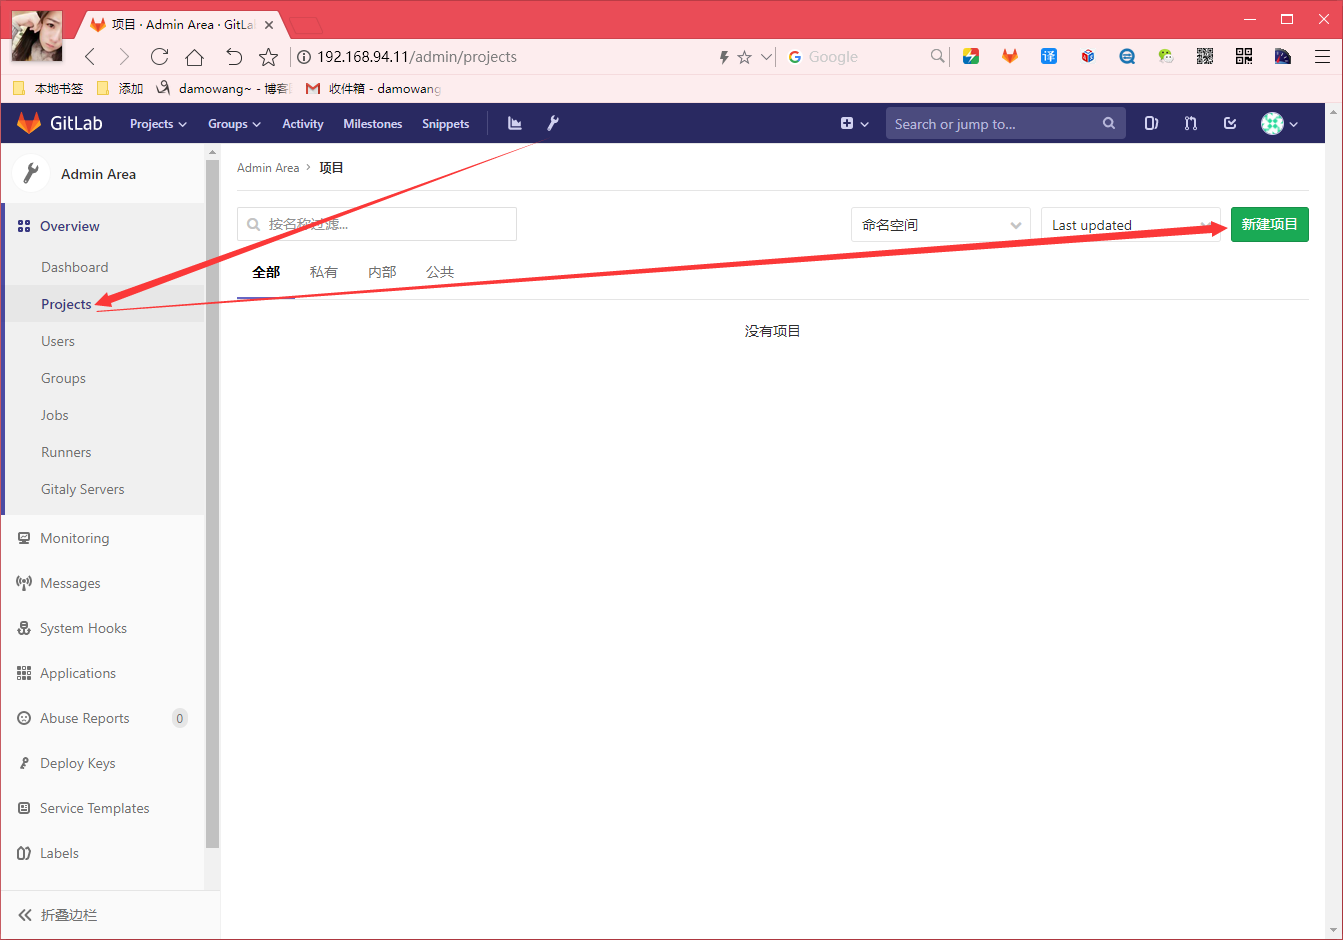
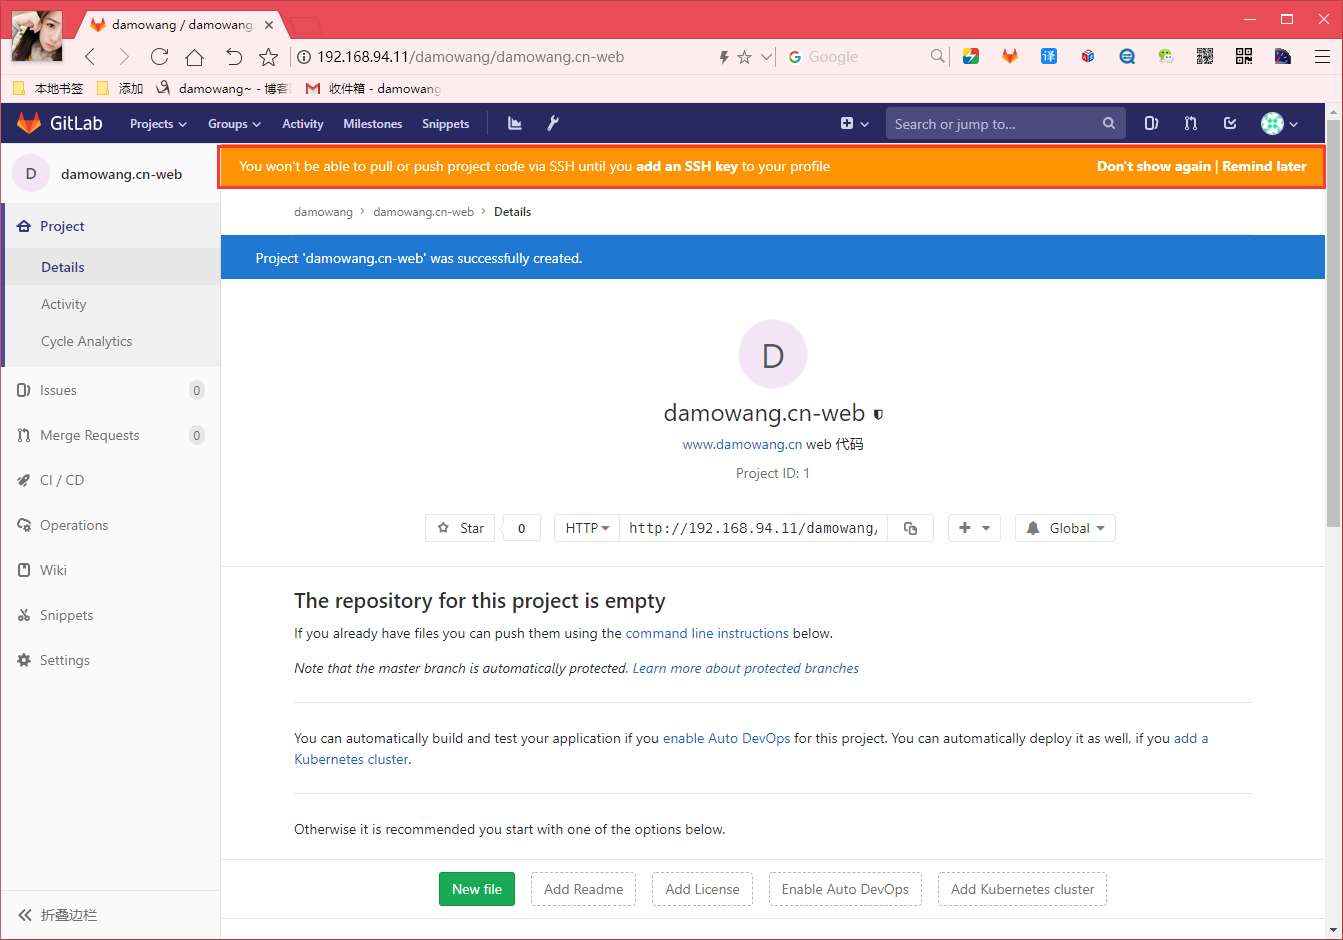
1 新建项目
2 创建用户
3 重置用户密码
4 删除用户
1 新建项目
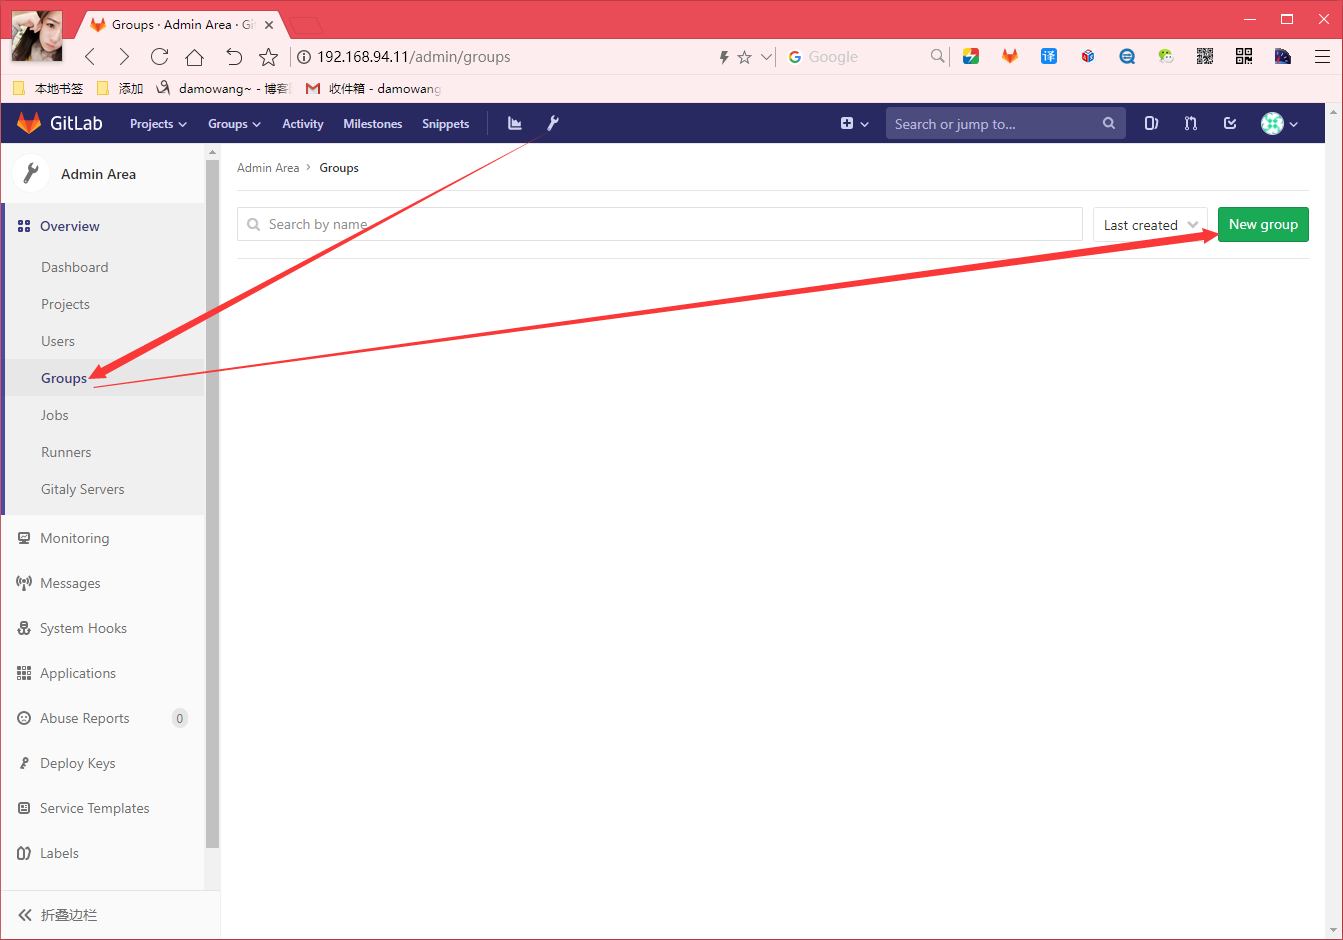
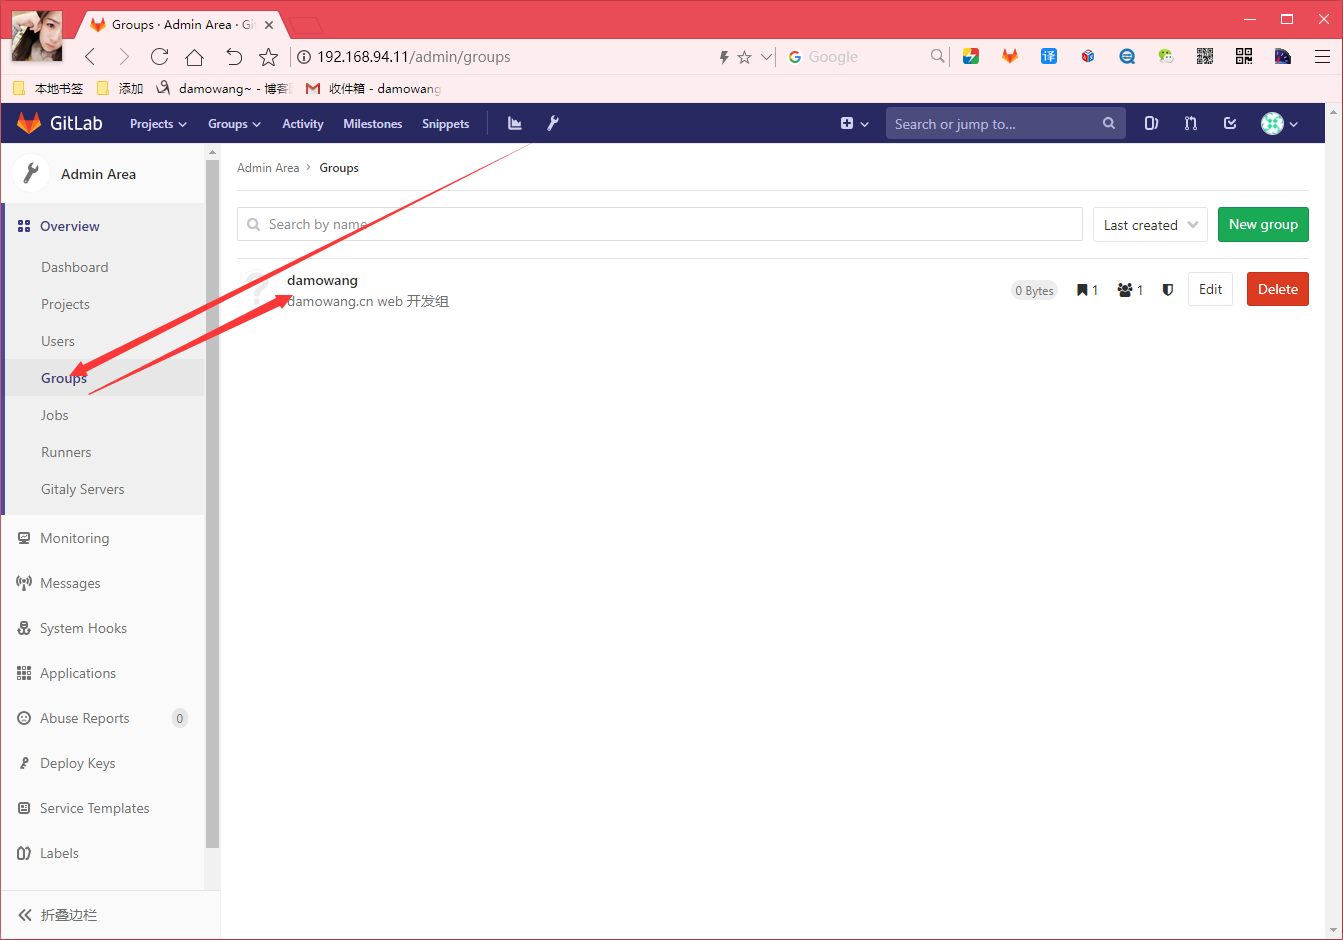
新建项目前,先创建项目所在的组(也就是说这个项目文件是保存在哪个组里)
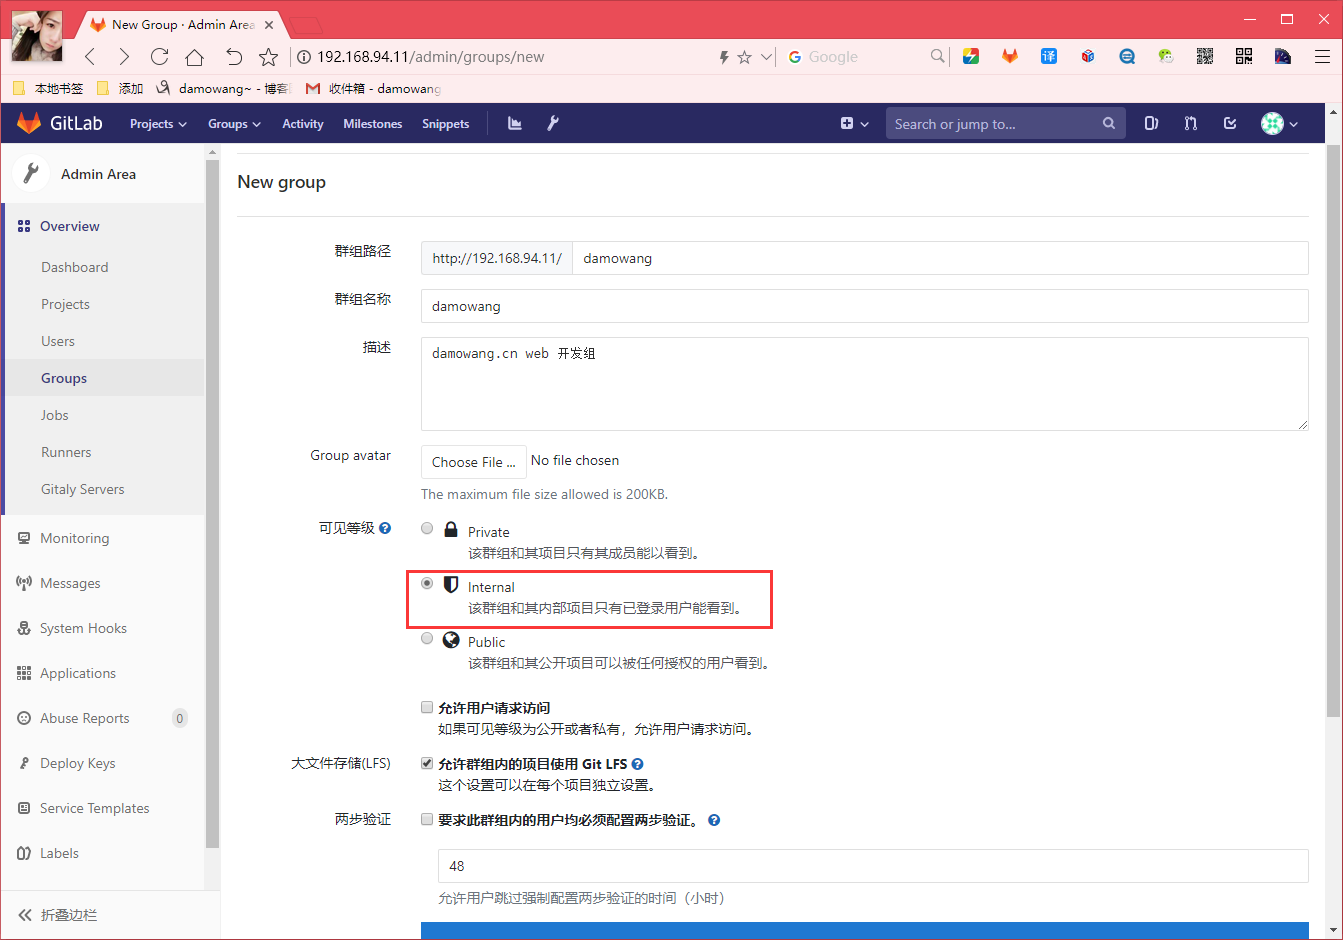
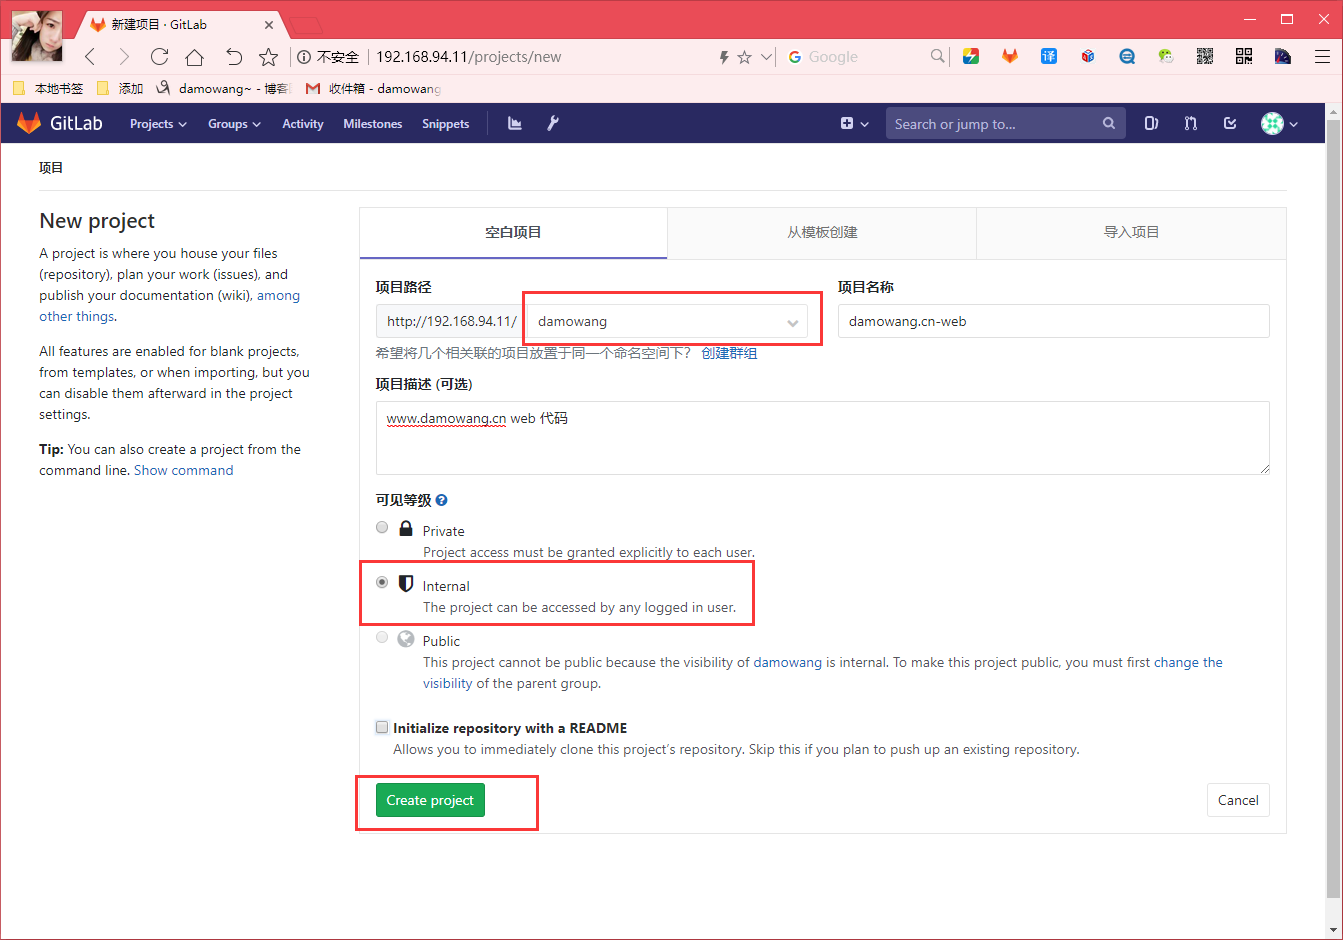
Visibility Level(项目可见级别):
Private(私有的,只有你自己戒者组内的成员能访问)
Internal(所有登录 gitlab平台的用户都可能访问)
Public(公开的,所有人都可以访问)三种选项。即不登录gitlab也可以访问
稍后会创建秘钥 , 实现无交互上传和下载代码 , 方便后期进行Jenkins自动部署
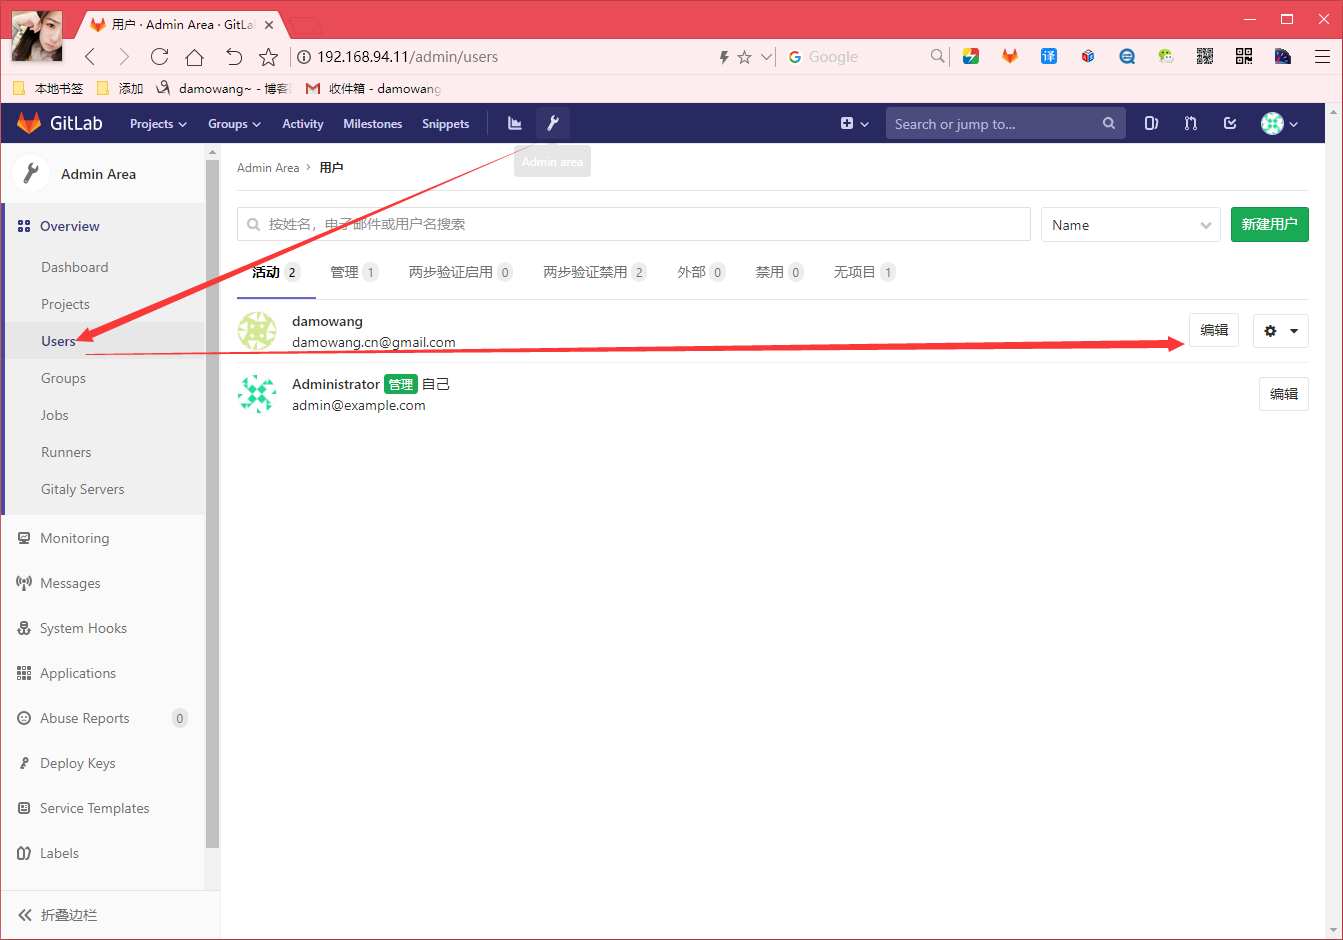
2 创建用户
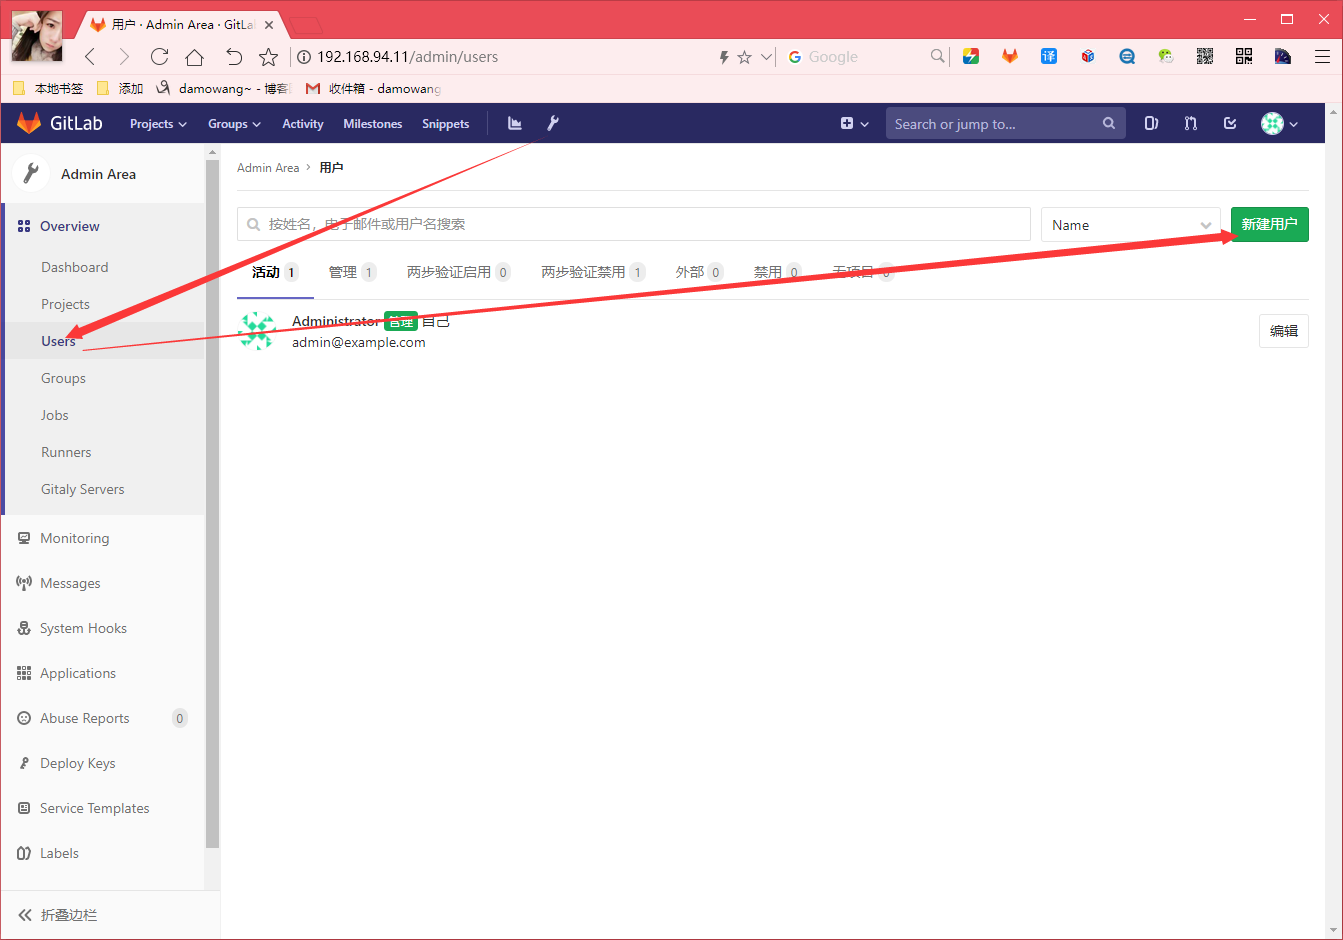
个人资料可以不填
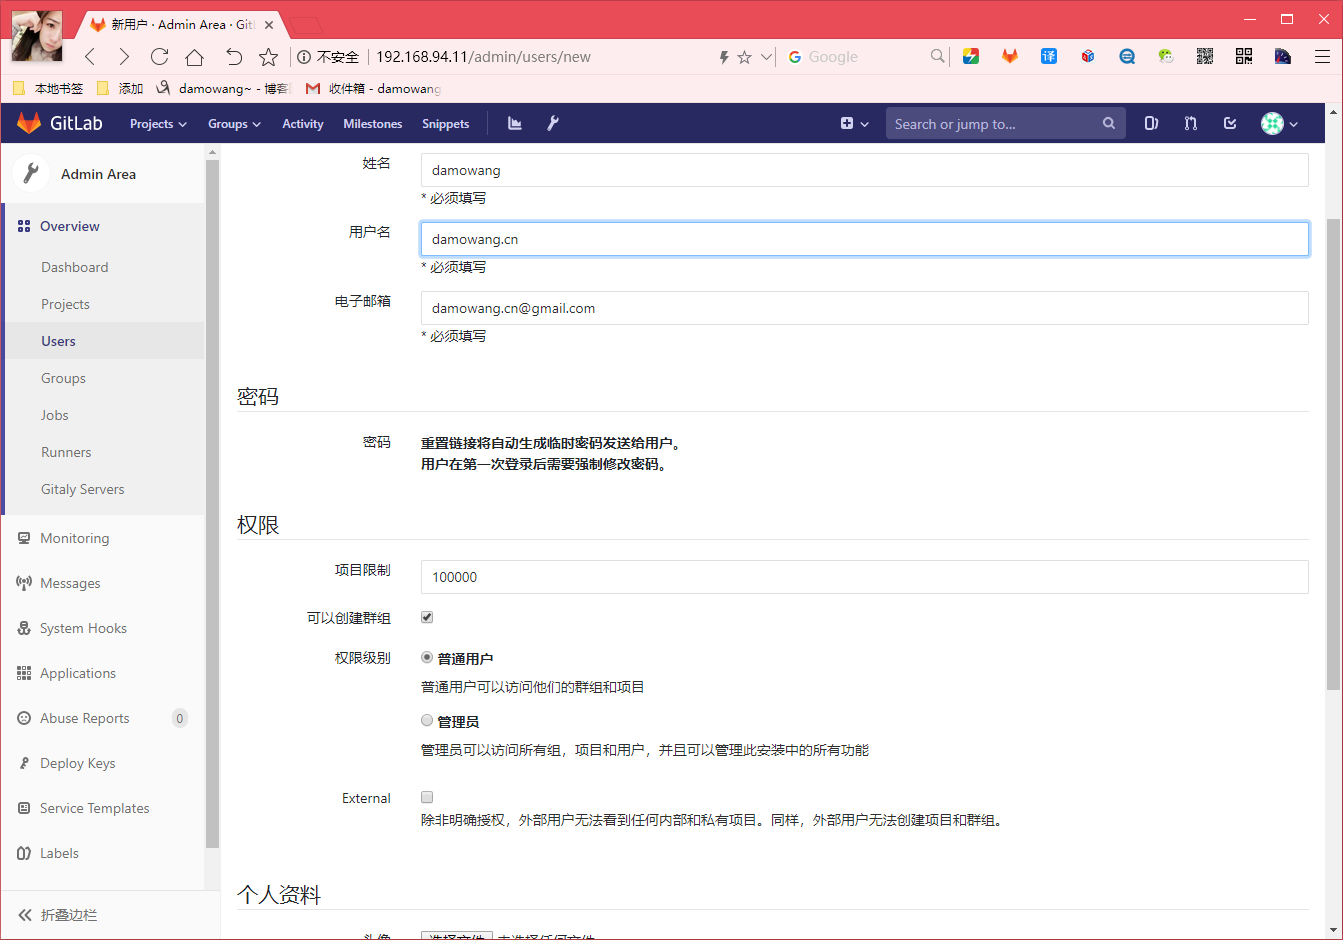
创建完用户会发邮件到你的添写的邮箱 , 点击进入给创建的用户修密码 , 邮件有时候会收到 ,有时候收不到
就算能收到 , 也不及时 , 所以让root用户修改密码是最快 , 最有效的
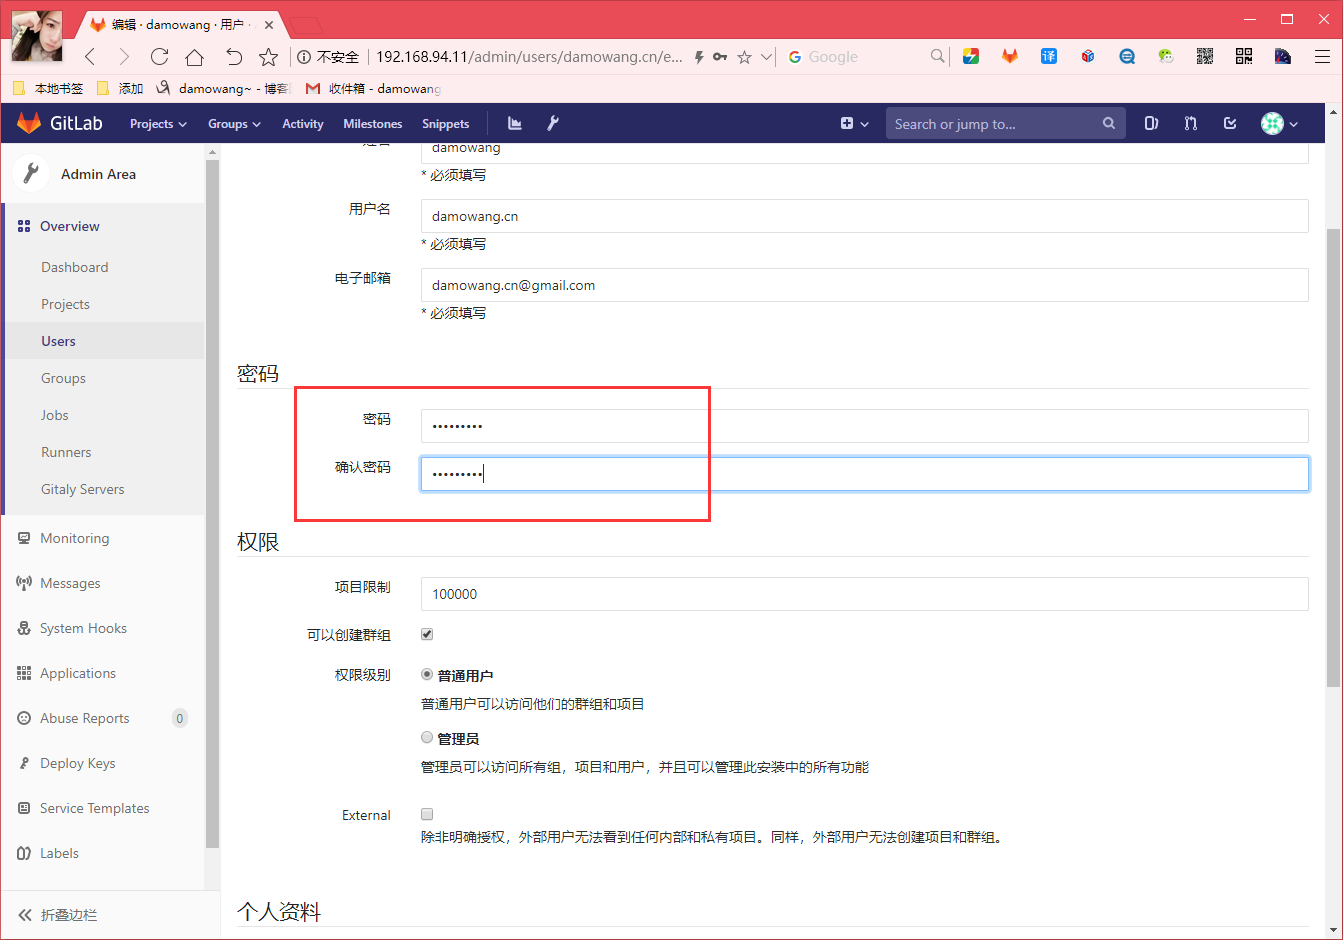
3 修改密码
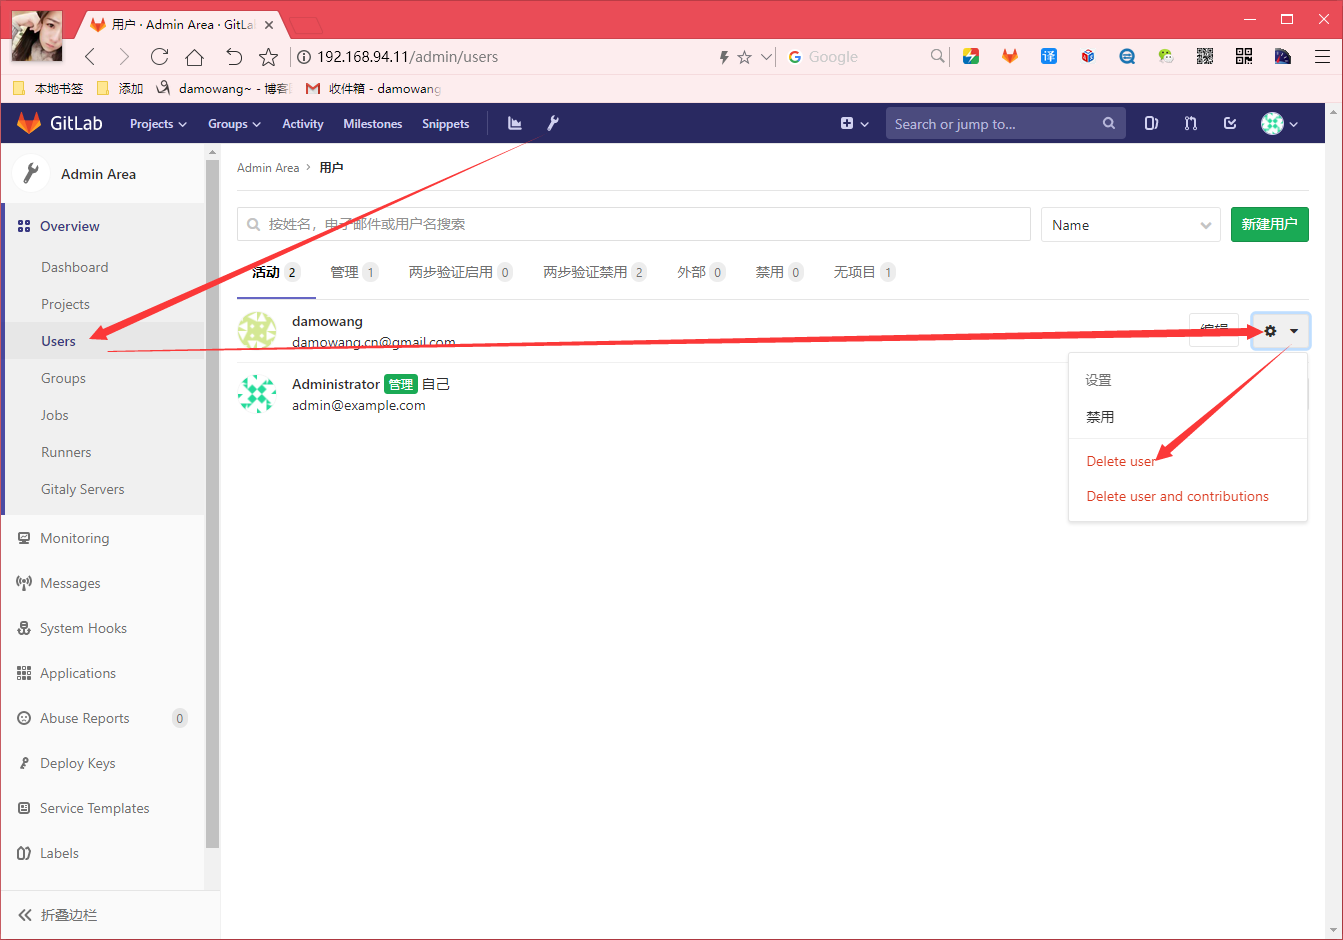
4 删除用户
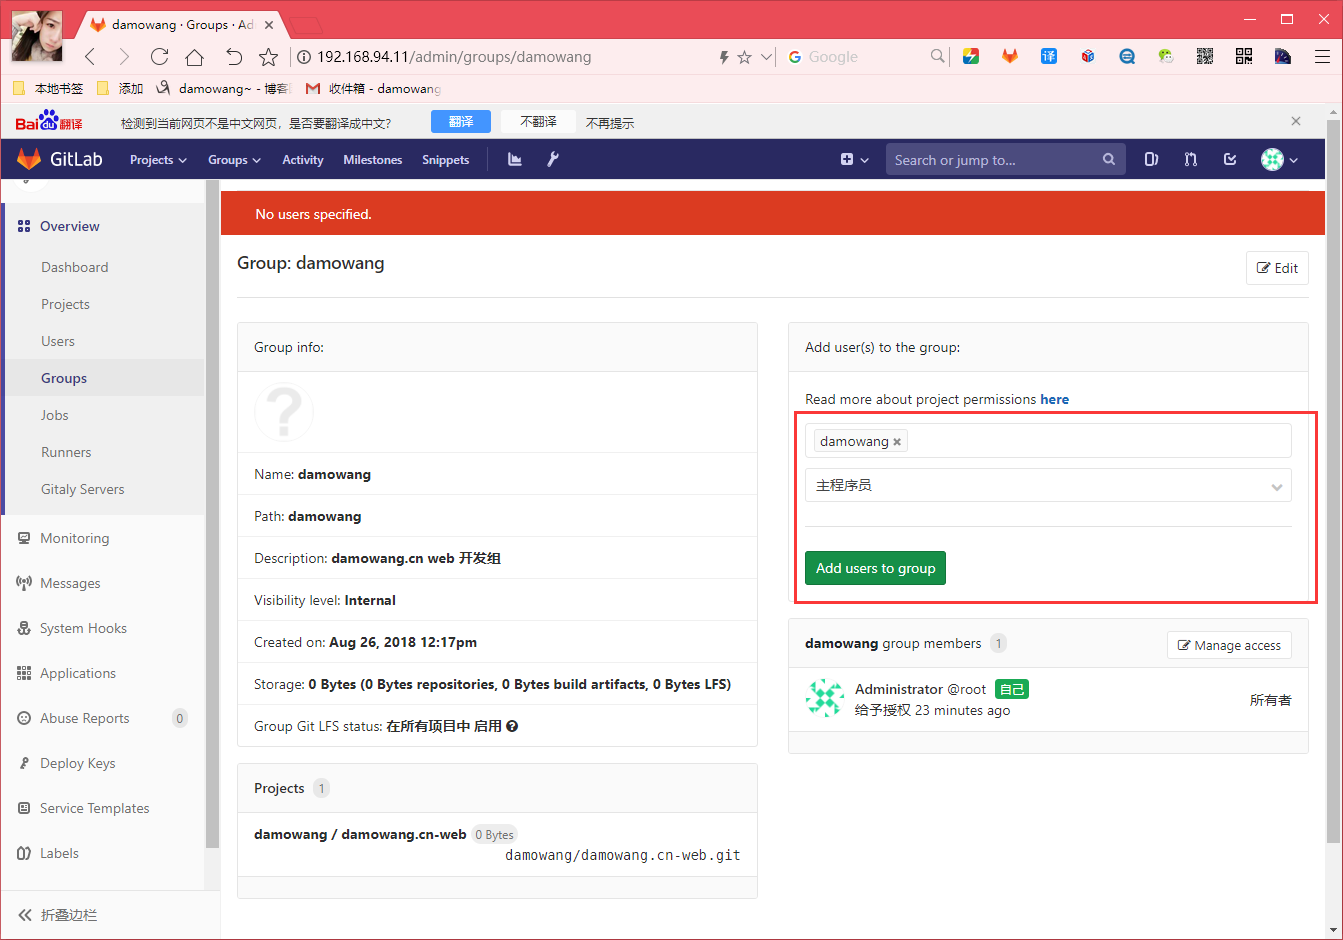
把用户damowang添加到damowang的群组里 , 身份选择"主程序员" , 后期就可以提交代码了 , "开发人员" 是没有权限提交代码的
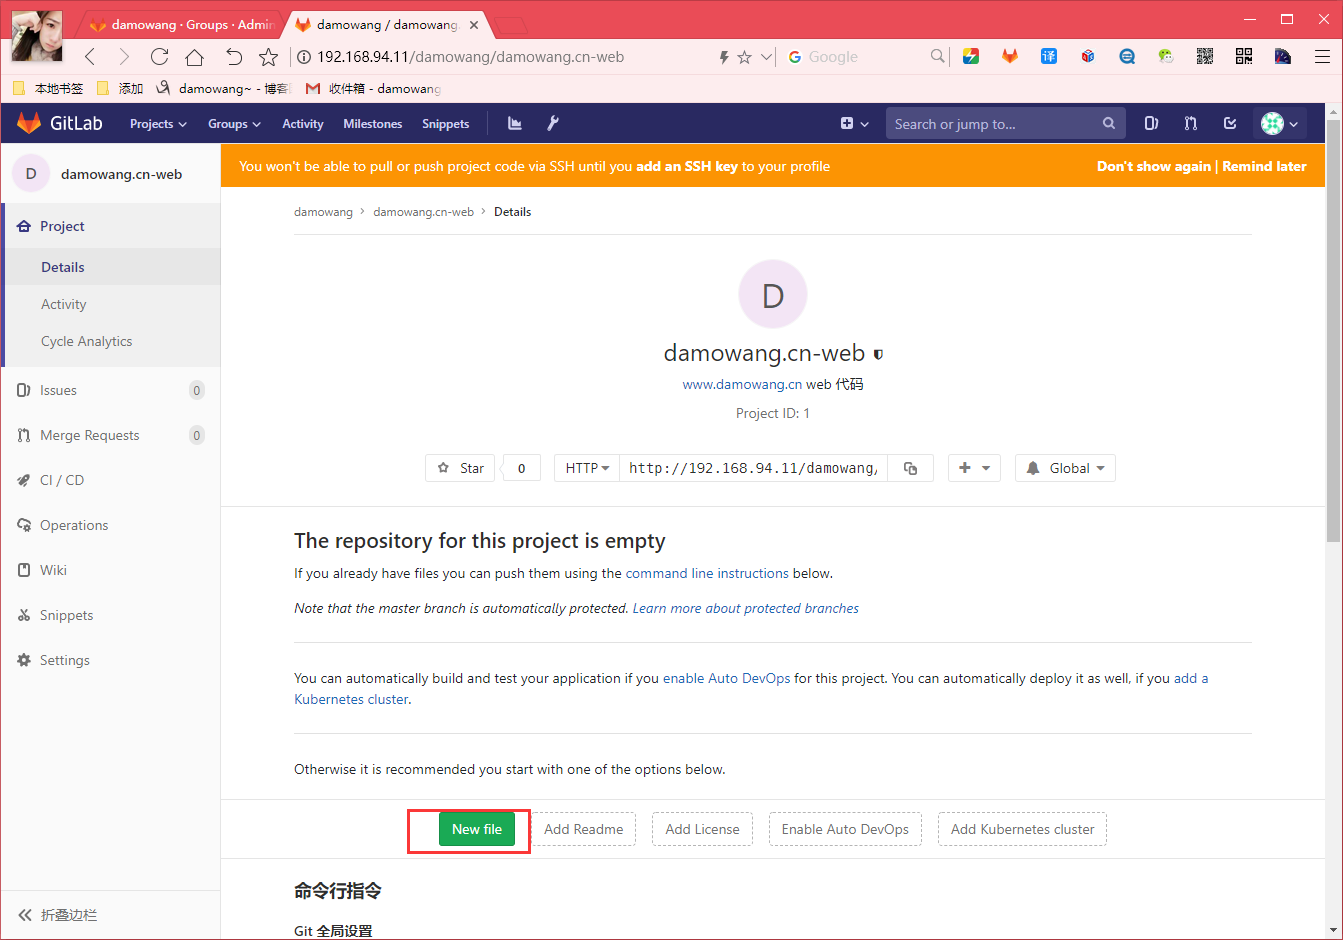
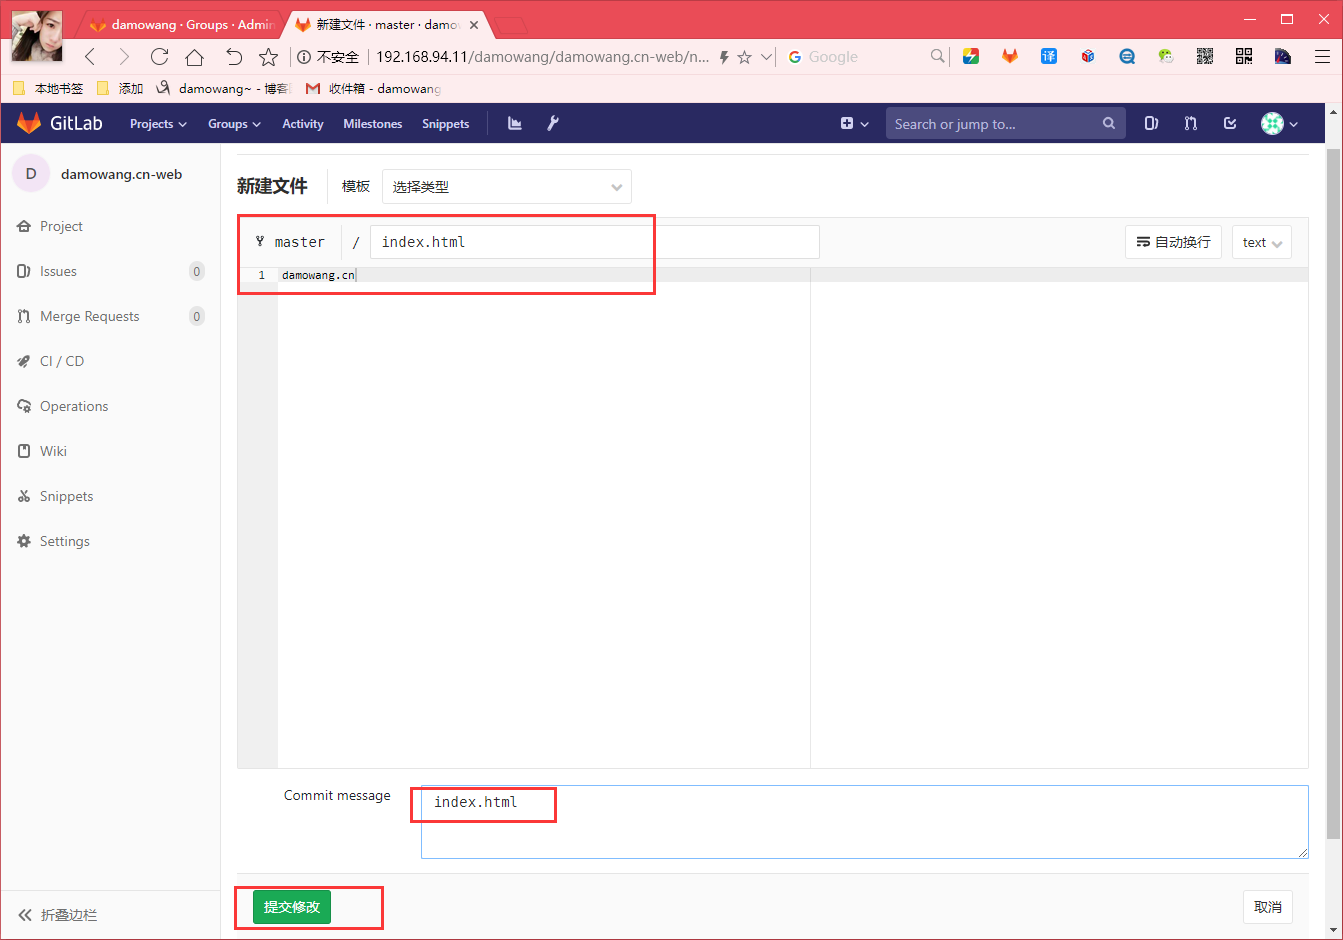
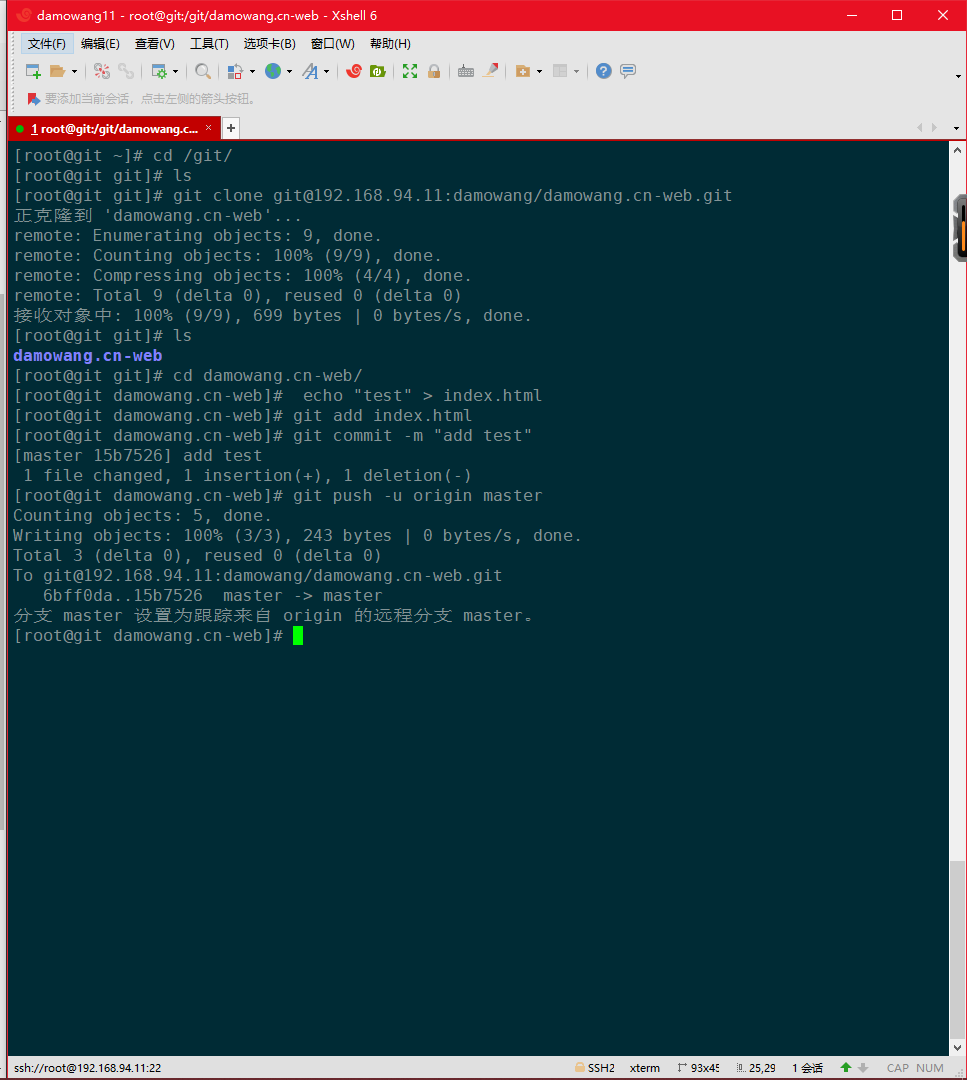
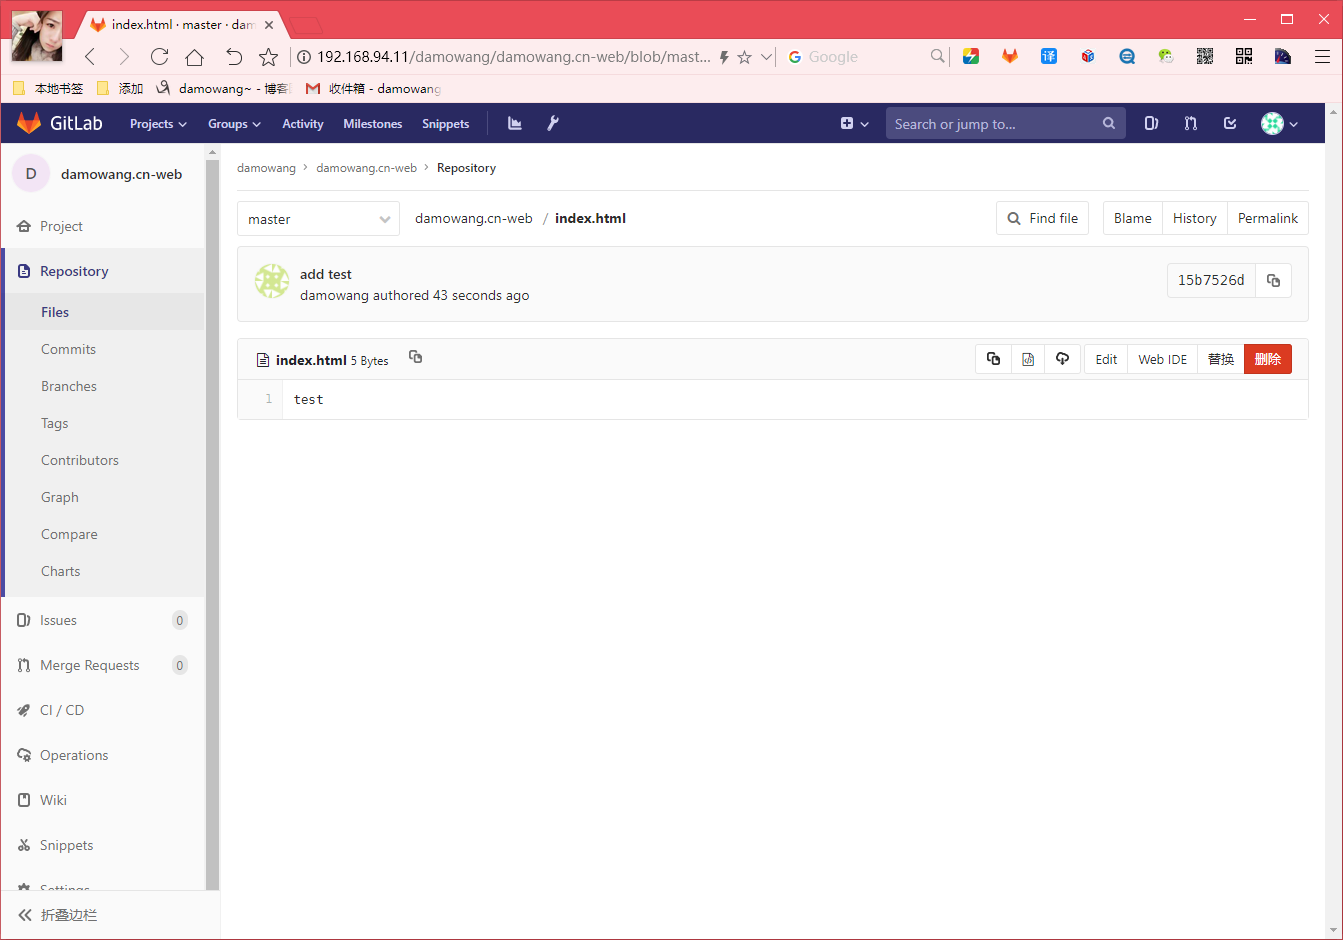
在项目中添加一个文件index.html
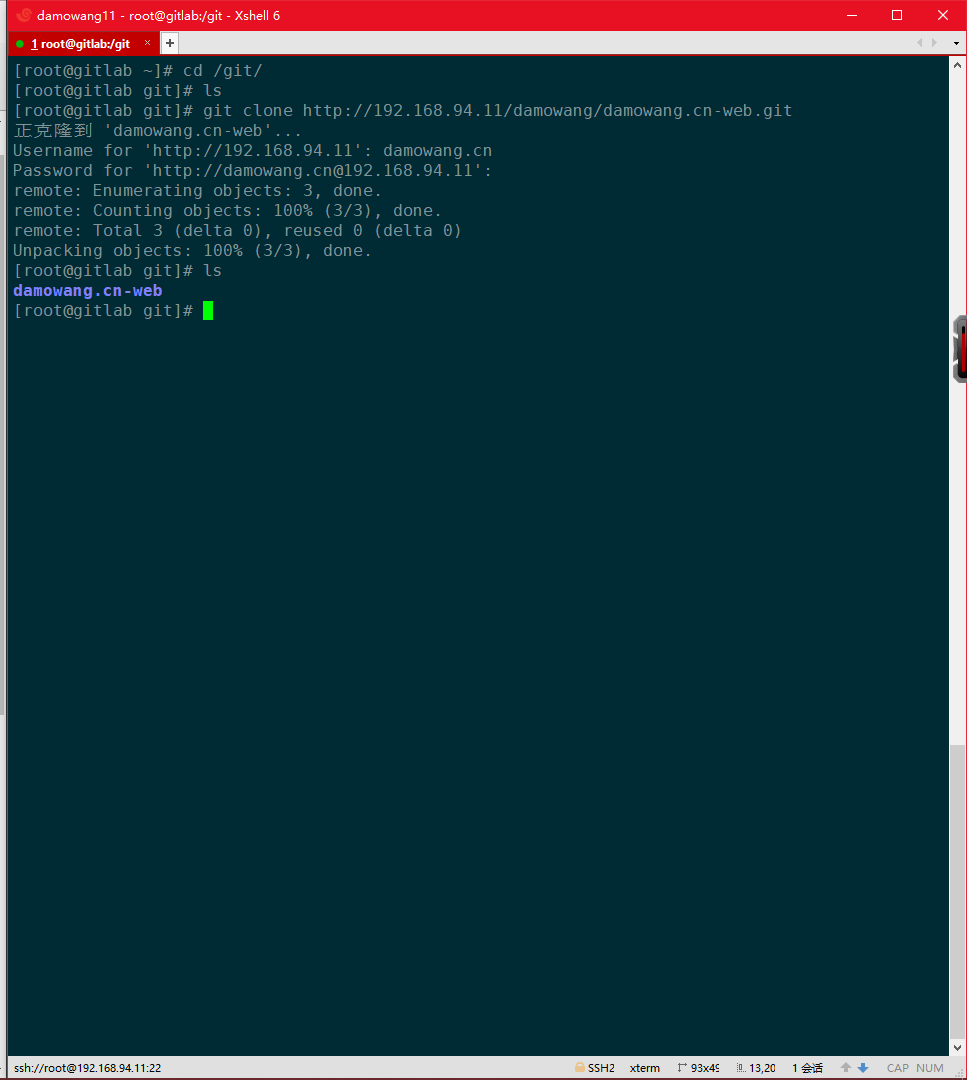
安装 git并 clone代码
[root@gitlab ~]# yum -y install git

初次运行Git钱的配置
一般在新的系统上, 我们都需要先配置先自己的Git 工作环境 , 配置工作只需要一次 , 以后升级时还会沿用现在的配置
第一个要配置的是你个人的用户名称和电子邮箱地址 , 这两条配置很重要 ,每次Git提交时都会引用这两条信息 , 说明是谁提交了更新 , 所以会随更新内容一起被永久纳入历史记录
Git运行的环境变量有点像 .bashrc , 决定了Git 在各个环节的具体工作方式和行为 , 这些变量可以存放在以下两个地方 :
~/.gitconfig文件 : 用户目录下的配置文件是适用于该用户 , 若使用 gitconfig时 用--global选项 , 读取的就是这个文件
[root@git damowang.cn-web]#  git config --global user.name "damowang.cn"
[root@git damowang.cn-web]#  git config --global user.email "damowang.cn@gmail.com"
[root@git damowang.cn-web]# cat ~/.gitconfig
[user]
    name = damowang.cn
    email = damowang.cn@gmail.com
当前项目的 Git 目录中的配置文件, 也就是工作目录中的 .git/config 文件 这里的配置仅仅 针对当前项目有效 每一个级别的配置都会覆盖上层的相同配置,所以 .git/config 里的配置会覆盖 ~/.gitconfig中的同名变量
如果要在某个特定的项目中使用其他名字或者邮件地址,先进到项目目录下,然后只要去掉 --global 选 项重新配置即可 最后配置的用户和邮件地址会保存在当前项目的 .git/config 文件里
[root@git damowang.cn-web]# pwd
/git/damowang.cn-web
[root@git damowang.cn-web]# cat ./.git/config
[core]
    repositoryformatversion = 0
    filemode = true
    bare = false
    logallrefupdates = true
[remote "origin"]
    url = http://192.168.94.11/damowang/damowang.cn-web.git
    fetch = +refs/heads/*:refs/remotes/origin/*
[branch "master"]
    remote = origin
    merge = refs/heads/master
[root@git damowang.cn-web]#  git config  user.name "damowang.cn"
[root@git damowang.cn-web]#  git config  user.email "damowang.cn@gmail.com"
[root@git damowang.cn-web]# cat ./.git/config
[core]
    repositoryformatversion = 0
    filemode = true
    bare = false
    logallrefupdates = true
[remote "origin"]
    url = http://192.168.94.11/damowang/damowang.cn-web.git
    fetch = +refs/heads/*:refs/remotes/origin/*
[branch "master"]
    remote = origin
    merge = refs/heads/master
[user]
    name = damowang.cn
    email = damowang.cn@gmail.com
git 常用命令: git config --global user.name “name“ # 设置全局用户名
git config --global user.email mail # 设置全局邮箱
git config --global --list # 列出用户全局设置
git add index.html # 添加文件到暂存区
git commit -m “描述内容“ # 提交文件到工作区
git status # 查看工作区的状态
git push # 提交代码到git 服务器上
git pull # 获取代码到本地
git log #查看操作日志
vim .gitignore #定义忽略文件 git reset --hard HEAD^ # git 版本回滚, HEAD为当前版本,加一个^为上一个,^^为上上一 个版本
git reflog # 获取每次提交的ID,可以使用--hard根据提交的ID 迚行版本回退
git reset --hard 5ae4b06 # 回退到指定id的版本
git branch # 查看当前所处的分支 git checkout -- file #从服务器更新某个那文件覆盖本地的文
git checkout -- file # 从服务器更新某个那文件覆盖本地的文件
把修改过的 index.html 文件更新主版本中
[root@git damowang.cn-web]# echo "mail.damowang.cn" >> index.html
[root@git damowang.cn-web]# git add index.html
[root@git damowang.cn-web]# git commit -m "add mail.damowang.cn"
[master 6bff0da] add mail.damowang.cn
 1 file changed, 1 insertion(+), 1 deletion(-)
[root@git damowang.cn-web]#    # 上传到master主干下
Username for 'http://192.168.94.11': damowang.cn
Password for 'http://damowang.cn@192.168.94.11':
Counting objects: 5, done.
Writing objects: 100% (3/3), 258 bytes | 0 bytes/s, done.
Total 3 (delta 0), reused 0 (delta 0)
To http://192.168.94.11/damowang/damowang.cn-web.git
   2c6153b..6bff0da  master -> master
分支 master 设置为跟踪来自 origin 的远程分支 master。
[root@git damowang.cn-web]# rm -rf index.html    # 删除一些代码
[root@git damowang.cn-web]# git reset --hard HEAD  # 回滚到最新版本
HEAD 现在位于 6bff0da add mail.damowang.cn
[root@git damowang.cn-web]# ls
index.html
[root@git damowang.cn-web]# git reflog  # 获取每次提交的ID
6bff0da HEAD@{0}: commit: add mail.damowang.cn
2c6153b HEAD@{1}: clone: from http://192.168.94.11/damowang/damowang.cn-web.git
工作区和暂存区及分支概述
工作区就是编辑文件的目录区域,需要将工作区的修改好的文件 add到暂存区才能提交到git服务器,在工作区有多个文件的时候可以将一个或多个文件添加至暂存区,再提交到git服务器即可
在服务器创建分支
[root@git damowang.cn-web]# git branch mail  # 创建一个分支
[root@git damowang.cn-web]# git checkout mail  # 切换到分支 mail
切换到分支 'mail'
[root@git damowang.cn-web]# git branch  # 查看当前所在分支
* mail
  master
[root@git damowang.cn-web]# echo "damowang" > test.txt
[root@git damowang.cn-web]# git add test.txt
[root@git damowang.cn-web]# git commit -m "add test.txt"  # 提交到暂存区中
[mail f4cd6f0] add test.txt
 1 file changed, 1 insertion(+)
 create mode 100644 test.txt
[root@git damowang.cn-web]# git push -u origin mail  # 上传到分支mail
Username for 'http://192.168.94.11': damowang.cn
Password for 'http://damowang.cn@192.168.94.11':
Counting objects: 4, done.
Delta compression using up to 4 threads.
Compressing objects: 100% (2/2), done.
Writing objects: 100% (3/3), 282 bytes | 0 bytes/s, done.
Total 3 (delta 0), reused 0 (delta 0)
remote:
remote: To create a merge request for mail, visit:
remote:   http://192.168.94.11/damowang/damowang.cn-web/merge_requests/new?merge_request%5Bsource_branch%5D=mail
remote:
To http://192.168.94.11/damowang/damowang.cn-web.git
 * [new branch]      mail -> mail
分支 mail 设置为跟踪来自 origin 的远程分支 mail。

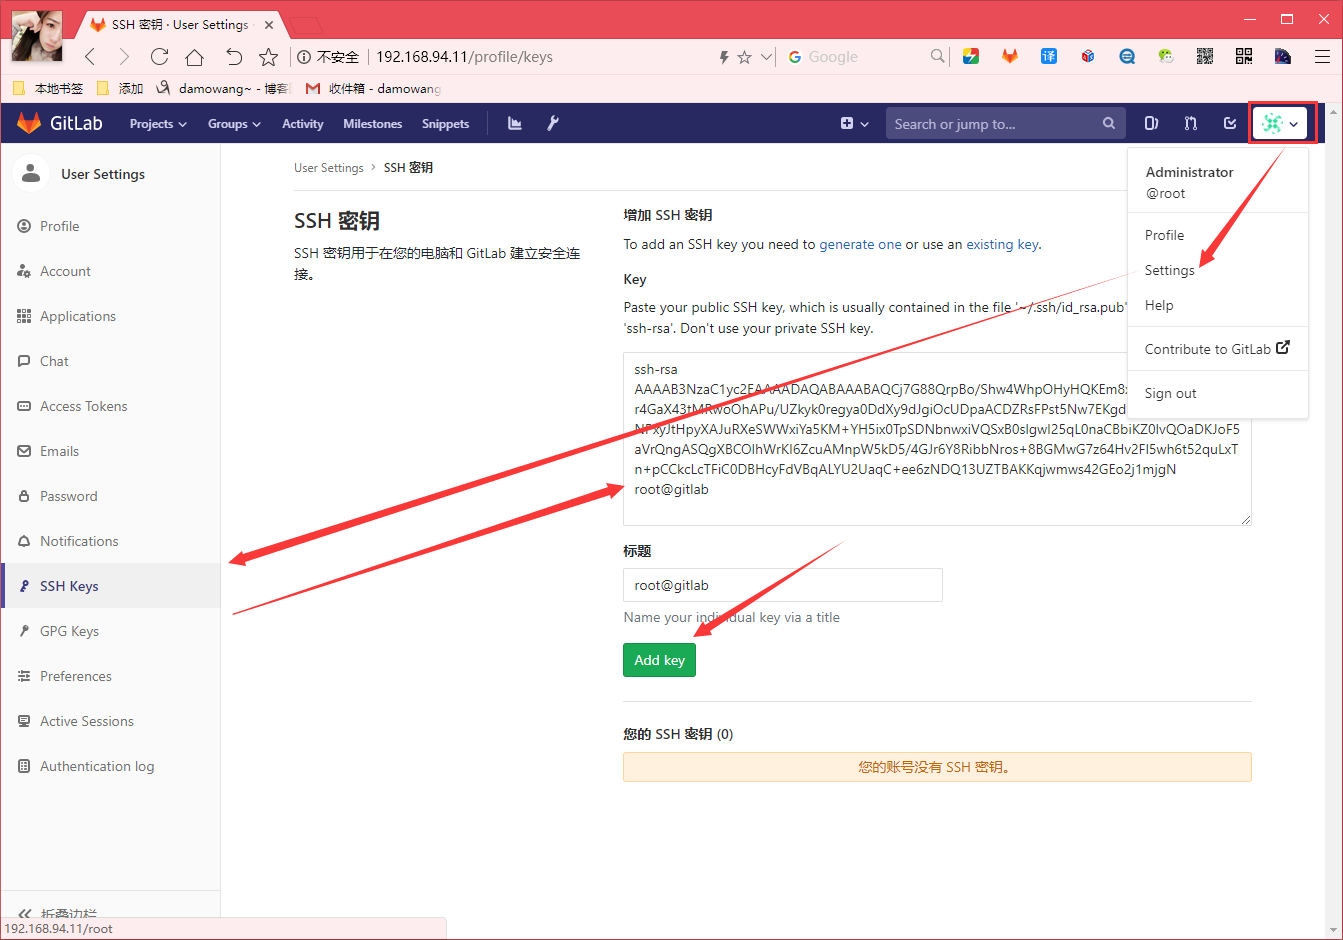
使用ssh密钥对实现免交互提交拉取代码
[root@git ~]# ssh-keygen -t rsa -f ~/.ssh/id_rsa -P ""
ssh-rsa
[root@git ~]# cat ~/.ssh/id_rsa.pub
AAAAB3NzaC1yc2EAAAADAQABAAABAQCj7G88QrpBo/Shw4WhpOHyHQKEm8xzCsL7++LWyhXUr4GaX43tMRwoOhAPu/UZkyk0regya0DdXy9dJgiOcUDpaACDZRsFPst5Nw7EKgd90BI4HWAuHQ+gNPxyJtHpyXAJuRXeSWWxiYa5KM+YH5ix0TpSDNbnwxiVQSxB0slgwI25qL0naCBbiKZ0lvQOaDKJoF5aVrQngASQgXBCOlhWrKI6ZcuAMnpW5kD5/4GJr6Y8RibbNros+8BGMwG7z64Hv2Fl5wh6t52quLxTn+pCCkcLcTFiC0DBHcyFdVBqALYU2UaqC+ee6zNDQ13UZTBAKKqjwmws42GEo2j1mjgN root@gitlab
登录gitlab 增加SSH密钥
复制git克隆地址拉取代码 , 再上传代码 , 看是否免交互

 浙公网安备 33010602011771号