
为什么要用到这个技术?
简单来说,vagrant是一个操作虚拟机的工具。
它提供了一套高效而便利的虚拟机管理方式,通过命令和配置文件,当然也要基于vagrant自身的约定,就能很快的完成一套开发环境的部署,并可以打包传播,极大的方便了在工作环境中,各个开发环境不一致的问题,也解决了重复配置环境的浪费
技术原理
主要流程就是读取Vagrantfile配置文件里指定的变量,然后进行转换调用虚拟机软件(virtualbox等)的api为用户创建好运行环境
实战
官网地址
快速开始
实战博客来自
排坑历程
VMware
当初使用这个工具是架构师老师的推荐,文档中建议配合使用的虚拟机是virtualbox而我本地电脑上装的是VMware,所以就到官方文档上去搜索VMware相关的配置,然后进行安装。最后发现vagrant连接VMware需要申请证书,所以VMware就要放弃了,最后也把本地的VMware也卸载了,浪费了有一天时间。
hyper-v
hyper-v 是架构师交流群里一位群友推荐的,主要优点是windows自带的虚拟机功能,不用额外下载其他虚拟机,但是下载配合vagrant使用后,发现hyperv并不能很方便的支持vagrant的连接,而且在虚拟机生成之后,通过hyperv自己的控制台工具想要进行本地宿主机和虚拟机之间的拷贝粘贴时,出现了问题,发现根本就不支持,后来在网上博客有人提到,目前hyper-v只支持ubuntu系统的一个工具,而我要装的虚拟机系统是centos,而且我看身边的人以及公司也用的是centos,最后不得不放弃hyperv.
Virtualbox
在VMware卸载后,下载了架构师老师提供的virtual安装包,box也是老师提供的,当时并没有意识到box是根据特定虚拟机版本生成的(中间切换到hyper-v才意识到这个问题),这个box老师已经预装了像Java,rocketmq,zookeeper等相关工具,在配合vagrant生成虚拟机的时候,有一个错误是一直解决不了,老师在博客中的解决方案也是起不了作用,所以才放弃去使用了hyper-v,但是我发现我的电脑并没有所谓的hyper-v,上网搜索才发现,这个工具只有在windows10专业版上才有,而我的电脑版本是家庭版!!!所以又花了15块钱在淘宝上买了一个激活码,最后升级成功,启用了hyper-v,由于不能在宿主机和虚拟机之间完美拷贝数据,所以最终还是回来继续用virtualbox,这次重新一试,之前的问题都解决了,由此我得出结论,一切都是windows系统的问题,作为开发者,一定要将系统版本升级到专业版,不然会很坑!!!
博客链接整理
https://www.cnblogs.com/crazymakercircle/p/14194688.html
基础命令整理
一般分为基础命令和详细命令,通过vagrant -h(--help)来获取常用命令,通过vagrant list-commands来获取详细的命令。如下所示:
vagrant --help
Usage: vagrant [options] <command> [<args>]

    -v, --version                    Print the version and exit.
    -h, --help                       Print this help.

Common commands:
     box             manages boxes: installation, removal, etc.
     cloud           manages everything related to Vagrant Cloud
     destroy         stops and deletes all traces of the vagrant machine
     global-status   outputs status Vagrant environments for this user
     halt            stops the vagrant machine
     help            shows the help for a subcommand
     init            initializes a new Vagrant environment by creating a Vagrantfile
     login
     package         packages a running vagrant environment into a box
     plugin          manages plugins: install, uninstall, update, etc.
     port            displays information about guest port mappings
     powershell      connects to machine via powershell remoting
     provision       provisions the vagrant machine
     push            deploys code in this environment to a configured destination
     rdp             connects to machine via RDP
     reload          restarts vagrant machine, loads new Vagrantfile configuration
     resume          resume a suspended vagrant machine
     snapshot        manages snapshots: saving, restoring, etc.
     ssh             connects to machine via SSH
     ssh-config      outputs OpenSSH valid configuration to connect to the machine
     status          outputs status of the vagrant machine
     suspend         suspends the machine
     up              starts and provisions the vagrant environment
     upload          upload to machine via communicator
     validate        validates the Vagrantfile
     version         prints current and latest Vagrant version
     winrm           executes commands on a machine via WinRM
     winrm-config    outputs WinRM configuration to connect to the machine
vagrant list-commands
░▒▓ /cygdrive/d/v/virtualbox vagrant list-commands ✔
Below is a listing of all available Vagrant commands and a brief
description of what they do.
box manages boxes: installation, removal, etc.
cap checks and executes capability
cloud manages everything related to Vagrant Cloud
destroy stops and deletes all traces of the vagrant machine
docker-exec attach to an already-running docker container
docker-logs outputs the logs from the Docker container
docker-run run a one-off command in the context of a container
global-status outputs status Vagrant environments for this user
halt stops the vagrant machine
help shows the help for a subcommand
init initializes a new Vagrant environment by creating a Vagrantfile
list-commands outputs all available Vagrant subcommands, even non-primary ones
login
package packages a running vagrant environment into a box
plugin manages plugins: install, uninstall, update, etc.
port displays information about guest port mappings
powershell connects to machine via powershell remoting
provider show provider for this environment
provision provisions the vagrant machine
push deploys code in this environment to a configured destination
rdp connects to machine via RDP
reload restarts vagrant machine, loads new Vagrantfile configuration
resume resume a suspended vagrant machine
rsync syncs rsync synced folders to remote machine
rsync-auto syncs rsync synced folders automatically when files change
snapshot manages snapshots: saving, restoring, etc.
ssh connects to machine via SSH
ssh-config outputs OpenSSH valid configuration to connect to the machine
status outputs status of the vagrant machine
suspend suspends the machine
up starts and provisions the vagrant environment
upload upload to machine via communicator
validate validates the Vagrantfile
version prints current and latest Vagrant version
winrm executes commands on a machine via WinRM
winrm-config outputs WinRM configuration to connect to the machine
vagrant 包含子命令的概念,所以如果想看指定命令下的子命令可以通过--help的形式查看,例如:
vagrant box --help
░▒▓ /cygdrive/d/v/virtualbox vagrant box --help ✔ 3s 13:53:27 ▓▒░
Usage: vagrant box <subcommand> [<args>]
Available subcommands:
add
list
outdated
prune
remove
repackage
update
For help on any individual subcommand run `vagrant box <subcommand> -h`
最下面一行给出,如果想查看任何独立的子命令,使用vagrant box
░▒▓ /cygdrive/d/v/virtualbox vagrant box add -h ✔ 13:53:43 ▓▒░
Usage: vagrant box add [options] <name, url, or path>
Options:
-c, --clean Clean any temporary download files
-f, --force Overwrite an existing box if it exists
--insecure Do not validate SSL certificates
--cacert FILE CA certificate for SSL download
--capath DIR CA certificate directory for SSL download
--cert FILE A client SSL cert, if needed
--location-trusted Trust 'Location' header from HTTP redirects and use the same credentials for subsequent urls as for the initial one
--provider PROVIDER Provider the box should satisfy
--box-version VERSION Constrain version of the added box
The box descriptor can be the name of a box on HashiCorp's Vagrant Cloud,
or a URL, or a local .box file, or a local .json file containing
the catalog metadata.
The options below only apply if you're adding a box file directly,
and not using a Vagrant server or a box structured like 'user/box':
--checksum CHECKSUM Checksum for the box
--checksum-type TYPE Checksum type (md5, sha1, sha256)
--name BOX Name of the box
-h, --help Print this help
常规命令
- list-command 列出所有主命令
- help /h 将显示命令的正确用法,一般显示为Usage: <命令的正确用法>
- version 返回当前vagrant的版本号
- global-status 将返回与当前用户关联的所有Vagrant环境的信息
配置类命令
login
用于登录 vagrant cloud账户时使用。
package
用于从你当前运行的环境中创建Vagrant box。
子命令:
使用vagrant package -h来获取子命令
░▒▓ /cygdrive/d/v/virtualbox vagrant package -h ✔ 3s 14:16:04 ▓▒░
Usage: vagrant package [options] [name|id]
Options:
--base NAME Name of a VM in VirtualBox to package as a base box (VirtualBox Only)
--output NAME Name of the file to output
--include FILE,FILE.. Comma separated additional files to package with the box
--vagrantfile FILE Vagrantfile to package with the box
-h, --help Print this help
在Usage中我们可以看到,子命令里包含两大类参数,第一类是可选的,就是[options]里的参数,第二类是命令的目标指定,可以是vagrant运行环境实例name名称,或者vagrant运行环境的实例id。
options里的参数是可选的,可不写,也可以写多个。
-
base是当前要打包的环境实例要以指定的box作为基础box
-
output 指定目标包的名称
-
include 一些文件打包到box里
-
vagrantfile 使用您希望打包成box的Vagrantfile文件名作为参数。
使用global-status命令获取所有的vagrant环境信息
░▒▓ /cygdrive/d/v/virtualbox vagrant global-status 1 ✘ 14:09:00 ▓▒░
id name provider state directory
------------------------------------------------------------------------
3fb32fa cdh1 virtualbox running D:/virtual/work
43b4aa1 cdh2 virtualbox poweroff D:/virtual/work
81b3696 cdh3 virtualbox poweroff D:/virtual/work
The above shows information about all known Vagrant environments
on this machine. This data is cached and may not be completely
up-to-date (use "vagrant global-status --prune" to prune invalid
entries). To interact with any of the machines, you can go to that
directory and run Vagrant, or you can use the ID directly with
Vagrant commands from any directory. For example:
"vagrant destroy 1a2b3c4d"
目前只有cdh1在运行,我们尝试对cdh2进行打包:
░▒▓ /cygdrive/d/v/virtualbox vagrant package cdh2 ✔ 15s 11:28:22 ▓▒░
==> cdh2: Clearing any previously set forwarded ports...
==> cdh2: Exporting VM...
==> cdh2: Compressing package to: D:/virtual/virtualbox/package.box
打包成功,没有指定box名称,默认为package.box,接下来对正在运行的cdh1进行打包,指定包的名称是cdh1.box。
░▒▓ /cygdrive/d/v/virtualbox vagrant package --output cdh1.box cdh1
==> cdh1: Attempting graceful shutdown of VM...
==> cdh1: Clearing any previously set forwarded ports...
==> cdh1: Exporting VM...
==> cdh1: Compressing package to: D:/virtual/virtualbox/cdh1.box
运行中的cdh1也是可以打包的,看下最新的运行状态:
░▒▓ /cygdrive/d/v/virtualbox vagrant global-status --prune ✔ 5s 11:44:32 ▓▒░
id name provider state directory
------------------------------------------------------------------------
594880d cdh1 virtualbox poweroff D:/virtual/virtualbox
fafefe8 cdh2 virtualbox poweroff D:/virtual/virtualbox
5911651 cdh3 virtualbox poweroff D:/virtual/virtualbox
运行中的机器是可以打包的,但是会 先关闭在进行打包,所以根据实际需要进行打包,尽量先保存好数据,将机器关闭然后进行打包是比较稳妥的。
常用命令
- box 管理系统上的box,包含安装,更新,删除和修改。
- reload 重启Vagrant机器,包含重新加载Vagrantfile。
- destory 使用destroy命令可以停止并删除一个Vagrant机器
- halt 使用halt命令可以停止或暂停正在运行的Vagrant机器
- init 初始化命令,会在当前文件夹生成一个新的Vagrantfile
- port 使用port命令可以返回从客户机到Vagrant环境的端口映射
- provision 使用provision命令将从可用的Vagrantfile中产生Vagrant机器
- push 使用push命令将根据您在Vagrantfile中配置的方法部署代码
- resume 使用resume命令将启动一个被暂停的Vagrant环境。
- status 返回Vagrant机器的状态
- suspend 暂停当前运行的机器,并不是完全停止,而是保存当前客户机的状态,下次重启机器时,会从保存状态的位置开始,没有冗长的启动过程。
- up 使用命令将启动Vagrant环境
- validate 用于验证Vagrantfile并返回存在的错误
看下up启动和suspend之后,通过resume启动的区别:
░▒▓ /cygdrive/d/v/virtualbox vagrant up cdh1 ✔ 10s 11:49:09 ▓▒░
Bringing machine 'cdh1' up with 'virtualbox' provider...
==> cdh1: Clearing any previously set network interfaces...
==> cdh1: Preparing network interfaces based on configuration...
cdh1: Adapter 1: nat
cdh1: Adapter 2: hostonly
==> cdh1: Forwarding ports...
cdh1: 22 (guest) => 2222 (host) (adapter 1)
==> cdh1: Running 'pre-boot' VM customizations...
==> cdh1: Booting VM...
==> cdh1: Waiting for machine to boot. This may take a few minutes...
cdh1: SSH address: 127.0.0.1:2222
cdh1: SSH username: root
cdh1: SSH auth method: password
cdh1: Warning: Connection reset. Retrying...
cdh1: Warning: Connection aborted. Retrying...
==> cdh1: Machine booted and ready!
==> cdh1: Checking for guest additions in VM...
cdh1: The guest additions on this VM do not match the installed version of
cdh1: VirtualBox! In most cases this is fine, but in rare cases it can
cdh1: prevent things such as shared folders from working properly. If you see
cdh1: shared folder errors, please make sure the guest additions within the
cdh1: virtual machine match the version of VirtualBox you have installed on
cdh1: your host and reload your VM.
cdh1:
cdh1: Guest Additions Version: 4.3.30
cdh1: VirtualBox Version: 5.2
==> cdh1: Setting hostname...
==> cdh1: Configuring and enabling network interfaces...
==> cdh1: Mounting shared folders...
cdh1: /vagrant => D:/virtual/virtualbox
==> cdh1: Machine already provisioned. Run `vagrant provision` or use the `--provision`
==> cdh1: flag to force provisioning. Provisioners marked to run always will still run.
░▒▓ /cygdrive/d/v/virtualbox vagrant suspend cdh1 ✔ 46s 12:50:04 ▓▒░
==> cdh1: Saving VM state and suspending execution...
░▒▓ /cygdrive/d/v/virtualbox vagrant resume cdh1 ✔ 11s 12:50:36 ▓▒░
==> cdh1: Resuming suspended VM...
==> cdh1: Booting VM...
==> cdh1: Waiting for machine to boot. This may take a few minutes...
cdh1: SSH address: 127.0.0.1:2222
cdh1: SSH username: root
cdh1: SSH auth method: password
==> cdh1: Machine booted and ready!
==> cdh1: Machine already provisioned. Run `vagrant provision` or use the `--provision`
==> cdh1: flag to force provisioning. Provisioners marked to run always will still run.
明显suspend启动的更快一点。
特定应用命令
-
docker-exec
-
docker-logs
-
docker-run
-
rdp
-
rsync
-
rsync-auto
-
ssh
-
ssh-config
-
powershell
删除global-status缓存
vagrant global-status --prune
删除过时的状态
关闭 Hyper-V 并重启并没有解决问题。最后在VirtualBox社区找到如下解决方案:
首先,管理员身份打开提示符。
输入 bcdedit 并回车,找到hypervisorlaunchtype选项发现为auto
输入命令bcdedit /set hypervisorlaunchtype off
重启电脑
问题解决。bcdedit是什么?
bcdedit 是一个启动选项编辑工具,用来管理启动设置
安装
安装virtualbox
安装vagrant
下载最新版本即可
到达指定文件夹
/cygdrive/d/virtual/virtualbox
然后添加需要运行的镜像
vagrant box add springcloud-dev springcloud-dev-10.box
然后初始化镜像
vagrant init springcloud-dev
这个时候会生成一个Vagrantfile文件,然后修改Vagrantfile文件,如下:
# -*- mode: ruby -*-
# vi: set ft=ruby :
# ruby用#代表注释符和java的//同理
#java的/* 多行注释符 */和ruby的=begin 多行注释符 =end同理
# All Vagrant configuration is done below. The "2" in Vagrant.configure
# configures the configuration version (we support older styles for
# backwards compatibility). Please don't change it unless you know what
# you're doing.
#这里的2是vagrant配置当前支持的最新版本号
#do在ruby中指定匿名块用的,用于执行多行命令。
#||用于接收参数,这里面的config是Vagrant.configure所代表的对象,取决去do前面获取到的对象
#其实Vagrantfile配置和ruby的关系不是特别大,具体配置方法介绍要看下官方文档
Vagrant.configure("2") do |config|
    #循环操作,ruby的循环,取值范围1、2、3,通过i传到方法中
  	(1..3).each do |i|
        # #{ }在Ruby中被称为字符串插值(String Interpolation),用于嵌入表达式或变量值到字符串中
    	# 示例:name = "world" puts "Hello,#{name}!" 输出  Hello,world!
        #这里将入参改为了config1是为了重命名的覆盖设置,子覆盖父的设置,下面的语句就要开始定制化的配置,
        #上面的for循环会有三个对象被定制创建,他们是同级的,不会 覆盖各自的自定义配置,所以会成为三个不同的对象,不会有覆盖配置的效果,总结下来的话,必须是在子块里面对父块进行覆盖配置
    	config.vm.define vm_name = "cdh#{i}"  do |config1|
        	config1.vm.provider "virtualbox" do |v|
            	v.customize ["modifyvm", :id, "--name", vm_name]
				v.customize ["modifyvm", :id, "--memory", "8192"]
            	v.customize ["modifyvm", :id, "--cpus", "2"]
        	end
        	config1.vm.box = "springcloud-dev"
        	config1.vm.hostname =vm_name
        	config1.ssh.username = "root"
        	config1.ssh.password = "vagrant"
			#config.ssh.shell = "powershell"
			#config.ssh.shell = "bash -l"
        	config1.vm.network :private_network, ip: "192.168.56.12#{i}"
			config1.vm.provision :shell, :path => "bootstrap.sh"
    	end
  	end
end
Vagrantfile文件使用的语言是ruby语言,官方关于Vagrantfile的文档介绍
文档中介绍了:
-
运行vagrant命令时,寻找Vagrantfile的逻辑,首先从当前路径寻找,不行就从根路径一级一级往下寻找。
-
配置的覆盖设置,子块定义同类对象,会将父类定义的同类对象覆盖,同级块不会覆盖各自配置,只会创建一个新的对象,下面是文档介绍截图:
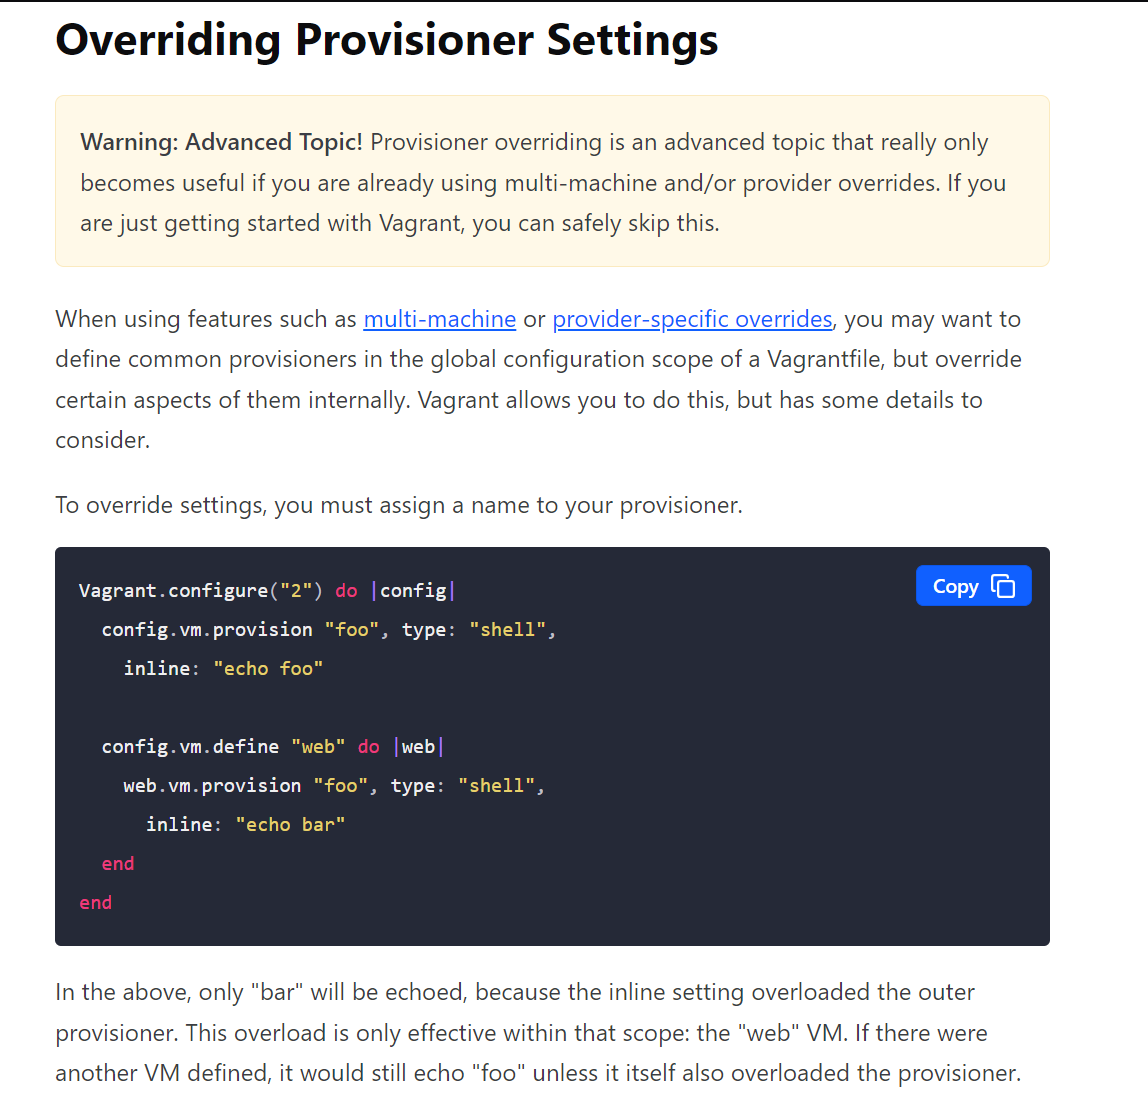
文档说要另起个名字,其实实际运行下来结果是一样的,只不过会给读者造成是同一个对象的错觉,所以说不建议写同一个名称。
配置完Vagrantfile,然后运行vagrant validate命令进行验证配置正确性。
░▒▓ /cygdrive/d/v/virtualbox vagrant validate ✔ 4s 12:53:30 ▓▒░
Vagrantfile validated successfully.
表示Vagrantfile配置正确,可以正常使用。
然后运行vagrant up命令,启动vagrant机器。
查看机器是否启动成功,可以通过ssh命令登录到机器里查看
░▒▓ /cygdrive/d/v/virtualbox vagrant ssh cdh1 ✔ 14:40:28 ▓▒░
Last login: Sun Aug 27 12:50:36 2023
[root@cdh1 ~]# exit
logout
不关闭机器退出,使用exit命令。
如果不想看到Vagrantfile里面的注释,可以追加命令-m来获取最少内容的Vagrantfile.
# -*- mode: ruby -*-
# vi: set ft=ruby :

Vagrant.configure("2") do |config|
  config.vm.box = "base"
end
从vagrantcloud安装box
选择一个新的文件夹,运行命令vagrant init生成一个Vagrant,到https://app.vagrantup.com/boxes/search上寻找你想要的box,类似于到mavenrepository或者github上搜索你想要的资源。
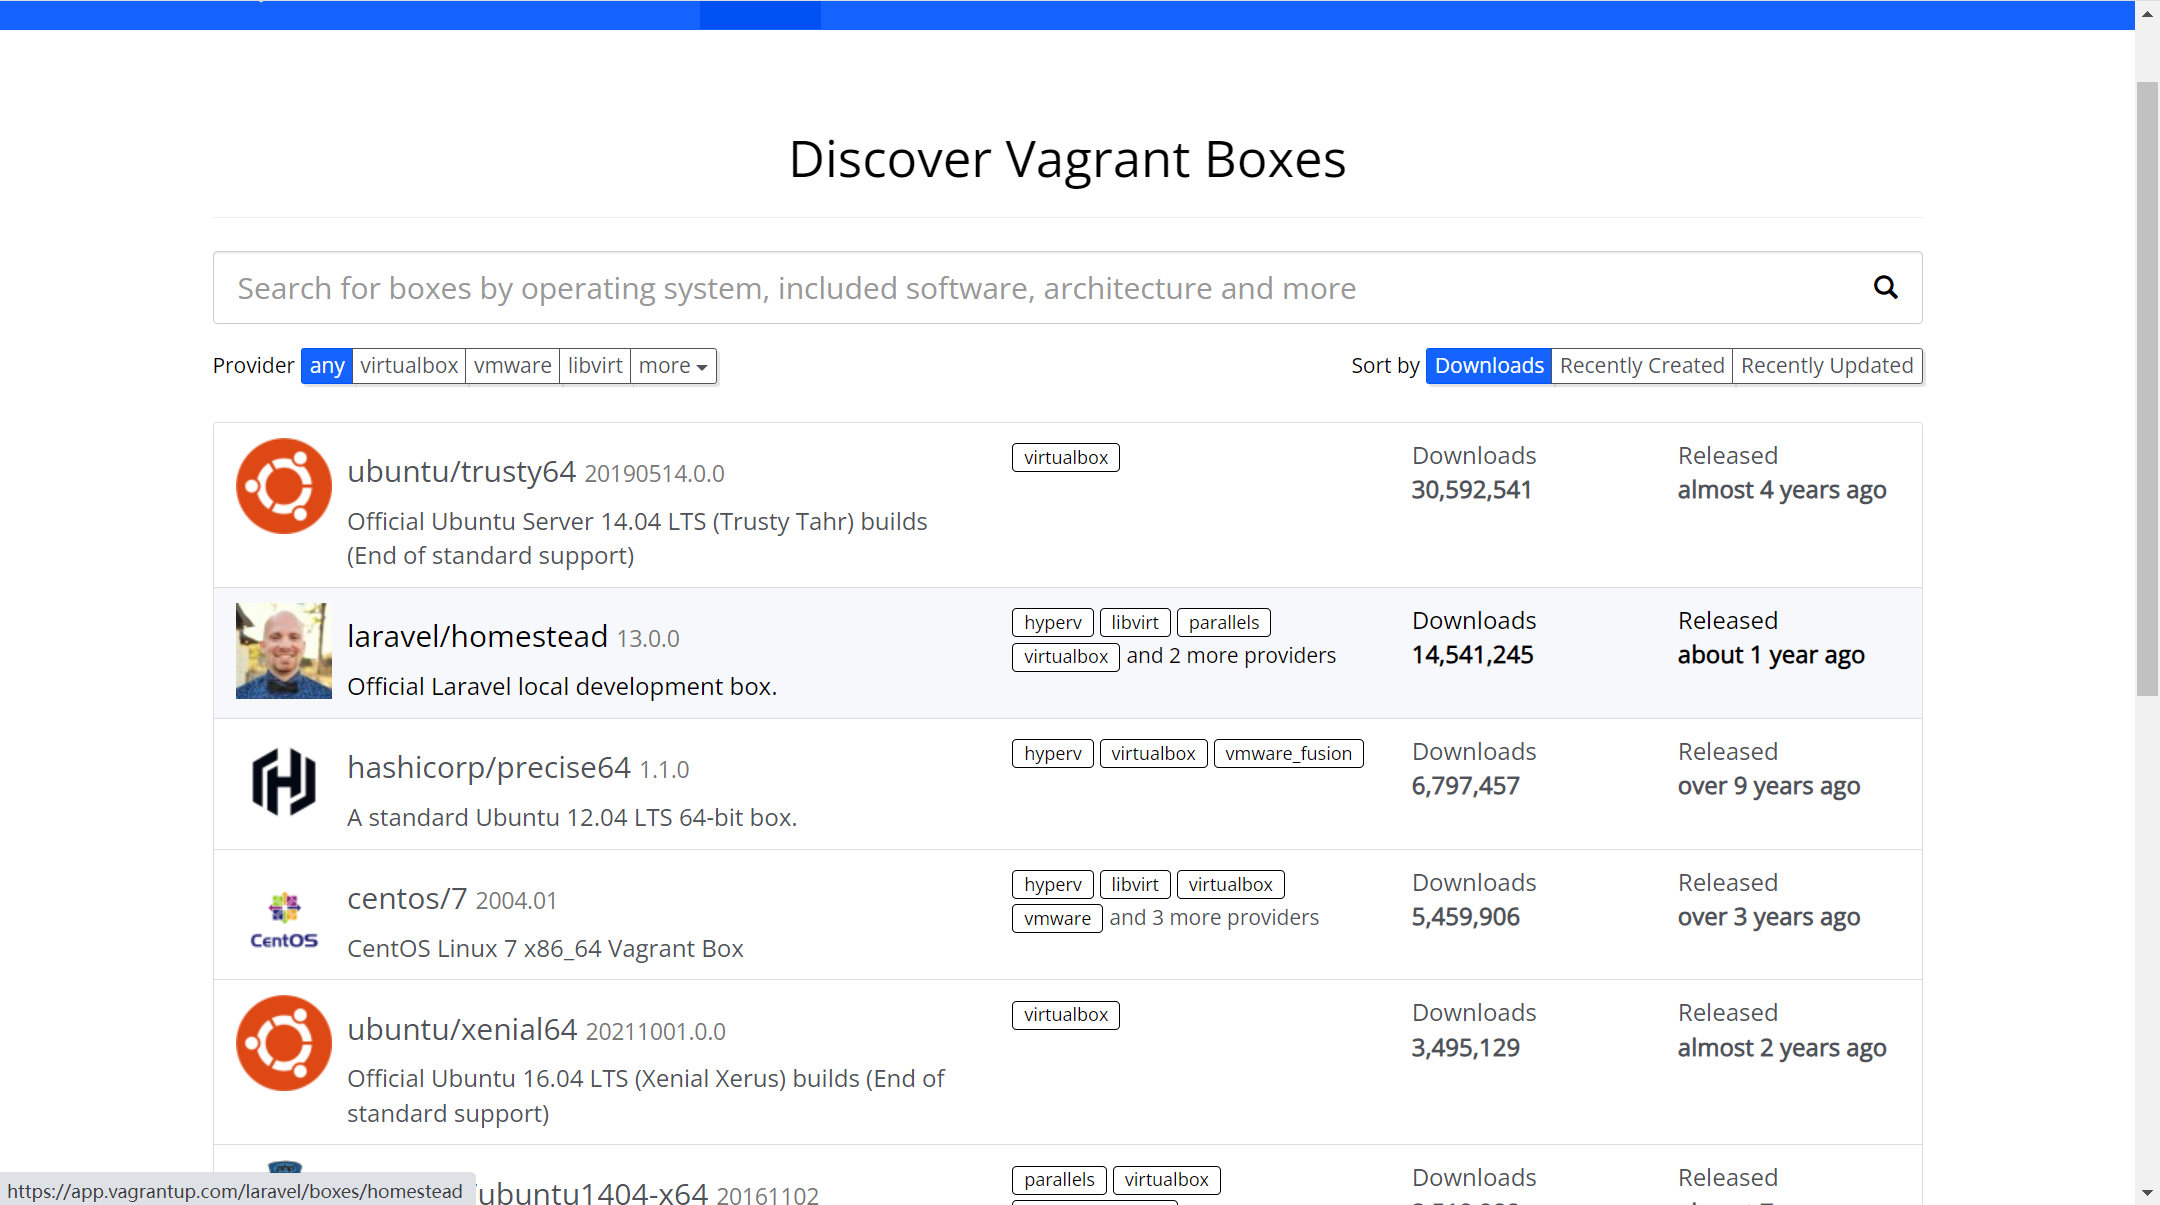
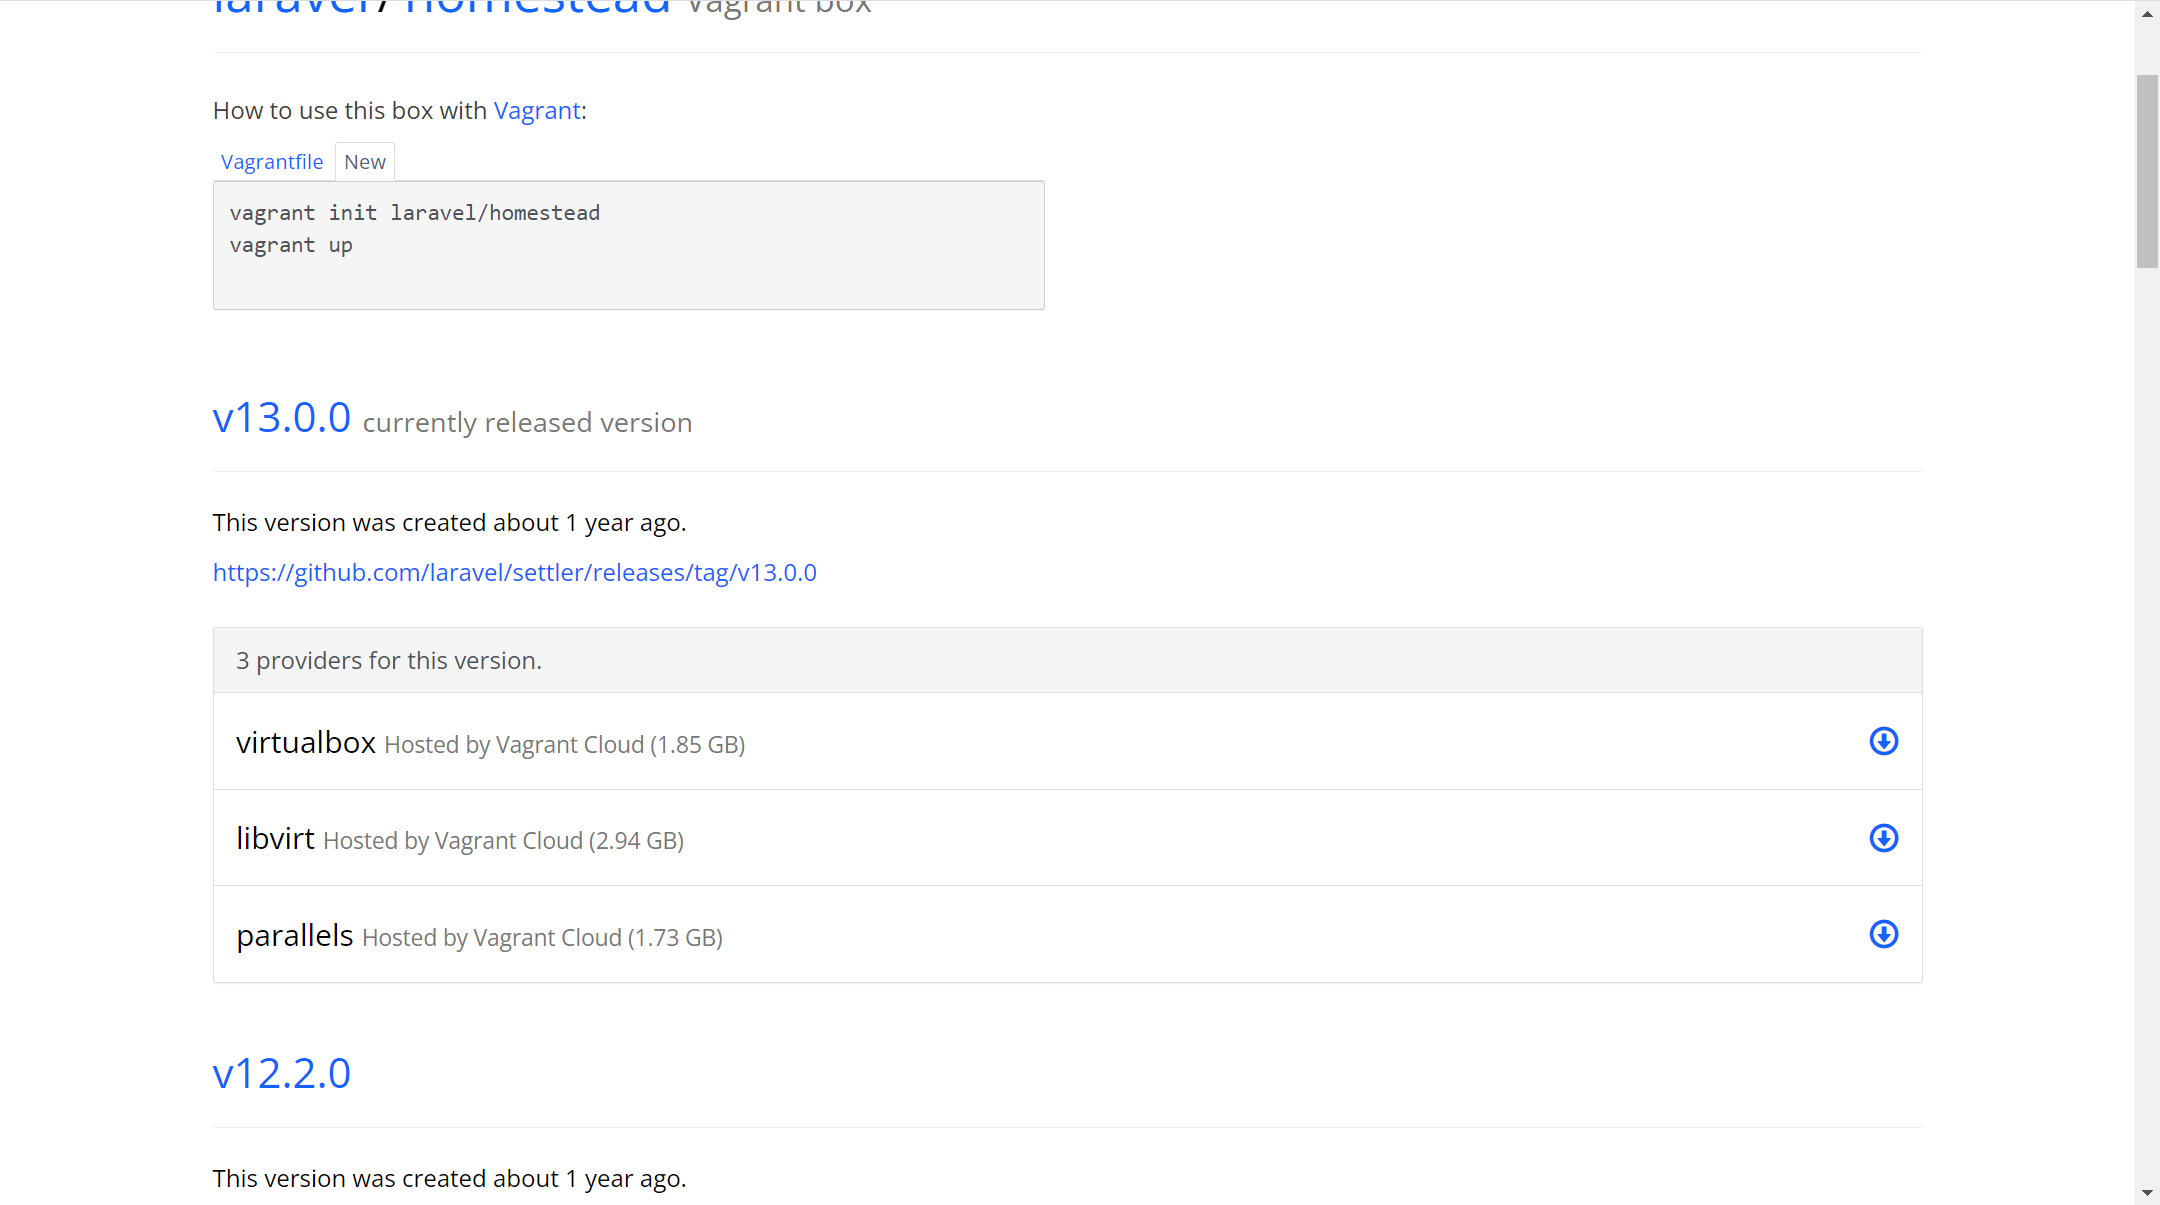
然后我们选择第二个,laravel/homestead,点击进去能看到它会提供一个类似依赖的配置,就是上面讲到的box的指定代码。
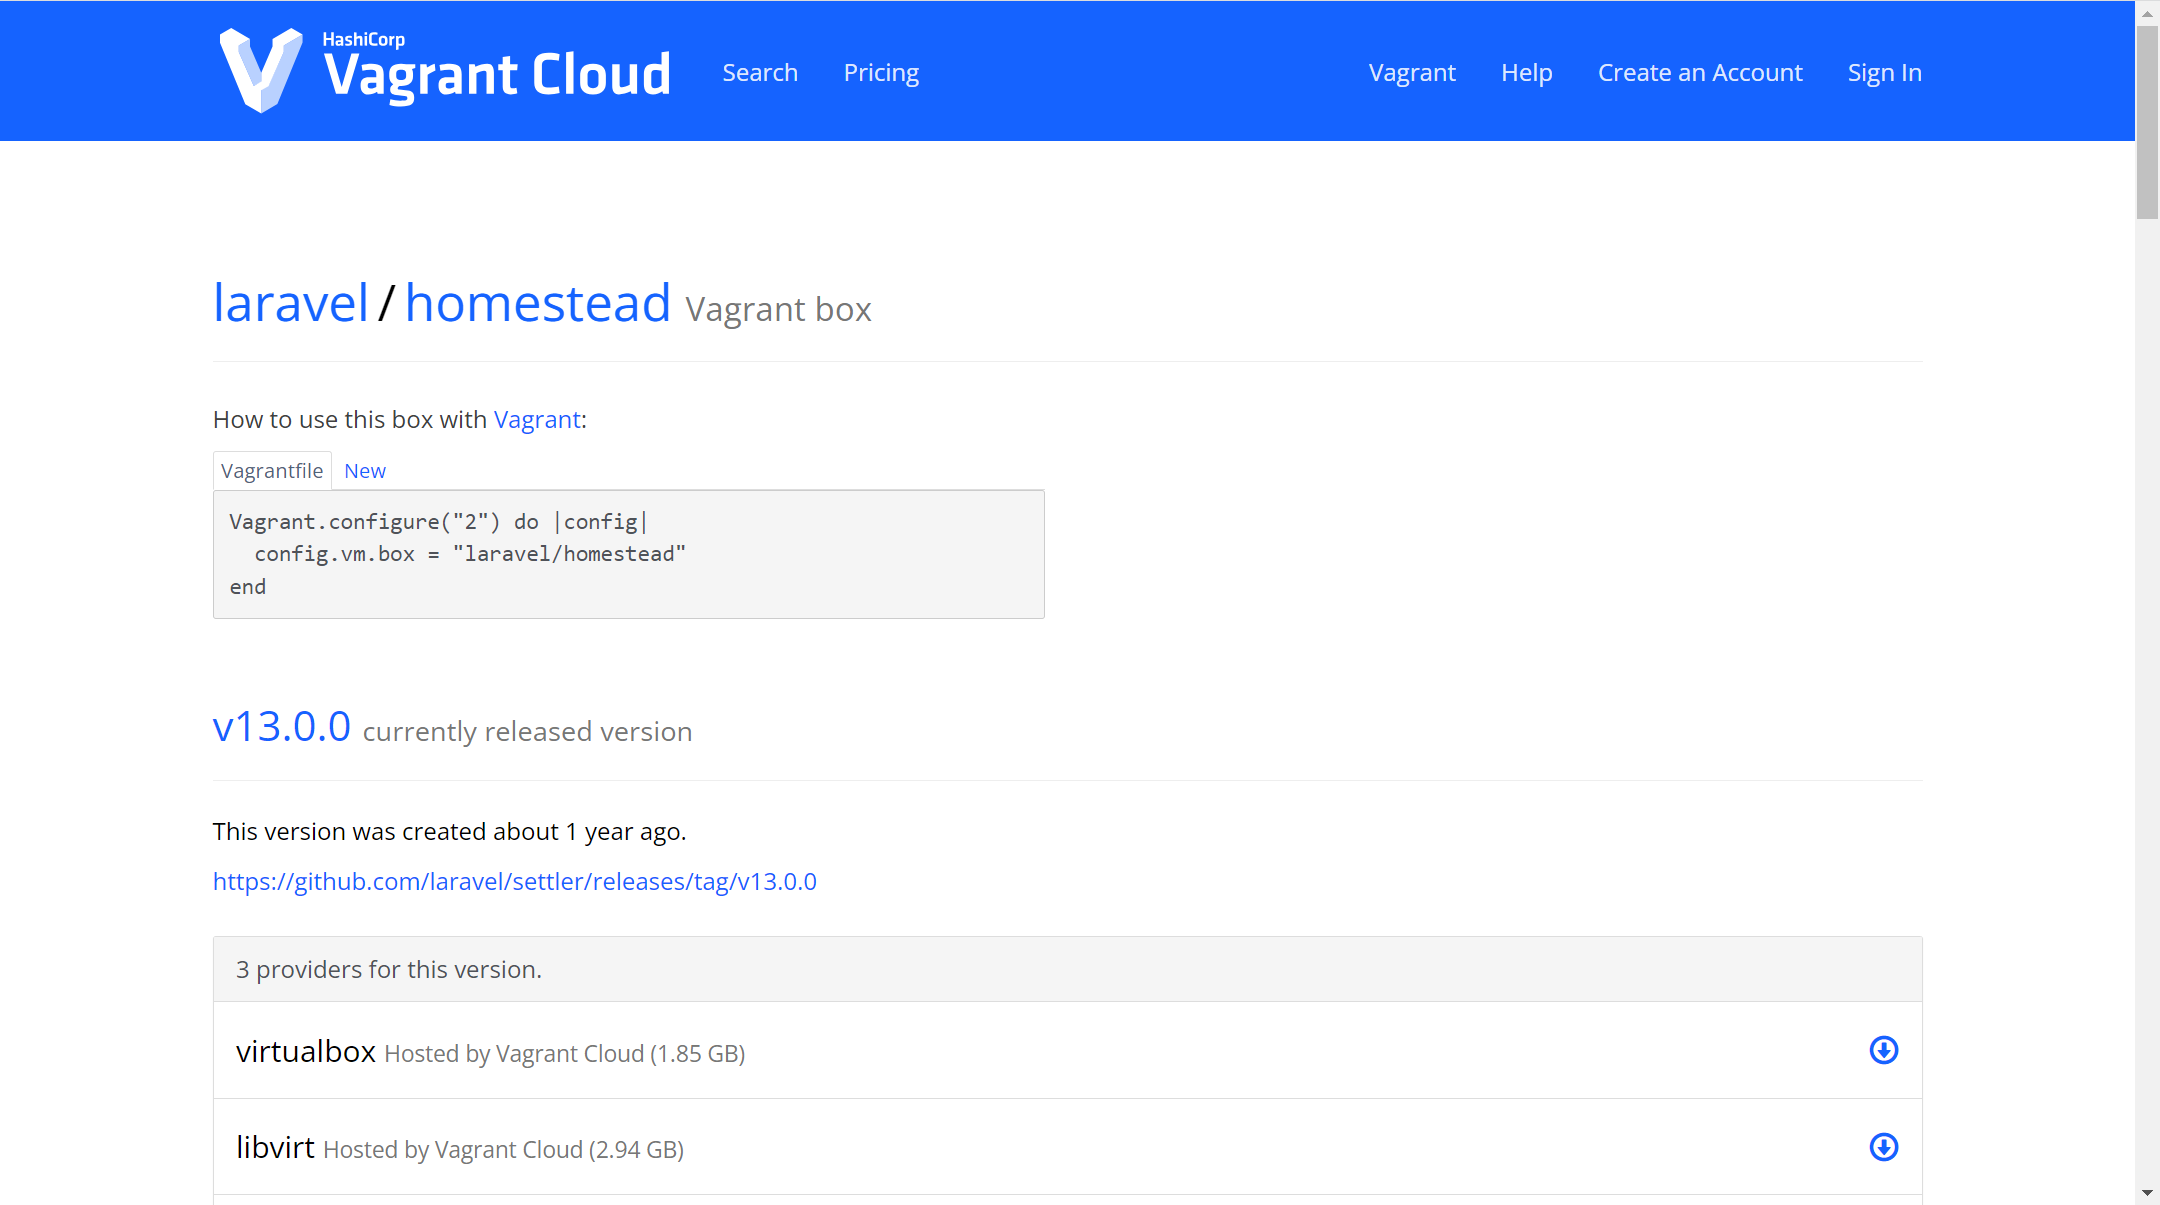
我们将里面的内容对本地文件夹里的Vagrantfile进行内容替换,然后进行保存,运行vagrant up命令
░▒▓ /cygdrive/d/v/homestead vagrant up 1 ✘ 3m 45s 13:53:40 ▓▒░
Bringing machine 'default' up with 'virtualbox' provider...
==> default: Box 'laravel/homestead' could not be found. Attempting to find and install...
default: Box Provider: virtualbox
default: Box Version: >= 0
==> default: Loading metadata for box 'laravel/homestead'
default: URL: https://vagrantcloud.com/laravel/homestead
==> default: Adding box 'laravel/homestead' (v13.0.0) for provider: virtualbox
default: Downloading: https://vagrantcloud.com/laravel/boxes/homestead/versions/13.0.0/providers/virtualbox.box
==> default: Box download is resuming from prior download progress
Progress: 2% (Rate: 0/s, Estimated time remaining: 1:03:18)
如果命令下载不了,可以直接下载box到本地
优先从本地寻找,找不到,便自动到vagrantcloud上寻找。
安装vagrant 插件
vagrant plugin install <插件名>
我们来安装下vagrant-hostsupdater插件,它会自动的在你启动vagrant机器时修改host文件,帮你配置域名映射,当你删除机器是也会自动的帮你删除在hosts文件里的配置。
░▒▓ /cygdrive/d/v/virtualbox vagrant plugin install vagrant-hostsupdater
Installing the 'vagrant-hostsupdater' plugin. This can take a few minutes...
Fetching vagrant-hostsupdater-1.2.4.gem
Installed the plugin 'vagrant-hostsupdater (1.2.4)'!
通过vagrant plugin list来查看已经安装的插件。
░▒▓ /cygdrive/d/v/virtualbox vagrant plugin list ✔ 1m 42s 16:13:16 ▓▒░
vagrant-hostsupdater (1.2.4, global)
该插件读取的是Vagrantfile里的config.vm.network和config.vm.hostname这两项,该插件生效必须要含有这两项配置
当我们重新运行vagrant up cdh1时,界面会有两行插件的输出:
==> cdh1: [vagrant-hostsupdater] Checking for host entries
==> cdh1: [vagrant-hostsupdater]   found entry for: 192.168.56.121 cdh1
这个显示表明已经存在该映射,如果不存在它会帮你创建,新创建的会向你询问vagrant机器的root密码,输入完回车即可。
vagrantcloud账号的创建
vagrantcloud官网上创建一个账号,我是用邮箱创建的。
然后使用vagrant login命令进行登录。
░▒▓ /cygdrive/d/v/homestead vagrant login -u ****@qq.com ✔ 4s 13:48:37 ▓▒░
WARNING: This command has been deprecated and aliased to `vagrant cloud auth login`
Translation missing: en.cloud_command.command_header
Vagrant Cloud username or email: *****@qq.com
Password (will be hidden):
Token description (Defaults to "Vagrant login from bibibao"):
D:/HashiCorp/Vagrant/embedded/gems/gems/vagrant_cloud-3.0.5/lib/vagrant_cloud/client.rb:132:in `rescue in request': Vagrant Cloud request failed - This endpoint is restricted as this account is linked through HCP. Please log into the web interface at https://app.vagrantup.com to manage your API tokens. (VagrantCloud::Error::ClientError::RequestError)
from D:/HashiCorp/Vagrant/embedded/gems/gems/vagrant_cloud-3.0.5/lib/vagrant_cloud/client.rb:129:in `request'
from D:/HashiCorp/Vagrant/embedded/gems/gems/vagrant_cloud-3.0.5/lib/vagrant_cloud/client.rb:192:in `authentication_token_create'
from D:/HashiCorp/Vagrant/embedded/gems/gems/vagrant-2.3.7/plugins/commands/cloud/client/client.rb:75:in `block in login'
from D:/HashiCorp/Vagrant/embedded/gems/gems/vagrant-2.3.7/plugins/commands/cloud/client/client.rb:167:in `with_error_handling'
from D:/HashiCorp/Vagrant/embedded/gems/gems/vagrant-2.3.7/plugins/commands/cloud/client/client.rb:74:in `login'
from D:/HashiCorp/Vagrant/embedded/gems/gems/vagrant-2.3.7/plugins/commands/cloud/util.rb:69:in `client_login'
from D:/HashiCorp/Vagrant/embedded/gems/gems/vagrant-2.3.7/plugins/commands/cloud/auth/login.rb:54:in `execute'
from D:/HashiCorp/Vagrant/embedded/gems/gems/vagrant-2.3.7/lib/vagrant/cli.rb:67:in `execute'
from D:/HashiCorp/Vagrant/embedded/gems/gems/vagrant-2.3.7/lib/vagrant/environment.rb:301:in `cli'
from D:/HashiCorp/Vagrant/embedded/gems/gems/vagrant-2.3.7/bin/vagrant:248:in `<main>'
D:/HashiCorp/Vagrant/embedded/gems/gems/excon-0.100.0/lib/excon/middlewares/expects.rb:13:in `response_call': Expected([200, 201, 204]) <=> Actual(403 Forbidden) (Excon::Error::Forbidden)
from D:/HashiCorp/Vagrant/embedded/gems/gems/excon-0.100.0/lib/excon/middlewares/response_parser.rb:12:in `response_call'
from D:/HashiCorp/Vagrant/embedded/gems/gems/excon-0.100.0/lib/excon/connection.rb:460:in `response'
from D:/HashiCorp/Vagrant/embedded/gems/gems/excon-0.100.0/lib/excon/connection.rb:291:in `request'
from D:/HashiCorp/Vagrant/embedded/gems/gems/vagrant_cloud-3.0.5/lib/vagrant_cloud/client.rb:130:in `block in request'
from D:/HashiCorp/Vagrant/embedded/gems/gems/vagrant_cloud-3.0.5/lib/vagrant_cloud/client.rb:84:in `block in with_connection'
from D:/HashiCorp/Vagrant/embedded/gems/gems/vagrant_cloud-3.0.5/lib/vagrant_cloud/client.rb:84:in `synchronize'
from D:/HashiCorp/Vagrant/embedded/gems/gems/vagrant_cloud-3.0.5/lib/vagrant_cloud/client.rb:84:in `with_connection'
from D:/HashiCorp/Vagrant/embedded/gems/gems/vagrant_cloud-3.0.5/lib/vagrant_cloud/client.rb:130:in `request'
from D:/HashiCorp/Vagrant/embedded/gems/gems/vagrant_cloud-3.0.5/lib/vagrant_cloud/client.rb:192:in `authentication_token_create'
from D:/HashiCorp/Vagrant/embedded/gems/gems/vagrant-2.3.7/plugins/commands/cloud/client/client.rb:75:in `block in login'
from D:/HashiCorp/Vagrant/embedded/gems/gems/vagrant-2.3.7/plugins/commands/cloud/client/client.rb:167:in `with_error_handling'
from D:/HashiCorp/Vagrant/embedded/gems/gems/vagrant-2.3.7/plugins/commands/cloud/client/client.rb:74:in `login'
from D:/HashiCorp/Vagrant/embedded/gems/gems/vagrant-2.3.7/plugins/commands/cloud/util.rb:69:in `client_login'
from D:/HashiCorp/Vagrant/embedded/gems/gems/vagrant-2.3.7/plugins/commands/cloud/auth/login.rb:54:in `execute'
from D:/HashiCorp/Vagrant/embedded/gems/gems/vagrant-2.3.7/lib/vagrant/cli.rb:67:in `execute'
from D:/HashiCorp/Vagrant/embedded/gems/gems/vagrant-2.3.7/lib/vagrant/environment.rb:301:in `cli'
from D:/HashiCorp/Vagrant/embedded/gems/gems/vagrant-2.3.7/bin/vagrant:248:in `<main>'
先通过vagrant login -u <你的用户名或者邮箱地址> 进行登录,
然后它会提示你输入密码,输入完密码会让你提供一个token的东西,我是直接回车的,然后就会在本地给你生成一些需要连接vagrantcloud的信息配置,这样就可以从vagrantcloud上下载box了。
传输本地box到vagrantcloud
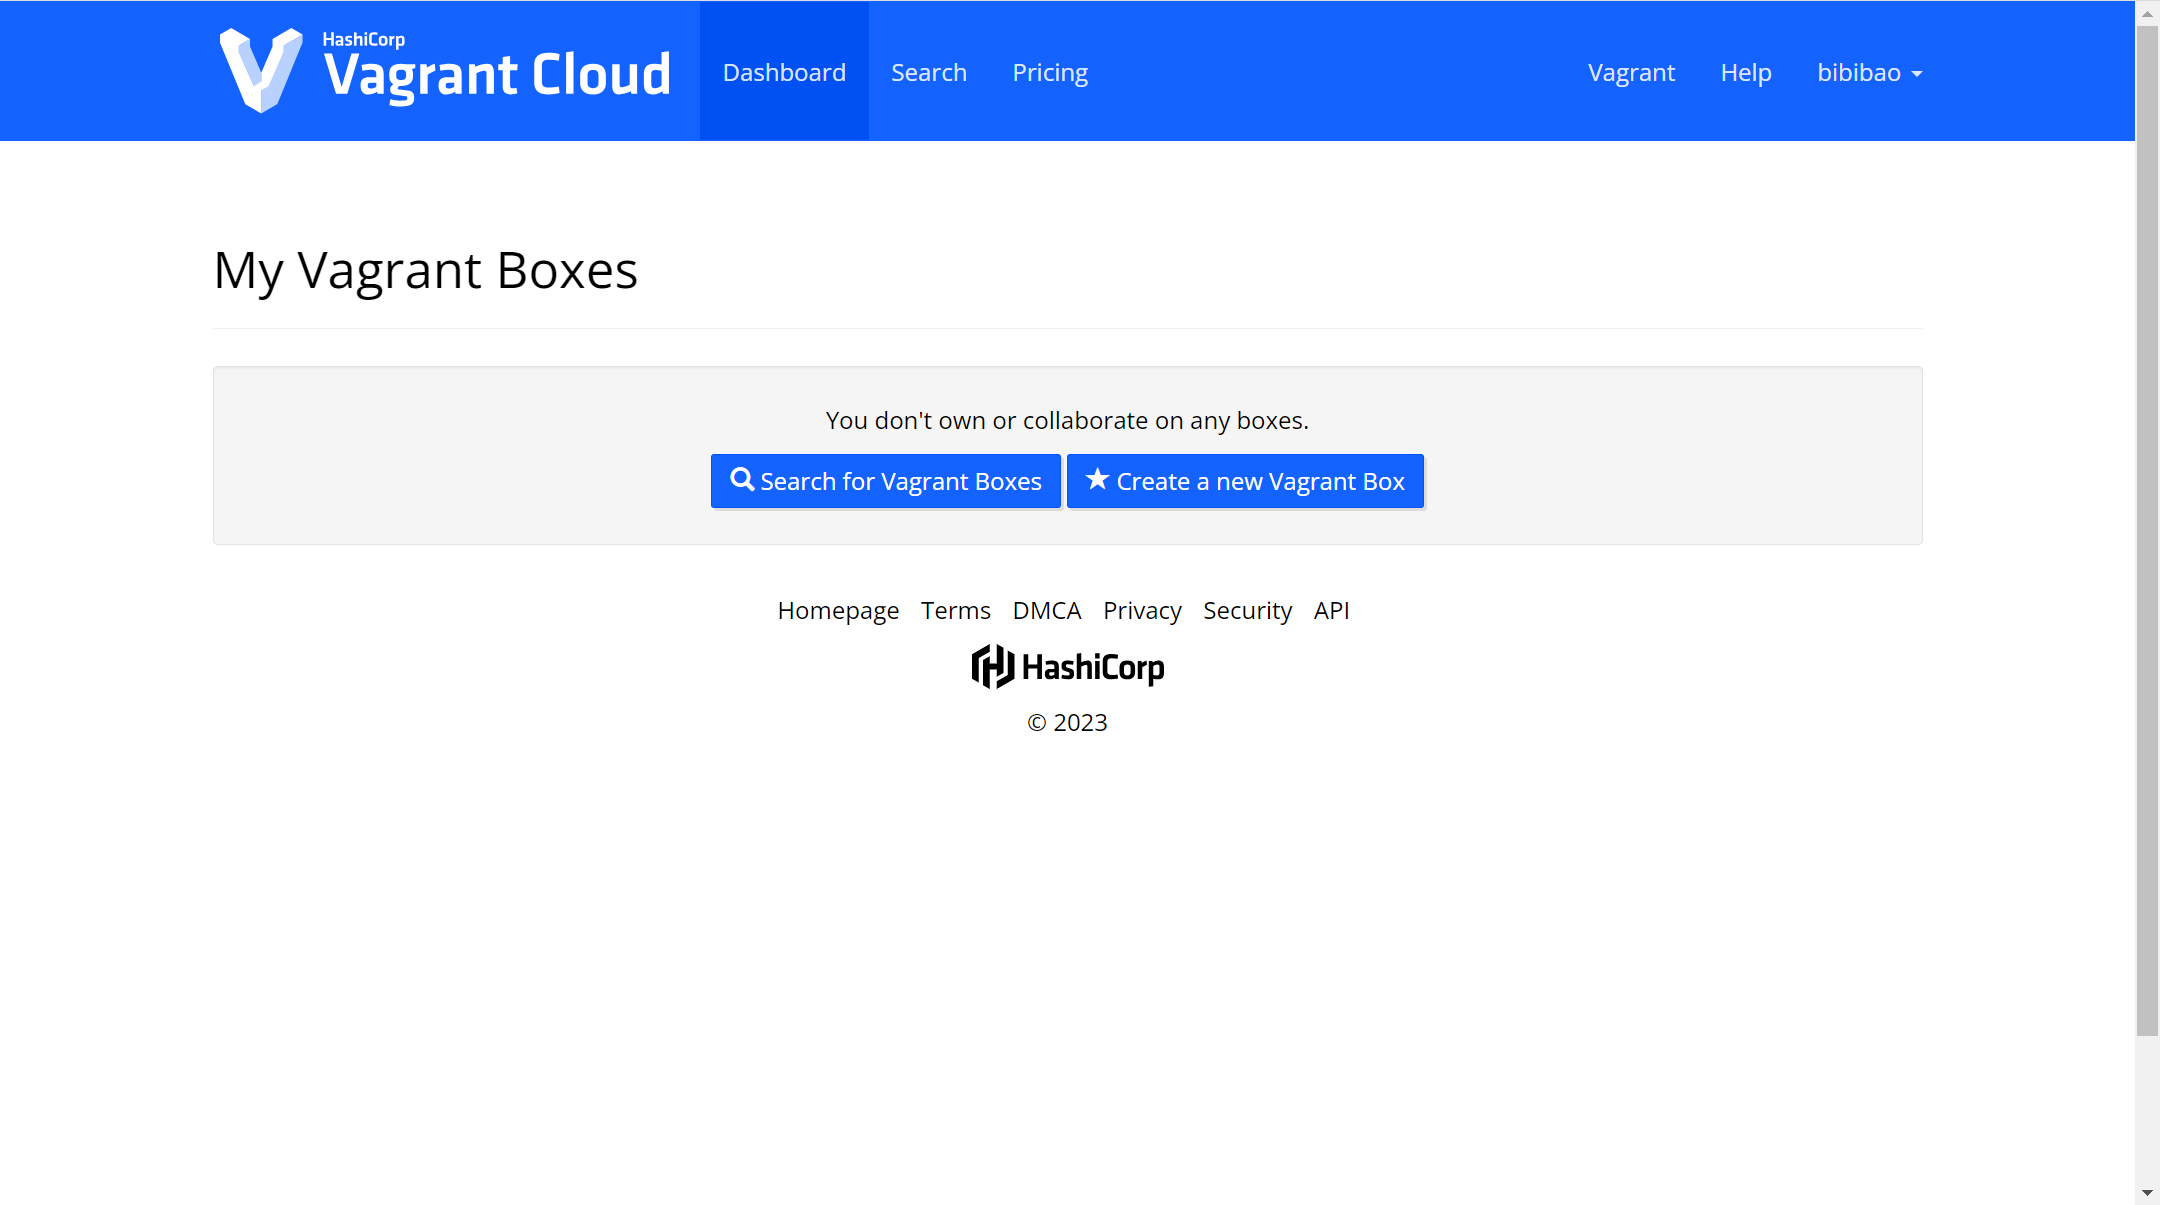
选择创建一个新的box
在第二栏输入box的名称,自己选择是否公开当前要上传的box。然后点击创建box。
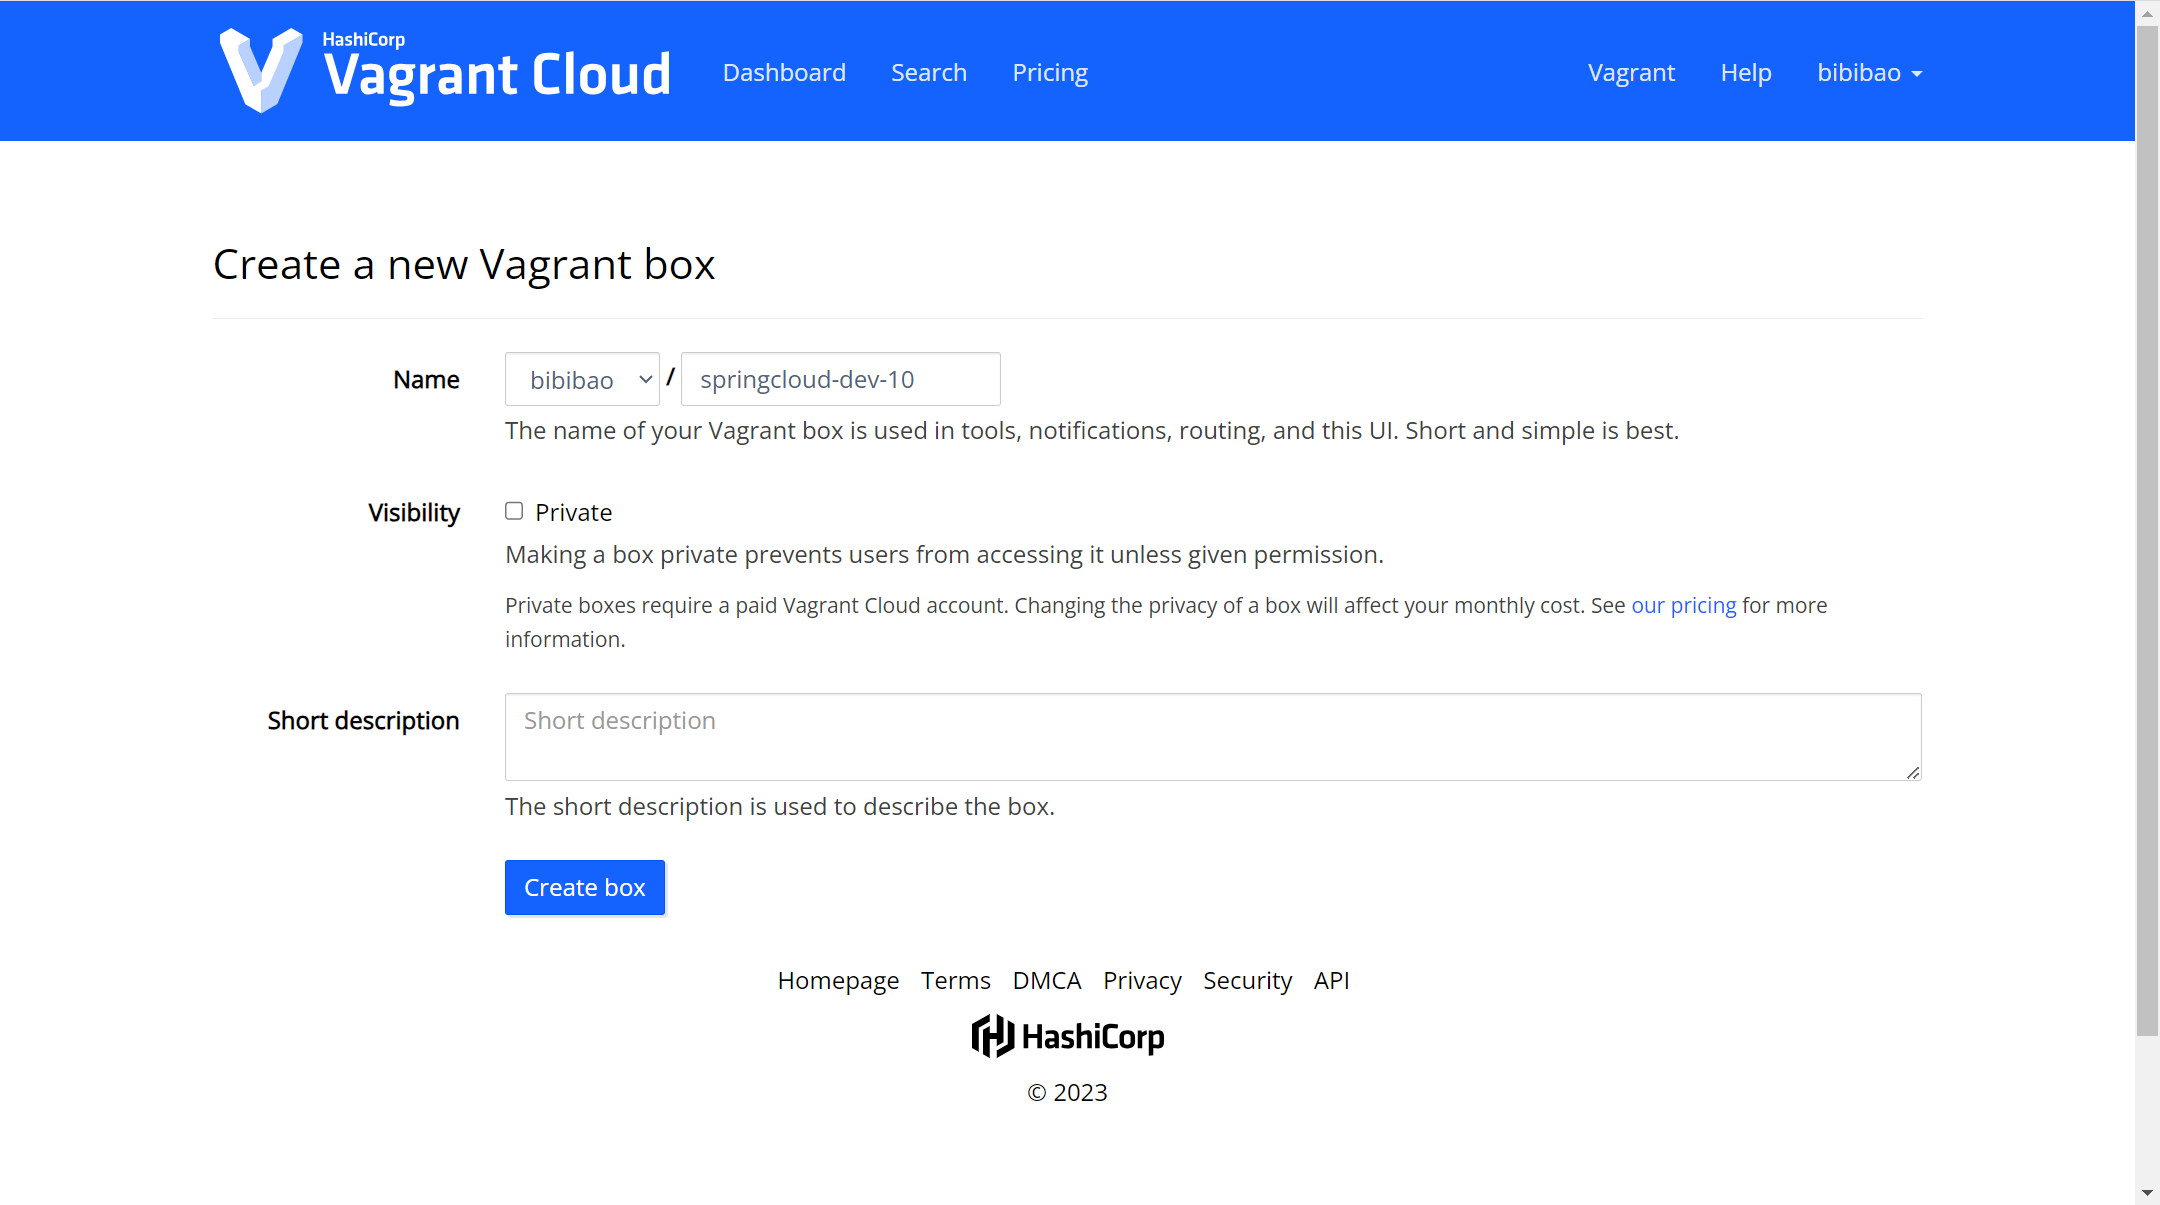
.png)
让你指定版本,以及相应的描述

然后添加一个运行的环境工具
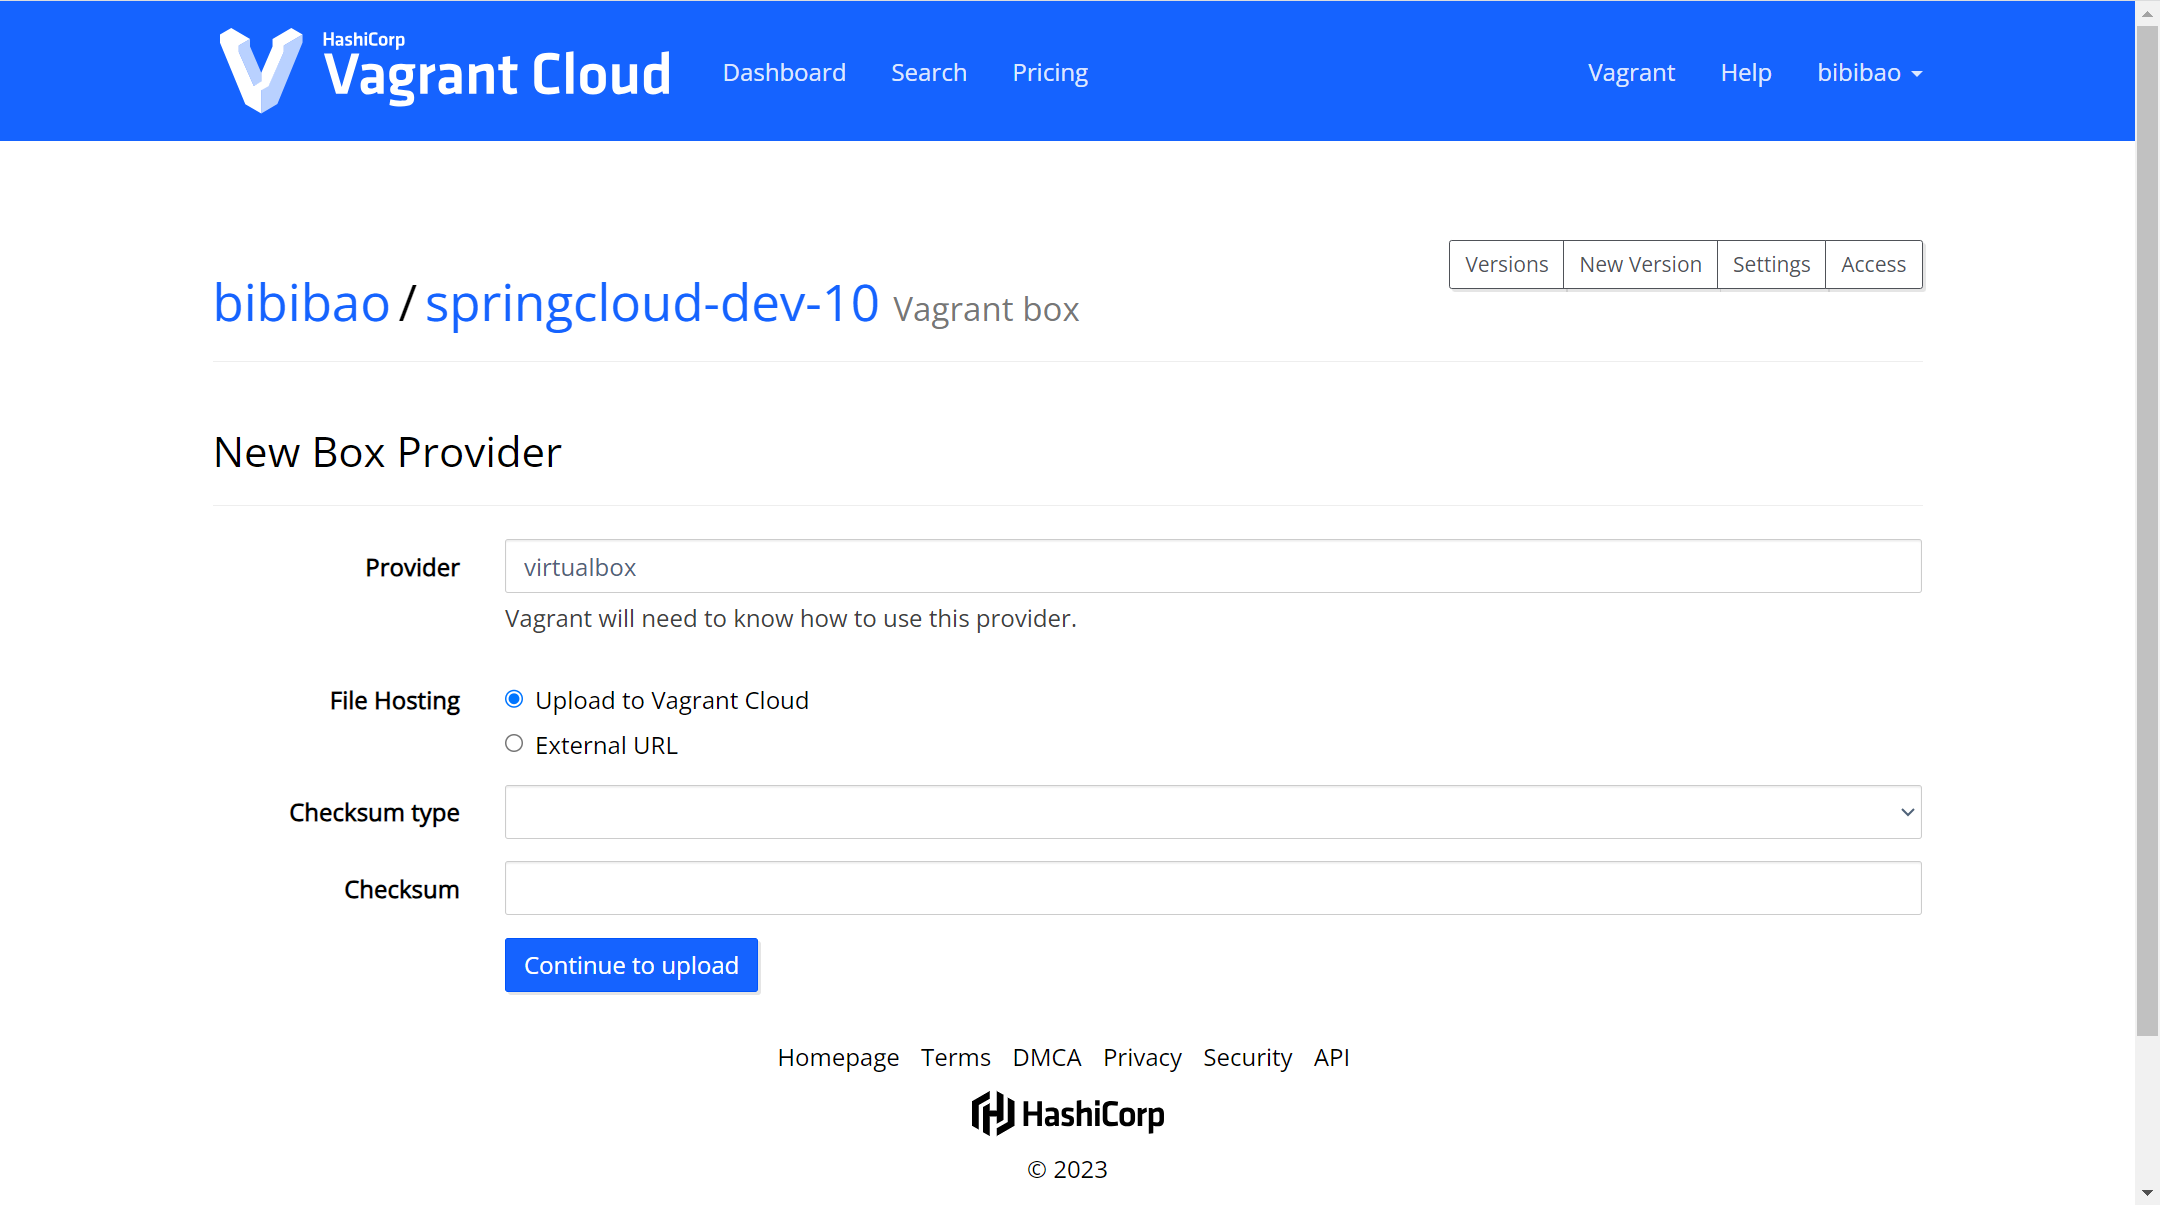
选择virtualbox后继续上传

会让你选择box文件上传,这个时候需要提前将生成的box文件准备好,然后选择上传。然后等待上传成功

上传成功后,对应版本号那里有release版本发布,点击后就算是正式提交了。
未完待续...

 浙公网安备 33010602011771号