内网穿透FRP实现(具有外网的服务器,穿透到本地局域网内)
下载测试可用
基于CentOS6.9 一台是本地服务器,一台是具有公网IP的云服务器

客户端和服务端都要下载
wget https://github.com/fatedier/frp/releases/download/v0.27.0/frp_0.27.0_linux_amd64.tar.gz
 cd frp_0.27.0_linux_amd64

[root@VM_0_10_centos backeges]# tar xzvf frp_0.27.0_linux_amd64.tar.gz


服务器端测试配置文件
[root@VM_0_10_centos frp_0.27.0_linux_amd64]# cat frps.ini
[common]
bind_port = 7000

开启服务
[root@VM_0_10_centos frp_0.27.0_linux_amd64]# ./frps -c ./frps.ini
2019/12/01 11:11:41 [I] [service.go:139] frps tcp listen on 0.0.0.0:7000
2019/12/01 11:11:41 [I] [root.go:204] Start frps success
2019/12/01 11:11:46 [I] [service.go:340] client login info: ip [183.0.89.219:24662] version [0.27.0] hostname [] os [linux] arch [amd64]


客服端测试配置文件
[root@#quan#Better frp_0.27.0_linux_amd64]$cat frpc.ini
[common]
server_addr = 129.204.3.133
server_port = 7000

#[ssh]
#type = tcp
#local_ip = 127.0.0.1
#local_port = 22
#remote_port = 6000
 启动服务
[root@#quan#Better frp_0.27.0_linux_amd64]$./frpc -c ./frpc.ini
2019/12/01 11:11:47 [I] [service.go:221] login to server success, get run id [6250c843a4d98a90], server udp port [0]
内网穿透之SSH登陆本地服务器
修该客户端配置文件
[root@#quan#Better frp_0.27.0_linux_amd64]$cat frpc.ini
[common]
server_addr = 129.204.3.133
server_port = 7000

[ssh]
type = tcp
local_ip = 127.0.0.1
local_port = 22
remote_port = 6000

服务端无需修改
启动即可
[root@VM_0_10_centos frp_0.27.0_linux_amd64]# ./frps -c ./frps.ini
2019/12/01 11:44:24 [I] [service.go:139] frps tcp listen on 0.0.0.0:7000
2019/12/01 11:44:24 [I] [root.go:204] Start frps success
2019/12/01 11:44:26 [I] [service.go:340] client login info: ip [183.0.89.219:23915] version [0.27.0] hostname [] os [linux] arch [amd64]
2019/12/01 11:44:26 [I] [tcp.go:66] [68fd44c1430415f0] [ssh] tcp proxy listen port [6000]
2019/12/01 11:44:26 [I] [control.go:398] [68fd44c1430415f0] new proxy [ssh] success

客服端启动
[root@#quan#Better frp_0.27.0_linux_amd64]$./frpc -c ./frpc.ini
2019/12/01 11:44:26 [I] [service.go:221] login to server success, get run id [68fd44c1430415f0], server udp port [0]
2019/12/01 11:44:26 [I] [proxy_manager.go:137] [68fd44c1430415f0] proxy added: [ssh]
2019/12/01 11:44:26 [I] [control.go:144] [ssh] start proxy success

测试结果
[root@localhost ~]# ssh -o Port=6000 root@129.204.3.133
The authenticity of host '[129.204.3.133]:6000 ([129.204.3.133]:6000)' can't be established.
RSA key fingerprint is 28:79:87:c4:41:22:3b:21:71:96:2c:12:19:73:5b:14.
Are you sure you want to continue connecting (yes/no)? yes
root@129.204.3.133's password:
Last login: Sun Dec  1 10:49:52 2019 from 192.168.139.1
[root@#quan#Better ~]$
成功登陆LAN服务器
内网穿透之访问本地WEB服务器
客服端配置文件
[root@#quan#Better frp_0.27.0_linux_amd64]$cat frpc.ini
[common]
server_addr = 129.204.3.133
server_port = 7000

[ssh]
type = tcp
local_ip = 127.0.0.1
local_port = 22
remote_port = 6000

[web]
type = http
local_port = 8027
custom_domains = www.qzqlsj.club

服务端配置文件
[root@VM_0_10_centos frp_0.27.0_linux_amd64]# cat frps.ini
[common]
bind_port = 7000
vhost_http_port = 9080 #端口自定义
测试结果
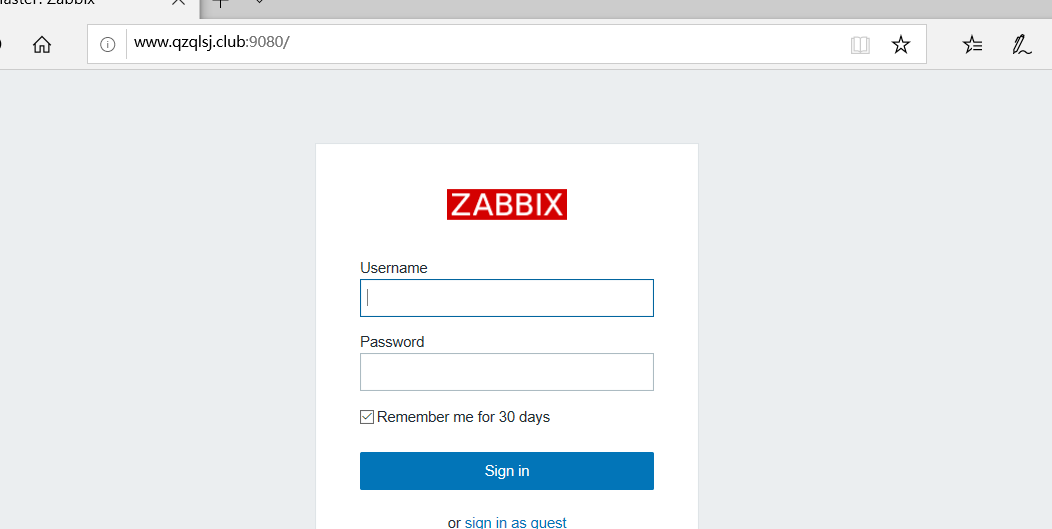
[root@VM_0_10_centos frp_0.27.0_linux_amd64]# ./frps -c frps.ini
2019/12/02 07:42:10 [I] [service.go:139] frps tcp listen on 0.0.0.0:7000
2019/12/02 07:42:10 [I] [service.go:181] http service listen on 0.0.0.0:9080
2019/12/02 07:42:10 [I] [root.go:204] Start frps success
2019/12/02 07:42:35 [I] [service.go:340] client login info: ip [59.41.161.140:24853] version [0.27.0] hostname [] os [linux] arch [amd64]
2019/12/02 07:42:35 [I] [tcp.go:66] [3df3c79c85a8ee43] [ssh] tcp proxy listen port [6000]
2019/12/02 07:42:35 [I] [control.go:398] [3df3c79c85a8ee43] new proxy [ssh] success
2019/12/02 07:42:35 [I] [http.go:72] [3df3c79c85a8ee43] [web] http proxy listen for host [www.qzqlsj.club] location []


客户端
[root@#quan#Better frp_0.27.0_linux_amd64]$2019/12/02 07:42:44 [I] [service.go:221] login to server success, get run id [1ac0fb84ca8abebe], server udp port [0]
2019/12/02 07:42:44 [I] [proxy_manager.go:137] [1ac0fb84ca8abebe] proxy added: [ssh web]
2019/12/02 07:42:44 [I] [control.go:144] [ssh] start proxy success
2019/12/02 07:42:44 [I] [control.go:144] [web] start proxy success
本地计算机访问服务端结果如下
内网穿透配置仪表板(服务端)
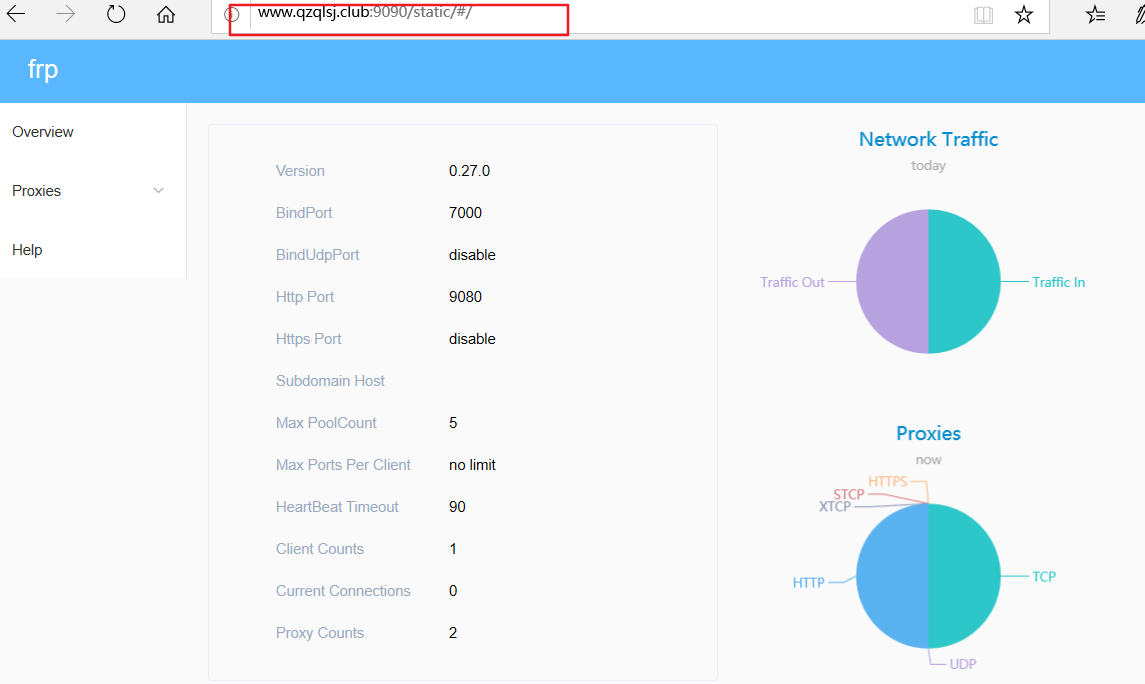
[root@VM_0_10_centos frp_0.27.0_linux_amd64]# cat frps.ini
[common]
bind_port = 7000
vhost_http_port = 9080

#仪表盘
# dashboard_addr的默认值是相同与bind_addr
dashboard_addr=0.0.0.0
dashboard_port=9090
dashboard_user=quan
dashboard_pwd=2004
#访问http://server_addr:9090 即可查看仪表板,账号是quan  密码是2004
测试结果
内网穿透配置token(服务端+客户端)
在common区域加入
token = QQQQ2004
注意:都要加入token
内网穿透配置子域名访问(访问本地服务器多个设备-通过域名)
需要将域名解析到服务器
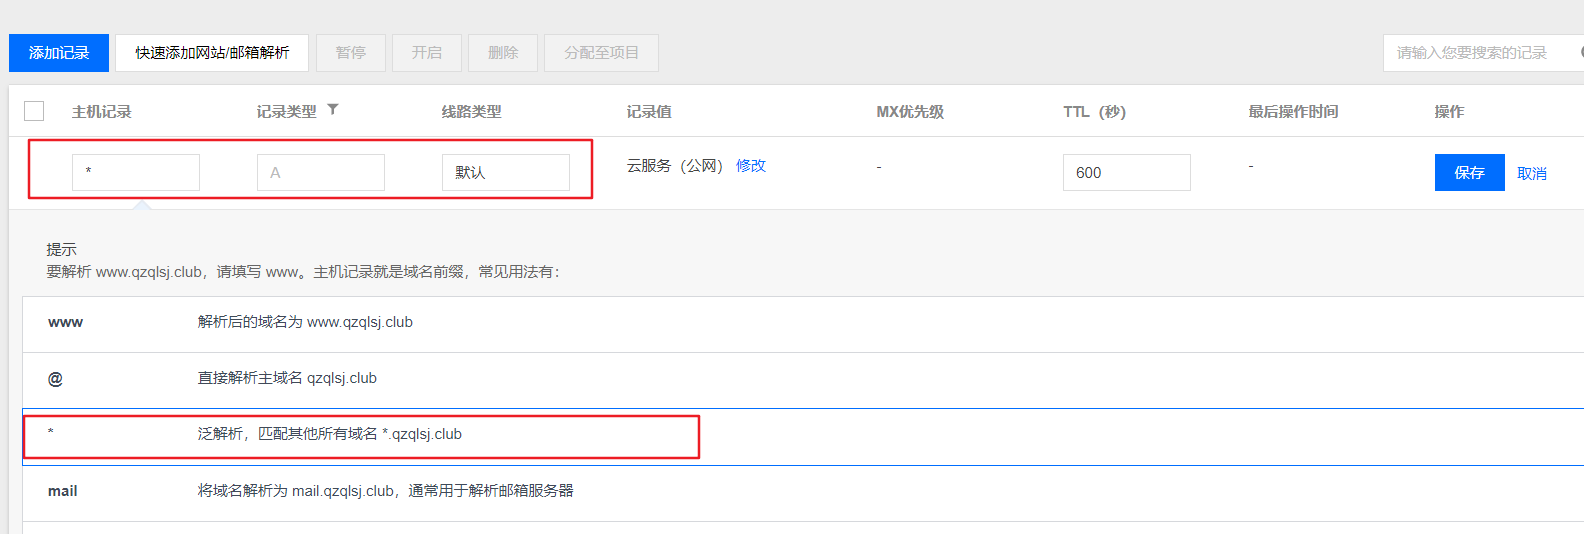
一定要进行泛解析!!!
配置服务端
[root@VM_0_10_centos frp_0.27.0_linux_amd64]# cat frps.ini
[common]
bind_port = 7000
vhost_http_port = 9080
token = QQQQ2004
subdomain_host= qzqlsj.club
配置客户端
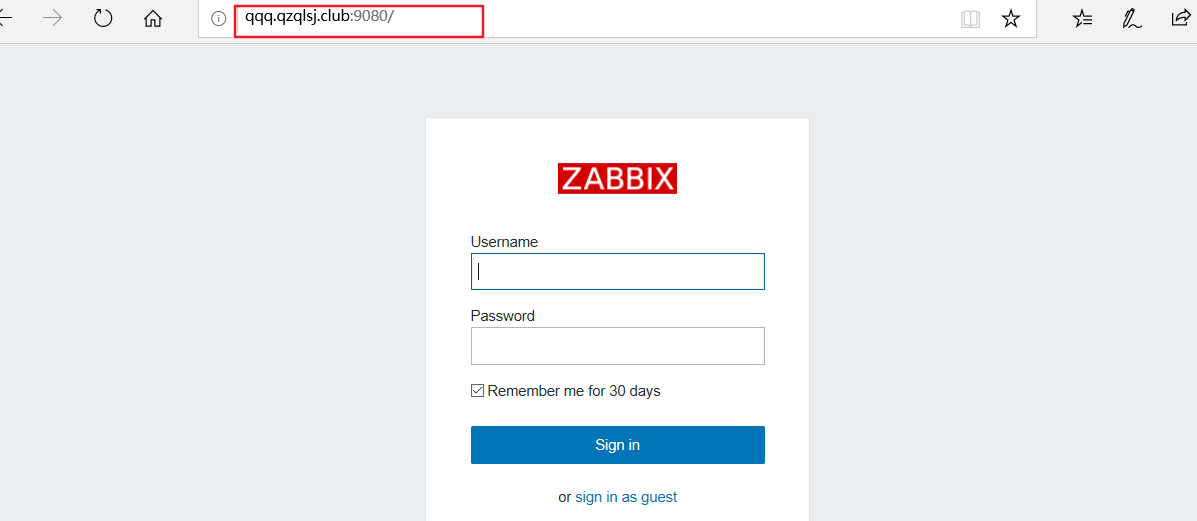
[root@#quan#Better frp_0.27.0_linux_amd64]$cat frpc.ini
[common]
server_addr = 129.204.3.133
server_port = 7000

token = QQQQ2004
[ssh]
type = tcp
local_ip = 127.0.0.1
local_port = 22
remote_port = 6000

#[web]
#type = http
#local_port = 8027
#custom_domains = www.qzqlsj.club
[qqqq] #一定要小写字母!!!!
type = http
local_port = 8027
subdomain = qqqq #一定要小写字母!!!
启动即可
测试
编写启动脚本
CentOS6.9
服务器
[root@VM_0_10_centos init.d]# cat frp-server
#!/bin/bash
# chkconfig: - 90 10
# description:  Starts and stops Zabbix Server using chkconfig

. /etc/init.d/functions


#install dir
INS_DIR=/root/backeges/frp_0.27.0_linux_amd64/
export INS_DIR

start(){
    cd $INS_DIR
    nohup frps  -c  frps.ini >/dev/null 2>&1 &  #nohup :表示不挂断运行,和& 结合起来就是不挂断后台运行
    sleep 3
    if [ $? == 0  ];then
    action "staring frps success" /bin/true
    else
    action "staring frps false" /bin/false
    fi
}

stop(){
    cd $INS_DIR
    kill `ps aux | grep frps |grep -v grep |awk '{print $2}'`
    sleep 3
    if [ $? == 0 ];then
        action "stop frps success" /bin/true
    else
        action "stop frps false" /bin/false
    fi

}

status(){
    SD=`ps aux | grep frps |grep -v grep |wc -l `
    if [ $SD == 1 ];then
    echo "frp-server is running ..."
    else
    echo "frp-server is not running !"
    fi

}
case "$1" in
    start)
        start
        ;;
     stop)
        stop
        ;;
    restart)
        stop
        start
        ;;
    status)
        status
        ;;

    *)
        echo $"Usage: service  frp-server {start|stop|status|restart}"
esac
将frp-server 加入开机自启动,移动现目录到/etc/init.d/下(一定要移动到此目录下)
chkconfig --add frp-server
chkconfig ftp-server on
启动服务 service frp-server start
客服端
[root@#quan#Better init.d]$cat frp-client
#!/bin/bash
#chkconfig:2345 90 10
#description:service frp-server
. /etc/init.d/functions


#install dir
INS_DIR=/root/backeges/frp_0.27.0_linux_amd64/
export INS_DIR

start(){
    cd $INS_DIR
    nohup frpc  -c  frpc.ini >/dev/null 2>&1 &
    sleep 3
    if [ $? == 0  ];then
    action "staring frpc success" /bin/true
    else
    action "staring frpc false" /bin/false
    fi
}

stop(){
    cd $INS_DIR
    kill `ps aux | grep frpc |grep -v grep |awk '{print $2}'`
    sleep 3
    if [ $? == 0 ];then
        action "stop frpc success" /bin/true
    else
        action "stop frpc false" /bin/false
    fi

}

status(){
    SD=`ps aux | grep frpc |grep -v grep |wc -l `
    if [ $SD == 1 ];then
    echo "frp-client is running ..."
    else
    echo "frp-client is not running !"
    fi

}
case "$1" in
    start)
        start
        ;;
     stop)
        stop
        ;;
    restart)
        stop
        start
        ;;
    status)
        status
        ;;

    *)
        echo $"Usage: service  frp-client {start|stop|status|restart}"
esac
将frp-server 加入开机自启动,移动现目录到/etc/init.d/下(一定要移动到此目录下)
chkconfig --add frp-client
chkconfig ftp-client on
启动服务 service frp-client start
知识点补充
# chkconfig: 2345 10 90
# description: ....
其中2345是默认启动级别,级别有0-6共7个级别。
  等级0表示:表示关机
  等级1表示:单用户模式
  等级2表示:无网络连接的多用户命令行模式
  等级3表示:有网络连接的多用户命令行模式
  等级4表示:不可用
  等级5表示:带图形界面的多用户模式
  等级6表示:重新启动
10是启动优先级,90是停止优先级,优先级范围是0-100,数字越大,优先级越低
附录一:服务端配置详解
# [common] is integral section
[common]
# A literal address or host name for IPv6 must be enclosed
# in square brackets, as in "[::1]:80", "[ipv6-host]:http" or "[ipv6-host%zone]:80"
bind_addr = 0.0.0.0
bind_port = 7000

# udp port to help make udp hole to penetrate nat
bind_udp_port = 7001

# udp port used for kcp protocol, it can be same with 'bind_port'
# if not set, kcp is disabled in frps
kcp_bind_port = 7000

# specify which address proxy will listen for, default value is same with bind_addr
# proxy_bind_addr = 127.0.0.1

# if you want to support virtual host, you must set the http port for listening (optional)
# Note: http port and https port can be same with bind_port
vhost_http_port = 80
vhost_https_port = 443

# response header timeout(seconds) for vhost http server, default is 60s
# vhost_http_timeout = 60

# set dashboard_addr and dashboard_port to view dashboard of frps
# dashboard_addr's default value is same with bind_addr
# dashboard is available only if dashboard_port is set
dashboard_addr = 0.0.0.0
dashboard_port = 7500

# dashboard user and passwd for basic auth protect, if not set, both default value is admin
dashboard_user = admin
dashboard_pwd = admin

# dashboard assets directory(only for debug mode)
# assets_dir = ./static
# console or real logFile path like ./frps.log
log_file = ./frps.log

# trace, debug, info, warn, error
log_level = info

log_max_days = 3

# disable log colors when log_file is console, default is false
disable_log_color = false

# auth token
token = 12345678

# heartbeat configure, it's not recommended to modify the default value
# the default value of heartbeat_timeout is 90
# heartbeat_timeout = 90

# only allow frpc to bind ports you list, if you set nothing, there won't be any limit
allow_ports = 2000-3000,3001,3003,4000-50000

# pool_count in each proxy will change to max_pool_count if they exceed the maximum value
max_pool_count = 5

# max ports can be used for each client, default value is 0 means no limit
max_ports_per_client = 0

# if subdomain_host is not empty, you can set subdomain when type is http or https in frpc's configure file
# when subdomain is test, the host used by routing is test.frps.com
subdomain_host = frps.com

# if tcp stream multiplexing is used, default is true
tcp_mux = true

# custom 404 page for HTTP requests
# custom_404_page = /path/to/404.html
客服端配置详解
# [common] is integral section
[common]
# A literal address or host name for IPv6 must be enclosed
# in square brackets, as in "[::1]:80", "[ipv6-host]:http" or "[ipv6-host%zone]:80"
server_addr = 0.0.0.0
server_port = 7000

# if you want to connect frps by http proxy or socks5 proxy, you can set http_proxy here or in global environment variables
# it only works when protocol is tcp
# http_proxy = http://user:passwd@192.168.1.128:8080
# http_proxy = socks5://user:passwd@192.168.1.128:1080

# console or real logFile path like ./frpc.log
log_file = ./frpc.log

# trace, debug, info, warn, error
log_level = info

log_max_days = 3

# disable log colors when log_file is console, default is false
disable_log_color = false

# for authentication
token = 12345678

# set admin address for control frpc's action by http api such as reload
admin_addr = 127.0.0.1
admin_port = 7400
admin_user = admin
admin_pwd = admin
# Admin assets directory. By default, these assets are bundled with frpc.
# assets_dir = ./static

# connections will be established in advance, default value is zero
pool_count = 5

# if tcp stream multiplexing is used, default is true, it must be same with frps
tcp_mux = true

# your proxy name will be changed to {user}.{proxy}
user = your_name

# decide if exit program when first login failed, otherwise continuous relogin to frps
# default is true
login_fail_exit = true

# communication protocol used to connect to server
# now it supports tcp and kcp and websocket, default is tcp
protocol = tcp

# if tls_enable is true, frpc will connect frps by tls
tls_enable = true

# specify a dns server, so frpc will use this instead of default one
# dns_server = 8.8.8.8

# proxy names you want to start seperated by ','
# default is empty, means all proxies
# start = ssh,dns

# heartbeat configure, it's not recommended to modify the default value
# the default value of heartbeat_interval is 10 and heartbeat_timeout is 90
# heartbeat_interval = 30
# heartbeat_timeout = 90

# 'ssh' is the unique proxy name
# if user in [common] section is not empty, it will be changed to {user}.{proxy} such as 'your_name.ssh'
[ssh]
# tcp | udp | http | https | stcp | xtcp, default is tcp
type = tcp
local_ip = 127.0.0.1
local_port = 22
# limit bandwith for this proxy, unit is KB and MB
bandwith_limit = 1MB
# true or false, if true, messages between frps and frpc will be encrypted, default is false
use_encryption = false
# if true, message will be compressed
use_compression = false
# remote port listen by frps
remote_port = 6001
# frps will load balancing connections for proxies in same group
group = test_group
# group should have same group key
group_key = 123456
# enable health check for the backend service, it support 'tcp' and 'http' now
# frpc will connect local service's port to detect it's healthy status
health_check_type = tcp
# health check connection timeout
health_check_timeout_s = 3
# if continuous failed in 3 times, the proxy will be removed from frps
health_check_max_failed = 3
# every 10 seconds will do a health check
health_check_interval_s = 10

[ssh_random]
type = tcp
local_ip = 127.0.0.1
local_port = 22
# if remote_port is 0, frps will assign a random port for you
remote_port = 0

# if you want to expose multiple ports, add 'range:' prefix to the section name
# frpc will generate multiple proxies such as 'tcp_port_6010', 'tcp_port_6011' and so on.
[range:tcp_port]
type = tcp
local_ip = 127.0.0.1
local_port = 6010-6020,6022,6024-6028
remote_port = 6010-6020,6022,6024-6028
use_encryption = false
use_compression = false

[dns]
type = udp
local_ip = 114.114.114.114
local_port = 53
remote_port = 6002
use_encryption = false
use_compression = false

[range:udp_port]
type = udp
local_ip = 127.0.0.1
local_port = 6010-6020
remote_port = 6010-6020
use_encryption = false
use_compression = false

# Resolve your domain names to [server_addr] so you can use http://web01.yourdomain.com to browse web01 and http://web02.yourdomain.com to browse web02
[web01]
type = http
local_ip = 127.0.0.1
local_port = 80
use_encryption = false
use_compression = true
# http username and password are safety certification for http protocol
# if not set, you can access this custom_domains without certification
http_user = admin
http_pwd = admin
# if domain for frps is frps.com, then you can access [web01] proxy by URL http://test.frps.com
subdomain = web01
custom_domains = web02.yourdomain.com
# locations is only available for http type
locations = /,/pic
host_header_rewrite = example.com
# params with prefix "header_" will be used to update http request headers
header_X-From-Where = frp
health_check_type = http
# frpc will send a GET http request '/status' to local http service
# http service is alive when it return 2xx http response code
health_check_url = /status
health_check_interval_s = 10
health_check_max_failed = 3
health_check_timeout_s = 3

[web02]
type = https
local_ip = 127.0.0.1
local_port = 8000
use_encryption = false
use_compression = false
subdomain = web01
custom_domains = web02.yourdomain.com
# if not empty, frpc will use proxy protocol to transfer connection info to your local service
# v1 or v2 or empty
proxy_protocol_version = v2

[plugin_unix_domain_socket]
type = tcp
remote_port = 6003
# if plugin is defined, local_ip and local_port is useless
# plugin will handle connections got from frps
plugin = unix_domain_socket
# params with prefix "plugin_" that plugin needed
plugin_unix_path = /var/run/docker.sock

[plugin_http_proxy]
type = tcp
remote_port = 6004
plugin = http_proxy
plugin_http_user = abc
plugin_http_passwd = abc

[plugin_socks5]
type = tcp
remote_port = 6005
plugin = socks5
plugin_user = abc
plugin_passwd = abc

[plugin_static_file]
type = tcp
remote_port = 6006
plugin = static_file
plugin_local_path = /var/www/blog
plugin_strip_prefix = static
plugin_http_user = abc
plugin_http_passwd = abc

[plugin_https2http]
type = https
custom_domains = test.yourdomain.com
plugin = https2http
plugin_local_addr = 127.0.0.1:80
plugin_crt_path = ./server.crt
plugin_key_path = ./server.key
plugin_host_header_rewrite = 127.0.0.1
plugin_header_X-From-Where = frp

[plugin_http2https]
type = http
custom_domains = test.yourdomain.com
plugin = http2https
plugin_local_addr = 127.0.0.1:443
plugin_host_header_rewrite = 127.0.0.1
plugin_header_X-From-Where = frp

[secret_tcp]
# If the type is secret tcp, remote_port is useless
# Who want to connect local port should deploy another frpc with stcp proxy and role is visitor
type = stcp
# sk used for authentication for visitors
sk = abcdefg
local_ip = 127.0.0.1
local_port = 22
use_encryption = false
use_compression = false

# user of frpc should be same in both stcp server and stcp visitor
[secret_tcp_visitor]
# frpc role visitor -> frps -> frpc role server
role = visitor
type = stcp
# the server name you want to visitor
server_name = secret_tcp
sk = abcdefg
# connect this address to visitor stcp server
bind_addr = 127.0.0.1
bind_port = 9000
use_encryption = false
use_compression = false

[p2p_tcp]
type = xtcp
sk = abcdefg
local_ip = 127.0.0.1
local_port = 22
use_encryption = false
use_compression = false

[p2p_tcp_visitor]
role = visitor
type = xtcp
server_name = p2p_tcp
sk = abcdefg
bind_addr = 127.0.0.1
bind_port = 9001
use_encryption = false
use_compression = false

 浙公网安备 33010602011771号